Category: healthy

  • The Sneaky Zucchini Bread: So Moist You’ll Never Know It’s Good for You

    The Sneaky Zucchini Bread: So Moist You’ll Never Know It’s Good for You

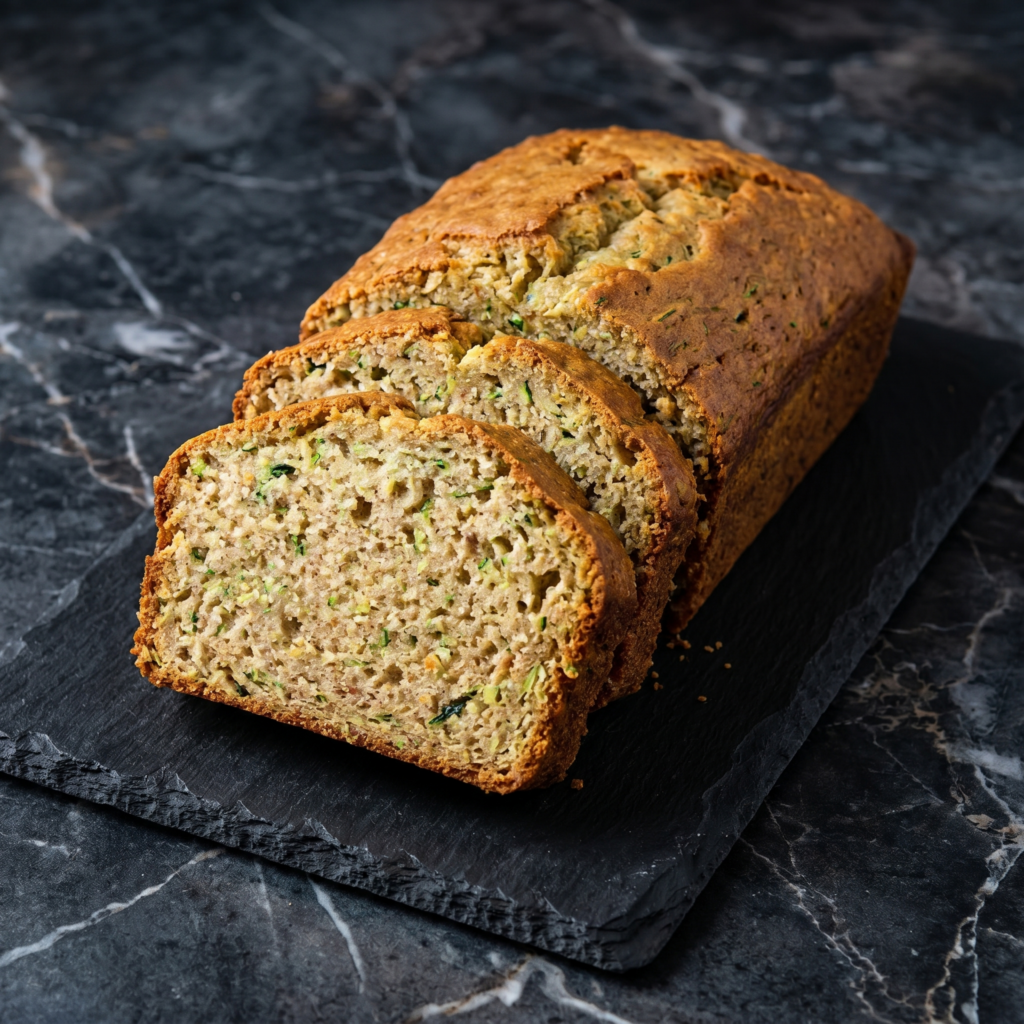
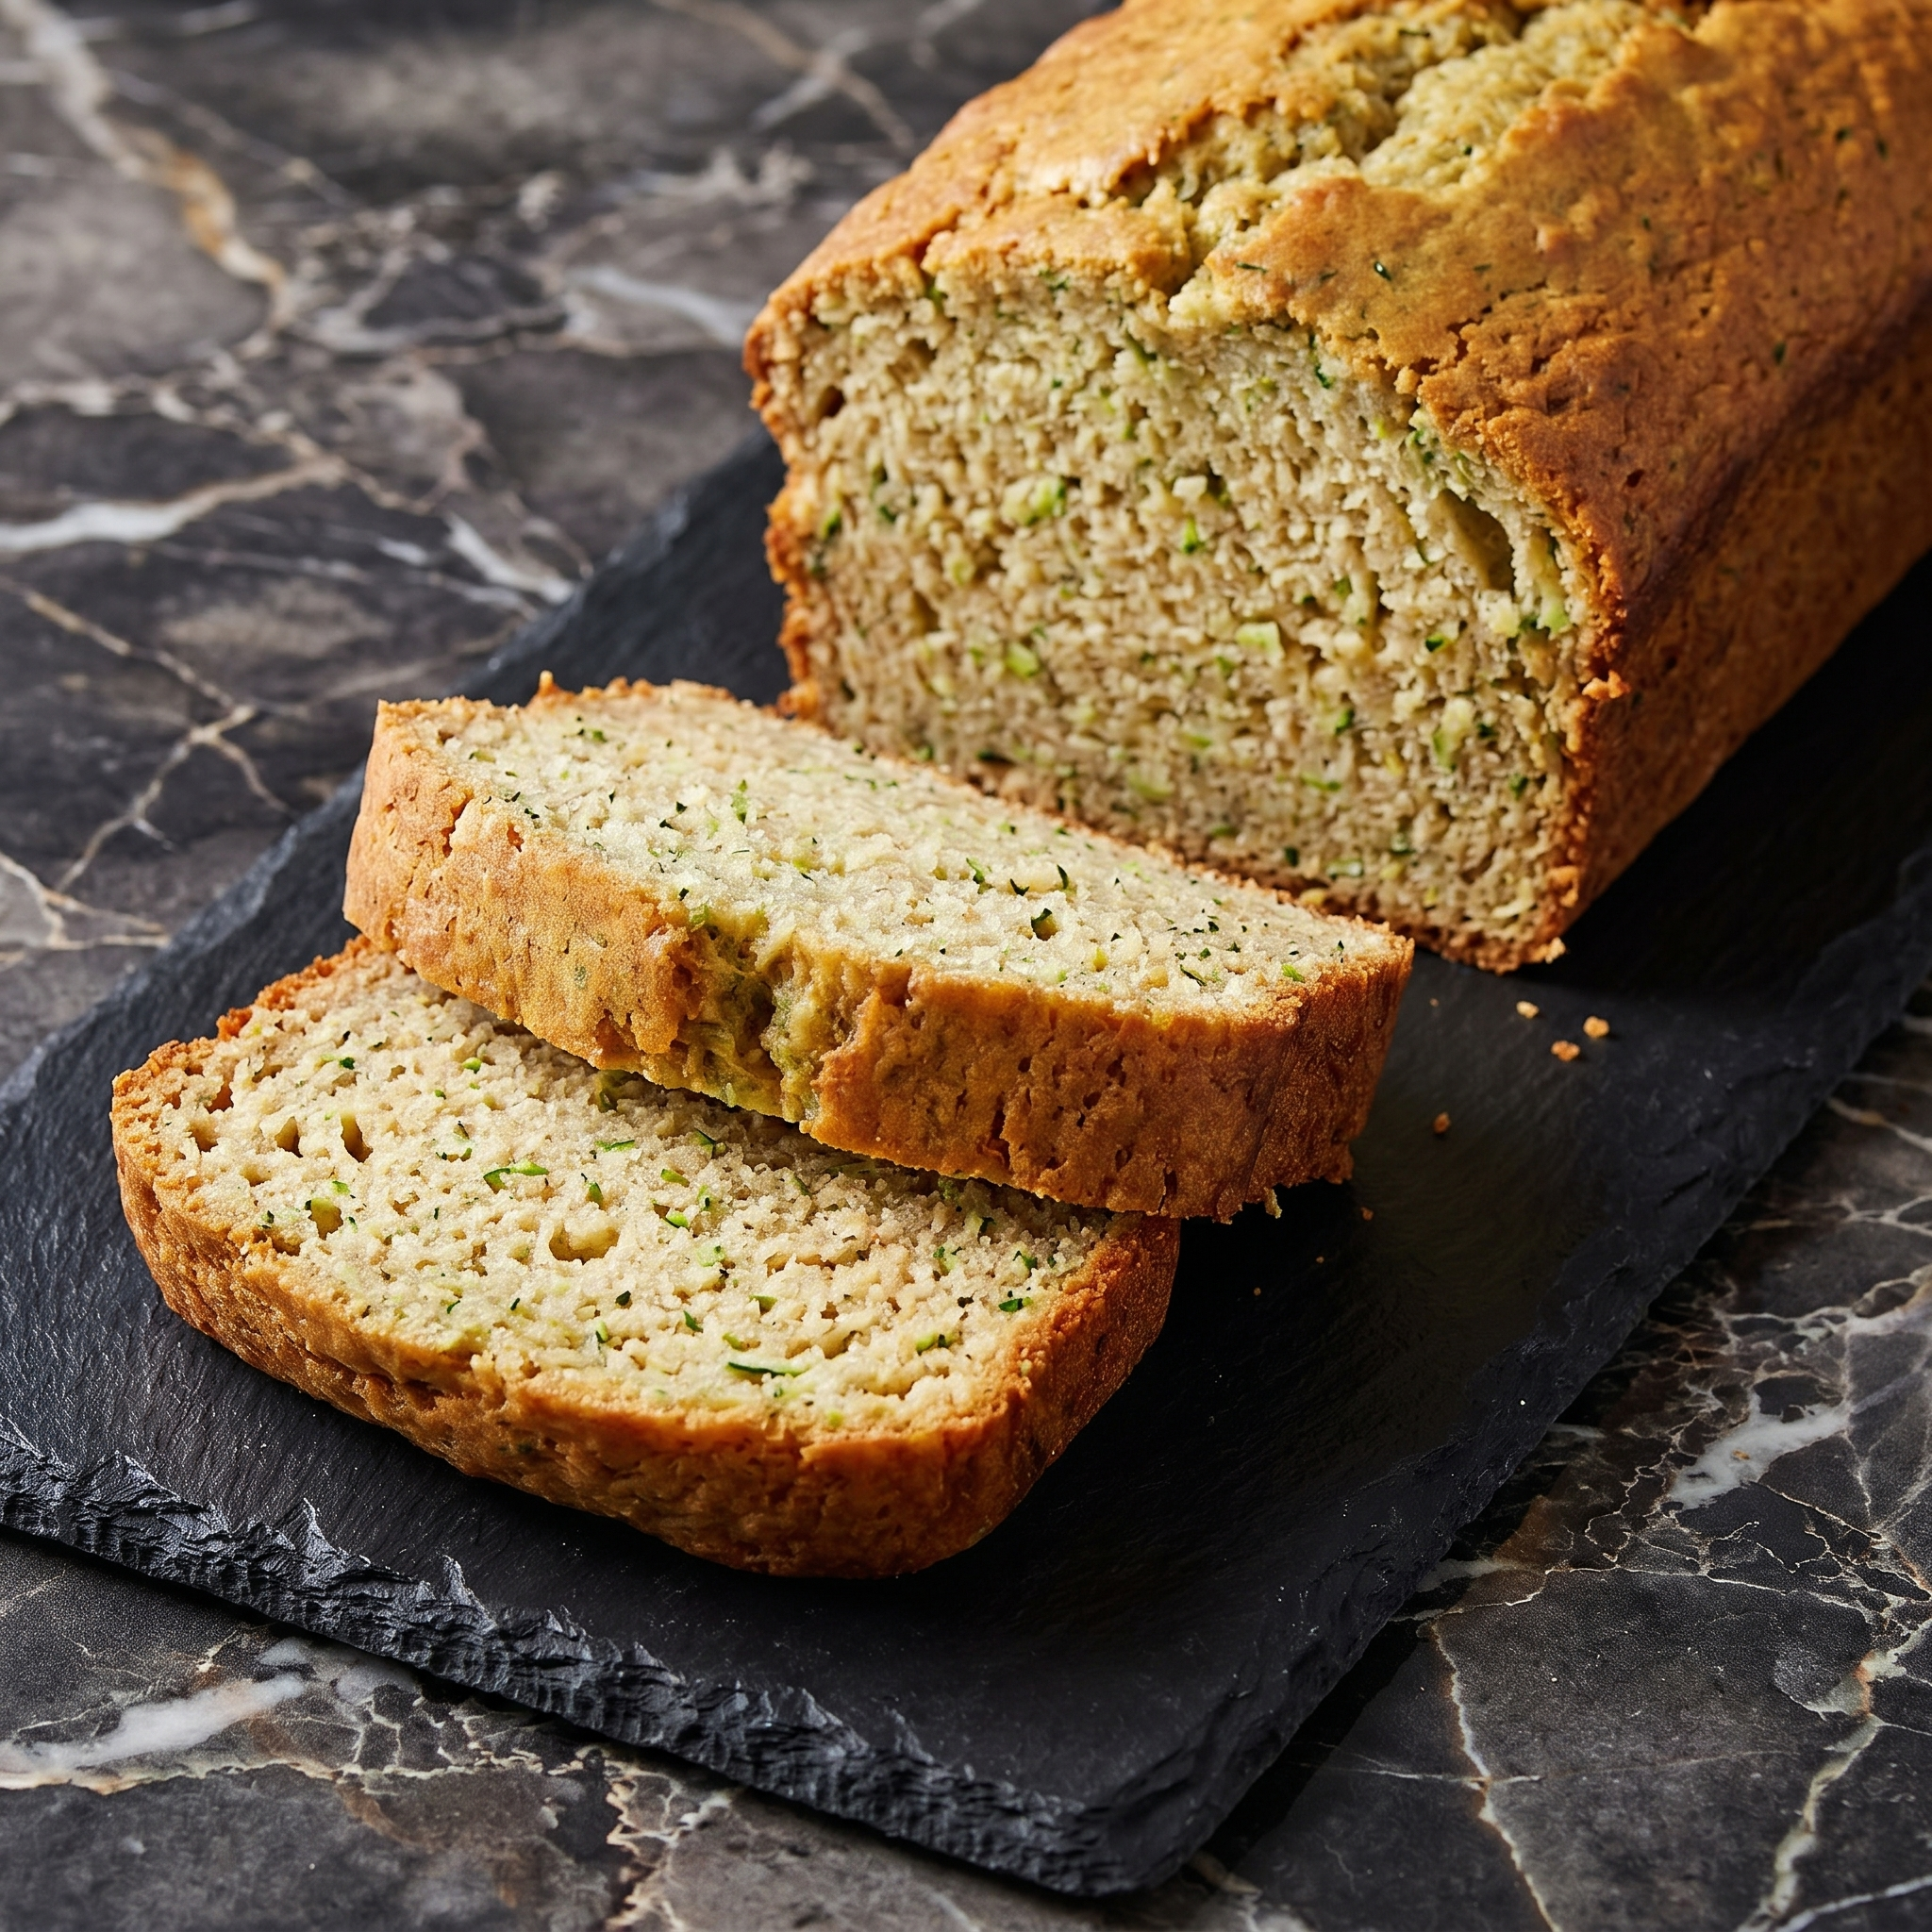
    This zucchini bread is so incredibly moist and delicious, no one will ever guess it’s packed with vegetables. The zucchini melts into the batter, leaving behind nothing but incredible tenderness and a subtle sweetness that pairs perfectly with warm spices.

    Studded with walnuts and chocolate chips (because everything is better with chocolate), this bread disappears fast. Whether you’re sneaking veggies into breakfast or just looking for the best way to use up that garden bounty, this recipe is about to become your summer staple.

    Ingredients

    Makes one 9×5 inch loaf (10-12 servings) or two mini loaves.

    For the Zucchini Bread:

    • 1 ½ cups (190g) all-purpose flour
    • ½ teaspoon baking powder
    • ½ teaspoon baking soda
    • ½ teaspoon salt
    • 1 ½ teaspoons ground cinnamon
    • ½ teaspoon ground nutmeg
    • ¼ teaspoon ground ginger (optional)
    • 2 large eggs, at room temperature
    • ½ cup (120ml) vegetable oil or melted coconut oil
    • ¾ cup (150g) granulated sugar
    • ½ cup (100g) light brown sugar, packed
    • 2 teaspoons vanilla extract
    • 1 ½ cups (about 1 medium zucchini) grated zucchini, lightly packed
    • ½ cup chopped walnuts or pecans (optional)
    • ½ cup semi-sweet chocolate chips (optional, but highly recommended)

    For the Cinnamon Sugar Topping (Optional):

    • 1 tablespoon granulated sugar
    • ¼ teaspoon cinnamon

    Step-by-Step Instructions

    1. Preheat and Prepare:

    1. Preheat your oven to 325°F (160°C). Grease a 9×5 inch loaf pan thoroughly, then dust with flour, tapping out the excess. Alternatively, line with parchment paper, leaving overhang on the long sides for easy removal.

    2. Prepare the Zucchini:

    1. Wash the zucchini and trim off the ends. Using a box grater, grate the zucchini on the large holes. Do not peel it—the green skin adds beautiful flecks of color.
    2. Place the grated zucchini in a clean kitchen towel or several layers of paper towels. Squeeze firmly to remove excess moisture. You should have about 1 cup of squeezed zucchini. This step is crucial for a moist, not soggy, loaf.

    3. Combine Dry Ingredients:

    1. In a medium bowl, whisk together the flour, baking powder, baking soda, salt, cinnamon, nutmeg, and ginger (if using). Set aside.

    4. Combine Wet Ingredients:

    1. In a large bowl, whisk the eggs until lightly beaten.
    2. Add the oil, granulated sugar, brown sugar, and vanilla extract. Whisk until smooth and well combined.

    5. Bring It Together:

    1. Add the dry ingredients to the wet ingredients and fold gently with a spatula until just combined. Do not overmix.
    2. Fold in the squeezed zucchini, and if using, the walnuts and chocolate chips. The batter will be thick and chunky with goodness.

    6. Fill the Pan:

    1. Pour the batter into the prepared loaf pan and spread evenly.
    2. If using the cinnamon sugar topping, mix the sugar and cinnamon together and sprinkle over the top.

    7. Bake:

    1. Bake for 55-65 minutes, until a toothpick inserted into the center comes out clean or with a few moist crumbs.
    2. If the top is browning too quickly, tent loosely with foil for the last 15-20 minutes.
    3. Let the bread cool in the pan for 15-20 minutes, then transfer to a wire rack to cool completely.

    8. Serve:

    1. Slice and serve at room temperature. This bread is delicious on its own, but a pat of butter takes it to another level.

    Summary

    Prep Time: 20 minutes (includes squeezing zucchini) | Bake Time: 55-65 minutes | Cooling Time: 20 minutes | Total Time: 1 hour 40 minutes

    Yield: One 9×5 inch loaf (10-12 servings)

    Difficulty: Easy

    Storage and Make-Ahead Tips

    How to Store:

    Store zucchini bread tightly wrapped in plastic wrap or in an airtight container at room temperature for up to 4 days. The moisture from the zucchini keeps it incredibly soft. For longer storage, refrigerate for up to a week.

    Can You Freeze Zucchini Bread?

    Absolutely! Zucchini bread freezes like a dream. Wrap the cooled loaf tightly in plastic wrap, then in foil, and place in a freezer bag. Freeze for up to 3 months. Thaw at room temperature.

    Freezing Slices:

    Slice the bread and wrap individual slices in plastic wrap, then place in a freezer bag. This way you can grab just one slice at a time. Toast frozen slices directly from the freezer for a quick breakfast.

    Make-Ahead for Gift Giving:

    Zucchini bread makes wonderful homemade gifts. Bake mini loaves, cool completely, wrap in decorative cellophane, and tie with a ribbon. It’s the perfect way to share your garden bounty!

    Freezing Grated Zucchini:

    Have more zucchini than you can use? Grate it, squeeze out the excess moisture, and freeze in 1½-cup portions. Thaw and use directly in bread—no need to squeeze again.

  • Fresh Vietnamese Spring Rolls (No Frying, All Vibes)

    Fresh Vietnamese Spring Rolls (No Frying, All Vibes)

    Summer rolls. Fresh rolls. Rice paper rolls. Call them what you want. Just call them delicious.

    These are the opposite of fried spring rolls—light, bright, and packed with shrimp, herbs, and crunchy veggies. The peanut sauce is mandatory and amazing. No cooking required (except the shrimp).

    Ingredients

    Makes 8 rolls.

    • 8 round rice paper wrappers (22cm/8.5 inch)
    • 12 medium shrimp, cooked, peeled, and sliced in half lengthwise
    • 4 oz rice vermicelli noodles
    • 1 cup butter lettuce or red leaf lettuce, torn
    • 1 carrot, julienned or shredded
    • 1 cucumber, julienned or cut into thin strips
    • ½ cup fresh mint leaves
    • ½ cup fresh cilantro leaves
    • Optional: Thai basil, bean sprouts, avocado

    For the Peanut Dipping Sauce:

    • ¼ cup creamy peanut butter
    • 2 tablespoons hoisin sauce
    • 1 tablespoon lime juice
    • 1 teaspoon soy sauce
    • ¼ cup warm water
    • Optional: 1 teaspoon sriracha (for heat)

    Step-by-Step Instructions

    Step 1: Prep Everything

    1. Cook vermicelli noodles according to package directions. Drain, rinse with cold water, and set aside.
    2. Prep all veggies, herbs, and shrimp. Put everything within arm’s reach.

    Step 2: Make the Peanut Sauce

    1. Whisk peanut butter, hoisin, lime juice, soy sauce, and warm water until smooth. Add sriracha if you want heat. Set aside.

    Step 3: Soften One Rice Paper

    1. Fill a wide shallow bowl with warm water. Dip one rice paper for 5-10 seconds—it should still feel firm. It will soften more as you work.
    2. Lay it flat on a damp cutting board or plate.

    Step 4: Fill and Roll

    1. Layer lettuce, noodles, carrots, cucumber, herbs, and 3 shrimp halves (pink side down so they show through).
    2. Fold the bottom edge over the filling. Fold in both sides. Roll tightly away from you.
    3. Place seam-side down on a plate. Repeat with remaining wrappers.

    Step 5: Serve

    1. Serve immediately with peanut sauce. Cover any waiting rolls with a damp paper towel so they don’t dry out.

    Summary

    Prep Time: 20 minutes | Cook Time: 5 minutes (noodles + shrimp) | Total Time: 25 minutes

    Yield: 8 rolls (2-4 servings)

    Difficulty: Easy (rolling takes practice)

    Storage Notes

    Spring rolls are best eaten the same day. Rice paper hardens and gets chewy in the fridge.

    Make ahead hack: Prep all ingredients and store separately. Assemble right before serving. The peanut sauce keeps in the fridge for up to a week.

  • The Smoked Salmon Bagel: 5 Minutes to Brunch Heaven

    The Smoked Salmon Bagel: 5 Minutes to Brunch Heaven

    Some meals are more than just food. The smoked salmon bagel? It’s a vibe. That first bite—the chewy crust giving way to cool, tangy cream cheese and buttery ribbons of salmon—hits different. It’s brunch at your favorite café, but you’re in sweatpants and the coffee is exactly how you like it.

    The magic is in the contrast. Salty capers pop against the rich fish. Sharp red onion cuts through the cream cheese. Fresh dill makes it all taste garden-fresh. And the best part? This entire masterpiece comes together in about five minutes flat.

    Ingredients

    Serves 2 lucky people.

    The Lineup:

    • 2 everything bagels (or your favorite—sesame, poppy, plain)
    • 4 oz cream cheese, softened (splurge on the good stuff)
    • 4 oz smoked salmon or lox
    • ¼ small red onion, shaved paper-thin
    • 2 tbsp capers, drained and roughly chopped (or leave whole)
    • Fresh dill, for that fresh-from-the-garden finish

    Extras (Because Why Not?):

    • Sliced tomato, lemon wedges, cracked pepper
    • Cucumber ribbons for extra crunch

    Step-by-Step Instructions

    Step 1: Bagel Time

    1. Slice your bagels in half. Give them a good toast until golden and crisp around the edges. This isn’t optional—toasting builds the foundation.

    Step 2: Schmear Campaign

    1. Let your cream cheese soften while the bagels toast. Spread it on thick and generous, all the way to the edges. This is your flavor base, so don’t be shy.

    Step 3: Salmon Goes On

    1. Drape the smoked salmon over the cream cheese. For bonus points, fold it into loose ribbons or little rosettes. It looks fancy and creates tiny pockets for the toppings to nestle into.

    Step 4: Topping Frenzy

    1. Sprinkle on the red onion, then scatter the capers evenly so every bite gets that briny pop.
    2. Tuck a few sprigs of fresh dill on top. It’s pretty and tastes like spring.

    Step 5: The Finish Line

    1. Squeeze a little lemon over everything if you’re using it. Crack some black pepper on top for a warm kick.
    2. Top with the other bagel half, or serve open-faced so everyone can admire your work.
    3. Serve immediately with a pile of potato chips or a pickle spear. Close your eyes. Take a bite. You’re officially brunch royalty.

    Summary

    Prep Time: 5 minutes | Cook Time: 3 minutes (toasting) | Total Time: 8 minutes

    Yield: 2 servings

    Difficulty: So easy it’s almost not a recipe

    Storage Notes

    Keep It Fresh:

    This is a now-food. Assembled bagels turn into sad, soggy sandwiches fast. Store components separately instead.

    Component Prep:

    • Salmon: Keep wrapped tight in the fridge. Use within 3 days of opening.
    • Onion: Slice fresh each time—pre-sliced onions get funky fast.
    • Cream Cheese: Store plain, or mix in herbs up to 2 days ahead for extra flavor.

    Brunch Hack:

    Set up a bagel bar! Lay out all the ingredients and let everyone build their own. Less work for you, more fun for everyone.

  • Creamy & Comforting: The Ultimate Mushroom Risotto With Peas (Step-by-Step Guide)

    Creamy & Comforting: The Ultimate Mushroom Risotto With Peas (Step-by-Step Guide)

    There’s something deeply comforting about a bowl of Mushroom Risotto with Peas. It’s creamy without heavy cream, rich without being overwhelming, and filled with earthy mushrooms and sweet bursts of green peas.

    This classic Italian-inspired dish transforms simple pantry staples into a luxurious meal that feels restaurant-worthy but is absolutely achievable at home.

    Risotto has a reputation for being fussy, but once you understand the technique, it becomes a relaxing and rewarding cooking experience. With patience, warm broth, and steady stirring, you’ll create a silky, flavorful dish that’s perfect for both weeknight dinners and elegant gatherings.

    Let’s walk through it step by step.


    Why You’ll Love This Mushroom Risotto

    • Creamy texture without cream
    • Deep, savory mushroom flavor
    • Bright sweetness from peas
    • Naturally gluten-free
    • Elegant yet comforting

    This dish is all about balance—earthy, sweet, rich, and fresh in every bite.


    Ingredients You’ll Need

    For the Risotto Base:

    • 1 ½ cups Arborio rice
    • 4–5 cups vegetable or chicken broth (kept warm)
    • 2 tablespoons olive oil
    • 2 tablespoons unsalted butter

    For the Vegetables:

    • 8 ounces mushrooms (cremini, button, or a mix), sliced
    • 1 small onion or 2 shallots, finely diced
    • 2 cloves garlic, minced
    • 1 cup frozen peas

    For Finishing:

    • ½ cup dry white wine
    • ½ cup freshly grated Parmesan cheese
    • Salt and freshly cracked black pepper

    Optional Garnish:

    • Fresh parsley
    • Extra Parmesan
    • Lemon zest

    Step 1: Warm the Broth

    Pour your broth into a saucepan and keep it gently simmering over low heat.

    Adding warm broth to risotto is essential—it allows the rice to cook evenly and release starch properly. Cold broth slows the cooking process and affects texture.


    Step 2: Sauté the Mushrooms

    Heat 1 tablespoon olive oil and 1 tablespoon butter in a large, heavy-bottomed skillet or saucepan over medium heat.

    Add the sliced mushrooms in a single layer. Cook for 5–7 minutes, stirring occasionally, until they release their moisture and turn golden brown.

    Season lightly with salt and pepper.

    Remove the mushrooms from the pan and set aside. Cooking them separately ensures they stay tender and flavorful rather than watery.


    Step 3: Cook the Aromatics

    In the same pan, add the remaining olive oil.

    Add diced onion or shallots and cook for 3–4 minutes until soft and translucent.

    Stir in the minced garlic and cook for 30 seconds, just until fragrant.

    These aromatics create a flavorful base that supports the creamy rice.


    Step 4: Toast the Rice

    Add the Arborio rice directly into the pan.

    Stir continuously for 1–2 minutes, coating each grain in oil. The edges will become slightly translucent while the center remains opaque.

    Toasting enhances the rice’s nutty flavor and helps maintain structure during cooking.


    Step 5: Deglaze with Wine

    Pour in the white wine and stir constantly.

    Allow it to simmer until most of the liquid evaporates. This adds acidity and depth, balancing the richness of the final dish.

    If you prefer not to use wine, substitute with a splash of broth and a squeeze of lemon.


    Step 6: Add Broth Gradually

    Add one ladle (about ½ cup) of warm broth to the rice.

    Stir gently and frequently until the liquid is mostly absorbed.

    Repeat this process—adding broth one ladle at a time—waiting for each addition to absorb before adding the next.

    This gradual addition is the key to creamy risotto. It encourages the rice to release starch slowly, creating that signature silky texture.


    Step 7: Stir with Patience

    Continue adding broth and stirring for 18–22 minutes.

    Taste as you go. The rice should be tender but still slightly firm in the center—al dente.

    Adjust the heat as needed to maintain a gentle simmer.

    Risotto isn’t about constant frantic stirring but steady, attentive movement.


    Step 8: Add Mushrooms and Peas

    When the rice is nearly done, stir the sautéed mushrooms back into the pan.

    Add the peas and cook for 2–3 minutes until heated through and bright green.

    The peas add a pop of sweetness and color, complementing the earthy mushrooms.


    Step 9: Finish with Butter and Parmesan

    Remove the pan from the heat.

    Stir in the remaining tablespoon of butter and the grated Parmesan cheese.

    This step, called mantecatura, gives risotto its luxurious, glossy finish.

    Taste and adjust seasoning with salt and freshly cracked black pepper.


    Step 10: Rest and Serve

    Let the risotto rest for 1–2 minutes before serving.

    It should flow slightly when spooned onto a plate—not stiff or dry.

    Garnish with fresh parsley, extra Parmesan, and a touch of lemon zest if desired.

    Serve immediately while warm and creamy.


    Texture and Flavor Highlights

    • Silky, creamy consistency
    • Tender rice with slight bite
    • Rich umami from mushrooms
    • Sweet bursts of peas
    • Savory, cheesy finish

    The combination creates a beautifully balanced dish that feels indulgent yet fresh.


    Pro Tips for Perfect Risotto

    Use Arborio rice. Its high starch content is essential.

    Keep broth warm. It ensures even cooking.

    Don’t rush the process. Gradual broth addition is key.

    Taste frequently. Texture matters as much as flavor.

    Serve immediately. Risotto thickens as it cools.


    Optional Variations

    • Vegan Version: Use olive oil instead of butter and plant-based Parmesan.
    • Protein Boost: Top with grilled chicken or shrimp.
    • Herb Forward: Add thyme or rosemary.
    • Extra Creamy: Stir in a spoonful of mascarpone at the end.
    • Lemon Brightness: Add extra lemon zest for freshness.

    Storage and Reheating

    Risotto is best enjoyed fresh, but leftovers can be stored in the refrigerator for up to 2 days.

    Reheat gently on the stovetop with a splash of broth or water to restore creaminess.

    Avoid high heat to prevent drying out the rice.


    Why This Recipe Works

    Mushroom Risotto with Peas works because it relies on technique rather than complicated ingredients. Slow stirring and gradual broth addition allow the rice’s natural starch to create creaminess.

    Sautéed mushrooms add depth and umami, while peas bring brightness and contrast.

    The finishing touch of butter and Parmesan ties everything together into a glossy, cohesive dish that feels comforting yet elegant.


    Creamy, savory, and beautifully balanced, Mushroom Risotto with Peas is a dish that rewards patience and simple technique.

    Once you master it, you’ll have a timeless recipe that delivers comfort, elegance, and incredible flavor every single time.

  • Crispy-Seared Scallops with Bread-Crumb Salsa Verde: A Restaurant-Worthy Dinner at Home

    Crispy-Seared Scallops with Bread-Crumb Salsa Verde: A Restaurant-Worthy Dinner at Home

    If you’ve ever ordered perfectly golden scallops at a restaurant and wondered how they achieved that caramelized crust and buttery center, you’re in for a treat.

    Scallops are surprisingly simple to cook at home, and when paired with a vibrant bread-crumb salsa verde, they transform into a dish that feels elegant yet approachable. This recipe walks you through every step, from selecting the scallops to plating like a pro.

    Let’s get started.


    Ingredients

    For the scallops:

    • 1 pound large sea scallops (about 12–16), side muscle removed
    • Salt and freshly ground black pepper
    • 2 tablespoons neutral oil (such as avocado or vegetable oil)
    • 1 tablespoon unsalted butter

    For the bread-crumb salsa verde:

    • 1 cup fresh parsley leaves, finely chopped
    • 2 tablespoons capers, drained and finely chopped
    • 1 small garlic clove, minced
    • Zest of 1 lemon
    • 2 tablespoons fresh lemon juice
    • ½ teaspoon red pepper flakes (optional)
    • ½ cup toasted fresh bread crumbs
    • ⅓ cup extra virgin olive oil
    • Salt and black pepper to taste

    Step 1: Prep the Scallops Properly

    Start by patting your scallops completely dry with paper towels. This is one of the most important steps. Moisture is the enemy of a golden crust, and any excess water will cause the scallops to steam rather than sear.

    If the small, tough side muscle is still attached, gently peel it off and discard. Season both sides of the scallops generously with salt and freshly ground black pepper. Let them sit at room temperature for about 10–15 minutes while you prepare the salsa verde.


    Step 2: Toast the Bread Crumbs

    For maximum flavor and texture, use fresh bread crumbs rather than store-bought dry ones. Pulse a slice or two of day-old crusty bread in a food processor until coarse.

    Heat a small skillet over medium heat. Add a drizzle of olive oil and toss in the bread crumbs. Stir constantly for 3–5 minutes, until they are golden brown and crisp. Transfer to a bowl and let cool completely. This step adds a nutty crunch that makes the salsa verde truly special.


    Step 3: Make the Bread-Crumb Salsa Verde

    In a medium bowl, combine the chopped parsley, capers, minced garlic, lemon zest, lemon juice, and red pepper flakes. Stir to combine.

    Add the cooled toasted bread crumbs and pour in the extra virgin olive oil. Mix until everything is evenly coated and vibrant. Taste and adjust seasoning with salt and black pepper as needed. The mixture should be bright, slightly tangy, and richly herbaceous, with a pleasant crunch from the crumbs.

    Set aside while you cook the scallops.


    Step 4: Heat the Pan Until Very Hot

    Place a large stainless steel or cast-iron skillet over medium-high heat. Let it heat for several minutes until very hot. Add the neutral oil and swirl to coat the bottom.

    You’ll know the pan is ready when the oil shimmers and just begins to smoke lightly. This high heat is essential for achieving that golden-brown crust.


    Step 5: Sear the Scallops

    Carefully place the scallops in the hot pan, flat-side down, leaving space between each one. Do not overcrowd the pan. If necessary, cook in batches.

    Resist the urge to move them. Let the scallops sear undisturbed for about 2–3 minutes. They should develop a deep golden crust.

    Once the bottom is beautifully browned, add the tablespoon of butter to the pan. Flip the scallops and spoon the melted butter over them as they cook for another 1–2 minutes. The centers should be just opaque and slightly translucent in the very middle.

    Remove immediately from the pan. Overcooked scallops become rubbery, so timing is key.


    Step 6: Plate Like a Pro

    Arrange the scallops on a serving platter or individual plates. Spoon a generous amount of bread-crumb salsa verde over the top or alongside each scallop.

    For an elegant touch, finish with an extra squeeze of fresh lemon juice and a drizzle of olive oil. A sprinkle of flaky sea salt can elevate the flavor even more.


    Serving Suggestions

    These scallops pair beautifully with creamy risotto, mashed potatoes, or a simple bed of lemony arugula. You can also serve them over a light pasta or alongside roasted vegetables for a complete meal.

    If you’re entertaining, consider serving them as an appetizer with small forks and a crisp white wine. The bright herbal salsa verde complements the sweet, delicate scallops perfectly.


    Pro Tips for Perfect Scallops

    • Always buy “dry” scallops rather than “wet” ones treated with preservatives. Dry scallops caramelize better.
    • Make sure the pan is hot before adding scallops.
    • Do not overcrowd the pan, as this lowers the temperature and prevents browning.
    • Let the scallops form a crust before flipping. If they stick, they’re not ready yet.

    Why This Dish Works

    The magic of this recipe lies in contrast. The scallops are tender and buttery with a crisp exterior, while the bread-crumb salsa verde is fresh, bright, and slightly crunchy. The acidity from the lemon and capers cuts through the richness of the scallops, creating a perfectly balanced bite.

    This dish feels sophisticated but relies on straightforward techniques. With just a handful of quality ingredients and attention to timing, you can create a meal that rivals your favorite seafood restaurant.

    Once you master this method, you’ll find yourself returning to it again and again for special occasions—or simply when you want to treat yourself to something extraordinary.

  • Zesty, Juicy & Perfectly Charred: The Ultimate Grilled Lemon Chicken Recipe

    Zesty, Juicy & Perfectly Charred: The Ultimate Grilled Lemon Chicken Recipe

    There’s something irresistible about the bright, fresh flavor of lemon paired with smoky, flame-kissed chicken.

    Grilled Lemon Chicken is simple, vibrant, and incredibly satisfying—perfect for weeknight dinners, weekend barbecues, or healthy meal prep. With just a handful of ingredients and a straightforward technique, you’ll get tender, juicy chicken bursting with citrus flavor and finished with gorgeous grill marks.

    Let’s break it down step by step so you can make perfectly grilled lemon chicken every time.


    Why You’ll Love This Recipe

    • Fresh, bold lemon flavor
    • Juicy and tender texture
    • Quick and easy to prepare
    • Healthy and protein-packed
    • Perfect for grilling season

    This recipe balances acidity, herbs, and smoky char for a dish that feels light yet deeply flavorful.


    Ingredients You’ll Need

    For the Marinade:

    • 4 boneless, skinless chicken breasts (or thighs)
    • ¼ cup fresh lemon juice (about 2 lemons)
    • Zest of 1 lemon
    • 3 tablespoons olive oil
    • 3 cloves garlic, minced
    • 1 teaspoon dried oregano (or 1 tablespoon fresh)
    • 1 teaspoon salt
    • ½ teaspoon black pepper
    • ½ teaspoon paprika
    • 1 tablespoon honey (optional, for balance)

    For Garnish:

    • Fresh parsley
    • Lemon slices

    Step 1: Prepare the Chicken

    If your chicken breasts are thick, slice them horizontally to create thinner cutlets. This helps them cook evenly and reduces grill time.

    Pat the chicken dry with paper towels before marinating. Removing excess moisture allows the marinade to adhere better.


    Step 2: Make the Lemon Marinade

    In a bowl, whisk together:

    • Lemon juice
    • Lemon zest
    • Olive oil
    • Garlic
    • Oregano
    • Salt
    • Pepper
    • Paprika
    • Honey (if using)

    The lemon juice tenderizes the chicken, while olive oil helps retain moisture. Garlic and oregano add depth, and paprika gives a subtle warmth.


    Step 3: Marinate for Maximum Flavor

    Place the chicken in a resealable plastic bag or shallow dish.

    Pour the marinade over the chicken, ensuring every piece is fully coated.

    Seal and refrigerate for at least 30 minutes, ideally 2–4 hours. Avoid marinating longer than 6 hours, as the acidity from the lemon can begin to break down the texture too much.

    Turn the chicken occasionally if using a dish to ensure even flavor distribution.


    Step 4: Preheat the Grill

    Preheat your grill to medium-high heat (about 400–450°F or 200–230°C).

    Clean the grates thoroughly and oil them lightly to prevent sticking.

    A properly heated grill ensures beautiful sear marks and prevents the chicken from drying out.


    Step 5: Remove from Marinade

    Take the chicken out of the marinade and let excess drip off.

    Discard the leftover marinade unless you plan to boil it thoroughly for use as a sauce.

    Let the chicken sit at room temperature for 10–15 minutes before grilling. This promotes even cooking.


    Step 6: Grill the Chicken

    Place the chicken on the hot grill.

    Cook for about 5–7 minutes per side, depending on thickness. Avoid flipping too frequently—let the grill create those signature char lines.

    Close the grill lid while cooking to retain heat and ensure even cooking.


    Step 7: Check for Doneness

    The chicken is done when the internal temperature reaches 165°F (74°C).

    Use a meat thermometer inserted into the thickest part for accuracy.

    If the outside is browning too quickly, move the chicken to a cooler section of the grill and finish cooking indirectly.


    Step 8: Rest the Chicken

    Remove the chicken from the grill and let it rest for 5 minutes.

    Resting allows the juices to redistribute, ensuring moist and tender results.

    Skipping this step can cause juices to run out when slicing.


    Step 9: Garnish and Serve

    Sprinkle freshly chopped parsley over the grilled chicken.

    Add lemon slices for extra brightness and presentation.

    Serve whole, sliced, or diced depending on your meal.


    Flavor Profile and Texture

    • Bright citrus freshness
    • Light herbal notes
    • Subtle smoky char
    • Tender, juicy interior
    • Slight caramelization from honey

    The balance of acidity and olive oil keeps the chicken moist while delivering a bold lemon punch.


    Serving Ideas

    Grilled Lemon Chicken is incredibly versatile. Try it with:

    • Steamed rice or lemon herb rice
    • Roasted vegetables
    • Fresh garden salad
    • Warm pita bread
    • Pasta with olive oil and herbs
    • Grilled corn on the cob

    It also works beautifully sliced over salads or stuffed into wraps.


    Pro Tips for Perfect Results

    Don’t skip the zest. Lemon zest intensifies flavor without extra acidity.

    Use fresh lemon juice. Bottled juice lacks brightness.

    Oil the grill grates. Prevents sticking and tearing.

    Avoid overcooking. Chicken dries out quickly past 165°F.

    Let it rest. This guarantees juiciness.


    Optional Variations

    Mediterranean Style: Add thyme and rosemary to the marinade.

    Spicy Kick: Include red pepper flakes or cayenne.

    Creamy Finish: Top with a spoonful of tzatziki sauce.

    Citrus Blend: Combine lemon with a splash of orange juice.

    Grill Pan Version: If you don’t have an outdoor grill, use a cast-iron grill pan over medium-high heat.


    Storage and Meal Prep

    Store leftover grilled chicken in an airtight container in the refrigerator for up to 4 days.

    Reheat gently in a skillet or microwave until warmed through.

    This chicken is excellent for meal prepping—slice and portion with rice and vegetables for balanced lunches throughout the week.


    Why This Recipe Works

    The acidity of lemon juice gently tenderizes the chicken while infusing it with fresh flavor. Olive oil locks in moisture and prevents dryness during grilling. High heat creates a quick sear, sealing juices inside and developing caramelized grill marks.

    Marinating ensures flavor penetrates beyond the surface, and resting after cooking keeps the meat succulent.

    The result? Chicken that’s juicy inside, lightly crisp outside, and bursting with bright, zesty flavor.


    Grilled Lemon Chicken is proof that simple ingredients can create something extraordinary. With its fresh citrus aroma, smoky char, and tender texture, this dish is a guaranteed crowd-pleaser. Whether you’re cooking for family, friends, or just yourself, this recipe delivers bold flavor with minimal effort.

    Light, vibrant, and endlessly versatile, it’s a recipe you’ll come back to again and again.