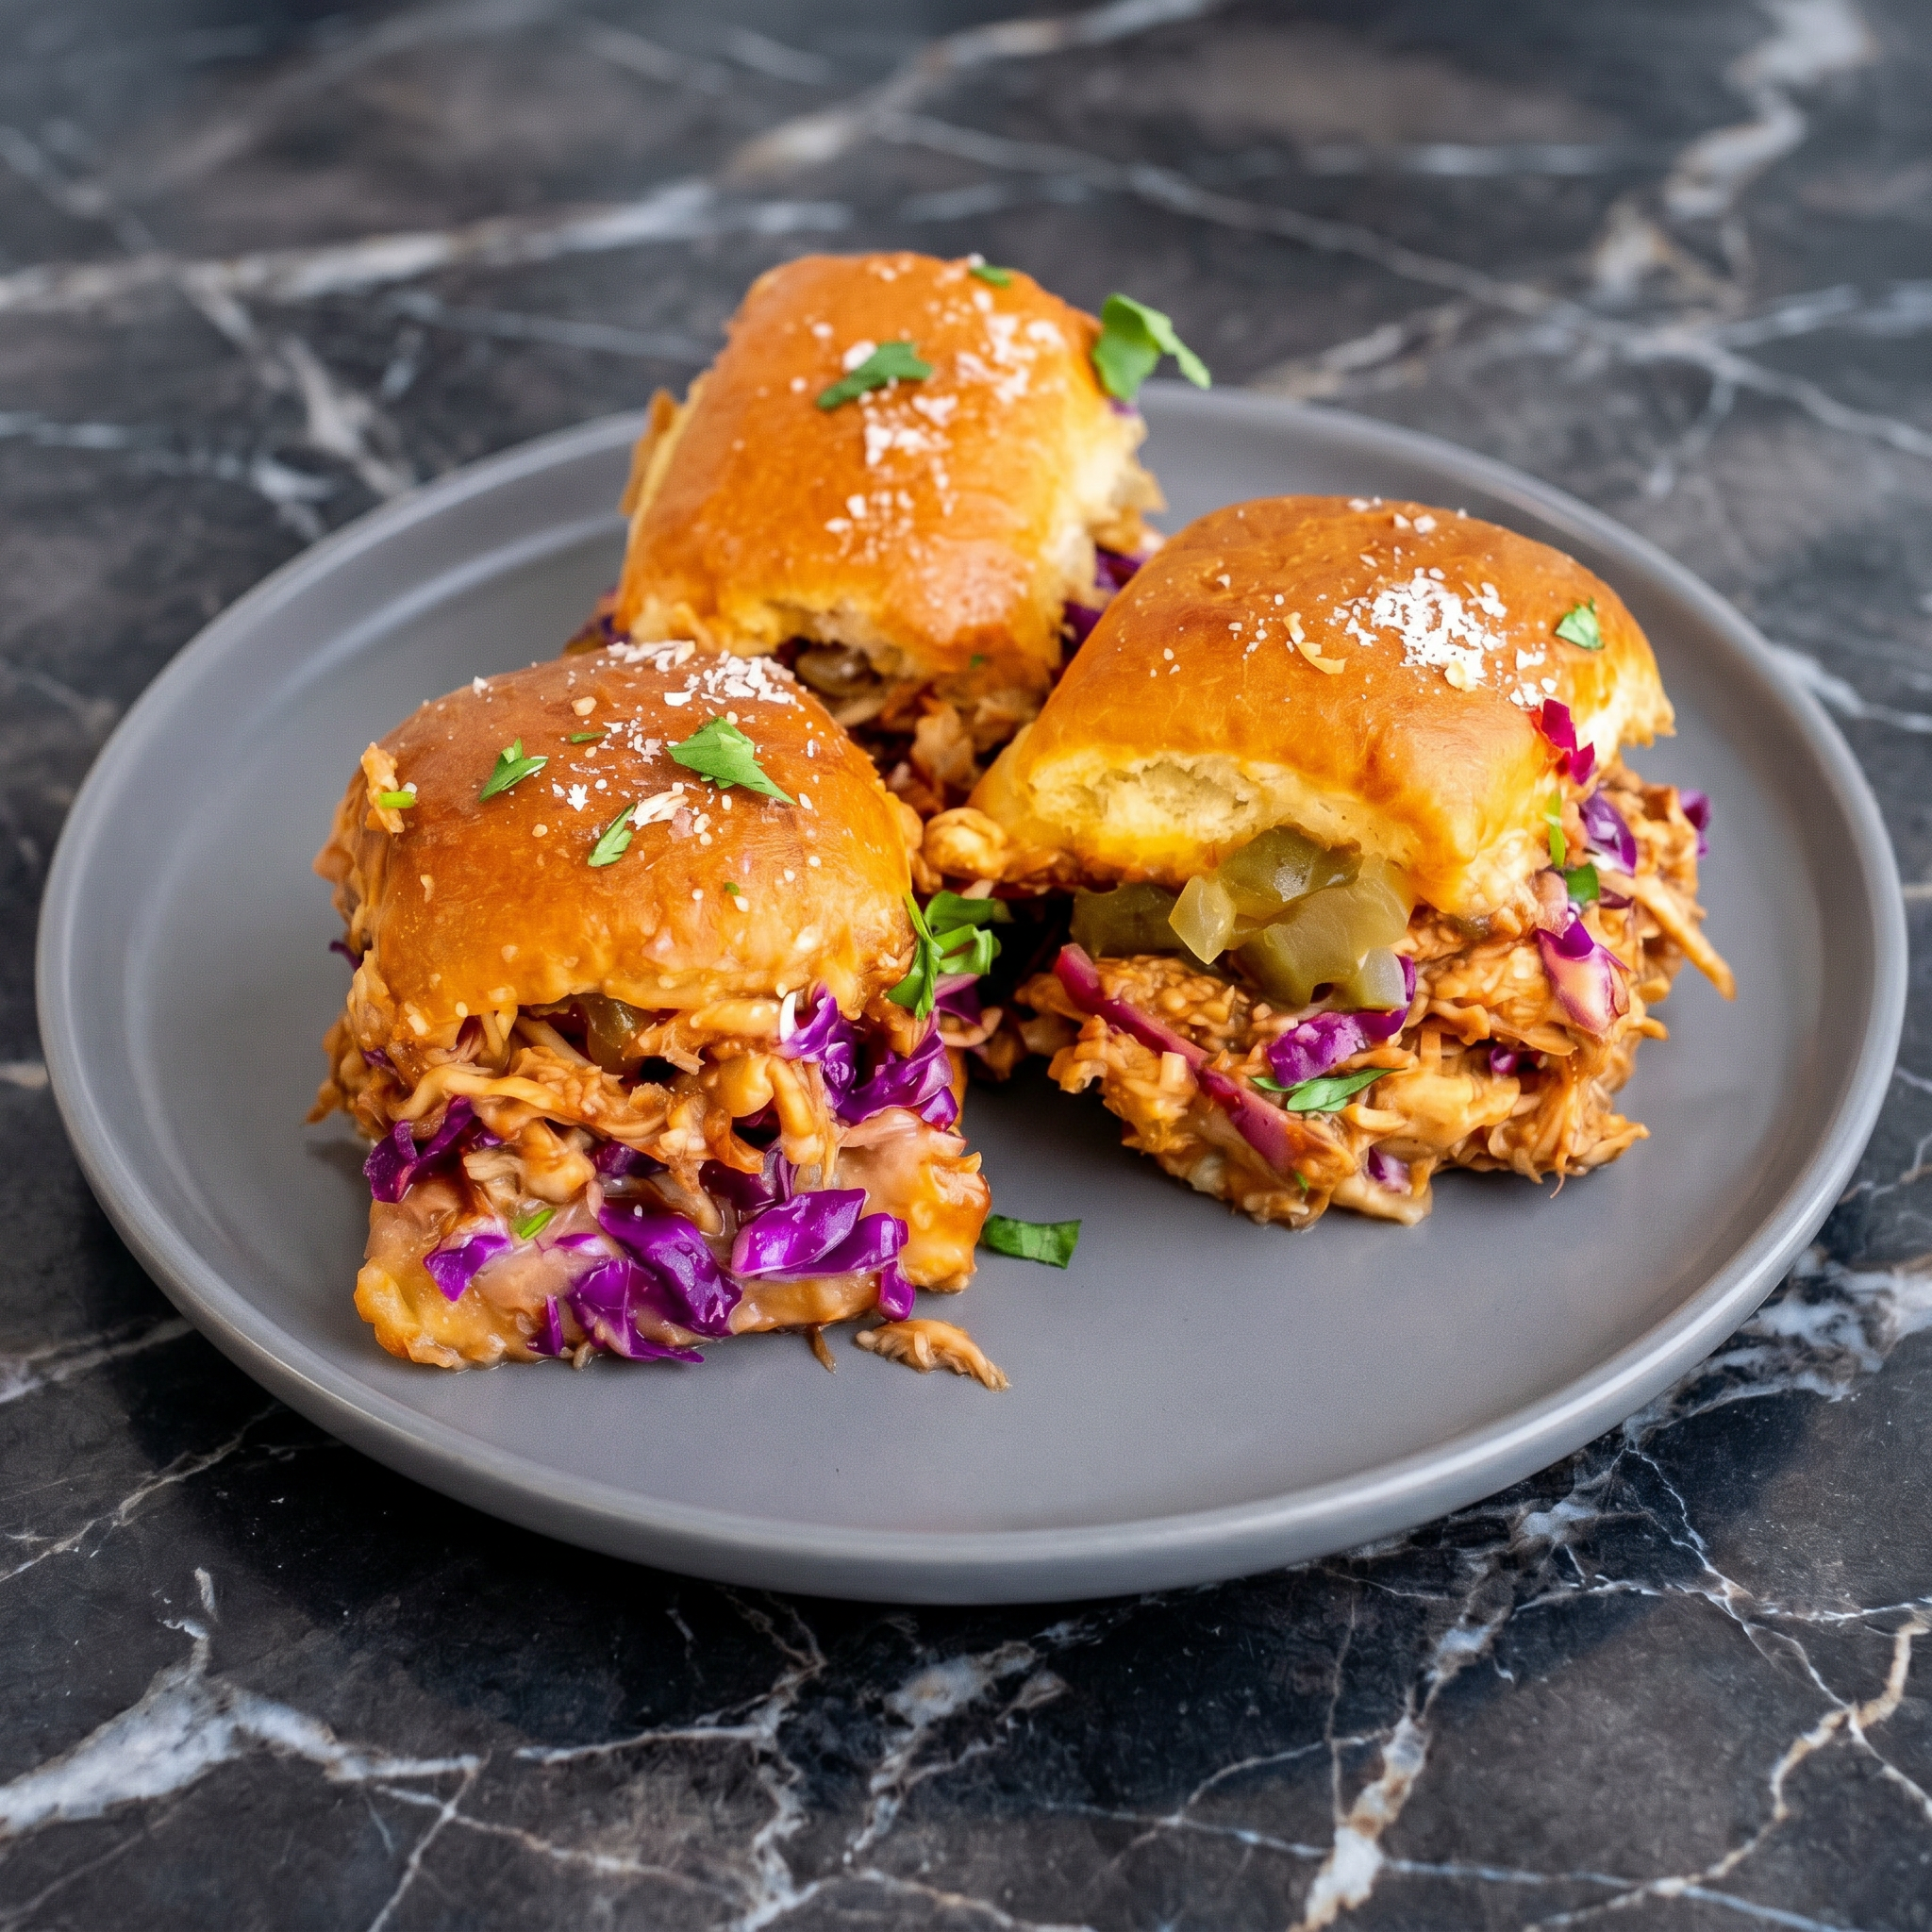
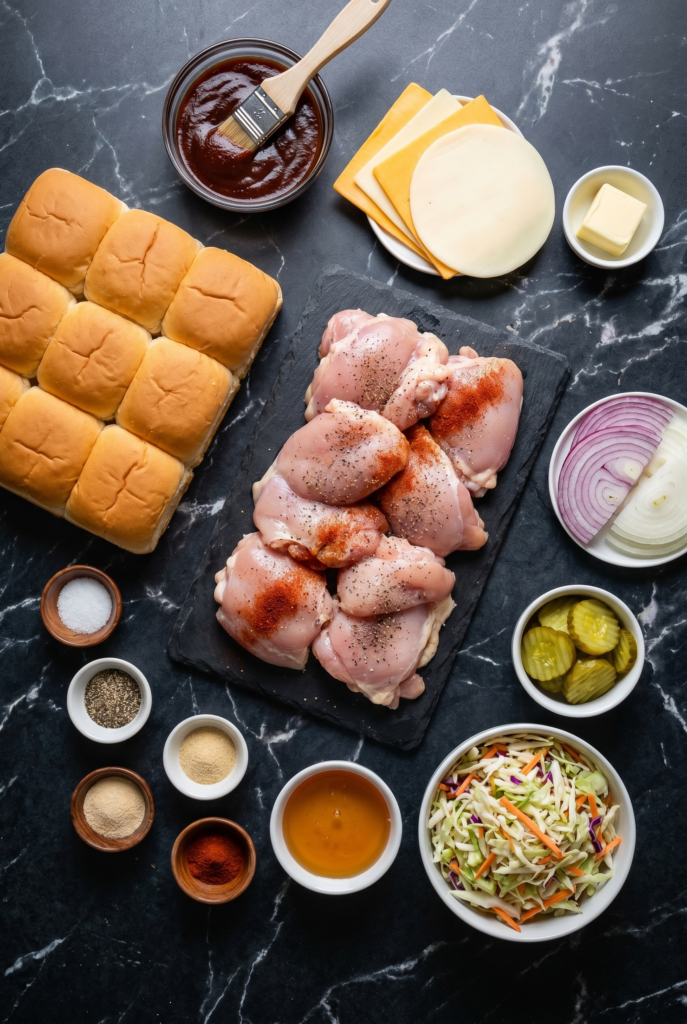
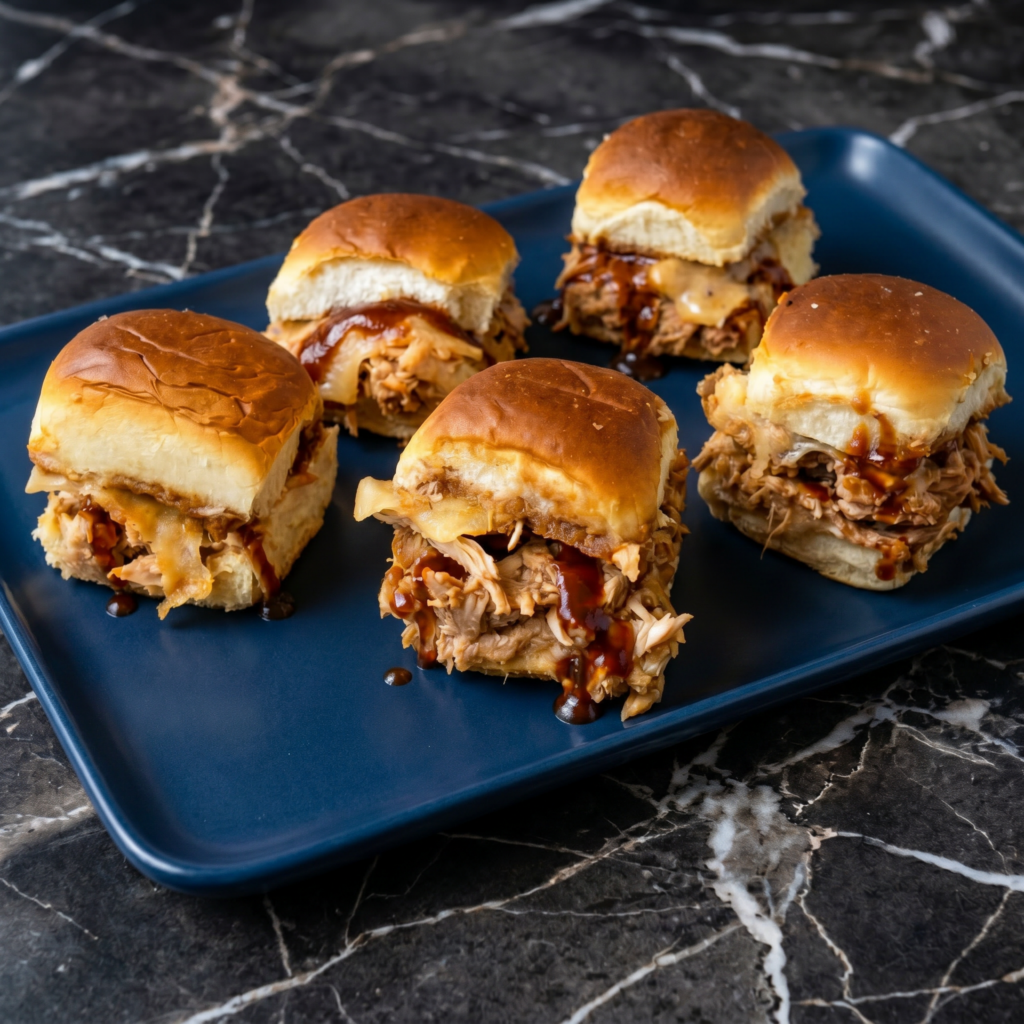
BBQ chicken sliders are bite-sized happiness. Sweet, smoky shredded chicken. Buttery, soft buns. Crunchy slaw. Pickles. All the flavors of summer barbecue in two-bite form. Make a batch. Hide a few for yourself.
Ingredients
Makes 12 sliders (serves 4-6).
12 slider buns (Hawaiian rolls or small brioche buns)
3 cups cooked chicken, shredded (rotisserie works great)
1 cup BBQ sauce (your favorite)
¼ cup red onion, finely diced
1 cup coleslaw mix (or shredded cabbage + carrot)
¼ cup mayonnaise
1 tbsp apple cider vinegar
1 tsp sugar
Pickles for topping (optional)
For the Garlic Butter Topping:
¼ cup (60g) unsalted butter, melted
1 tsp garlic powder
1 tsp smoked paprika
Step-by-Step Instructions
Step 1: Make BBQ Chicken
In a bowl, mix shredded chicken with BBQ sauce and red onion. Warm in microwave or skillet if desired.
Step 2: Make Slaw
In another bowl, mix coleslaw mix, mayonnaise, vinegar, and sugar. Set aside.
Step 3: Prep Buns
Preheat oven to 375°F (190°C).
Without separating individual rolls, slice the entire block of buns horizontally (top and bottom slab).
Place bottom bun slab in a 9×13 baking dish.
Step 4: Assemble
Spread BBQ chicken evenly over bottom buns.
Top with slaw and pickles (if using). Place top bun slab over everything.
Step 5: Butter & Bake
Mix melted butter, garlic powder, and smoked paprika. Brush over tops of buns.
Cover with foil. Bake 10 minutes.
Remove foil. Bake 5 more minutes until golden.
Step 6: Serve
Pull apart. Eat immediately. Don’t blink or they’re gone.
Summary
Prep Time: 15 min | Cook Time: 15 min | Total: 30 min
Yield: 12 sliders | Difficulty: Easy
Storage Notes
Fridge: 3 days. Reheat: Cover with foil and bake at 350°F for 10-12 minutes. Best fresh — slaw gets soggy. Keep slaw separate until ready to serve for maximum crunch.
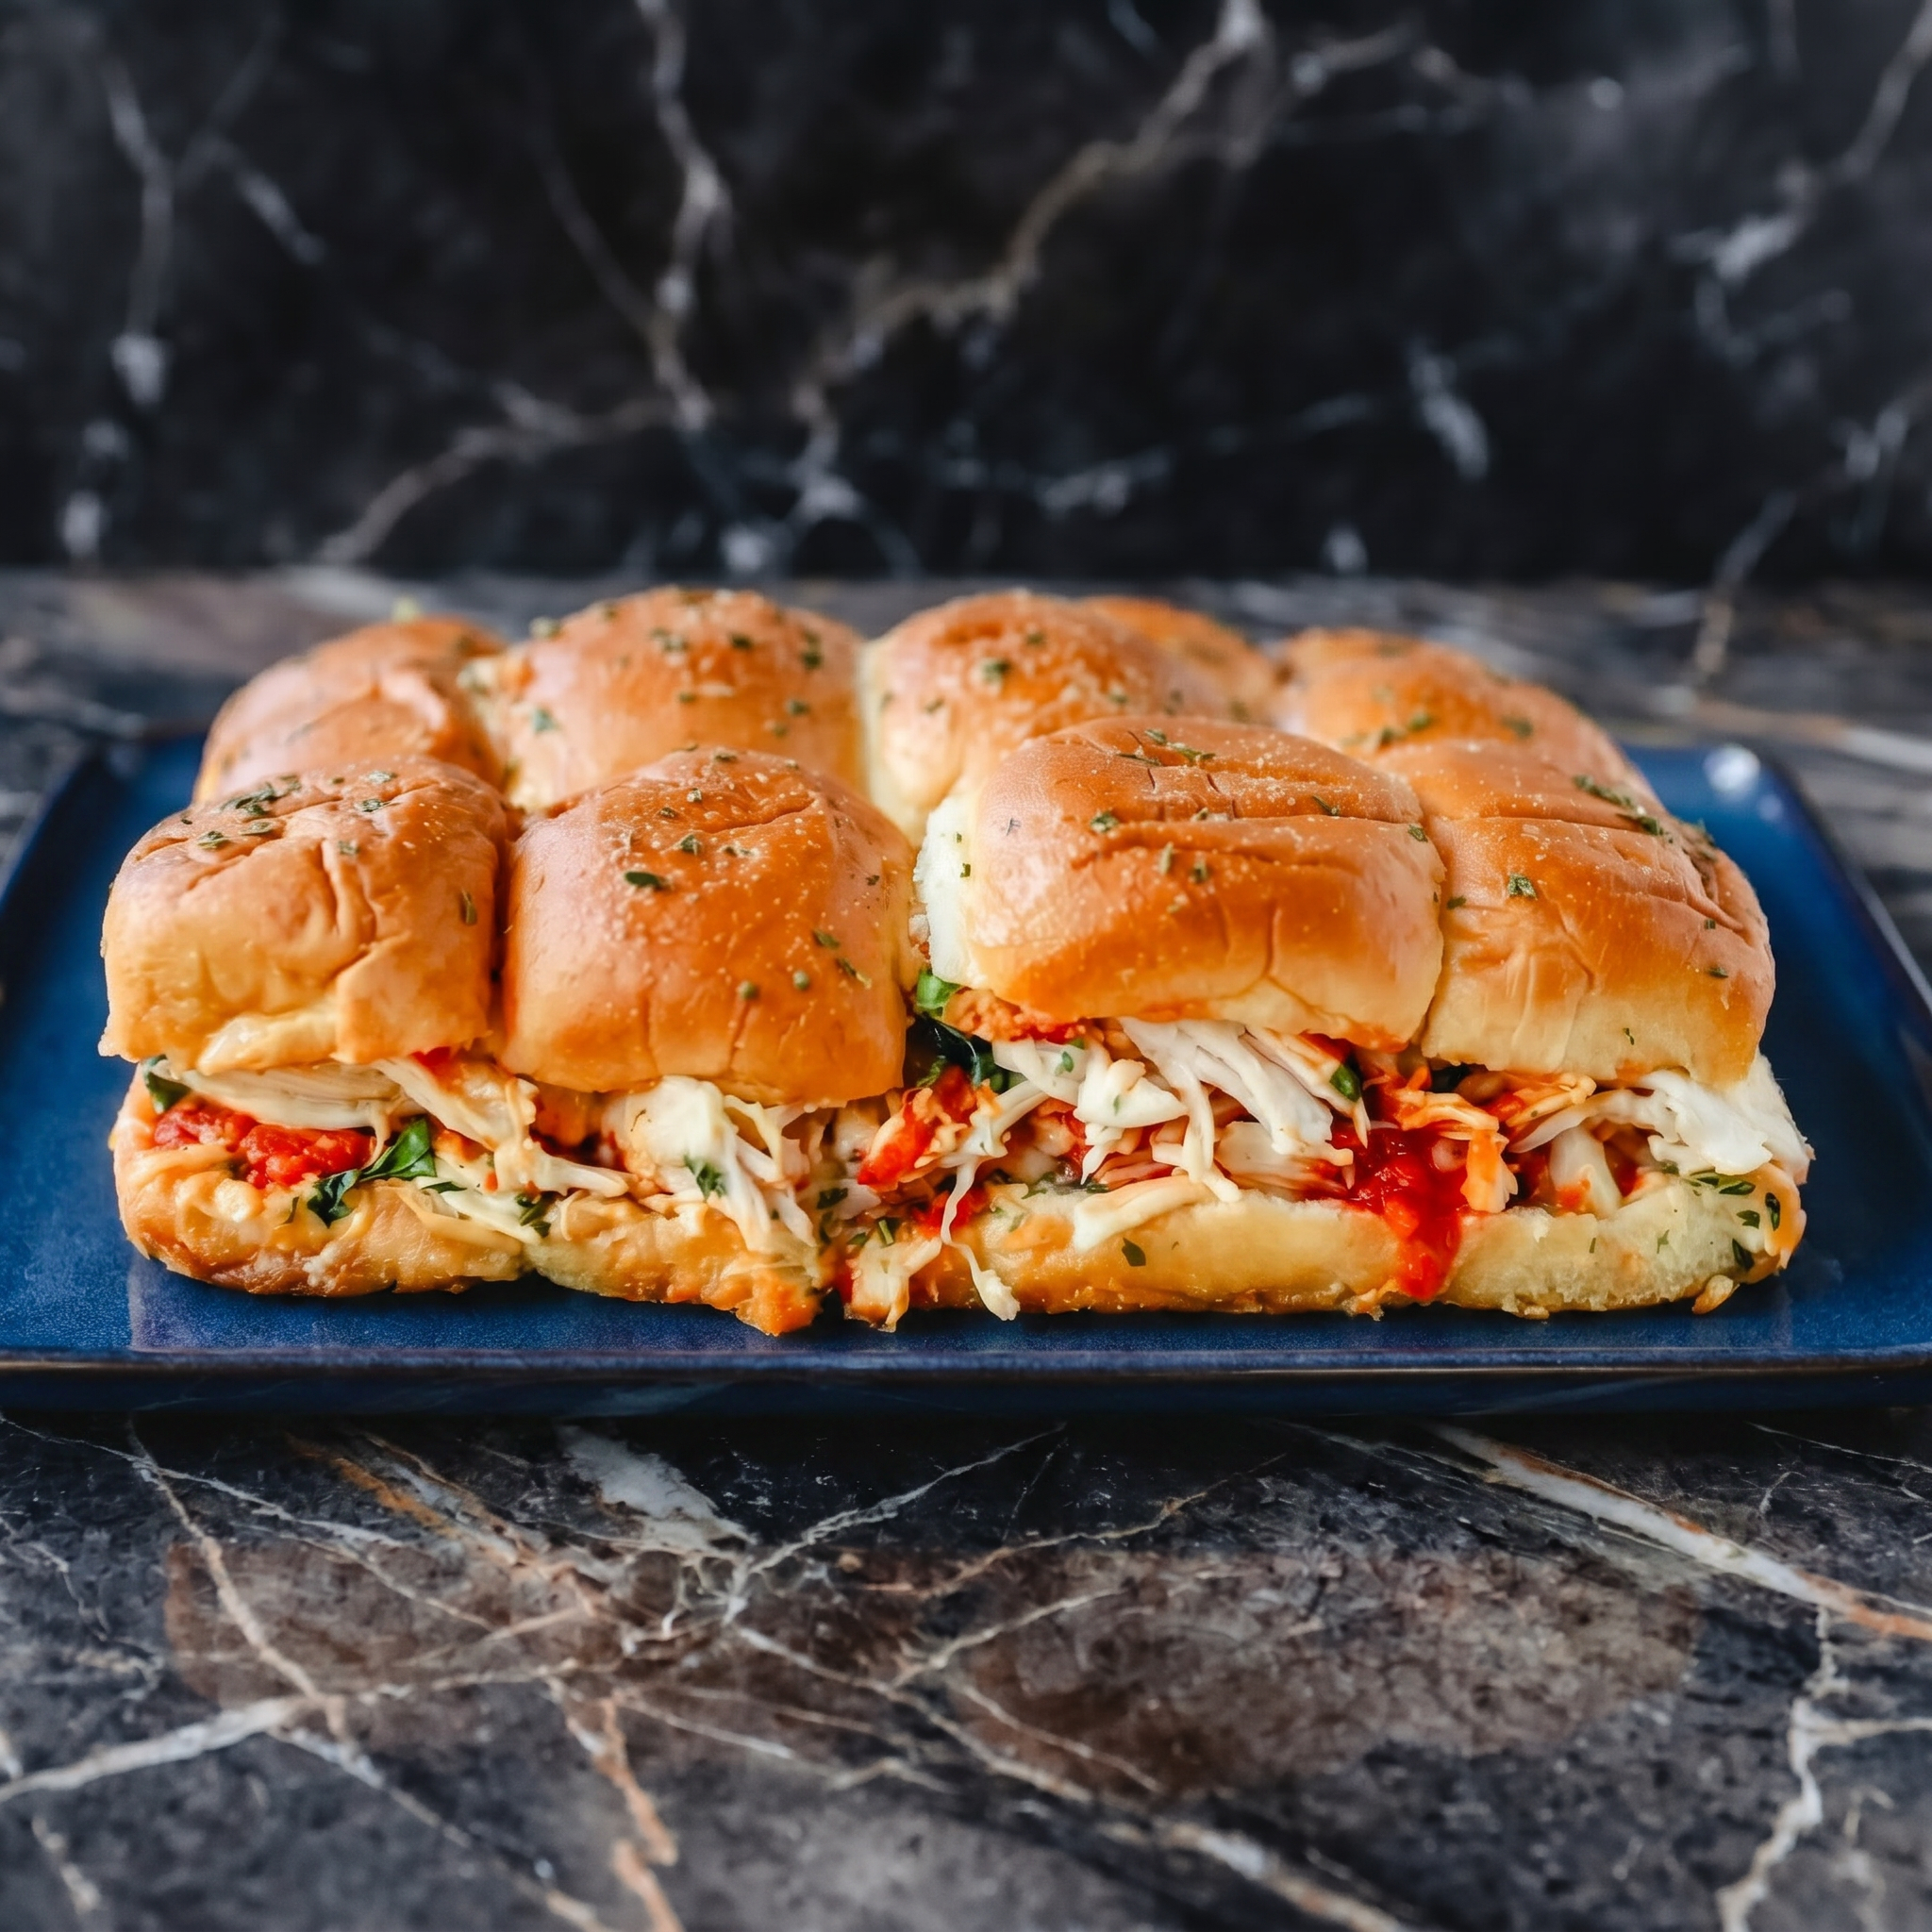
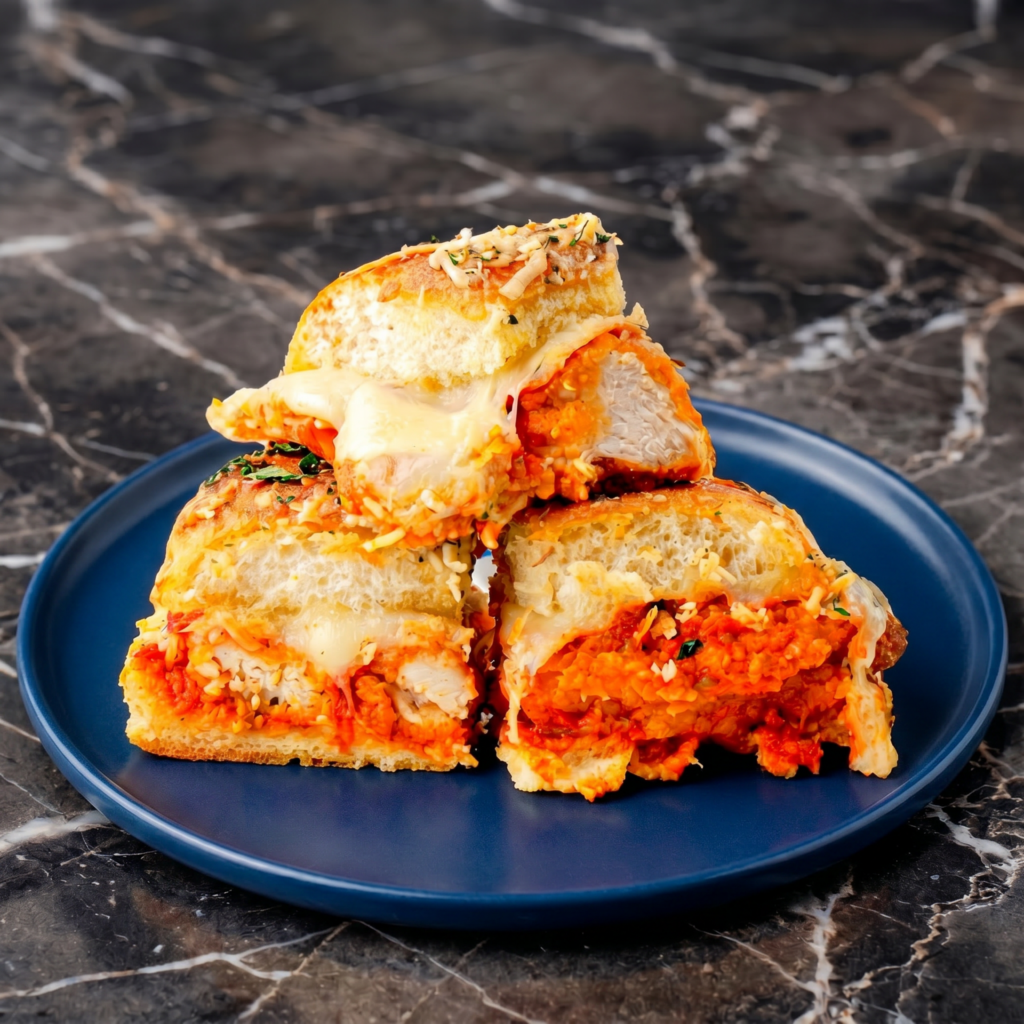
Chicken Parmesan is a fork-and-knife situation. These sliders are not. Crispy chicken, tangy marinara, gooey mozzarella, all tucked into buttery garlic-topped Hawaiian rolls. Pull apart. Eat with your hands. No plates required.
Ingredients
Makes 12 sliders (serves 4-6).
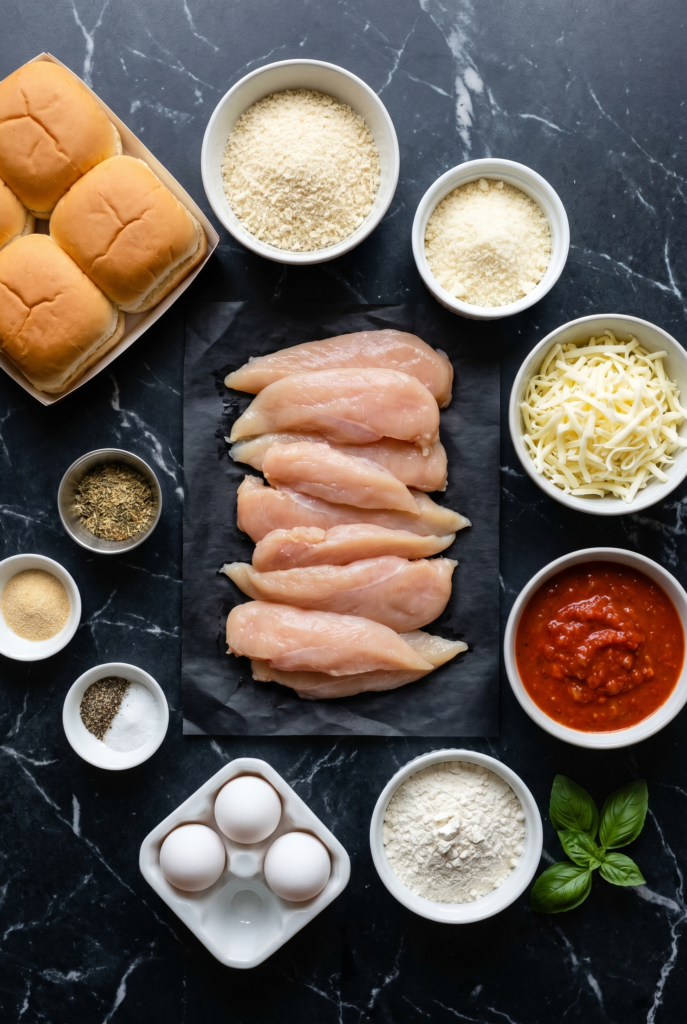
12 slider buns (Hawaiian rolls or small brioche buns)
12 frozen or refrigerated chicken tenders (or 2 large breaded chicken cutlets, cut to fit)
1 cup marinara sauce
1½ cups shredded mozzarella cheese
½ cup grated Parmesan cheese
¼ cup fresh basil, chopped (optional)
For the Garlic Butter Topping:
¼ cup (60g) unsalted butter, melted
2 cloves garlic, minced
1 tsp dried parsley or oregano
Step-by-Step Instructions
Step 1: Preheat & Cook Chicken
Preheat oven to 375°F (190°C). Cook chicken tenders according to package directions (or bake fresh cutlets at 400°F for 15-20 minutes).
Step 2: Prep Buns
Without separating individual rolls, slice the entire block of buns horizontally (like a top and bottom slab).
Place bottom bun slab in a 9×13 baking dish.
Step 3: Assemble Sliders
Arrange cooked chicken tenders on bottom buns (cut to fit if needed).
Spoon marinara sauce over chicken. Sprinkle with mozzarella and Parmesan.
Place top bun slab over the cheese.
Step 4: Garlic Butter
Mix melted butter, garlic, and parsley. Brush generously over the tops of the buns.
Step 5: Bake
Cover with foil. Bake 15 minutes.
Remove foil. Bake 5-10 more minutes until cheese is melted and buns are golden.
Step 6: Serve
Sprinkle with fresh basil. Pull apart. Eat immediately. Don’t share.
Summary
Prep Time: 10 min | Cook Time: 25 min | Total: 35 min
Yield: 12 sliders | Difficulty: Easy
Storage Notes
Fridge: 3 days. Reheat: Cover with foil and bake at 350°F for 10-12 minutes. Avoid microwaving — buns get rubbery. These sliders are best fresh but leftovers still hit.
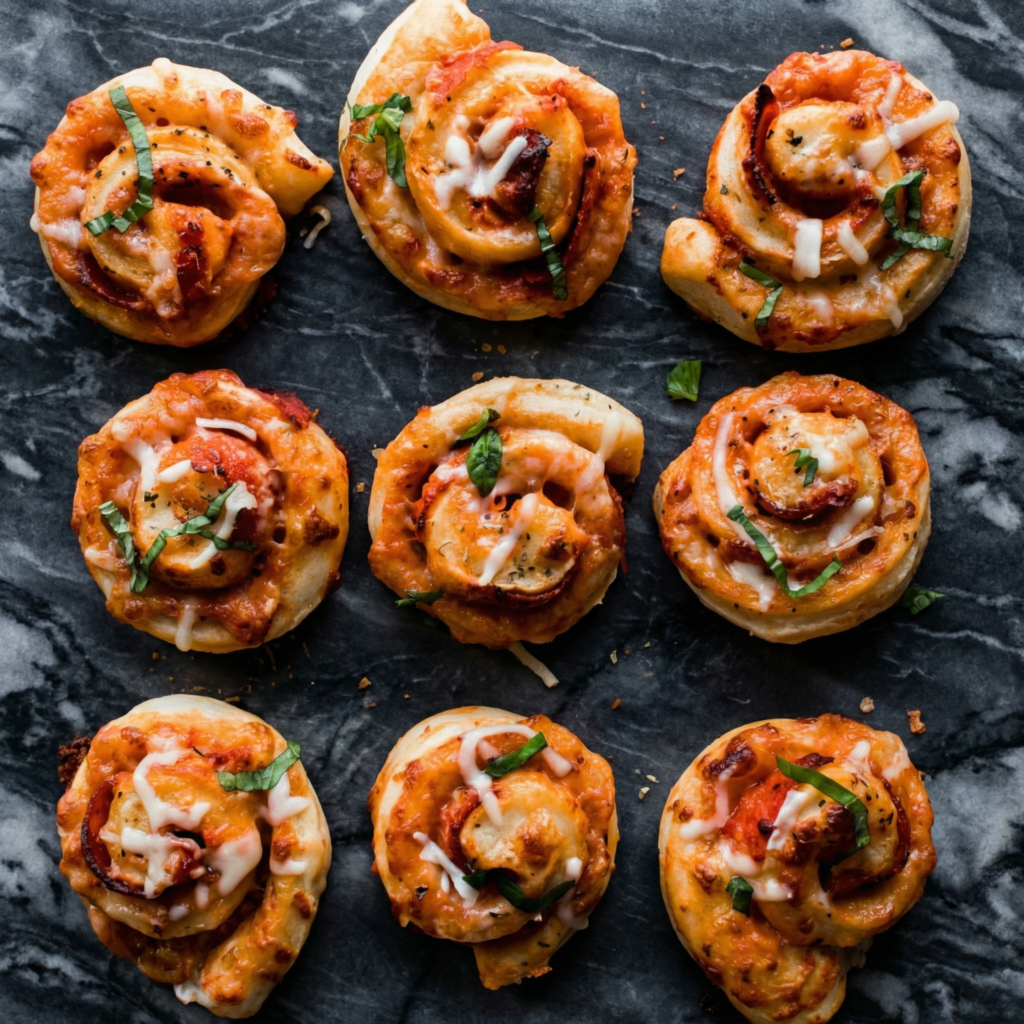
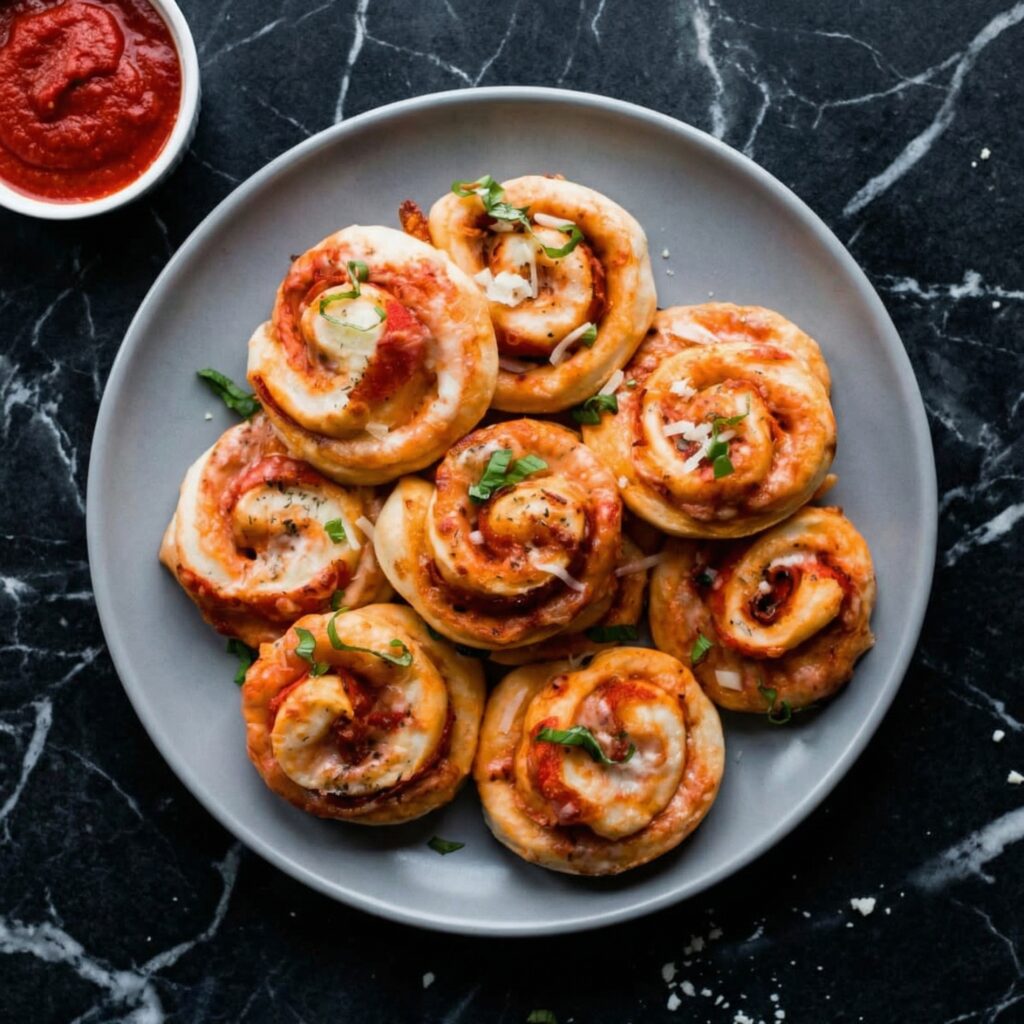
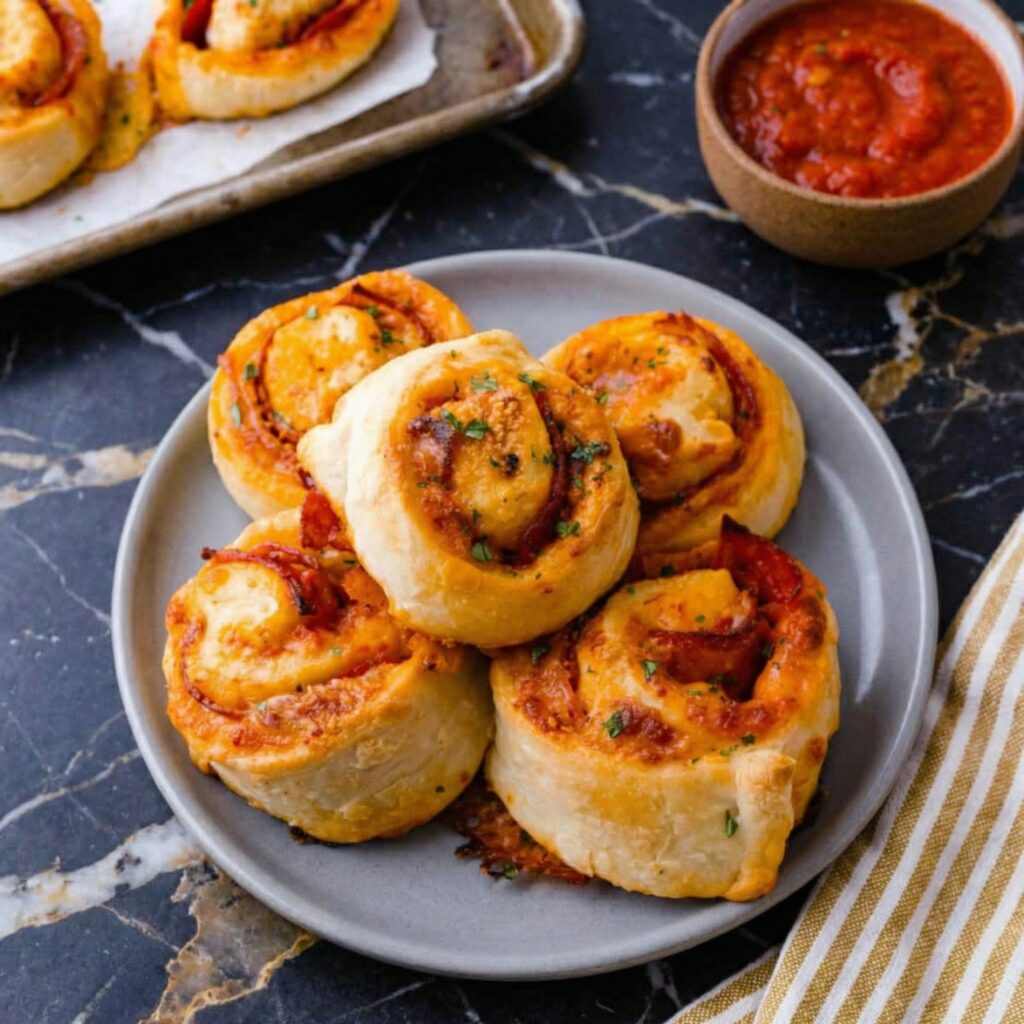
Everything you love about pepperoni pizza—savory pepperoni, melted mozzarella, tangy pizza sauce—rolled up in flaky, buttery pastry and baked to golden perfection. These pepperoni pizza rolls are the ultimate snack, perfect for game day, parties, or anytime you’re craving something delicious.
They come together quickly using store-bought puff pastry, and they disappear even faster. Serve them warm with marinara sauce for dipping, and watch them vanish.
Ingredients
For the Pepperoni Pizza Rolls (makes about 12-16 rolls):
1 large egg, beaten with 1 tablespoon water (for egg wash)
For Serving:
Warm marinara sauce
Fresh basil for garnish
Instructions
1. Prep the Pastry: Preheat your oven to 400°F (200°C). Line a baking sheet with parchment paper. On a lightly floured surface, roll the puff pastry into a 10×12-inch rectangle (about ⅛ inch thick).
2. Assemble the Roll: Spread the pizza sauce evenly over the pastry, leaving a ½-inch border along one long edge. Sprinkle with mozzarella, Parmesan, chopped pepperoni, and oregano.
3. Roll and Seal: Starting from the long edge opposite the border, tightly roll the pastry into a log. Brush the bare border with egg wash and press to seal. Place seam-side down on a plate or baking sheet and refrigerate for 20-30 minutes. Chilling makes slicing easier.
4. Slice: Use a sharp knife to slice the chilled log into ½-inch thick rounds. Place the rolls on the prepared baking sheet, cut-side up, spacing about 1 inch apart.
5. Egg Wash and Bake: Brush the tops of the rolls with egg wash. Bake for 12-15 minutes, until puffed, golden brown, and bubbly.
6. Serve: Let cool slightly, then serve warm with marinara sauce for dipping.
Pro-Tips for Pepperoni Pizza Roll Perfection
Use All-Butter Puff Pastry: The flavor difference is enormous. Look for Dufour or another brand that uses real butter.
Don’t Overfill: Too much filling will leak out during baking.
Leave a Border: A ½-inch border on one edge helps seal the roll.
Chill Before Slicing: Cold dough slices cleanly without squishing the layers.
Use a Sharp Knife: A sharp knife cuts cleanly through the layers.
Serve with Marinara: Warm marinara sauce is the perfect dipping companion.
Variations: Try adding cooked sausage, olives, or mushrooms.
Make Ahead: Assemble the log and refrigerate for up to 24 hours before slicing and baking.
These Pepperoni Pizza Rolls are everything you love, rolled up—absolutely delicious.
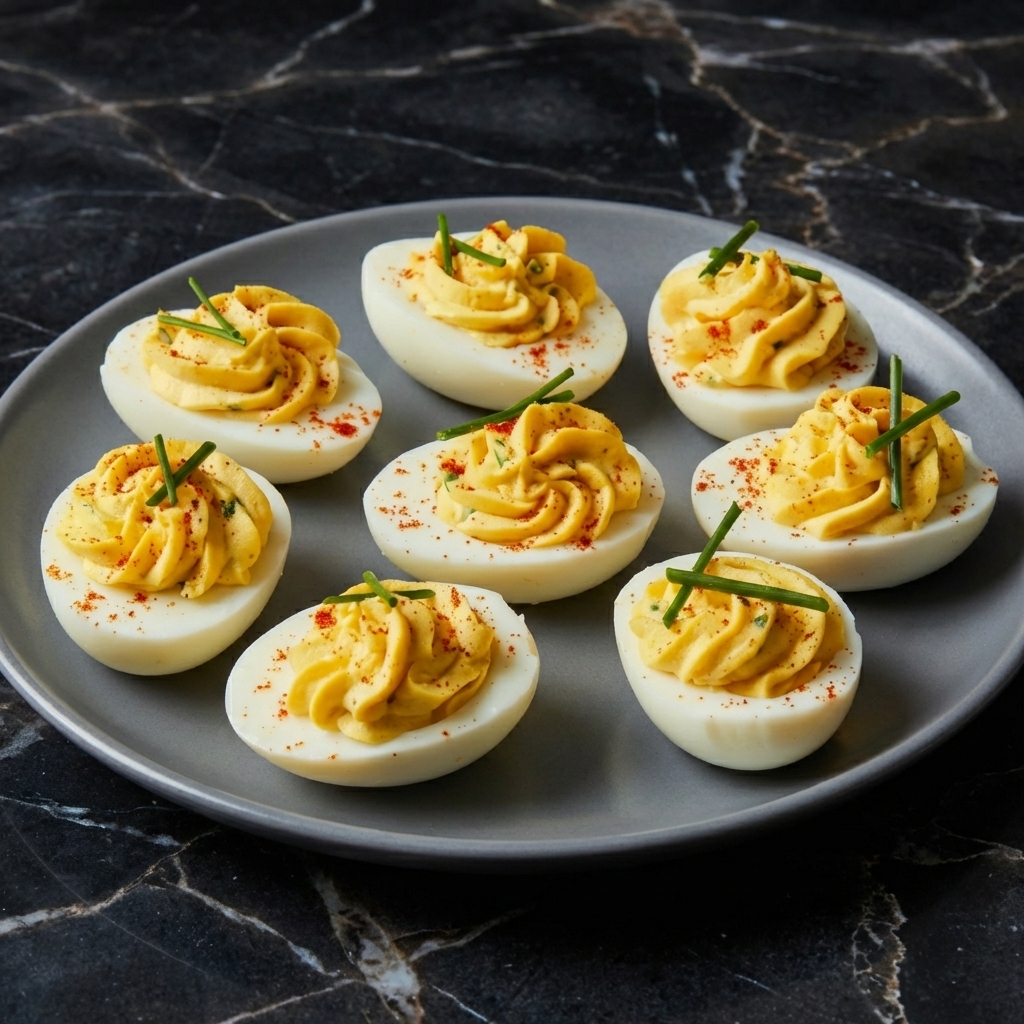
Deviled eggs are the ultimate party appetizer—creamy, tangy, and impossibly satisfying. They’re the first thing to disappear at potlucks, picnics, and holiday gatherings. This classic recipe delivers perfectly cooked hard-boiled eggs with a silky smooth filling that’s tangy from mustard and pickle relish, with just the right amount of mayo.
Topped with a sprinkle of paprika, they’re as beautiful as they are delicious. While simple, the technique matters: perfectly boiled eggs, a smooth filling, and careful piping make all the difference. Once you master these, you’ll be asked to bring them to every gathering.
Ingredients
For the Deviled Eggs (makes 12 deviled egg halves):
6 large eggs (older eggs peel more easily)
3 tablespoons mayonnaise
1 teaspoon Dijon mustard (or yellow mustard)
1 teaspoon white vinegar or pickle juice
1 teaspoon sweet pickle relish (optional)
Salt and white pepper to taste
Paprika, for garnish
Fresh parsley or chives, for garnish (optional)
Optional Add-Ins:
1 teaspoon prepared horseradish (for a kick)
1 tablespoon crumbled bacon
1 teaspoon hot sauce
Instructions
1. Hard Boil the Eggs: Place the eggs in a single layer in a saucepan and cover with cold water by about 1 inch. Bring to a boil over high heat. Once boiling, remove from heat, cover, and let sit for 12 minutes.
2. Ice Bath: While the eggs cook, prepare a large bowl of ice water. Transfer the eggs to the ice bath and let cool completely, about 10 minutes. This stops the cooking and makes peeling easier.
3. Peel the Eggs: Gently tap each egg on the counter to crack the shell, then roll it between your hands to loosen the shell. Peel under running water to help remove any stubborn pieces.
4. Slice and Remove Yolks: Slice each egg in half lengthwise. Gently remove the yolks and place them in a medium bowl. Arrange the egg white halves on a serving platter.
5. Make the Filling: Mash the yolks with a fork until finely crumbled. Add the mayonnaise, mustard, vinegar (or pickle juice), pickle relish (if using), salt, and pepper. Mix until smooth. For an ultra-smooth filling, press through a fine-mesh sieve or use a small food processor.
6. Fill the Eggs: Transfer the filling to a piping bag fitted with a star tip (or use a zip-top bag with a corner snipped off). Pipe the filling into each egg white half, dividing evenly.
7. Garnish and Serve: Sprinkle with paprika and garnish with fresh parsley or chives if desired. Refrigerate until ready to serve. Serve chilled.
Pro-Tips for Deviled Egg Perfection
Use Older Eggs: Fresh eggs are harder to peel. Eggs that are a week or two old are ideal.
Don’t Overcook: Overcooked eggs develop a green ring around the yolk and a rubbery texture. The 12-minute rest method is foolproof.
Ice Bath Is Essential: Shocking the eggs in ice water stops the cooking and makes peeling much easier.
Peel Under Running Water: The water helps separate the shell from the egg white.
Make Filling Smooth: For the silkiest texture, press the yolk mixture through a fine-mesh sieve or use a food processor.
Pipe for Presentation: Piping the filling creates beautiful, uniform deviled eggs.
Make Ahead: You can prepare the filling and whites separately a day ahead. Fill just before serving.
Variations: Try adding bacon, horseradish, hot sauce, or fresh herbs.
These Classic Deviled Eggs are creamy, tangy, and perfect for parties.
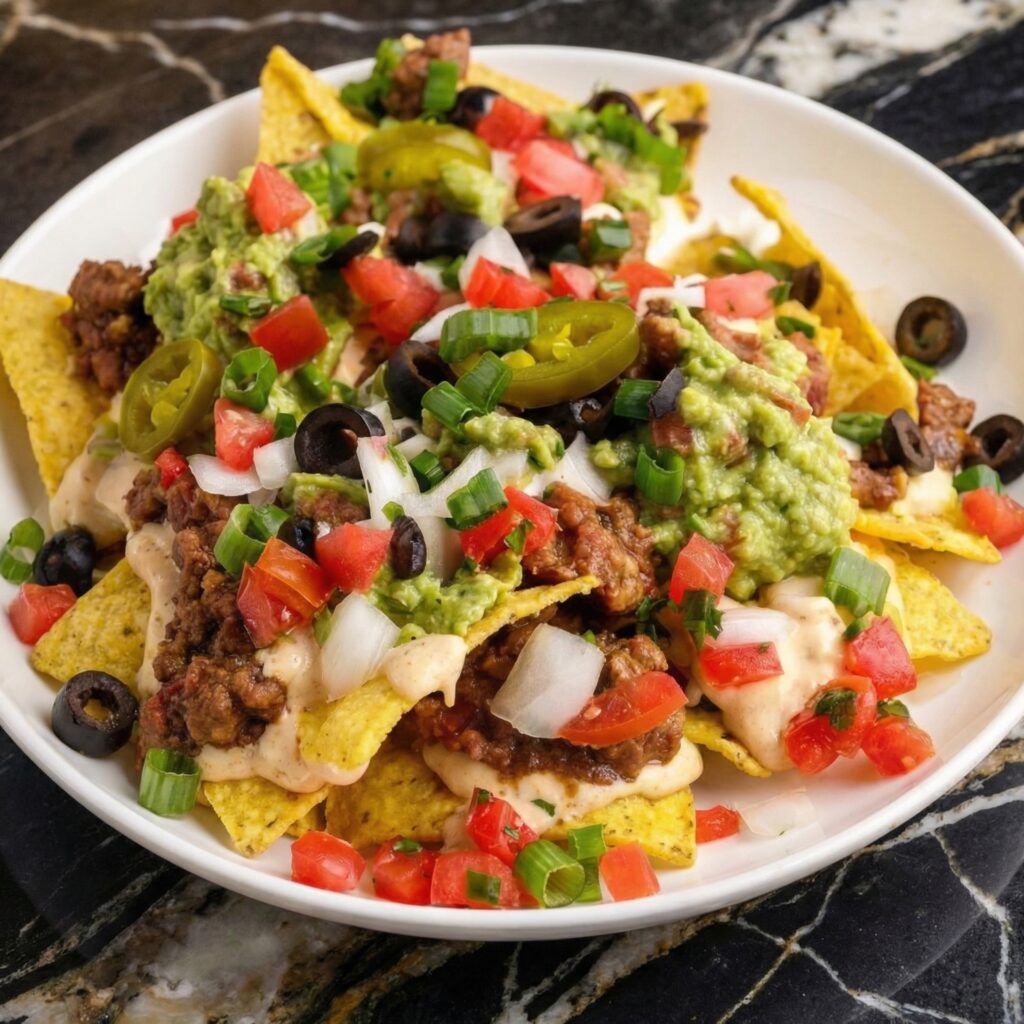
Nachos are more than just a snack—they’re an event. A massive platter of crispy tortilla chips loaded with seasoned meat, melted cheese, refried beans, and all the fresh toppings, served right in the middle of the table for everyone to dig in. Whether it’s game day, movie night, or just a Tuesday that needs some excitement, loaded nachos deliver.
The key is layering: every chip should get some of the good stuff. Not just cheese on top, but cheese throughout, so every bite is perfect. This recipe walks you through building the ultimate nacho platter, with seasoned ground beef, a silky cheese sauce (or melted shredded cheese), and all the classic toppings.
Ingredients
For the Seasoned Ground Beef:
1 lb (450g) ground beef (80/20)
1 small onion, finely diced
2 cloves garlic, minced
1 tablespoon chili powder
1 teaspoon ground cumin
1 teaspoon smoked paprika
½ teaspoon salt
¼ teaspoon black pepper
¼ cup (60ml) water or beef broth
For the Cheese Sauce (Optional, but amazing):
2 tablespoons unsalted butter
2 tablespoons all-purpose flour
1 cup (240ml) whole milk
2 cups (200g) shredded sharp cheddar cheese
½ cup (50g) shredded Monterey Jack cheese
¼ teaspoon salt
Pinch of cayenne pepper (optional)
For Assembly:
1 large bag (13-16 oz) restaurant-style tortilla chips (sturdy chips are essential)
1 can (15 oz) refried beans, warmed
2 cups (200g) shredded cheese (cheddar, Monterey Jack, or a mix) if not using cheese sauce
Pickled jalapeño slices, to taste
½ cup black olives, sliced
For Fresh Toppings:
Pico de gallo or fresh salsa
Sour cream
Guacamole or sliced avocado
Fresh cilantro, chopped
Green onions, sliced
Lime wedges
Instructions
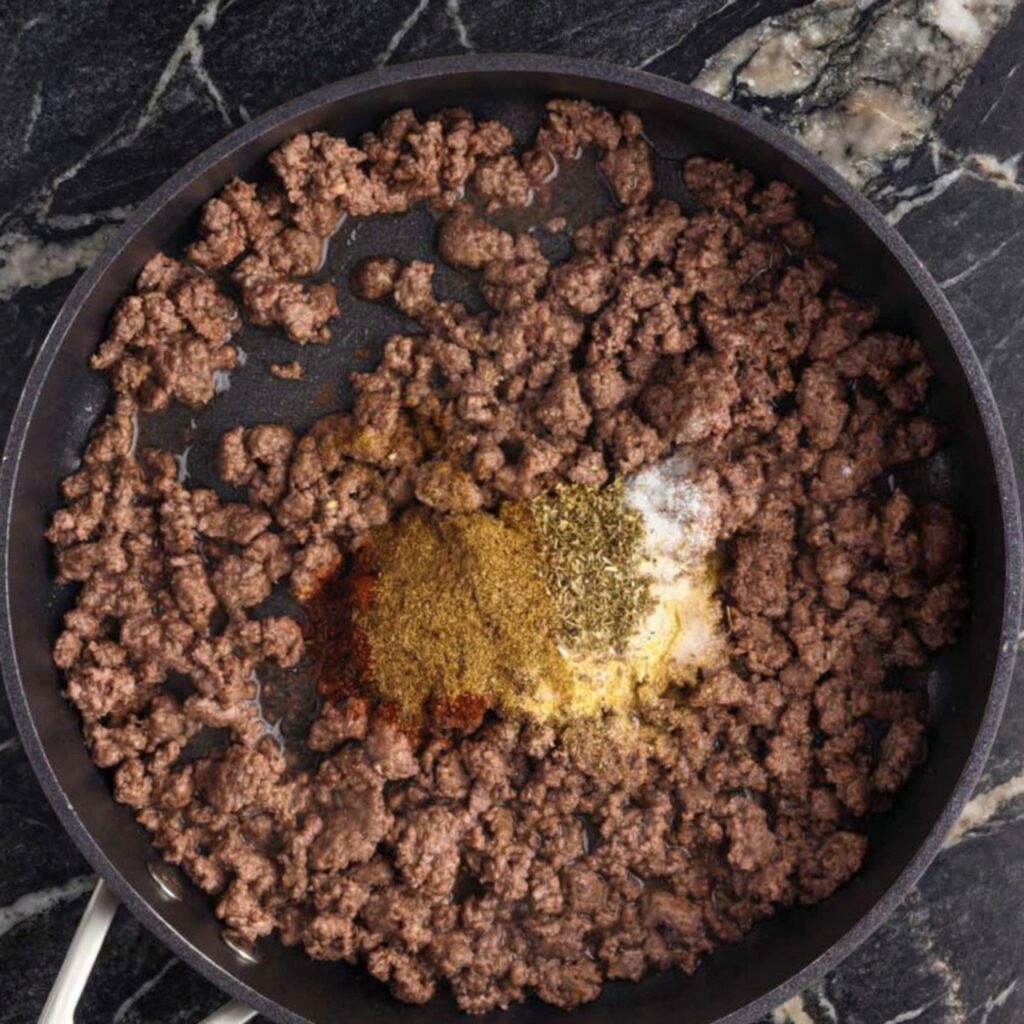
1. Cook the Ground Beef: In a large skillet over medium-high heat, cook the ground beef, breaking it up with a spoon, until browned and cooked through, about 5-7 minutes. Add the diced onion and cook until softened, about 3-4 minutes. Add the garlic and cook for 1 minute until fragrant. Drain excess fat if needed.
2. Season the Beef: Add the chili powder, cumin, smoked paprika, salt, and pepper to the beef. Stir to coat. Add the water or broth and simmer until the liquid reduces and the beef is nicely coated, about 2-3 minutes. Remove from heat and set aside.
3. Make the Cheese Sauce (Optional): In a medium saucepan over medium heat, melt the butter. Whisk in the flour and cook for 1-2 minutes until golden and bubbly. Gradually whisk in the milk, stirring constantly until thickened, about 3-4 minutes. Reduce heat to low and add the shredded cheeses, a handful at a time, stirring until smooth. Season with salt and cayenne. Keep warm.
4. Warm the Refried Beans: In a small saucepan or microwave-safe bowl, warm the refried beans until soft and spreadable. Add a tablespoon of water if needed to thin.
5. Preheat the Oven: Preheat your oven to 375°F (190°C). Line a large baking sheet with parchment paper or foil.
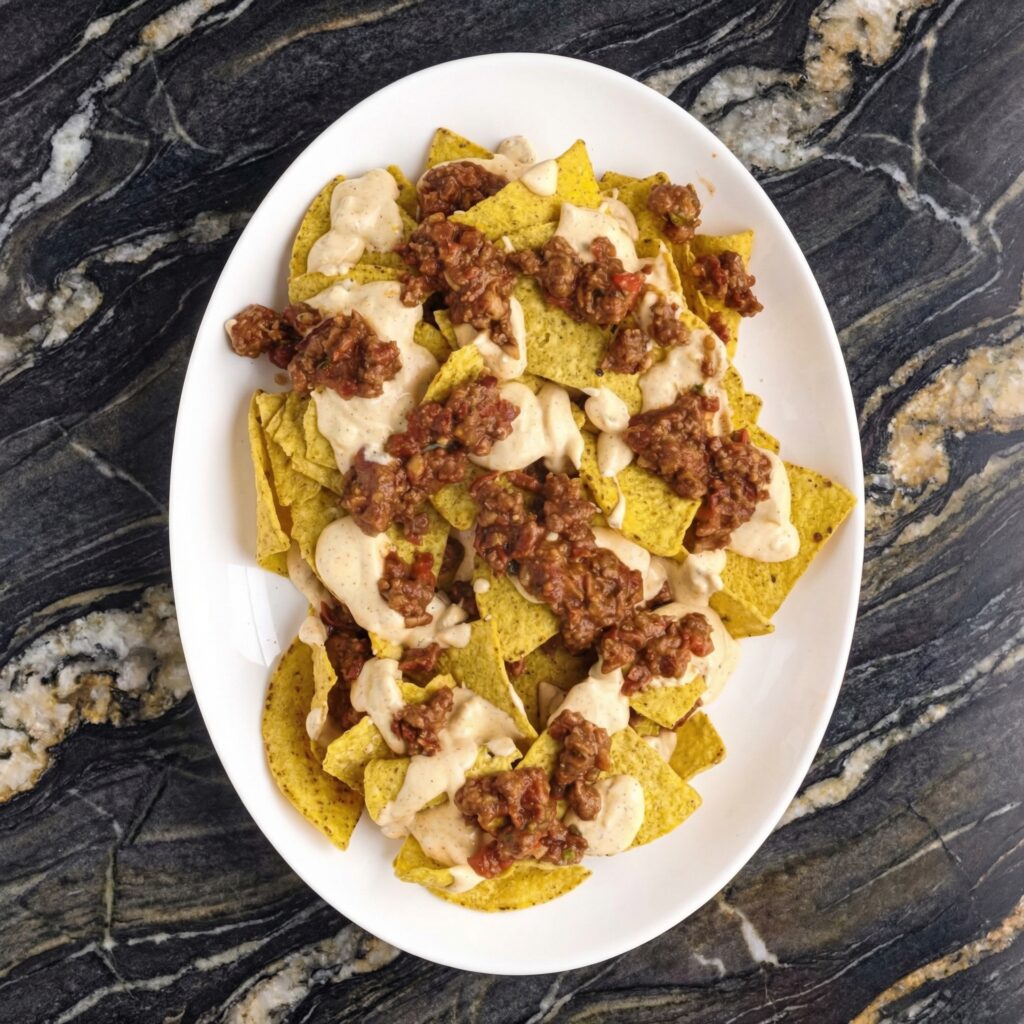
6. First Layer of Chips: Spread half the tortilla chips in an even layer on the prepared baking sheet.
7. Add First Layer of Toppings: Dollop half the refried beans in small spoonfuls over the chips. Sprinkle half the seasoned ground beef over the beans. If using shredded cheese, sprinkle half over this layer. If using cheese sauce, drizzle half over everything. Add half the jalapeños and olives.
8. Second Layer of Chips: Top with the remaining chips.
9. Add Second Layer of Toppings: Repeat with remaining refried beans, ground beef, cheese, jalapeños, and olives.
10. Bake: Bake for 8-10 minutes, until the cheese is melted and bubbly and the edges of the chips are just starting to brown. Watch carefully—chips can burn quickly.
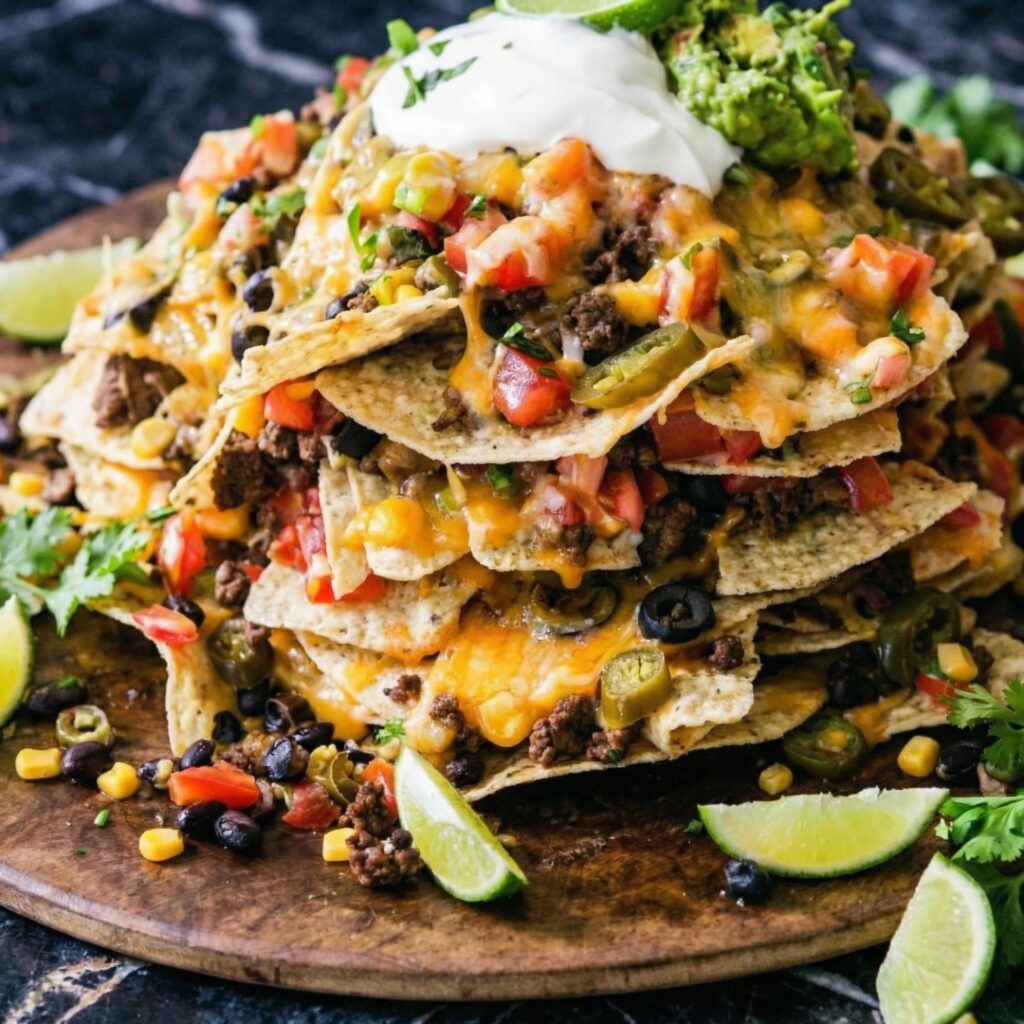
11. Add Fresh Toppings: Remove from the oven and immediately drizzle with cheese sauce (if using) and add dollops of sour cream, pico de gallo, and guacamole. Sprinkle with fresh cilantro and green onions.
12. Serve Immediately: Serve hot, with lime wedges on the side for squeezing. Place the baking sheet right on the table for everyone to dig in.
Pro-Tips for Nacho Perfection
Use Sturdy Chips: Thin, flimsy chips will break under the weight of toppings. Look for “restaurant-style” or “thick-cut” tortilla chips.
Layer, Layer, Layer: Don’t just pile toppings on top—layer chips and toppings so every chip gets some love.
Warm the Beans: Cold, stiff beans are hard to spread and don’t melt well. Warm them until soft and spreadable.
Don’t Overbake: Chips go from perfectly crisp to burnt quickly. Watch closely and pull when cheese is melted.
Fresh Toppings at the End: Add cold toppings like sour cream, guacamole, and pico after baking so they stay fresh and cool.
Serve on the Baking Sheet: Nachos are meant to be shared. Bring the whole baking sheet to the table for that authentic experience.
Customize: Try shredded chicken, carnitas, or black beans. Add corn, pickled red onions, or cotija cheese.
These Ultimate Loaded Nachos are game day perfection.
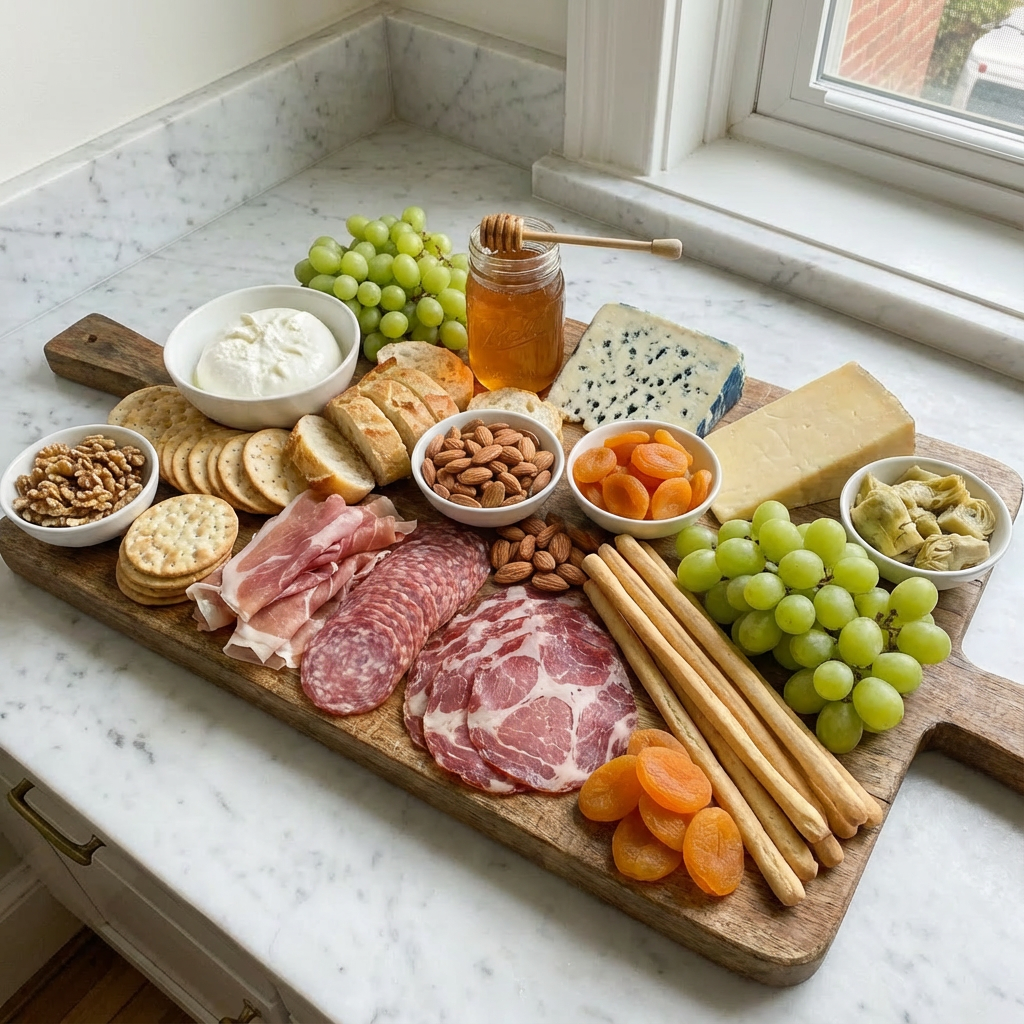
Entertaining should be fun, not frantic. The sight of a beautifully abundant snack board—or charcuterie board, if you want to be fancy—has a magical way of making any gathering feel special, welcoming, and effortlessly stylish. But for many, the idea of assembling one is intimidating. Where do you start? How much do you buy? This guide is here to demystify the process.
Think of it not as a rigid recipe, but as a foolproof formula and a permission slip to play with your food. We’ll break down the components into simple categories, offer easy shopping lists, and walk you through the relaxing, creative process of building a board that looks like it came from a gourmet shop but is truly achievable for anyone.
The goal is abundance, variety, and most importantly, deliciousness. Let’s build a centerpiece that will have your guests gathering around in awe (and digging in with joy).
The Snack Board Philosophy: Balance, Variety, and Ease
A great snack board is a study in contrasts and complements. It’s about offering a little something for everyone and creating delightful flavor combinations in every bite. The foundation is built on a balance of textures (creamy, crunchy, chewy) and flavors (salty, sweet, tangy, rich).
You don’t need expensive, exotic items. A few well-chosen staples from your local grocery store can create a stunning display. The key is shopping with categories in mind: something cheesy, something meaty, something crunchy, something sweet, something briny, and something for dipping. Arrangement is your secret weapon. Start with anchors like cheese wedges and small bowls for dips, then fill in the gaps with piles and clusters.
Let the colors and shapes guide you—a board should look bountiful, not bare. Remember, there are no mistakes here. If it tastes good together, it belongs on the board.
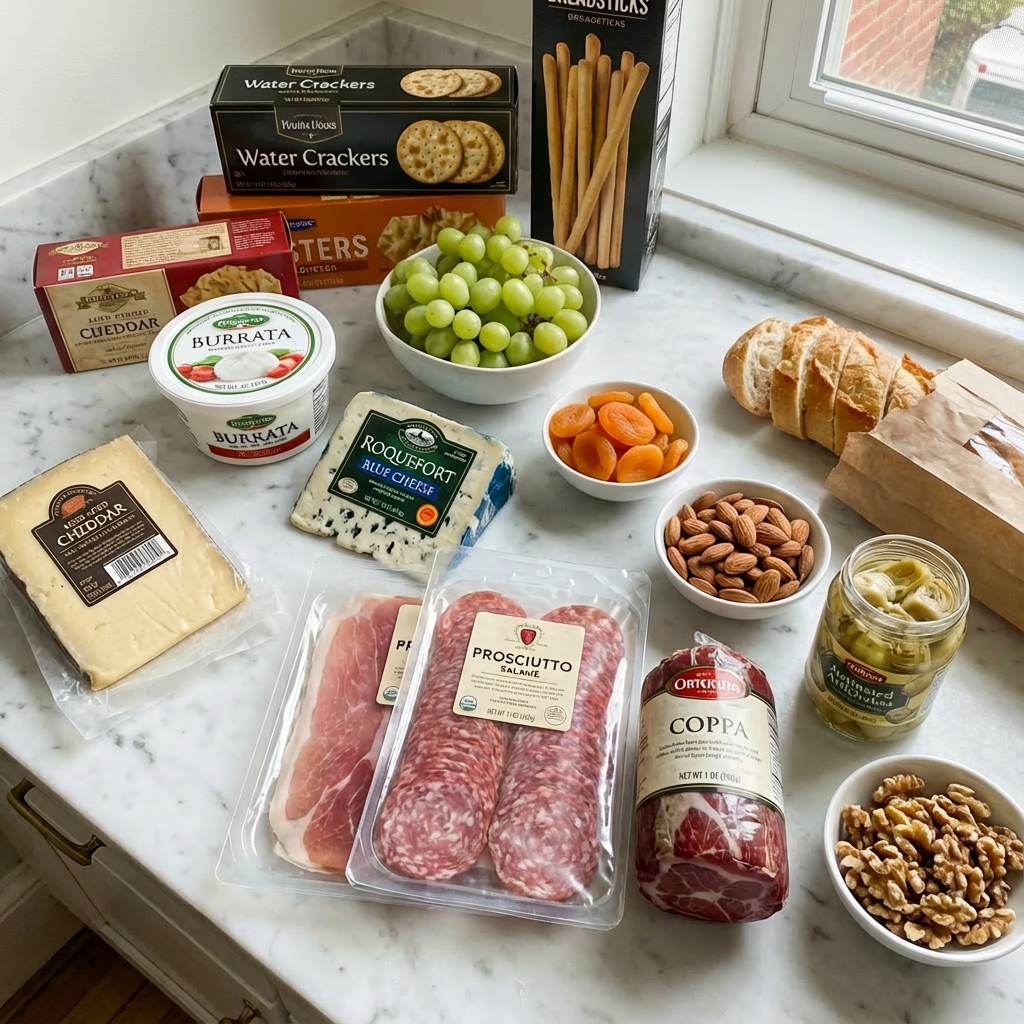
The Formula & Shopping List (Serves 6-8)
Use this as your flexible blueprint. Choose 1-2 items from each category.
The Cheese (Choose 3-4):
Hard: Aged Cheddar, Manchego, Gouda
Soft/Creamy: Brie, Goat Cheese, Burrata
Funky/Bold: Blue Cheese, Pepper Jack
The Meats (Choose 2-3):
Prosciutto, Salame, Soppressata, Coppa
Pre-sliced packs from the deli are perfect.
The Crunch (Choose 3-4):
Water Crackers, Baguette Slices, Breadsticks
Pretzels, Potato Chips, Crostini
The Sweet (Choose 2-3):
Grapes, Apple or Pear Slices, Berries
Dried Apricots, Figs, Honey or Jam
The Briny & Extras (Choose 2-3):
Mixed Olives, Cornichons, Marinated Artichokes
Whole-Grain Mustard, Hummus, Almonds, Walnuts
Step-by-Step Assembly Instructions
1. Gather & Prep Your Components: Choose a large board, platter, or even a clean baking sheet. Take all cheeses out of the fridge 30-60 minutes before serving so they can come to room temperature (this maximizes flavor and spreadability). Wash and dry fruits. Slice apples/pears and toss with a little lemon juice to prevent browning. Slice baguettes. Have small bowls or ramekins ready for loose items like olives or dips.
2. Place Your Anchors: Start by placing your small bowls on the board, spacing them out. Then, arrange your cheese wedges and blocks around the board. Cut a few slices or crumble a bit of one cheese to make it inviting. Variety in cheese shape is visually appealing.
3. Add the Meats: Fan out sliced meats or arrange them in loose, casual folds or rolls near the cheeses. Cluster different meats together for a plentiful look.
4. Fill in with Crunch & Bulk: Place piles of crackers and bread in a few different areas. Tuck in breadsticks. This creates “bread zones” so guests aren’t all reaching for the same spot.
5. Scatter the Fruits, Nuts, and Extras: Now, fill all the empty spaces. Create clusters of grapes, piles of dried fruit, small mounds of nuts, and spoonfuls of jam or honey. Scatter olives and cornichons. The goal is to cover the board surface, creating an abundant, “grazing” feel.
6. Final Touches & Garnish: Add utensils: small cheese knives, spreaders, and cocktail picks for olives. Tuck in fresh herbs like rosemary or thyme for a beautiful, fragrant garnish. Add a drizzle of honey over a cheese wedge or a sprinkle of flaky salt over nuts.
Pro Tips for Effortless Entertaining
Shop Smart: The grocery store olive bar, pre-sliced meat packs, and a well-stocked cheese section are your best friends.
No Board? No Problem: Use a large cutting board, a ceramic platter, a slab of slate, or even a clean piece of marble.
Make-Ahead: You can prep components (slice cheese, wash fruit, fill bowls) a few hours ahead. Cover the board loosely with plastic wrap and refrigerate. Add crackers and bread right before serving to keep them crisp.
Scale It: For a cozy date night, use a small board with just one cheese, one meat, some crackers, and fruit. The formula scales perfectly.
The Rule of Odd Numbers: Arranging items in groups of 3 or 5 is more visually appealing than even numbers.
Most importantly, relax and have fun with it. A snack board is a generous, welcoming gesture, and its imperfection is part of its charm.
Frequently Asked Questions (FAQ):
I’m on a tight budget. Can I still make an impressive board?
Absolutely! Focus on value. Choose one excellent cheese (like a sharp cheddar) and one affordable meat (like a salami). Use in-season fruits and vegetables (like apples, carrots, or radishes). Bulk it out with affordable crackers, popcorn, and mixed nuts from the bulk bin. A little creativity goes a long way.
How much food should I buy per person?
Cheese: 2-3 ounces per person Meat: 2-3 ounces per person Crackers/Bread: 3-4 pieces per person Accoutrements (fruit, nuts, etc.): ¼ to ⅓ cup per person It’s always better to have a little extra!
Can I make a snack board ahead of time?
Yes, with smart prep! You can slice cheeses, wash and dry fruits, fill small bowls with dips and olives, and even arrange meats on the board. Cover the entire board tightly with plastic wrap and refrigerate for up to 4-6 hours. Add crackers, bread, and any delicate fresh herbs RIGHT BEFORE serving to prevent sogginess.
What are some good vegetarian alternatives to cured meats?
Plenty! Focus on a variety of cheeses. Add hearty elements like marinated artichoke hearts, roasted peppers, sundried tomatoes, seasoned chickpeas, falafel bites, or vegetarian pâté. Smoked almonds or savory roasted nuts also add a “meaty” depth of flavor.
My board looks a little sparse. How do I make it look fuller?
Use the “cluster and fill” technique. Don’t spread things out thinly. Group items like nuts and dried fruit in small, abundant piles. Use fresh herbs (like bunches of grapes on the vine or rosemary sprigs) to take up visual space. Fill every gap with something, even if it’s just a few extra crackers tucked in.
Can I make a kid-friendly snack board?
Definitely! Kids love boards. Use familiar cheeses (mozzarella pearls, mild cheddar cubes), sliced turkey or ham rolls, pretzels, goldfish crackers, apple slices, grapes, berries, and small cookies. Use fun cookie cutters on cheeses and meats. Skip the strong olives and blue cheese.
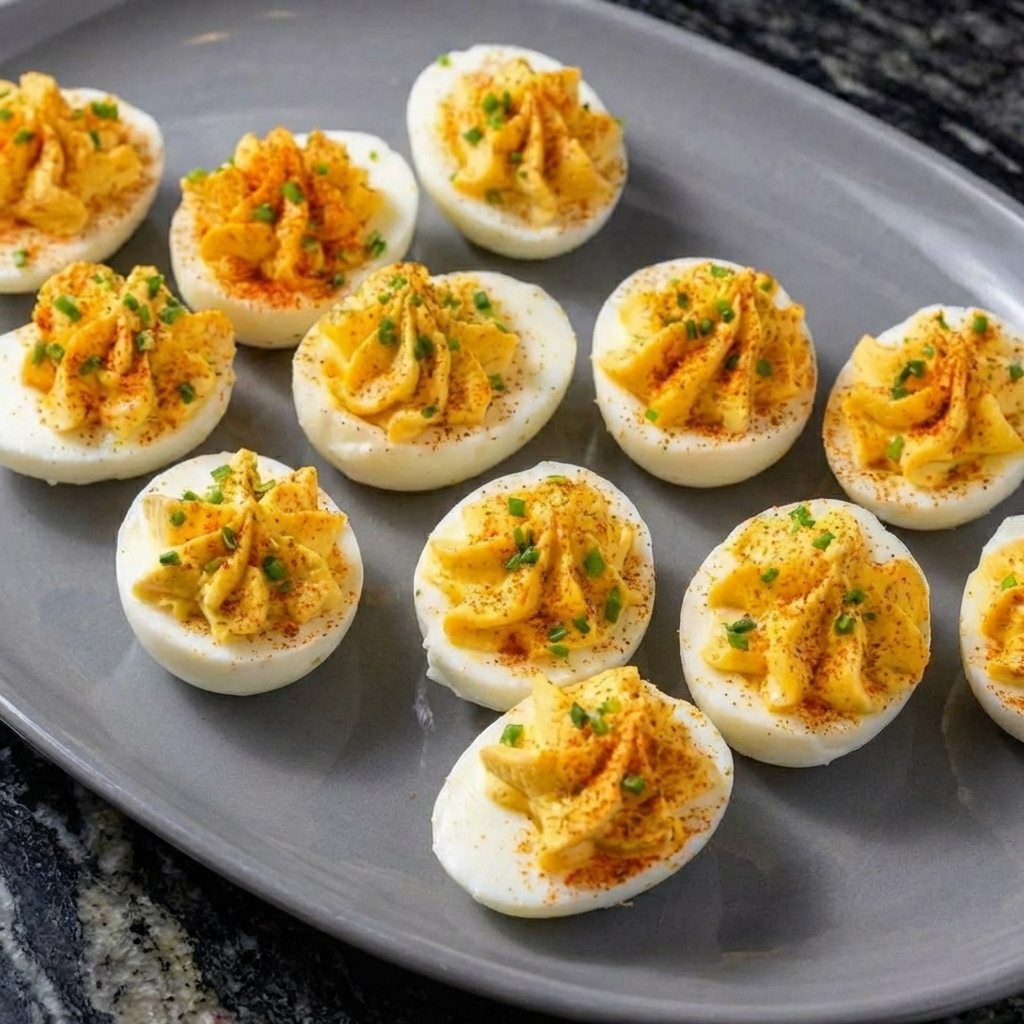
No party spread is truly complete without a platter of deviled eggs. This iconic appetizer sits at the intersection of simplicity and perfection: a humble hard-boiled egg transformed into a vehicle for creamy, tangy, savory bliss. While endlessly adaptable, mastering the classic version is a essential culinary rite of passage.
This recipe delivers that timeless ideal—a velvety-smooth filling that’s rich but not heavy, perfectly seasoned, and piped into glossy white cups just waiting for that final dusting of paprika. They’re the bite-sized proof that the best party foods are often the most straightforward, and with a few key techniques, you can ensure yours are the ones guests rave about.
The Science of the Perfect Hard-Boil & Emulsified Filling
The journey to deviled egg excellence begins with the egg itself. The goal is a fully set yolk without the dreaded gray-green sulfur ring. Starting eggs in cold water and bringing them to a boil ensures even heating from shell to core, minimizing protein shock and cracks.
The immediate ice bath after cooking is non-negotiable; it rapidly halts the cooking process, prevents overcooking, and creates a temperature shock that contracts the egg inside its shell, making peeling infinitely easier. The filling’s texture is a study in emulsion.
The crumbled egg yolks are rich in fat and lecithin, a powerful natural emulsifier. When mixed with the water and fat in mayonnaise and the acidic tang of mustard and vinegar, the lecithin helps bind these elements into a cohesive, creamy, and stable mixture that won’t separate. Mashing while still slightly warm and pressing through a sieve guarantees the signature ultra-smooth, lump-free base that’s essential for elegant piping.
Ingredients
For the Deviled Eggs (Makes 24 halves):
12 large eggs
½ cup (112g) mayonnaise
2 teaspoons yellow mustard or Dijon mustard
1 teaspoon white vinegar or apple cider vinegar
¼ teaspoon salt, or to taste
⅛ teaspoon black pepper
Paprika, for garnish
Fresh chives or parsley, for garnish (optional)
Instructions
1. Perfect Hard-Boiled Eggs: Place eggs in a single layer in a large saucepan. Cover with cold water by at least 1 inch. Bring to a full, rolling boil over high heat. Once boiling, immediately cover the pot and remove it from the heat. Let stand for 12 minutes.
2. The Ice Bath: While eggs stand, prepare a large bowl of ice water. After 12 minutes, use a slotted spoon to transfer the hot eggs directly into the ice bath. Let them cool completely, about 15 minutes.
3. Peel & Halve: Gently tap each egg on the counter and roll to crackle the shell. Peel under cool running water to help remove shell fragments. Slice each peeled egg in half lengthwise.
4. Make the Filling: Gently pop the yolks into a medium bowl. Arrange the hollow egg white halves on a serving platter. Mash the yolks with a fork until they resemble fine crumbs. For an ultra-smooth filling, press the mashed yolks through a fine-mesh sieve into the bowl.
5. Season & Mix: To the yolks, add mayonnaise, mustard, vinegar, salt, and pepper. Stir vigorously with a spoon or spatula until completely smooth and creamy. Taste and adjust seasoning.
6. Fill the Eggs: Spoon the filling into a piping bag fitted with a star or large round tip, or into a zip-top bag with a corner snipped off. Pipe the filling generously into each egg white half. Alternatively, spoon the filling in with a teaspoon.
7. Garnish & Chill: Lightly dust the tops with paprika. Garnish with a tiny piece of fresh chive or parsley if desired. Cover loosely with plastic wrap and refrigerate for at least 30 minutes before serving to allow flavors to meld.
8. Pro-Tip for Make-Ahead: You can prepare the components up to 2 days ahead. Store peeled, halved egg whites and the yolk filling separately in airtight containers in the fridge. Pipe or fill just before serving.
Pro-Tips for Flawless Deviled Eggs Every Time
Use Slightly Older Eggs: Eggs that are 7-10 days old peel more easily than super-fresh ones.
The Ice Bath is Mandatory: This is the single biggest factor in easy peeling and preventing rubbery whites.
Sieve for Supreme Smoothness: Pressing the yolks through a sieve is the secret restaurant trick for an impeccably velvety filling with no graininess.
Season Aggressively: The filling should taste bold on its own, as it’s mellowed by the plain egg white. Don’t be shy with salt, pepper, and acidity.
The Mayo Matters: Use a high-quality, full-fat mayonnaise like Hellmann’s or Duke’s for the best flavor and stability.
Get Creative with Mix-Ins: Fold in finely chopped pickles (or pickle relish), crisp cooked bacon, horseradish, sriracha, or fresh herbs for endless variations.
Serving Savvy: Use a deviled egg platter with indentations to keep them from sliding, or secure them on a regular platter with a bed of lettuce or parsley.
Master this classic, and you hold the key to a lifetime of successful gatherings.
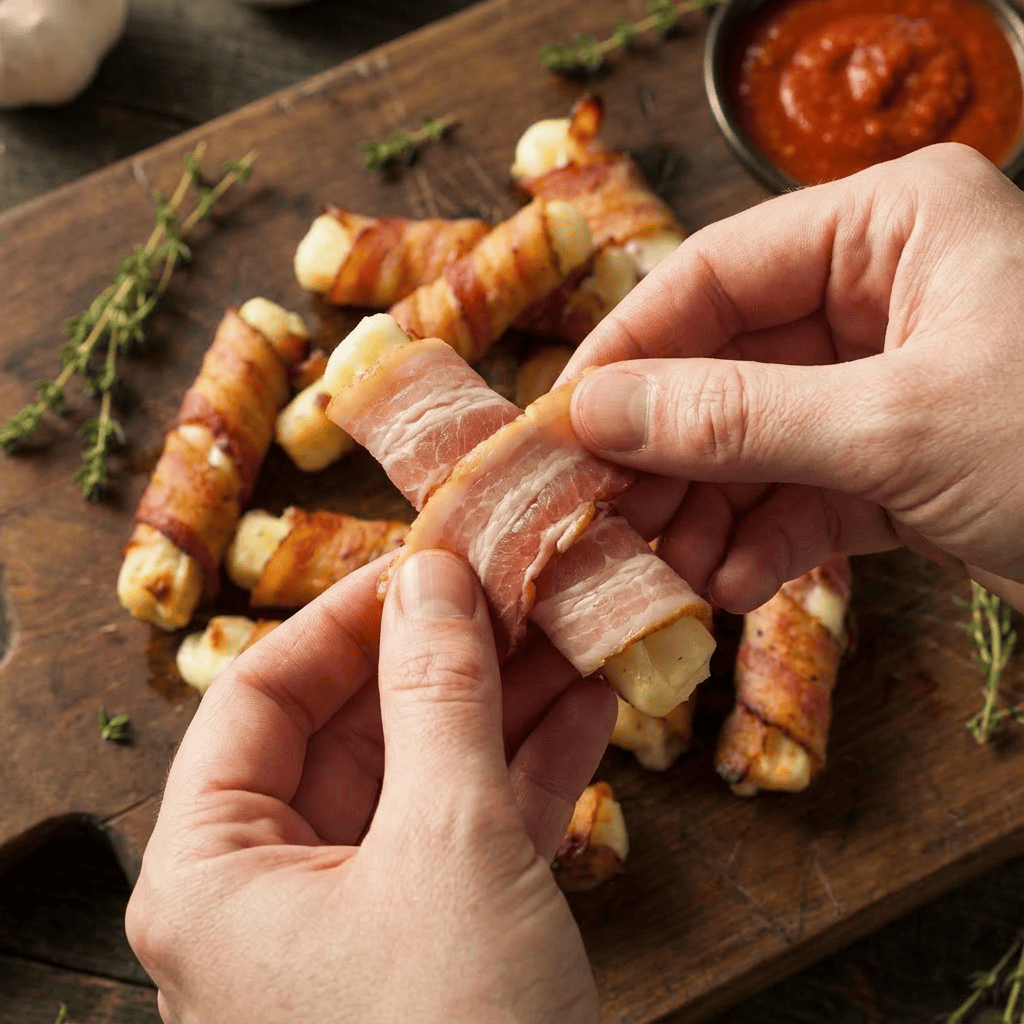
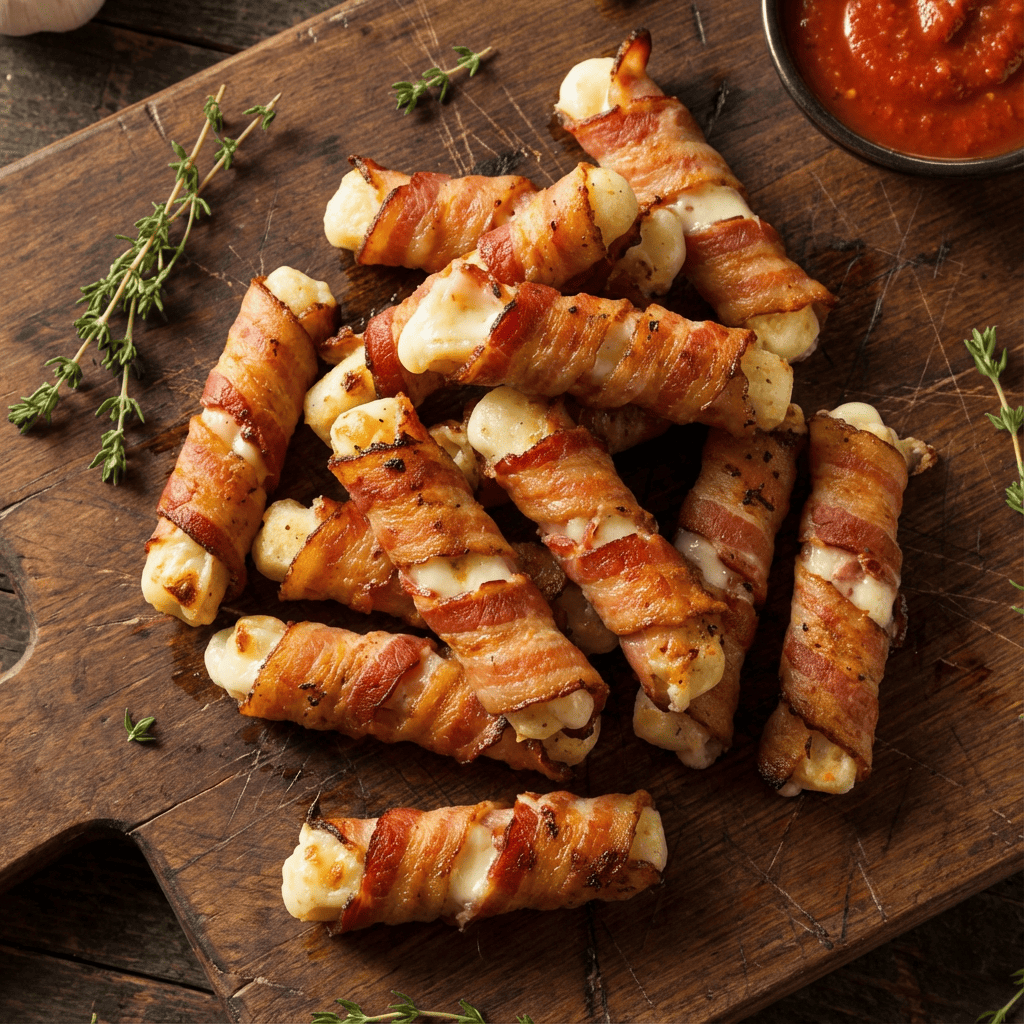
Let’s be honest: the classic mozzarella stick is a nearly perfect food. Crispy coating, molten cheese center—it’s a formula for success. But what if we could make it even better? What if we could inject it with the smoky, salty, universally adored magic of bacon? That’s exactly what these Bacon-Wrapped Mozzarella Sticks do. They are the ultimate fusion of two iconic appetizers, creating a single, irresistible bite that is greater than the sum of its parts. Imagine a strip of bacon, crisped to perfection, acting as the world’s most flavorful breading for a stick of high-quality mozzarella.
When baked or air-fried, the bacon renders its fat, basting the cheese from the outside in, resulting in a snack that’s crispy, savory, and delivers that iconic cheese pull with every single bite. These aren’t just an appetizer; they’re a statement piece for your party platter, a guaranteed conversation starter, and quite possibly the best reason to turn on your oven before the big game.
The Science of the Perfect Cheese Pull & Crispy Bacon
The challenge of any hot cheese dish is achieving that glorious melt without a total cheese breakout. The secret here is two-fold. First, using low-moisture, block mozzarella (the kind you shred for pizza) is non-negotiable. It has less water than fresh mozzarella, so it melts beautifully and holds its shape longer before becoming a puddle. Second, the bacon itself acts as a protective barrier. As it cooks and tightens around the cheese, it forms a crisp casing that contains the molten interior, giving you precious extra seconds between “perfectly melted” and “cheese explosion.”
For the crispiest bacon without burning the cheese, a two-step cooking method works wonders: a partial pre-cook of the bacon to render some fat and start the crisping process, followed by a quick, high-heat bake to finish the bacon and melt the cheese. This technique ensures every element—crispy bacon, gooey cheese—is at its absolute best at the same moment.
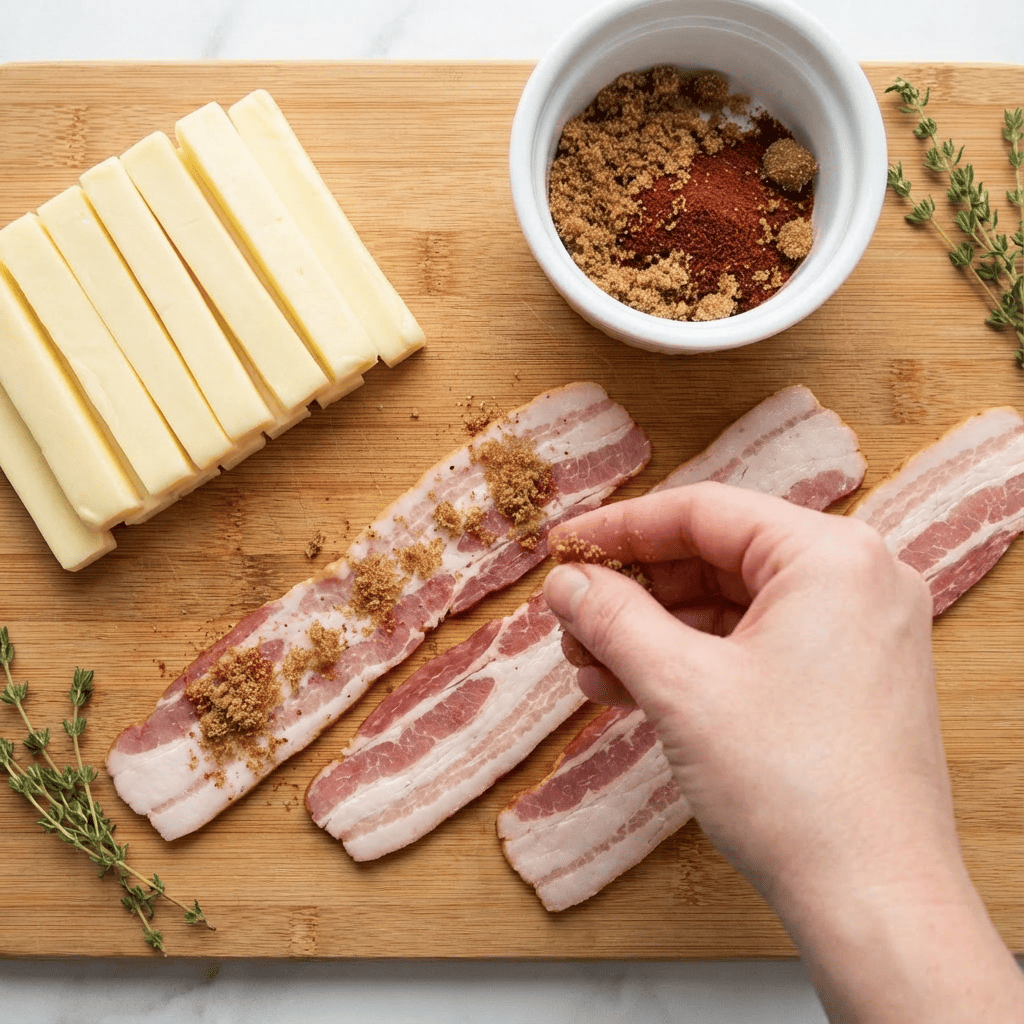
2 tablespoons brown sugar (optional, for a sweet-savory glaze)
1 teaspoon smoked paprika or black pepper (optional)
For Serving:
1 cup marinara sauce, warmed
Ranch dressing for dipping
Chopped fresh parsley for garnish (optional)
Instructions
1. Prep the Cheese & Bacon: Unwrap the mozzarella sticks and pat them completely dry with a paper towel. If using the optional brown sugar and paprika, mix them together in a small bowl. Lay a slice of bacon flat on a cutting board. If desired, lightly sprinkle the bacon with the brown sugar mixture.
2. Wrap the Sticks: Place one mozzarella stick at the end of a bacon slice. Roll it up tightly, ensuring the bacon overlaps itself slightly. The entire cheese stick should be covered. If your bacon is very short, you can stretch it slightly as you roll. Place the wrapped stick seam-side down on a plate. Repeat with all cheese sticks and bacon. For best results, place the plate of wrapped sticks in the freezer for 20-30 minutes. This firms up the cheese and bacon, preventing a meltdown during cooking.
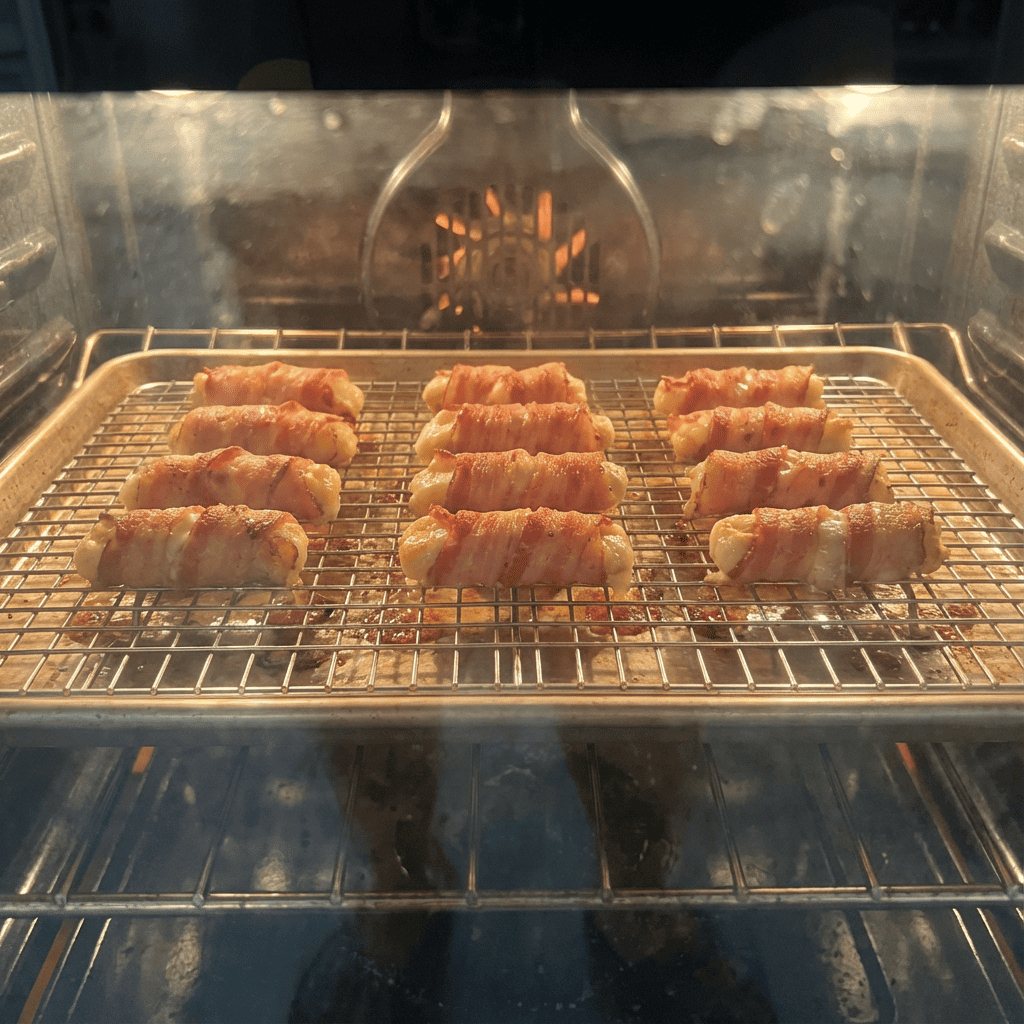
3. Cook (Oven Method): Preheat your oven to 400°F (200°C). Place a wire rack on top of a rimmed baking sheet (this allows air to circulate for even crisping). Arrange the chilled, bacon-wrapped sticks on the rack, seam-side down, leaving space between them. Bake for 12-16 minutes, turning halfway through, until the bacon is crispy and browned. Watch closely near the end to prevent burning.
4. Cook (Air Fryer Method): Preheat air fryer to 390°F (200°C). Arrange the chilled sticks in a single layer in the basket, seam-side down. Do not overcrowd; cook in batches if necessary. Air fry for 8-10 minutes, turning halfway, until the bacon is crisp.
5. Serve Immediately: Carefully transfer the hot bacon-wrapped mozzarella sticks to a serving platter using tongs. They will be very hot inside! Let them cool for exactly 1-2 minutes—this allows the cheese to set slightly for the perfect pull. Garnish with parsley and serve immediately with warm marinara and ranch dressing for dipping.
Pro-Tips for Appetizer Victory
Choose your bacon wisely: Thin-cut bacon works best as it crisps up quickly, wrapping the cheese tightly. Thick-cut bacon may not get fully crisp before the cheese overheats.
The freeze is key: Don’t skip the 20-minute freezer chill. This is your insurance policy against leaky cheese.
Dipping sauce matters: The cool, creamy tang of ranch dressing is the perfect contrast to the smoky, salty, rich sticks. Marinara is the classic, but don’t overlook other options like sriracha mayo or honey mustard.
Make-ahead strategy: You can wrap the sticks and freeze them solid on a baking sheet, then transfer to a freezer bag for up to a month. Cook from frozen, adding 2-4 extra minutes to the cooking time. These Bacon-Wrapped Mozzarella Sticks are the ultimate upgrade, turning a simple snack into a legendary party food that will have everyone asking for the recipe.