Tag: oat topping

  • Cherry Pie Bars (All the Flavor, None of the Fuss)

    Cherry Pie Bars (All the Flavor, None of the Fuss)

    Pie is wonderful. But let’s be honest: pie can be a project. The rolling, the chilling, the crimping, the fear of a soggy bottom. These Cherry Pie Bars are the answer.

    They have everything you love about cherry pie—that sweet-tart filling, the buttery crust, the crumbly topping—but in an easy, sliceable bar form that comes together in minutes. A buttery shortbread crust, a generous layer of cherry pie filling, and a golden oat crumble topping bake into the most irresistible dessert.

    Serve them warm with vanilla ice cream, pack them for picnics, or just stand at the counter and eat one (or three). No judgment here.

    The Secret to Perfectly Layered Pie Bars

    The key to great cherry pie bars is building the layers correctly. Start with a sturdy shortbread crust that’s pressed firmly into the pan—this creates a solid base that won’t crumble when you cut.

    The cherry filling goes right on top, and here’s the secret: use high-quality cherry pie filling or make your own with fresh or frozen cherries. The filling should be thick, not runny, so it doesn’t soak into the crust.

    The oat topping is the final layer, and the secret there is cold butter, cut into the dry ingredients until you have craggy, buttery clumps. Bake until golden and bubbly, cool completely (this is crucial for clean cuts), and you’ve got bars that taste like pie without the fuss.

    Ingredients
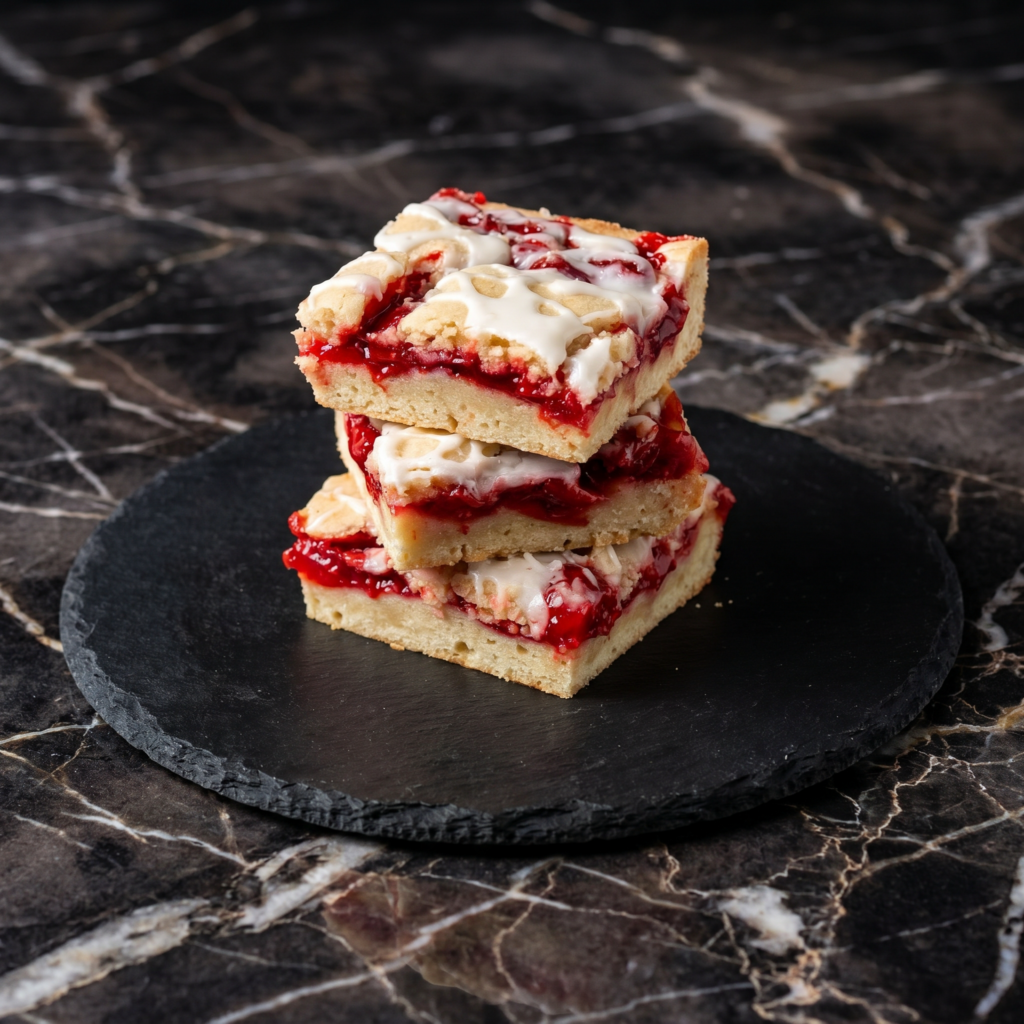
    For the Cherry Pie Bars (Makes 12-16 bars):

    • 2 cups (250g) all-purpose flour
    • ½ cup (100g) granulated sugar
    • ¼ teaspoon salt
    • 1 cup (226g) cold unsalted butter, cut into small cubes
    • 1 teaspoon vanilla extract
    • 1 can (21 oz) cherry pie filling (or about 2 cups homemade cherry filling)

    For the Oat Crumble Topping:

    • 1 cup (125g) all-purpose flour
    • ½ cup (100g) packed brown sugar
    • ½ cup (45g) old-fashioned rolled oats
    • ½ teaspoon cinnamon
    • ¼ teaspoon salt
    • ½ cup (113g) cold unsalted butter, cut into small cubes

    For Serving (Optional):

    • Powdered sugar, for dusting
    • Vanilla ice cream or whipped cream

    Instructions

    1. Preheat and Prep: Preheat your oven to 375°F (190°C). Grease a 9×13-inch baking pan or line it with parchment paper, leaving overhang on the long sides for easy removal.

    2. Make the Crust: In a large bowl, combine the flour, granulated sugar, and salt. Add the cold butter cubes and vanilla extract. Use a pastry blender, fork, or your fingertips to cut the butter into the flour until the mixture resembles coarse crumbs with pea-sized butter pieces. Press the mixture firmly and evenly into the bottom of the prepared pan.

    3. Pre-Bake the Crust: Bake the crust for 15-18 minutes until lightly golden around the edges. Remove from the oven (leave oven on).

    4. Make the Oat Topping: In a separate bowl, combine the flour, brown sugar, oats, cinnamon, and salt. Add the cold butter cubes and cut in until the mixture forms craggy, buttery clumps of various sizes.

    5. Add Cherry Filling: Spread the cherry pie filling evenly over the warm pre-baked crust.

    6. Add Topping: Sprinkle the oat crumble topping evenly over the cherry layer, covering as much as possible.

    7. Bake: Bake for 25-30 minutes until the topping is golden brown and the filling is bubbly around the edges.

    8. Cool Completely: Let the bars cool completely in the pan on a wire rack. This is essential for clean slices—at least 2 hours.

    9. Slice: Once completely cool, use the parchment overhang to lift the bars out of the pan. Place on a cutting board and slice into squares or bars with a sharp knife.

    10. Serve: Dust with powdered sugar if desired and serve. Extra delicious with vanilla ice cream.

    11. Store: Store in an airtight container at room temperature for up to 3 days, or in the refrigerator for up to 5 days.

    Pro-Tips for Cherry Pie Bar Greatness

    • Use Cold Butter: Cold butter is essential for a flaky crust and crumbly topping. If the butter softens, pop the dough in the fridge for 10 minutes.
    • Cool Completely Before Slicing: Warm bars will fall apart. Patience is rewarded with clean, beautiful squares.
    • Make Your Own Filling: For an extra-special treat, make your own cherry filling with fresh or frozen cherries, sugar, and a little cornstarch.
    • Customize the Fruit: Swap cherry for apple, blueberry, peach, or any pie filling you love.
    • Serve Warm with Ice Cream: If you can’t resist warm bars, serve them in bowls with vanilla ice cream—soggy bars don’t matter when they’re à la mode.
  • Apple Crisp (The One with the Buttery, Crunchy Topping)

    Apple Crisp (The One with the Buttery, Crunchy Topping)

    Some desserts are fancy. This is not one of them. Apple crisp is the dessert that feels like a warm hug, the one that fills your kitchen with the smell of cinnamon and baked apples, the one that requires exactly zero fuss and delivers maximum comfort.

    Tender, cinnamon-spiced apples bubbling away under a blanket of buttery, oat-filled, brown sugar crunch—it’s simple, it’s soul-warming, and it’s absolutely irresistible. The best part? It comes together in minutes with ingredients you probably already have.

    Serve it warm with a scoop of vanilla ice cream melting into every bite, and you’ve got a dessert that feels special without any of the stress. This is the apple crisp you’ll come back to again and again.

    The Secret to the Perfect Crispy, Never-Soggy Topping

    The line between perfect apple crisp and sad, soggy topping is a thin one. The secret to a topping that stays crunchy is cold butter and the right ratio. Cold butter cut into the dry ingredients creates those glorious, craggy clumps that crisp up in the oven instead of melting into a paste.

    The other secret is old-fashioned rolled oats. Quick oats will turn to mush; old-fashioned oats hold their shape and give you that satisfying crunch. And don’t forget the nuts—pecans or walnuts add extra texture and flavor.

    As for the apples, you want a mix of firm, tart apples (like Granny Smith) and sweeter ones (like Honeycrisp) for the perfect balance of flavor and texture. They hold their shape during baking while becoming perfectly tender.

    Ingredients

    For the Apple Filling:

    • 6 cups (about 6-7 medium apples) peeled, cored, and sliced ¼-inch thick
    • 2 tablespoons granulated sugar
    • ¼ cup (50g) packed brown sugar
    • 1 tablespoon lemon juice
    • 1 teaspoon vanilla extract
    • 1 tablespoon all-purpose flour
    • 1 teaspoon ground cinnamon
    • ¼ teaspoon ground nutmeg
    • Pinch of salt

    For the Crisp Topping:

    • 1 cup (120g) old-fashioned rolled oats (not quick oats)
    • ½ cup (65g) all-purpose flour
    • ½ cup (100g) packed brown sugar
    • ½ teaspoon ground cinnamon
    • ¼ teaspoon salt
    • ½ cup (113g) cold unsalted butter, cut into small cubes
    • ½ cup (60g) chopped pecans or walnuts (optional, but highly recommended)

    For Serving:

    • Vanilla ice cream or whipped cream
    • Caramel drizzle (optional)

    Instructions

    1. Preheat and Prep: Preheat your oven to 350°F (175°C). Grease a 9×9-inch (or similar 2-quart) baking dish .

    2. Prepare the Apples: Peel, core, and slice the apples into ¼-inch thick slices. Try to make them uniform so they cook evenly .

    3. Make the Apple Filling: In a large bowl, combine the sliced apples, granulated sugar, brown sugar, lemon juice, vanilla extract, flour, cinnamon, nutmeg, and salt. Toss everything together until the apples are evenly coated .

    4. Transfer to Baking Dish: Pour the apple mixture into the prepared baking dish and spread it into an even layer .

    5. Make the Crisp Topping: In a separate medium bowl, combine the rolled oats, flour, brown sugar, cinnamon, and salt. Whisk to combine.

    Add the cold butter cubes and use a pastry blender, fork, or your fingertips to cut the butter into the dry ingredients until the mixture resembles coarse crumbs with pea-sized butter pieces. Stir in the chopped nuts if using .

    6. Top the Apples: Sprinkle the crisp topping evenly over the apples, covering them completely. Don’t press it down—you want those craggy bits to get crispy .

    7. Bake: Place the baking dish on a baking sheet to catch any bubbling juices. Bake for 40-45 minutes until the topping is golden brown and crisp, and the apples are tender and bubbling around the edges .

    8. Cool Slightly: Let the apple crisp cool for at least 10-15 minutes before serving. This allows the juices to settle and thicken slightly .

    9. Serve Warm: Scoop into bowls while still warm. Top with a generous scoop of vanilla ice cream and a drizzle of caramel if desired .

    10. Store Leftovers (If Any): Cover and refrigerate for up to 3 days. Reheat in the oven at 350°F for 10-15 minutes to re-crisp the topping .

    Pro-Tips for Apple Crisp Greatness

    • Use a Mix of Apples: Tart Granny Smiths hold their shape; sweeter Honeycrisp or Fuji add flavor. A mix gives you the best texture and taste .
    • Keep Butter Cold: Cold butter is essential for a crispy topping. If the butter softens, pop the topping in the fridge for 10 minutes before baking .
    • Don’t Overmix the Topping: You want pea-sized butter chunks, not a uniform paste. Those chunks create the crispy, craggy bits .
    • Bake on a Sheet Pan: Apple crisp loves to bubble over. A baking sheet underneath saves your oven from a sticky mess .
    • Serve Warm with Ice Cream: The contrast of warm, spiced apples and cold, creamy ice cream is the whole point. Don’t skip it .