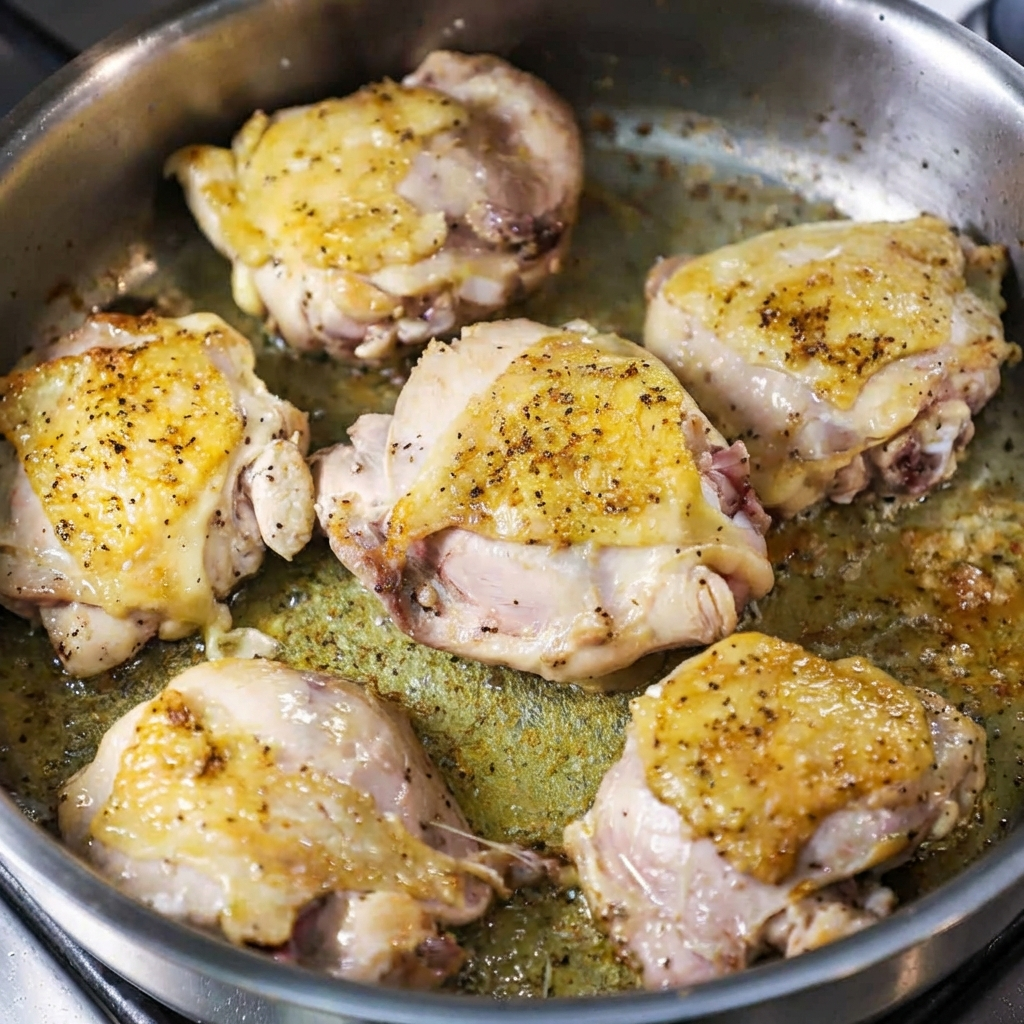
Tag: Italian dinner

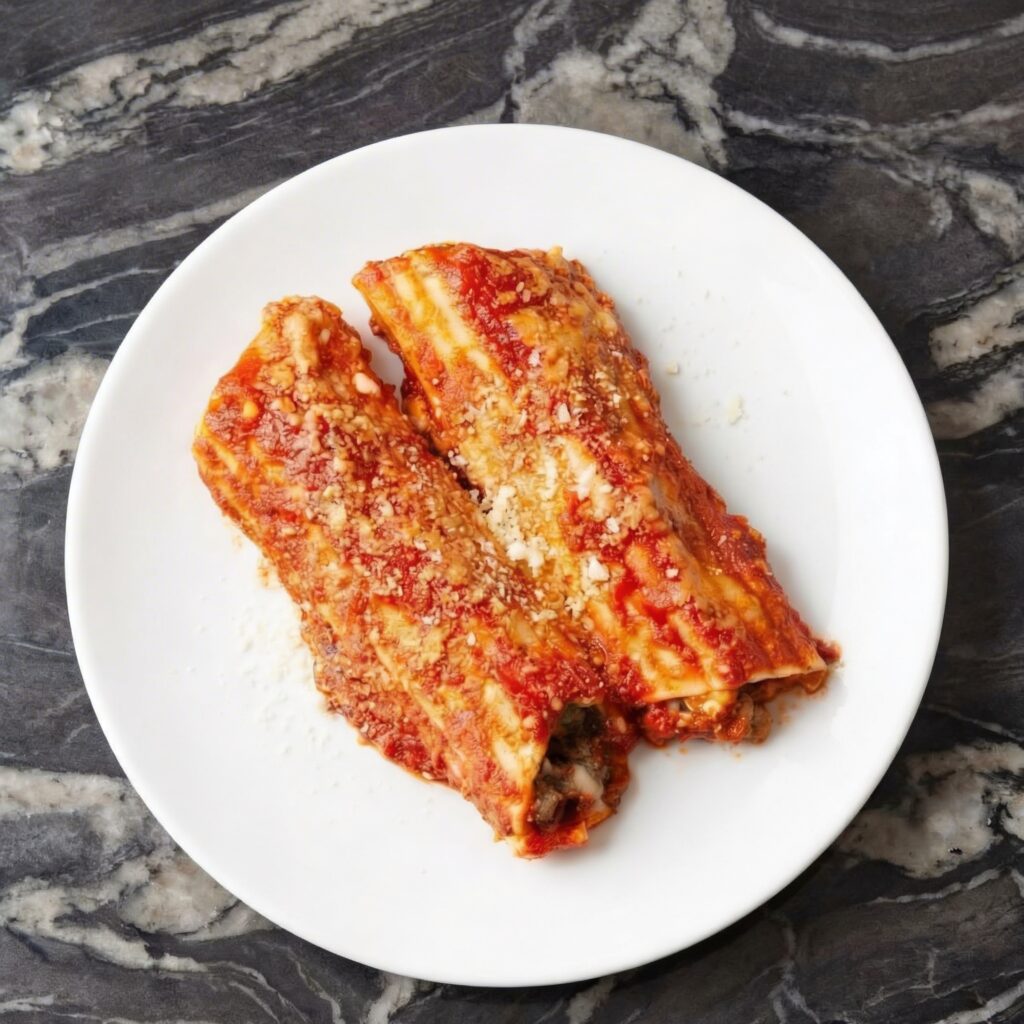
  • Stuffed to Perfection: How to Make Sausage Manicotti

    Stuffed to Perfection: How to Make Sausage Manicotti

    There’s nothing quite like a dish that combines tender pasta, savory sausage, creamy cheese, and rich tomato sauce.

    Sausage manicotti is one of those comfort-food classics that feels indulgent but is surprisingly approachable to make at home.

    With tubular pasta stuffed with a flavorful sausage and cheese mixture, topped with marinara sauce and melted mozzarella, this dish is perfect for family dinners, holiday gatherings, or any time you want a hearty, satisfying meal.

    Follow this step-by-step guide, and you’ll create manicotti that’s cheesy, savory, and irresistible.
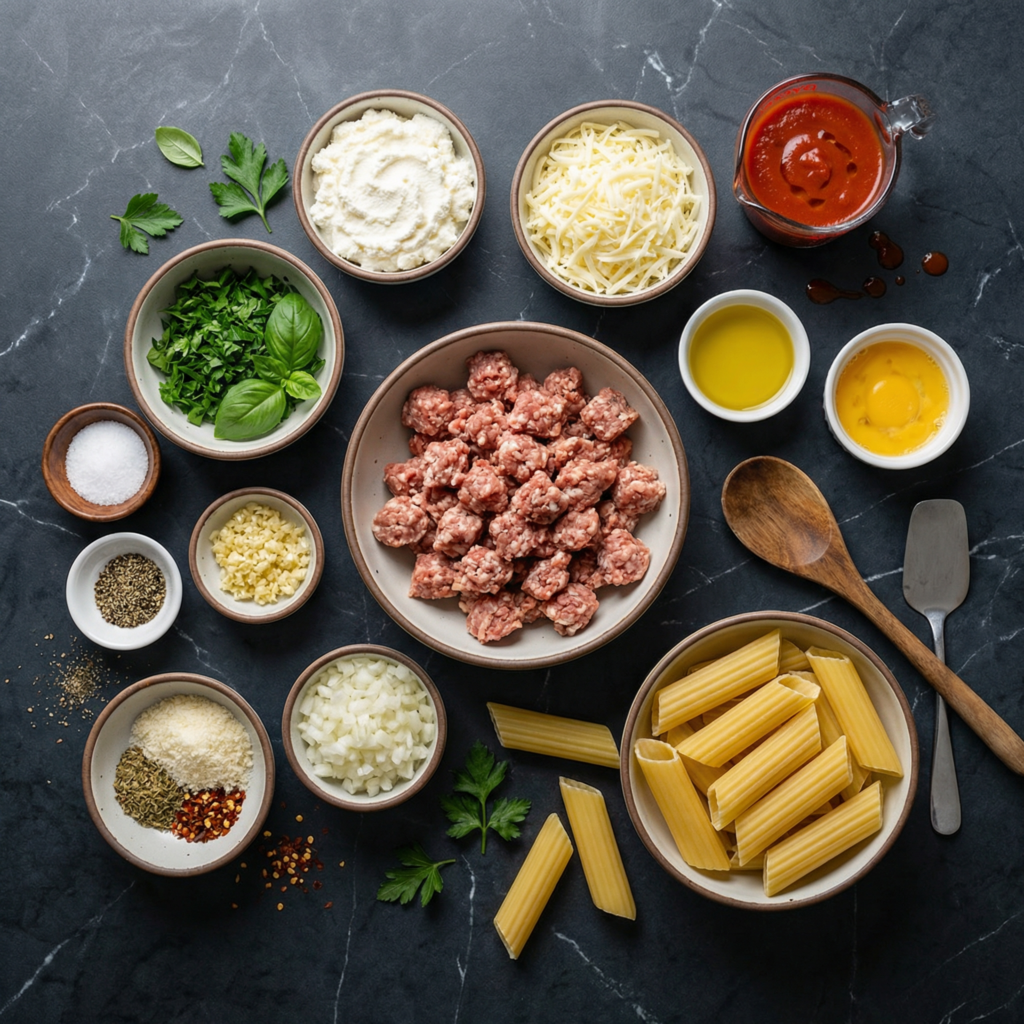

    Ingredients You’ll Need

    Gather all ingredients before you begin to ensure a smooth cooking process.

    For the pasta:

    • 8 manicotti shells (uncooked or boiled according to package instructions)

    For the sausage filling:

    • 1 pound (450g) Italian sausage (mild or spicy, removed from casings)
    • 1 small onion, finely chopped
    • 2 cloves garlic, minced
    • 1 ½ cups ricotta cheese
    • 1 cup shredded mozzarella cheese
    • ½ cup grated Parmesan cheese
    • 1 large egg
    • 1 teaspoon dried Italian seasoning
    • Salt and black pepper, to taste
    • Optional: 2 tablespoons fresh parsley, chopped

    For the sauce and topping:

    • 3 cups marinara sauce (homemade or store-bought)
    • 1 cup shredded mozzarella cheese
    • ¼ cup grated Parmesan cheese
    • Fresh basil or parsley for garnish

    Step 1: Preheat the Oven

    Preheat your oven to 375°F (190°C).

    Lightly grease a 9×13-inch baking dish with olive oil or cooking spray to prevent sticking.


    Step 2: Cook the Sausage Filling

    In a large skillet over medium heat, cook the Italian sausage until browned, breaking it into small pieces with a spatula.

    Add the chopped onion and cook until translucent, about 3–4 minutes.

    Stir in the minced garlic and cook for another 30 seconds until fragrant. Remove the skillet from heat and let the mixture cool slightly.

    In a large mixing bowl, combine the cooked sausage mixture with ricotta cheese, shredded mozzarella, Parmesan, egg, Italian seasoning, salt, pepper, and parsley if using. Mix thoroughly until all ingredients are evenly combined.

    This filling will be rich, creamy, and full of savory flavor.


    Step 3: Prepare the Pasta

    If using uncooked manicotti shells, boil them according to package instructions until just al dente, then drain and let cool slightly.

    If using pre-cooked shells, skip this step. It’s important to avoid overcooking, as the pasta will bake further in the oven.


    Step 4: Fill the Manicotti

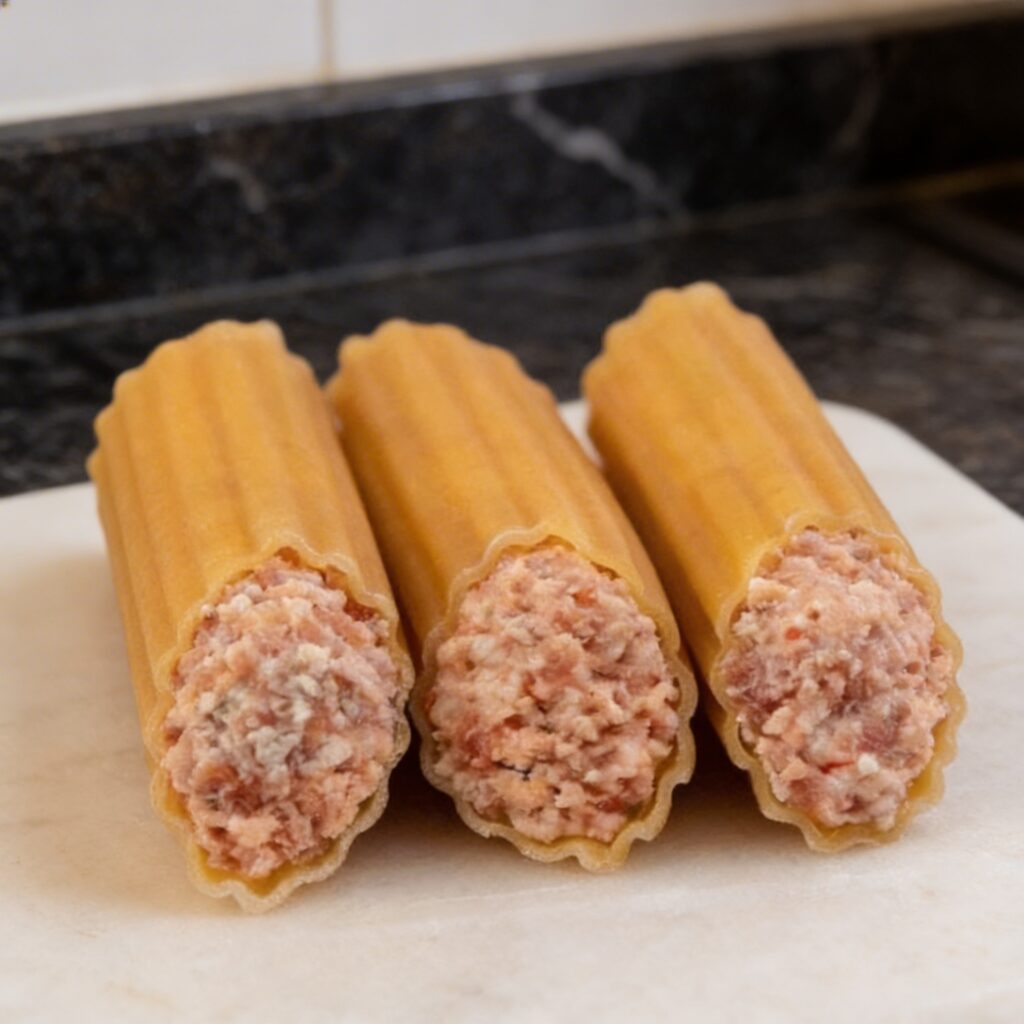
    Using a small spoon or a piping bag, carefully fill each manicotti shell with the sausage and cheese mixture.

    Fill them generously but leave a small gap at each end to prevent spilling.

    Place the filled shells in the prepared baking dish, arranging them in a single layer.

    Step 5: Add the Sauce

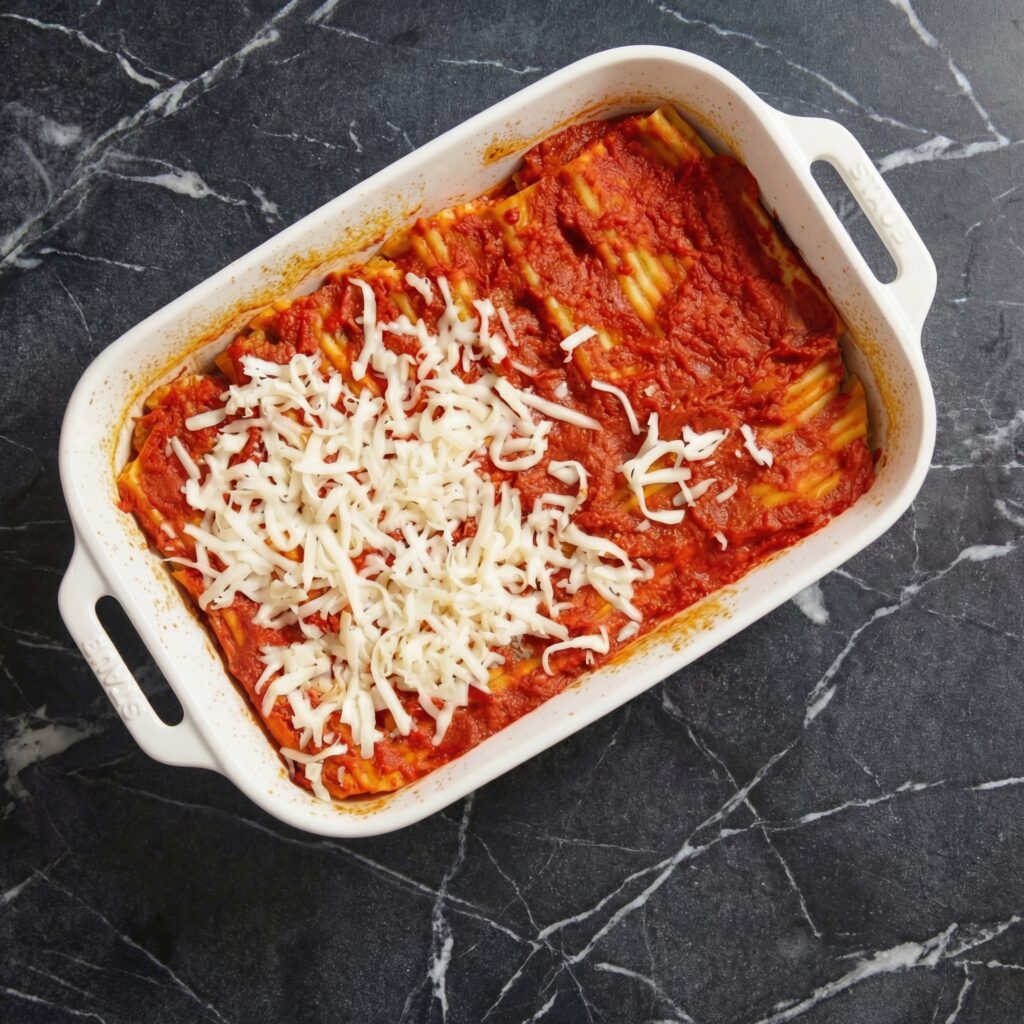
    Pour the marinara sauce evenly over the filled manicotti shells, making sure each shell is well-coated.

    The sauce will keep the pasta moist while baking and infuse it with flavor.


    Step 6: Top with Cheese

    Sprinkle shredded mozzarella and grated Parmesan evenly over the top of the sauced manicotti.

    This creates a golden, bubbling cheese layer that adds richness and visual appeal.

    Step 7: Bake the Manicotti

    Cover the baking dish with aluminum foil and bake in the preheated oven for 25 minutes.

    Remove the foil and bake for an additional 10–15 minutes, or until the cheese is melted and slightly golden on top.


    Step 8: Cool and Garnish

    Remove the manicotti from the oven and allow it to cool for 5 minutes.

    This rest time allows the filling to set slightly and makes serving easier. Garnish with fresh basil or parsley for color and a burst of freshness.


    Step 9: Serve

    Use a spatula to carefully transfer individual manicotti shells to plates. Serve hot, ideally with garlic bread or a simple green salad.

    Each bite combines tender pasta, rich sausage filling, and melty cheese, all balanced by the tangy marinara sauce—a true comfort food masterpiece.


    Pro Tips for Perfect Sausage Manicotti

    1. Cook the sausage thoroughly – Browning the sausage fully brings out its flavor and reduces excess grease.
    2. Don’t overfill the shells – Leaving small gaps at the ends prevents cheese and sausage from spilling during baking.
    3. Use a piping bag – It makes filling manicotti easier and less messy.
    4. Even sauce coverage – Ensures pasta stays moist and flavorful during baking.
    5. Allow it to rest – Cooling slightly before serving makes it easier to cut and keeps the filling intact.

    Variations and Twists

    • Vegetable Sausage Manicotti: Substitute mushrooms, spinach, or zucchini for a veggie-packed version.
    • Spicy Sausage Manicotti: Use hot Italian sausage and add a pinch of red pepper flakes for extra heat.
    • Cheese Lover’s Delight: Mix in provolone or Fontina with the ricotta for an even creamier filling.
    • Creamy Alfredo Sauce: Swap marinara for Alfredo sauce for a rich, white-sauce version.

    Wrapping Up

    Sausage manicotti is a comforting, hearty dish that brings the flavors of Italian cuisine to your table without requiring hours of work.

    The combination of tender pasta, savory sausage, creamy cheeses, and rich tomato sauce makes it a guaranteed crowd-pleaser.

    Whether for a weeknight dinner, a family gathering, or a special occasion, this recipe delivers a dish that’s both indulgent and approachable.

    With a little preparation and careful assembly, you can serve manicotti that tastes like it came from a fine Italian restaurant—golden, cheesy, and bursting with flavor.

    From filling each shell with savory sausage and creamy cheese to topping it with gooey, bubbling mozzarella, every step brings you closer to the perfect baked pasta dish.

    Serve with garlic bread, a fresh salad, and a sprinkle of fresh herbs for a complete, satisfying meal. Sausage manicotti is comfort food at its finest—warm, cheesy, and absolutely irresistible.
  • Cheesy, Saucy, Irresistible: The Ultimate Homemade Baked Ziti

    Cheesy, Saucy, Irresistible: The Ultimate Homemade Baked Ziti

    If there’s one dish that guarantees comfort in every bite, it’s Baked Ziti.

    Layers of tender pasta, rich tomato sauce, creamy cheese, and bubbling golden mozzarella come together in a hearty casserole that’s perfect for family dinners, potlucks, or meal prep.

    It’s the kind of dish that fills your kitchen with incredible aromas and brings everyone to the table before you even call them.

    This step-by-step guide will walk you through making a classic baked ziti from scratch—simple ingredients, bold flavor, and that perfectly cheesy finish.

    Let’s get started.


    Why You’ll Love This Recipe

    • Classic Italian-American comfort food
    • Perfectly cheesy and saucy
    • Great for feeding a crowd
    • Make-ahead and freezer friendly
    • Easy to customize

    Baked ziti is essentially the cozier cousin of lasagna—without all the layering fuss.


    Ingredients You’ll Need

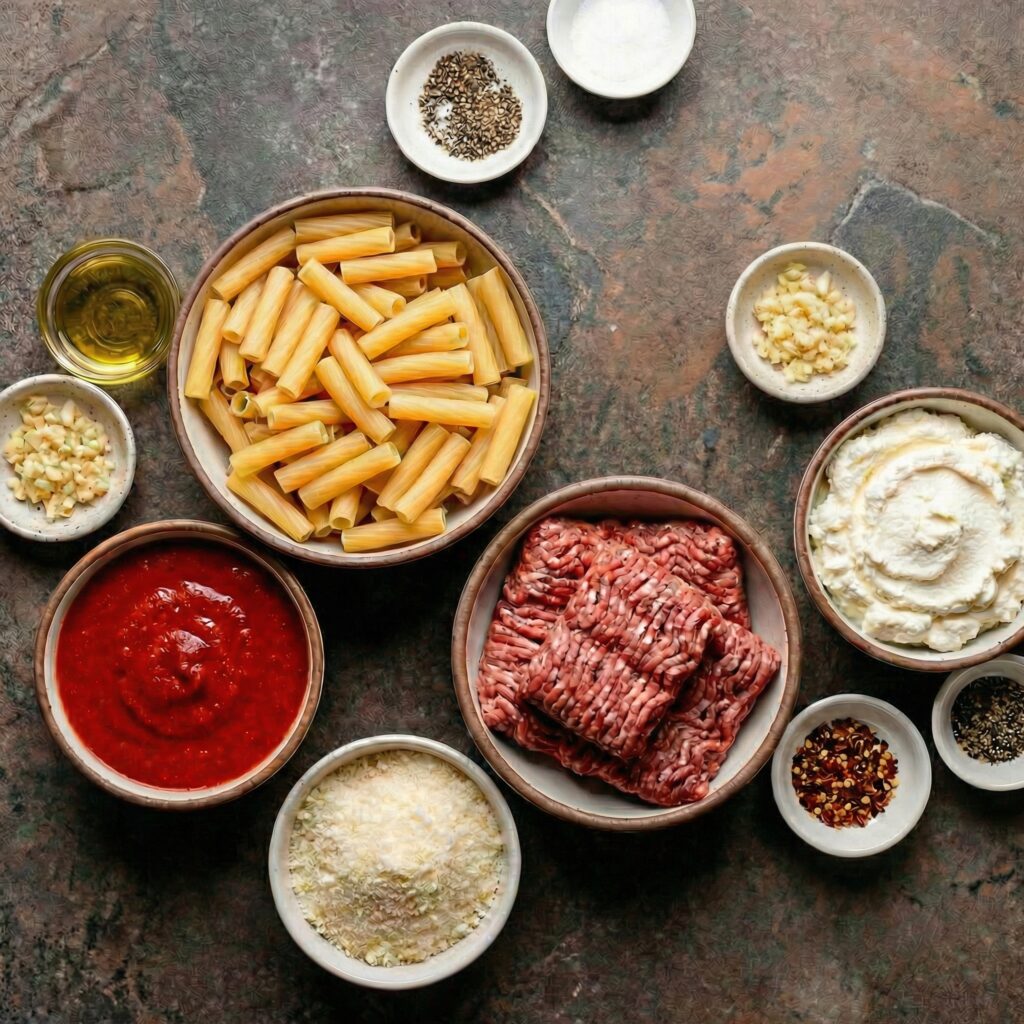
    For the Pasta:

    • 1 pound ziti pasta
    • Salt for pasta water

    For the Meat Sauce:

    • 1 pound ground beef or Italian sausage
    • 1 small onion, diced
    • 3 cloves garlic, minced
    • 1 (24-ounce) jar marinara sauce or 3 cups homemade tomato sauce
    • 1 (14-ounce) can crushed tomatoes
    • 1 teaspoon dried oregano
    • 1 teaspoon dried basil
    • ½ teaspoon red pepper flakes (optional)
    • Salt and black pepper, to taste
    • 1 tablespoon olive oil

    For the Cheese Layer:

    • 1 cup ricotta cheese
    • 1 large egg
    • ½ cup grated Parmesan cheese
    • 2 cups shredded mozzarella cheese (divided)
    • 2 tablespoons chopped fresh parsley (optional)

    Step 1: Cook the Pasta

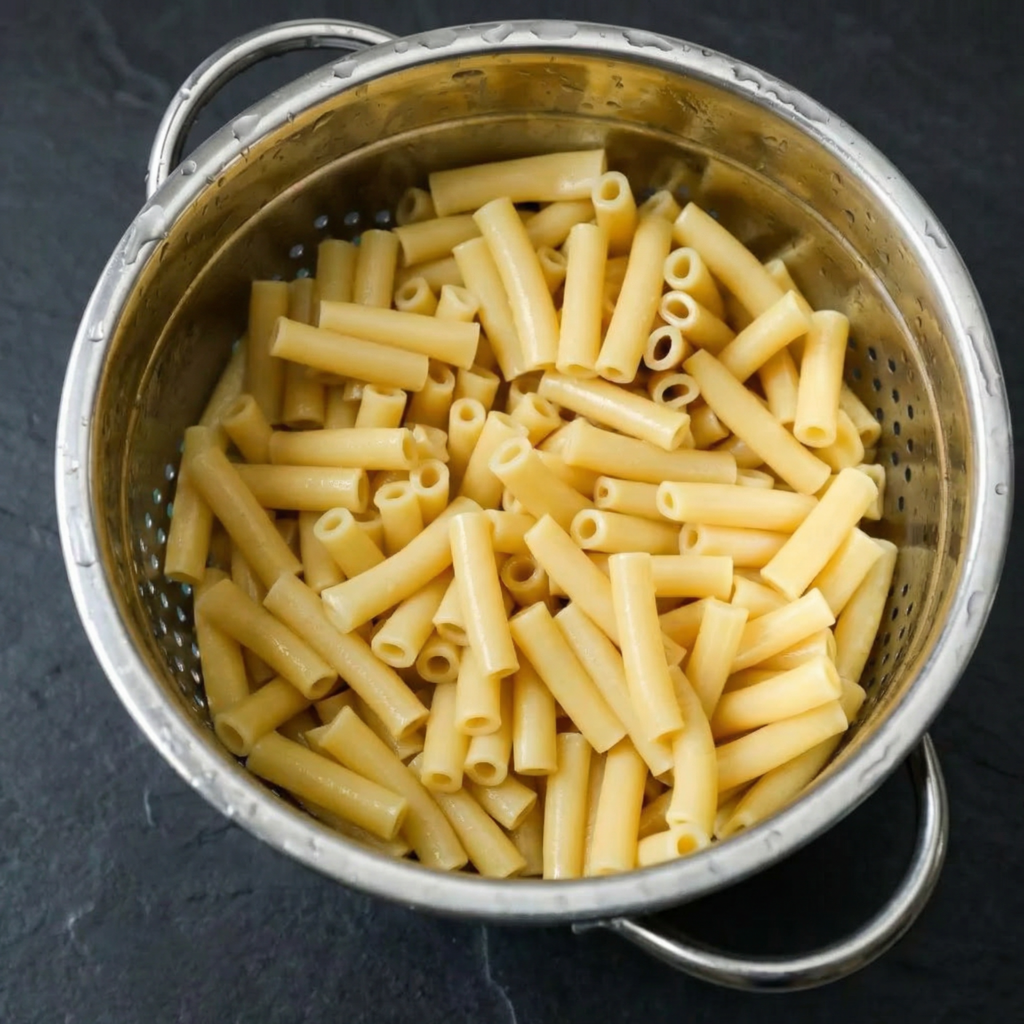
    Bring a large pot of salted water to a boil. Add the ziti and cook until just shy of al dente—about 1–2 minutes less than the package directions.

    The pasta will continue cooking in the oven, so slightly undercooking prevents it from becoming mushy.

    Drain and set aside. Do not rinse.


    Step 2: Prepare the Meat Sauce

    Heat olive oil in a large skillet over medium heat. Add diced onion and sauté for 3–4 minutes until softened.

    Add garlic and cook for 30 seconds until fragrant.

    Stir in the ground beef or sausage. Cook, breaking it up with a spoon, until browned and fully cooked. Drain excess fat if needed.

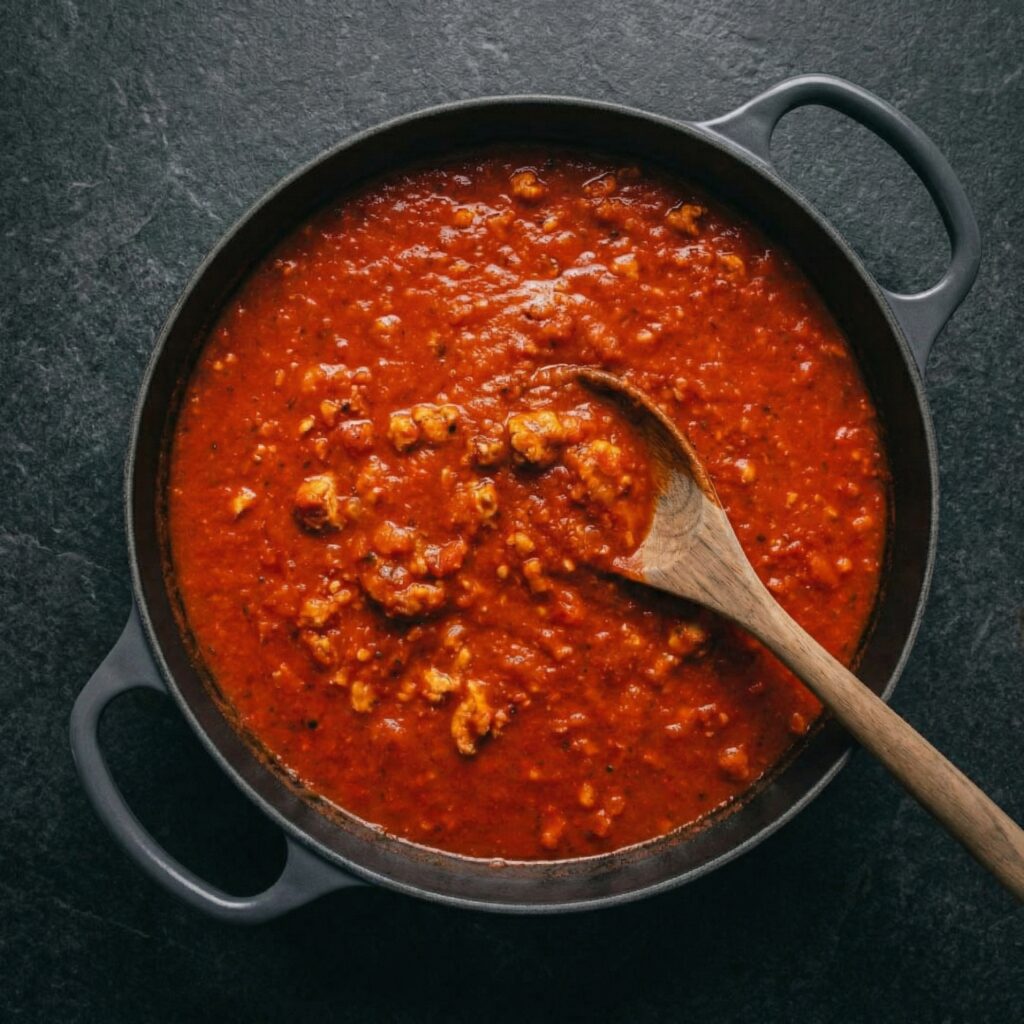
    Add marinara sauce, crushed tomatoes, oregano, basil, red pepper flakes, salt, and pepper. Stir well.

    Let the sauce simmer for 10–15 minutes to develop flavor.


    Step 3: Prepare the Cheese Mixture

    In a medium bowl, combine ricotta cheese, egg, Parmesan, parsley, and 1 cup of shredded mozzarella.

    Mix until smooth and well combined.

    This mixture adds creamy richness and helps bind the layers together.


    Step 4: Combine Pasta and Sauce

    Preheat your oven to 375°F (190°C).

    In a large mixing bowl, combine the drained pasta with about two-thirds of the meat sauce. Toss until evenly coated.

    This ensures every bite has flavor built in—not just on top.


    Step 5: Assemble the Baked Ziti

    Spread a thin layer of remaining sauce on the bottom of a 9×13-inch baking dish.

    Add half of the pasta mixture in an even layer.

    Dollop half of the ricotta cheese mixture over the pasta and gently spread it.

    Repeat with the remaining pasta mixture.

    Top with the rest of the sauce, then sprinkle the remaining 1 cup of mozzarella evenly over the top.

    Step 6: Bake Until Bubbly

    Cover the baking dish with foil and bake for 20 minutes.

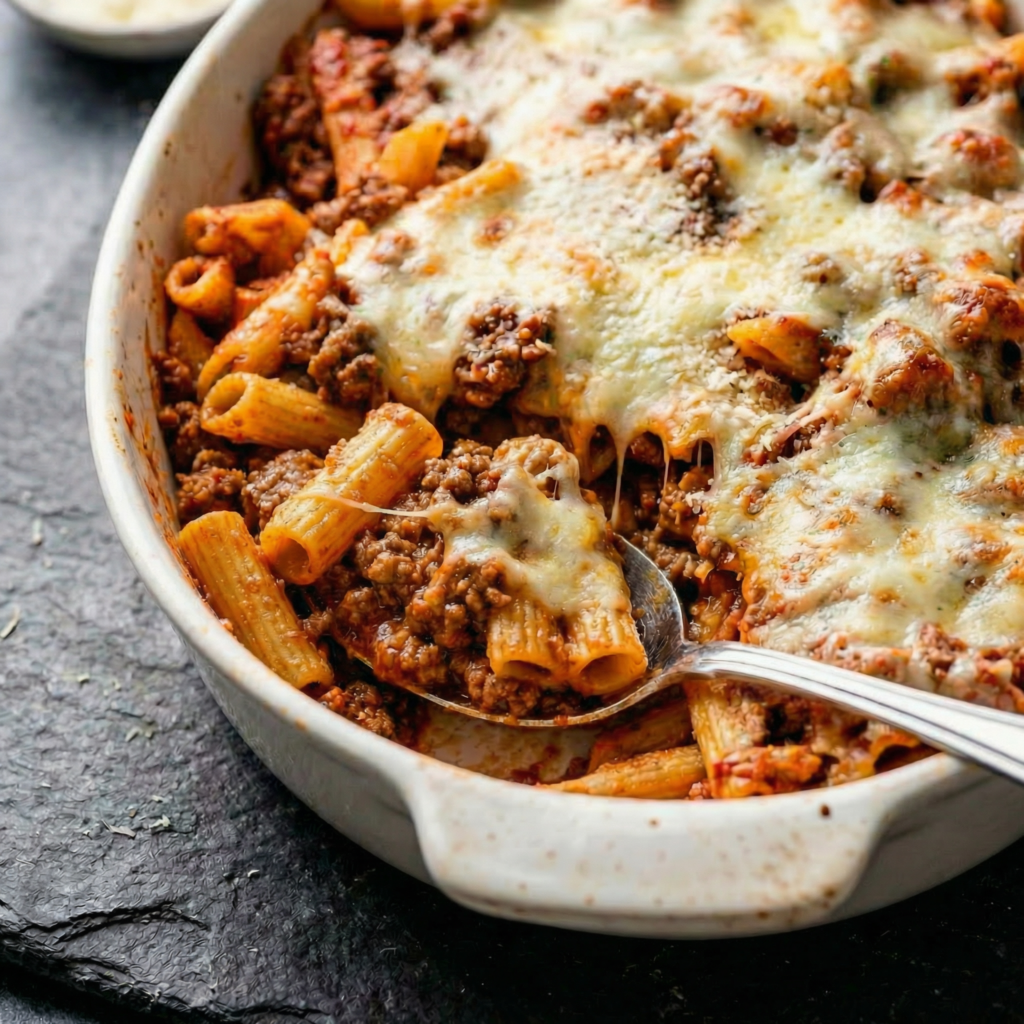
    Remove the foil and bake for an additional 10–15 minutes, until the cheese is melted, bubbly, and lightly golden.

    For extra browning, broil for 1–2 minutes at the end—watch closely to prevent burning.


    Step 7: Rest Before Serving

    Remove from the oven and let the baked ziti rest for 5–10 minutes.

    This allows the layers to set, making it easier to slice and serve.


    Serving Suggestions

    Serve warm with:

    • Garlic bread
    • A crisp Caesar salad
    • Roasted vegetables
    • Extra grated Parmesan

    A sprinkle of fresh basil on top adds a beautiful finishing touch.


    Tips for Perfect Baked Ziti

    • Slightly undercook pasta before baking.
    • Simmer sauce long enough to deepen flavor.
    • Use whole milk ricotta for creaminess.
    • Let it rest before slicing.
    • Don’t skimp on cheese—it’s part of the magic.

    Variations

    • Swap ground beef for ground turkey.
    • Add sautéed mushrooms or spinach.
    • Use spicy Italian sausage for extra heat.
    • Make it vegetarian by skipping the meat and adding roasted vegetables.
    • Try a blend of mozzarella and provolone for deeper flavor.

    Make-Ahead & Storage

    To make ahead, assemble the dish and refrigerate (covered) up to 24 hours before baking. Add 5–10 extra minutes to baking time if starting cold.

    Store leftovers in the refrigerator for up to 4 days. Reheat individual portions in the microwave or oven until warmed through.

    Baked ziti freezes beautifully. Wrap tightly and freeze up to 2 months. Thaw overnight before reheating.


    Final Thoughts

    Baked Ziti is everything you want in a comfort meal—rich, cheesy, saucy, and satisfying. It’s simple enough for a weeknight but impressive enough to serve to guests.

    With tender pasta layered between hearty meat sauce and creamy ricotta, finished with bubbling golden mozzarella, this dish delivers classic flavor with every forkful.

    Gather your ingredients, preheat your oven, and get ready to pull a beautifully golden, bubbling pan of baked ziti from your kitchen.

    Once you make it from scratch, it might just become your go-to comfort food classic.

  • Baked Feta Pasta: The Creamy, Roasted Tomato Sensation You’ll Make on Repeat

    Baked Feta Pasta: The Creamy, Roasted Tomato Sensation You’ll Make on Repeat

    Few dishes have taken home kitchens by storm quite like Baked Feta Pasta.

    With just a handful of simple ingredients, this recipe transforms into a creamy, tangy, roasted tomato sauce that clings beautifully to tender pasta. It’s rich without being heavy, vibrant without being complicated, and best of all—it practically cooks itself in the oven.

    If you’re looking for a cozy, crowd-pleasing meal that requires minimal effort but delivers maximum flavor, this is it. Let’s walk through it step by step so you can master this viral favorite with confidence.


    Why You’ll Love This Recipe

    • Minimal prep work
    • Oven does most of the cooking
    • Creamy without heavy cream
    • Perfect for weeknights or entertaining
    • Easily customizable

    The magic happens when the feta bakes alongside juicy cherry tomatoes, creating a silky sauce with almost no stirring required.


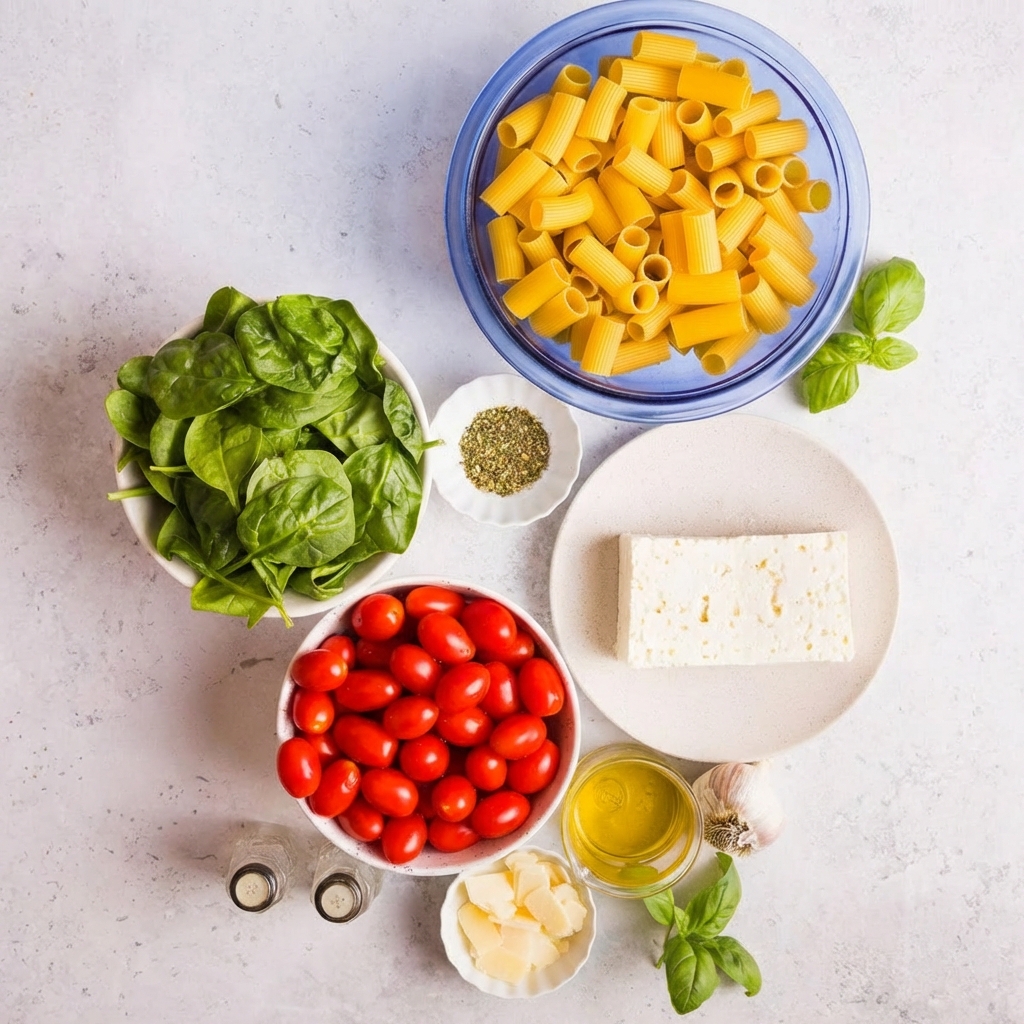
    Ingredients You’ll Need

    • 2 pints cherry or grape tomatoes
    • 1 block (7–8 ounces) feta cheese
    • ¼ cup olive oil
    • 3–4 cloves garlic, minced
    • ½ teaspoon red pepper flakes (optional)
    • ½ teaspoon dried oregano
    • Salt and freshly ground black pepper
    • 12 ounces pasta (penne, rigatoni, or rotini work well)
    • Fresh basil leaves
    • Optional: grated Parmesan for serving

    Step 1: Preheat the Oven

    Preheat your oven to 400°F (200°C).

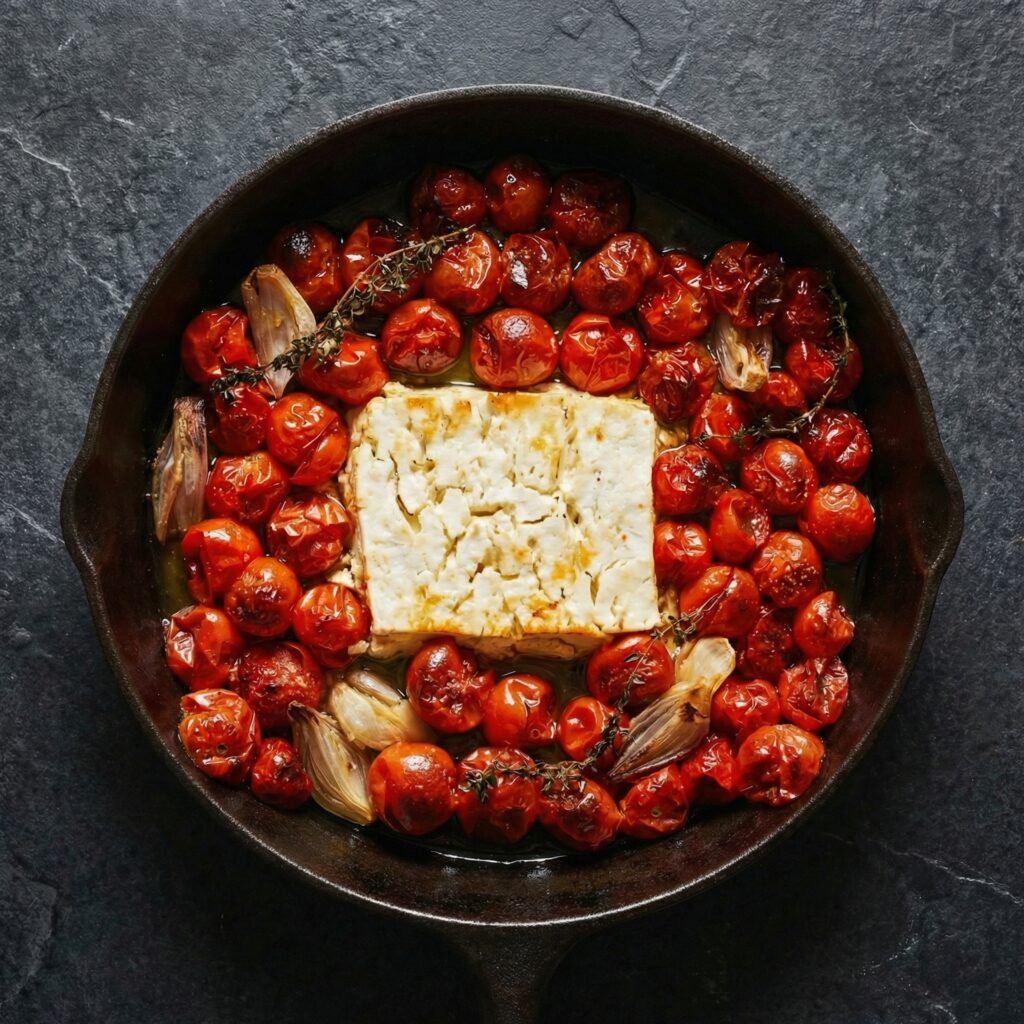
    Choose a medium-sized baking dish—large enough to hold the tomatoes in a single layer while leaving space in the center for the feta.


    Step 2: Prepare the Tomatoes

    Add the cherry tomatoes to the baking dish.

    Drizzle with olive oil and sprinkle with salt, pepper, oregano, and red pepper flakes. Toss gently to coat.

    Spread the tomatoes evenly around the dish.

    The oil helps the tomatoes roast and caramelize, intensifying their natural sweetness.


    Step 3: Add the Feta

    Place the block of feta in the center of the tomatoes.

    Drizzle a little extra olive oil over the top of the feta and sprinkle lightly with black pepper.

    Add the minced garlic around the tomatoes (not directly on top of the feta to prevent burning).

    This setup allows the tomatoes to blister and burst while the feta softens into creamy perfection.


    Step 4: Bake Until Golden and Jammy

    Transfer the dish to the oven and bake for 30–35 minutes.

    You’ll know it’s ready when:

    • The tomatoes have burst and released their juices
    • The feta is soft and lightly golden on top
    • The garlic is fragrant

    For extra color, switch the oven to broil for 2–3 minutes at the end, watching carefully to avoid burning.


    Step 5: Cook the Pasta

    While the feta and tomatoes bake, bring a large pot of salted water to a boil.

    Cook the pasta according to package instructions until al dente.

    Reserve about ½ cup of pasta water before draining. This starchy water helps loosen and emulsify the sauce later.

    Drain the pasta and set aside.


    Step 6: Create the Creamy Sauce

    Once the baking dish comes out of the oven, use a spoon to gently mash the softened feta and roasted tomatoes together.

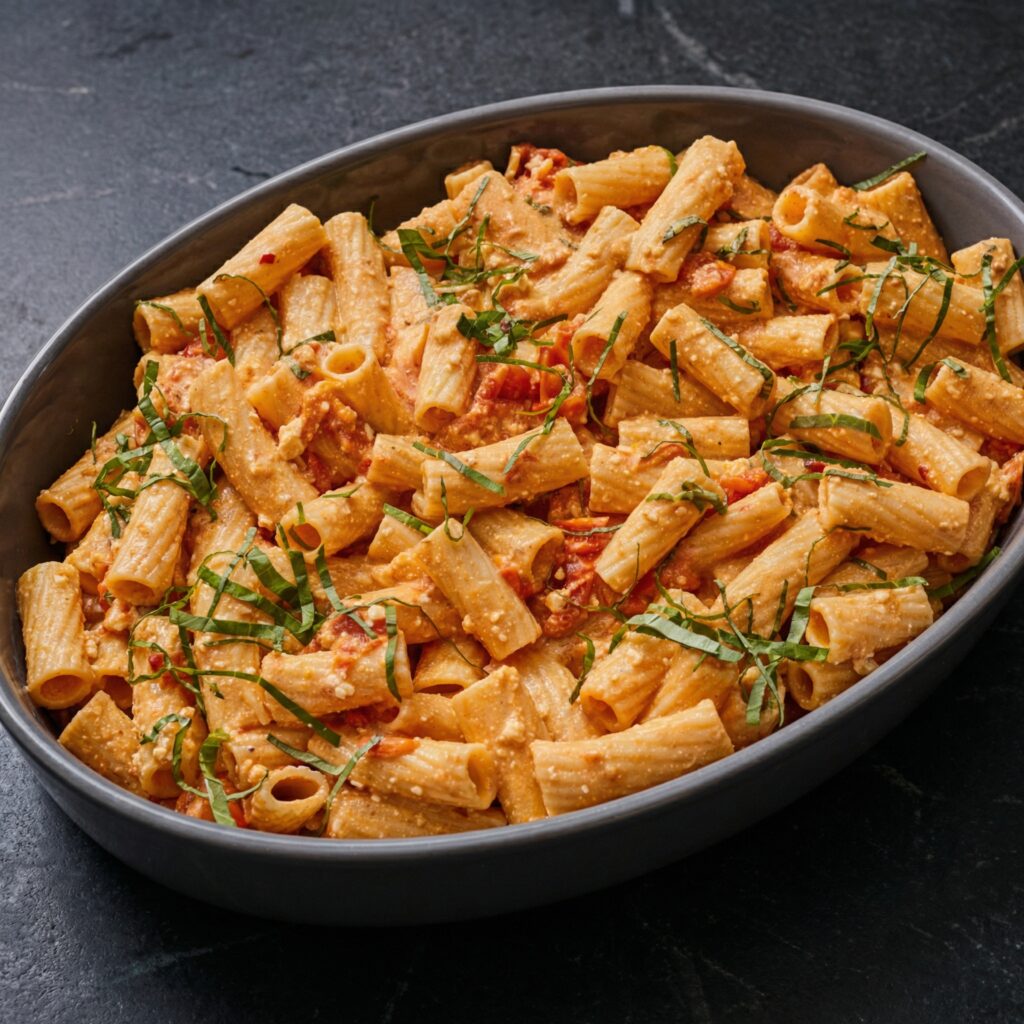
    Stir until everything blends into a creamy, rosy-colored sauce. The feta will melt into the tomato juices, creating a rich yet tangy base.

    If the sauce seems thick, add a splash of reserved pasta water to loosen it.


    Step 7: Combine Pasta and Sauce

    Add the cooked pasta directly into the baking dish.

    Toss thoroughly until every piece of pasta is coated in the creamy feta-tomato sauce.

    If needed, add more pasta water a tablespoon at a time to reach your desired consistency.

    The heat from the pasta will help bring everything together into a silky, cohesive dish.


    Step 8: Finish With Fresh Herbs

    Tear fresh basil leaves and stir them into the pasta.

    The basil adds brightness and freshness that balances the richness of the feta.

    Taste and adjust seasoning—add more salt, pepper, or red pepper flakes if desired.

    Serve immediately with an optional sprinkle of grated Parmesan.


    Tips for Success

    Use block feta. Pre-crumbled feta doesn’t melt as smoothly.

    Don’t overcrowd the tomatoes. They should roast, not steam.

    Reserve pasta water. It’s the secret to achieving a silky sauce.

    Taste before adding salt. Feta is naturally salty.


    Easy Variations

    This recipe is wonderfully adaptable. Try these ideas:

    • Add baby spinach after mixing for extra greens.
    • Stir in cooked chicken or shrimp for added protein.
    • Toss in sun-dried tomatoes for deeper flavor.
    • Use whole wheat pasta for a heartier option.
    • Add a splash of balsamic glaze for subtle sweetness.

    You can even swap cherry tomatoes for grape tomatoes or a mix of both.


    Storage and Reheating

    Store leftovers in an airtight container in the refrigerator for up to 4 days.

    When reheating, add a splash of water or milk before warming to restore creaminess.

    The flavors deepen overnight, making leftovers especially delicious.


    Final Thoughts

    Baked Feta Pasta is proof that simple ingredients can create extraordinary results. Roasted tomatoes, creamy feta, and perfectly cooked pasta combine into a dish that feels indulgent yet effortless.

    Whether you’re cooking for yourself, your family, or entertaining friends, this recipe delivers bold flavor with minimal effort and cleanup.

    Preheat that oven, grab a block of feta, and prepare to fall in love with one of the easiest—and most satisfying—pasta dishes you’ll ever make.

  • Bold, Briny, and Bursting with Flavor: How to Make Classic Pasta Puttanesca at Home

    Bold, Briny, and Bursting with Flavor: How to Make Classic Pasta Puttanesca at Home

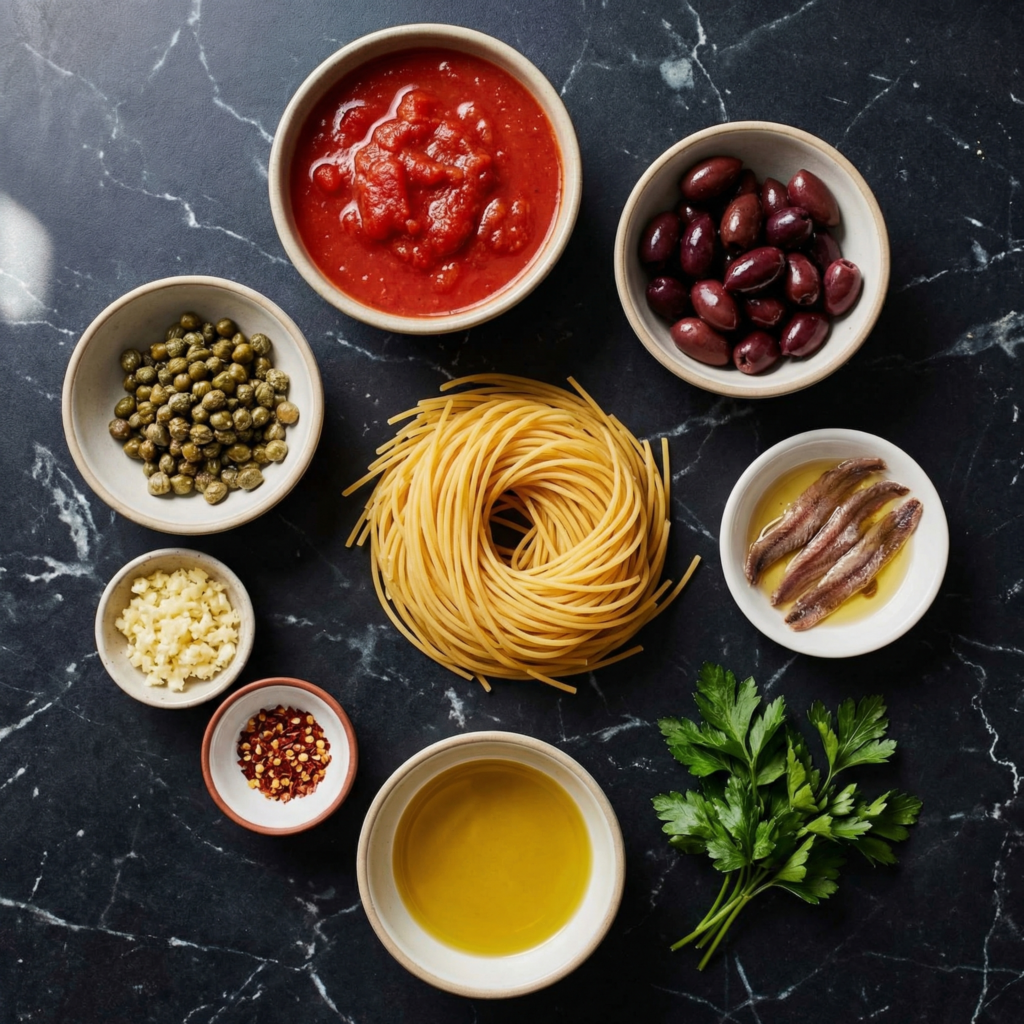
    If you love pasta that delivers punchy, vibrant flavors in every bite, Pasta Puttanesca is your ultimate go-to. Hailing from Southern Italy, this dish is famous for its bold combination of tomatoes, olives, capers, garlic, and anchovies—a salty, briny symphony that’s quick to make yet packed with depth. It’s a perfect weeknight dinner, a crowd-pleasing meal for friends, or a sophisticated dish for a cozy night in.

    What makes Pasta Puttanesca remarkable is its simplicity. With pantry staples and fresh ingredients, you can create a dish that tastes like it simmered all day in a professional Italian kitchen. This step-by-step guide will take you through crafting a traditional, flavorful Pasta Puttanesca that’s perfectly balanced, quick, and unforgettable.


    Why You’ll Love Pasta Puttanesca

    • Bold, savory, and briny flavors
    • Quick and easy to prepare in under 30 minutes
    • Uses simple pantry ingredients you probably already have
    • Perfectly balanced with salty, tangy, and aromatic notes
    • Pairs beautifully with crusty bread and a green salad

    The magic of Pasta Puttanesca is in its sauce: briny olives, tangy capers, and salty anchovies blend with aromatic garlic and chili flakes to create a sauce that clings beautifully to every strand of pasta.


    Ingredients You’ll Need

    For the Pasta:

    • 12 oz (340 g) spaghetti or linguine
    • Salt, for pasta water

    For the Sauce:

    • 3 tablespoons extra virgin olive oil
    • 4 cloves garlic, thinly sliced or minced
    • 4–6 anchovy fillets, finely chopped
    • 1 teaspoon red pepper flakes (adjust to taste)
    • 1 can (14 oz/400 g) diced tomatoes or crushed tomatoes
    • ½ cup pitted black olives, roughly chopped (Kalamata preferred)
    • 2 tablespoons capers, rinsed
    • 1 teaspoon dried oregano
    • ½ teaspoon black pepper
    • Optional: ¼ cup chopped fresh parsley for garnish

    Step 1: Cook the Pasta

    Bring a large pot of salted water to a boil. Add the spaghetti and cook until al dente, following package instructions.

    Reserve ½ cup of pasta water before draining. This starchy water will help bind the sauce to the noodles.

    Drain the pasta and set aside, keeping it warm.


    Step 2: Sauté the Aromatics

    While the pasta cooks, heat olive oil in a large skillet over medium heat.

    Add garlic, red pepper flakes, and anchovies. Sauté for 1–2 minutes until the garlic is fragrant and the anchovies start to dissolve into the oil.

    This step is crucial—it infuses the oil with the umami-rich flavors that form the backbone of the sauce.


    Step 3: Build the Sauce

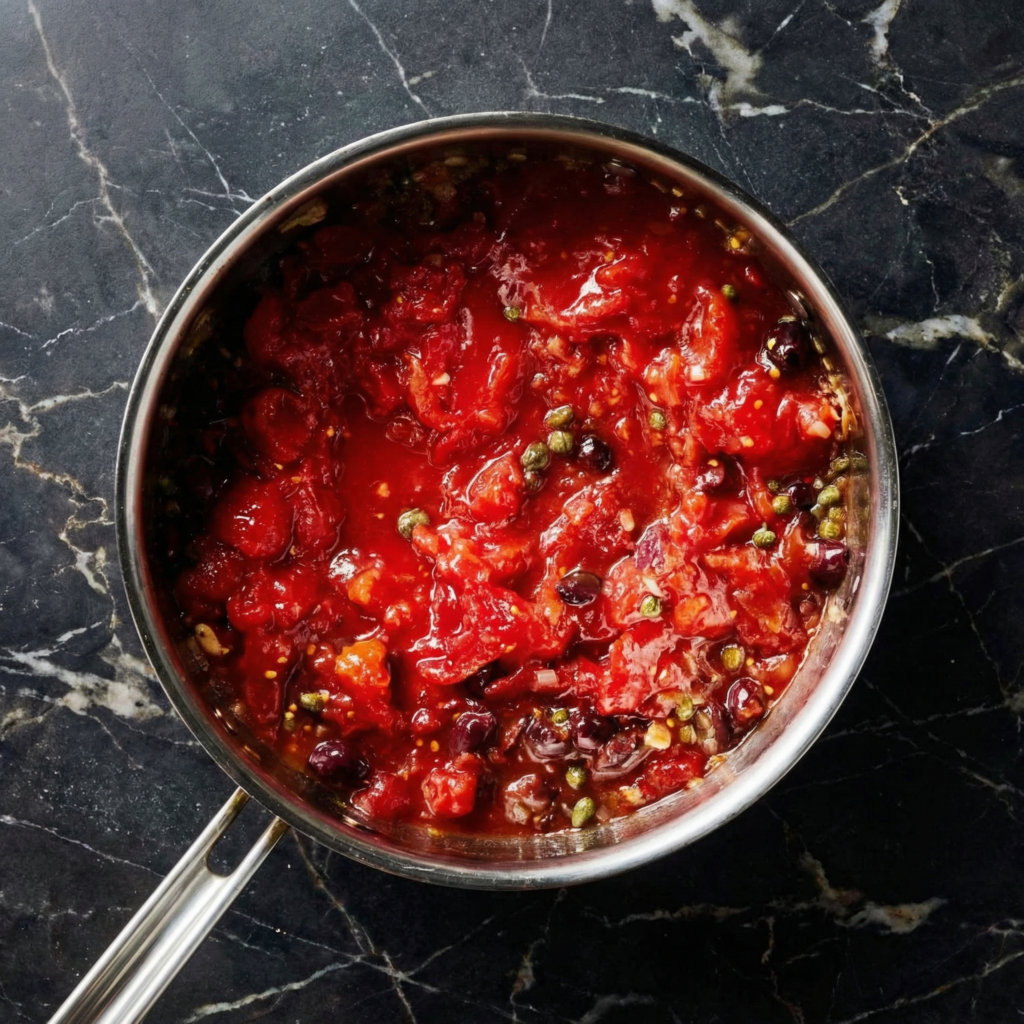
    Add diced tomatoes to the skillet. Stir to combine and bring to a gentle simmer.

    Mix in olives, capers, oregano, and black pepper.

    Simmer for 6–8 minutes, stirring occasionally, until the sauce thickens slightly and flavors meld. Taste and adjust seasoning—anchovies add saltiness, but you may want a pinch of extra salt depending on your preference.


    Step 4: Combine Pasta and Sauce

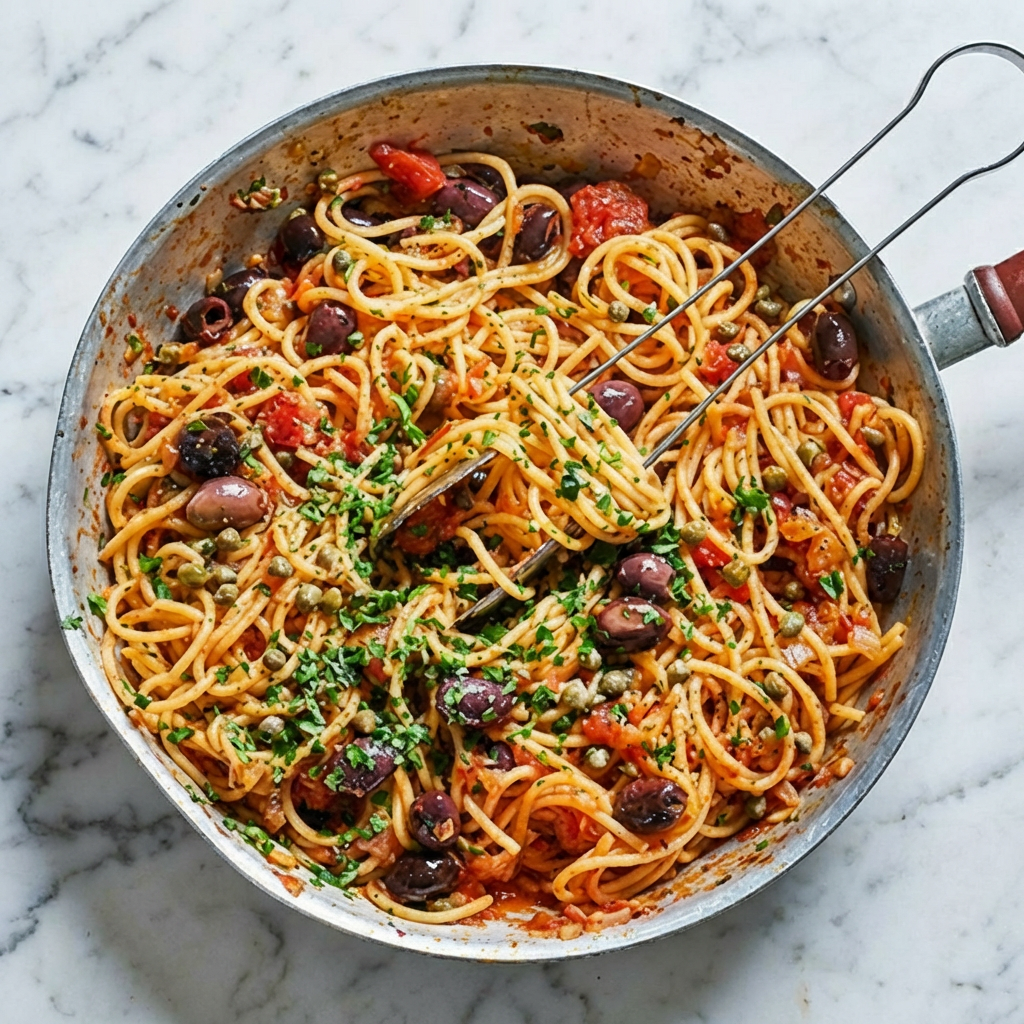
    Add the cooked pasta directly into the skillet with the sauce.

    Toss to coat evenly, adding reserved pasta water a tablespoon at a time until the sauce clings beautifully to the noodles.

    This technique ensures that every strand of spaghetti is coated with the flavorful, briny sauce.


    Step 5: Finish and Garnish

    Remove from heat and stir in chopped fresh parsley if desired.

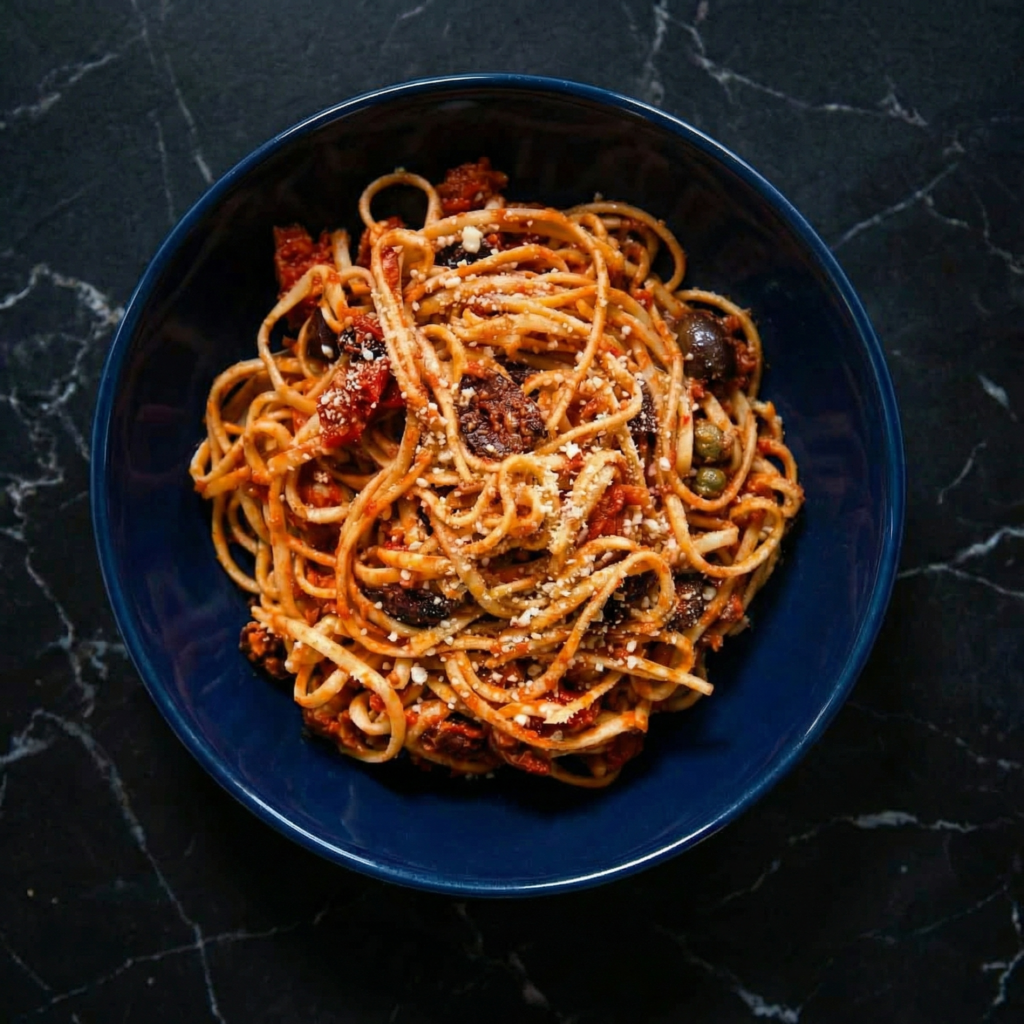
    Serve immediately with extra black pepper and a drizzle of olive oil for brightness.

    Optional: sprinkle with grated Parmesan or Pecorino cheese, though traditional Puttanesca often goes without.


    Flavor and Texture Highlights

    • Briny, salty bursts from olives, capers, and anchovies
    • Slight heat from red pepper flakes
    • Rich, savory umami from garlic and anchovy-infused oil
    • Bright, fresh notes from optional parsley
    • Perfectly coated pasta that absorbs every bit of sauce

    Every bite is a complex, satisfying combination of bold flavors and satisfying textures.


    Tips for Perfect Pasta Puttanesca

    • Use quality anchovies—they dissolve into the sauce and provide deep umami without fishiness.
    • Don’t skip the pasta water—it helps bind the sauce and makes it silky.
    • Adjust heat carefully—start with 1 teaspoon of red pepper flakes and add more if desired.
    • Serve immediately—Pasta Puttanesca is best fresh; reheating can intensify the saltiness.
    • Balance flavors—taste before serving; add a splash of lemon juice if the sauce feels too salty or tangy.

    Optional Variations

    • Protein Additions: Add cooked shrimp, grilled chicken, or seared scallops for extra heartiness.
    • Vegetarian Version: Omit anchovies; add roasted red peppers or sun-dried tomatoes for depth.
    • Whole Wheat or Gluten-Free: Swap spaghetti for whole wheat or gluten-free pasta for dietary preference.
    • Extra Sauce: Double the sauce ingredients for a more saucy, restaurant-style plate.
    • Herbal Twist: Add fresh basil or thyme for aromatic complexity.

    Storage and Make-Ahead

    • Cooked Pasta Puttanesca can be stored in an airtight container in the refrigerator for up to 2 days.
    • Reheat gently in a skillet with a splash of pasta water to restore sauce consistency.
    • For meal prep, store pasta and sauce separately to prevent noodles from becoming mushy.

    Why This Recipe Works

    Pasta Puttanesca works because it balances bold, briny flavors with the natural sweetness of tomatoes and aromatic garlic. Anchovies provide deep umami, while olives and capers add tang and complexity. Quick cooking preserves freshness, while tossing the pasta in the sauce ensures every bite is perfectly coated.

    This dish proves that simple ingredients, when combined thoughtfully, can produce a restaurant-quality meal that’s vibrant, hearty, and irresistibly delicious.


    With tender, al dente pasta coated in a bold, briny sauce, Pasta Puttanesca delivers complex flavors in a simple, quick meal.

    Perfect for weeknight dinners or impressing friends, it’s an Italian classic that celebrates pantry staples and proves that flavor doesn’t need to be complicated. Serve with a crisp green salad and crusty bread for the ultimate Italian dining experience at home.

  • Fiery, Crispy, and Utterly Addictive: How to Make Spaghetti All’Assassina at Home

    Fiery, Crispy, and Utterly Addictive: How to Make Spaghetti All’Assassina at Home

    If you’re looking for a pasta dish that’s bold, intense, and completely unforgettable, Spaghetti All’Assassina is the answer.

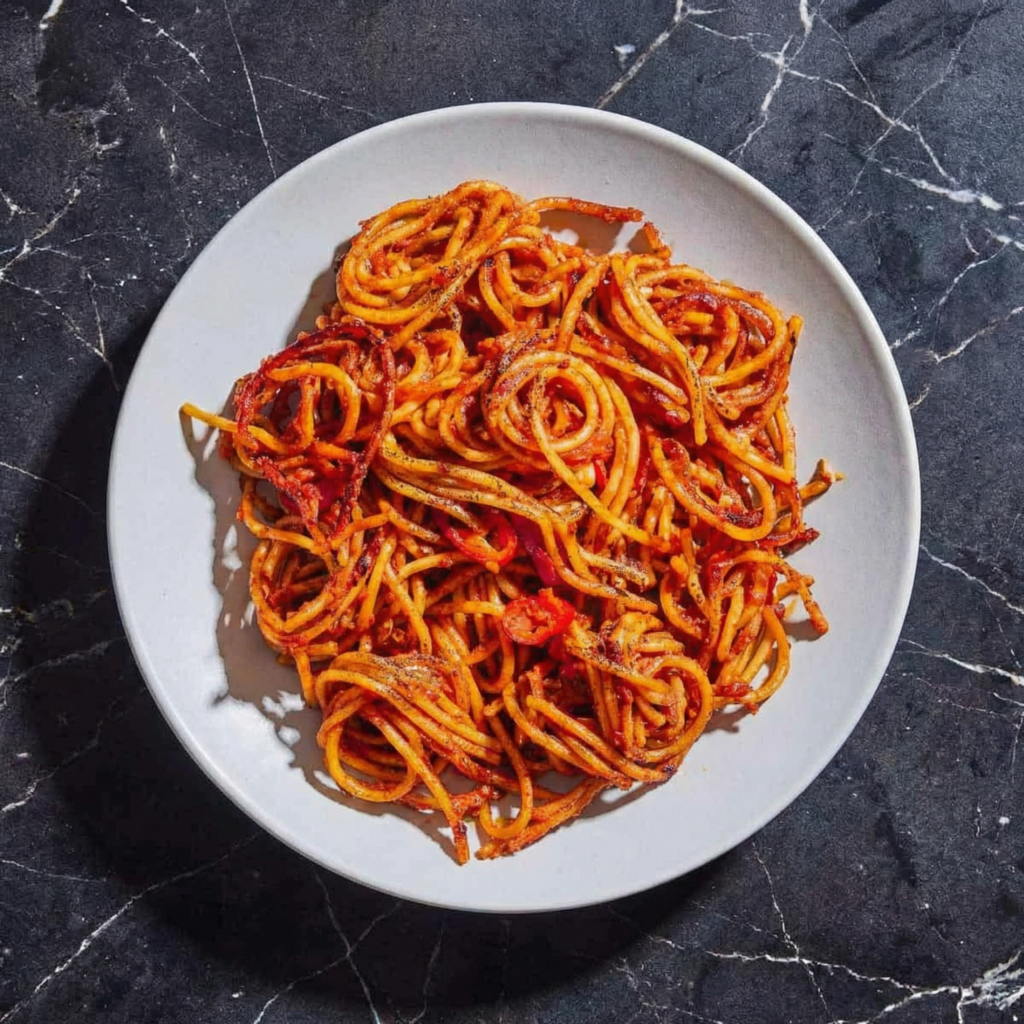
    Hailing from Bari, Italy, this “killer spaghetti” earns its name from the dramatic, almost theatrical way it’s prepared—spaghetti is cooked directly in a spicy, rich tomato sauce that clings to every strand and forms a delectably crispy crust at the bottom of the pan.

    Unlike traditional pasta dishes, there’s no boiling water beforehand; the pasta cooks entirely in the sauce, absorbing every bit of flavor and spice. With this step-by-step guide, you can recreate this fiery, restaurant-quality pasta at home, guaranteed to impress anyone brave enough to take on the heat.


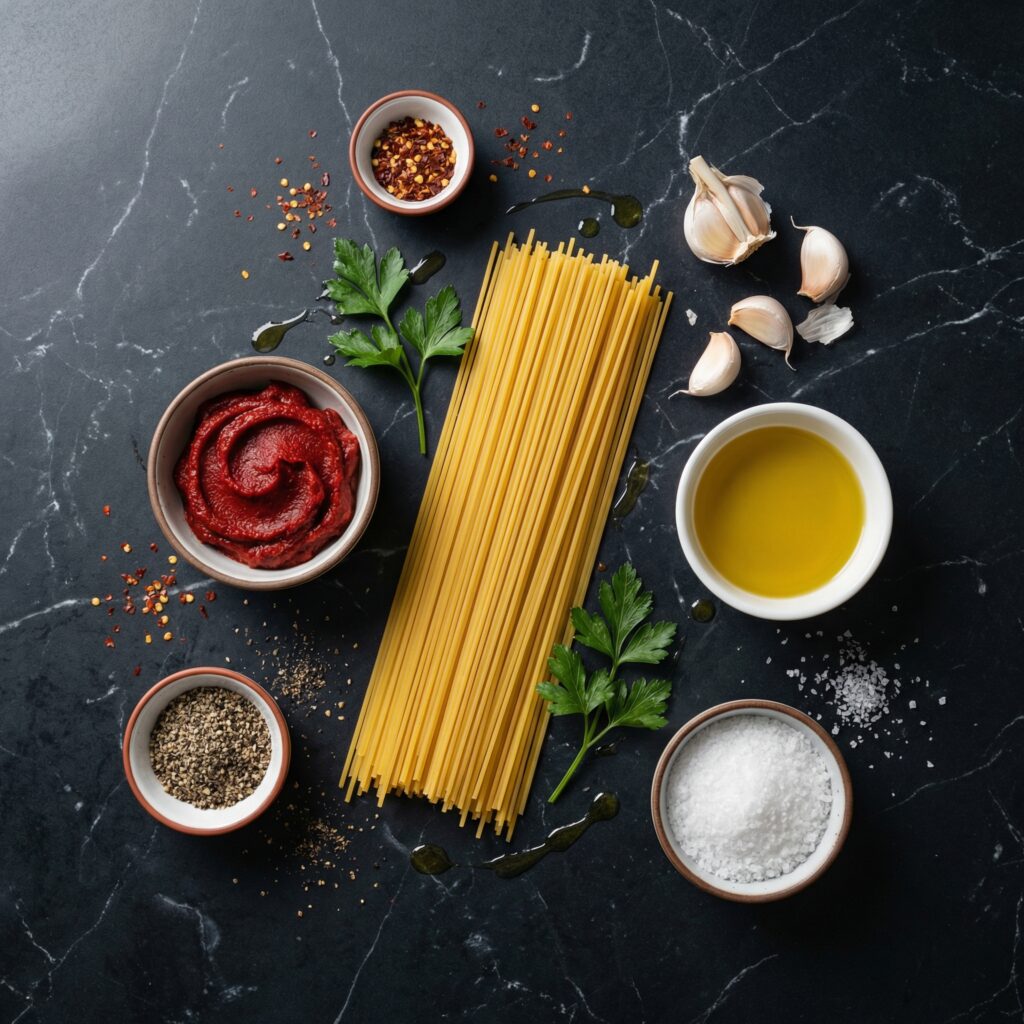
    Ingredients You’ll Need

    For authentic Spaghetti All’Assassina, fresh, high-quality ingredients are key. Here’s what you’ll need for about 2–3 servings:

    • 200g spaghetti (preferably spaghetti No. 5)
    • 400g canned peeled tomatoes, crushed by hand or blended
    • 3 tbsp extra virgin olive oil
    • 3 cloves garlic, minced
    • 1–2 tsp red chili flakes (adjust based on spice tolerance)
    • 1 tsp sweet paprika (optional, adds depth)
    • 1 tsp tomato paste
    • 1 cup pasta cooking water (or more as needed)
    • Salt, to taste
    • Freshly ground black pepper, to taste
    • Optional: grated Pecorino Romano or Parmigiano-Reggiano for serving

    Step 1: Prepare the Ingredients

    Before you start, crush your tomatoes, mince the garlic, and measure out the chili flakes, olive oil, and tomato paste.

    Spaghetti All’Assassina is all about timing—having ingredients ready ensures that the pasta cooks evenly and absorbs maximum flavor.


    Step 2: Heat the Oil and Garlic

    In a large, heavy-bottomed skillet or sauté pan, heat olive oil over medium heat.

    Add the minced garlic and sauté for 30–45 seconds until fragrant, taking care not to burn it. The garlic infuses the oil with a rich aroma that forms the base of the sauce.


    Step 3: Add the Chili and Paprika

    Sprinkle in the red chili flakes and, if using, the sweet paprika. Stir for a few seconds to toast the spices lightly, releasing their natural oils and enhancing their flavor.

    This step gives the dish its signature kick and deep color.


    Step 4: Build the Sauce

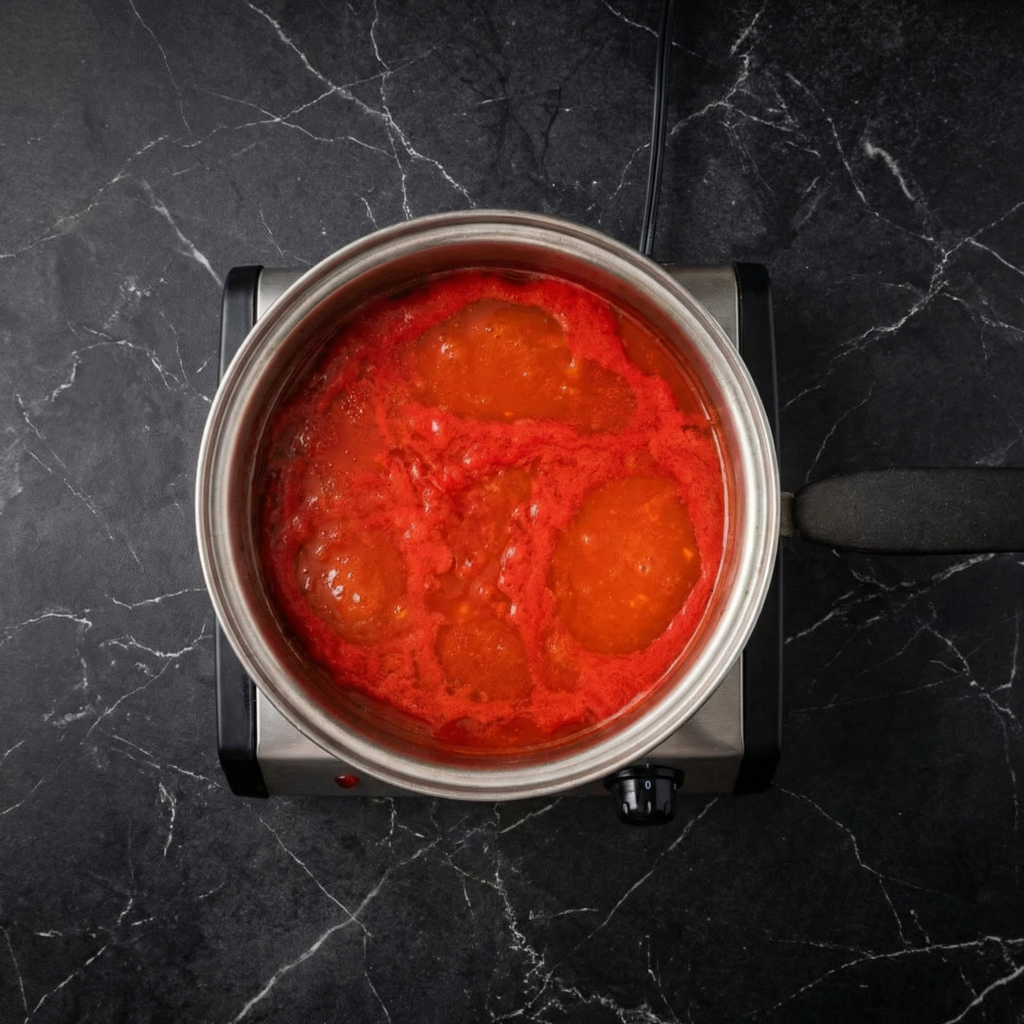
    Add the tomato paste and water to the pan, stirring to combine with the spiced oil. Then, pour in the crushed tomatoes. Season with salt and pepper to taste.

    Allow the sauce to simmer gently for 5–7 minutes, stirring occasionally, until it thickens slightly and the flavors meld.


    Step 5: Add the Spaghetti

    Unlike traditional pasta recipes, you do not boil the spaghetti first. Break the dry spaghetti in half if necessary and add it directly to the simmering sauce.

    Stir well to coat the strands with sauce, ensuring they don’t stick together. The pasta will gradually absorb the tomato sauce and the fiery flavors of the chili.


    Step 6: Create the Crispy Bottom (The “Soccarata”)

    One of the defining characteristics of Spaghetti All’Assassina is the crispy, caramelized layer of pasta that forms at the bottom of the pan, called the “soccarata.”

    Once the pasta is nearly done, stop stirring for a few minutes and let it sit over medium heat. The bottom will crisp slightly, creating a deep, toasted flavor that contrasts beautifully with the tender spaghetti above.


    Step 7: Check for Seasoning

    Taste the spaghetti and adjust salt, pepper, or chili flakes as needed.

    The dish should have a perfect balance of heat, acidity from the tomatoes, and savory depth from the garlic and oil.


    Step 8: Serve the Spaghetti

    Once the pasta is fully cooked and the bottom layer is golden and crisp, transfer the spaghetti to serving plates.

    Use a spatula to scoop some of the “soccarata” from the bottom for each portion—this crispy element is what makes Spaghetti All’Assassina truly special. Sprinkle with grated Pecorino Romano or Parmigiano-Reggiano if desired.


    Step 9: Enjoy Immediately

    Spaghetti All’Assassina is best enjoyed fresh and piping hot, straight from the pan.

    The contrast between tender pasta and the crispy, slightly charred bottom is what makes this dish unique. Pair with a simple green salad or crusty bread to complete the meal, and be prepared for an intense, flavorful experience.


    Tips for Perfect Spaghetti All’Assassina

    1. Don’t pre-boil the pasta – cooking it directly in the sauce is essential.
    2. Use a heavy-bottomed pan – this ensures even heat and helps form the soccarata.
    3. Adjust chili to taste – the dish should be spicy but balanced.
    4. Break the spaghetti if necessary – makes it easier to stir and coat with sauce.
    5. Patience is key – let the bottom crisp for a few minutes without stirring for the perfect texture.

    Spaghetti All’Assassina is a bold and unforgettable Italian dish that transforms simple ingredients into something extraordinary.

    The tender pasta, intense tomato-chili sauce, and crispy caramelized soccarata make it a meal that’s both dramatic and deeply satisfying. With this recipe, you can bring a taste of Bari’s streets into your home—fiery, crispy, and utterly addictive.


    Ready to experience the thrill of Spaghetti All’Assassina in your own kitchen?

    Follow these steps carefully, and you’ll have a pasta dish that’s tender, crispy, and packed with fiery Italian flavor in every bite.

  • Classic Chicken Cacciatore: The Ultimate Italian Hunter’s Chicken Recipe

    Classic Chicken Cacciatore: The Ultimate Italian Hunter’s Chicken Recipe

    Why You’ll Love This Chicken Cacciatore Recipe

    Chicken Cacciatore, also known as Italian hunter’s chicken, is beloved for its rustic flavors and simple preparation.

    Slow simmering allows the chicken to absorb the savory tomato and herb sauce, creating a comforting meal that tastes even better the next day.

    Reasons this recipe stands out:

    • Classic Italian comfort food
    • One-pan meal with simple ingredients
    • Perfect for meal prep and leftovers
    • Rich tomato garlic herb sauce
    • Beginner-friendly step-by-step method

    Ingredients for Chicken Cacciatore

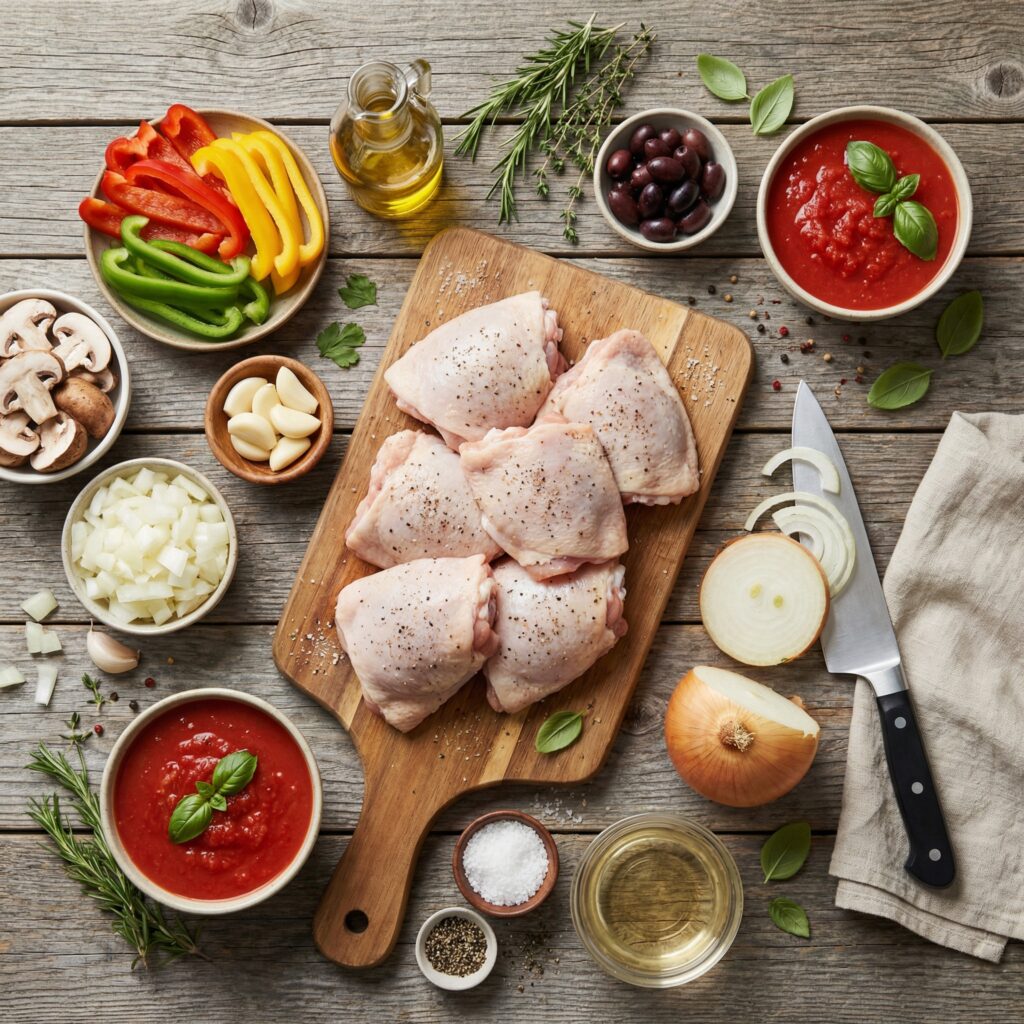
    Using fresh herbs and quality tomatoes creates the best flavor for this traditional Chicken Cacciatore recipe.

    Main Ingredients

    • 6 bone-in, skin-on chicken thighs (or mixed chicken pieces)
    • Salt and black pepper
    • 2 tablespoons olive oil
    • 1 medium onion, sliced
    • 1 red bell pepper, sliced
    • 1 green bell pepper, sliced
    • 4 cloves garlic, minced

    Sauce

    • 1 can (28 oz) crushed tomatoes
    • ½ cup chicken broth
    • ½ cup dry red wine (optional but recommended)
    • 1 teaspoon dried oregano
    • 1 teaspoon dried basil
    • ½ teaspoon red pepper flakes (optional)
    • 1 bay leaf

    Finishing

    • Fresh parsley or basil for garnish

    How to Make Chicken Cacciatore (Step-by-Step)

    Step 1: Season the Chicken

    Pat the chicken pieces dry with paper towels and season generously with salt and black pepper. Proper seasoning before cooking ensures deeper flavor throughout the dish.


    Step 2: Sear the Chicken

    Heat olive oil in a large skillet or Dutch oven over medium-high heat. Place the chicken skin-side down and sear for 4–5 minutes until golden brown. Flip and cook another 3–4 minutes. Remove the chicken and set aside.

    Searing locks in flavor and helps build the base of the sauce.


    Step 3: Sauté the Vegetables

    In the same pan, add sliced onions and bell peppers. Cook for 5 minutes until softened. Stir in minced garlic and cook for another 30 seconds until fragrant.

    The browned bits left from the chicken add extra flavor to the vegetables.


    Step 4: Deglaze the Pan

    Pour in the red wine and scrape the bottom of the pan to release flavorful browned bits. Let the wine simmer for 2–3 minutes to cook off the alcohol while concentrating flavor.

    If not using wine, substitute additional chicken broth.


    Step 5: Add the Tomato Sauce

    Stir in crushed tomatoes, chicken broth, oregano, basil, red pepper flakes, and bay leaf. Mix well and bring the sauce to a gentle simmer.


    Step 6: Return the Chicken to the Pan

    Place the seared chicken pieces back into the sauce, skin-side up. Reduce heat to low, cover, and simmer for 35–40 minutes, or until the chicken is fully cooked and tender.

    Slow simmering allows the chicken to absorb the rich tomato herb flavors.


    Step 7: Adjust Seasoning

    Taste the sauce and adjust salt and pepper as needed. If the sauce is too thick, add a small splash of broth. For a thicker consistency, simmer uncovered for a few extra minutes.


    Step 8: Garnish and Serve

    Remove the bay leaf and garnish with freshly chopped parsley or basil. Serve hot over pasta, mashed potatoes, polenta, or crusty Italian bread for a complete classic Italian dinner.


    Pro Tips for Perfect Chicken Cacciatore

    • Use bone-in chicken for deeper flavor.
    • Brown the chicken well before simmering.
    • Allow the sauce to simmer gently, not boil.
    • Use quality canned tomatoes for richer taste.
    • Let the dish rest 5 minutes before serving for best flavor.

    Serving Suggestions

    This homemade Chicken Cacciatore pairs beautifully with:

    • Spaghetti or fettuccine
    • Creamy polenta
    • Garlic bread
    • Roasted vegetables
    • Simple green salad

    The rich tomato sauce also works perfectly spooned over rice or rustic country bread.


    Make-Ahead and Storage Tips

    Chicken Cacciatore tastes even better the next day as the flavors continue to develop.

    • Refrigerator: Store in an airtight container for up to 4 days
    • Freezer: Freeze portions for up to 2 months
    • Reheat: Warm gently on the stovetop with a splash of broth to loosen the sauce

    This makes it an excellent meal prep Italian chicken recipe for busy weeks.


    Easy Recipe Variations

    • Mushroom Chicken Cacciatore: Add sliced mushrooms when sautéing vegetables.
    • Slow Cooker Version: Transfer everything to a slow cooker and cook on low for 6–7 hours.
    • Boneless Chicken Option: Use boneless thighs for faster cooking.
    • Spicy Cacciatore: Increase red pepper flakes for extra heat.

    Frequently Asked Questions

    What does “Cacciatore” mean?
    “Cacciatore” means “hunter-style” in Italian, referring to rustic dishes cooked with tomatoes, herbs, onions, and peppers.

    Can I make Chicken Cacciatore without wine?
    Yes, simply substitute chicken broth for the wine while maintaining great flavor.

    What is the best cut of chicken for Chicken Cacciatore?
    Bone-in thighs are preferred because they remain juicy and flavorful during simmering.


    Final Thoughts

    This Classic Chicken Cacciatore recipe brings authentic Italian comfort food straight to your kitchen with minimal effort and maximum flavor.

    Tender braised chicken simmered in a rich tomato herb sauce creates a satisfying meal perfect for weeknight dinners or special gatherings.

    Once you try this easy homemade Chicken Cacciatore, it’s sure to become a staple recipe thanks to its hearty ingredients, simple cooking method, and timeless Italian taste.

  • The Best Classic Lasagna Recipe

    The Best Classic Lasagna Recipe

    There are few dishes in the world that command the universal love and respect of a truly great lasagna. It’s more than a meal; it’s an event. A labor of love that fills your home with the unmistakable, soul-warming aroma of simmering tomatoes, herbs, and browning cheese.

    This recipe is my ode to that classic, the one I’ve refined over years of family dinners and gatherings. It delivers everything you want: a rich, deeply flavored meat sauce, a creamy, perfectly seasoned ricotta layer, sheets of pasta that hold their structure, and that iconic blanket of bubbly, golden cheese.

    While it requires time and patience, each step is simple and the payoff is monumental. This lasagna is what Sunday dinners and holiday tables are made for—a dish that promises and delivers pure, unadulterated comfort with every single, layered forkful.

    The Philosophy of Layered Perfection

    Building a legendary lasagna is about understanding the role of each component and treating it with care. The foundation is a slow-simmered meat sauce. Using a combination of ground beef and Italian sausage creates a complex flavor base, while a long, gentle simmer allows the tomatoes to sweeten and the herbs to infuse every bite.

    The ricotta mixture is more than just cheese; it’s enriched with egg for stability, Parmesan for saltiness, and fresh parsley for brightness. It should be a flavorful layer in its own right. The choice of pasta is crucial. No-boil noodles are a fantastic modern shortcut that actually absorb moisture from the sauce, becoming perfectly tender without turning mushy. Finally, the cheese blend—a mix of mozzarella for that iconic stretch and Parmesan for sharpness—creates the glorious, browned top.

    Assembling the lasagna is a meditative process, creating a structure that bakes into a cohesive, sliceable unit where every layer sings in harmony.

    Ingredients

    For the Meat Sauce:

    • 1 tablespoon olive oil
    • 1 pound lean ground beef
    • 1 pound mild Italian sausage, casings removed
    • 1 large yellow onion, finely diced
    • 4 cloves garlic, minced
    • 1 (28 oz) can crushed tomatoes
    • 2 (15 oz) cans tomato sauce
    • 1 (6 oz) can tomato paste
    • 1/2 cup red wine or water
    • 2 tablespoons sugar
    • 2 teaspoons dried basil
    • 2 teaspoons dried oregano
    • 1 teaspoon fennel seeds (optional)
    • Salt and black pepper to taste

    For the Ricotta Filling:

    • 32 oz (4 cups) whole milk ricotta cheese
    • 1 large egg
    • 1 cup grated Parmesan cheese
    • 1/4 cup fresh parsley, finely chopped
    • 1/2 teaspoon salt
    • 1/4 teaspoon black pepper

    For Assembly:

    • 12 no-boil lasagna noodles
    • 4 cups shredded low-moisture mozzarella cheese (16 oz)
    • Additional Parmesan for topping

    Instructions

    Instructions

    1. Make the Meat Sauce: 

      In a large Dutch oven or heavy pot, heat olive oil over medium-high heat. Add ground beef and Italian sausage. Cook, breaking up with a spoon, until no pink remains. Drain excess fat if desired. Add diced onion and cook for 5 minutes until softened. Add garlic and cook for 1 minute until fragrant. Stir in crushed tomatoes, tomato sauce, tomato paste, wine, sugar, basil, oregano, fennel seeds, salt, and pepper. Bring to a simmer, then reduce heat to low. Cover and simmer for at least 1 hour, stirring occasionally. The longer it simmers (up to 3 hours), the better the flavor.

    2. Make the Ricotta Filling: 

      While sauce simmers, in a medium bowl, combine ricotta cheese, egg, 1 cup of Parmesan, chopped parsley, salt, and pepper. Mix until well blended. Set aside.

    3. Preheat Oven & Prep Pan:

      Preheat oven to 375°F (190°C). Lightly grease a 9×13 inch deep baking dish.

    4. Assemble the Lasagna:

      Spread 1 ½ cups of meat sauce evenly over the bottom of the dish. Arrange 4 no-boil noodles over the sauce (they will expand). Spread 1/3 of the ricotta mixture over the noodles. Sprinkle with 1 cup of shredded mozzarella. Spoon 1 ½ cups of meat sauce over the cheese. Repeat layers twice more (noodles, ricotta, mozzarella, sauce). For the final layer, top with the last 4 noodles, the remaining meat sauce, the last cup of mozzarella, and a generous sprinkle of Parmesan.

    5. Bake:

      Cover the dish tightly with aluminum foil (tent it slightly so it doesn’t touch the cheese). Bake for 25 minutes. Remove foil and bake for an additional 25-30 minutes, until the top is golden and bubbly and the edges are lightly browned.

    6. Rest and Serve:

      Remove lasagna from oven and let it rest, uncovered, for at least 20-30 minutes before slicing. This allows the layers to set, ensuring you get clean, perfect squares. Garnish with fresh basil or parsley before serving.

    Frequently Asked Questions (FAQ)

    Can I make this lasagna ahead of time?

    Absolutely! Assemble the entire lasagna, cover tightly, and refrigerate for up to 2 days before baking. You may need to add 10-15 minutes to the baking time if starting from cold. You can also freeze the assembled, unbaked lasagna for up to 3 months. Thaw in the refrigerator overnight before baking.

    Can I use regular lasagna noodles that need to be boiled?

    Yes. Cook them according to package directions until al dente, drain, and lay them flat on clean kitchen towels to prevent sticking before assembling.

    Can I make it vegetarian?

    Definitely. Omit the meat and add 2 cups of finely chopped mushrooms and 1 cup of lentils (cooked) to the sauce for a hearty vegetarian version.

    Why is my lasagna watery/soupy?

    This is usually due to: 1) Not simmering the sauce long enough to reduce, 2) Using fresh mozzarella (which has more water), or 3) Not letting it rest before slicing. Using no-boil noodles and a thick sauce solves this.

    How do I store and reheat leftovers?

    Store covered in the fridge for up to 5 days. Reheat individual portions in the microwave or cover the whole dish with foil and reheat in a 350°F oven until warmed through.

    Pro Tips for Lasagna Mastery

    For the best flavor, make the meat sauce a day ahead. Use whole milk ricotta for the creamiest filling. When assembling, spread the ricotta mixture carefully to avoid moving the noodles. The final rest is non-negotiable for clean slices—use this time to make a green salad and garlic bread. This lasagna freezes beautifully; bake half now and freeze the other half for a future effortless feast.

    It’s a recipe designed to feed a crowd and warm hearts, a true testament to the power of layered, homemade goodness.