Tag: homemade bread

  • Homemade Brioche (Buttery, Flaky, and So Worth the Effort)

    Homemade Brioche (Buttery, Flaky, and So Worth the Effort)

    Let’s talk about brioche. It’s the crown jewel of enriched breads—rich, tender, and impossibly buttery, with a golden crust that shatters slightly and a soft, fluffy interior that melts in your mouth. It’s the bread of French bakeries, of leisurely weekend breakfasts, of the most incredible French toast you’ve ever tasted. And yes, you can make it at home.

    Brioche takes time and a little patience, but the result is so worth it. The smell alone as it bakes will transport you to a Parisian pâtisserie. Slather it with jam, turn it into the ultimate bread pudding, or just eat it warm from the oven with a generous pat of butter. This is bread worth waiting for.

    Ingredients
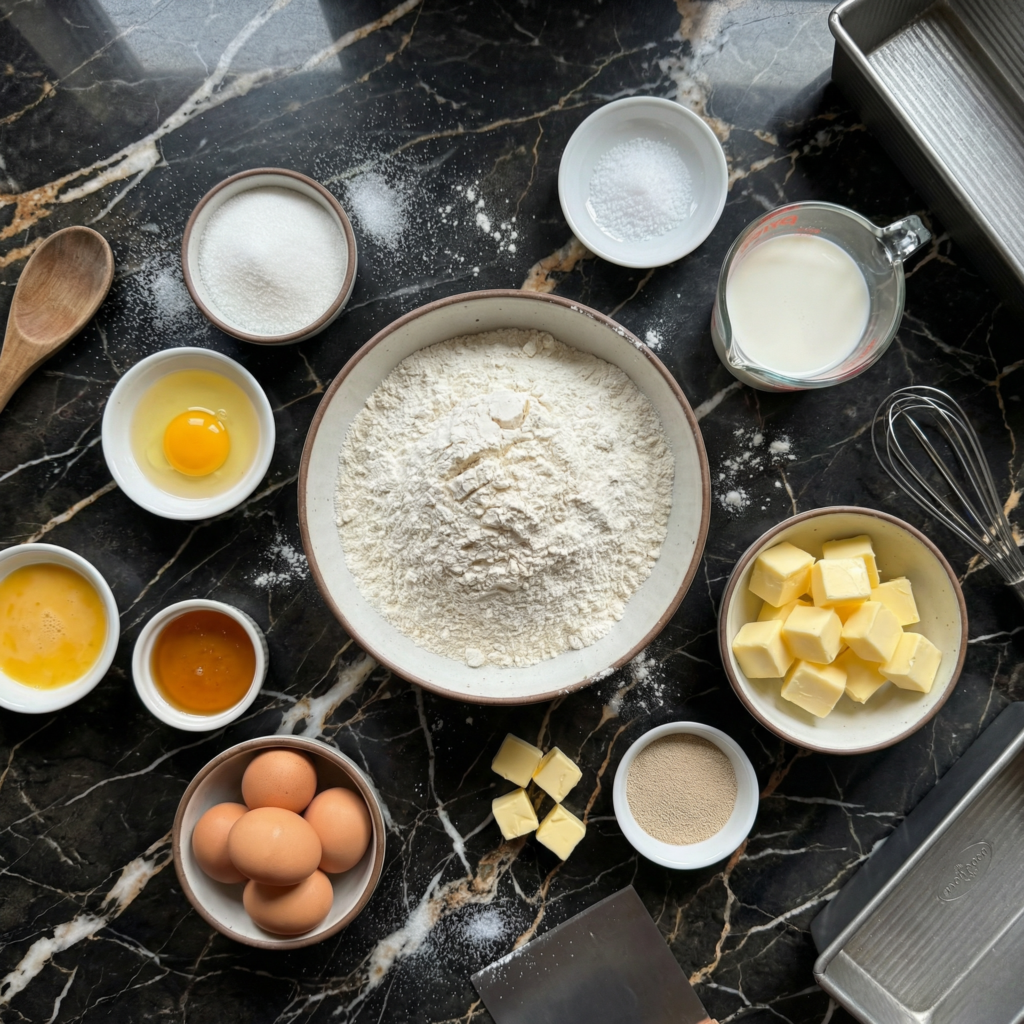
    For the Homemade Brioche (Makes 1 large loaf or 12 brioche buns):

    • 4 cups (500g) all-purpose or bread flour
    • ¼ cup (50g) granulated sugar
    • 2 ¼ teaspoons (1 packet) instant yeast
    • 1 ½ teaspoons salt
    • 4 large eggs, at room temperature
    • ½ cup (120ml) whole milk, warmed to about 110°F
    • 1 cup (226g) unsalted butter, cold, cut into small cubes

    For Egg Wash:

    • 1 large egg, beaten with 1 tablespoon water or milk

    Instructions

    1. Combine Dry Ingredients: In the bowl of a stand mixer, whisk together the flour, sugar, yeast, and salt.

    2. Add Eggs and Milk: Add the eggs and warm milk to the dry ingredients. Mix with the dough hook on low speed until a shaggy dough forms.

    3. Knead: Knead on medium-low speed for 5-7 minutes until the dough becomes smoother and starts to come together. It will still be quite stiff.
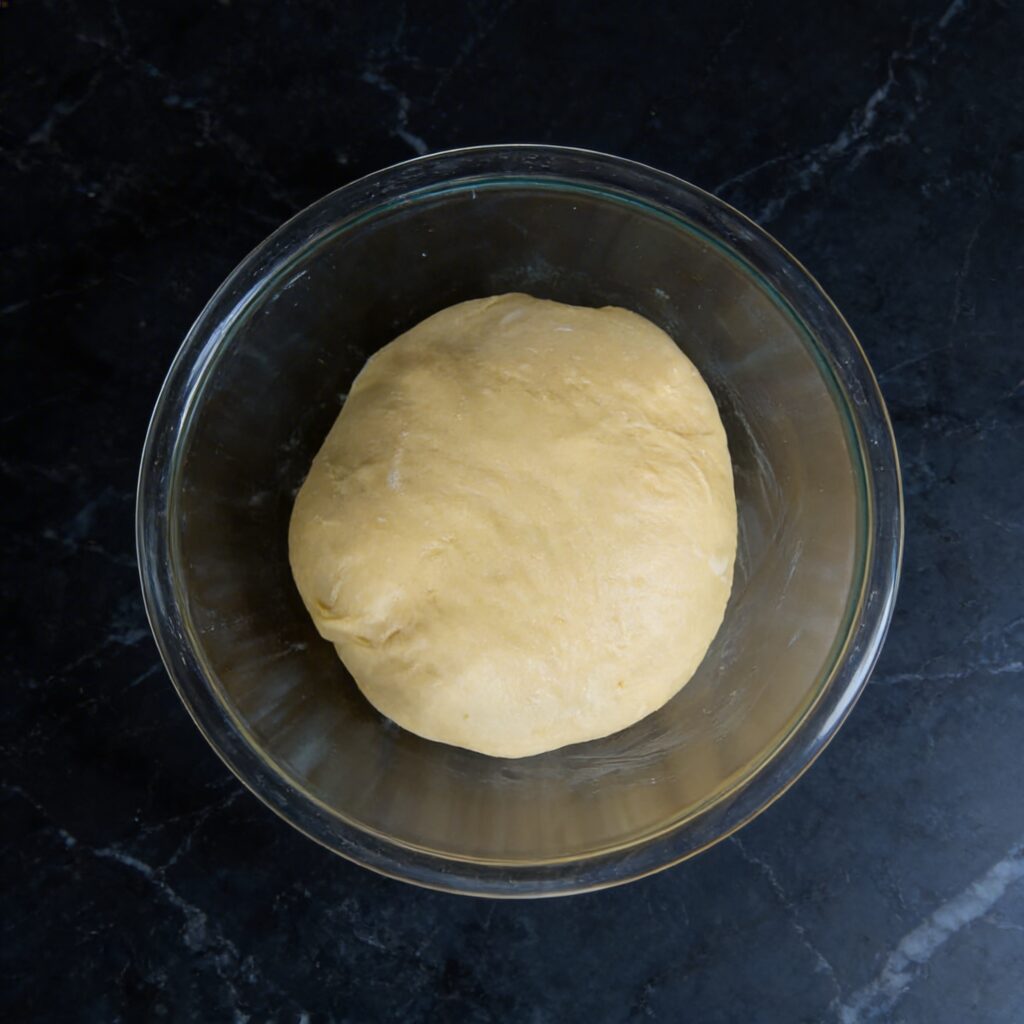
    4. Add Butter Gradually: With the mixer running on medium-low, add the cold butter cubes a few at a time, waiting until each addition is mostly incorporated before adding more. This process takes time—be patient.

    The dough will look messy and may seem to fall apart, but keep mixing. After all the butter is added, continue kneading for another 10-15 minutes until the dough is smooth, elastic, and pulls away from the sides of the bowl. It should be silky and shiny.

    5. First Rise: Place the dough in a lightly oiled bowl, cover, and let rise at room temperature for 1-2 hours until doubled in size.

    6. Chill Overnight: Punch down the dough, cover tightly, and refrigerate for at least 4 hours, preferably overnight. This step develops flavor and makes the dough easier to shape.

    7. Shape the Dough: Turn the chilled dough out onto a lightly floured surface. For a loaf, shape it into a rectangle and place in a greased 9×5-inch loaf pan. For buns, divide into 12 equal pieces, shape into balls, and place in a greased baking dish or on a baking sheet.
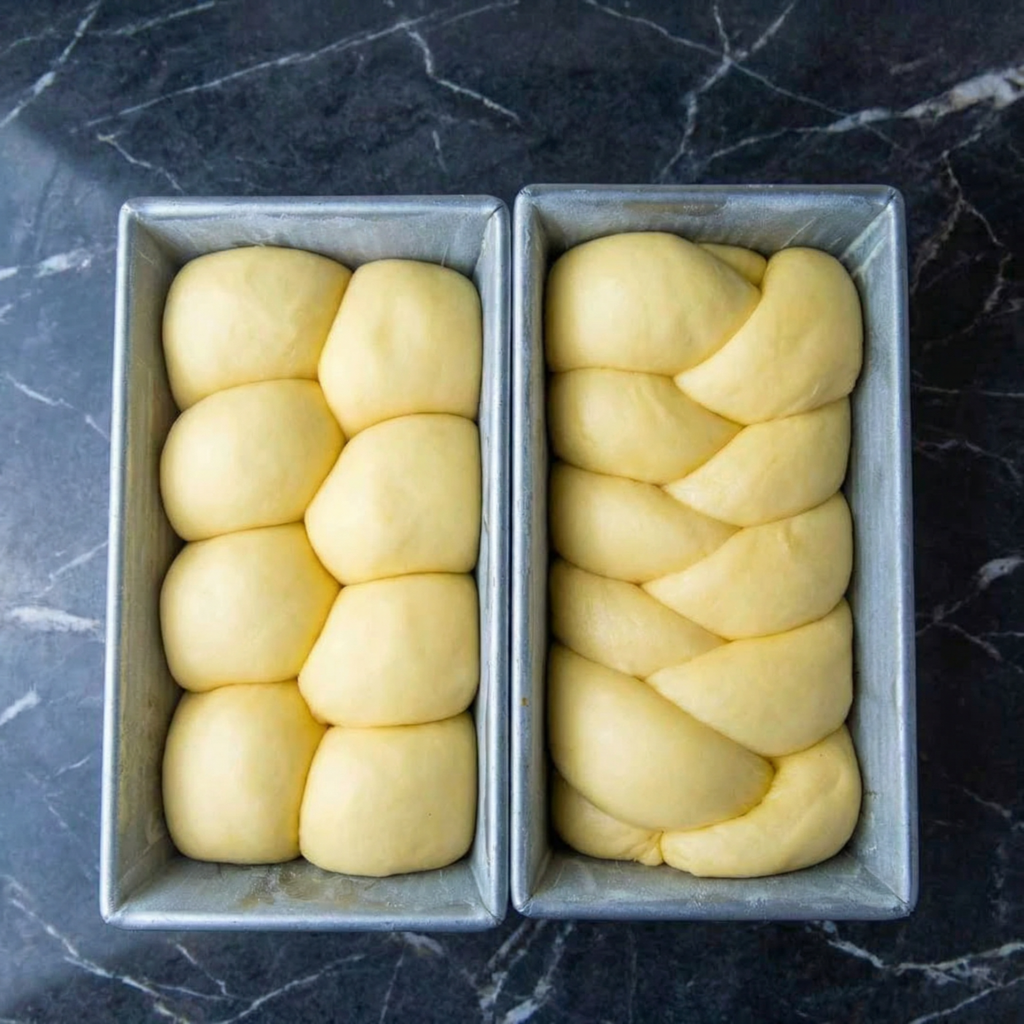
    8. Second Rise: Cover loosely and let rise at room temperature for 1-2 hours until puffy and almost doubled.

    9. Preheat and Egg Wash: Preheat your oven to 375°F (190°C). Brush the top of the brioche gently with egg wash.

    10. Bake: Bake for 25-35 minutes (depending on shape) until deep golden brown and the internal temperature reaches 190°F (88°C). If the top browns too quickly, tent with foil.

    11. Cool: Let cool in the pan for 10 minutes, then transfer to a wire rack to cool completely.

    12. Serve and Store: Serve warm or at room temperature. Store in an airtight container at room temperature for up to 3 days, or freeze for up to 3 months.

    Pro-Tips for Brioche Greatness

    • Use Cold Butter: Cold butter cubes incorporate better and prevent the dough from becoming greasy.
    • Be Patient with Butter Addition: Adding the butter gradually is crucial. Don’t rush this step.
    • Chill the Dough: The overnight rest in the fridge develops flavor and makes shaping much easier.
    • Don’t Rush the Rises: Brioche needs time to develop its signature texture. Let it rise fully.
    • Egg Wash Gently: A gentle hand with the egg wash prevents deflating the dough.
  • Artisan Bread (The Crusty, Golden Loaf of Your Dreams)

    Artisan Bread (The Crusty, Golden Loaf of Your Dreams)

    There’s something magical about pulling a gorgeous, golden, crusty loaf of bread out of your own oven. The crackle of the crust as it cools, the aroma filling your kitchen, the way it makes you feel like you’ve just done something extraordinary—because you have.

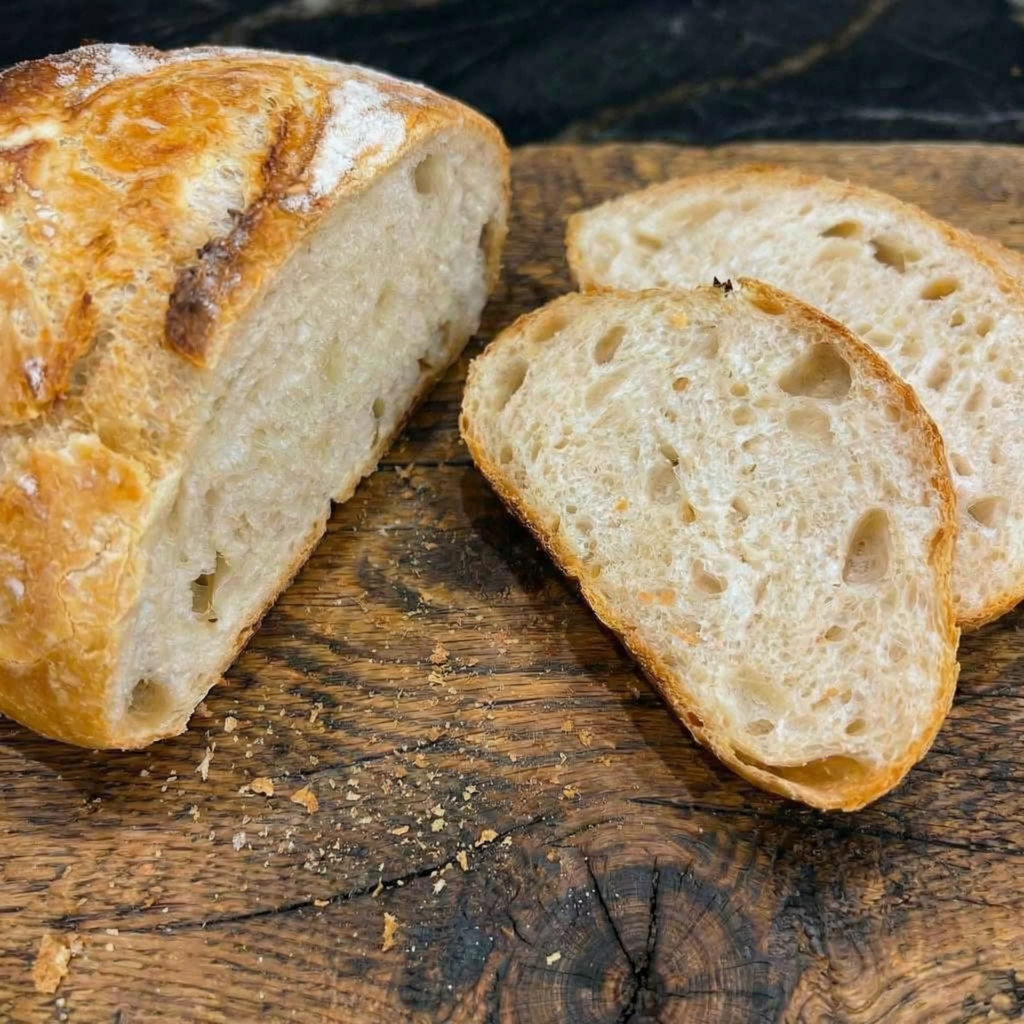
    This artisan bread is everything you want: a shatteringly crisp crust, a chewy, hole-filled interior, and that deep, complex, bakery-style flavor that seems impossible to achieve at home.

    But here’s the secret: it’s not impossible. It’s actually incredibly simple. With just four ingredients, a little patience, and a Dutch oven, you can create bread that rivals any bakery. Let’s bake something beautiful.

    The Secret to Bakery-Style Crust and Crumb

    The magic of artisan bread lies in three things: high hydration, long fermentation, and steam. A wetter dough (about 75-80% hydration) creates those iconic holes and a chewy, open crumb. A long, slow rise develops deep, complex flavor that you just can’t rush.

    And steam is the secret to that crackly, golden crust—it keeps the exterior soft long enough for the bread to expand fully, then evaporates to leave behind that shatteringly crisp shell. A Dutch oven is your secret weapon here: it traps steam perfectly, creating a mini bread oven right in your kitchen. The result? Bread that looks and tastes like it came from a fancy bakery. Spoiler: you made it.

    Ingredients

    For the Artisan Bread (Makes 1 large loaf):

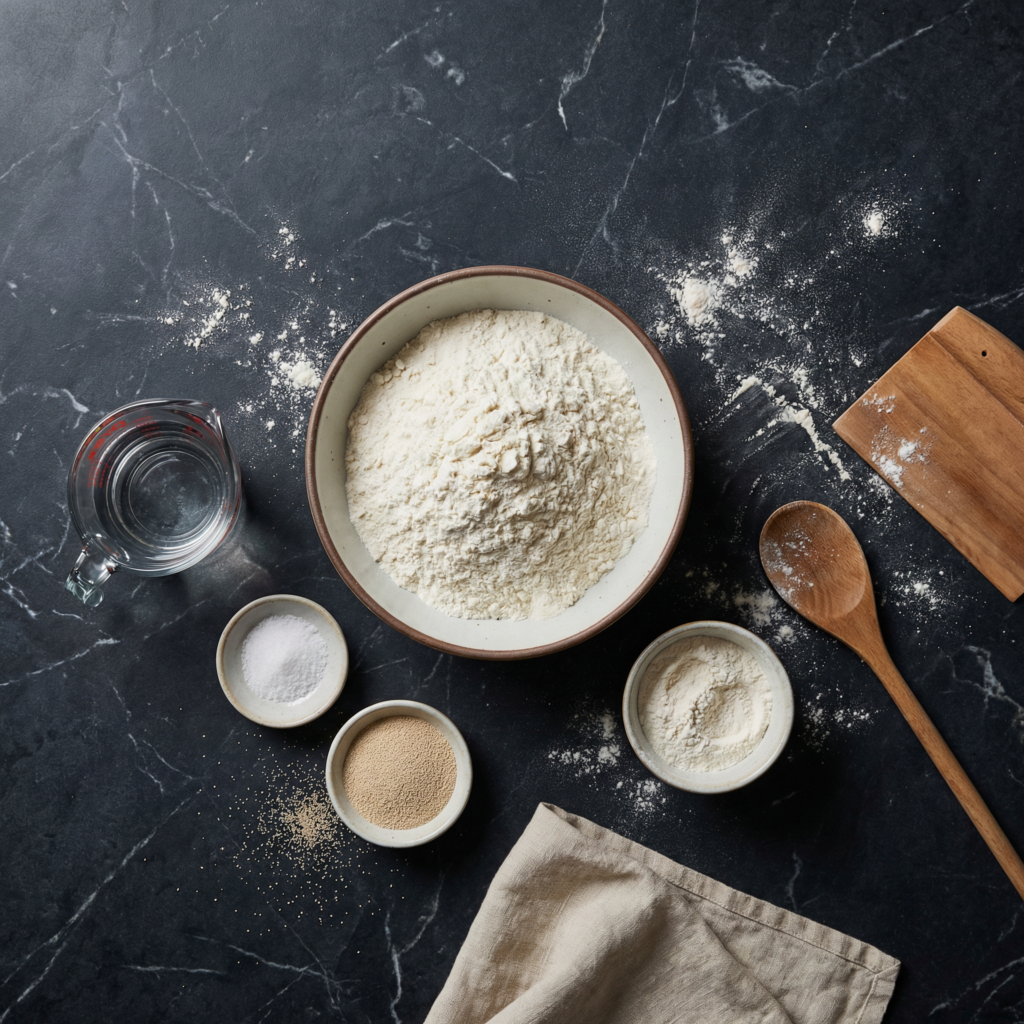
    • 3 ¼ cups (about 430g) bread flour (or all-purpose flour, but bread flour gives better structure)
    • 1 ½ teaspoons (about 9g) salt
    • ½ teaspoon (about 3g) instant yeast (or active dry yeast)
    • 1 ½ cups (about 360g) warm water (about 90-95°F)
    • Extra flour for dusting

    Instructions

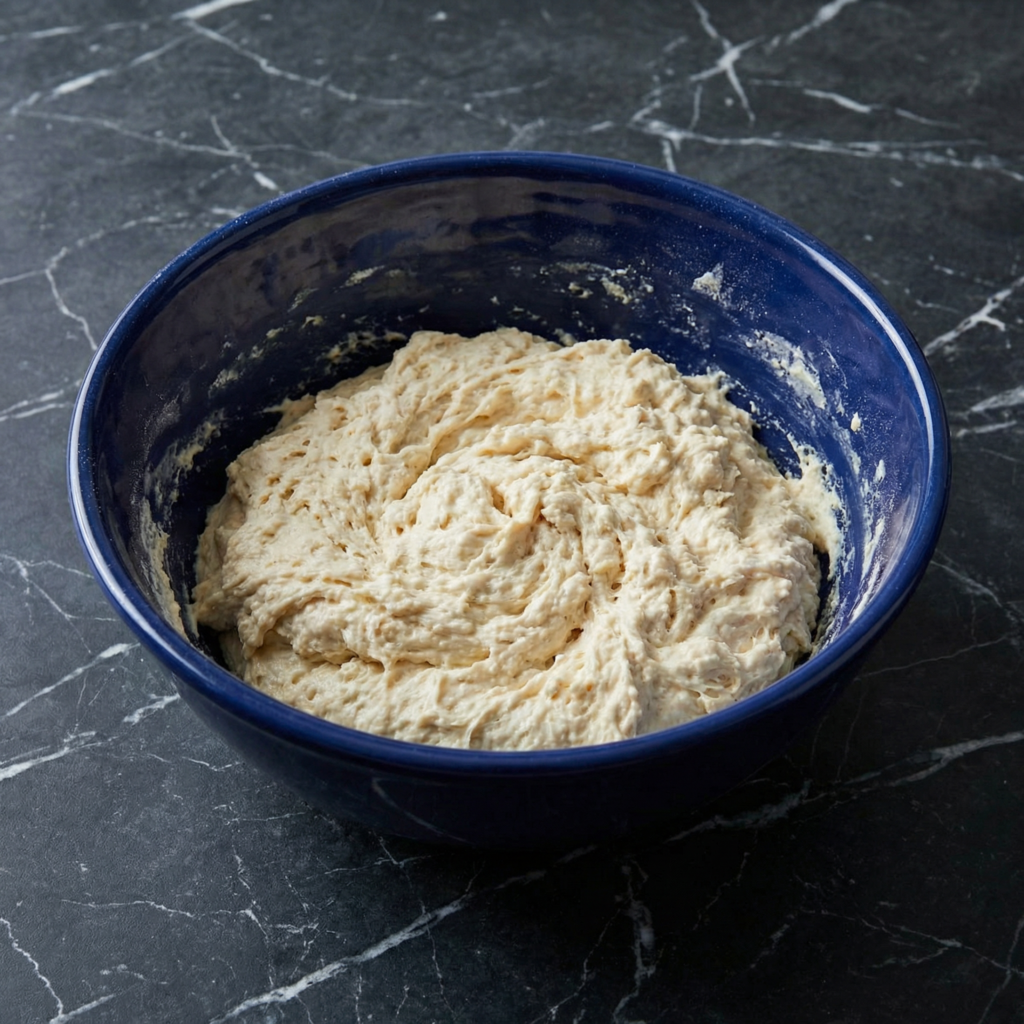
    1. Mix the Dough: In a large bowl, combine the flour, salt, and instant yeast. Whisk to combine. Add the warm water and stir with a wooden spoon or your hand until a shaggy, sticky dough forms and no dry flour remains. The dough will be very wet and sticky—that’s exactly right .

    2. Cover and Rest: Cover the bowl with plastic wrap or a damp kitchen towel. Let it rest at room temperature for 12-18 hours (overnight is perfect). The dough should double in size, be bubbly on top, and smell slightly yeasty .

    3. Turn Out and Fold: Lightly flour a work surface. Turn the dough out onto the floured surface. It will be very wet and sticky. Using floured hands, gently stretch and fold the dough over itself a few times—like folding a letter. This adds structure without kneading .

    4. Shape the Dough: Gently shape the dough into a round by tucking the edges underneath, creating surface tension. Don’t overwork it—a few gentle movements are enough .

    5. Second Rise: Place the shaped dough seam-side down on a piece of parchment paper. Dust the top with flour and cover loosely with plastic wrap or a towel. Let it rise for 1-2 hours until puffy and nearly doubled. It should hold an indent when gently poked .

    6. Preheat Dutch Oven: About 30 minutes before the second rise is complete, place a Dutch oven with its lid in the oven and preheat to 450°F (230°C). Getting the pot screaming hot is essential .

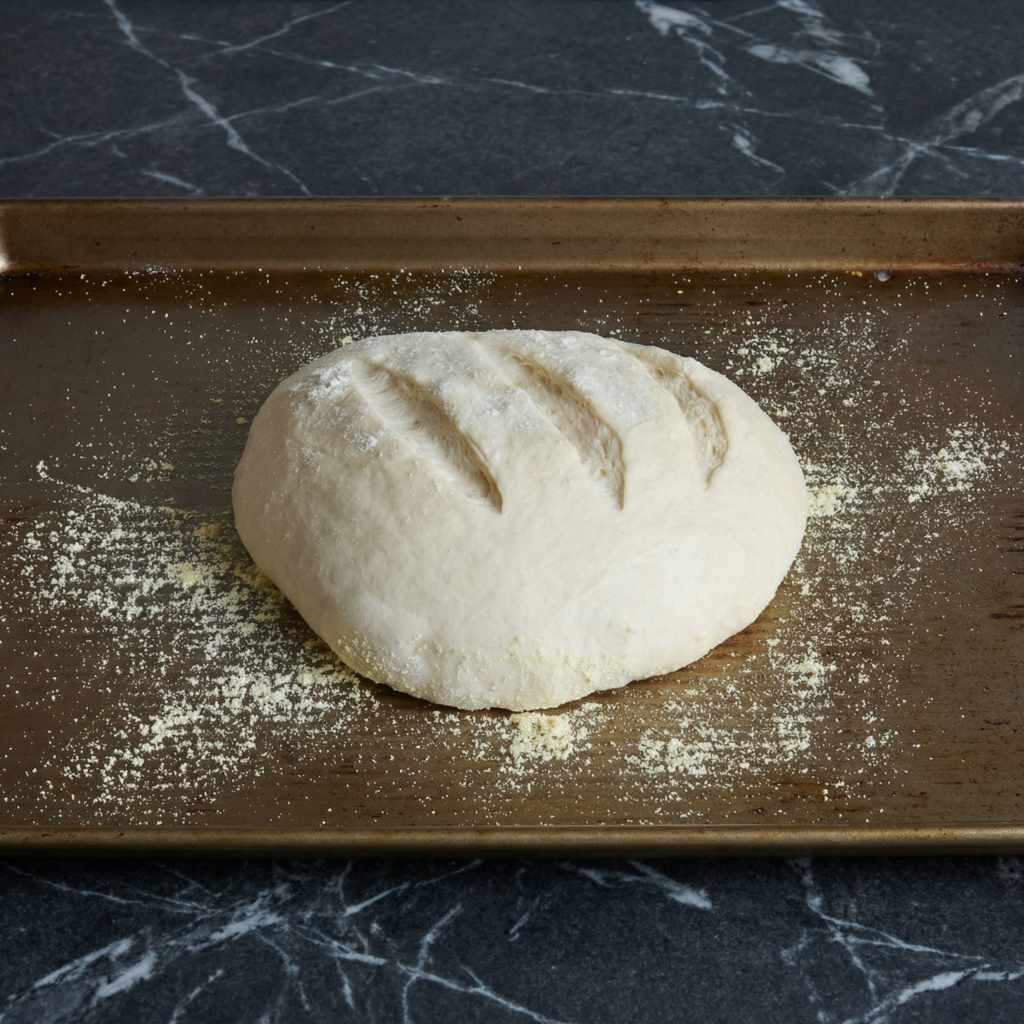
    7. Score the Dough: Carefully remove the hot Dutch oven from the oven. Using the parchment paper as a sling, lift the dough and lower it into the pot. Using a lame or sharp knife, score the top with a quick, confident slash about ¼-inch deep. This allows the bread to expand .

    8. Bake Covered: Put the lid on and bake for 30 minutes. The lid traps steam, creating that perfect crust .

    9. Bake Uncovered: Remove the lid and bake for another 10-15 minutes until the crust is deeply golden brown and beautiful. The bread should sound hollow when tapped on the bottom .

    10. Cool Completely: Transfer the bread to a wire rack and let it cool completely—at least 1-2 hours. This is the hardest part, but essential for the perfect texture .

    11. Slice and Enjoy: Slice into that gorgeous loaf, slather with butter, and marvel at what you’ve created .

    12. Store: Store leftover bread in a paper bag at room temperature for 2-3 days, or freeze for up to 3 months .

    Pro-Tips for Artisan Bread Greatness

    • Use a Kitchen Scale: Baking by weight is far more accurate than cups. A scale is your best friend for consistent results .
    • Don’t Rush the First Rise: A full 12-18 hours develops deep flavor and that beautiful open crumb. Overnight is perfect .
    • Hot Dutch Oven is Essential: A screaming-hot pot creates steam and gives you that gorgeous, crackly crust. Don’t skip preheating it .
    • Be Gentle When Shaping: Wet dough is delicate. Overworking it will deflate all those lovely air bubbles you worked so hard to create .
    • Cool Completely: Slicing warm bread is tempting, but it will be gummy inside. Patience is rewarded with the perfect crumb .
  • Egg Bread: A Beautiful, Braided Loaf for Any Table

    Egg Bread: A Beautiful, Braided Loaf for Any Table

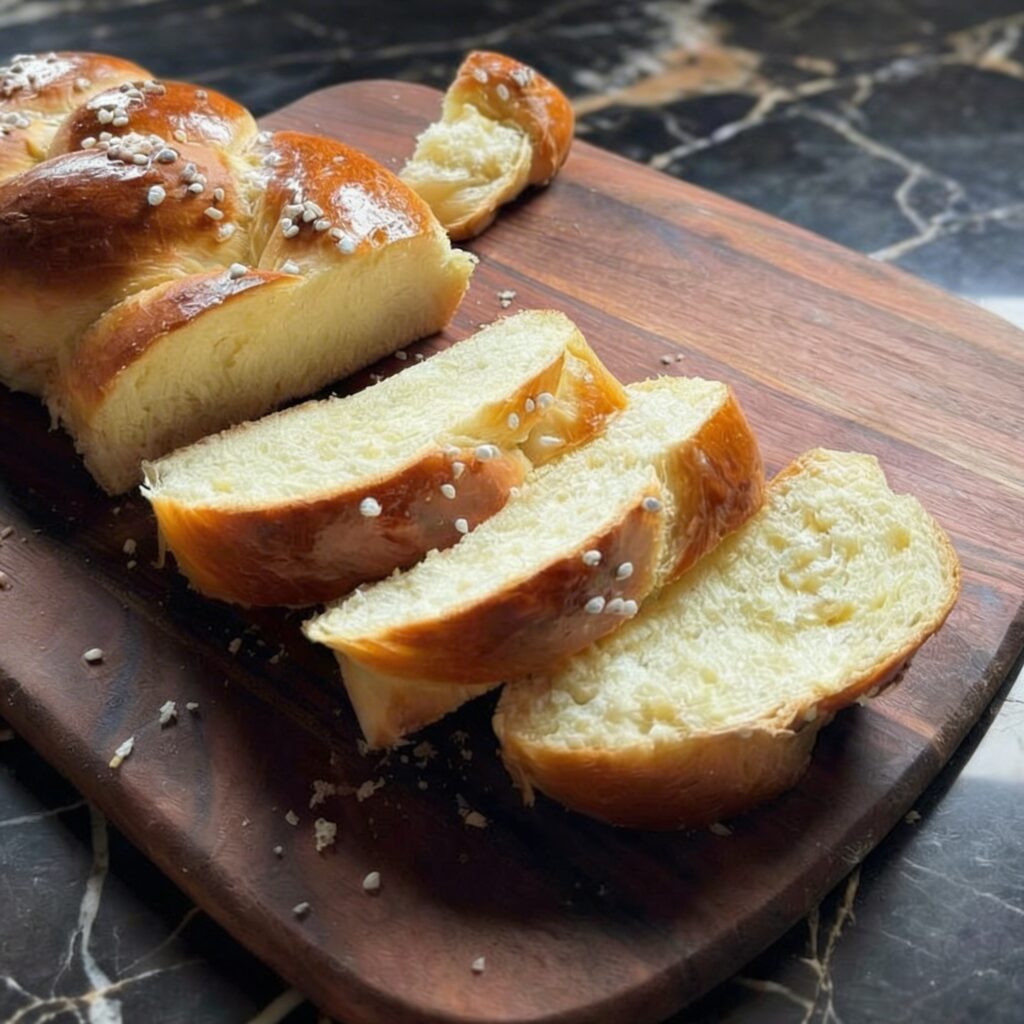
    Challah is more than just bread—it’s a centerpiece. This enriched Jewish egg bread is known for its soft, slightly sweet, and tender interior, its beautiful braided shape, and its deeply golden, glossy crust. Baking challah is a deeply satisfying ritual.

    The process of kneading the supple dough, mastering the braid, and watching it transform in the oven yields a loaf that’s as impressive to look at as it is delicious to eat. Whether for a Friday night Shabbat dinner, French toast on Sunday morning, or simply to elevate any meal, homemade challah is a gift from the oven.

    The Science of the Rich, Tender Crumb & Shiny Crust

    Challah’s distinct texture and appearance come from its enriched dough. The high proportion of eggs and oil (or sometimes butter) adds fat, which coats the flour proteins, tenderizing the gluten and creating a soft, rich crumb with a slight yellow hue.

    The sugar feeds the yeast for a robust rise and contributes to browning. The key to challah’s signature shine is the egg wash applied before baking. The proteins in the egg coagulate quickly in the oven’s heat, creating a thin, sealed layer that traps steam, allowing the loaf to expand fully before setting. Meanwhile, the sugars in the egg caramelize, producing that deep, mahogany brown, glossy crust.

    The braiding isn’t just for beauty; it creates a structured loaf that bakes evenly and offers a delightful pull-apart texture.

    Ingredients

    For One Large Loaf:

    • 4 ½ cups (563g) bread flour or all-purpose flour, plus more as needed
    • ¼ cup (50g) granulated sugar
    • 2 ¼ teaspoons instant yeast (1 packet)
    • 2 teaspoons salt
    • 2 large eggs, room temperature
    • 1 large egg yolk (save the white for the wash)
    • ¾ cup (180ml) warm water (110°F/43°C)
    • ¼ cup (60ml) vegetable or neutral oil
    • Optional: ¼ cup (85g) honey (replace the sugar for a deeper flavor)

    For the Egg Wash & Topping:

    • 1 egg white + 1 tablespoon water, beaten
    • Sesame seeds or poppy seeds for sprinkling

    Instructions

    1. Make the Dough: In the bowl of a stand mixer fitted with the dough hook, combine flour, sugar, yeast, and salt. In a separate bowl or measuring cup, whisk together the 2 whole eggs, 1 egg yolk, warm water, and oil (and honey, if using).

    2. Knead: With the mixer on low, gradually pour the wet ingredients into the dry. Once combined, increase speed to medium and knead for 6-8 minutes until the dough is smooth, elastic, and slightly tacky but not sticky. Add a tablespoon of flour if needed, but avoid a dry dough.

    3. First Rise: Place dough in a lightly oiled bowl, turn to coat, and cover with a damp towel or plastic wrap. Let rise in a warm place until doubled in size, about 1.5 to 2 hours.

    4. Divide & Braid: Punch down the dough. Turn it out onto a lightly floured surface. For a classic 3-strand braid, divide the dough into 3 equal pieces. Roll each piece into a long rope, about 18 inches long, thicker in the middle and tapered at the ends.

    5. Braid the Loaf: Pinch the tops of the three ropes together. Braid them tightly, then pinch the ends together and tuck both pinched ends under the loaf. Transfer the braid to a parchment-lined baking sheet.

    6. Second Rise: Cover the braided loaf loosely and let rise until puffy and nearly doubled, about 45 minutes to 1 hour. Preheat oven to 375°F (190°C).

    7. Bake: Gently brush the loaf all over with the egg wash. Sprinkle with seeds if desired. Bake for 25-35 minutes, until the crust is a deep, glossy golden brown and the loaf sounds hollow when tapped on the bottom.

    8. Cool: Transfer the challah to a wire rack and let it cool completely before slicing.

    Pro-Tips for Challah Mastery

    • Flour Choice: Bread flour gives a chewier, more structured loaf; all-purpose yields a more tender crumb. Both work.
    • Proper Hydration: The dough should be soft and slightly tacky. Resist the urge to add too much flour during kneading, as this will make the bread dry.
    • Even Rolling: When forming the ropes, roll them evenly so your braid is uniform. Let the ropes rest for 5 minutes if they keep snapping back.
    • Tight Braid, Loose Proof: Braid tightly so it holds its shape, but don’t pull too hard. The final proof will relax and expand the braid.
    • The Egg Wash Secret: For maximum shine, do a double wash: apply a thin coat 10 minutes into the final proof, then a second coat right before baking.
    • Testing for Doneness: The hollow sound is the best test. An internal temperature of 190°F (88°C) is perfect.
    • Braid Variations: Challenge yourself with a 4 or 6-strand braid for an even more impressive look.
    • Storage: Keep challah in a bread bag or wrapped in foil at room temp for 2-3 days. It makes phenomenal French toast or bread pudding.

    Baking Challah is a rewarding craft that fills your home with warmth and your table with beauty.