Tag: graham cracker crust

  • Classic New York Cheesecake (Creamy, Dense, Perfect)

    Classic New York Cheesecake (Creamy, Dense, Perfect)

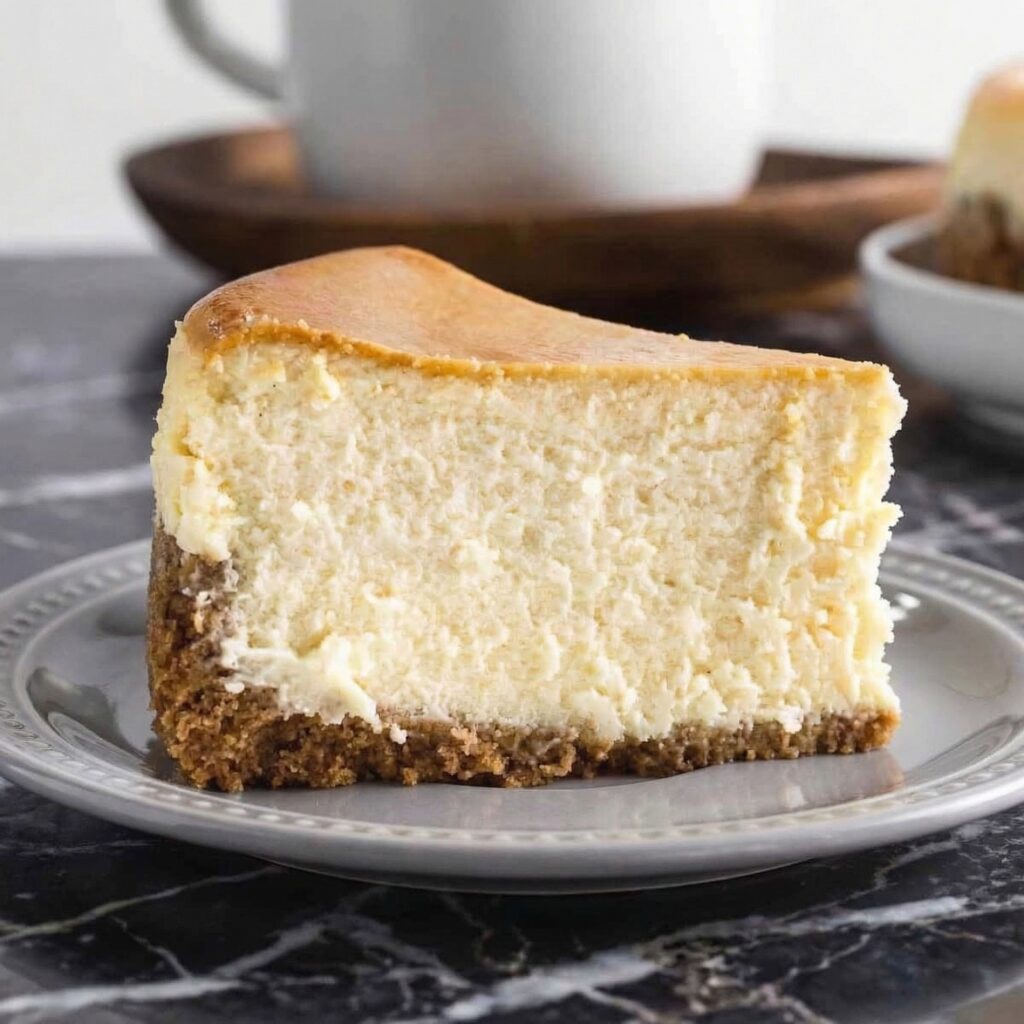
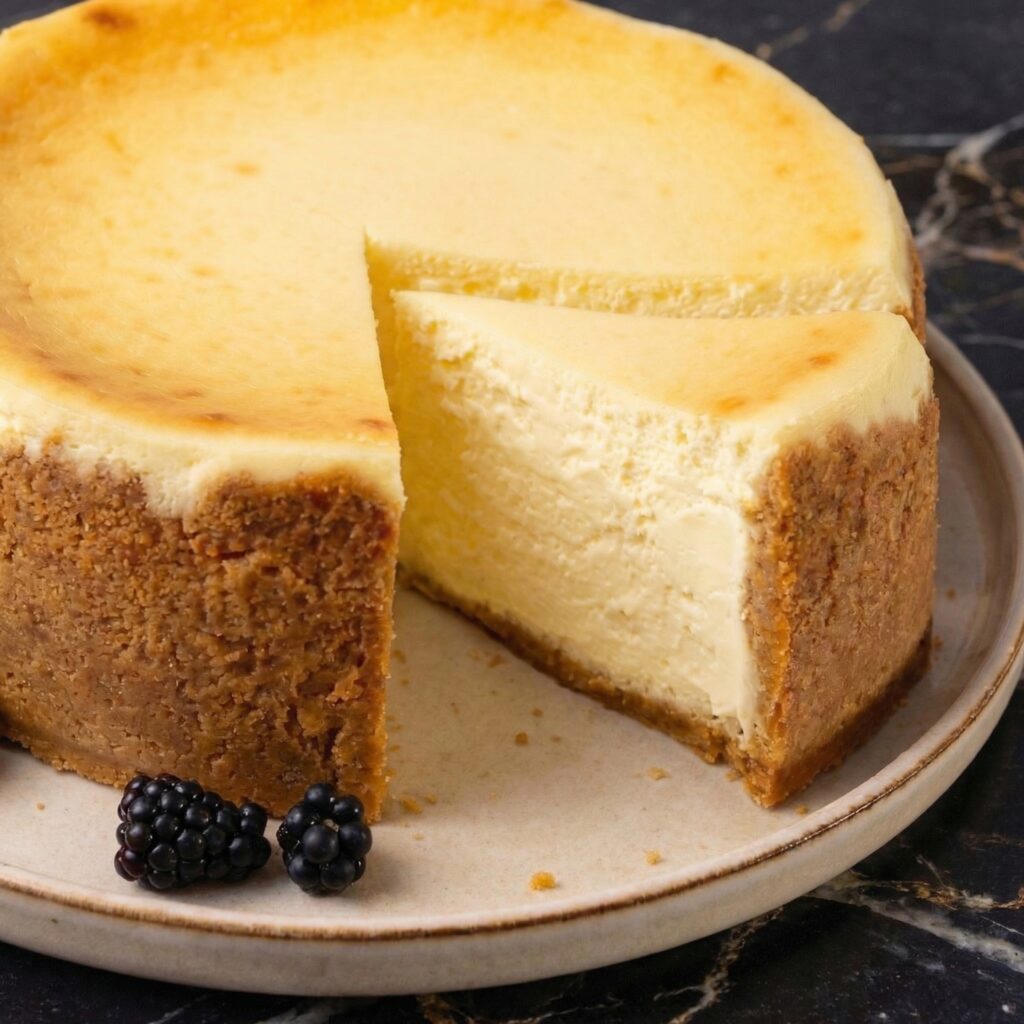
    New York cheesecake is the king of cheesecakes—dense, rich, and impossibly creamy, with a tangy cream cheese flavor that’s perfectly balanced by a buttery graham cracker crust. It’s the kind of dessert that makes an impression: tall, proud, and absolutely luxurious. This authentic recipe delivers that iconic texture—no cracks, no sinking, just pure silky perfection.

    The secret is in the technique: room temperature ingredients, a water bath, and gentle mixing to avoid incorporating too much air. The result is a cheesecake that slices like a dream and tastes like heaven. Serve it plain, with fresh berries, or a drizzle of raspberry sauce. Either way, it’s unforgettable.

    Ingredients
    For the Graham Cracker Crust:

    • 1 ½ cups (150g) graham cracker crumbs (about 12 full sheets)
    • 2 tablespoons granulated sugar
    • ¼ teaspoon salt
    • 5 tablespoons (70g) unsalted butter, melted

    For the Cheesecake Filling:

    • 4 packages (32 oz / 900g total) full-fat cream cheese, softened to room temperature
    • 1 ¼ cups (250g) granulated sugar
    • ½ cup (120g) sour cream, room temperature
    • 2 teaspoons vanilla extract
    • 4 large eggs, room temperature

    For Serving (Optional):

    • Raspberry sauce, strawberry sauce, or caramel
    • Fresh berries
    • Whipped cream

    Instructions

    1. Prep and Preheat: Preheat your oven to 325°F (165°C). Wrap the outside of a 9-inch springform pan with a double layer of heavy-duty aluminum foil, covering the bottom and up the sides. This will prevent water from seeping in during the water bath.

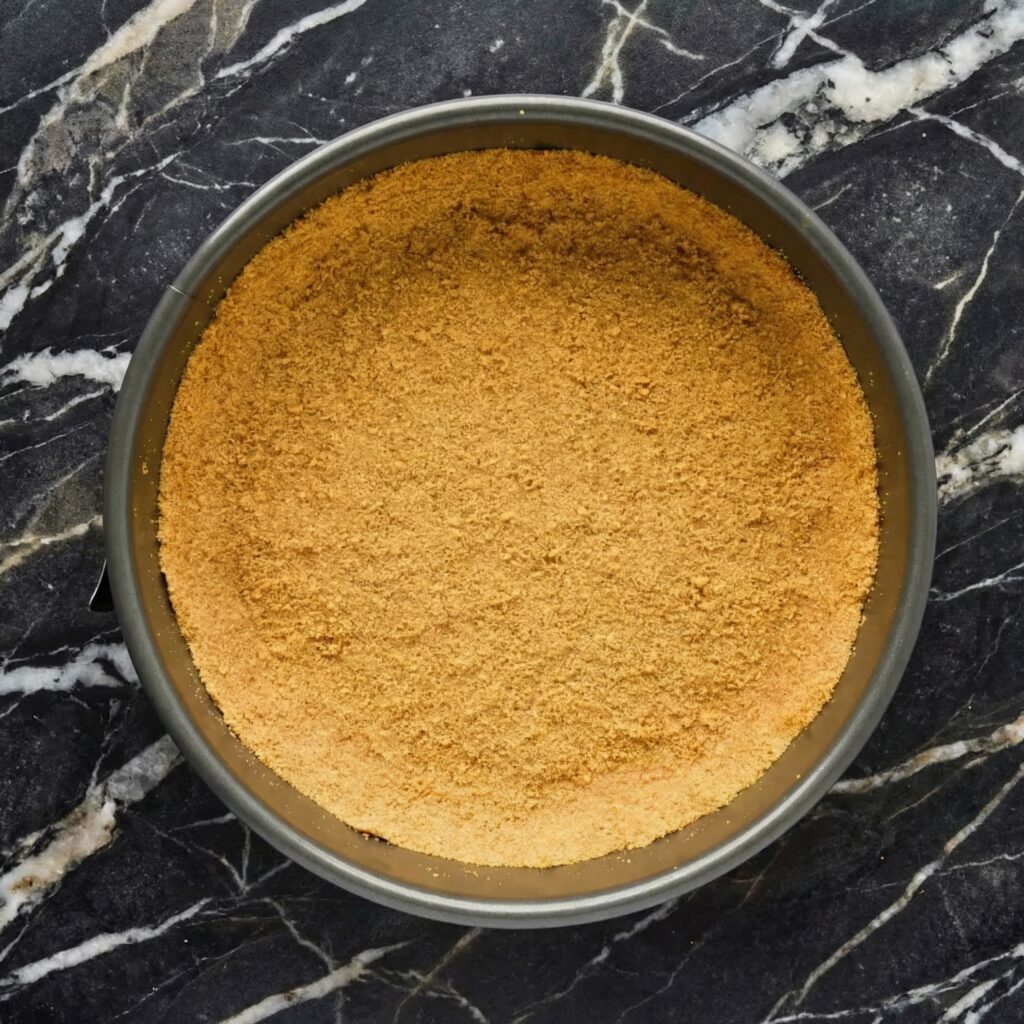
    2. Make the Crust: In a medium bowl, combine the graham cracker crumbs, sugar, and salt. Pour in the melted butter and stir with a fork until all crumbs are moistened.

    Press the mixture firmly into the bottom of the prepared springform pan, using the bottom of a measuring cup to create an even layer. Bake for 10 minutes. Remove from oven and set aside to cool. Reduce oven temperature to 300°F (150°C).
    3. Prepare the Water Bath: Bring a large kettle or pot of water to a boil. Place a large roasting pan or baking dish in the oven on the lower rack to preheat with the oven.

    4. Make the Filling: In a large bowl or stand mixer fitted with the paddle attachment, beat the softened cream cheese on medium speed until completely smooth and creamy, about 2-3 minutes, scraping down the sides and bottom well.

    5. Add Sugar: Gradually add the sugar and beat until smooth and well combined, scraping down the sides as needed.

    6. Add Sour Cream and Vanilla: Add the sour cream and vanilla, and beat on low speed until just combined.

    7. Add Eggs One at a Time: Add the eggs one at a time, beating on low speed just until each egg is incorporated before adding the next. Scrape down the bowl between additions. Do not overmix—you want a smooth, silky batter without excess air.

    8. Pour the Filling: Pour the filling over the cooled crust. Gently tap the pan on the counter a few times to release any air bubbles.
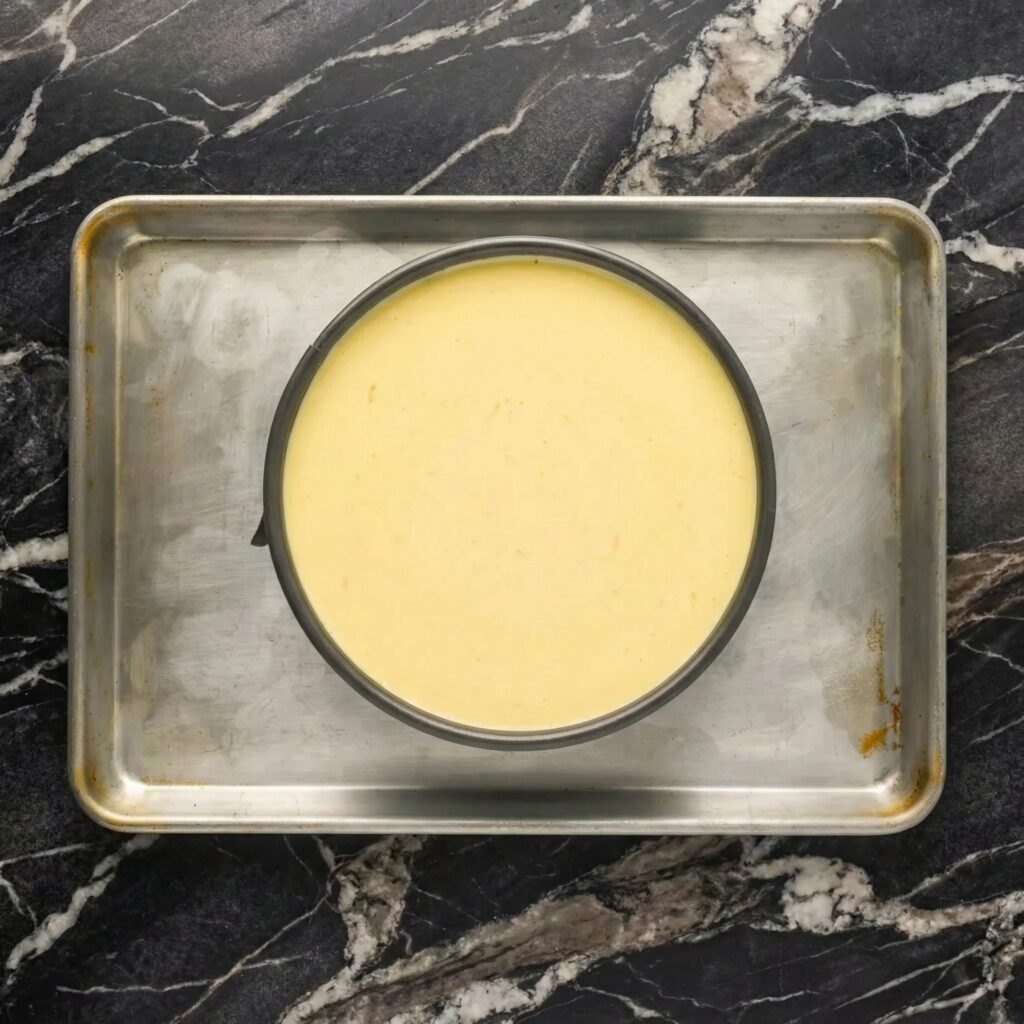
    9. Water Bath: Place the springform pan into the preheated roasting pan. Carefully pour the boiling water into the roasting pan until it reaches about halfway up the sides of the springform pan.

    10. Bake: Bake at 300°F (150°C) for 60-75 minutes, until the edges are set but the center still jiggles slightly when gently shaken. It should look firm around the edges and slightly wobbly in the very center.

    11. Cool Gradually: Turn off the oven, prop the door open slightly with a wooden spoon, and let the cheesecake cool in the oven for 1 hour. This gradual cooling helps prevent cracks.

    12. Cool to Room Temperature: Remove the cheesecake from the water bath and carefully remove the foil. Place on a wire rack and let cool completely to room temperature.

    13. Chill: Refrigerate the cheesecake for at least 4 hours, preferably overnight, until fully chilled and set.

    14. Serve: Run a thin knife around the edge of the pan before releasing the springform latch. Slice with a sharp, thin-bladed knife, wiping clean between cuts. Serve plain or with desired toppings.

    Pro-Tips for Cheesecake Perfection

    • Room Temperature Everything: Cold cream cheese creates lumps. Set all ingredients out 1-2 hours before starting.
    • Don’t Overmix: Overmixing incorporates too much air, which can cause cracks and a cakey texture. Mix just until smooth.
    • Wrap the Pan Well: Double-layer heavy-duty foil prevents water from seeping into the cheesecake during the water bath.
    • Water Bath Is Essential: The gentle, moist heat prevents cracking and ensures even baking.
    • Don’t Overbake: The center should still jiggle slightly when done. It will continue to set as it cools.
    • Cool Gradually: Sudden temperature changes cause cracks. The slow cool in the oven, then at room temperature, then in the fridge is key.
    • Chill Thoroughly: Cheesecake needs at least 4 hours, preferably overnight, to set properly.
    • Clean Slices: Use a thin, sharp knife dipped in hot water and wiped clean between cuts for picture-perfect slices.

    This Classic New York Cheesecake is creamy, dense, and absolutely perfect.
  • Creamy, Dreamy & No-Oven Needed: The Ultimate No-Bake Mango Float

    Creamy, Dreamy & No-Oven Needed: The Ultimate No-Bake Mango Float

    If there’s one dessert that perfectly captures tropical comfort in every bite, it’s the beloved no-bake mango float. With layers of sweet ripe mangoes, lightly sweetened cream, and soft graham crackers that melt into cake-like perfection, this chilled dessert is simple, nostalgic, and absolutely irresistible.

    Often served at celebrations and family gatherings, mango float is especially popular in the Philippines—and for good reason. It’s easy to prepare, requires no oven, and tastes even better after chilling overnight. Whether you’re making it for a party or just craving something refreshing and sweet, this step-by-step guide will walk you through creating the perfect no-bake mango float.


    Why You’ll Love This Recipe

    • No baking required
    • Minimal ingredients
    • Beginner-friendly
    • Make-ahead dessert
    • Perfect for warm weather

    The magic happens in the fridge, where the layers soften and meld together into a creamy, sliceable treat.


    Ingredients You’ll Need

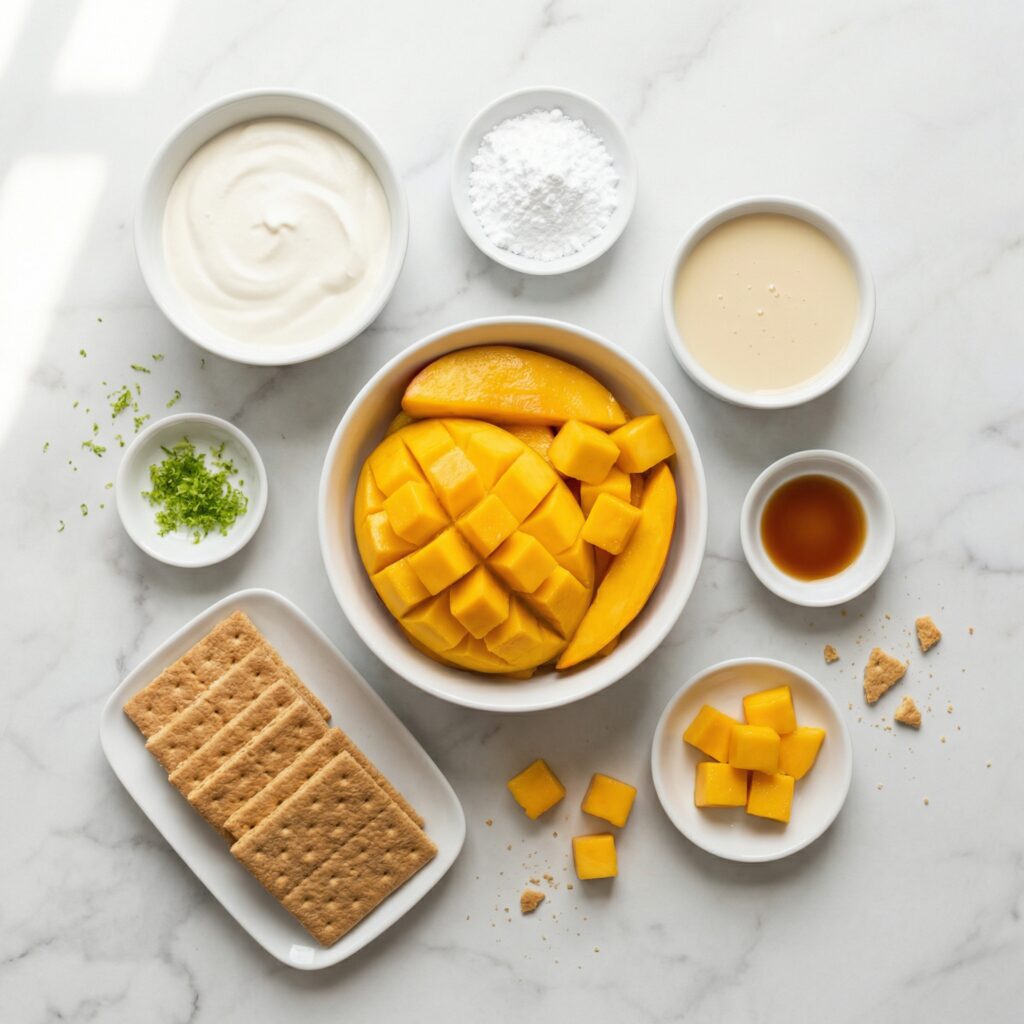
    • 4–5 ripe mangoes (preferably sweet, golden varieties)
    • 2 cups heavy whipping cream (cold)
    • 1 can (14 oz) sweetened condensed milk
    • 2 packs graham crackers

    That’s it—just four simple ingredients for a dessert that tastes like sunshine.


    Step 1: Prepare the Mangoes

    Start by peeling the mangoes and slicing the flesh away from the pit. Cut the mangoes into thin, even slices.

    Try to choose mangoes that are ripe but firm. Overripe mangoes can become mushy and release too much juice, while underripe mangoes may taste tart.

    Set aside a handful of the prettiest slices for the top layer decoration.


    Step 2: Make the Cream Mixture

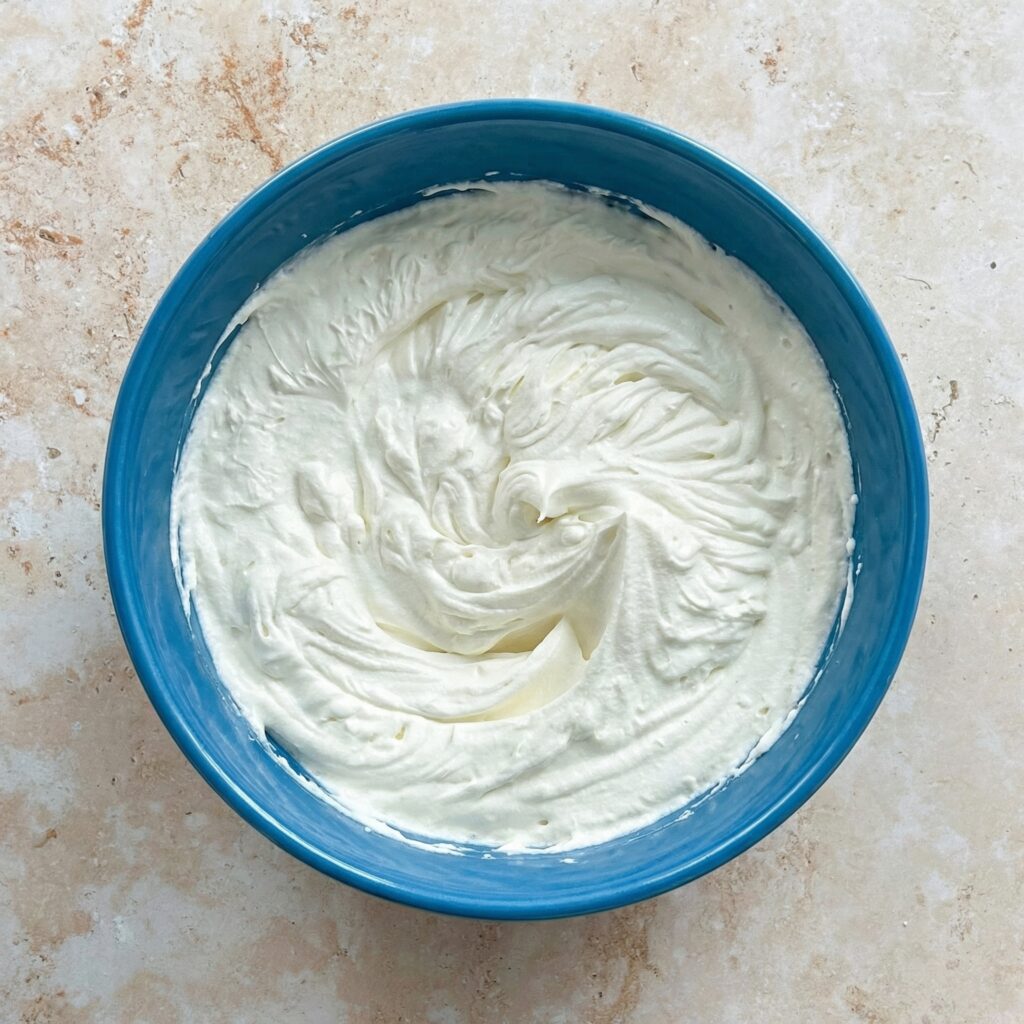
    In a large chilled mixing bowl, pour in the cold heavy whipping cream. Using a hand mixer or stand mixer, whip on medium speed until soft peaks begin to form.

    Gradually add the sweetened condensed milk while continuing to whip. Beat until the mixture thickens to stiff peaks. The cream should hold its shape but still look smooth and fluffy.

    Be careful not to overwhip, as this can cause the cream to become grainy.

    This cream layer is what gives mango float its rich, melt-in-your-mouth texture.


    Step 3: Prepare Your Dish

    Choose a rectangular glass or ceramic dish (8×8 or 9×13 inches works well depending on how thick you want the layers).

    There’s no need to grease the dish since this is a chilled dessert.


    Step 4: Create the First Layer

    Start by arranging a single layer of graham crackers on the bottom of the dish. Break crackers as needed to fully cover the base.

    Spread a generous layer of the whipped cream mixture evenly over the graham crackers.

    Use a spatula to smooth it out into an even layer.


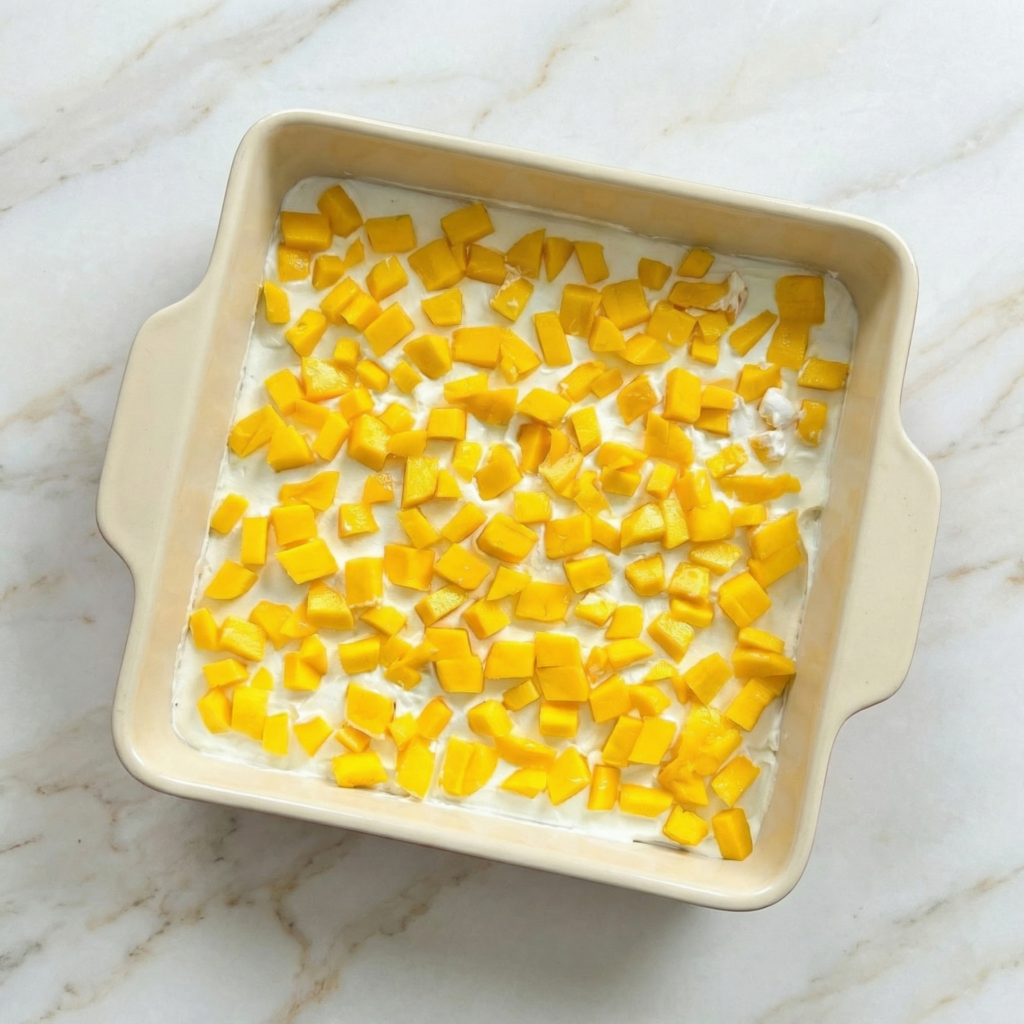
    Step 5: Add the Mango Layer

    Arrange a layer of sliced mangoes over the cream. Try to cover the entire surface so each bite has fruit.

    Don’t overcrowd the mangoes—just enough for a balanced layer.


    Step 6: Repeat the Layers

    Repeat the layering process:

    1. Graham crackers
    2. Cream mixture
    3. Mango slices

    Continue layering until you run out of ingredients, finishing with a layer of cream on top.

    Most dishes will yield 3 to 4 layers depending on thickness.


    Step 7: Decorate the Top

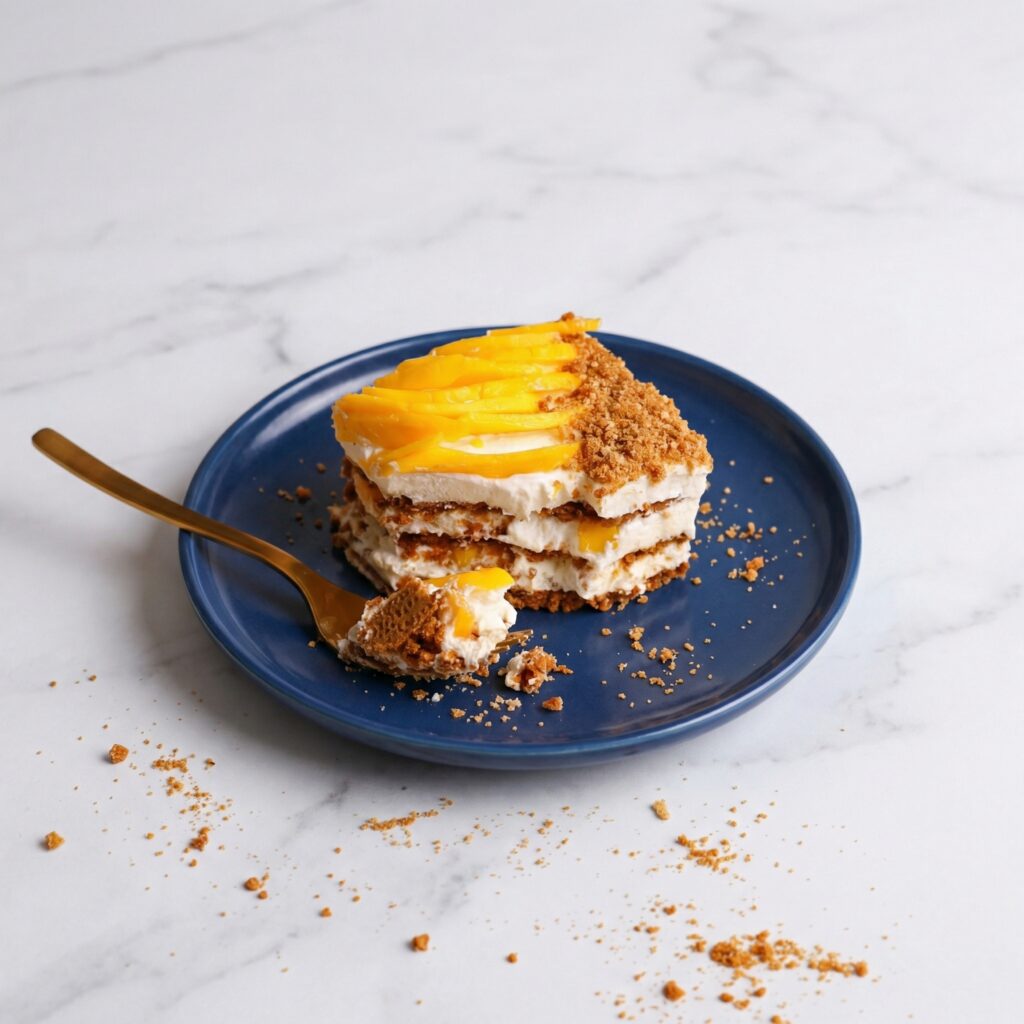
    Use your reserved mango slices to decorate the top layer. You can create neat rows, overlapping slices, or even a simple fan pattern for a more elegant look.

    For extra flair, you can crush a graham cracker and sprinkle crumbs lightly over the top.


    Step 8: Chill to Set

    Cover the dish with plastic wrap and refrigerate for at least 6 hours, though overnight is best.

    During this time, the graham crackers absorb moisture from the cream and soften into a cake-like texture.

    This chilling step is essential—don’t rush it.


    Step 9: Slice and Serve

    Once fully chilled, slice into squares or rectangles using a sharp knife. Wipe the knife clean between cuts for neat slices.

    Serve cold straight from the refrigerator.

    Each bite should be creamy, fruity, and lightly sweet with a soft, layered texture.


    Tips for the Perfect Mango Float

    • Use cold cream for better whipping results.
    • Chill overnight for the best texture.
    • Use ripe, sweet mangoes for natural sweetness.
    • Don’t skip the layering balance—keep cream and fruit evenly distributed.
    • For cleaner slices, briefly chill the dish in the freezer for 20–30 minutes before cutting.

    Storage and Make-Ahead

    Mango float keeps well in the refrigerator for up to 3 days.

    Cover tightly to prevent it from absorbing other refrigerator odors.

    Freezing is optional if you prefer a firmer, ice cream-like texture. Just thaw slightly before serving.


    Optional Variations

    Want to customize your mango float?

    • Add a thin layer of crushed graham crumbs between layers for extra texture.
    • Drizzle a little caramel sauce between layers.
    • Mix small mango cubes into the cream for added fruit distribution.
    • Add a splash of vanilla extract to the whipped cream for deeper flavor.

    Why This Dessert Is So Loved

    No-bake mango float is more than just a dessert—it’s a celebration staple and comfort food classic. It’s simple enough for beginners yet impressive enough for gatherings.

    The contrast between soft graham layers, airy cream, and juicy mango slices makes it refreshing yet indulgent. Every spoonful feels light but satisfying.

    And the best part? You don’t need an oven, complicated techniques, or fancy tools—just layering and patience while it chills.


    If you’re looking for a guaranteed crowd-pleaser that tastes like tropical sunshine, this no-bake mango float delivers every single time. Creamy, fruity, and effortlessly delicious, it’s the kind of dessert that disappears fast—so you might want to make an extra batch.

  • Mini Pumpkin Pie Bites with Graham Cracker Crust

    Mini Pumpkin Pie Bites with Graham Cracker Crust

    Transform the classic Thanksgiving dessert into a charming, shareable treat. These Mini Pumpkin Pie Bites deliver all the beloved flavors of the season—spiced pumpkin, creamy filling, and a buttery graham cracker crust—in a perfectly portable, two-bite package.

    They’re surprisingly easy to make, require no rolling of pastry dough, and are a guaranteed hit on any holiday dessert table or as a festive snack.

    The Science of a Stable Mini Filling & No-Soggy Crust

    Creating the perfect mini pie involves two key challenges: a filling that sets firmly in a small space and a crust that stays crisp. The filling uses a higher ratio of egg to pumpkin than a full-sized pie. The eggs provide the protein structure needed to set the filling firmly without a long bake time, which would overcook the crust.

    Using evaporated milk instead of regular milk or cream adds richness and proteins that also aid in setting. For the crust, a pre-baked (par-baked) graham cracker shell is essential. The butter in the crust solidifies during this initial bake, creating a moisture barrier that prevents the wet pumpkin filling from making the base soggy.

    Ingredients

    For the Graham Cracker Crust:

    • 1 ½ cups (150g) graham cracker crumbs (about 12 full sheets)
    • ¼ cup (50g) granulated sugar
    • 6 tablespoons (85g) unsalted butter, melted
    • Pinch of salt

    For the Pumpkin Filling:

    • 1 cup (245g) canned pure pumpkin puree (not pumpkin pie filling)
    • ⅓ cup (67g) packed light brown sugar
    • 1 large egg plus 1 egg yolk, room temperature
    • ¼ cup (60ml) evaporated milk or heavy cream
    • 1 teaspoon vanilla extract
    • 1 teaspoon pumpkin pie spice*
    • ¼ teaspoon salt

    For Serving (optional): Whipped cream or whipped topping.

    Note: You can make your own blend: ½ tsp cinnamon + ¼ tsp ginger + ⅛ tsp nutmeg + ⅛ tsp allspice or cloves.

    Instructions

    1. Make & Pre-Bake the Crusts: Preheat oven to 325°F (165°C). In a bowl, mix graham cracker crumbs, sugar, melted butter, and salt until it resembles wet sand. Press about 1 tablespoon of the mixture firmly into the bottom and up the sides of each cup of a 24-cup mini muffin tin.

    Use a small glass or tamper to compact it. Bake for 6-8 minutes until fragrant. Let cool while you make the filling. Leave the oven on.

    2. Prepare the Pumpkin Filling: In a medium bowl, whisk the pumpkin puree and brown sugar until smooth. Add the whole egg, egg yolk, evaporated milk, vanilla, pumpkin pie spice, and salt. Whisk vigorously until the mixture is completely smooth and uniform in color.

    3. Fill the Crusts: Spoon or pipe the pumpkin filling into the cooled crusts, filling each to just below the rim (about 1 heaping teaspoon each). The filling will not rise much.

    4. Bake Until Set: Bake for 15-18 minutes, until the filling is set around the edges and the center only has a slight jiggle when you gently shake the pan. Do not overbake.

    5. Cool Completely: Let the pies cool in the muffin tin on a wire rack for 30 minutes. Then, carefully run a small offset spatula or knife around the edge of each to loosen. Gently lift each pie bite out and transfer to the rack to cool completely, about 1 hour. They will firm up as they cool.

    6. Serve & Store: Once completely cool, top with a small dollop of whipped cream if desired. Store leftovers in an airtight container in the refrigerator for up to 4 days. Serve chilled or at room temperature.

    Pro-Tips for Perfect Mini Pies

    • Press the Crust Firmly: A well-compacted crust is essential for the bites to hold together when removed from the pan. Use a tamper or the bottom of a small shot glass.
    • Use Pure Pumpkin Puree: Ensure you buy 100% pumpkin, not the pre-sweetened “pumpkin pie filling.”
    • Room Temperature Eggs: They incorporate more smoothly into the filling, preventing a lumpy texture.
    • Don’t Overfill: Leave a tiny gap at the top to make removal easier and prevent spillover.
    • The Jiggle Test: The centers should look slightly underdone when you take them out—they will set fully as they cool. Overbaking can cause cracking.
    • Chill for Clean Removal: If any bites are stubborn, place the entire pan in the fridge for 15 minutes; the chilled butter in the crust will firm up and release.

    These Mini Pumpkin Pie Bites are the ultimate festive, fuss-free holiday dessert.

  • Fresh Strawberry Pie: The Ultimate No-Bake Summer Dessert

    Fresh Strawberry Pie: The Ultimate No-Bake Summer Dessert

    When strawberries are at their peak of sweetness, there’s no better way to showcase them than in this glorious Fresh Strawberry Pie. A buttery, press-in graham cracker crust provides the perfect crunchy base for a towering pile of whole, glistening berries.

    A simple cooked glaze, made from a portion of the strawberries, binds the fruit together with a shiny, sweet-tart coating that amplifies their natural flavor. Chilled until set and crowned with billowy whipped cream, this pie is refreshing, vibrant, and requires no oven for the filling—making it the ideal dessert for hot summer days and effortless entertaining.

    The Science of the Glaze & The Stable Crust

    The structural integrity of this pie relies on the pectin in the strawberries and the stabilizing power of cornstarch. To make the glaze, a portion of the berries is cooked down with sugar and mashed.

    The heat breaks down the fruit’s cell walls, releasing natural pectin—a soluble fiber that acts as a gelling agent. Cornstarch is added to further thicken the liquid by forming a gel network as it heats. When this hot glaze is poured over the remaining fresh, uncooked berries, it cools and sets, creating a glossy matrix that holds the berries firmly in place without making them mushy.

    The graham cracker crust is pre-baked to toast the crumbs and melt the butter, which then re-solidifies upon cooling into a sturdy, crisp shell that can support the weight of the juicy filling without getting soggy.

    Ingredients

    For the Graham Cracker Crust:

    • 1 ½ cups (150g) graham cracker crumbs (about 12 full sheets)
    • ⅓ cup (66g) granulated sugar
    • 6 tablespoons (85g) unsalted butter, melted
    • Pinch of salt

    For the Strawberry Filling:

    • 2 quarts (about 2 lbs / 900g) fresh strawberries, hulled
    • ¾ cup (150g) granulated sugar
    • 3 tablespoons cornstarch
    • ⅓ cup (80ml) water
    • 1 tablespoon lemon juice
    • 1-2 drops red food coloring (optional, for vibrancy)

    For the Topping:

    • 1 cup (240ml) heavy whipping cream, cold
    • 2 tablespoons powdered sugar
    • ½ teaspoon vanilla extract

    Instructions

    1. The Pressed Graham Cracker Crust: In a medium bowl, mix graham cracker crumbs, sugar, and salt. Stir in melted butter until the mixture resembles wet sand. Press firmly and evenly into the bottom and up the sides of a 9-inch pie plate. Bake at 375°F (190°C) for 8 minutes, then cool completely.

    2. The Prepared Fresh Strawberries: Hull all strawberries. Set aside the most beautiful, similar-sized berries (about 1 quart) for arranging. Halve or quarter any larger ones so they are all roughly bite-sized.

    3. The Cooking Berries for Glaze: Take the remaining 1 quart of strawberries and slice or mash them. In a medium saucepan, combine these mashed berries, sugar, cornstarch, water, and lemon juice. Cook over medium heat, stirring constantly, until thickened, clear, and bubbly.

    4. The Strawberry Glaze with Food Coloring (Optional): If a deeper red color is desired, stir in 1-2 drops of red food coloring into the hot glaze until uniform. Let the glaze cool for 10-15 minutes, stirring occasionally.

    5. The Combined Berries & Glaze: In a large bowl, gently fold the prepared fresh strawberries (the ones set aside for arranging) into the slightly cooled glaze until every berry is evenly coated.

    6. The Filled Pie Shell: Pour the glazed strawberry mixture into the cooled graham cracker crust. Spread into an even layer, mounding the berries slightly higher in the center. Arrange a few perfect berries on top if desired.

    7. The Chilled & Set Pie: Refrigerate the pie for at least 4 hours, or until the filling is completely set and no longer jiggles when the pan is nudged.

    8. The Whipped Cream Topping: Just before serving, in a chilled bowl, whip the heavy cream, powdered sugar, and vanilla to stiff peaks.

    9. The Finished & Served Pie: Spread or pipe the whipped cream over the chilled pie. Garnish with a few fresh strawberry halves or mint leaves. Slice with a sharp knife and serve cold.

    Pro-Tips for Pie Perfection

    • Use the Best Strawberries: Flavor is paramount. Seek out ripe, in-season, fragrant berries for the best results.
    • Press the Crust Firmly: A well-compacted crust holds together when sliced. Use the bottom of a measuring cup to press it evenly.
    • Cool the Glaze Slightly: Pouring boiling hot glaze over fresh berries will cook them and make them soft. Let it cool until warm but still fluid.
    • Don’t Skip the Lemon Juice: The acidity brightens the flavor and balances the sweetness.
    • Chill Thoroughly: This step is non-negotiable for clean slices. Overnight chilling is ideal.
    • Whip Cream Just Before Serving: For the best texture and to prevent weeping, top the pie with whipped cream right before you serve it.
    • Make Ahead: The crust can be baked a day ahead. The filled, un-topped pie can be refrigerated for up to 24 hours.
    • Variations: Use a traditional pastry crust if preferred. Add a layer of sweetened cream cheese under the berries for a strawberry cheesecake pie effect.
    • Slicing: Use a sharp, thin-bladed knife dipped in hot water for the cleanest cuts through the glaze and crust.
    • Storage: Store any leftovers covered in the refrigerator for up to 2 days (the crust will soften over time).

    This Fresh Strawberry Pie is a celebration of simplicity and seasonal fruit at its finest.

  • No-Bake Cheesecake: The Easiest, Creamiest Dessert with 6 Ingredients

    No-Bake Cheesecake: The Easiest, Creamiest Dessert with 6 Ingredients

    Craving the rich, tangy delight of cheesecake without turning on the oven? This No-Bake Cheesecake is your ultimate dessert savior. With just six simple ingredients and about 20 minutes of active time, you can create a luxuriously smooth, perfectly set cheesecake that rivals any baked version.

    The secret is in the gentle setting power of whipped cream and the stability of cream cheese, which together create a cloud-like, mousse-like filling that slices beautifully. Resting on a classic, buttery graham cracker crust and topped with your favorite fruit or sauce, this dessert is foolproof, elegant, and guaranteed to impress at any summer gathering, potluck, or weeknight treat.

    The Science of a Firm, No-Bake Set

    Unlike its baked cousin that relies on eggs for structure, this cheesecake gets its firm, sliceable texture from a combination of fat stabilization and chilling. The filling is essentially a stabilized mousse.

    The cream cheese provides a dense, tangy base rich in fat, which helps solidify when cold. The whipped heavy cream is the key: when beaten, its fat molecules trap air, creating a light foam. Folding this foam into the sweetened cream cheese creates millions of tiny air pockets. As the cheesecake chills for several hours, these air pockets set within the firm fat matrix of the cream cheese, creating a structure that’s light yet firm enough to hold its shape when sliced.

    The crust, pre-baked or set with butter, provides a sturdy, crunchy foundation that contrasts perfectly with the creamy filling.

    Ingredients

    For the Graham Cracker Crust:

    • 2 cups (200g) graham cracker crumbs (about 14-16 full sheets)
    • ½ cup (1 stick / 113g) unsalted butter, melted
    • 2 tablespoons granulated sugar

    For the No-Bake Filling:

    • 16 oz (two 8 oz blocks) full-fat cream cheese, softened to room temperature
    • 1 cup (120g) powdered sugar, sifted
    • 1 tablespoon fresh lemon juice
    • 1 teaspoon pure vanilla extract
    • 1 ¼ cups (300ml) cold heavy whipping cream

    For Topping (Optional): Fresh berries, fruit sauce, or lemon curd.

    Instructions

    1. Make the Crust: In a medium bowl, mix graham cracker crumbs, melted butter, and sugar until combined and the texture resembles wet sand. Press the mixture firmly and evenly into the bottom and slightly up the sides of a 9-inch springform pan or pie dish. Use the bottom of a glass to compact it. Refrigerate while you make the filling.

    2. Make the Cheesecake Filling Base: In a large bowl, beat the softened cream cheese with an electric mixer until completely smooth and lump-free, about 2 minutes. Beat in the sifted powdered sugar, lemon juice, and vanilla extract until fully incorporated and creamy. Scrape down the bowl.

    3. Whip the Cream: In a separate, chilled bowl, whip the cold heavy cream until it forms stiff peaks. Be careful not to over-whip into butter.

    4. Combine & Fold: Gently fold about one-third of the whipped cream into the cream cheese mixture to lighten it. Then, carefully fold in the remaining whipped cream using a large spatula. Use a gentle, broad folding motion until no white streaks remain, being careful not to deflate the mixture.

    5. Assemble & Chill: Pour the fluffy filling into the prepared crust and smooth the top with an offset spatula. Cover loosely with plastic wrap and refrigerate for at least 6 hours, or preferably overnight, to set completely.

    6. Serve: Run a thin knife around the edge of the springform pan before releasing the collar. If using a pie dish, slice directly from the dish. Top with fresh berries, a fruit sauce, or enjoy plain. Slice with a clean, hot knife for the neatest cuts.

    7. Store: Keep covered in the refrigerator for up to 4 days. The crust will soften slightly over time but will remain delicious.

    Pro-Tips for a Perfectly Set, Silky Cheesecake

    • Room Temperature Cream Cheese is Non-Negotiable: This is the single most important tip. Cold cream cheese will leave lumps that are impossible to beat out, resulting in a grainy filling.
    • Chill Your Bowl & Cream: For the best volume when whipping the cream, chill your mixer bowl and beaters in the freezer for 10-15 minutes beforehand.
    • Don’t Over-Whip the Cream: Whip just until stiff peaks form. Over-whipped cream becomes grainy and buttery, which will make your filling greasy and less stable.
    • Fold Gently: Preserve the air in the whipped cream by folding gently. Overmixing will deflate the filling, making it dense.
    • The Long Chill: Do not shortcut the chilling time. The cheesecake needs a full 6+ hours to firm up properly for clean slices. Overnight is ideal.
    • Clean Slices: For picture-perfect slices, dip your knife in hot water and wipe it clean between each cut.
    • Flavor Variations: Add ½ cup of lemon curd or passionfruit puree to the filling. For a chocolate version, fold in 1 cup of melted and cooled chocolate after step 2.

    This No-Bake Cheesecake is the ultimate easy, elegant dessert that delivers on every promise.