Tag: egg recipe

  • Classic Deviled Eggs: Creamy, Tangy and Perfect for Parties

    Classic Deviled Eggs: Creamy, Tangy and Perfect for Parties

    Deviled eggs are the ultimate party appetizer—creamy, tangy, and impossibly satisfying. They’re the first thing to disappear at potlucks, picnics, and holiday gatherings. This classic recipe delivers perfectly cooked hard-boiled eggs with a silky smooth filling that’s tangy from mustard and pickle relish, with just the right amount of mayo.

    Topped with a sprinkle of paprika, they’re as beautiful as they are delicious. While simple, the technique matters: perfectly boiled eggs, a smooth filling, and careful piping make all the difference. Once you master these, you’ll be asked to bring them to every gathering.

    Ingredients

    For the Deviled Eggs (makes 12 deviled egg halves):

    • 6 large eggs (older eggs peel more easily)
    • 3 tablespoons mayonnaise
    • 1 teaspoon Dijon mustard (or yellow mustard)
    • 1 teaspoon white vinegar or pickle juice
    • 1 teaspoon sweet pickle relish (optional)
    • Salt and white pepper to taste
    • Paprika, for garnish
    • Fresh parsley or chives, for garnish (optional)

    Optional Add-Ins:

    • 1 teaspoon prepared horseradish (for a kick)
    • 1 tablespoon crumbled bacon
    • 1 teaspoon hot sauce

    Instructions

    1. Hard Boil the Eggs: Place the eggs in a single layer in a saucepan and cover with cold water by about 1 inch. Bring to a boil over high heat. Once boiling, remove from heat, cover, and let sit for 12 minutes.

    2. Ice Bath: While the eggs cook, prepare a large bowl of ice water. Transfer the eggs to the ice bath and let cool completely, about 10 minutes. This stops the cooking and makes peeling easier.

    3. Peel the Eggs: Gently tap each egg on the counter to crack the shell, then roll it between your hands to loosen the shell. Peel under running water to help remove any stubborn pieces.

    4. Slice and Remove Yolks: Slice each egg in half lengthwise. Gently remove the yolks and place them in a medium bowl. Arrange the egg white halves on a serving platter.

    5. Make the Filling: Mash the yolks with a fork until finely crumbled. Add the mayonnaise, mustard, vinegar (or pickle juice), pickle relish (if using), salt, and pepper. Mix until smooth. For an ultra-smooth filling, press through a fine-mesh sieve or use a small food processor.

    6. Fill the Eggs: Transfer the filling to a piping bag fitted with a star tip (or use a zip-top bag with a corner snipped off). Pipe the filling into each egg white half, dividing evenly.

    7. Garnish and Serve: Sprinkle with paprika and garnish with fresh parsley or chives if desired. Refrigerate until ready to serve. Serve chilled.

    Pro-Tips for Deviled Egg Perfection

    • Use Older Eggs: Fresh eggs are harder to peel. Eggs that are a week or two old are ideal.
    • Don’t Overcook: Overcooked eggs develop a green ring around the yolk and a rubbery texture. The 12-minute rest method is foolproof.
    • Ice Bath Is Essential: Shocking the eggs in ice water stops the cooking and makes peeling much easier.
    • Peel Under Running Water: The water helps separate the shell from the egg white.
    • Make Filling Smooth: For the silkiest texture, press the yolk mixture through a fine-mesh sieve or use a food processor.
    • Pipe for Presentation: Piping the filling creates beautiful, uniform deviled eggs.
    • Make Ahead: You can prepare the filling and whites separately a day ahead. Fill just before serving.
    • Variations: Try adding bacon, horseradish, hot sauce, or fresh herbs.

    These Classic Deviled Eggs are creamy, tangy, and perfect for parties.

  • Perfect French Omelette (Soft, Creamy, Elegant)

    Perfect French Omelette (Soft, Creamy, Elegant)

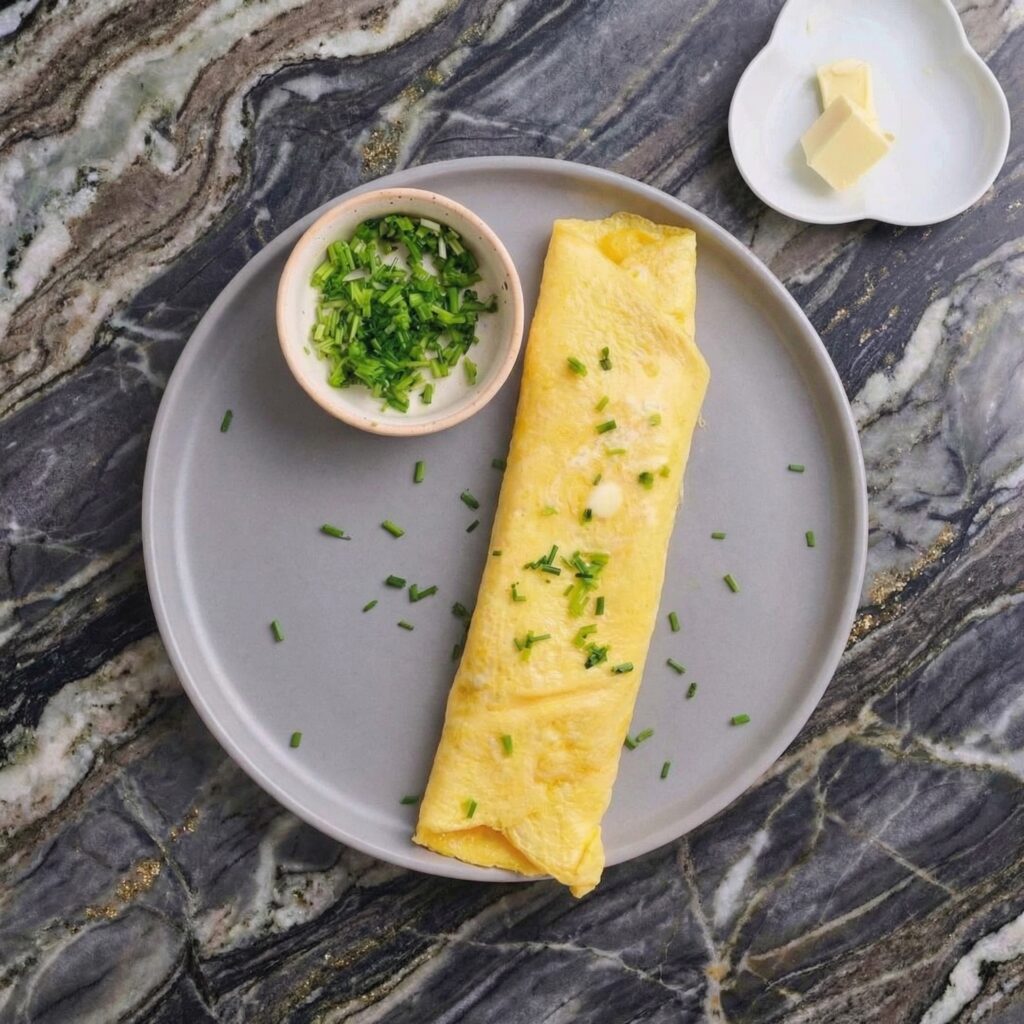
    The French omelette is a thing of beauty—smooth and pale yellow on the outside, soft and creamy within, rolled into a perfect cylinder. It’s the dish that separates home cooks from true chefs, a test of patience and technique. But here’s the secret: with a little practice and the right method, anyone can master it.

    This omelette has no browning, no color, just pure, velvety eggs that are barely set and incredibly creamy. It’s simple, elegant, and absolutely delicious. Serve it with a sprinkle of fresh herbs and a slice of crusty bread for a breakfast that feels like a Parisian café.

    Ingredients

    For the French Omelette (serves 1):

    • 3 large eggs, preferably farm-fresh
    • 1 tablespoon cold unsalted butter, divided
    • 1 teaspoon finely chopped fresh chives or parsley
    • Salt and white pepper to taste

    For Serving (Optional):

    • Fresh chives, chopped
    • Crusty baguette
    • Simple green salad

    Instructions

    1. Prep the Eggs: Crack the eggs into a small bowl. Using a fork (not a whisk), beat them gently until the whites and yolks are just combined but not frothy. You want them homogenous but with no bubbles. Season with salt and white pepper.

    2. Heat the Pan: Place an 8-inch non-stick skillet over medium-low heat. Add ½ tablespoon of the butter and let it melt, swirling to coat the pan. The butter should foam gently but not brown.

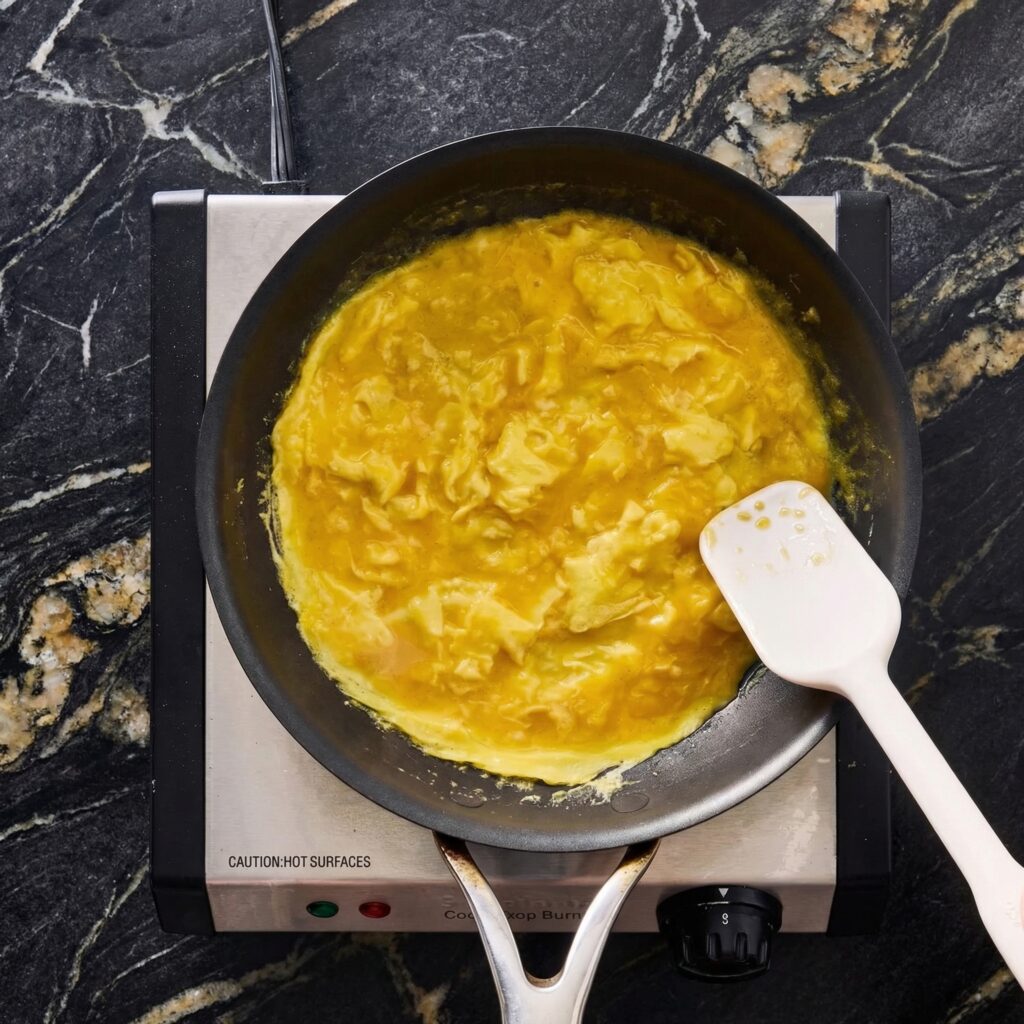
    3. Add the Eggs: Pour the beaten eggs into the pan. Let them set for just a few seconds, then immediately begin stirring with a rubber spatula. Use a circular motion, scraping the bottom of the pan constantly.

    4. Stir Constantly: Continue stirring over medium-low heat, moving the spatula around the pan to form small, soft curds. The eggs should never stop moving. This takes about 45-60 seconds. The eggs will gradually thicken but remain soft and creamy.

    5. Stop Stirring: When the eggs are about 75% set (still quite soft and creamy, with some liquid remaining), stop stirring and let them rest for 5-10 seconds. The bottom will set slightly.

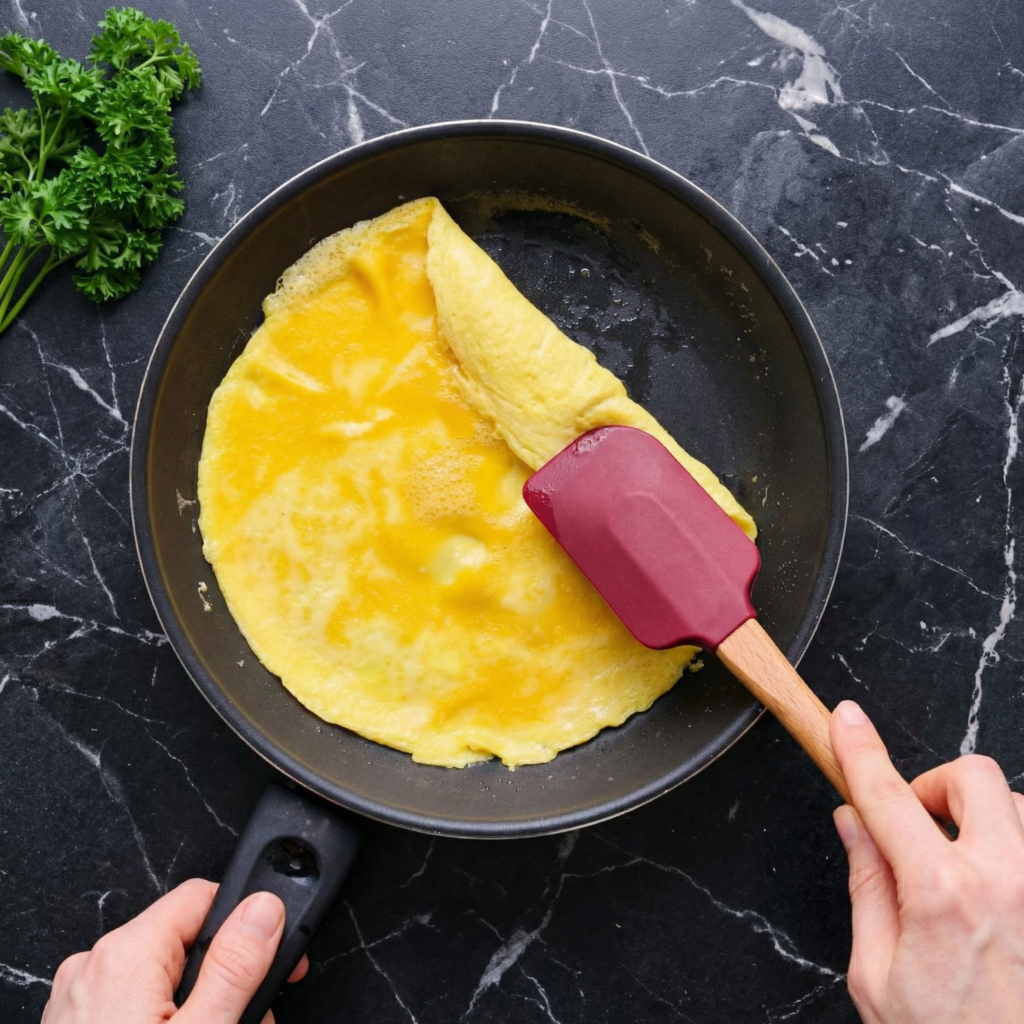
    6. Tilt and Tap: Tilt the pan away from you at a 45-degree angle. Use the spatula to gently fold the top edge of the omelette toward the center. Tap the pan handle to encourage the omelette to slide and roll.

    7. Roll the Omelette: Continue rolling the omelette toward the edge of the pan, using the spatula to guide it. It should form a neat cylinder. Invert onto a plate, seam-side down.

    8. Shape and Finish: Use your hands (careful—it’s hot!) or a clean towel to gently shape the omelette into a perfect cylinder. Rub the remaining ½ tablespoon of butter over the top for a beautiful sheen.

    9. Garnish and Serve: Sprinkle with fresh chives and serve immediately with crusty bread and a simple salad.

    Pro-Tips for Omelette Perfection

    • Use the Right Pan: An 8-inch non-stick skillet is essential. The eggs won’t stick, and the sloped sides help with rolling.
    • Low and Slow: Medium-low heat is crucial. If the heat is too high, the eggs will brown and become tough.
    • Stir Constantly: Constant motion creates those soft, creamy curds. Don’t stop until the eggs are 75% set.
    • Take It Off Early: The eggs will continue to cook from residual heat. Remove them from the pan while still slightly underdone.
    • No Color: A true French omelette has no browning—just pure, pale yellow.
    • Fresh Eggs Matter: Farm-fresh eggs have better flavor and texture.
    • Practice Makes Perfect: The French omelette takes practice. Don’t be discouraged if your first few aren’t perfect.
    • Add Fillings (Optional): For a filled omelette, add cheese, herbs, or sautéed mushrooms just before rolling.

    This Perfect French Omelette is soft, creamy, and absolutely elegant.