Tag: Easy Recipe

  • Perfectly Seared Sesame Tuna with Fluffy Rice: A Restaurant-Style Dinner at Home

    Perfectly Seared Sesame Tuna with Fluffy Rice: A Restaurant-Style Dinner at Home

    If you’re craving a light, flavorful, and elegant dinner, Sesame Seared Tuna with Rice is a showstopper.

    With a tender, pink center, a nutty sesame crust, and perfectly cooked rice on the side, this dish feels gourmet without requiring hours in the kitchen. It’s fresh, healthy, and bursting with umami, making it ideal for weeknight dinners, date nights, or any time you want a meal that impresses both the eyes and the palate.

    In this step-by-step guide, you’ll learn how to sear tuna perfectly, create a crisp sesame crust, and pair it with fluffy rice for a balanced, restaurant-quality plate.


    Why You’ll Love This Sesame Seared Tuna

    • Quick and easy: ready in under 30 minutes
    • Tender tuna with a crisp, nutty crust
    • Balanced, healthy meal with protein and grains
    • Elegant enough for entertaining
    • Customizable with vegetables or sauces

    This recipe proves that a few high-quality ingredients, treated with care, can produce a dish that tastes extraordinary.
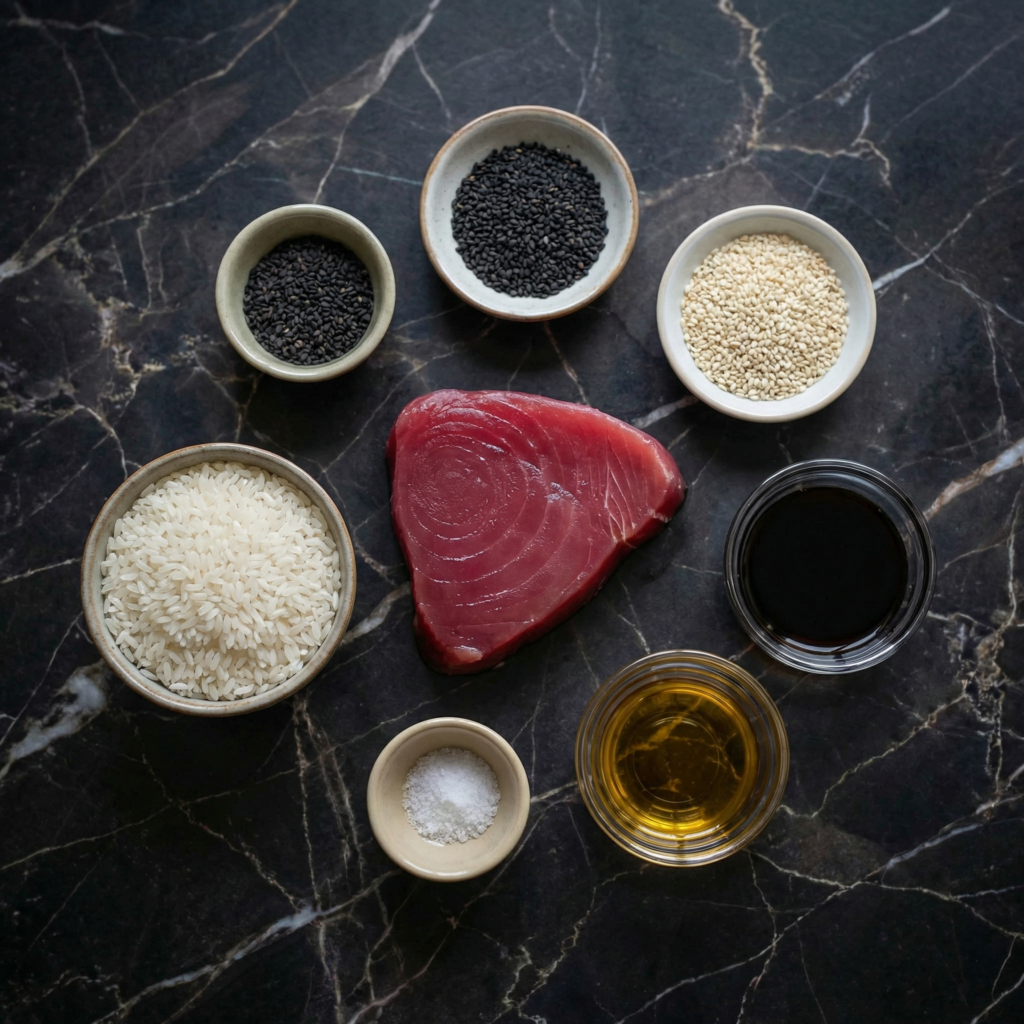

    Ingredients You’ll Need

    For the Tuna:

    • 2 tuna steaks (about 6 ounces each)
    • 2 tablespoons sesame seeds (white, black, or a mix)
    • 1 tablespoon olive oil
    • Salt and pepper to taste

    For the Rice:

    • 1 cup jasmine or sushi rice
    • 2 cups water or low-sodium chicken/vegetable broth
    • Pinch of salt

    Optional Accompaniments:

    • Soy sauce or tamari
    • Sliced avocado
    • Steamed or sautéed vegetables (like bok choy, snap peas, or carrots)
    • Pickled ginger

    Step 1: Prepare the Rice

    Rinse 1 cup of rice under cold water until the water runs clear. This removes excess starch, ensuring fluffy, separate grains.

    In a medium saucepan, combine the rice with 2 cups of water or broth and a pinch of salt. Bring to a boil over medium-high heat.

    Once boiling, reduce the heat to low, cover, and simmer for 15–18 minutes, or until all liquid is absorbed. Turn off the heat and let it sit, covered, for 5 minutes. Fluff with a fork before serving.

    Perfectly cooked rice serves as the neutral, slightly fragrant base for the rich, savory tuna.


    Step 2: Prepare the Tuna

    Pat the tuna steaks dry with paper towels. Moisture will prevent a proper sear.

    Season both sides lightly with salt and pepper.

    Place sesame seeds on a shallow plate. Press each side of the tuna steak into the sesame seeds so that both sides are evenly coated. The sesame seeds create a nutty crust and add visual appeal.


    Step 3: Heat the Pan

    Heat a non-stick or cast-iron skillet over medium-high heat.

    Add 1 tablespoon of olive oil and allow it to shimmer but not smoke.

    The pan must be hot enough to sear quickly, locking in juices while creating a crisp, golden crust.


    Step 4: Sear the Tuna

    Place the tuna steaks in the hot pan. Sear without moving for about 1–2 minutes per side, depending on thickness.

    For a rare center, aim for 1 minute per side. For medium-rare, cook 2 minutes per side. Avoid overcooking—tuna is best served pink in the center for tenderness.

    Remove the tuna from the pan and let it rest for a few minutes. Resting allows juices to redistribute for maximum flavor.


    Step 5: Slice and Plate

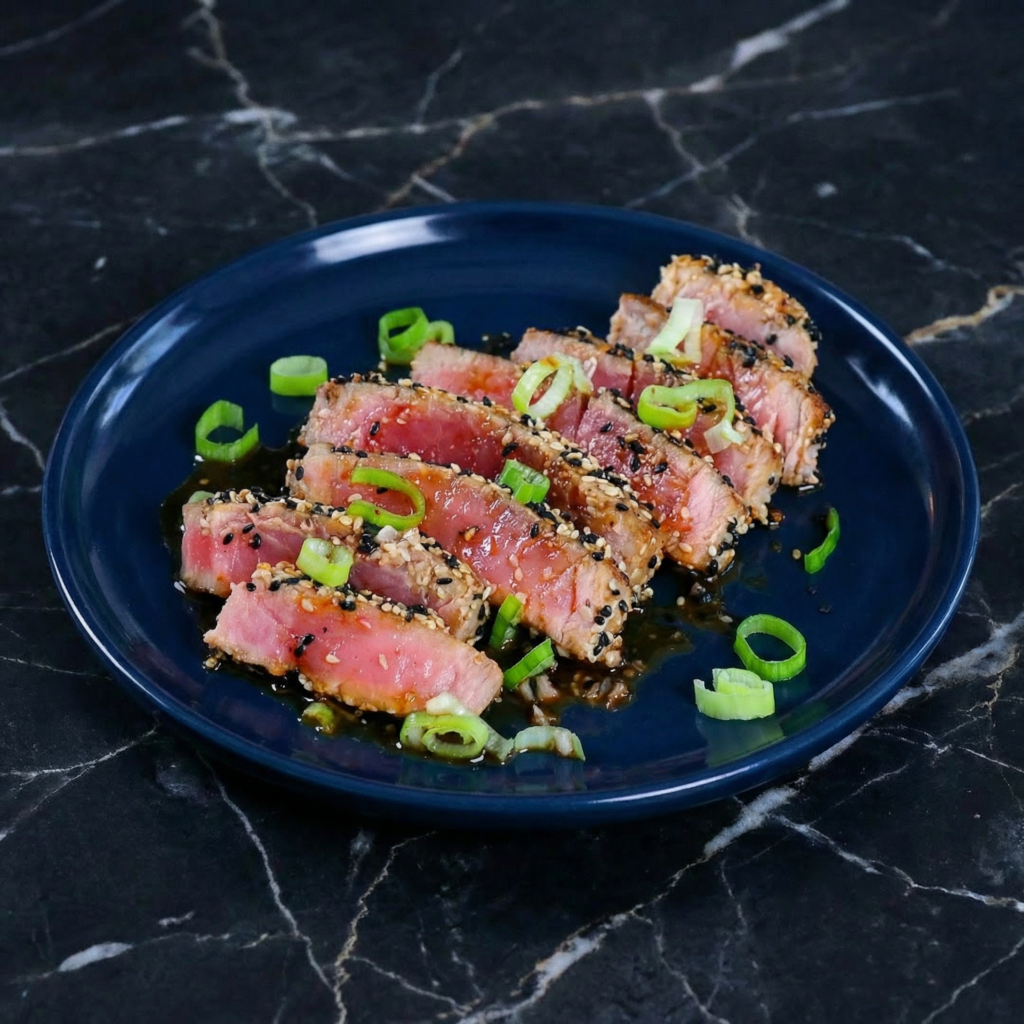
    Using a sharp knife, slice the tuna against the grain into ¼-inch thick slices. Arrange neatly over a bed of fluffy rice.
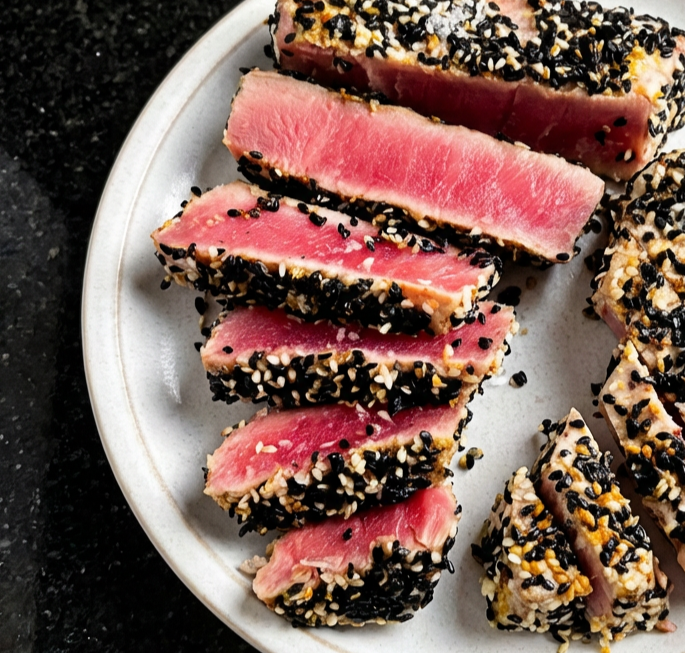
    If desired, add steamed or sautéed vegetables alongside. Top with soy sauce, a drizzle of sesame oil, or pickled ginger for added flavor complexity.

    Flavor and Texture Highlights

    • Crispy sesame crust adds nutty flavor and crunch
    • Tender, juicy tuna melts in your mouth
    • Fluffy, aromatic rice balances the rich protein
    • Optional vegetables add freshness and texture contrast

    Every bite delivers layers of flavor: savory, nutty, slightly salty, and fresh.


    Tips for Perfect Sesame Seared Tuna

    • Use sushi-grade tuna: Ensures safety and optimal flavor for rare preparation.
    • Pat dry: Moisture prevents proper searing.
    • Don’t overcook: Tuna cooks quickly; aim for rare to medium-rare for tenderness.
    • Even sesame coating: Press firmly so seeds stick well.
    • Hot pan: Quick sear ensures crisp crust without overcooking the center.

    Optional Variations

    • Spicy Tuna: Brush with sriracha or chili oil before searing.
    • Ginger Soy Glaze: Drizzle a mixture of soy sauce, rice vinegar, and grated ginger over tuna.
    • Sesame Rice: Stir a teaspoon of toasted sesame oil into the rice for extra flavor.
    • Avocado & Cucumber Salad: Serve alongside for a fresh, creamy element.
    • Ponzu Sauce: Add a citrusy, tangy ponzu drizzle for a light, zesty twist.

    Storage and Meal Prep

    • Tuna is best enjoyed fresh, but rice can be cooked in advance and stored in an airtight container for up to 3 days.
    • Leftover rice pairs well with eggs, vegetables, or stir-fries.
    • If you need to prep ahead, sear tuna last and slice just before serving for best texture.

    Why This Recipe Works

    This Sesame Seared Tuna with Rice works because of contrast: the crunchy, nutty sesame crust meets the silky, rare tuna, and fluffy, slightly seasoned rice provides a neutral base.

    Cooking tuna quickly at high heat preserves moisture and natural flavor, while sesame seeds add texture and aromatic richness. A few simple seasonings and fresh accompaniments elevate this dish to restaurant quality without complicated techniques.


    Serving Suggestions

    • Serve as a light, elegant weeknight dinner.
    • Pair with a crisp white wine like Sauvignon Blanc or a light sake.
    • Add a small side salad for balance.
    • Garnish with sesame seeds, microgreens, or thinly sliced scallions for presentation.

    With its delicate, seared exterior, nutty sesame flavor, and perfectly cooked rice, this Sesame Seared Tuna with Rice is a dish that looks impressive and tastes incredible.

    Minimal ingredients, maximum flavor, and quick preparation make it ideal for busy nights, special dinners, or when you want to treat yourself to a healthy, gourmet meal at home.

    Tender, seared, nutty, and fresh—each bite is a perfectly balanced combination of textures and flavors, proving that restaurant-quality meals can be effortlessly recreated in your own kitchen.

  • Five Cheese Ziti al Forno: The Ultimate Bubbly, Golden Baked Pasta Dream

    Five Cheese Ziti al Forno: The Ultimate Bubbly, Golden Baked Pasta Dream

    If there’s one dish that guarantees empty plates and second helpings, it’s Five Cheese Ziti al Forno.

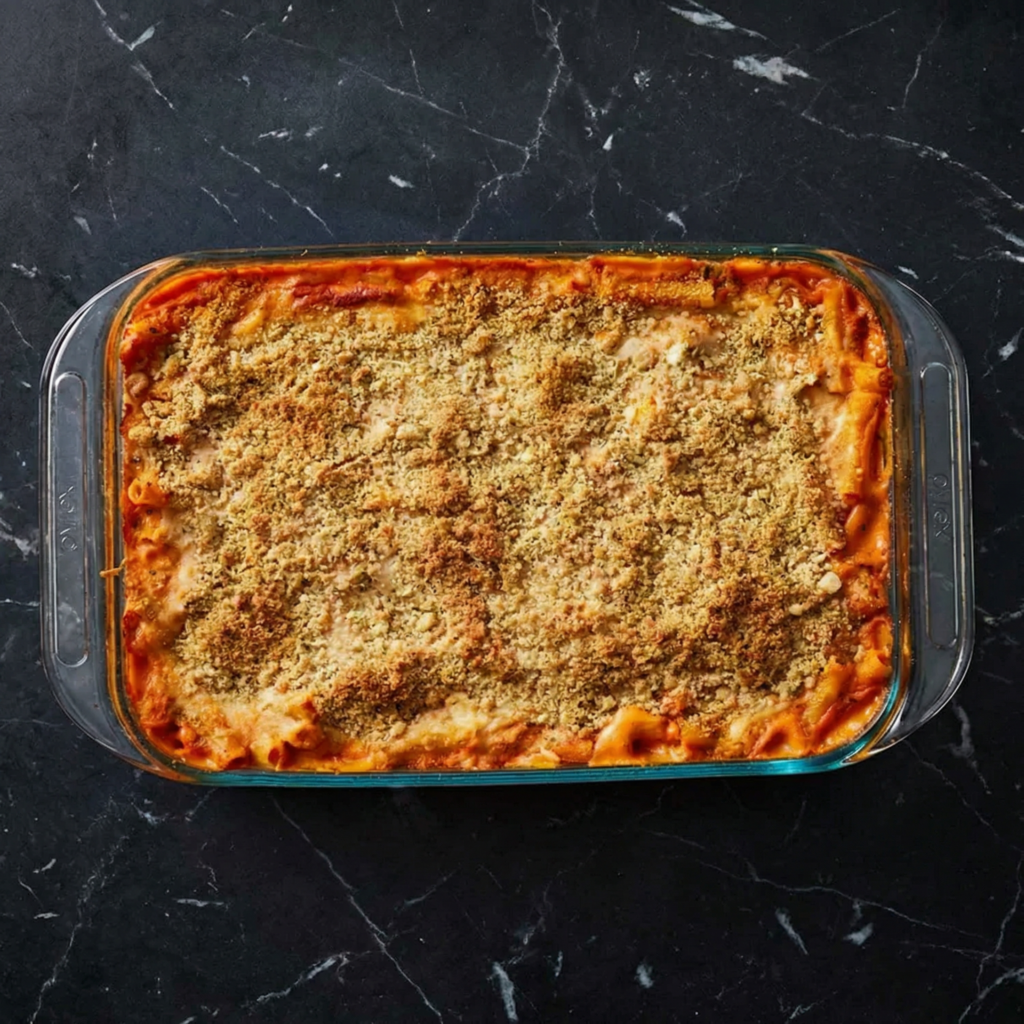
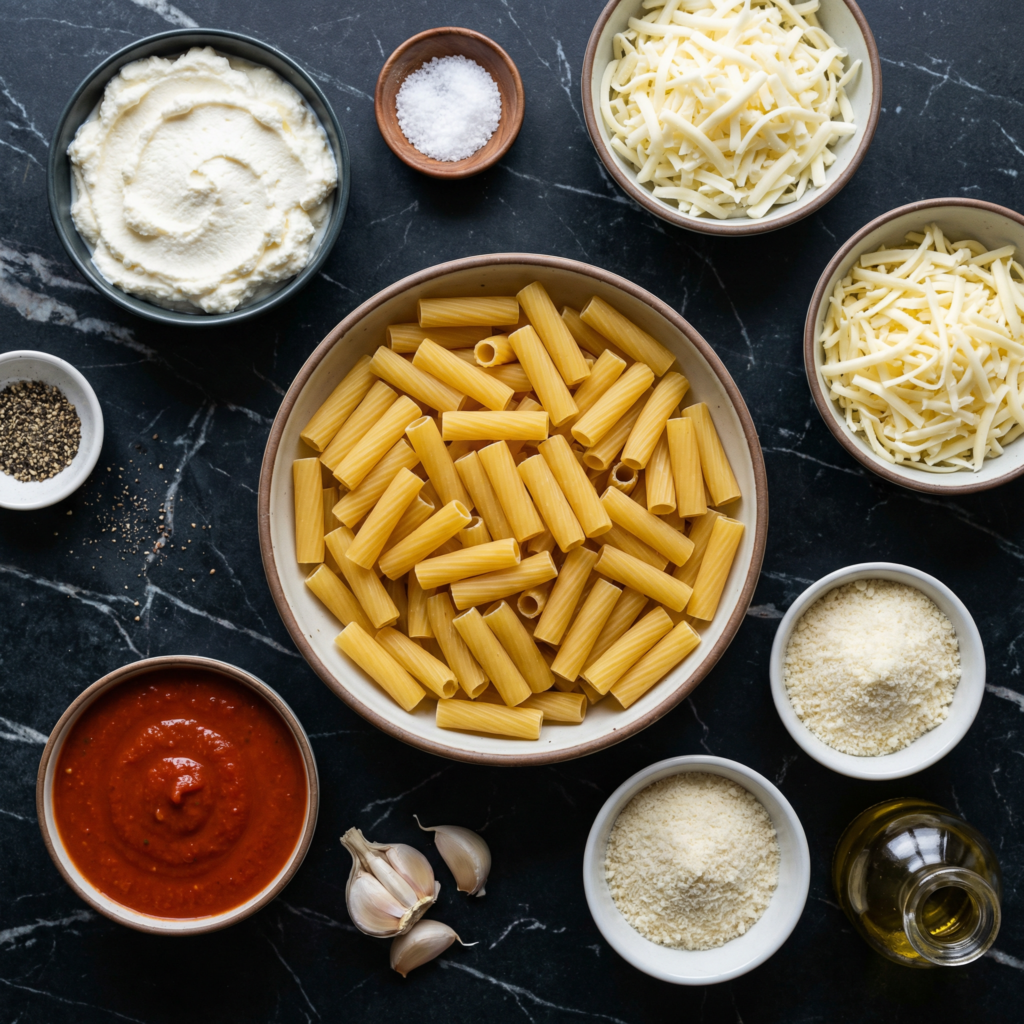
    This baked pasta is rich, creamy, perfectly sauced, and layered with five different cheeses that melt into pure comfort. With tender ziti, a hearty tomato sauce, and a golden, bubbling cheese topping, this recipe brings restaurant-quality flavor straight to your kitchen.

    Let’s walk through this indulgent, crowd-pleasing pasta step by step.


    Ingredients You’ll Need

    For the Pasta and Sauce:

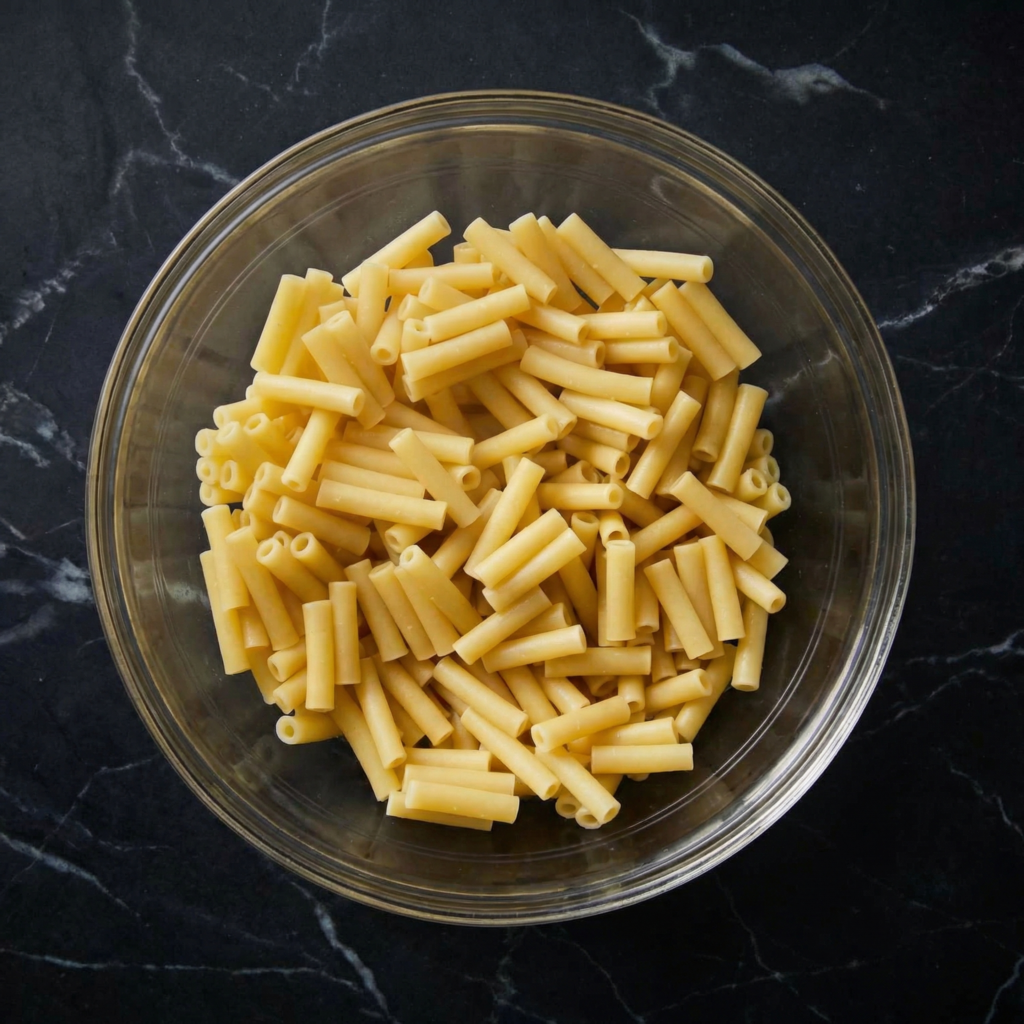
    • 1 pound ziti pasta
    • 1 tablespoon olive oil
    • 1 pound ground beef or Italian sausage
    • 1 small onion, finely diced
    • 3 cloves garlic, minced
    • 1 (24-ounce) jar marinara sauce
    • 1 (14-ounce) can crushed tomatoes
    • 1 teaspoon Italian seasoning
    • ½ teaspoon salt
    • ½ teaspoon black pepper

    For the Five Cheese Blend:

    • 1 cup ricotta cheese
    • 1 cup shredded mozzarella
    • 1 cup shredded provolone
    • ½ cup grated Parmesan
    • ½ cup shredded fontina (or Romano)

    Step 1: Cook the Ziti

    Bring a large pot of salted water to a rolling boil. Add the ziti and cook until just shy of al dente, about 1–2 minutes less than package instructions. The pasta will continue cooking in the oven, so slightly undercooking prevents it from becoming mushy.

    Drain the pasta and set aside. Drizzle lightly with olive oil to prevent sticking.


    Step 2: Prepare the Meat Sauce

    In a large skillet or Dutch oven, heat olive oil over medium heat. Add the diced onion and cook for about 3–4 minutes until softened and translucent.

    Add the minced garlic and cook for 30 seconds until fragrant. Stir in the ground beef or sausage, breaking it apart with a wooden spoon. Cook until browned and fully cooked through. Drain excess grease if necessary.

    Pour in the marinara sauce and crushed tomatoes. Add Italian seasoning, salt, and black pepper. Stir well and let the sauce simmer gently for 10–15 minutes. This helps the flavors deepen and blend beautifully.


    Step 3: Prepare the Cheese Mixture

    In a medium bowl, combine the ricotta, half of the mozzarella, half of the provolone, and half of the fontina. Mix until smooth and evenly blended. The Parmesan will mostly be reserved for layering and topping.

    This creamy cheese blend will create pockets of richness throughout the baked pasta.


    Step 4: Preheat and Prepare the Baking Dish

    Preheat your oven to 375°F (190°C).

    Lightly grease a 9×13-inch baking dish with cooking spray or olive oil. This prevents sticking and makes serving easier.


    Step 5: Combine Pasta and Sauce

    In a large mixing bowl, combine the cooked ziti with the prepared meat sauce. Stir until every piece of pasta is coated in that rich tomato mixture.

    This ensures even distribution and prevents dry spots in the finished dish.


    Step 6: Layer the Ziti al Forno

    Now comes the fun part — layering.

    1. Spread half of the pasta mixture evenly in the baking dish.
    2. Dollop half of the cheese mixture across the pasta and gently spread.
    3. Sprinkle a portion of Parmesan over the layer.
    4. Add the remaining pasta mixture.
    5. Spread the remaining cheese mixture on top.
    6. Finish with the rest of the mozzarella, provolone, fontina, and a generous sprinkle of Parmesan.

    This layering method guarantees cheesy goodness in every bite.


    Step 7: Bake to Golden Perfection

    Cover the dish loosely with foil (tent it slightly so it doesn’t stick to the cheese).

    Bake for 20 minutes covered. Then remove the foil and bake for another 15–20 minutes, or until the cheese is fully melted, bubbling, and lightly golden on top.

    For extra browning, broil for 1–2 minutes at the end — but watch closely to prevent burning.


    Step 8: Let It Rest

    Once out of the oven, allow the ziti to rest for 10–15 minutes before serving. This step is crucial. Resting allows the cheese and sauce to settle, making slicing and serving much easier.

    Skipping this step can result in a runny texture.


    Step 9: Garnish and Serve

    Sprinkle with freshly chopped parsley or extra grated Parmesan before serving for a pop of color and flavor.

    Serve hot with:

    • Garlic bread
    • A crisp green salad
    • Roasted vegetables

    Tips for the Best Five Cheese Ziti al Forno

    Use freshly shredded cheese. Pre-shredded cheese contains anti-caking agents that can affect melt quality.

    Don’t overcook the pasta. Slightly undercooked pasta ensures the final dish has perfect texture.

    Customize your cheese blend. Romano, asiago, or even white cheddar can replace one of the cheeses if desired.

    Make it ahead. Assemble the dish up to a day in advance, cover tightly, and refrigerate. Add 10–15 extra minutes to the baking time if cooking from cold.

    Freeze for later. Wrap tightly and freeze before baking for up to 2 months. Thaw overnight in the refrigerator before baking.


    Why You’ll Love This Recipe

    Five Cheese Ziti al Forno combines everything we crave in comfort food: creamy cheese, hearty sauce, tender pasta, and that irresistible golden crust. It’s ideal for family dinners, potlucks, or when you simply want something indulgent and satisfying.

    Every forkful delivers layers of flavor and gooey, melty cheese balanced by rich tomato sauce and perfectly baked pasta. Once you make it, this baked ziti just might become your go-to pasta dish.

    So preheat that oven, shred that cheese, and get ready to serve up a bubbling pan of pure comfort.

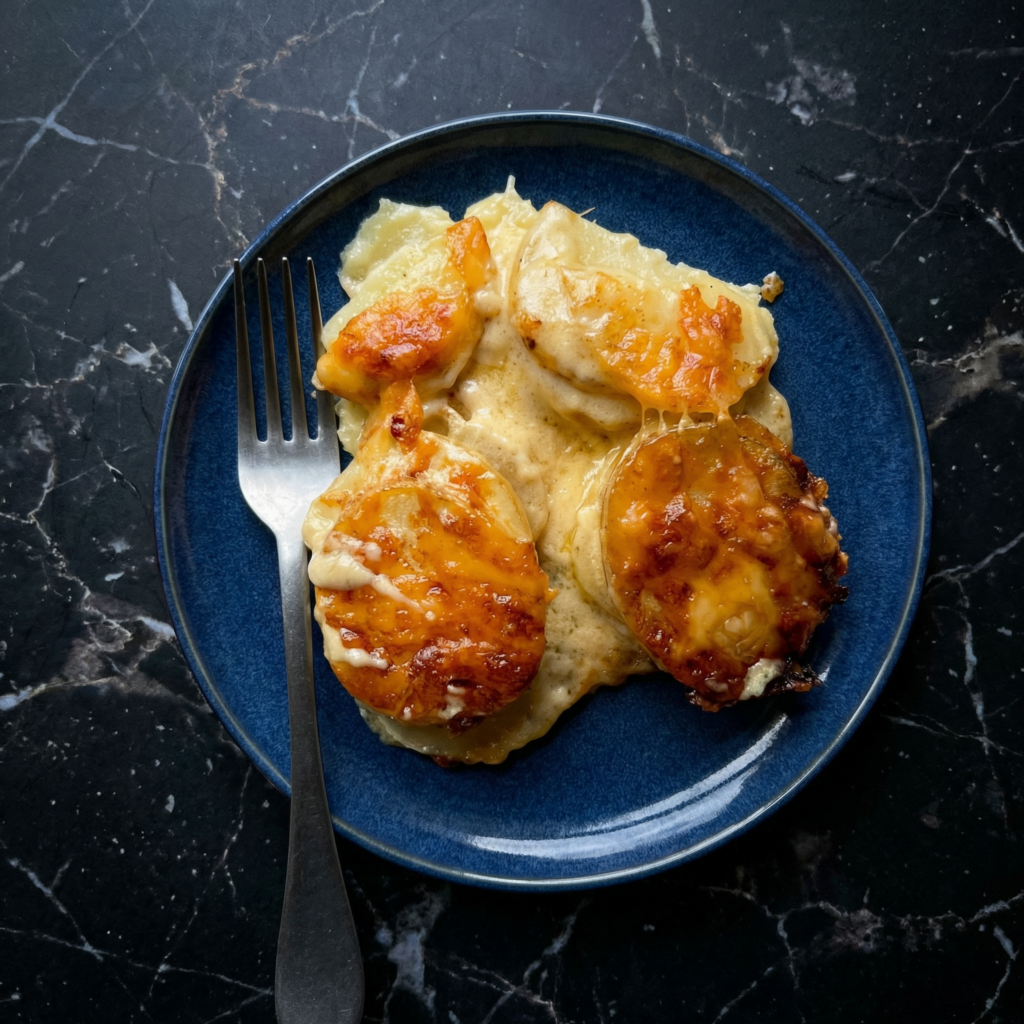
  • Creamy, Cheesy, and Comforting: How to Make Classic Scalloped Potatoes

    Creamy, Cheesy, and Comforting: How to Make Classic Scalloped Potatoes

    Few side dishes capture the essence of comfort food quite like scalloped potatoes. Layered with tender slices of potato, creamy sauce, and melted cheese, this dish is perfect for holiday dinners, family gatherings, or simply a cozy weeknight meal. Scalloped potatoes are deceptively simple to make but deliver a rich, decadent flavor that everyone will love.

    This step-by-step guide will walk you through making classic scalloped potatoes with a creamy, cheesy sauce and perfectly tender layers. By following these steps, you’ll end up with a golden, bubbling dish that’s as beautiful as it is delicious.


    Why You’ll Love These Scalloped Potatoes

    • Creamy, cheesy, and comforting
    • Perfectly tender potato slices
    • Baked to golden perfection with a bubbly top
    • Great as a side dish for any meal
    • Easily customizable with herbs, spices, or additional cheese varieties

    The combination of tender potatoes and a rich, flavorful sauce makes scalloped potatoes a dish that never goes out of style.


    Ingredients You’ll Need

    For the Potatoes:

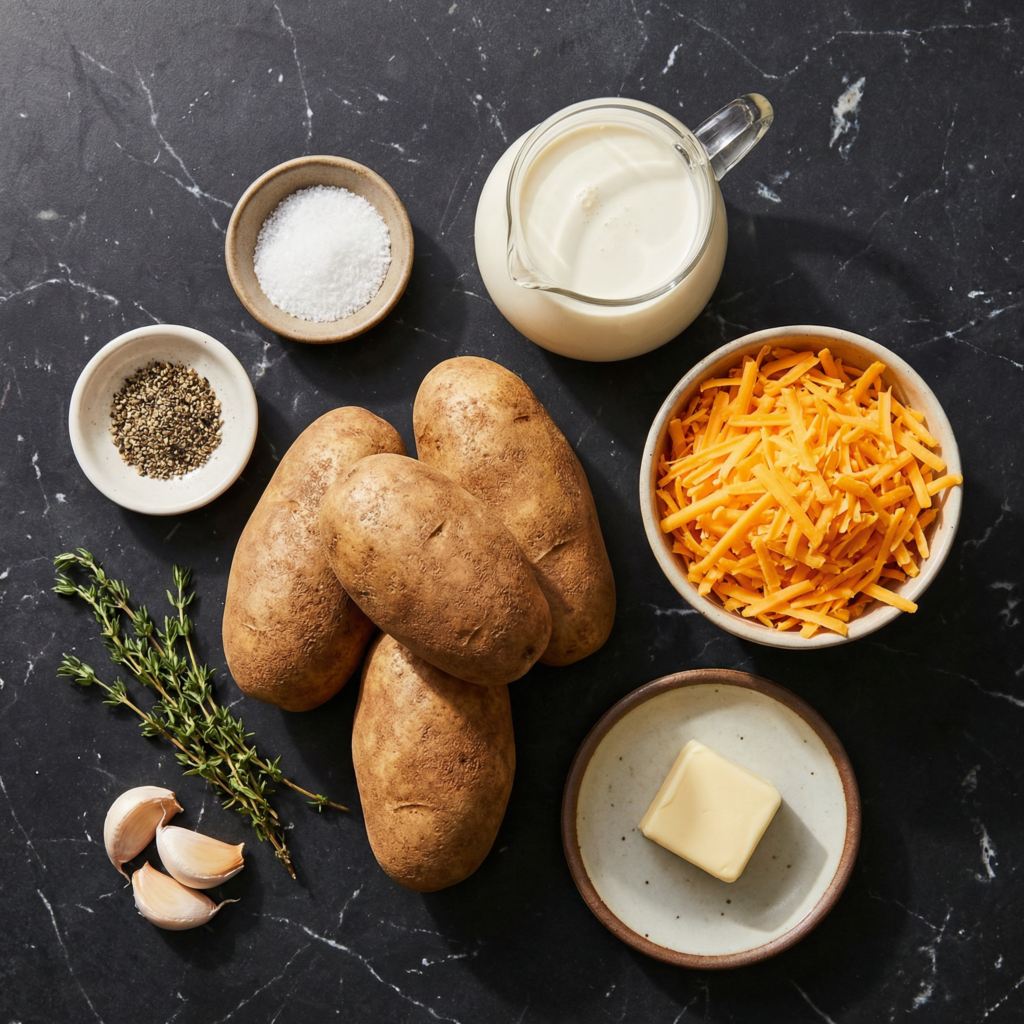
    • 3 pounds (1.4 kg) russet or Yukon gold potatoes, peeled and thinly sliced
    • 2 tablespoons unsalted butter
    • 2 tablespoons all-purpose flour
    • 2 cups (480 ml) whole milk, warmed
    • 1 cup (100 g) shredded sharp cheddar cheese
    • ½ cup (50 g) grated Parmesan cheese
    • 2 teaspoons garlic powder or 2 cloves garlic, minced
    • 1 teaspoon salt
    • ½ teaspoon black pepper
    • Optional: ½ teaspoon paprika or dried thyme for garnish

    Step 1: Preheat and Prepare

    Preheat your oven to 375°F (190°C).

    Grease a 9×13-inch baking dish with butter or nonstick spray. This will prevent the potatoes from sticking and make cleanup easier.


    Step 2: Prepare the Creamy Cheese Sauce

    In a medium saucepan over medium heat, melt the butter. Add the flour and whisk constantly for 1–2 minutes to form a roux. This cooks out the raw flour taste and will thicken the sauce.

    Gradually whisk in the warm milk, making sure to eliminate any lumps. Continue to cook until the sauce begins to thicken, about 5–7 minutes.

    Remove from heat and stir in ¾ cup of cheddar cheese, garlic, salt, and pepper until melted and smooth.

    The cheese sauce should be creamy, slightly thick, and full of flavor—it will coat the potatoes beautifully.


    Step 3: Slice the Potatoes

    Peel the potatoes and slice them into ¼-inch thick rounds. Use a sharp knife or mandoline for even slices, which ensures uniform cooking.

    Even slices allow the potatoes to cook at the same rate and create an attractive layered presentation.


    Step 4: Layer the Potatoes

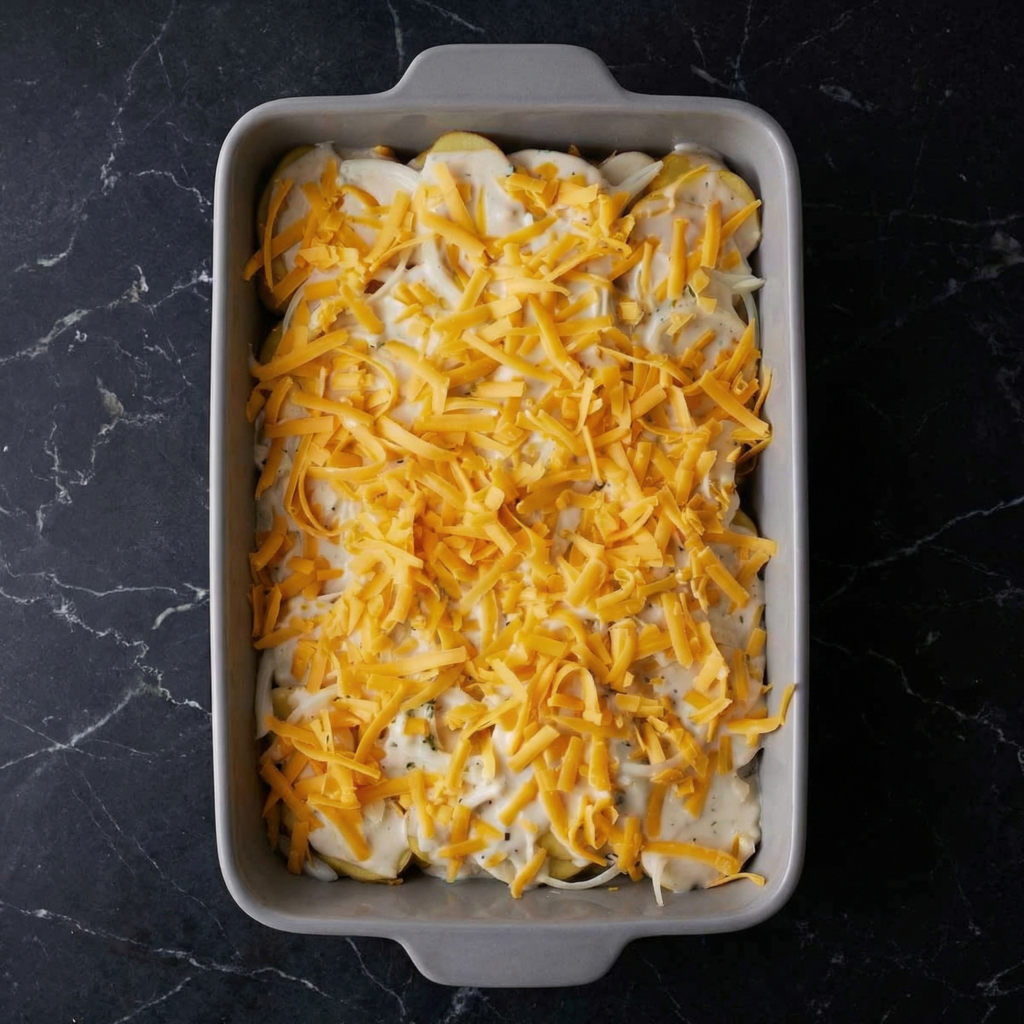
    Arrange a layer of potato slices in the bottom of the prepared baking dish. Pour a portion of the cheese sauce over the layer, spreading it evenly.

    Repeat the layers, alternating potatoes and sauce, until all potatoes and sauce are used. Sprinkle the remaining cheddar and Parmesan on top for a golden, cheesy crust.

    Optional: Sprinkle paprika or dried thyme over the top for color and added flavor.


    Step 5: Cover and Bake

    Cover the baking dish tightly with aluminum foil to prevent the top from browning too quickly while the potatoes cook through.

    Bake in the preheated oven for 45 minutes.


    Step 6: Uncover and Finish Baking

    Remove the foil and bake for an additional 20–25 minutes, or until the potatoes are tender and the top is golden brown and bubbling.

    Check for doneness by inserting a knife into the center—potatoes should slide easily without resistance.


    Step 7: Rest Before Serving

    Let the scalloped potatoes rest for 5–10 minutes before serving.

    Resting allows the sauce to thicken slightly, making the dish easier to serve and giving the flavors time to meld together.


    Flavor and Texture Highlights

    • Tender potato slices cooked to perfection
    • Creamy, cheesy sauce with rich flavor
    • Golden, bubbly top with slightly crisp edges
    • Subtle garlic and spice notes enhance the richness

    Every bite offers a balance of soft potatoes and rich, savory sauce, with just the right amount of cheese pull.


    Tips for Perfect Scalloped Potatoes

    • Use starchy potatoes like Russet for fluffier layers or Yukon Gold for a creamier texture.
    • Slice potatoes evenly to ensure uniform cooking.
    • Warm the milk before adding to the roux to prevent lumps.
    • Cover during the initial bake to prevent the top from burning.
    • Let the dish rest before serving to thicken the sauce.

    Optional Variations

    • Bacon and Onion: Add cooked bacon bits and sautéed onions between layers.
    • Herb-Infused: Mix fresh rosemary, thyme, or sage into the cheese sauce.
    • Extra Cheesy: Use a blend of cheeses like Gruyère, Fontina, or mozzarella for depth of flavor.
    • Spicy Kick: Add a pinch of cayenne or red pepper flakes to the cheese sauce.
    • Vegetable Boost: Layer in thin slices of zucchini, sweet potato, or cauliflower for variety.

    Storage and Serving

    • Serve immediately for the best texture.
    • Store leftovers in an airtight container in the refrigerator for up to 3 days.
    • Reheat covered in the oven at 350°F (175°C) until warmed through.
    • Can be prepared ahead and baked just before serving—cover and refrigerate overnight.

    Why This Recipe Works

    Classic scalloped potatoes succeed because of the combination of thinly sliced potatoes, a flavorful cheese sauce, and layered baking. Covering the dish during the initial bake ensures tender potatoes, while uncovering allows a golden, bubbly top.

    The balance of creamy sauce, cheese, and tender potatoes creates a dish that is comforting, decadent, and universally loved.


    With its tender, flavorful layers, rich cheese sauce, and golden baked top, these classic scalloped potatoes are a comforting, elegant side dish for any meal.

    Perfect for holiday feasts, cozy dinners, or special occasions, every bite delivers creamy, cheesy goodness that will leave everyone asking for seconds. Whether served alongside roasted meats, vegetables, or enjoyed on their own, scalloped potatoes are the ultimate comfort food.

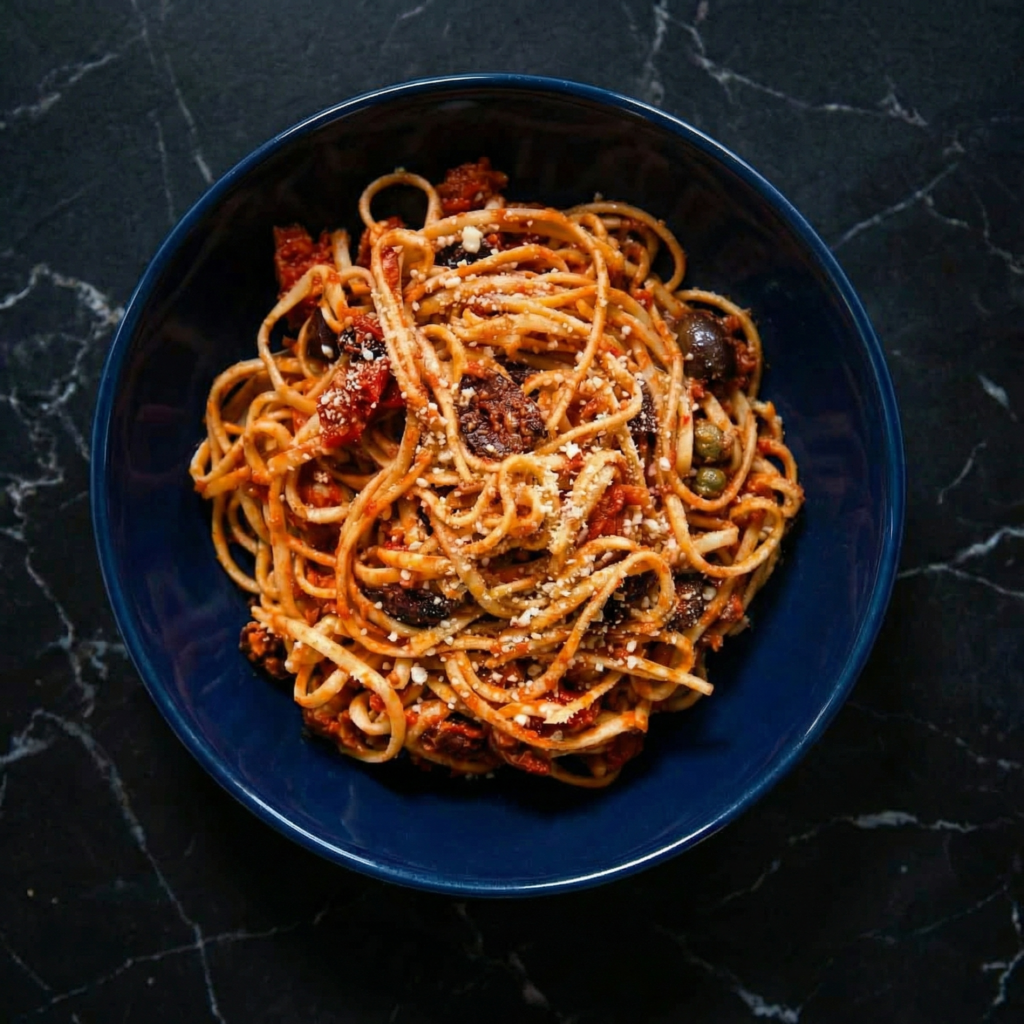
  • Bold, Briny, and Bursting with Flavor: How to Make Classic Pasta Puttanesca at Home

    Bold, Briny, and Bursting with Flavor: How to Make Classic Pasta Puttanesca at Home

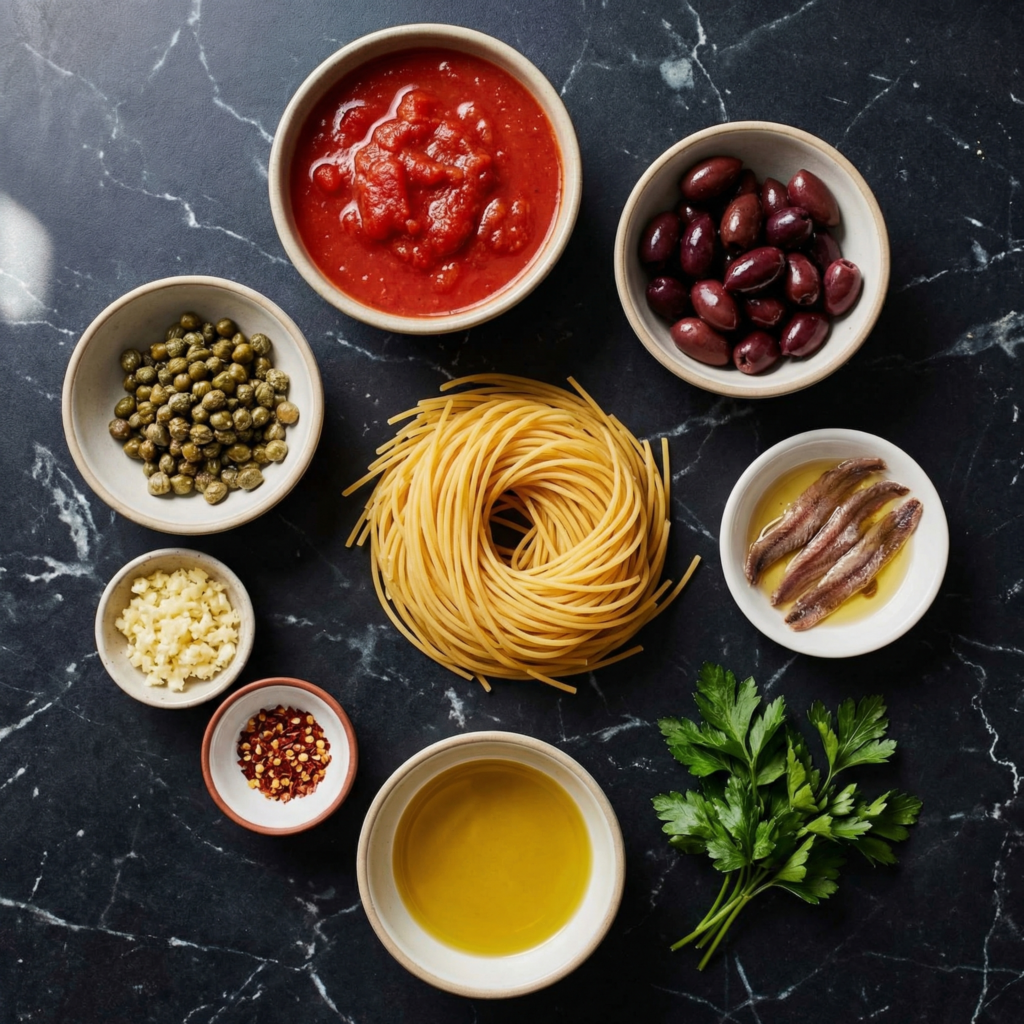
    If you love pasta that delivers punchy, vibrant flavors in every bite, Pasta Puttanesca is your ultimate go-to. Hailing from Southern Italy, this dish is famous for its bold combination of tomatoes, olives, capers, garlic, and anchovies—a salty, briny symphony that’s quick to make yet packed with depth. It’s a perfect weeknight dinner, a crowd-pleasing meal for friends, or a sophisticated dish for a cozy night in.

    What makes Pasta Puttanesca remarkable is its simplicity. With pantry staples and fresh ingredients, you can create a dish that tastes like it simmered all day in a professional Italian kitchen. This step-by-step guide will take you through crafting a traditional, flavorful Pasta Puttanesca that’s perfectly balanced, quick, and unforgettable.


    Why You’ll Love Pasta Puttanesca

    • Bold, savory, and briny flavors
    • Quick and easy to prepare in under 30 minutes
    • Uses simple pantry ingredients you probably already have
    • Perfectly balanced with salty, tangy, and aromatic notes
    • Pairs beautifully with crusty bread and a green salad

    The magic of Pasta Puttanesca is in its sauce: briny olives, tangy capers, and salty anchovies blend with aromatic garlic and chili flakes to create a sauce that clings beautifully to every strand of pasta.


    Ingredients You’ll Need

    For the Pasta:

    • 12 oz (340 g) spaghetti or linguine
    • Salt, for pasta water

    For the Sauce:

    • 3 tablespoons extra virgin olive oil
    • 4 cloves garlic, thinly sliced or minced
    • 4–6 anchovy fillets, finely chopped
    • 1 teaspoon red pepper flakes (adjust to taste)
    • 1 can (14 oz/400 g) diced tomatoes or crushed tomatoes
    • ½ cup pitted black olives, roughly chopped (Kalamata preferred)
    • 2 tablespoons capers, rinsed
    • 1 teaspoon dried oregano
    • ½ teaspoon black pepper
    • Optional: ¼ cup chopped fresh parsley for garnish

    Step 1: Cook the Pasta

    Bring a large pot of salted water to a boil. Add the spaghetti and cook until al dente, following package instructions.

    Reserve ½ cup of pasta water before draining. This starchy water will help bind the sauce to the noodles.

    Drain the pasta and set aside, keeping it warm.


    Step 2: Sauté the Aromatics

    While the pasta cooks, heat olive oil in a large skillet over medium heat.

    Add garlic, red pepper flakes, and anchovies. Sauté for 1–2 minutes until the garlic is fragrant and the anchovies start to dissolve into the oil.

    This step is crucial—it infuses the oil with the umami-rich flavors that form the backbone of the sauce.


    Step 3: Build the Sauce

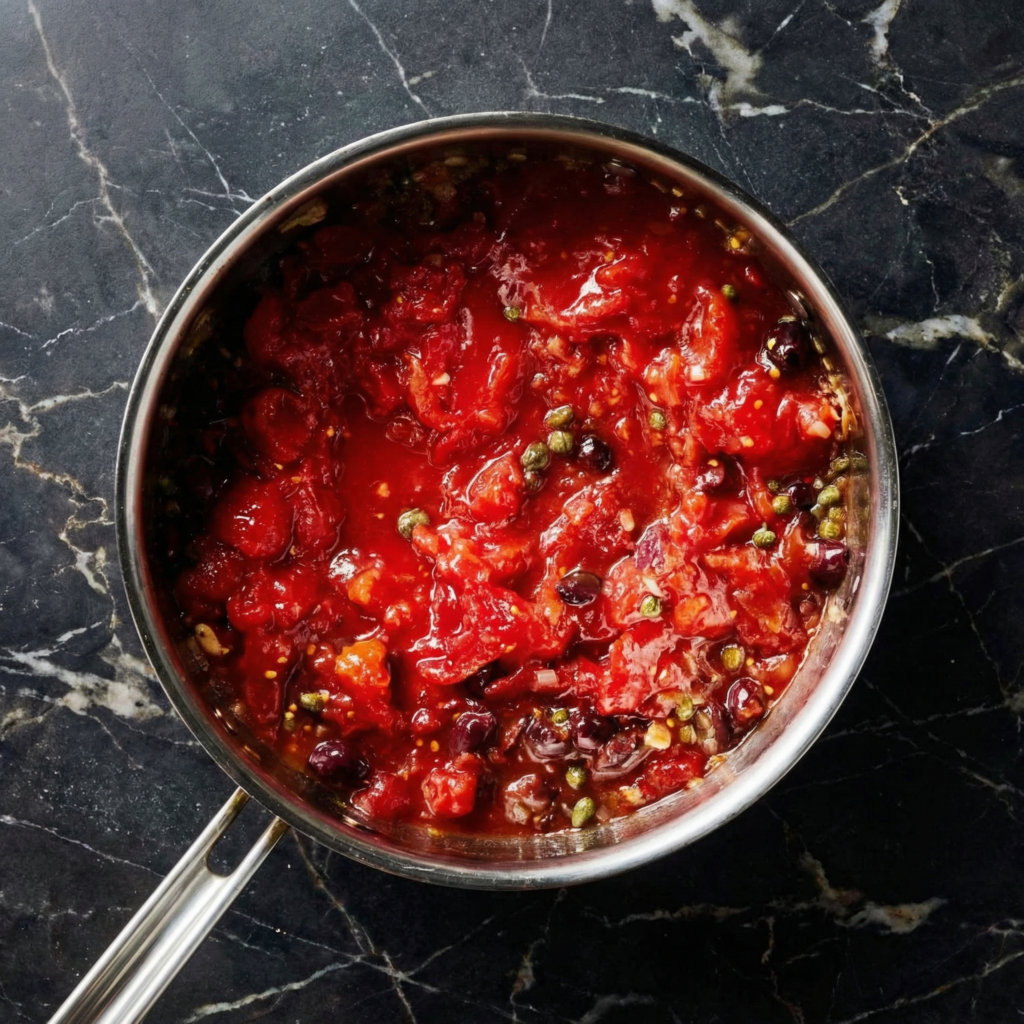
    Add diced tomatoes to the skillet. Stir to combine and bring to a gentle simmer.

    Mix in olives, capers, oregano, and black pepper.

    Simmer for 6–8 minutes, stirring occasionally, until the sauce thickens slightly and flavors meld. Taste and adjust seasoning—anchovies add saltiness, but you may want a pinch of extra salt depending on your preference.


    Step 4: Combine Pasta and Sauce

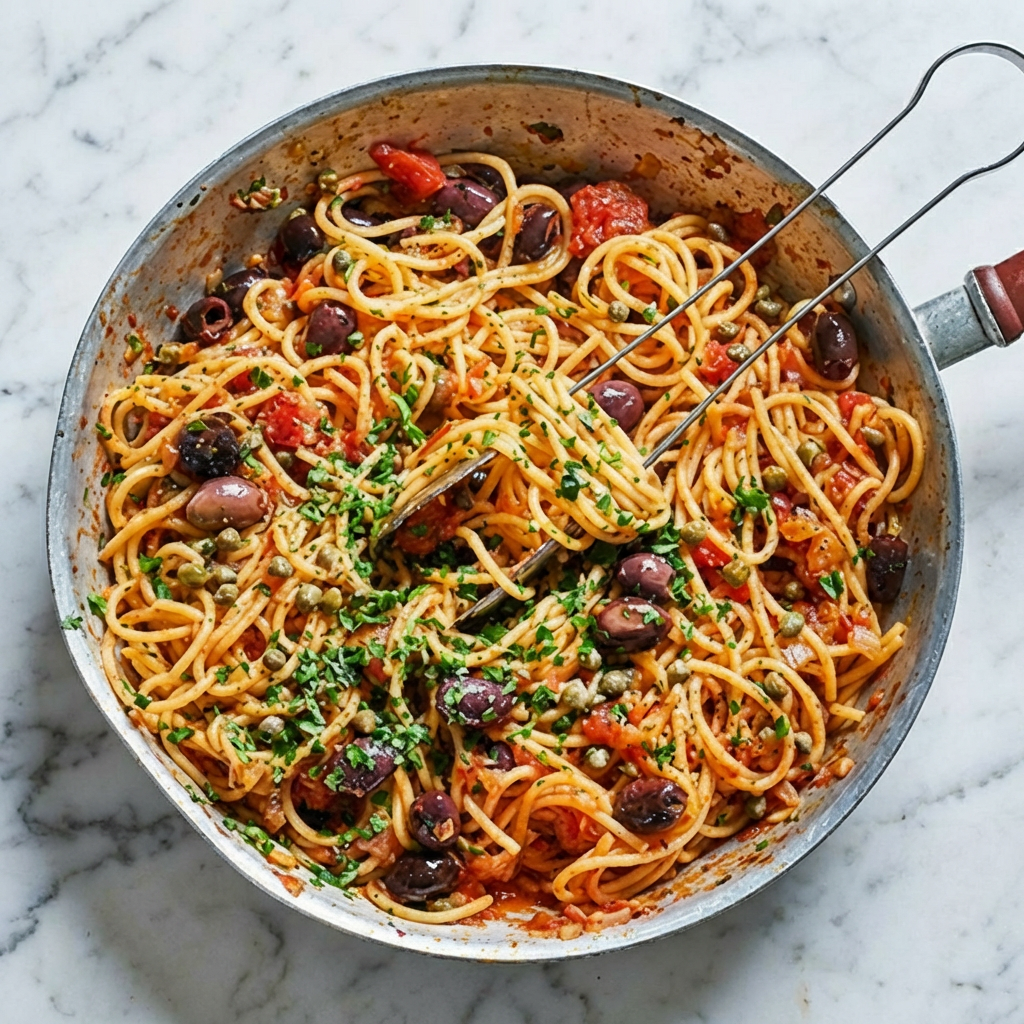
    Add the cooked pasta directly into the skillet with the sauce.

    Toss to coat evenly, adding reserved pasta water a tablespoon at a time until the sauce clings beautifully to the noodles.

    This technique ensures that every strand of spaghetti is coated with the flavorful, briny sauce.


    Step 5: Finish and Garnish

    Remove from heat and stir in chopped fresh parsley if desired.

    Serve immediately with extra black pepper and a drizzle of olive oil for brightness.

    Optional: sprinkle with grated Parmesan or Pecorino cheese, though traditional Puttanesca often goes without.


    Flavor and Texture Highlights

    • Briny, salty bursts from olives, capers, and anchovies
    • Slight heat from red pepper flakes
    • Rich, savory umami from garlic and anchovy-infused oil
    • Bright, fresh notes from optional parsley
    • Perfectly coated pasta that absorbs every bit of sauce

    Every bite is a complex, satisfying combination of bold flavors and satisfying textures.


    Tips for Perfect Pasta Puttanesca

    • Use quality anchovies—they dissolve into the sauce and provide deep umami without fishiness.
    • Don’t skip the pasta water—it helps bind the sauce and makes it silky.
    • Adjust heat carefully—start with 1 teaspoon of red pepper flakes and add more if desired.
    • Serve immediately—Pasta Puttanesca is best fresh; reheating can intensify the saltiness.
    • Balance flavors—taste before serving; add a splash of lemon juice if the sauce feels too salty or tangy.

    Optional Variations

    • Protein Additions: Add cooked shrimp, grilled chicken, or seared scallops for extra heartiness.
    • Vegetarian Version: Omit anchovies; add roasted red peppers or sun-dried tomatoes for depth.
    • Whole Wheat or Gluten-Free: Swap spaghetti for whole wheat or gluten-free pasta for dietary preference.
    • Extra Sauce: Double the sauce ingredients for a more saucy, restaurant-style plate.
    • Herbal Twist: Add fresh basil or thyme for aromatic complexity.

    Storage and Make-Ahead

    • Cooked Pasta Puttanesca can be stored in an airtight container in the refrigerator for up to 2 days.
    • Reheat gently in a skillet with a splash of pasta water to restore sauce consistency.
    • For meal prep, store pasta and sauce separately to prevent noodles from becoming mushy.

    Why This Recipe Works

    Pasta Puttanesca works because it balances bold, briny flavors with the natural sweetness of tomatoes and aromatic garlic. Anchovies provide deep umami, while olives and capers add tang and complexity. Quick cooking preserves freshness, while tossing the pasta in the sauce ensures every bite is perfectly coated.

    This dish proves that simple ingredients, when combined thoughtfully, can produce a restaurant-quality meal that’s vibrant, hearty, and irresistibly delicious.


    With tender, al dente pasta coated in a bold, briny sauce, Pasta Puttanesca delivers complex flavors in a simple, quick meal.

    Perfect for weeknight dinners or impressing friends, it’s an Italian classic that celebrates pantry staples and proves that flavor doesn’t need to be complicated. Serve with a crisp green salad and crusty bread for the ultimate Italian dining experience at home.

  • Bold, Smoky, and Bursting with Flavor: How to Make Tandoori Chicken Skewers at Home

    Bold, Smoky, and Bursting with Flavor: How to Make Tandoori Chicken Skewers at Home

    Few dishes capture the vibrant, aromatic flavors of Indian cuisine quite like Tandoori Chicken.

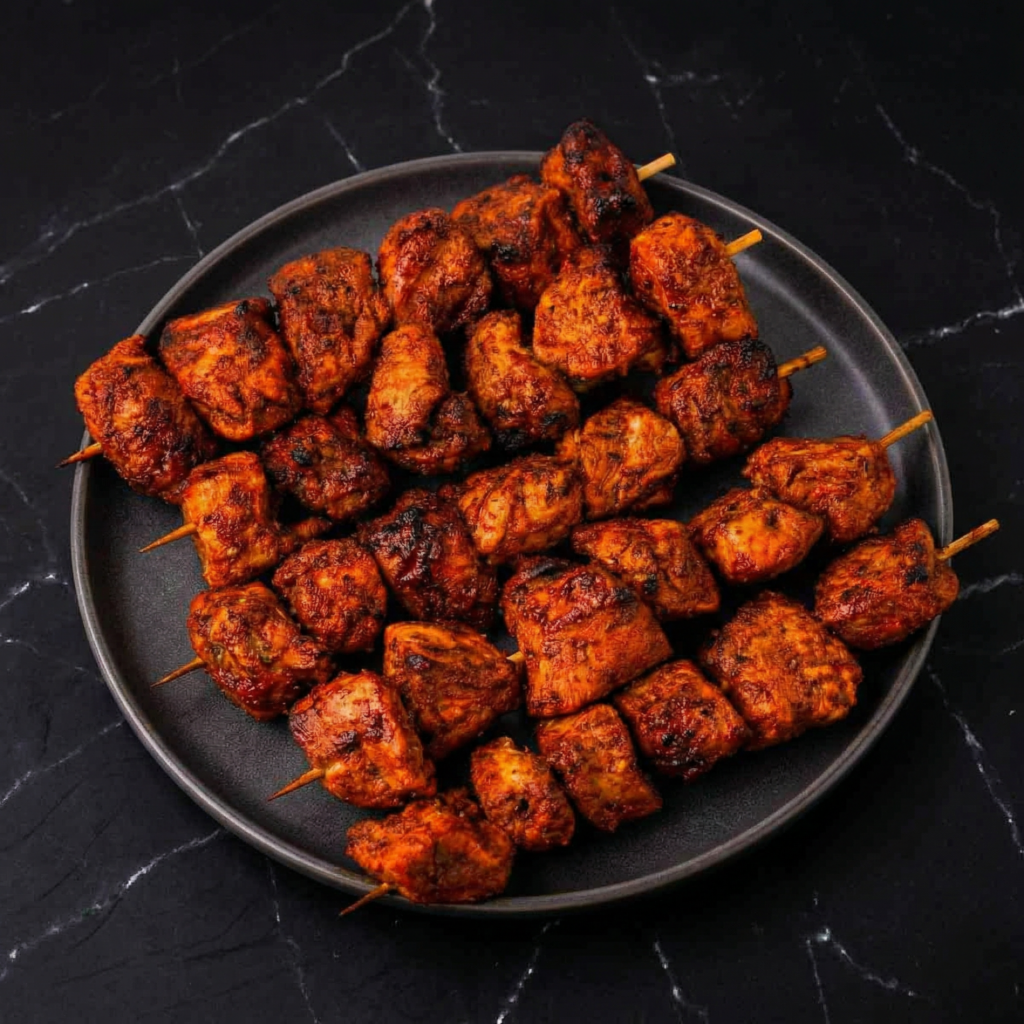
    These skewers feature juicy, marinated chicken infused with a rich blend of spices, yogurt, and citrus, then grilled to perfection until smoky and slightly charred. Perfect for a weeknight dinner, a summer barbecue, or a party appetizer, Tandoori Chicken Skewers are visually stunning, deeply flavorful, and surprisingly easy to make at home—no traditional tandoor oven required.

    This step-by-step guide will walk you through creating tender, flavorful skewers from scratch, including tips for marinating, grilling, and serving a dish that’s restaurant-quality yet home-friendly.


    Why You’ll Love Tandoori Chicken Skewers

    • Bold, smoky, and aromatic flavors
    • Juicy, tender chicken with a slightly charred exterior
    • Easy to prepare with simple ingredients
    • Works on grill, oven, or stovetop grill pan
    • Perfect for serving as a main, appetizer, or party dish

    The key is a marinade that balances yogurt, citrus, and traditional tandoori spices, which not only imparts flavor but also tenderizes the chicken for maximum juiciness.


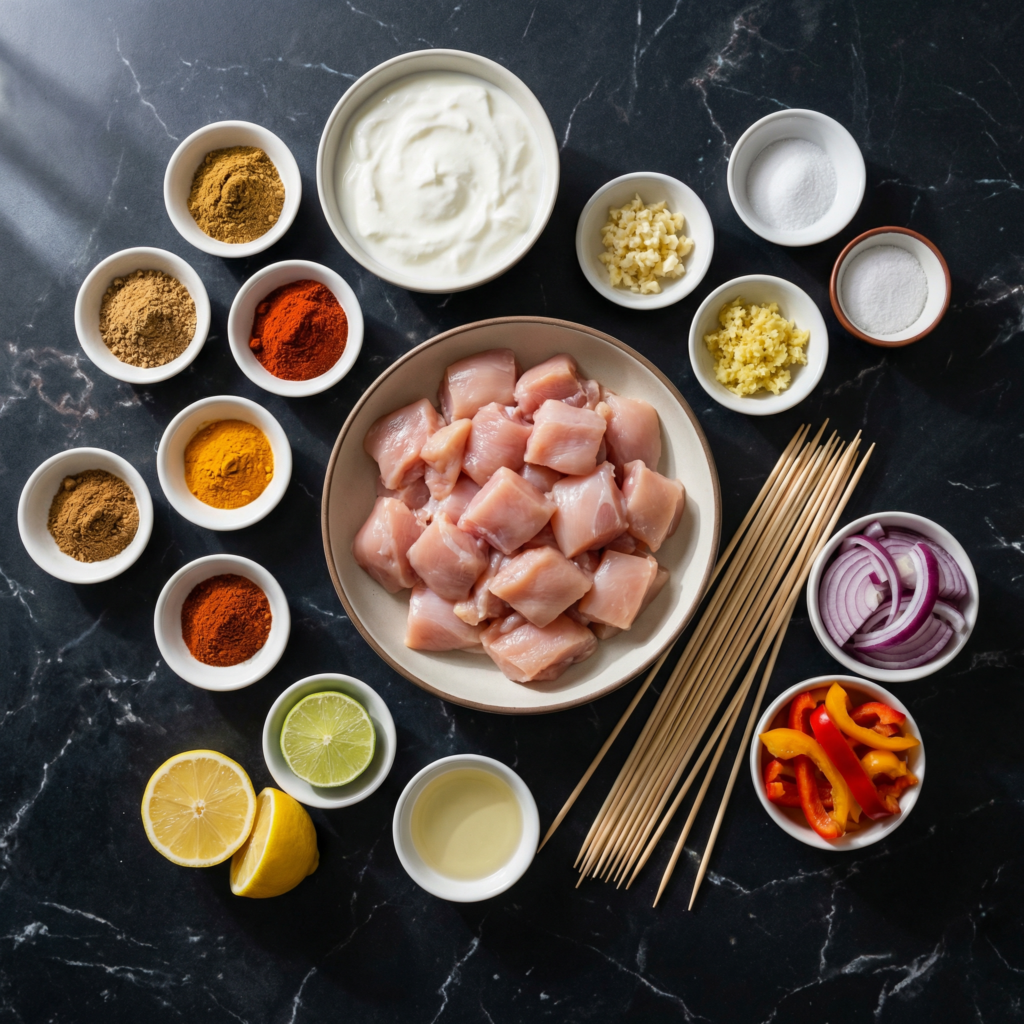
    Ingredients You’ll Need

    For the Chicken:

    • 1½ pounds boneless, skinless chicken thighs or breasts, cut into 1½-inch cubes
    • Wooden or metal skewers (soak wooden skewers in water for 15–20 minutes)

    For the Marinade:

    • ½ cup plain yogurt (Greek or regular)
    • 2 tablespoons lemon juice
    • 2 tablespoons vegetable oil
    • 2 tablespoons tandoori masala powder (store-bought or homemade)
    • 1 teaspoon ground cumin
    • 1 teaspoon smoked paprika
    • 1 teaspoon turmeric
    • 1 teaspoon chili powder (adjust to taste)
    • 3 garlic cloves, minced
    • 1-inch piece ginger, grated
    • 1 teaspoon salt

    For Serving:

    • Lemon wedges
    • Fresh cilantro
    • Sliced red onion
    • Optional: mint chutney or yogurt sauce

    Step 1: Prepare the Marinade

    In a medium bowl, combine yogurt, lemon juice, vegetable oil, tandoori masala, cumin, paprika, turmeric, chili powder, minced garlic, grated ginger, and salt.

    Whisk until smooth and aromatic. This vibrant mixture is the heart of your tandoori flavor.


    Step 2: Marinate the Chicken

    Add the cubed chicken to the marinade, ensuring each piece is fully coated.

    Cover and refrigerate for at least 2 hours, preferably 4–6 hours, or even overnight for maximum flavor and tenderness.

    Marinating allows the yogurt and citrus to tenderize the chicken while the spices infuse deep, smoky flavor.


    Step 3: Preheat Grill or Oven

    If using a grill, preheat to medium-high heat and lightly oil the grates.

    For oven-baking, preheat the oven to 425°F (220°C) and line a baking sheet with foil. Place a wire rack on top for even heat circulation.

    If cooking on a stovetop, preheat a grill pan over medium-high heat and lightly brush with oil.


    Step 4: Thread the Chicken onto Skewers

    Remove chicken from the marinade, letting excess drip off to prevent flare-ups on the grill.

    Thread the chicken cubes onto skewers, leaving a small gap between pieces to ensure even cooking and slight charring.


    Step 5: Cook the Skewers

    Grilling:

    Place skewers on the preheated grill. Cook for 10–12 minutes, turning every 2–3 minutes, until chicken is cooked through and lightly charred.

    Oven-Baking:

    Place skewers on the wire rack and bake for 12–15 minutes, flipping halfway through. For extra char, broil for 1–2 minutes at the end.

    Stovetop Grill Pan:

    Cook skewers over medium-high heat for 10–12 minutes, rotating frequently to ensure even browning.

    Check that the internal temperature reaches 165°F (74°C) for safe consumption.


    Step 6: Rest the Chicken

    Let the skewers rest for 3–5 minutes after cooking to allow juices to redistribute, keeping the chicken tender and moist.


    Step 7: Garnish and Serve

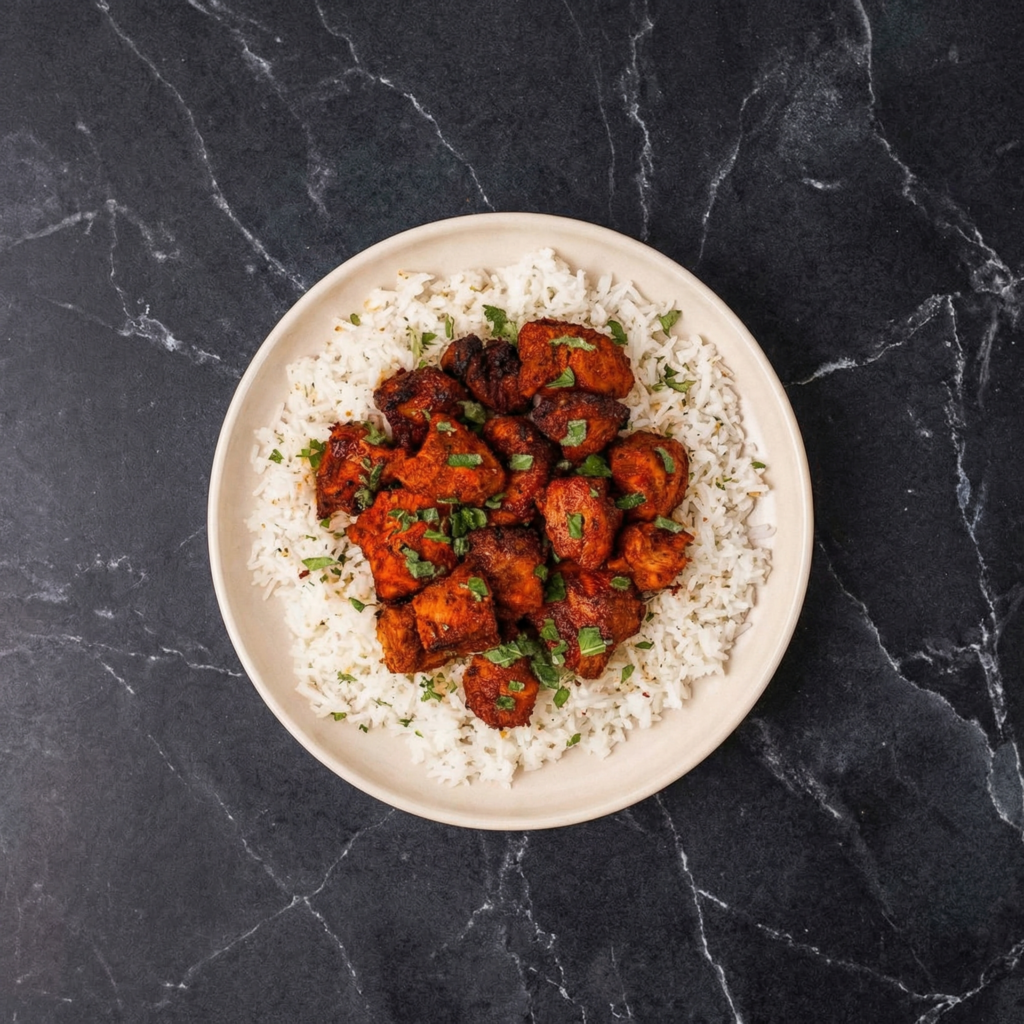
    Arrange skewers on a serving platter. Garnish with fresh cilantro, lemon wedges, and thinly sliced red onion for brightness.

    Optional: serve with mint chutney or a simple yogurt dip to complement the smoky, spiced chicken.

    These skewers are perfect alongside rice, naan, or in a lettuce wrap for a low-carb option.


    Flavor and Texture Highlights

    • Juicy, tender chicken with a smoky exterior
    • Bold, aromatic spices balanced by yogurt and citrus
    • Slightly charred edges for added depth of flavor
    • Fresh garnishes that add brightness and contrast

    Every bite combines complex flavors and satisfying textures, making Tandoori Chicken Skewers irresistible.


    Tips for Perfect Tandoori Chicken

    • Use thighs for juicier meat; breasts are leaner but require careful monitoring to avoid drying.
    • Marinate long for maximum tenderness and depth of flavor.
    • Thread skewers evenly to ensure consistent cooking.
    • Don’t overcrowd the grill or pan to allow proper caramelization.
    • Serve immediately for optimal texture and flavor.

    Optional Variations

    • Vegetable Skewers: Alternate chicken with bell peppers, onions, or zucchini.
    • Spicy Variation: Add extra chili powder or fresh chilies to the marinade.
    • Creamier Marinade: Stir in a little coconut milk for a richer flavor.
    • Sheet Pan Meal: Bake chicken and vegetables together for a simple one-pan dinner.

    Storage and Meal Prep

    • Marinated chicken can be stored in the refrigerator for up to 24 hours before cooking.
    • Cooked skewers can be refrigerated for 2–3 days and reheated gently in the oven or on a grill.
    • The marinade can also double as a dipping sauce if boiled for 1–2 minutes to ensure safety.

    Why This Recipe Works

    Tandoori Chicken Skewers are a perfect combination of smoky, spicy, and tangy flavors. Yogurt tenderizes the chicken, while the blend of spices creates depth and aroma. Cooking on skewers ensures even heat distribution and a visually appealing presentation.

    These skewers are versatile, easy to prepare, and full of bold flavors, making them perfect for weeknight dinners, parties, or outdoor grilling.


    With tender, juicy chicken, vibrant spices, and fresh garnishes, Tandoori Chicken Skewers bring the bold flavors of Indian cuisine straight to your home kitchen.

    They’re easy to make, fun to serve, and utterly satisfying—proof that a simple skewer can deliver extraordinary taste.

  • Fresh, Zesty & Vibrant: How to Make Lemongrass Vermicelli Salad at Home

    Fresh, Zesty & Vibrant: How to Make Lemongrass Vermicelli Salad at Home

    There’s nothing quite like a dish that feels light, refreshing, and packed with bold flavors all at once.

    Enter the Lemongrass Vermicelli Salad—a Vietnamese-inspired bowl that combines tender vermicelli noodles, fragrant lemongrass, crisp vegetables, fresh herbs, and a tangy, savory dressing. Perfect for lunch, dinner, or even a make-ahead meal, this salad is an explosion of texture and flavor in every bite.

    Whether you’re a fan of Asian cuisine or just looking for a vibrant, healthy dish, this step-by-step guide will help you assemble a restaurant-quality Lemongrass Vermicelli Salad that’s fresh, balanced, and utterly delicious.


    Why You’ll Love This Salad

    • Light, healthy, and refreshing
    • Perfectly balanced flavors: tangy, savory, and slightly sweet
    • Quick to prepare with simple ingredients
    • Fully customizable with proteins or extra vegetables
    • Ideal for meal prep, parties, or solo lunches

    The magic of this salad lies in the lemongrass—its fragrant, citrusy aroma infuses the noodles and dressing for a uniquely bright flavor profile.


    Ingredients You’ll Need

    For the Vermicelli Salad:

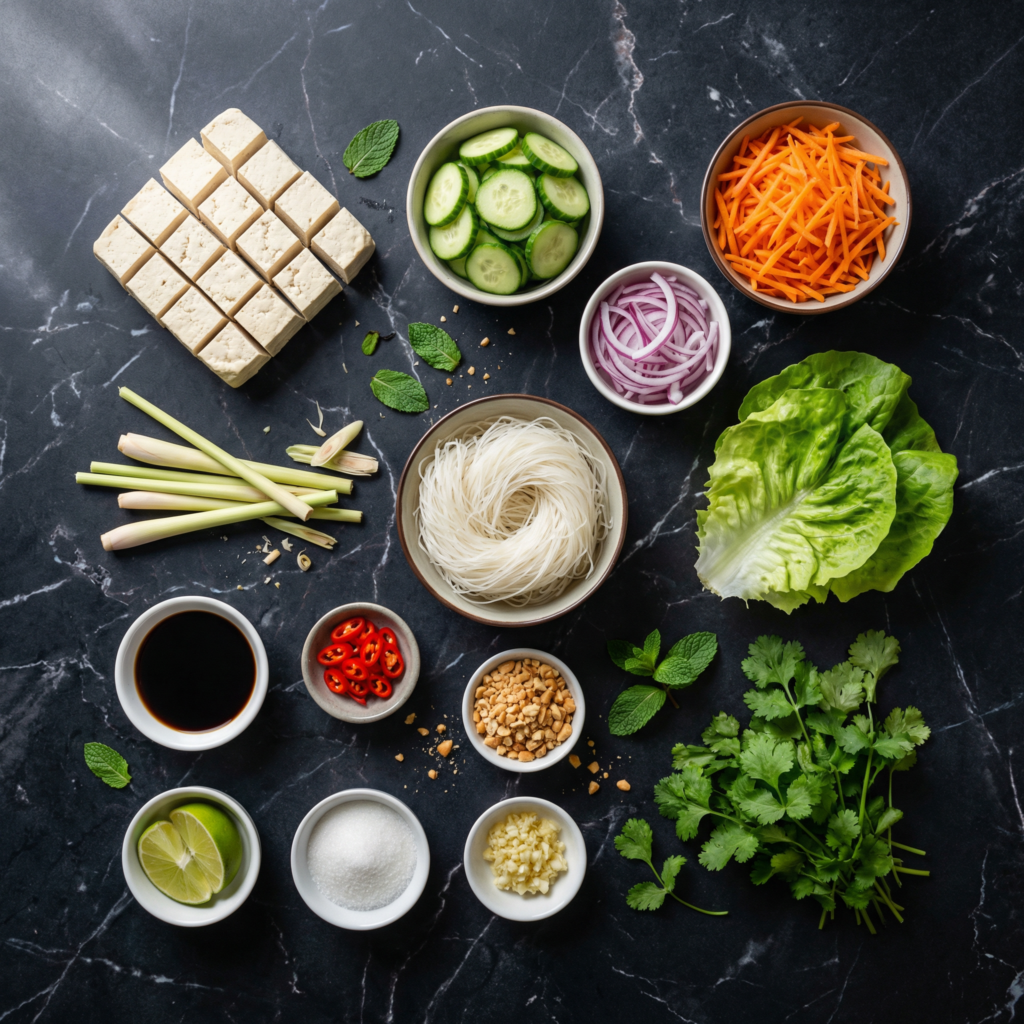
    • 6 oz (170 g) rice vermicelli noodles
    • 1 cup shredded carrots
    • 1 cup cucumber, julienned
    • 1 red bell pepper, thinly sliced
    • ½ cup bean sprouts (optional)
    • ½ cup fresh herbs: mint, cilantro, and Thai basil
    • Optional protein: grilled chicken, shrimp, or tofu

    For the Lemongrass:

    • 2 stalks lemongrass, finely minced (white parts only)
    • 1 teaspoon vegetable oil
    • 1 clove garlic, minced
    • 1 teaspoon sugar

    For the Dressing (Nuoc Cham-inspired):

    • 3 tablespoons fish sauce (or soy sauce for vegetarian)
    • 2 tablespoons lime juice
    • 1 tablespoon sugar
    • 1 garlic clove, minced
    • 1 small chili, minced (optional for heat)
    • 2 tablespoons water

    For Garnish:

    • Crushed roasted peanuts
    • Lime wedges
    • Extra herbs

    Step 1: Prepare the Vermicelli Noodles

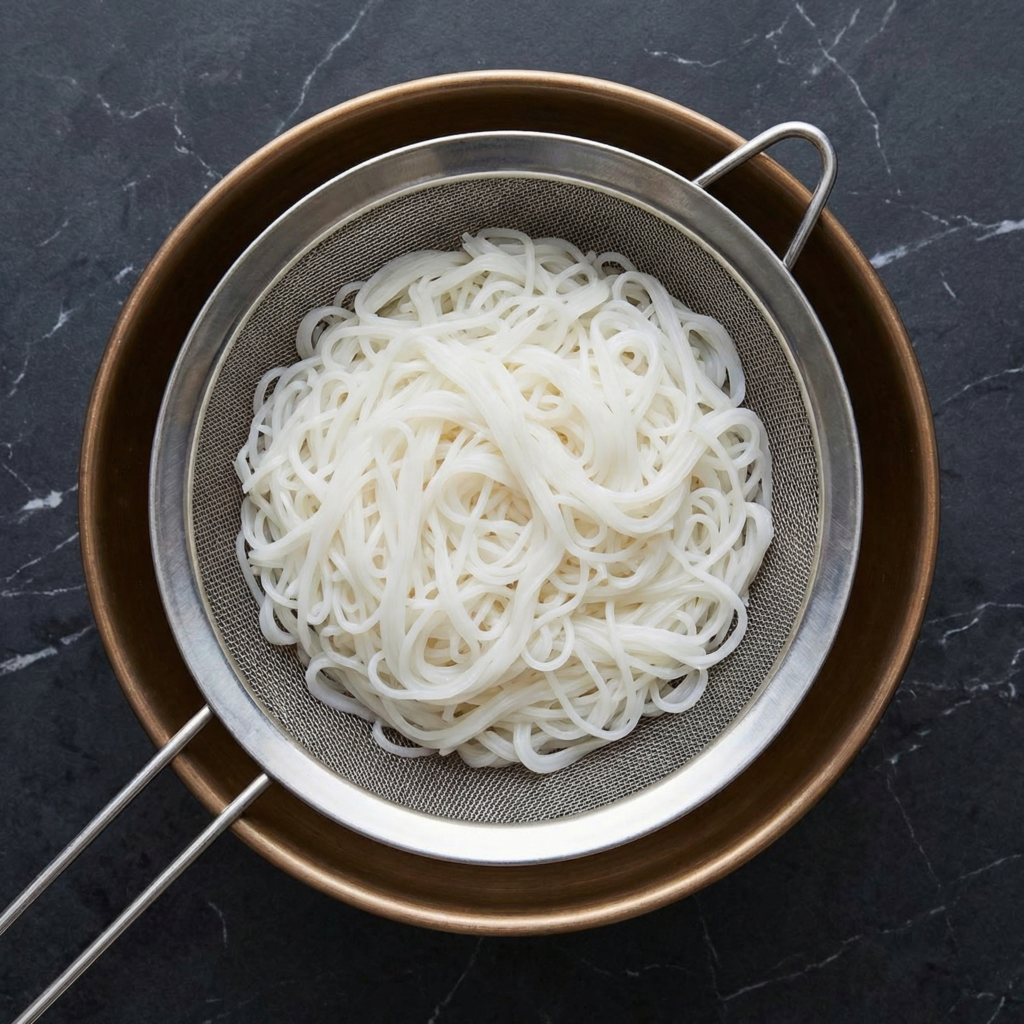
    Bring a large pot of water to a boil. Remove from heat, add the rice vermicelli noodles, and let them soak for 4–5 minutes or until tender but firm.

    Drain and rinse under cold water to stop the cooking process. Toss lightly with a teaspoon of vegetable oil to prevent sticking and set aside.


    Step 2: Sauté the Lemongrass

    Heat 1 teaspoon vegetable oil in a small skillet over medium heat. Add minced lemongrass, garlic, and sugar.

    Sauté for 1–2 minutes until fragrant, being careful not to burn the garlic.

    This lemongrass mixture will add a fragrant, citrusy note to your noodles and enhance the salad’s overall flavor.


    Step 3: Make the Dressing

    In a small bowl, whisk together fish sauce, lime juice, sugar, minced garlic, chili (if using), and water until the sugar dissolves.

    Taste and adjust balance—add more lime for acidity, sugar for sweetness, or fish sauce for saltiness.


    Step 4: Prep the Vegetables and Herbs

    While the noodles soak and the lemongrass sautés, prepare the vegetables:

    • Shred carrots
    • Julienne cucumber
    • Thinly slice red bell pepper
    • Wash and roughly chop fresh herbs

    For proteins, grill or pan-sear chicken, shrimp, or tofu until fully cooked and flavorful. Slice into bite-sized pieces for easy mixing.


    Step 5: Combine the Noodles and Lemongrass

    Place the drained noodles in a large mixing bowl. Add the sautéed lemongrass and garlic mixture, tossing gently to coat the noodles evenly.

    This step infuses the noodles with subtle citrusy aroma and sweetness, creating the base for the salad.


    Step 6: Assemble the Salad

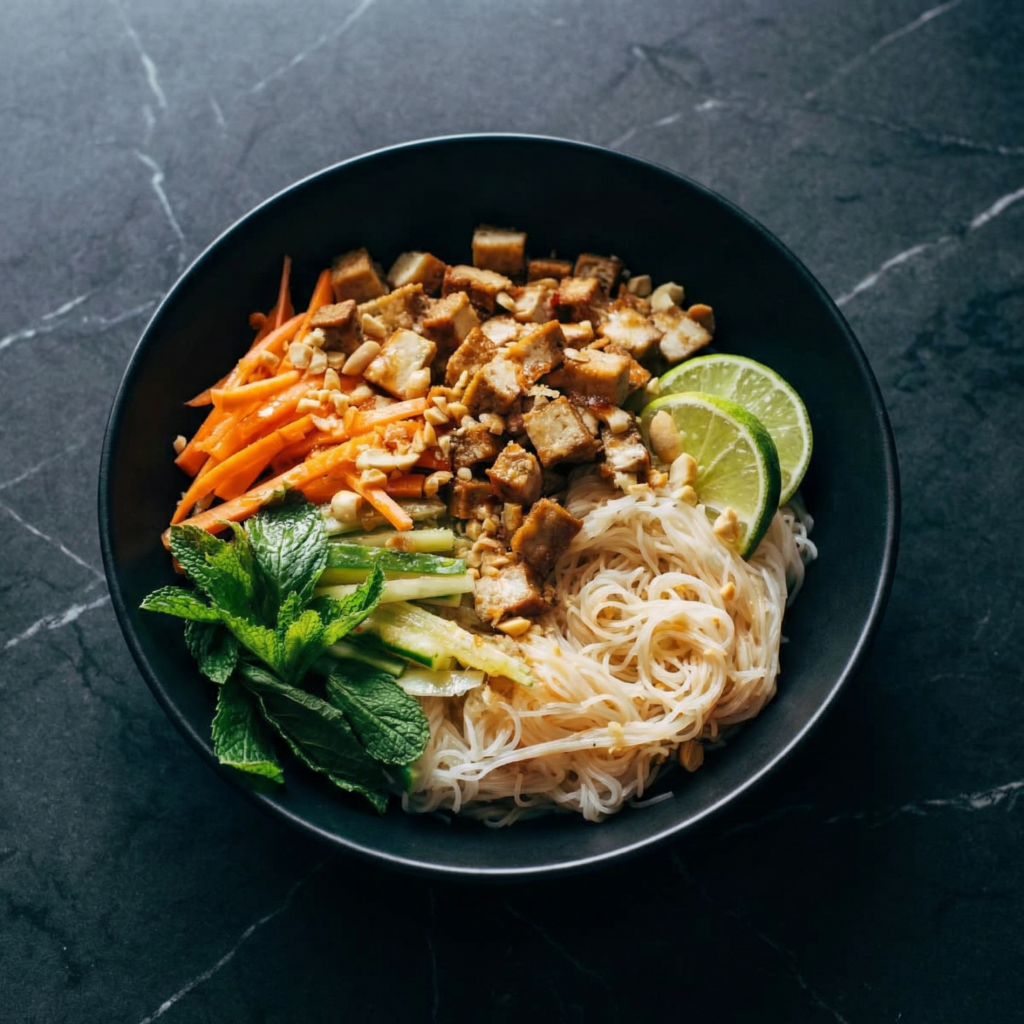
    Add the prepared vegetables, herbs, and optional protein to the noodles. Pour the dressing over the top and toss gently to combine, ensuring everything is coated evenly.

    Balance is key—each forkful should have noodles, vegetables, herbs, and a hint of protein.


    Step 7: Garnish and Serve

    Transfer the salad to serving bowls. Sprinkle with crushed roasted peanuts and additional fresh herbs for extra flavor and crunch.

    Serve immediately with lime wedges for a fresh citrus boost.

    Optional: drizzle extra dressing on top if desired for more tanginess.


    Flavor and Texture Highlights

    A perfect Lemongrass Vermicelli Salad balances:

    • Tender, fragrant noodles
    • Crisp, fresh vegetables
    • Bright, citrusy lemongrass aroma
    • Savory-sweet-tangy dressing
    • Crunchy peanuts and fresh herbs

    Every bite combines soft, crunchy, and aromatic elements for an unforgettable experience.


    Tips for the Perfect Salad

    • Use only the white, tender parts of lemongrass for the best flavor.
    • Rinse noodles under cold water to stop cooking and prevent clumping.
    • Chop vegetables uniformly for even texture and visual appeal.
    • Make dressing ahead of time—flavors deepen as it sits.
    • Adjust heat by adding more chili or leaving it out entirely.

    Optional Variations

    • Protein Swap: Add grilled shrimp, pork, or marinated tofu.
    • Noodle Alternatives: Try soba noodles, rice sticks, or spiralized vegetables for a low-carb option.
    • Extra Crunch: Toasted cashews or sesame seeds make a delicious topping.
    • Vegan Dressing: Use soy sauce or tamari instead of fish sauce for vegetarian or vegan versions.
    • Spicy Kick: Add sriracha, chili oil, or fresh chilies to elevate heat.

    Storage and Meal Prep

    Store noodles, vegetables, and protein separately in airtight containers in the fridge for up to 2–3 days.

    Assemble bowls when ready to eat to maintain freshness and crispness of the vegetables.

    Dressing can be stored in a sealed container for up to a week.


    Why This Recipe Works

    The Lemongrass Vermicelli Salad works because it balances bright, fragrant, and savory flavors with multiple textures. The tender noodles, crisp vegetables, fresh herbs, and zesty dressing create a harmony that feels light yet satisfying.

    It’s customizable, quick to prepare, and ideal for any occasion—from weekday lunches to dinner parties.


    With fresh herbs, zesty lemongrass, and vibrant vegetables, this Lemongrass Vermicelli Salad is a refreshing, crave-worthy dish you can make at home.

    Perfectly balanced, customizable, and full of color, it proves that healthy meals can be just as exciting and flavorful as indulgent ones.

  • The Ultimate Fried Chicken Sandwich: Crispy, Juicy, and Worth the Mess

    The Ultimate Fried Chicken Sandwich: Crispy, Juicy, and Worth the Mess

    Few things hit harder than a perfectly made fried chicken sandwich. We’re talking shatteringly crisp coating, tender and juicy chicken, a soft toasted bun, and just enough sauce to bring everything together.

    It’s indulgent, comforting, and incredibly satisfying—and the best part is that you can make a restaurant-quality version right at home.

    This step-by-step guide walks you through everything, from seasoning the chicken to building the sandwich so every bite delivers crunch, flavor, and balance. Whether you’re cooking for friends or treating yourself, this fried chicken sandwich is a guaranteed favorite.


    Why This Fried Chicken Sandwich Works

    A great fried chicken sandwich is all about contrast:

    • Crispy exterior paired with juicy chicken
    • Savory seasoning balanced with a touch of sweetness
    • Soft buns against crunchy coating

    This recipe focuses on technique just as much as ingredients, ensuring consistent results even if it’s your first time frying.


    Ingredients You’ll Need

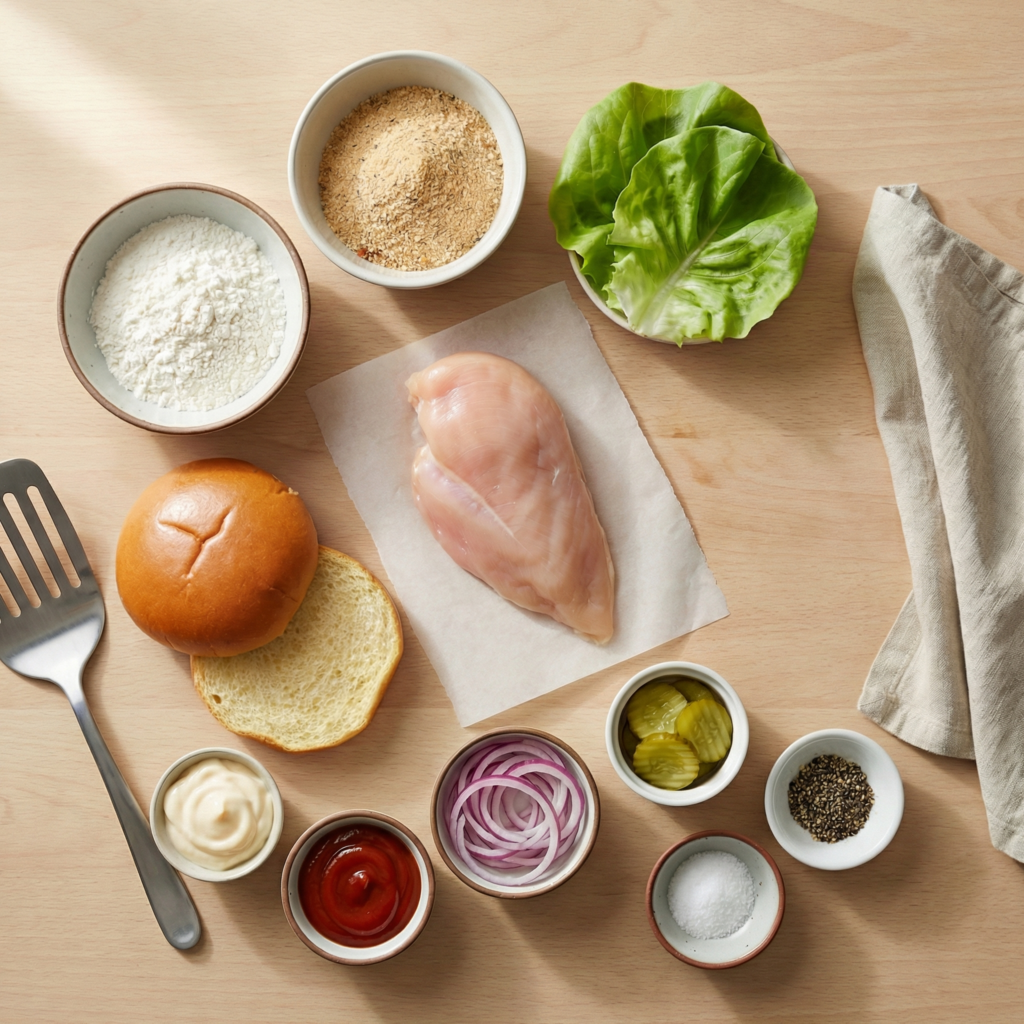
    Gather everything before you start—organization makes frying much easier.

    For the chicken:

    • 2 large boneless, skinless chicken breasts
    • 1 cup buttermilk
    • 1 teaspoon salt
    • ½ teaspoon black pepper
    • ½ teaspoon paprika
    • ½ teaspoon garlic powder

    For the breading:

    • 1 ½ cups all-purpose flour
    • 1 teaspoon salt
    • 1 teaspoon paprika
    • ½ teaspoon cayenne pepper (optional)
    • ½ teaspoon onion powder

    For frying:

    • Vegetable or canola oil

    For assembling:

    • 4 brioche buns
    • Butter for toasting
    • Dill pickles
    • Lettuce (optional)
    • Mayo or spicy sauce of choice

    Step-by-Step Instructions

    Step 1: Prepare the Chicken

    Slice each chicken breast horizontally to create thinner cutlets. This helps the chicken cook evenly and keeps the sandwich from being too bulky.

    Place the chicken in a bowl and add buttermilk, salt, pepper, paprika, and garlic powder. Mix well, cover, and refrigerate for at least 30 minutes—or up to overnight for deeper flavor.


    Step 2: Set Up the Breading Station

    In a shallow bowl, whisk together the flour, salt, paprika, cayenne, and onion powder.

    Remove the chicken from the buttermilk, allowing excess to drip off, then dredge each piece thoroughly in the seasoned flour. Press firmly so the coating sticks well.

    For extra crunch, dip the chicken back into the buttermilk and then into the flour a second time.


    Step 3: Heat the Oil

    Pour oil into a deep skillet or heavy-bottomed pan until it reaches about 1½ inches deep. Heat to 175°C / 350°F.

    If you don’t have a thermometer, test the oil by dropping in a small pinch of flour—it should sizzle immediately.


    Step 4: Fry the Chicken

    Carefully place the breaded chicken into the hot oil, working in batches to avoid overcrowding. Fry for 5–7 minutes per side, turning once, until golden brown and fully cooked.

    Transfer to a wire rack or paper towel-lined plate to drain excess oil.


    Step 5: Toast the Buns

    While the chicken rests, butter the cut sides of the brioche buns and toast them in a skillet until golden brown. Toasting adds flavor and keeps the buns from getting soggy.


    Step 6: Build the Sandwich

    Start with the bottom bun and spread a generous layer of mayo or sauce. Add lettuce if using, followed by the crispy fried chicken. Top with dill pickles for brightness and crunch.

    Finish with the top bun and press gently to set the sandwich.


    Step 7: Serve Hot

    Serve immediately while the chicken is at its crispiest. Pair with fries, coleslaw, or a simple salad for a complete meal.


    Tips for Extra-Crispy Fried Chicken

    • Don’t rush the marinade—buttermilk tenderizes the chicken
    • Double dredge for thicker, crunchier coating
    • Maintain oil temperature for even frying
    • Rest after frying to lock in juices

    These small steps make a huge difference.


    Variations to Try

    Once you master the classic, experiment:

    • Add hot honey for a sweet-spicy twist
    • Use spicy mayo or chipotle sauce
    • Swap lettuce for crunchy slaw
    • Add melted cheese for an indulgent upgrade

    The fried chicken sandwich is endlessly customizable.


    Final Thoughts

    This fried chicken sandwich recipe proves you don’t need a deep fryer or fast-food drive-thru to enjoy an incredible sandwich.

    With the right seasoning, proper frying technique, and thoughtful assembly, you get a sandwich that’s crispy, juicy, and completely irresistible.

    Once you make it at home, it’s hard to go back to anything else.