Tag: easy quick bread

  • Swirled with Sweet Spice: The Ultimate Cinnamon Quick Bread You’ll Make Again and Again

    Swirled with Sweet Spice: The Ultimate Cinnamon Quick Bread You’ll Make Again and Again

    There’s something timeless about the warm aroma of cinnamon drifting through your kitchen.

    Cinnamon quick bread is soft, tender, and beautifully swirled with sweet spice—perfect for breakfast, brunch, or an afternoon treat with coffee. Best of all, since it’s a quick bread, there’s no yeast and no rising time required.

    Just mix, swirl, bake, and enjoy. This step-by-step guide will show you exactly how to create a moist, bakery-style cinnamon quick bread with a rich cinnamon sugar ribbon in every slice.
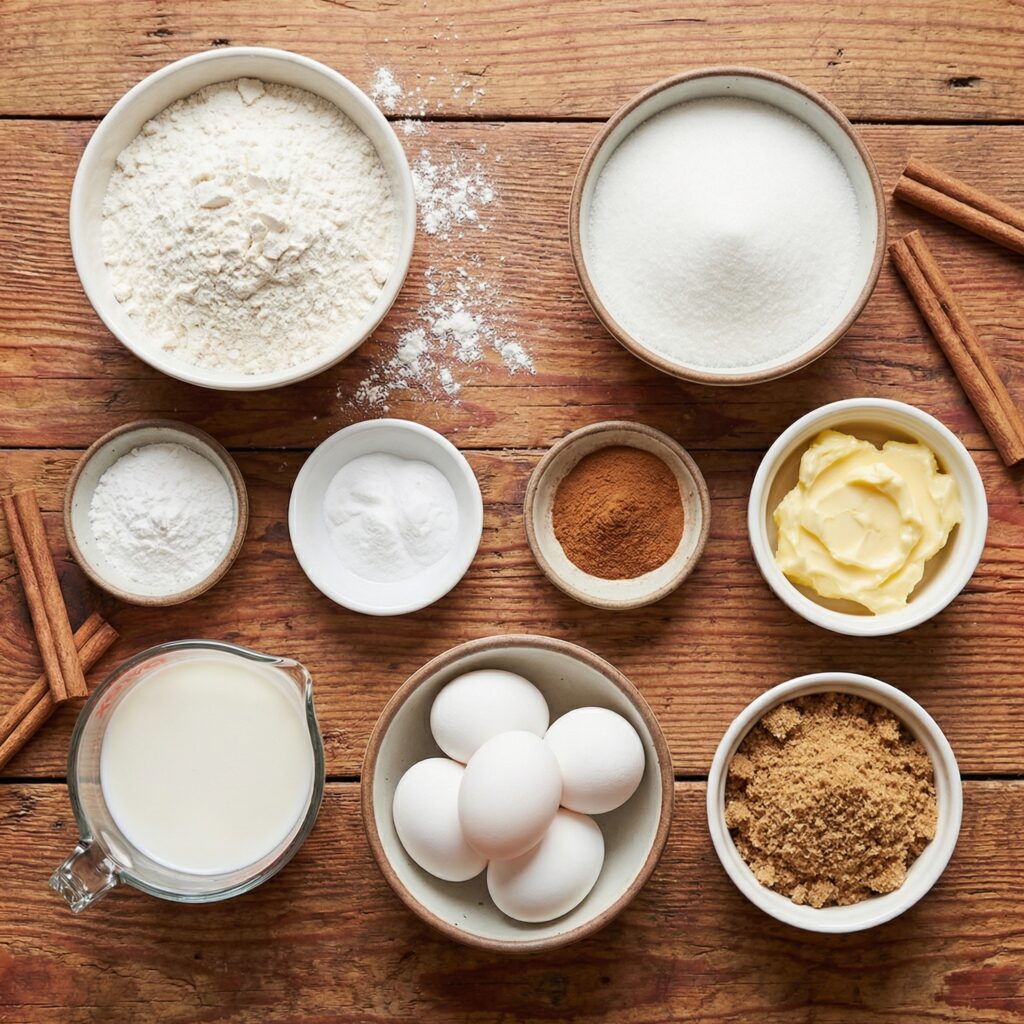

    Ingredients You’ll Need

    For the Bread Batter:

    • 2 cups (250g) all-purpose flour
    • 1 cup (200g) granulated sugar
    • 1 teaspoon baking soda
    • ½ teaspoon baking powder
    • ½ teaspoon salt
    • 1 teaspoon ground cinnamon
    • 2 large eggs
    • 1 cup (240ml) buttermilk (or milk + 1 tablespoon vinegar)
    • ½ cup (120ml) vegetable oil or melted butter
    • 1 teaspoon vanilla extract

    For the Cinnamon Swirl:

    • ⅓ cup (65g) brown sugar
    • 1 tablespoon ground cinnamon
    • 1 tablespoon melted butter

    Optional Glaze:

    • ½ cup powdered sugar
    • 1–2 tablespoons milk
    • ¼ teaspoon vanilla extract

    Step 1: Preheat and Prepare Your Pan

    Preheat your oven to 350°F (175°C). Lightly grease a standard 9×5-inch loaf pan with butter or nonstick spray.

    For easy removal, you can also line the pan with parchment paper, leaving an overhang on the sides.

    Preparing the pan properly ensures your bread releases cleanly after baking.


    Step 2: Mix the Dry Ingredients

    In a large mixing bowl, whisk together the flour, sugar, baking soda, baking powder, salt, and cinnamon.

    Mixing the dry ingredients first ensures even distribution of the leavening agents and spice, giving the bread a consistent texture and flavor throughout.


    Step 3: Combine the Wet Ingredients

    In a separate bowl, whisk together the eggs, buttermilk, oil (or melted butter), and vanilla extract until smooth.

    The buttermilk adds moisture and a slight tang, while the oil keeps the bread soft and tender for days.


    Step 4: Combine Wet and Dry Mixtures

    Pour the wet ingredients into the bowl of dry ingredients. Using a spatula or wooden spoon, gently stir until just combined.

    Be careful not to overmix—this can develop too much gluten and make the bread dense. The batter should be smooth but slightly thick, with no visible streaks of flour.


    Step 5: Prepare the Cinnamon Swirl

    In a small bowl, mix together the brown sugar, ground cinnamon, and melted butter until combined.

    This mixture will create the sweet, gooey ribbon that makes cinnamon quick bread so irresistible.


    Step 6: Layer and Swirl

    Pour half of the batter into the prepared loaf pan and spread evenly. Sprinkle half of the cinnamon swirl mixture over the batter.

    Add the remaining batter on top and gently smooth it out. Sprinkle the rest of the cinnamon mixture over the top layer. Using a knife or skewer, gently swirl the cinnamon sugar into the batter with a few figure-eight motions. Avoid over-swirling—you want distinct ribbons of cinnamon throughout the bread.


    Step 7: Bake to Golden Perfection

    Place the loaf pan in the preheated oven and bake for 50–60 minutes, or until a toothpick inserted into the center comes out clean or with just a few moist crumbs.

    If the top begins to brown too quickly, loosely tent the bread with aluminum foil during the last 10–15 minutes of baking.


    Step 8: Cool Before Removing

    Once baked, remove the bread from the oven and let it cool in the pan for 10–15 minutes.

    Then carefully transfer it to a wire rack to cool completely. Cooling allows the crumb to set and prevents the bread from becoming gummy when sliced.


    Step 9: Add the Optional Glaze

    For an extra touch of sweetness, whisk together powdered sugar, milk, and vanilla extract until smooth.

    Drizzle the glaze over the cooled bread, allowing it to cascade down the sides. Let it set for 10–15 minutes before slicing.


    Step 10: Slice and Serve

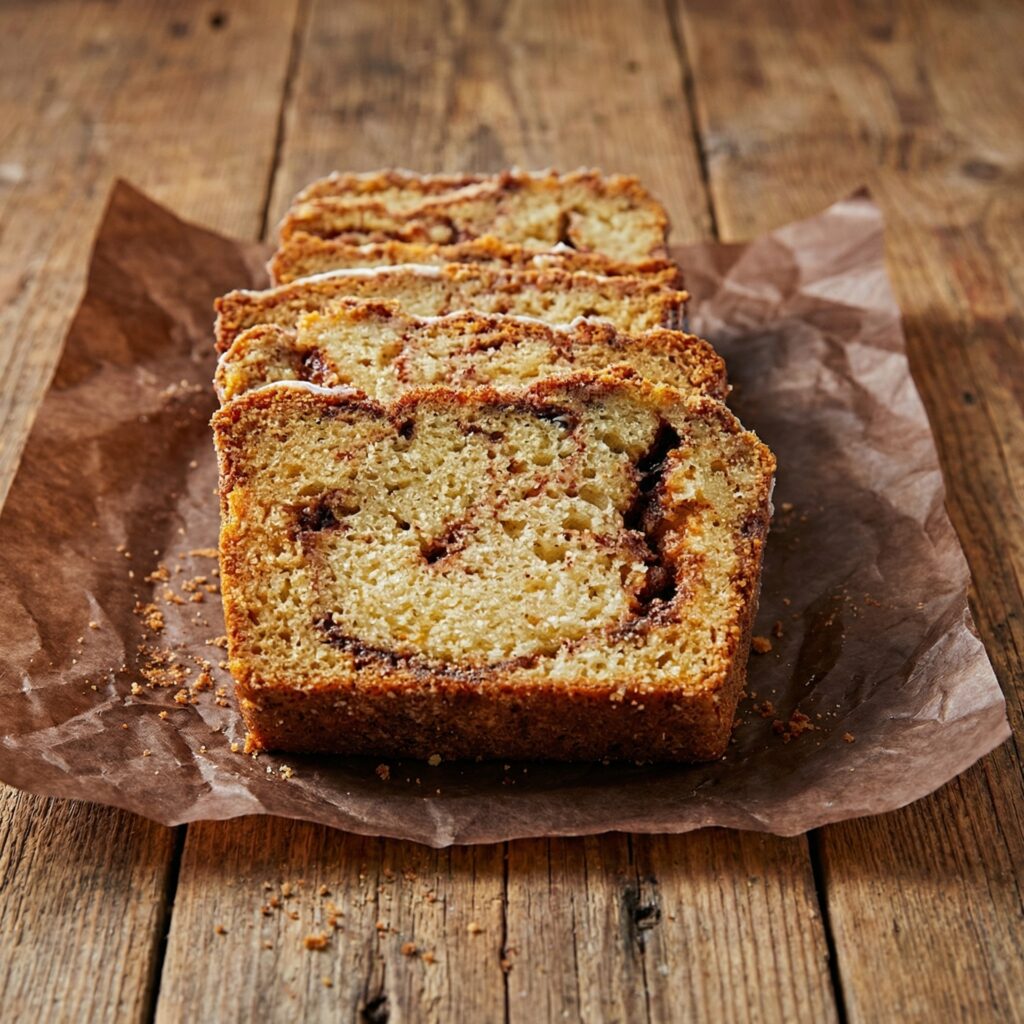
    Use a sharp serrated knife to slice the bread. Each slice should reveal beautiful swirls of cinnamon sugar running throughout the soft, tender crumb.

    Serve warm with butter, alongside coffee or tea, or as a comforting afternoon snack.

    Tips for the Best Cinnamon Quick Bread

    1. Don’t overmix the batter – Stir just until combined to keep the bread tender.
    2. Use room-temperature ingredients – They incorporate more smoothly into the batter.
    3. Measure flour correctly – Spoon it into the measuring cup and level it off to avoid dense bread.
    4. Let it cool fully before slicing – This ensures clean slices and proper texture.
    5. Customize it – Add chopped nuts, raisins, or a streusel topping for extra texture.

    Storage and Freezing

    • Store cinnamon quick bread in an airtight container at room temperature for up to 3 days.
    • Refrigerate for up to 5 days if glazed.
    • Freeze slices individually wrapped for up to 3 months. Thaw at room temperature or warm gently in the microwave.
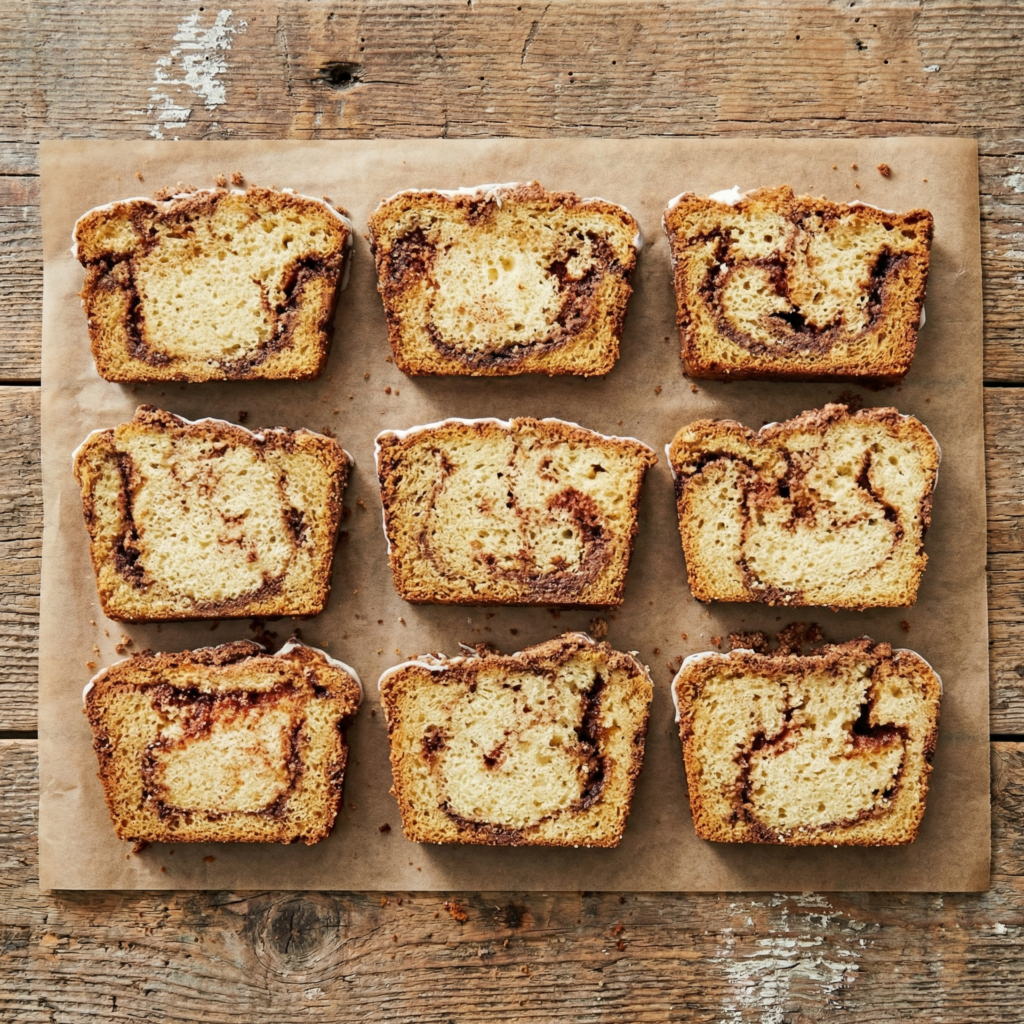
    Cinnamon quick bread is the kind of recipe you’ll turn to again and again. It’s simple enough for beginner bakers yet impressive enough to share with friends and family. The soft crumb, sweet cinnamon swirl, and optional glaze create a comforting loaf that feels both nostalgic and indulgent.

    With minimal prep and everyday ingredients, you can fill your kitchen with the warm scent of cinnamon and enjoy a homemade treat that tastes like it came straight from a bakery. One slice is never enough—and luckily, this recipe makes it easy to bake another loaf whenever the craving strikes.

  • Ice Cream Bread: The 2-Ingredient, Magically Easy Quick Bread

    Ice Cream Bread: The 2-Ingredient, Magically Easy Quick Bread

    This recipe is the ultimate kitchen hack that seems too good to be true—but it absolutely works. With just a pint of melted ice cream and self-rising flour, you can create a moist, sweet, cake-like quick bread that carries the subtle flavor of whatever ice cream you choose. It’s a fascinating lesson in food science and the easiest path to homemade bread imaginable.

    Perfect for beginners, a fun project with kids, or when you need a last-minute sweet treat, this bread is a delightful surprise that will have everyone asking, “You made this from ice cream?”

    The Science of the 2-Ingredient Wonder

    The magic here is all about ingredient composition and chemical leavening. Ice cream contains the three essential components for a simple quick bread: fat (from cream), sugar, and liquid (milk). Self-rising flour contains both flour and the precise amount of baking powder and salt needed for leavening.

    When combined, the sugar and fat from the ice cream tenderize the bread, while the liquid activates the baking powder in the flour. As the loaf bakes, the baking powder produces carbon dioxide bubbles, causing the bread to rise. The result is a bread with a tight, tender crumb, similar to a pound cake or muffin.

    The flavor will be subtly sweet and carry notes of the ice cream’s base flavor, making vanilla, chocolate, or strawberry excellent starting points.

    Ingredients

    For the Basic Loaf:

    • 2 cups (500ml) melted ice cream, any flavor (approx. 1 pint)
    • 1 ½ cups (188g) self-rising flour*

    *If you don’t have self-rising flour, use 1 ½ cups (188g) all-purpose flour + 2 ¼ teaspoons baking powder + ¾ teaspoon salt, whisked together.

    Optional Add-Ins: ½ cup chocolate chips, sprinkles, chopped nuts, or a swirl of fruit preserves.

    Instructions

    1. The Melted Ice Cream: Scoop the ice cream into a microwave-safe bowl or let it sit at room temperature until completely melted and smooth. Stir well to ensure it’s a uniform liquid.

    2. The Combined Self-Rising Flour: Measure the self-rising flour into a separate bowl. If making your own, whisk the all-purpose flour, baking powder, and salt together thoroughly here.

    3. The Mixed, Lumpy Batter: Add the melted ice cream to the bowl with the flour. Using a spatula, stir gently until just combined. The batter will be very thick and lumpy—this is perfect. Do not overmix.

    4. The Panned Batter with Mix-Ins: If using add-ins like chocolate chips, fold them in now. Transfer the thick batter to a greased or parchment-lined 9×5 inch loaf pan. Smooth the top slightly with the spatula.

    5. The Baked & Golden Loaf: Bake at 350°F (175°C) for 40-50 minutes, until the top is deep golden brown and a toothpick inserted into the center comes out clean or with a few dry crumbs.

    6. The Cooled Loaf Removed from Pan: Let the loaf cool in the pan for 10 minutes. Then, run a knife around the edges and turn it out onto a wire rack to cool completely. The loaf will have a rustic, craggy top.

    7. The Sliced Loaf Revealing the Crumb: Once completely cool, slice the loaf with a serrated knife. The interior will be tender, moist, and have a fine, even crumb similar to cake.

    Pro-Tips for Ice Cream Bread Success

    • Choose Your Ice Cream Wisely: Full-fat, premium ice cream yields the richest, most tender bread. Low-fat or non-dairy alternatives will work but produce a drier, less flavorful loaf.
    • Flavor Forecast: Vanilla is a classic. Chocolate makes a chocolate bread. Cookie dough or strawberry ice cream will impart subtle notes. Avoid chunky ice creams with large mix-ins, as they can sink or burn.
    • Melt Completely: Ensure the ice cream is fully liquid and at room temperature for even mixing with the flour.
    • Do Not Overmix: Stir just until the flour is incorporated. Overmixing develops gluten, leading to a tough, dense bread. Lumps are good!
    • Pan Prep: Grease the loaf pan well or use parchment paper, as the high sugar content can cause sticking.
    • Test for Doneness: Ovens vary. The loaf should be deeply golden and sound hollow when tapped. The toothpick test is the best indicator.
    • Cool Completely: This bread is very tender when warm and can tear. Let it cool fully on a rack for clean slices.
    • Flavor Boosts: Add 1 teaspoon of vanilla or almond extract to vanilla ice cream batter. Swirl in a tablespoon of peanut butter or a sprinkle of cinnamon sugar before baking.
    • Storage: Store wrapped in plastic at room temperature for 2 days, or freeze slices for longer storage.
    • Serving: Enjoy plain, toasted with butter, or as a base for bread pudding or French toast.

    Ice Cream Bread is a wonderfully simple, endlessly customizable baking adventure.

  • Classic Zucchini Bread: The Secret to a Perfectly Moist, Spiced Loaf

    Classic Zucchini Bread: The Secret to a Perfectly Moist, Spiced Loaf

    Zucchini bread is the ultimate culinary sleight of hand: a vegetable transformed into a sweet, tender, and irresistibly spiced treat. This classic recipe is the one you’ll return to year after year—a forgiving, one-bowl wonder that yields loaves with a beautiful domed top, a crackly sugar crust, and an impossibly moist interior that stays fresh for days.

    The secret lies not just in the shredded zucchini, but in the perfect balance of oil, sugar, and warm spices that let the vegetable’s subtle sweetness shine. Whether you’re looking for a clever way to use up a garden glut, a portable breakfast, or a comforting afternoon snack, this zucchini bread is the delicious, versatile answer.

    The Science of “Hidden” Moisture & Structure

    The magic of zucchini bread is a brilliant manipulation of moisture. Grated zucchini is about 95% water. When baked, this water slowly steams out, but not before it hydrates the surrounding flour and creates an exceptionally moist crumb.

    However, moisture alone would make a soggy, dense loaf. The structure comes from the careful balance of oil and eggs. The oil coats the flour proteins, inhibiting gluten development and ensuring tenderness, while the eggs provide proteins that coagulate to set the loaf’s structure as it bakes.

    The sugar does triple duty: it sweetens, it tenderizes by interfering with gluten, and it caramelizes at the edges to create that beautiful, crisp crust.

    The moderate oven temperature is key—it’s hot enough to create a good rise and set the structure before the zucchini releases all its water, but not so hot that the crust burns before the center is done.

    Ingredients

    For Two 9×5-inch Loaves or One 10-inch Bundt:

    • 3 cups (about 1 lb / 450g) grated zucchini (2-3 medium), unpeeled*
    • 3 cups (375g) all-purpose flour
    • 2 teaspoons baking soda
    • ½ teaspoon baking powder
    • 1 teaspoon salt
    • 2 teaspoons ground cinnamon
    • ½ teaspoon ground nutmeg
    • 3 large eggs, at room temperature
    • 1 cup (200g) granulated sugar
    • 1 cup (200g) packed light brown sugar
    • 1 cup (240ml) vegetable oil or melted coconut oil
    • 1 tablespoon vanilla extract
    • 1 cup (120g) chopped walnuts or pecans (optional)
    • 1 cup (170g) chocolate chips (optional)

    *Do not drain the zucchini after grating. The moisture is essential.

    Instructions

    1. Prep: Preheat oven to 350°F (175°C). Grease and flour two 9×5-inch loaf pans. Grate the zucchini using the large holes of a box grater. No need to squeeze it dry.

    2. Whisk Dry Ingredients: In a large bowl, whisk together the flour, baking soda, baking powder, salt, cinnamon, and nutmeg.

    3. Mix Wet Ingredients: In another large bowl, whisk the eggs vigorously until frothy. Add both sugars and whisk until combined and slightly pale. Slowly stream in the oil while whisking constantly, then whisk in the vanilla.

    4. Combine & Fold: Add the dry ingredients to the wet ingredients. Stir with a spatula until just combined and no dry flour remains—do not overmix. Fold in the grated zucchini, and the nuts or chocolate chips if using. The batter will be thick.

    5. Bake: Divide the batter evenly between the prepared pans. Bake for 50-65 minutes, or until a toothpick inserted into the center of a loaf comes out clean or with a few moist crumbs. The tops will be deeply golden brown and spring back when lightly pressed.

    6. Cool Completely: Let the loaves cool in the pans on a wire rack for 20 minutes. Then, run a knife around the edges and carefully turn them out onto the rack to cool completely before slicing. This prevents a gummy texture.

    7. Storage: Once completely cool, wrap tightly in plastic wrap or store in an airtight container at room temperature for up to 4 days, or freeze for up to 3 months.

    8. Pro-Tip: For an extra-special touch, sprinkle the top of the batter in the pans with a tablespoon of turbinado sugar before baking for a sparkling, crunchy crust.

    Pro-Tips for Zucchini Bread Perfection

    • Don’t Drain the Zucchini: The natural moisture is your secret weapon for a moist loaf. Draining it will result in dry bread.
    • Room Temperature Eggs: They incorporate more easily into the batter, creating a better emulsion for a uniform rise.
    • Measure Flour Correctly: For accuracy, spoon flour into your measuring cup and level it off. Packing the cup can lead to a dense loaf.
    • The Toothpick Test: Check a few minutes before the minimum bake time. Overbaking is the enemy of moisture.
    • The Long Cool-Down: Slicing into warm zucchini bread is tempting, but it will be gummy. The structure needs time to set as it cools.
    • Grating Size: Large shreds give visible texture and moisture pockets; fine shreds will virtually disappear.
    • Flavor Boosters: Add 1 teaspoon of orange zest or replace ½ cup of oil with applesauce for a lighter version.
    • Freezing for Later: Slice the cooled loaf, wrap slices individually, and freeze for instant, ready-to-toast portions.

    This Classic Zucchini Bread is more than a recipe—it’s a delicious tradition.