Tag: easy dessert

  • Perfect Rice Krispie Treats (Buttery, Gooey, Irresistible)

    Perfect Rice Krispie Treats (Buttery, Gooey, Irresistible)

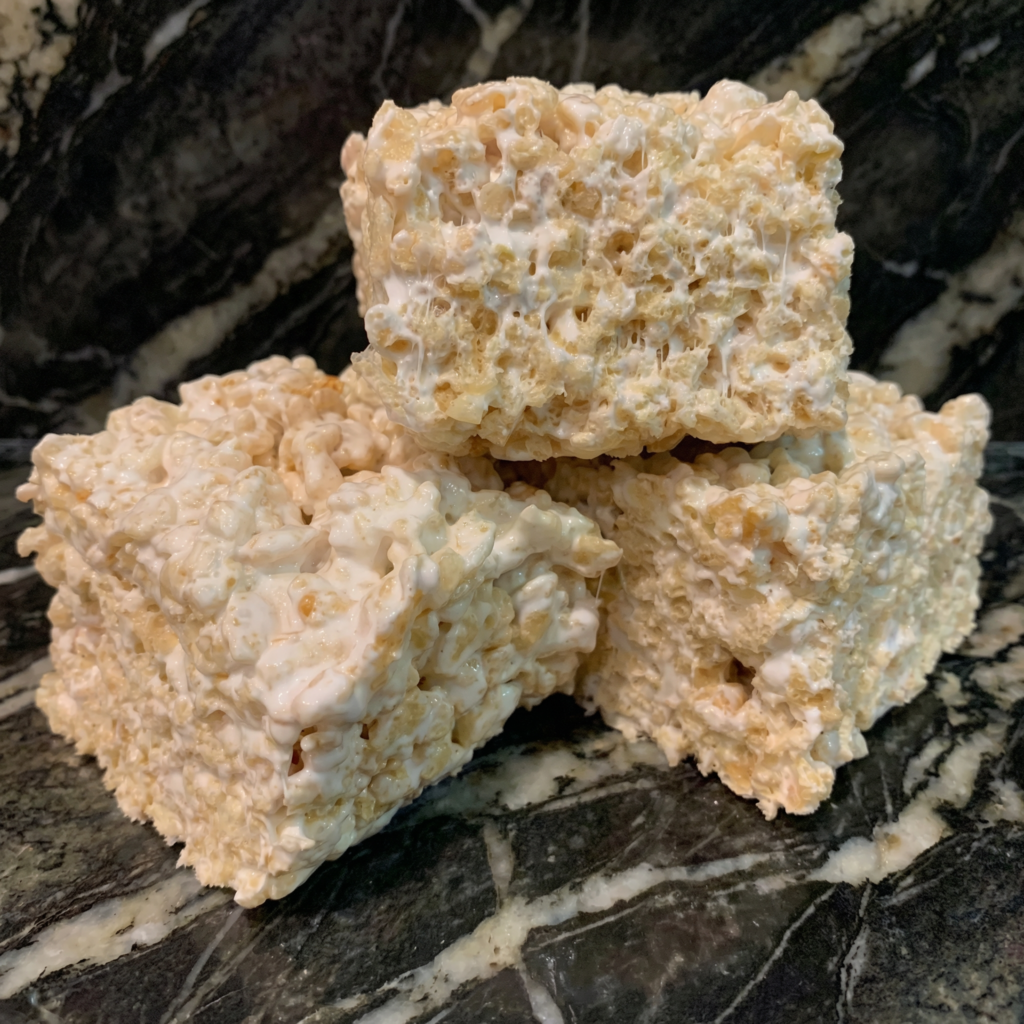
    Rice Krispie treats are pure nostalgia—the no-bake classic that everyone loves. But there’s a world of difference between a good Rice Krispie treat and a perfect one. The perfect version is buttery, impossibly gooey, and perfectly chewy with that signature marshmallow pull in every bite.

    It’s not too hard, not too soft, and absolutely packed with that toasty cereal flavor. This recipe delivers that perfection every time, with a few simple tricks: using good butter, a touch of vanilla, and a sprinkle of flaky salt to balance the sweetness. They come together in minutes, disappear even faster, and are guaranteed to make everyone smile.

    Ingredients
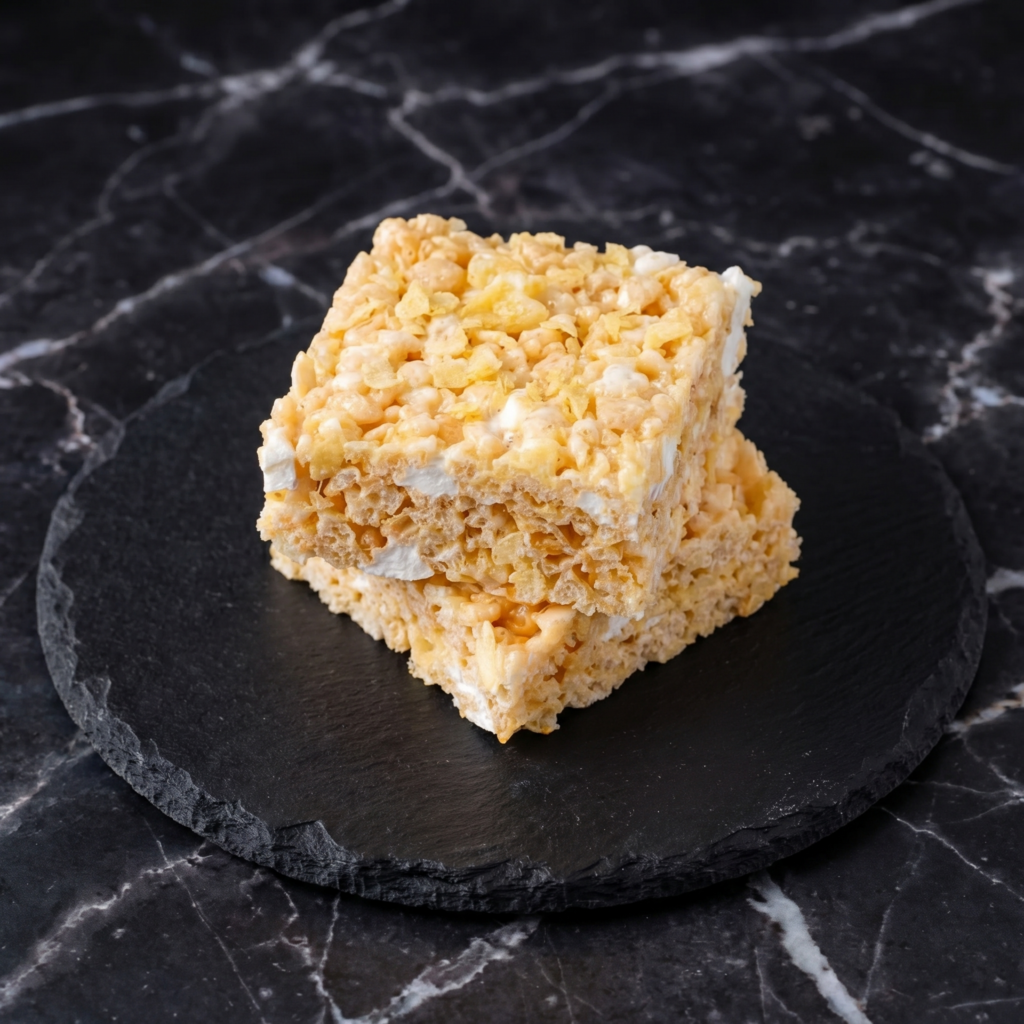
    For the Rice Krispie Treats (makes one 9×13 pan, about 12-16 treats):

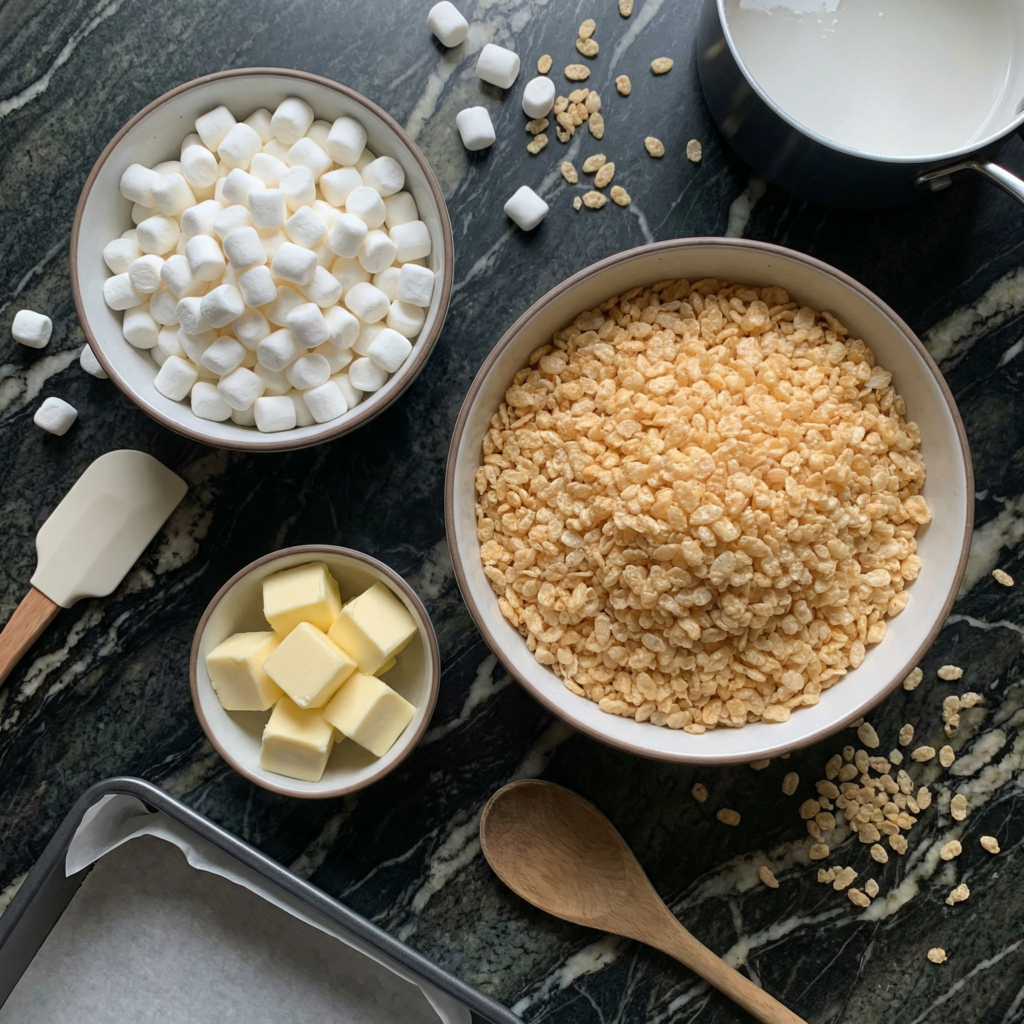
    • ¼ cup (60g) unsalted butter
    • 1 package (10 oz / 280g) mini marshmallows (about 6 cups)
    • ½ teaspoon vanilla extract
    • ¼ teaspoon salt (if using unsalted butter)
    • 6 cups (about 180g) Rice Krispies cereal
    • Flaky sea salt, for sprinkling

    Instructions

    1. Prep the Pan: Grease a 9×13-inch baking dish with butter or non-stick spray. Set aside.

    2. Melt the Butter: In a large pot or Dutch oven over low heat, melt the butter completely.

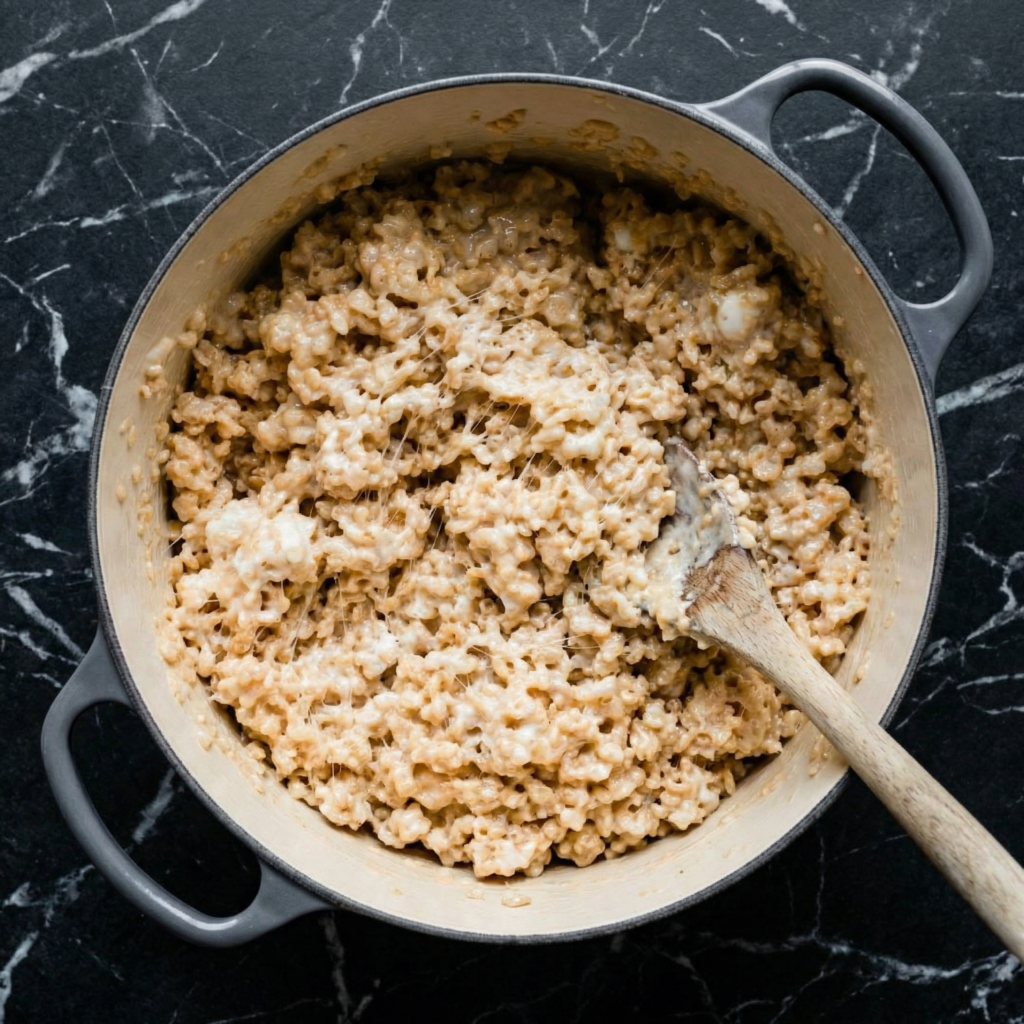
    3. Add Marshmallows: Add the mini marshmallows to the melted butter. Stir constantly with a silicone spatula or wooden spoon until the marshmallows are completely melted and the mixture is smooth. Remove from heat immediately.

    4. Add Vanilla and Salt: Stir in the vanilla extract and salt (if using) until combined.

    5. Add Cereal: Add the Rice Krispies cereal all at once. Fold gently until the cereal is evenly coated with the marshmallow mixture. Be careful not to crush the cereal—you want those crispy pieces intact.

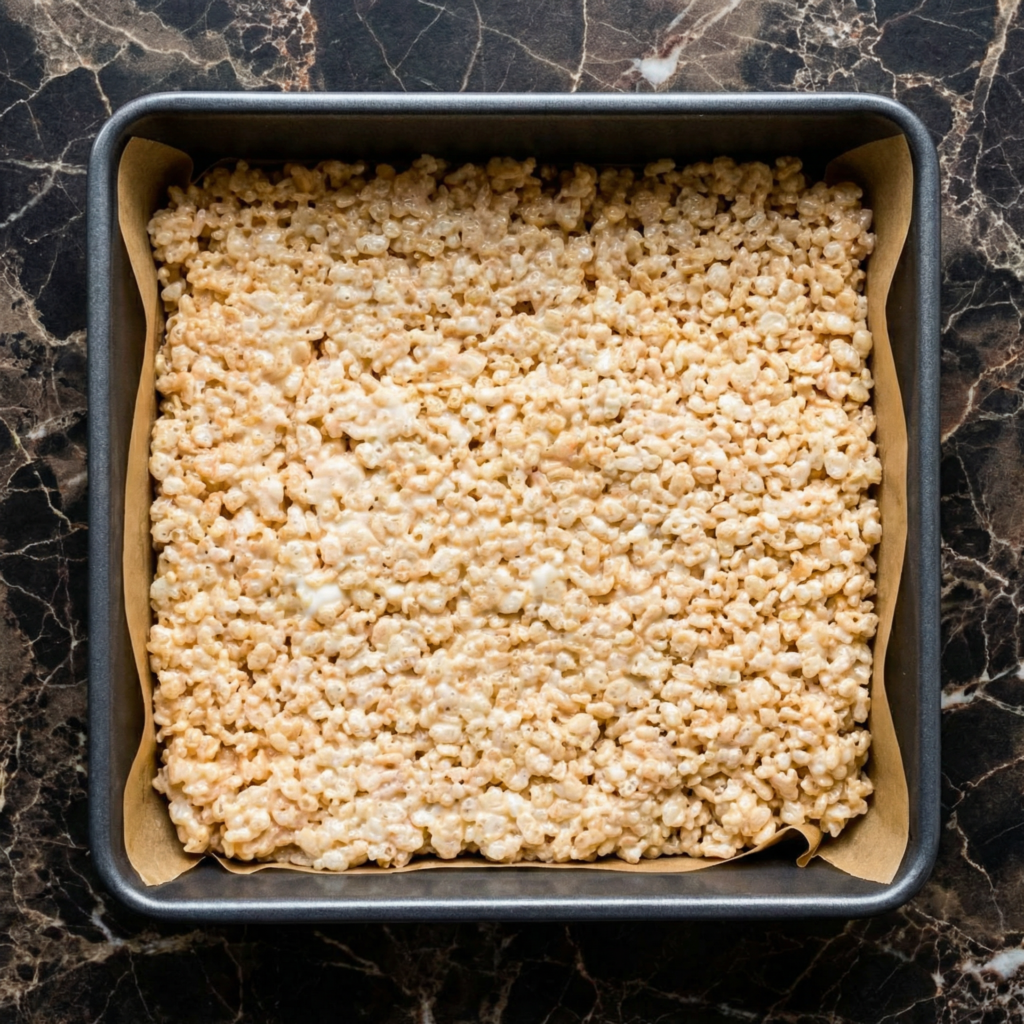
    6. Transfer to Pan: Scrape the mixture into the prepared pan. Using a lightly buttered spatula or your buttered hands, gently press the mixture into an even layer. Don’t press too hard—you want them chewy, not dense.

    7. Sprinkle with Salt: Immediately sprinkle the top with flaky sea salt.

    8. Cool and Set: Let the treats cool completely at room temperature until set, about 1 hour.

    9. Cut and Serve: Cut into squares with a sharp knife. Serve and enjoy!

    Pro-Tips for Rice Krispie Treat Perfection

    • Use Fresh Marshmallows: Stale marshmallows won’t melt smoothly and can result in grainy treats. Use a fresh bag for best results.
    • Low Heat Is Key: Melting over low heat prevents the sugar from crystallizing and ensures a smooth, gooey texture.
    • Work Quickly: The marshmallow mixture sets up fast. Have your cereal measured and pan ready before you start melting.
    • Don’t Overpress: Pressing too firmly creates dense, hard treats. Gentle pressure keeps them light and chewy.
    • Butter Your Utensils: A lightly buttered spatula or buttered hands prevent sticking when pressing the mixture into the pan.
    • Flaky Salt Finish: Don’t skip this—the salt balances the sweetness and adds sophistication.
    • Customize: Add mix-ins like chocolate chips, sprinkles, or peanut butter chips after removing from heat. Swirl in some peanut butter or Nutella for extra indulgence.
    • Storage: Keep in an airtight container at room temperature for up to 3 days. They’ll stay soft and chewy.

    These Perfect Rice Krispie Treats are buttery, gooey, and absolutely irresistible.
  • Rice Krispie Treats (The 3-Ingredient Magic You Never Outgrow)

    Rice Krispie Treats (The 3-Ingredient Magic You Never Outgrow)

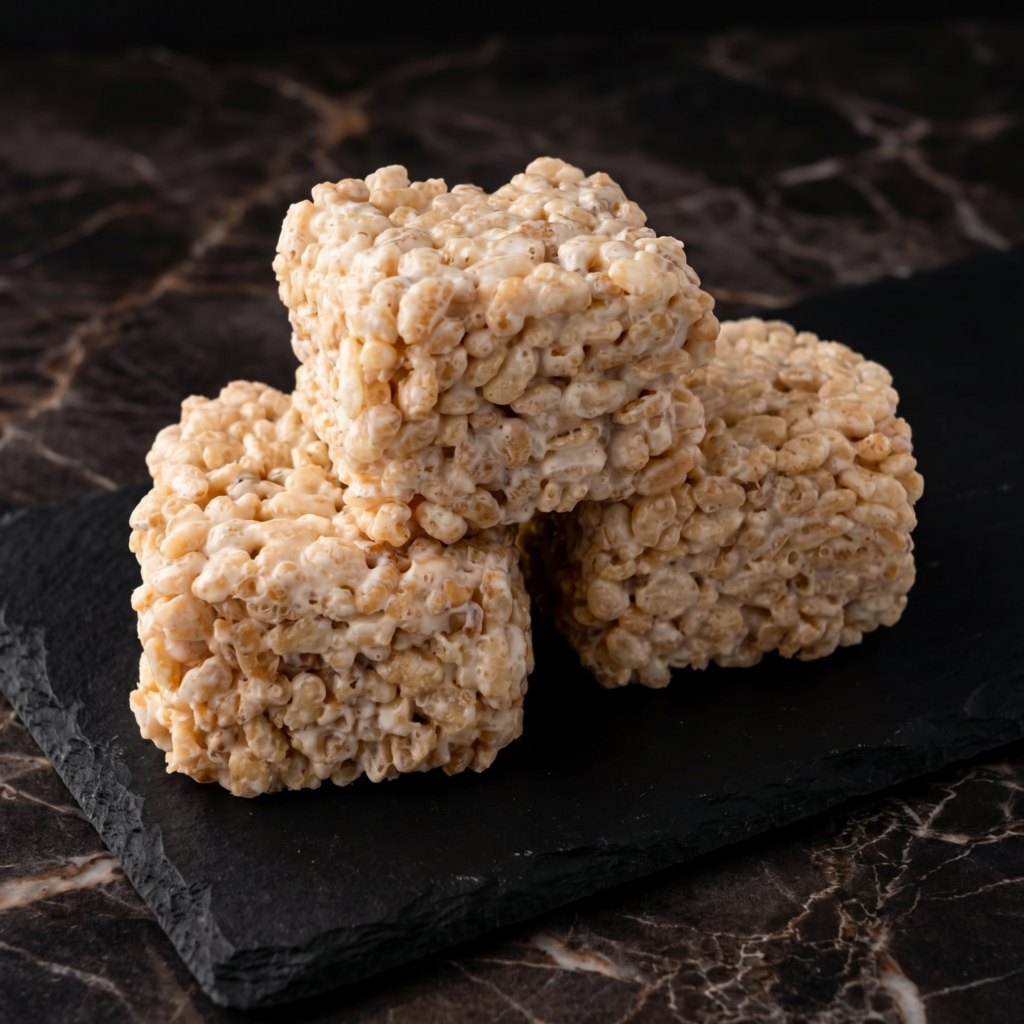
    Some things never get old. Rice Krispie treats are one of them. They’re the taste of childhood birthdays, after-school snacks, and bake sales. They’re the treat you begged your mom to make, and now you can make them yourself—in about 10 minutes, with three ingredients, and zero stress.

    Buttery, marshmallowy, perfectly crispy, and impossibly gooey, these treats are pure nostalgia in every bite. The secret? Don’t overcomplicate them. Quality butter, fresh marshmallows, and a gentle hand are all you need. Go ahead, eat the whole pan. We won’t tell.

    The Secret to Perfectly Gooey, Never-Hard Rice Krispie Treats

    The line between perfect Rice Krispie treats and sad, hard, brick-like blocks is a thin one. The secret is low heat and gentle handling. Melt your butter and marshmallows over low heat, stirring constantly. High heat will make the marshmallows seize up and turn tough.

    The other secret? Use fresh marshmallows. Stale marshmallows won’t melt smoothly and can lead to gritty treats. And here’s the pro tip: add a pinch of salt. It balances the sweetness and makes the butter flavor sing.

    Finally, press the mixture gently into the pan—don’t smash it down or your treats will be dense and hard. Light hands, low heat, perfect treats.

    Ingredients

    For the Rice Krispie Treats (Makes 12-16 squares):

    • 6 cups (180g) Rice Krispies cereal (or any crispy rice cereal)
    • 3 tablespoons (42g) unsalted butter
    • 1 package (10 oz, about 40 large) marshmallows (or 4 cups mini marshmallows)
    • ¼ teaspoon salt (optional, but highly recommended)
    • ½ teaspoon vanilla extract (optional, but lovely)

    Optional Add-Ins:

    • Chocolate chips, drizzled on top
    • Sprinkles, for fun
    • Peanut butter (stir in ¼ cup with the marshmallows)

    Instructions

    1. Prep Your Pan: Generously butter a 9×13-inch baking pan or line it with parchment paper, leaving overhang on the long sides for easy removal. Set aside.

    2. Measure the Cereal: Measure 6 cups of Rice Krispies cereal into a large bowl. Having it ready ensures you can work quickly once the marshmallow mixture is ready.

    3. Melt the Butter: In a large pot or Dutch oven, melt the butter over low heat. Stir occasionally until completely melted.

    4. Add Marshmallows: Add the marshmallows to the pot. Stir constantly with a spatula over low heat until the marshmallows are completely melted and smooth. Remove from heat immediately. Do not overheat—this is crucial for soft treats.

    5. Add Salt and Vanilla: Stir in the salt and vanilla extract (if using) until combined.

    6. Combine with Cereal: Pour the Rice Krispies cereal into the pot with the marshmallow mixture. Fold gently with a spatula until all the cereal is evenly coated. Work quickly but gently to avoid crushing the cereal.

    7. Transfer to Pan: Scrape the mixture into the prepared pan. Using a buttered spatula or buttered hands, gently press the mixture into an even layer. Don’t smash it down hard—just gently coax it into place.

    8. Add Toppings (Optional): If adding chocolate chips or sprinkles, sprinkle them on top now and press in gently.

    9. Cool: Let the treats cool completely at room temperature, about 30-60 minutes. Do not refrigerate—they’ll get hard.

    10. Slice and Serve: Use the parchment overhang to lift the treats out of the pan. Place on a cutting board and slice into squares with a sharp knife. A buttered knife helps prevent sticking.

    11. Store: Store in an airtight container at room temperature for up to 3 days. If they last that long.

    Pro-Tips for Rice Krispie Treat Greatness

    • Low Heat is Non-Negotiable: High heat makes marshmallows tough and grainy. Keep it low, keep it gentle.
    • Use Fresh Marshmallows: Stale marshmallows won’t melt smoothly. For extra gooey treats, use mini marshmallows—they melt faster and more evenly.
    • Don’t Overwork the Cereal: Fold just until combined. Crushed cereal leads to dense, sad treats.
    • Press Gently: Light hands create light, airy treats. Smashing them down makes them hard.
    • Customize Endlessly: Add peanut butter, Nutella, chocolate chips, sprinkles, or even Fruity Pebbles for a colorful twist.
  • Creamy, Dreamy & No-Oven Needed: The Ultimate No-Bake Mango Float

    Creamy, Dreamy & No-Oven Needed: The Ultimate No-Bake Mango Float

    If there’s one dessert that perfectly captures tropical comfort in every bite, it’s the beloved no-bake mango float. With layers of sweet ripe mangoes, lightly sweetened cream, and soft graham crackers that melt into cake-like perfection, this chilled dessert is simple, nostalgic, and absolutely irresistible.
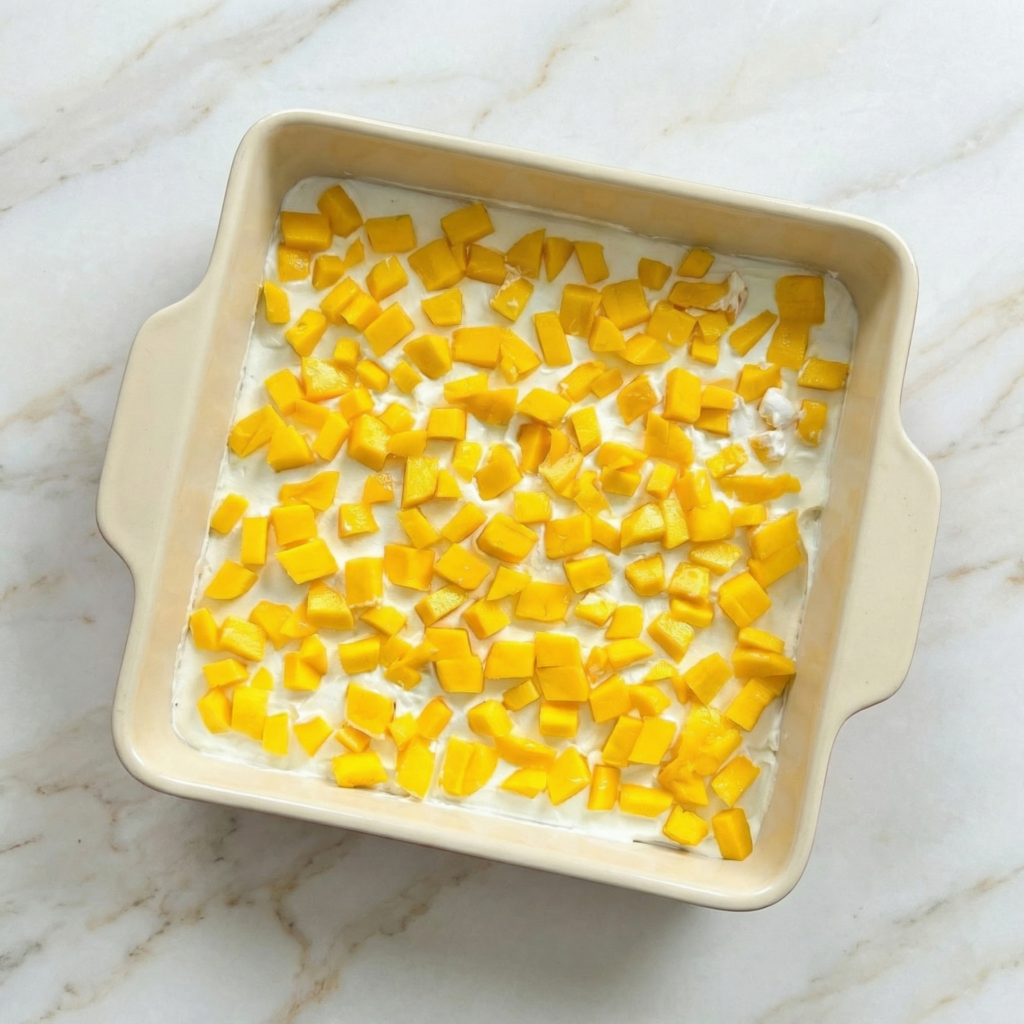
    Often served at celebrations and family gatherings, mango float is especially popular in the Philippines—and for good reason. It’s easy to prepare, requires no oven, and tastes even better after chilling overnight. Whether you’re making it for a party or just craving something refreshing and sweet, this step-by-step guide will walk you through creating the perfect no-bake mango float.


    Why You’ll Love This Recipe

    • No baking required
    • Minimal ingredients
    • Beginner-friendly
    • Make-ahead dessert
    • Perfect for warm weather

    The magic happens in the fridge, where the layers soften and meld together into a creamy, sliceable treat.


    Ingredients You’ll Need

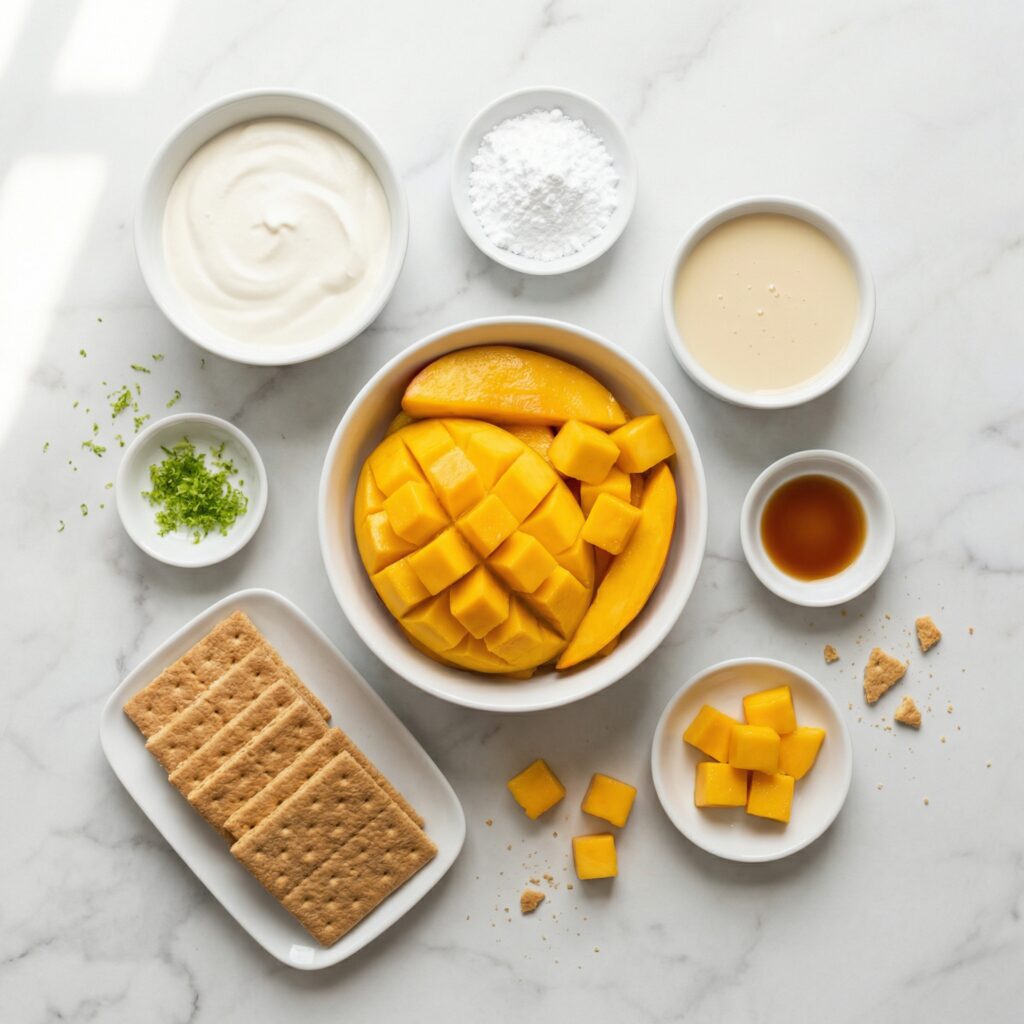
    • 4–5 ripe mangoes (preferably sweet, golden varieties)
    • 2 cups heavy whipping cream (cold)
    • 1 can (14 oz) sweetened condensed milk
    • 2 packs graham crackers

    That’s it—just four simple ingredients for a dessert that tastes like sunshine.


    Step 1: Prepare the Mangoes

    Start by peeling the mangoes and slicing the flesh away from the pit. Cut the mangoes into thin, even slices.

    Try to choose mangoes that are ripe but firm. Overripe mangoes can become mushy and release too much juice, while underripe mangoes may taste tart.

    Set aside a handful of the prettiest slices for the top layer decoration.


    Step 2: Make the Cream Mixture

    In a large chilled mixing bowl, pour in the cold heavy whipping cream. Using a hand mixer or stand mixer, whip on medium speed until soft peaks begin to form.

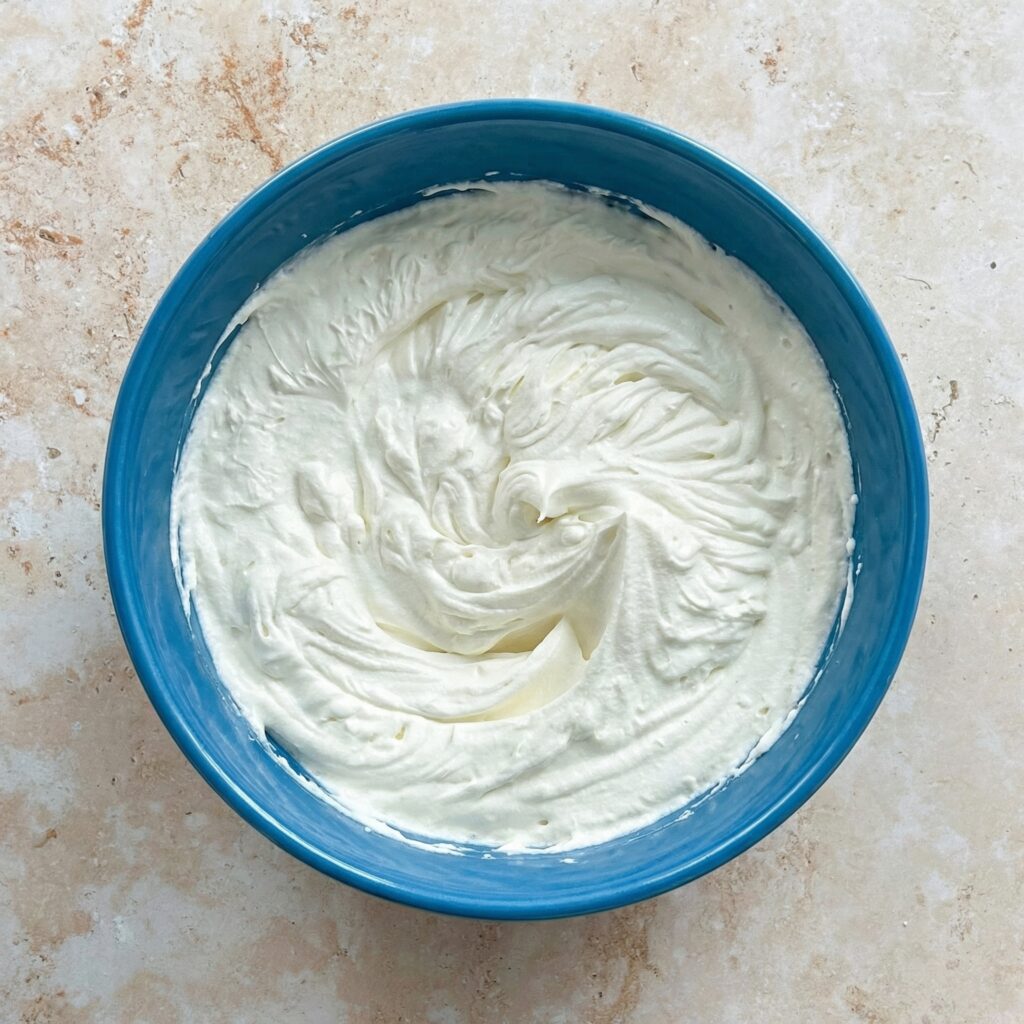
    Gradually add the sweetened condensed milk while continuing to whip. Beat until the mixture thickens to stiff peaks. The cream should hold its shape but still look smooth and fluffy.

    Be careful not to overwhip, as this can cause the cream to become grainy.

    This cream layer is what gives mango float its rich, melt-in-your-mouth texture.


    Step 3: Prepare Your Dish

    Choose a rectangular glass or ceramic dish (8×8 or 9×13 inches works well depending on how thick you want the layers).

    There’s no need to grease the dish since this is a chilled dessert.


    Step 4: Create the First Layer

    Start by arranging a single layer of graham crackers on the bottom of the dish. Break crackers as needed to fully cover the base.

    Spread a generous layer of the whipped cream mixture evenly over the graham crackers.

    Use a spatula to smooth it out into an even layer.


    Step 5: Add the Mango Layer

    Arrange a layer of sliced mangoes over the cream. Try to cover the entire surface so each bite has fruit.

    Don’t overcrowd the mangoes—just enough for a balanced layer.


    Step 6: Repeat the Layers

    Repeat the layering process:

    1. Graham crackers
    2. Cream mixture
    3. Mango slices

    Continue layering until you run out of ingredients, finishing with a layer of cream on top.

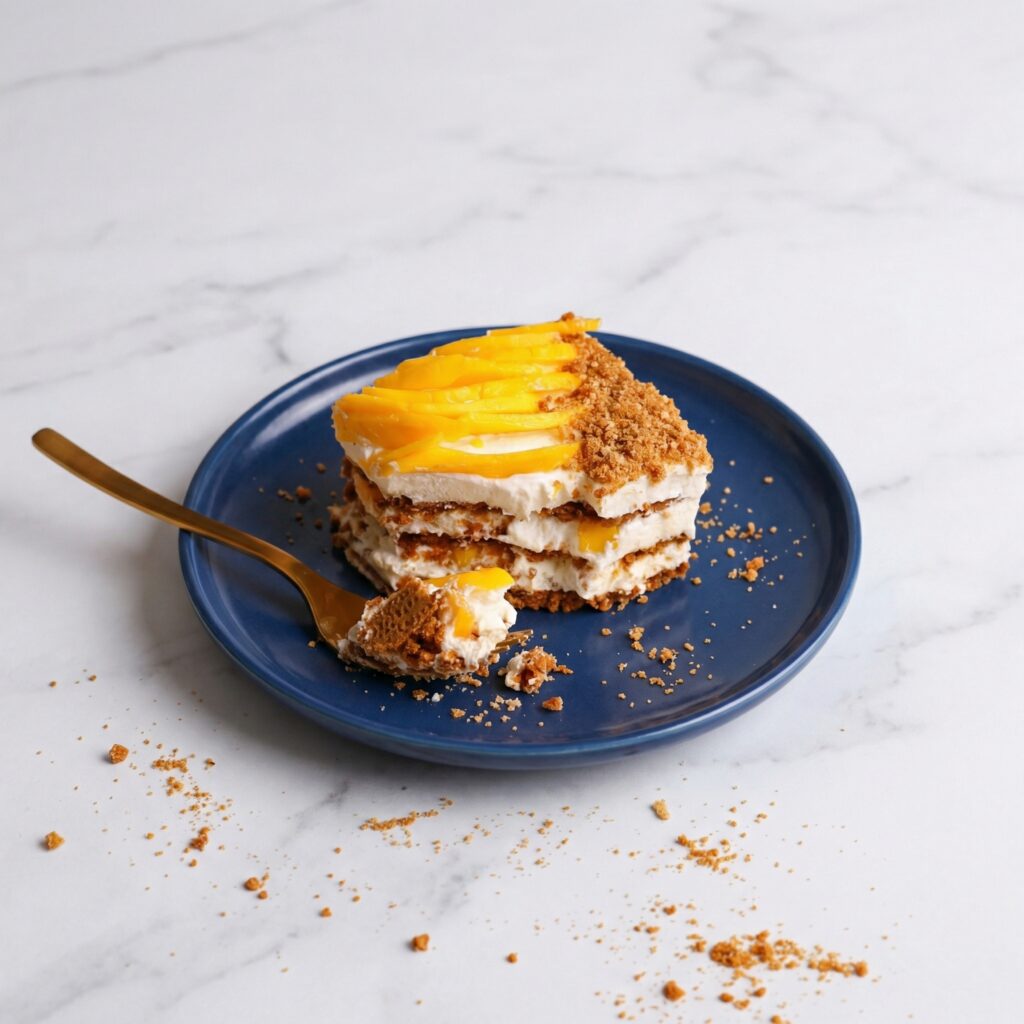
    Most dishes will yield 3 to 4 layers depending on thickness.


    Step 7: Decorate the Top

    Use your reserved mango slices to decorate the top layer. You can create neat rows, overlapping slices, or even a simple fan pattern for a more elegant look.

    For extra flair, you can crush a graham cracker and sprinkle crumbs lightly over the top.


    Step 8: Chill to Set

    Cover the dish with plastic wrap and refrigerate for at least 6 hours, though overnight is best.

    During this time, the graham crackers absorb moisture from the cream and soften into a cake-like texture.

    This chilling step is essential—don’t rush it.


    Step 9: Slice and Serve

    Once fully chilled, slice into squares or rectangles using a sharp knife. Wipe the knife clean between cuts for neat slices.

    Serve cold straight from the refrigerator.

    Each bite should be creamy, fruity, and lightly sweet with a soft, layered texture.


    Tips for the Perfect Mango Float

    • Use cold cream for better whipping results.
    • Chill overnight for the best texture.
    • Use ripe, sweet mangoes for natural sweetness.
    • Don’t skip the layering balance—keep cream and fruit evenly distributed.
    • For cleaner slices, briefly chill the dish in the freezer for 20–30 minutes before cutting.

    Storage and Make-Ahead

    Mango float keeps well in the refrigerator for up to 3 days.

    Cover tightly to prevent it from absorbing other refrigerator odors.

    Freezing is optional if you prefer a firmer, ice cream-like texture. Just thaw slightly before serving.


    Optional Variations

    Want to customize your mango float?

    • Add a thin layer of crushed graham crumbs between layers for extra texture.
    • Drizzle a little caramel sauce between layers.
    • Mix small mango cubes into the cream for added fruit distribution.
    • Add a splash of vanilla extract to the whipped cream for deeper flavor.

    Why This Dessert Is So Loved

    No-bake mango float is more than just a dessert—it’s a celebration staple and comfort food classic. It’s simple enough for beginners yet impressive enough for gatherings.

    The contrast between soft graham layers, airy cream, and juicy mango slices makes it refreshing yet indulgent. Every spoonful feels light but satisfying.

    And the best part? You don’t need an oven, complicated techniques, or fancy tools—just layering and patience while it chills.


    If you’re looking for a guaranteed crowd-pleaser that tastes like tropical sunshine, this no-bake mango float delivers every single time. Creamy, fruity, and effortlessly delicious, it’s the kind of dessert that disappears fast—so you might want to make an extra batch.

  • No Oven, All Indulgence: The Ultimate No-Bake Banoffee Pie

    No Oven, All Indulgence: The Ultimate No-Bake Banoffee Pie

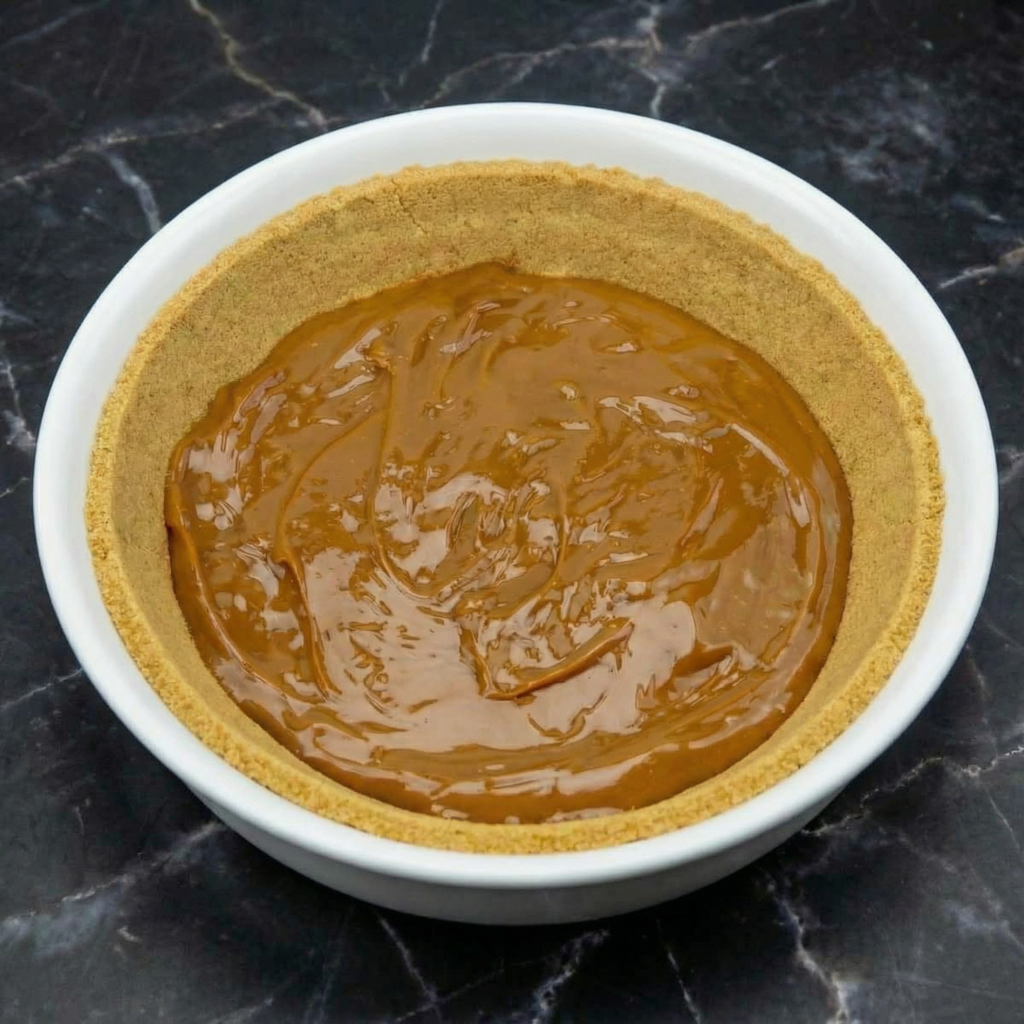
    If you’re craving something rich, creamy, and irresistibly sweet—but don’t want to turn on the oven—this No-Bake Banoffee Pie is exactly what you need. With a buttery biscuit crust, luscious caramel filling, fresh banana slices, and fluffy whipped cream, this dessert delivers big flavor with minimal effort.

    Banoffee pie, a beloved British classic, gets its name from “banana” and “toffee.” Traditionally baked, this version skips the oven entirely while keeping all the indulgence. It’s perfect for warm days, last-minute guests, or when you simply want an easy yet impressive dessert.

    Let’s walk through it step by step.


    Why You’ll Love This No-Bake Version

    • No oven required
    • Simple, accessible ingredients
    • Minimal prep time
    • Make-ahead friendly
    • Perfect balance of creamy, crunchy, and sweet

    The secret is creating a firm crust that sets in the refrigerator and layering it with rich dulce de leche and fresh bananas.


    Ingredients You’ll Need

    For the Crust:

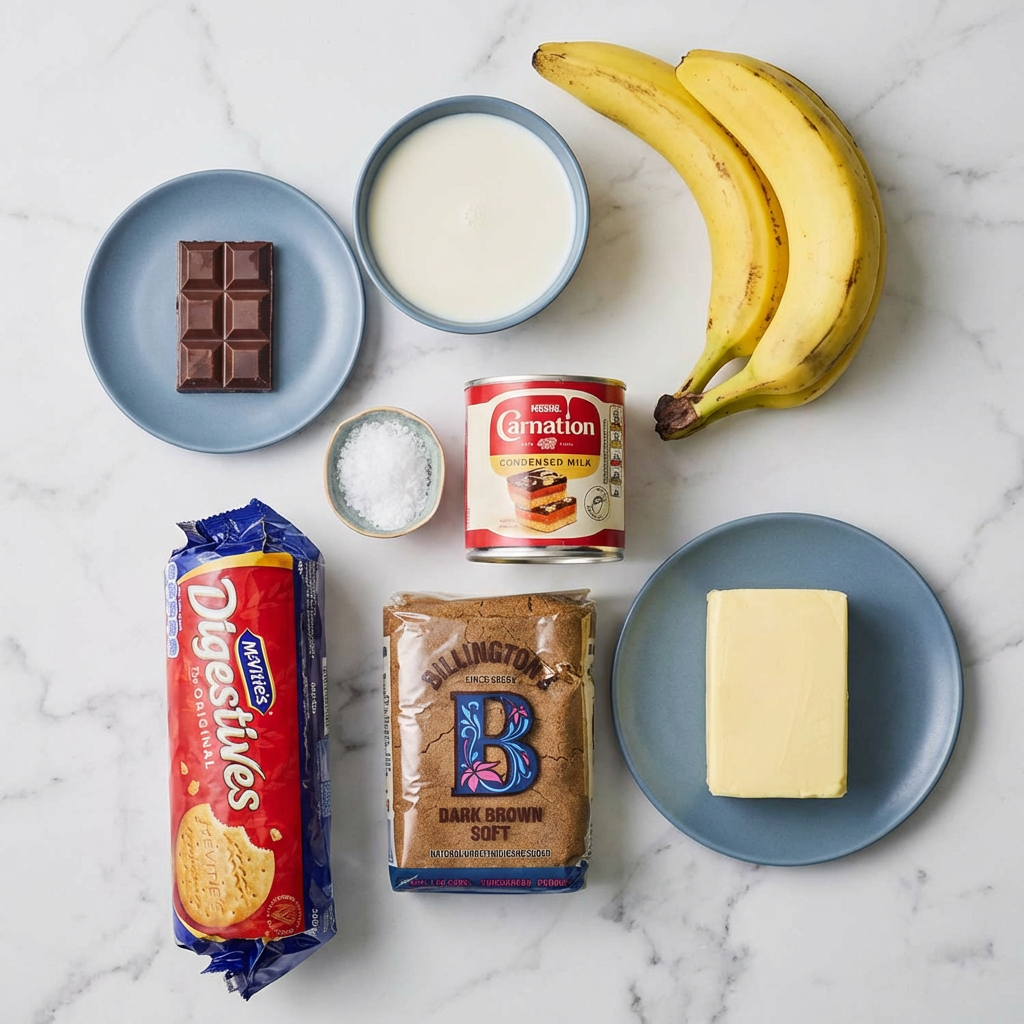
    • 2 cups (200g) graham cracker crumbs or crushed digestive biscuits
    • ½ cup (113g) unsalted butter, melted
    • 2 tablespoons granulated sugar

    For the Filling:

    • 1½ cups dulce de leche (store-bought or canned caramel)
    • 3–4 ripe but firm bananas

    For the Topping:

    • 1½ cups heavy whipping cream
    • 2 tablespoons powdered sugar
    • 1 teaspoon vanilla extract

    Optional garnish:

    • Chocolate shavings or cocoa powder

    Step 1: Prepare the Crust

    In a medium mixing bowl, combine the graham cracker crumbs, melted butter, and sugar. Stir until the mixture resembles wet sand and holds together when pressed between your fingers.

    Press the mixture firmly into a 9-inch pie dish, covering the bottom and slightly up the sides. Use the bottom of a measuring cup to pack it down tightly—this helps it hold its shape once chilled.

    Place the crust in the refrigerator for at least 30–45 minutes to firm up.

    Tip: The firmer you press the crust, the cleaner your slices will be later.


    Step 2: Prepare the Caramel Layer

    While the crust chills, stir your dulce de leche until smooth and spreadable. If it’s too thick, warm it gently in the microwave for 10–15 seconds to loosen it.

    Once the crust is firm, spread the dulce de leche evenly across the base. Use an offset spatula or spoon to smooth it into an even layer.

    Return the pie to the refrigerator for about 15 minutes to let the caramel set slightly before adding bananas.

    This step keeps the layers neat and defined.


    Step 3: Slice and Layer the Bananas

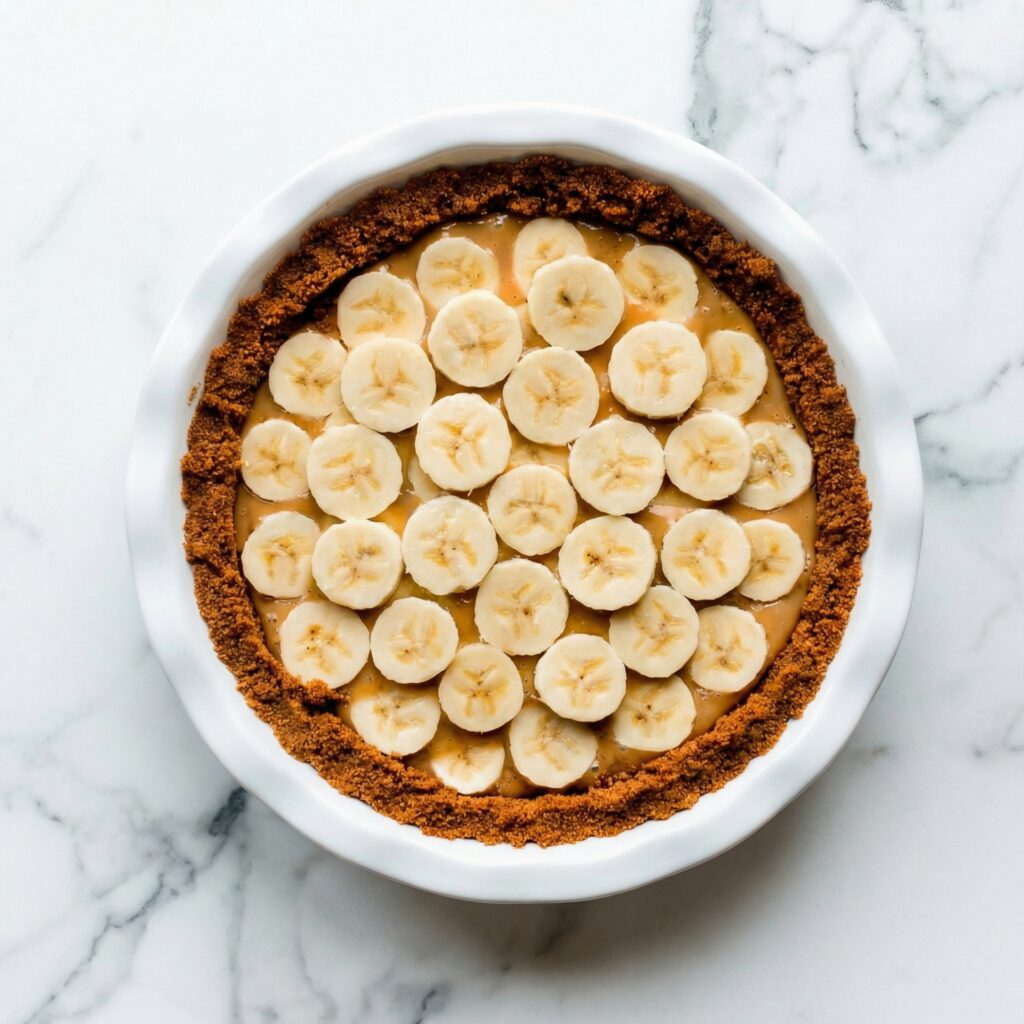
    Peel the bananas and slice them into even rounds, about ¼-inch thick.

    Arrange the banana slices evenly over the caramel layer. You can slightly overlap them, but aim for a consistent layer across the pie.

    Choose bananas that are ripe but still firm. Overripe bananas can become mushy and overly sweet.

    Optional tip: Lightly brush the banana slices with lemon juice to slow browning if making ahead.


    Step 4: Whip the Cream

    In a chilled mixing bowl, add the heavy whipping cream, powdered sugar, and vanilla extract.

    Using a hand mixer or stand mixer, beat on medium-high speed until soft peaks form. Continue whipping until stiff peaks form, meaning the cream holds its shape when you lift the beaters.

    Be careful not to overwhip, as it can turn grainy or begin separating.

    The whipped cream should be thick, fluffy, and smooth.


    Step 5: Add the Final Layer

    Spoon the whipped cream over the banana layer. Spread evenly, or create decorative swirls with the back of a spoon.

    For a polished finish, garnish with chocolate shavings, grated dark chocolate, or a light dusting of cocoa powder.

    This topping adds visual appeal and a subtle chocolate note that pairs beautifully with banana and caramel.


    Step 6: Chill to Set

    Refrigerate the assembled pie for at least 2 hours before serving. This allows the layers to firm up and makes slicing much easier.

    For best results, chill 3–4 hours if time allows.

    The longer it chills (within reason), the better the structure.


    Step 7: Slice and Serve

    Use a sharp knife dipped in warm water for clean slices. Wipe the blade between cuts for neat presentation.

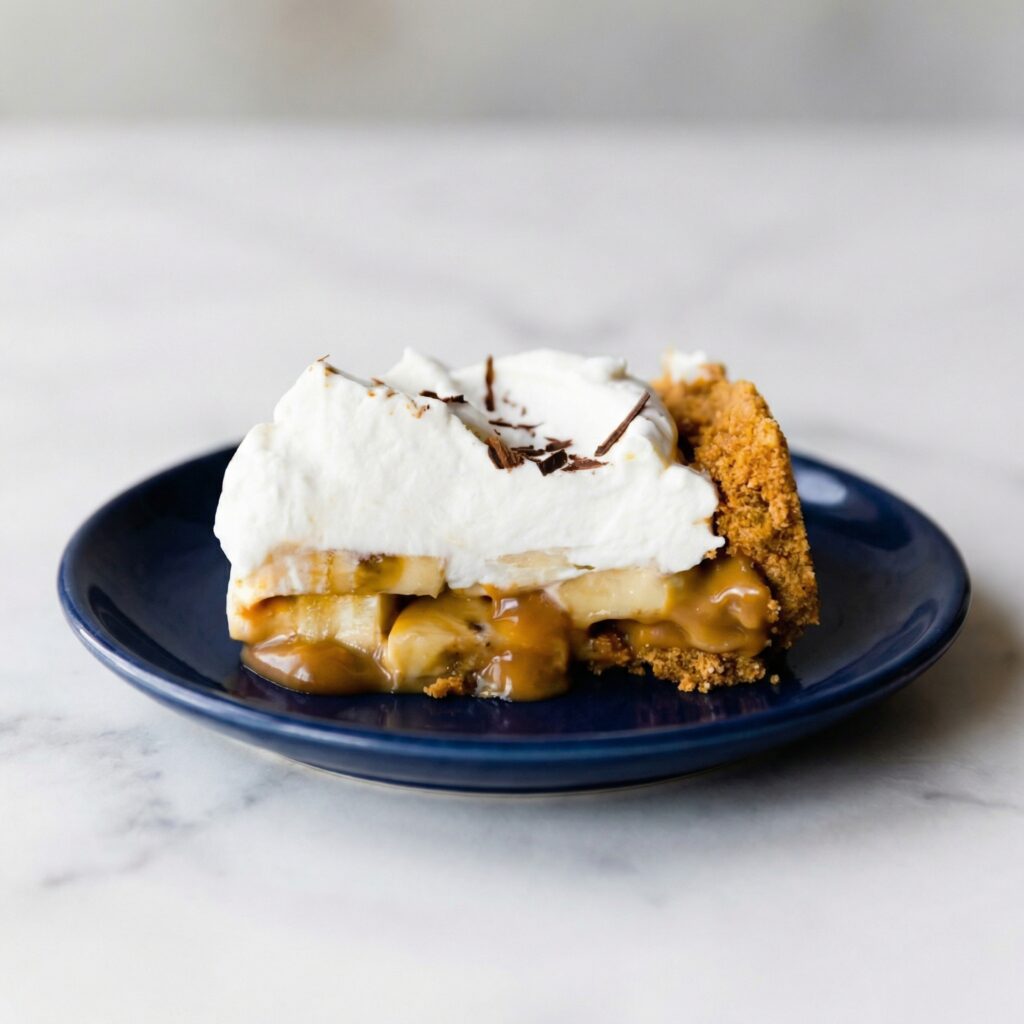
    Each slice should show distinct layers:

    • Firm, buttery crust
    • Thick caramel
    • Fresh banana
    • Cloud-like whipped cream

    Serve chilled for the best texture and flavor balance.


    Tips for the Perfect No-Bake Banoffee Pie

    • Press the crust very firmly to prevent crumbling.
    • Chill between layers to keep structure clean.
    • Use full-fat whipping cream for stable peaks.
    • Avoid overripe bananas.
    • Serve within 24 hours for the freshest appearance.

    Make-Ahead and Storage

    This pie can be made up to one day in advance. Store covered in the refrigerator.

    It’s best enjoyed within 1–2 days, as bananas may begin to brown and release moisture over time.

    Freezing is not recommended because whipped cream and bananas change texture when thawed.


    Optional Variations

    Want to customize it?

    • Add a thin layer of melted chocolate over the crust before caramel.
    • Sprinkle flaky sea salt over the caramel for a salted twist.
    • Use chocolate cookie crumbs instead of graham crackers.
    • Add a drizzle of chocolate sauce on top before serving.

    This No-Bake Banoffee Pie proves that you don’t need an oven to create a show-stopping dessert. With its buttery crust, silky caramel, fresh bananas, and fluffy whipped cream, it’s a guaranteed crowd-pleaser.

    It’s rich yet balanced, simple yet impressive, and easy enough for beginner bakers. Whether you’re hosting guests or treating yourself, this chilled dessert delivers comfort and indulgence in every bite.

    No baking. No stress. Just layers of sweet, creamy perfection.

  • Chewy, Chocolatey, and Irresistible: The Ultimate Homemade Revel Bars Recipe

    Chewy, Chocolatey, and Irresistible: The Ultimate Homemade Revel Bars Recipe

    If you love the combination of buttery oats and rich, fudgy chocolate, then Revel Bars are about to become your new favorite dessert.

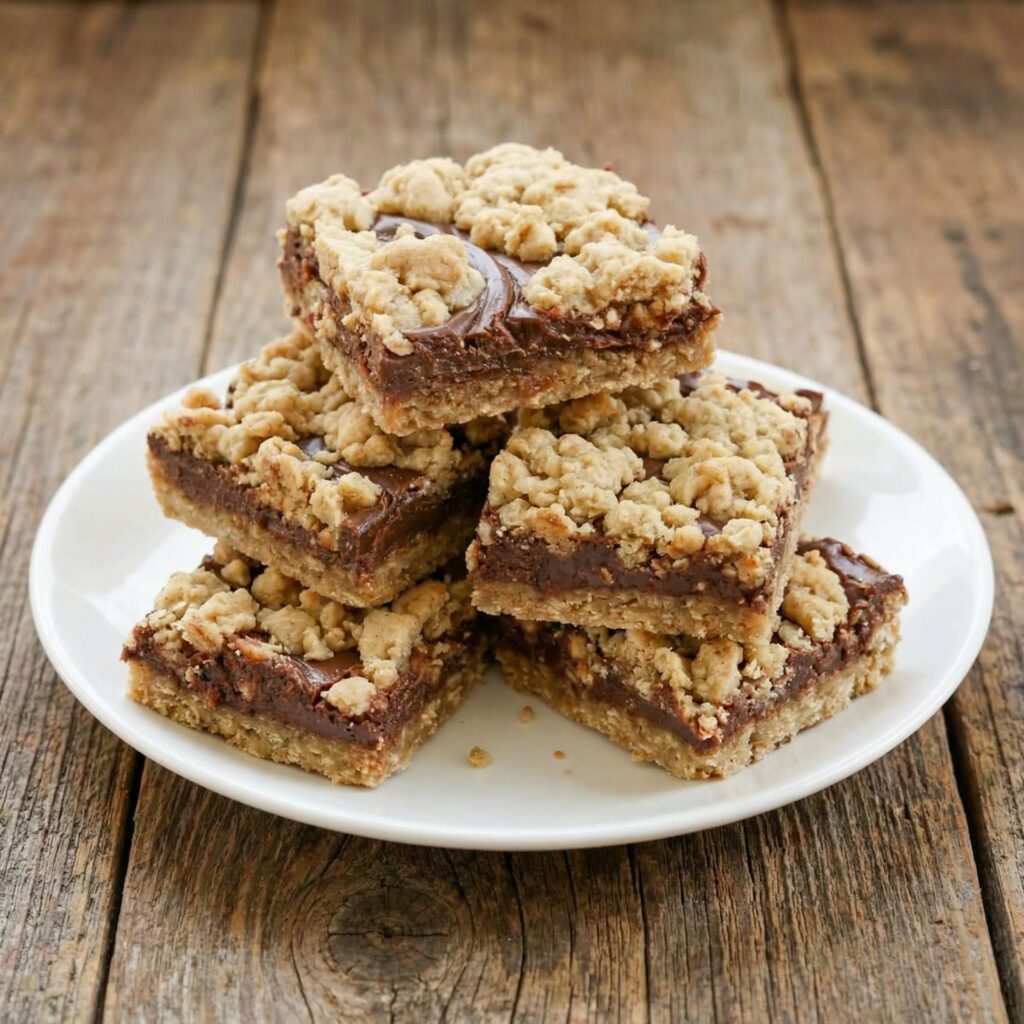
    These classic layered bars feature a soft oatmeal cookie crust and topping with a thick, gooey chocolate center that melts in your mouth.

    They’re simple enough for beginner bakers yet impressive enough for potlucks, bake sales, and family gatherings. Follow this detailed step-by-step guide to make perfectly chewy, chocolate-packed Revel Bars right in your own kitchen.


    What Are Revel Bars?

    Revel Bars are a vintage dessert bar made with a hearty oatmeal cookie dough that doubles as both the crust and crumb topping.

    The center is filled with a luscious chocolate mixture that bakes into a soft fudge-like layer. The contrast between chewy oats and silky chocolate is what makes these bars so special.


    Ingredients You’ll Need

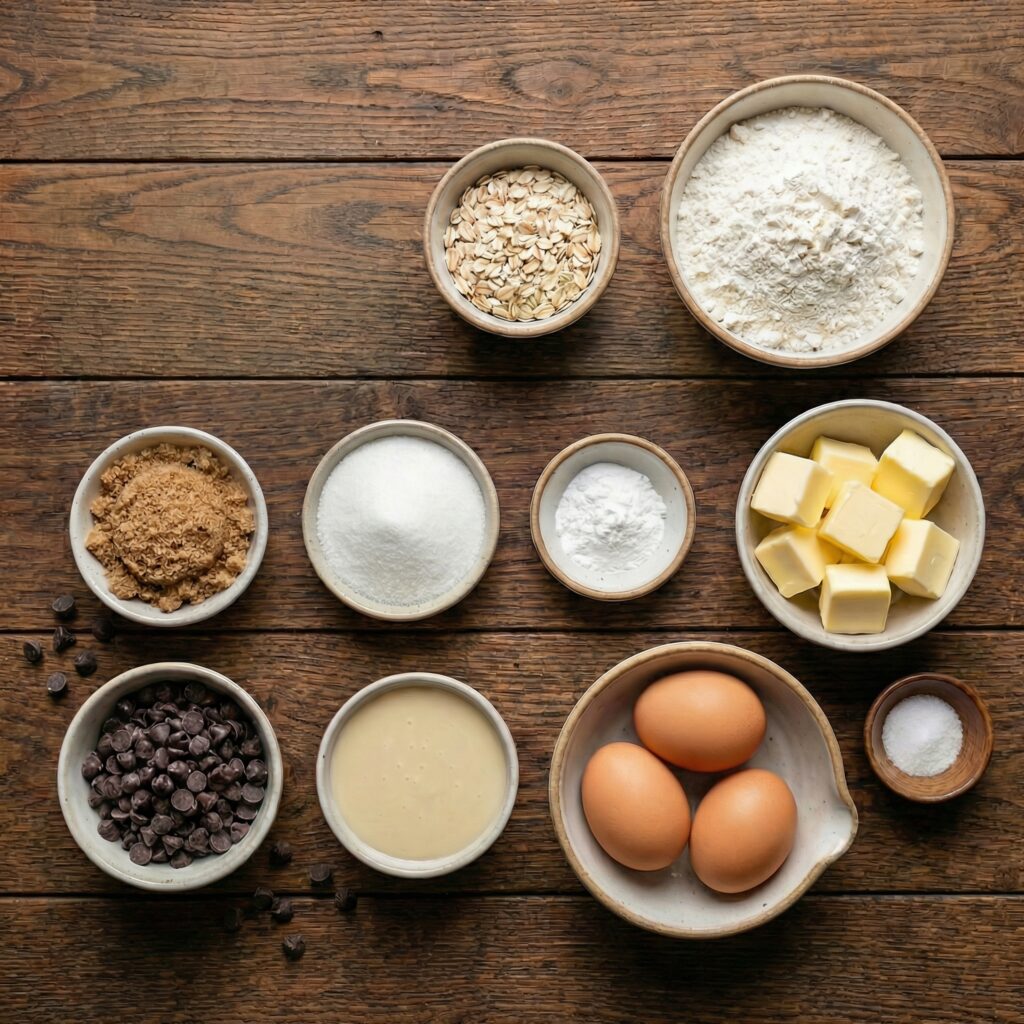
    For the Oatmeal Cookie Base and Topping:

    • 1 cup (226g) unsalted butter, softened
    • 2 cups (400g) packed brown sugar
    • 2 large eggs
    • 1 teaspoon vanilla extract
    • 2½ cups (310g) all-purpose flour
    • 1 teaspoon baking soda
    • ½ teaspoon salt
    • 3 cups (270g) old-fashioned rolled oats

    For the Chocolate Filling:

    • 1 can (14 oz) sweetened condensed milk
    • 2 cups (340g) semi-sweet chocolate chips
    • 2 tablespoons unsalted butter
    • ½ teaspoon salt
    • 1 teaspoon vanilla extract

    Step 1: Preheat and Prepare the Pan

    Preheat your oven to 350°F (175°C).

    Grease a 9×13-inch baking pan or line it with parchment paper, leaving overhang on the sides for easy removal. Proper preparation ensures your bars release cleanly once cooled.


    Step 2: Cream Butter and Sugar

    In a large mixing bowl, beat the softened butter and brown sugar together until light and fluffy.

    This step incorporates air into the mixture, helping create a soft and chewy texture. Cream for about 2–3 minutes using a hand mixer or stand mixer.


    Step 3: Add Eggs and Vanilla

    Add the eggs one at a time, beating well after each addition. Stir in the vanilla extract.

    The mixture should be smooth and slightly creamy at this stage.


    Step 4: Combine Dry Ingredients

    In a separate bowl, whisk together the flour, baking soda, and salt.

    Gradually add the dry ingredients to the wet mixture, mixing just until combined. Avoid overmixing to keep the bars tender.


    Step 5: Fold in the Oats

    Stir in the old-fashioned rolled oats until evenly distributed.

    The dough will be thick and hearty—this is exactly what you want for that classic chewy texture.


    Step 6: Press the Base Layer

    Press about two-thirds of the oatmeal dough evenly into the bottom of the prepared baking pan.

    Use a spatula or lightly damp fingers to smooth it into an even layer. This will serve as the sturdy base for your chocolate filling.

    Set aside the remaining dough for the topping.


    Step 7: Prepare the Chocolate Filling

    In a medium saucepan over low heat, combine the sweetened condensed milk, chocolate chips, and butter. Stir continuously until the chocolate is fully melted and smooth.

    Remove from heat and stir in the salt and vanilla extract. The filling should be glossy, thick, and rich.


    Step 8: Spread the Chocolate Layer

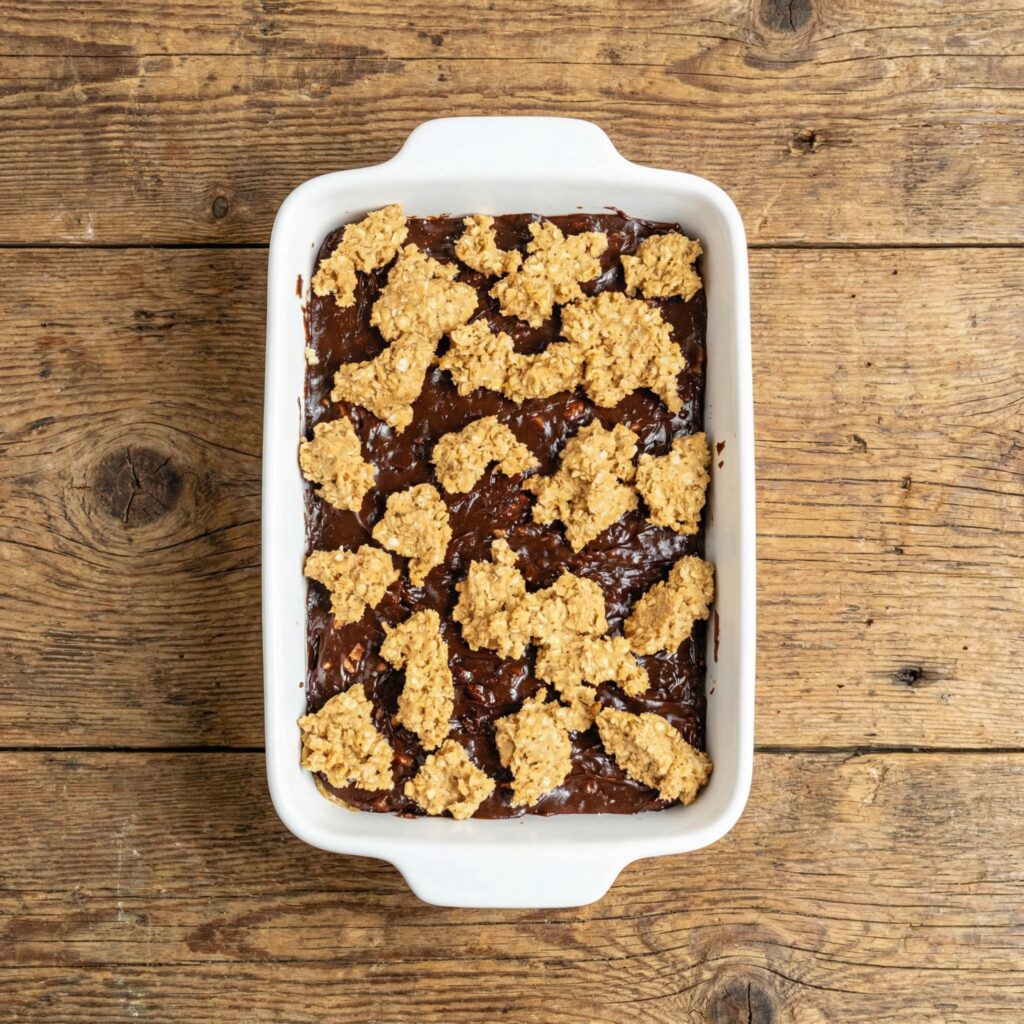
    Pour the warm chocolate filling evenly over the oatmeal base in the pan. Use a spatula to spread it into an even layer, making sure it reaches all corners.


    Step 9: Add the Oatmeal Topping

    Crumble the remaining oatmeal dough evenly over the chocolate layer. Don’t worry about covering every inch—the chocolate peeking through creates that classic rustic look.


    Step 10: Bake to Perfection

    Bake in the preheated oven for 25–30 minutes, or until the top is lightly golden brown and set.

    The center may still look slightly soft, but it will firm up as it cools.

    Avoid overbaking, as this can dry out the bars.


    Step 11: Cool Completely

    Remove the pan from the oven and allow the bars to cool completely in the pan.

    This step is crucial—cutting them too early can cause the chocolate layer to ooze and fall apart.

    For clean slices, refrigerate the cooled bars for 1–2 hours before cutting.


    Step 12: Slice and Serve

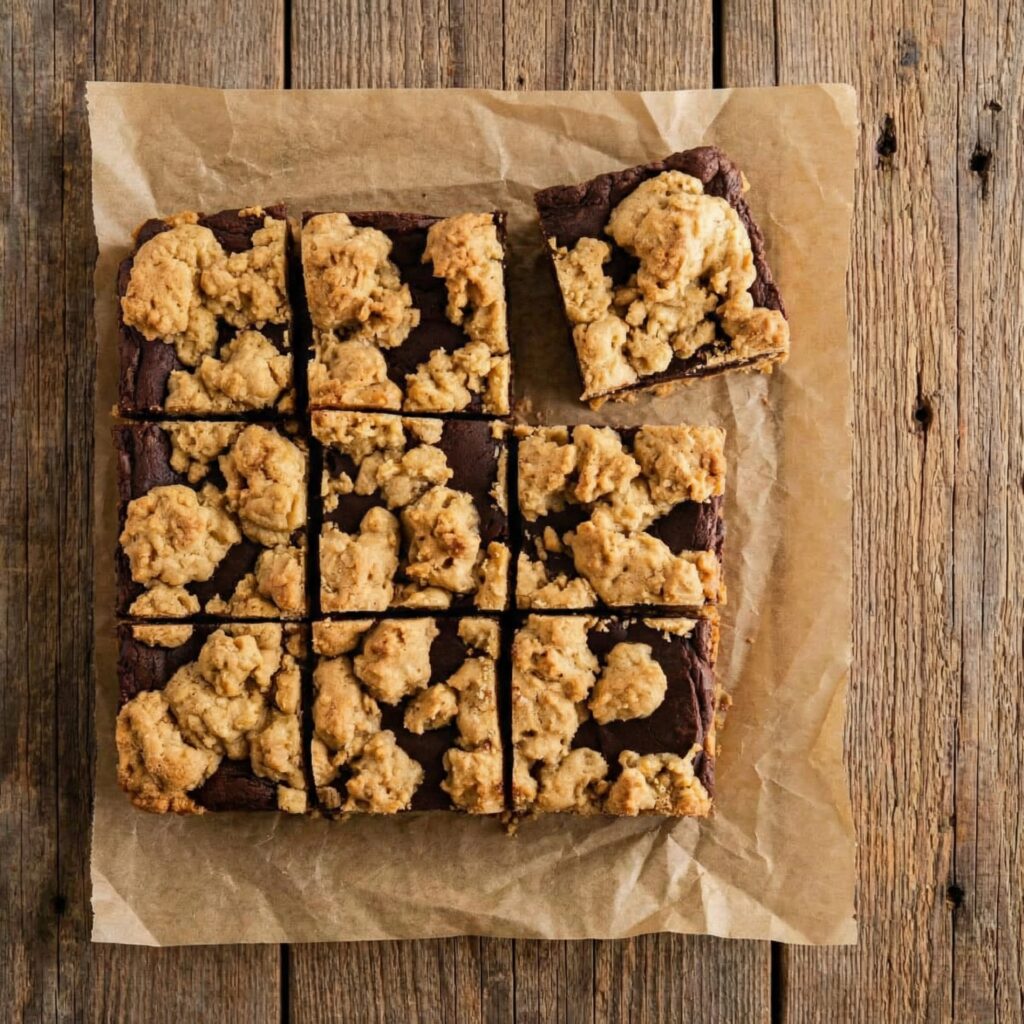
    Use the parchment overhang to lift the bars out of the pan. With a sharp knife, cut into squares or rectangles.

    Wipe the knife clean between cuts for neat edges.

    Serve at room temperature for the perfect balance of chewy oatmeal and fudgy chocolate.


    Tips for Perfect Revel Bars

    1. Use old-fashioned oats, not quick oats, for the best texture.
    2. Line the pan with parchment for easy removal.
    3. Don’t overbake—slightly soft centers ensure a fudgy filling.
    4. Chill before slicing for cleaner cuts.
    5. Add chopped nuts like walnuts or pecans for extra crunch if desired.

    Storage and Freezing

    • Store Revel Bars in an airtight container at room temperature for up to 4 days.
    • Refrigerate for a firmer texture and longer freshness.
    • Freeze individually wrapped bars for up to 3 months. Thaw at room temperature before serving.

    Revel Bars are the perfect combination of nostalgic comfort and indulgent flavor.

    The chewy oatmeal layers contrast beautifully with the rich chocolate center, creating a dessert that feels both homey and decadent. Whether you’re baking for a gathering or simply satisfying a chocolate craving, these bars deliver every time.

    Once you try homemade Revel Bars, you’ll understand why this classic recipe has stood the test of time. With simple ingredients and easy steps, you can create a batch of irresistible bars that disappear almost as quickly as they cool.

  • Classic Brazilian Brigadeiros

    Classic Brazilian Brigadeiros

    Brigadeiros are the heart and soul of Brazilian celebration—a simple, no-bake confection that is unbelievably rich, fudgy, and fun. With just three core ingredients, they transform into decadent little truffles with a deep chocolate flavor and a uniquely soft, chewy texture.

    Rolled in chocolate sprinkles (granulado), they are a staple at birthday parties, gatherings, and a beloved treat for all ages. Once you try one, you’ll understand why Brazil is obsessed.

    The Science of the Perfect Fudge Consistency

    The magic of a brigadeiro lies in the cooked condensed milk mixture. Sweetened condensed milk is essentially milk with its water removed and sugar added. When heated with cocoa powder and butter, the sugars caramelize slightly and the proteins thicken, transforming the liquid into a soft, pliable fudge.

    The key is cooking it to the exact right stage—the “bottom of the pan” test. As you stir, the mixture will thicken and start to pull away from the bottom of the saucepan, leaving a clear path for a few seconds before slowly filling back in. This indicates enough moisture has evaporated to create a mixture that will hold its shape when rolled but remain soft and chewy when cooled.

    Ingredients

    For the Brigadeiro Mixture:

    • 1 (14 oz / 397g) can of sweetened condensed milk
    • ¼ cup (25g) unsweetened cocoa powder, sifted
    • 2 tablespoons unsalted butter, plus extra for greasing hands
    • Pinch of salt (optional)

    For Coating:

    • ½ cup (about 60g) chocolate sprinkles (granulado)

    Instructions

    1. Cook the Fudge Base: In a medium non-stick saucepan, combine the sweetened condensed milk, sifted cocoa powder, 2 tablespoons of butter, and a pinch of salt. Cook over medium-low heat, stirring constantly and scraping the bottom and sides of the pan with a heatproof spatula.

    2. Cook to the Perfect Consistency: Continue cooking and stirring for 10-15 minutes. The mixture will gradually thicken, bubble slowly, and darken in color.

    It is done when you can run your spatula through the center and the mixture takes 2-3 seconds to fill back in, leaving a clear path on the bottom of the pan. It should be thick enough to hold its shape slightly when a spoonful is dropped.

    3. Chill the Mixture: Immediately pour the hot fudge mixture into a lightly buttered plate or shallow dish. Spread it out to cool faster. Let it cool to room temperature, then cover with plastic wrap (pressed directly onto the surface) and refrigerate for at least 2 hours, or until completely cold and firm enough to handle.

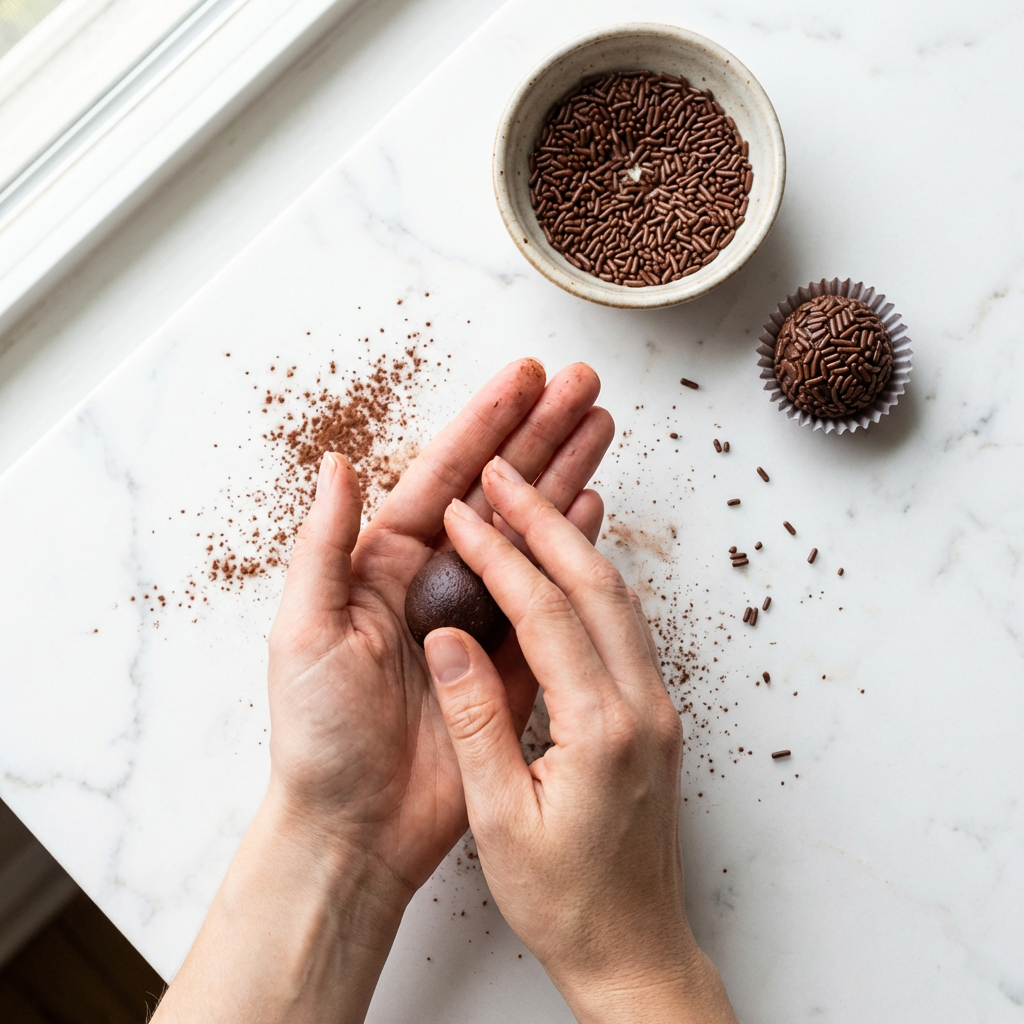
    4. Roll into Balls: Place the chocolate sprinkles in a shallow bowl. Lightly butter your palms. Scoop about 1 teaspoon of the chilled mixture and roll it quickly between your buttered hands into a smooth, round ball (about 1-inch in diameter). If the mixture becomes too sticky, chill it again for 15 minutes.

    5. Coat in Sprinkles: Immediately roll each ball in the chocolate sprinkles until fully covered. Place the finished brigadeiro in a paper candy cup or on a parchment-lined tray.

    6. Serve or Store: Brigadeiros can be served at room temperature or slightly chilled. They will keep in an airtight container in the refrigerator for up to 1 week. For the best texture, let them sit at room temperature for 15 minutes before serving.

    Pro-Tips for Brigadeiro Success

    • Use a Non-Stick Pan & Spatula: This prevents scorching and makes stirring and cleaning much easier.
    • Low and Slow Cooking: Cook over medium-low heat and stir constantly. Rushing with high heat will burn the mixture.
    • The “Pan Test” is Key: Do not stop cooking before the mixture passes the “clear bottom” test. If undercooked, the balls will be too soft and sticky to roll; if overcooked, they will be too hard and crumbly.
    • Butter Your Hands: This is essential to prevent the sticky mixture from adhering to your palms while rolling. Re-butter as needed.
    • Work with Cold Mixture: The fudge must be thoroughly chilled. If it warms up and becomes sticky while rolling, return it to the fridge.
    • Authentic Sprinkles: Seek out “granulado” or chocolate jimmies. The tiny round nonpareil sprinkles are not traditional and will not coat as well.

    These Classic Brazilian Brigadeiros are pure, joyful indulgence.

  • Chocolate Pudding Pie: The Ultimate No-Bake, Make-Ahead Dessert

    Chocolate Pudding Pie: The Ultimate No-Bake, Make-Ahead Dessert

    This pie is the epitome of comfort and elegance, all in one no-bake package. It starts with a simple, crunchy cookie crust that requires just minutes to make.

    The star is the pudding—a luxurious, from-scratch chocolate custard cooked on the stovetop until it’s thick enough to coat a spoon. Poured into the waiting crust and chilled, it sets into a sliceable, intensely chocolatey filling that’s far superior to any mix.

    Topped with freshly whipped cream, it’s a dessert that feels special enough for a dinner party but is straightforward enough for a weeknight treat. The best part? It must be made ahead, taking all the stress out of dessert timing.

    The Science of the Set & The Crust

    The perfection of this pie relies on two types of setting: chemical and physical. The cookie crust sets through the melting and re-solidification of butter. When mixed with fine cookie crumbs and baked (or chilled), the butter acts as a binder, creating a firm, cohesive base as it cools.

    The homemade pudding is a starch-thickened custard. Cornstarch granules swell and burst when heated with liquid, creating a gel network that traps water and milk, resulting in a thick, smooth texture. The egg yolks add richness and a velvety mouthfeel, while the chocolate contributes both flavor and additional structure as its cocoa butter solidifies upon chilling.

    This combination of starch gelatinization and fat solidification creates a filling that is firm enough to slice cleanly yet melts luxuriously on the tongue.

    Ingredients

    For the Cookie Crust:

    • 24 chocolate sandwich cookies (like Oreos)
    • 5 tablespoons (70g) unsalted butter, melted
    • Pinch of salt

    For the Chocolate Pudding Filling:

    • ¾ cup (150g) granulated sugar
    • ⅓ cup (40g) cornstarch
    • ⅓ cup (30g) unsweetened cocoa powder
    • ½ teaspoon salt
    • 3 cups (720ml) whole milk
    • 4 large egg yolks
    • 4 oz (115g) semi-sweet or bittersweet chocolate, finely chopped
    • 2 tablespoons (28g) unsalted butter
    • 2 teaspoons vanilla extract

    For the Topping:

    • 1 cup (240ml) heavy whipping cream, cold
    • 2 tablespoons powdered sugar
    • Chocolate shavings or grated chocolate, for garnish

    Instructions

    1. The Prepared Crumb Crust: In a food processor, pulse the cookies (creams and all) into fine, uniform crumbs. Mix with melted butter and salt until it resembles wet sand. Press firmly and evenly into the bottom and up the sides of a 9-inch pie plate.

    2. The Chilled or Baked Crust: For a no-bake option, chill the crust in the freezer for 15 minutes to set. For a firmer crust, bake at 350°F (175°C) for 8-10 minutes, then cool completely.

    3. The Cooked, Thickened Pudding Base: In a medium saucepan, whisk together sugar, cornstarch, cocoa, and salt. Gradually whisk in the milk until smooth. Cook over medium heat, whisking constantly, until the mixture thickens, becomes glossy, and reaches a low boil.

    4. The Tempered Egg Mixture: In a separate bowl, whisk the egg yolks. While whisking constantly, slowly pour about 1 cup of the hot pudding mixture into the yolks to temper them. Then, whisk this yolk mixture back into the saucepan.

    5. The Finished, Enriched Pudding: Return the saucepan to low heat. Cook for 2 more minutes, whisking constantly. Remove from heat. Whisk in the chopped chocolate, butter, and vanilla until completely smooth, melted, and glossy.

    6. The Filled Pie Shell: Immediately pour the hot pudding into the prepared crust. Smooth the top with a spatula. Press plastic wrap directly onto the surface of the pudding to prevent a skin from forming.

    7. The Fully Chilled & Set Pie: Refrigerate the pie for at least 4 hours, or preferably overnight, until the pudding is completely cold and firmly set.

    8. The Topped & Finished Pie: Just before serving, whip the cream and powdered sugar to stiff peaks. Spread or pipe it over the chilled pie. Garnish with chocolate shavings.

    Pro-Tips for Pie Perfection

    • Use a Food Processor: For the most uniform, fine crumbs that pack into a solid crust.
    • Press the Crust Firmly: Use a flat-bottomed cup to press the crumbs firmly into the plate, especially in the corners, to prevent crumbling when sliced.
    • Constant Whisking is Key: When cooking the pudding, never stop whisking to prevent lumps and scorching on the bottom of the pan.
    • Temper the Eggs: This gradual heating prevents the eggs from scrambling when added to the hot mixture.
    • Chop Chocolate Finely: Smaller pieces melt instantly into the hot pudding, ensuring a smooth finish.
    • Press Plastic Directly: This crucial step prevents a rubbery skin from forming on the pudding surface.
    • Chill Thoroughly: Patience is essential for a clean slice. Overnight chilling is best.
    • Whip Cream Cold: Chill your bowl and beaters for the fluffiest whipped cream.
    • Make Ahead: This pie is perfect for making 1-2 days in advance. Add the whipped cream topping just a few hours before serving.
    • Storage: Store covered in the refrigerator for up to 3 days. The crust will soften over time but will still be delicious.

    This Chocolate Pudding Pie is a timeless, foolproof dessert that never goes out of style.

  • No-Bake Cheesecake: The Easiest, Creamiest Dessert with 6 Ingredients

    No-Bake Cheesecake: The Easiest, Creamiest Dessert with 6 Ingredients

    Craving the rich, tangy delight of cheesecake without turning on the oven? This No-Bake Cheesecake is your ultimate dessert savior. With just six simple ingredients and about 20 minutes of active time, you can create a luxuriously smooth, perfectly set cheesecake that rivals any baked version.

    The secret is in the gentle setting power of whipped cream and the stability of cream cheese, which together create a cloud-like, mousse-like filling that slices beautifully. Resting on a classic, buttery graham cracker crust and topped with your favorite fruit or sauce, this dessert is foolproof, elegant, and guaranteed to impress at any summer gathering, potluck, or weeknight treat.

    The Science of a Firm, No-Bake Set

    Unlike its baked cousin that relies on eggs for structure, this cheesecake gets its firm, sliceable texture from a combination of fat stabilization and chilling. The filling is essentially a stabilized mousse.

    The cream cheese provides a dense, tangy base rich in fat, which helps solidify when cold. The whipped heavy cream is the key: when beaten, its fat molecules trap air, creating a light foam. Folding this foam into the sweetened cream cheese creates millions of tiny air pockets. As the cheesecake chills for several hours, these air pockets set within the firm fat matrix of the cream cheese, creating a structure that’s light yet firm enough to hold its shape when sliced.

    The crust, pre-baked or set with butter, provides a sturdy, crunchy foundation that contrasts perfectly with the creamy filling.

    Ingredients

    For the Graham Cracker Crust:

    • 2 cups (200g) graham cracker crumbs (about 14-16 full sheets)
    • ½ cup (1 stick / 113g) unsalted butter, melted
    • 2 tablespoons granulated sugar

    For the No-Bake Filling:

    • 16 oz (two 8 oz blocks) full-fat cream cheese, softened to room temperature
    • 1 cup (120g) powdered sugar, sifted
    • 1 tablespoon fresh lemon juice
    • 1 teaspoon pure vanilla extract
    • 1 ¼ cups (300ml) cold heavy whipping cream

    For Topping (Optional): Fresh berries, fruit sauce, or lemon curd.

    Instructions

    1. Make the Crust: In a medium bowl, mix graham cracker crumbs, melted butter, and sugar until combined and the texture resembles wet sand. Press the mixture firmly and evenly into the bottom and slightly up the sides of a 9-inch springform pan or pie dish. Use the bottom of a glass to compact it. Refrigerate while you make the filling.

    2. Make the Cheesecake Filling Base: In a large bowl, beat the softened cream cheese with an electric mixer until completely smooth and lump-free, about 2 minutes. Beat in the sifted powdered sugar, lemon juice, and vanilla extract until fully incorporated and creamy. Scrape down the bowl.

    3. Whip the Cream: In a separate, chilled bowl, whip the cold heavy cream until it forms stiff peaks. Be careful not to over-whip into butter.

    4. Combine & Fold: Gently fold about one-third of the whipped cream into the cream cheese mixture to lighten it. Then, carefully fold in the remaining whipped cream using a large spatula. Use a gentle, broad folding motion until no white streaks remain, being careful not to deflate the mixture.

    5. Assemble & Chill: Pour the fluffy filling into the prepared crust and smooth the top with an offset spatula. Cover loosely with plastic wrap and refrigerate for at least 6 hours, or preferably overnight, to set completely.

    6. Serve: Run a thin knife around the edge of the springform pan before releasing the collar. If using a pie dish, slice directly from the dish. Top with fresh berries, a fruit sauce, or enjoy plain. Slice with a clean, hot knife for the neatest cuts.

    7. Store: Keep covered in the refrigerator for up to 4 days. The crust will soften slightly over time but will remain delicious.

    Pro-Tips for a Perfectly Set, Silky Cheesecake

    • Room Temperature Cream Cheese is Non-Negotiable: This is the single most important tip. Cold cream cheese will leave lumps that are impossible to beat out, resulting in a grainy filling.
    • Chill Your Bowl & Cream: For the best volume when whipping the cream, chill your mixer bowl and beaters in the freezer for 10-15 minutes beforehand.
    • Don’t Over-Whip the Cream: Whip just until stiff peaks form. Over-whipped cream becomes grainy and buttery, which will make your filling greasy and less stable.
    • Fold Gently: Preserve the air in the whipped cream by folding gently. Overmixing will deflate the filling, making it dense.
    • The Long Chill: Do not shortcut the chilling time. The cheesecake needs a full 6+ hours to firm up properly for clean slices. Overnight is ideal.
    • Clean Slices: For picture-perfect slices, dip your knife in hot water and wipe it clean between each cut.
    • Flavor Variations: Add ½ cup of lemon curd or passionfruit puree to the filling. For a chocolate version, fold in 1 cup of melted and cooled chocolate after step 2.

    This No-Bake Cheesecake is the ultimate easy, elegant dessert that delivers on every promise.

  • Perfect Carrot Cupcakes with Cream Cheese Frosting

    Perfect Carrot Cupcakes with Cream Cheese Frosting

    Carrot cupcakes are the quintessential treat that feels like a celebration but is grounded in wholesome goodness. This recipe delivers everything you love: an incredibly moist, spice-kissed crumb studded with sweet carrots and pecans, all crowned by a luxurious, tangy cream cheese frosting that’s not too sweet.

    They’re surprisingly easy to make, and the result is a cupcake that’s perfectly balanced, utterly delicious, and sure to become a requested favorite for birthdays, Easter, or any spring gathering.

    The Science of Moisture & Flavor Development

    The legendary moistness of carrot cake comes from a combination of oil-based hydration and vegetable-derived moisture. Using vegetable oil instead of butter keeps the crumb tender and locks in moisture for days, as oil coats flour proteins more thoroughly than solid fat.

    The finely grated carrots are the star, releasing their natural sugars and water during baking, which steams the cake from within. The warm spices—cinnamon, nutmeg, and ginger—are fat-soluble, meaning their aromatic compounds are best released and carried by the oil in the batter, creating a deep, complex flavor profile.

    The cream cheese frosting relies on the emulsion of fat and acid. Using full-fat, brick-style cream cheese and properly softened butter is crucial for a stable, pipeable frosting that won’t be runny. The slight acidity of the cream cheese cuts through the sweetness of the cupcakes, creating the perfect balance.

    Ingredients

    For the Carrot Cupcakes (Makes 14-16):

    • 1 ½ cups (188g) all-purpose flour
    • 1 teaspoon baking powder
    • ½ teaspoon baking soda
    • 1 ½ teaspoons ground cinnamon
    • ¼ teaspoon ground nutmeg
    • ¼ teaspoon ground ginger
    • ½ teaspoon salt
    • 2 large eggs, room temperature
    • ¾ cup (150g) granulated sugar
    • ¾ cup (165g) packed light brown sugar
    • ⅔ cup (160ml) vegetable or canola oil
    • 1 teaspoon vanilla extract
    • 2 cups (about 220g) finely grated carrots (about 3 medium)
    • ½ cup (60g) chopped pecans or walnuts (optional)

    For the Cream Cheese Frosting:

    • 8 oz (226g) full-fat brick cream cheese, softened
    • ½ cup (1 stick / 113g) unsalted butter, softened
    • 3 cups (360g) powdered sugar, sifted
    • 1 teaspoon vanilla extract
    • Pinch of salt

    Instructions

    1. Make the Cupcakes: Preheat oven to 350°F (175°C). Line a muffin tin with paper liners. In a medium bowl, whisk together flour, baking powder, baking soda, cinnamon, nutmeg, ginger, and salt.

    2. Mix Wet Ingredients: In a large bowl, whisk eggs, both sugars, oil, and vanilla until smooth and well combined.

    3. Combine & Add Carrots: Add the dry ingredients to the wet ingredients and mix with a spatula until just combined. Fold in the grated carrots and chopped nuts (if using). The batter will be thick.

    4. Bake: Divide batter evenly among liners, filling each about ⅔ full. Bake for 18-22 minutes, until a toothpick inserted comes out clean. Cool in pan for 5 minutes, then transfer to a wire rack to cool completely.

    5. Make the Frosting: While cupcakes cool, beat the softened cream cheese and butter together with an electric mixer on medium speed until completely smooth and creamy, about 2 minutes.

    6. Finish Frosting: With the mixer on low, gradually add the sifted powdered sugar, then the vanilla and salt. Once incorporated, beat on high speed for 1-2 minutes until light and fluffy. If frosting is too soft to pipe, refrigerate for 15-20 minutes.

    7. Frost & Serve: Once cupcakes are completely cool, pipe or spread the frosting on top. Garnish with a sprinkle of cinnamon, extra chopped nuts, or a fondant carrot.

    8. Storage: Store frosted cupcakes in an airtight container in the refrigerator for up to 4 days. Let sit at room temperature for 20 minutes before serving for the best texture.

    Pro-Tips for Cupcake Perfection

    • Grate Carrots Finely: Use the small holes of a box grater. This ensures they distribute evenly and soften completely during baking.
    • Don’t Drain the Carrots: Their natural moisture is essential to the cake. Squeezing them out will result in a drier cupcake.
    • Room Temperature Ingredients: Cold eggs or cream cheese won’t emulsify properly, leading to a broken batter or grainy frosting.
    • Measure Flour Correctly: For accuracy, spoon flour into the measuring cup and level it off. Packing the cup can lead to dense cupcakes.
    • The Toothpick Test: Check a few minutes before the minimum bake time. Overbaking is the enemy of moisture.
    • Cool Completely Before Frosting: The slightest warmth will melt the cream cheese frosting. Patience is key.
    • Frosting Consistency: If your frosting seems too soft after mixing, it’s likely because the cream cheese or butter was too warm. Chilling it briefly will fix it.
    • Add-In Ideas: For extra texture and flavor, fold in ½ cup of crushed pineapple (well-drained) or ½ cup of raisins with the carrots.

    These Perfect Carrot Cupcakes are a timeless, beloved classic for a very good reason.