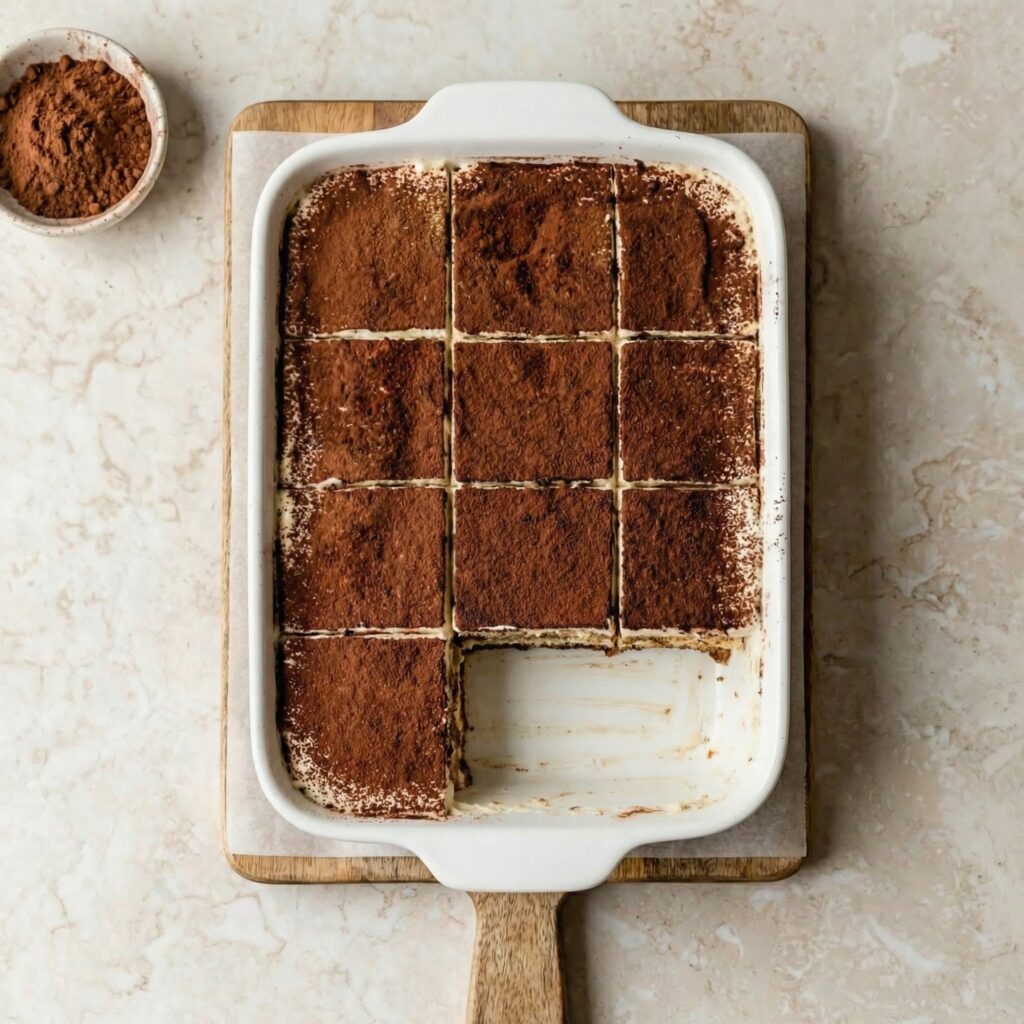
Tag: dessert

  • Golden Perfection: How to Make Authentic Portuguese Egg Tarts

    Golden Perfection: How to Make Authentic Portuguese Egg Tarts

    Few desserts can rival the sweet, creamy, caramelized delight of Portuguese egg tarts, also known as pastéis de nata.

    With a crisp, flaky puff pastry shell and a rich, velvety custard filling topped with a signature caramelized surface, these tarts are a treat that captures the heart of Portuguese cuisine.

    While they may look sophisticated, making them at home is a rewarding experience that doesn’t require professional pastry skills.

    Follow this step-by-step guide to create egg tarts that are golden, creamy, and utterly irresistible.
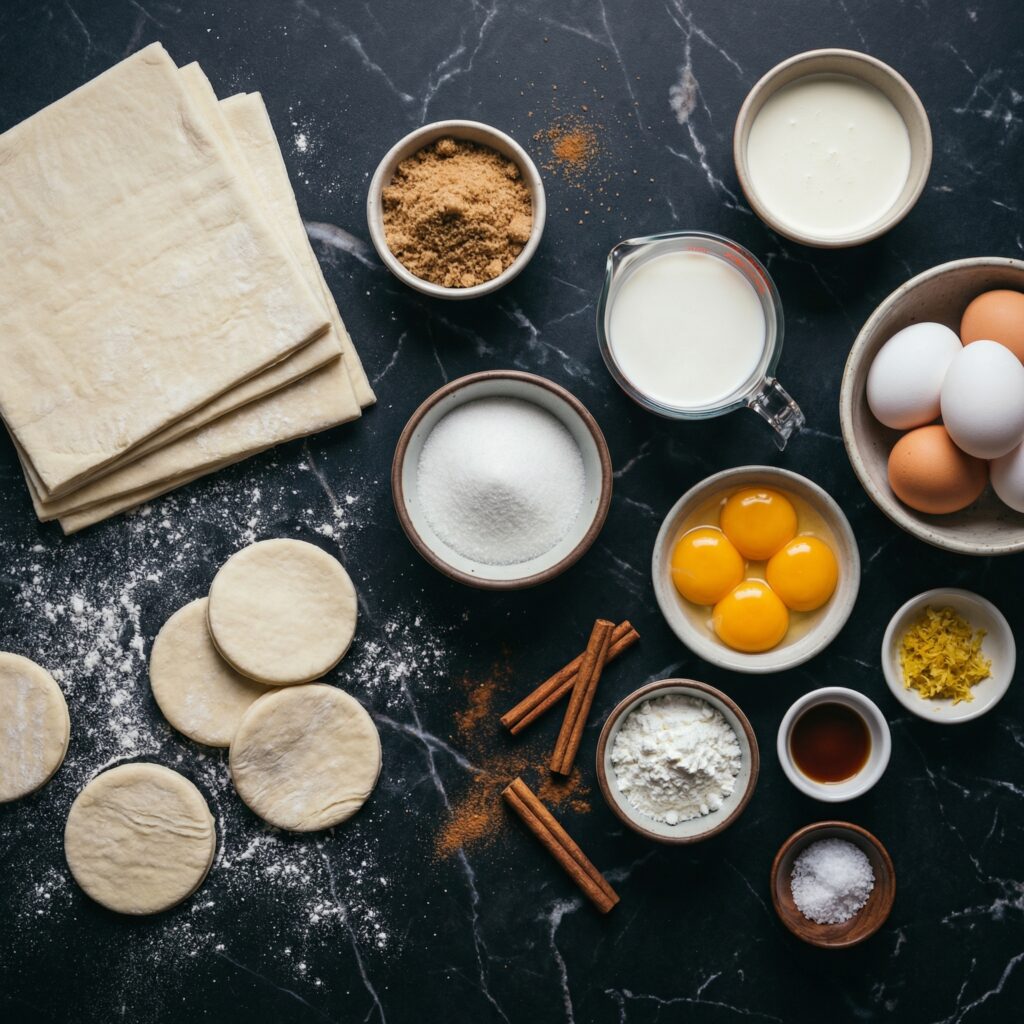

    Ingredients You’ll Need

    Before starting, gather all ingredients to ensure smooth preparation.

    For the pastry shell:

    • 1 package of frozen puff pastry (about 8 sheets), thawed
    • 1 tablespoon all-purpose flour (for dusting)

    For the custard filling:

    • 1 cup whole milk
    • ½ cup heavy cream
    • ½ cup granulated sugar
    • 3 tablespoons all-purpose flour
    • 6 large egg yolks
    • 1 teaspoon vanilla extract
    • 1 tablespoon lemon zest (optional, for subtle aroma)
    • ½ teaspoon ground cinnamon (optional, for flavor)

    Step 1: Preheat the Oven

    Preheat your oven to 500°F (260°C).

    Place a baking tray in the oven to heat as well. Using a hot baking surface helps achieve the signature caramelized top on Portuguese egg tarts.


    Step 2: Prepare the Puff Pastry

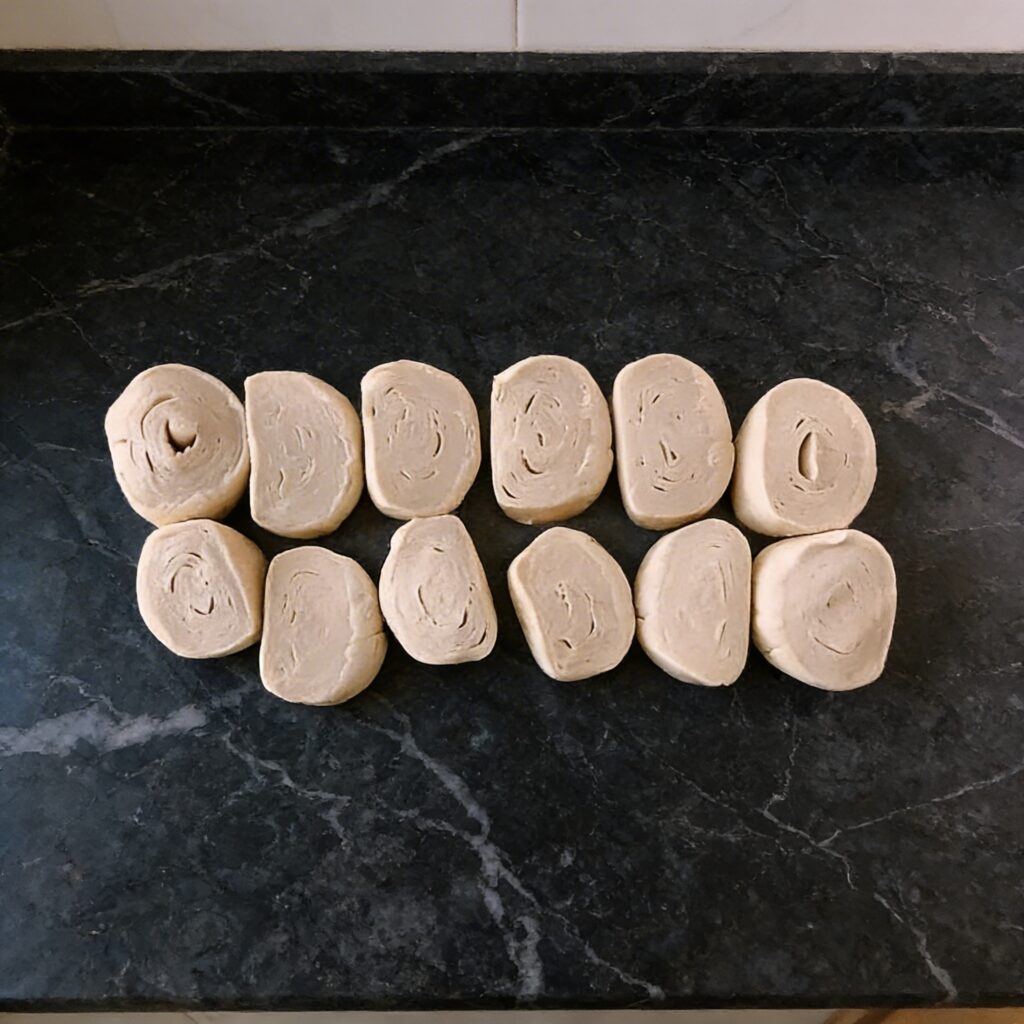
    Lightly flour your work surface and roll out the puff pastry sheets. Cut the pastry into circles slightly larger than the openings of your muffin tin or tart molds.

    Gently press the pastry circles into the cups, ensuring the sides are evenly lined. Chill the pastry-lined molds in the refrigerator for 15 minutes to prevent shrinking during baking.

    Step 3: Make the Custard Filling

    In a medium saucepan, combine milk, heavy cream, and lemon zest (if using).

    In a separate bowl, whisk together sugar and flour until smooth.

    Gradually add the milk mixture to the flour and sugar, whisking constantly to prevent lumps.

    Return the mixture to the saucepan over medium heat. Stir continuously until the custard thickens slightly, about 5–7 minutes. Remove from heat and allow it to cool slightly.

    In another bowl, lightly beat the egg yolks. Gradually whisk the egg yolks into the slightly cooled custard, along with vanilla extract and cinnamon if using.

    Mix until fully incorporated, creating a smooth, velvety filling.


    Step 4: Fill the Pastry Shells

    Remove the chilled pastry-lined molds from the refrigerator. Carefully pour the custard filling into each pastry shell, filling about ¾ of the way.

    Avoid overfilling to prevent spillage during baking.


    Step 5: Bake the Egg Tarts

    Place the filled tarts on the preheated baking tray and bake for 12–15 minutes.

    The high temperature will help the custard set quickly and create the iconic caramelized, slightly blistered top.

    Keep a close eye on the tarts in the final minutes to ensure the custard doesn’t burn but achieves those signature dark spots.


    Step 6: Cool Slightly and Serve

    Once baked, remove the tarts from the oven and let them cool for 5–10 minutes.

    This resting period allows the custard to set while keeping the pastry crisp.

    Serve warm for the ultimate creamy and flaky experience.


    Step 7: Optional Garnish

    Sprinkle a tiny pinch of cinnamon or powdered sugar over the tarts before serving.

    Some enjoy them with a light drizzle of caramel or a touch of lemon zest for added flavor complexity.


    Pro Tips for Perfect Portuguese Egg Tarts

    1. Use high-quality puff pastry – Proper layering is key for crisp, flaky shells.
    2. High oven temperature – Achieves the signature caramelized spots on the custard.
    3. Do not overcook the custard – The filling should be creamy, not dry or rubbery.
    4. Chill the pastry before filling – Helps prevent shrinkage during baking.
    5. Watch the baking closely – A few seconds can make the difference between a perfect caramelized top and a burnt custard.

    Variations and Twists

    • Classic Cinnamon: Sprinkle extra cinnamon for a spiced aroma.
    • Coffee Egg Tarts: Add 1 teaspoon instant coffee to the custard for a mocha twist.
    • Citrus Zest: Incorporate orange or lemon zest for a fresh, bright flavor.
    • Mini Egg Tarts: Use mini muffin tins for bite-sized treats perfect for parties or tea time.
    • Chocolate Twist: Add a thin layer of chocolate ganache at the bottom of the pastry before pouring the custard.

    Wrapping Up

    Portuguese egg tarts are a perfect balance of flaky pastry and silky custard with a golden, caramelized top that delights the eyes and palate alike.

    While they may seem intimidating at first glance, following these steps ensures a successful, delicious outcome.

    Making these tarts at home is rewarding—not only do you get to enjoy their warm, creamy goodness fresh out of the oven, but you also gain the satisfaction of mastering a classic dessert that has charmed generations.

    Whether for breakfast, dessert, or a special gathering, these pastéis de nata will impress anyone lucky enough to enjoy them.

    From preparing the crisp puff pastry shells to whisking the velvety custard and achieving the iconic caramelized top, each step is essential for the perfect balance of texture and flavor.

    Serve them with a hot cup of coffee or tea, and you have a delightful treat that transports you straight to the streets of Lisbon.

    Indulge yourself and your loved ones with homemade Portuguese egg tarts—golden, creamy, and absolutely irresistible.

    With patience, attention to detail, and a little love, these tarts are a masterpiece of dessert perfection.

  • Creamy, Dreamy & No-Oven Needed: The Ultimate No-Bake Mango Float

    Creamy, Dreamy & No-Oven Needed: The Ultimate No-Bake Mango Float

    If there’s one dessert that perfectly captures tropical comfort in every bite, it’s the beloved no-bake mango float. With layers of sweet ripe mangoes, lightly sweetened cream, and soft graham crackers that melt into cake-like perfection, this chilled dessert is simple, nostalgic, and absolutely irresistible.

    Often served at celebrations and family gatherings, mango float is especially popular in the Philippines—and for good reason. It’s easy to prepare, requires no oven, and tastes even better after chilling overnight. Whether you’re making it for a party or just craving something refreshing and sweet, this step-by-step guide will walk you through creating the perfect no-bake mango float.


    Why You’ll Love This Recipe

    • No baking required
    • Minimal ingredients
    • Beginner-friendly
    • Make-ahead dessert
    • Perfect for warm weather

    The magic happens in the fridge, where the layers soften and meld together into a creamy, sliceable treat.


    Ingredients You’ll Need

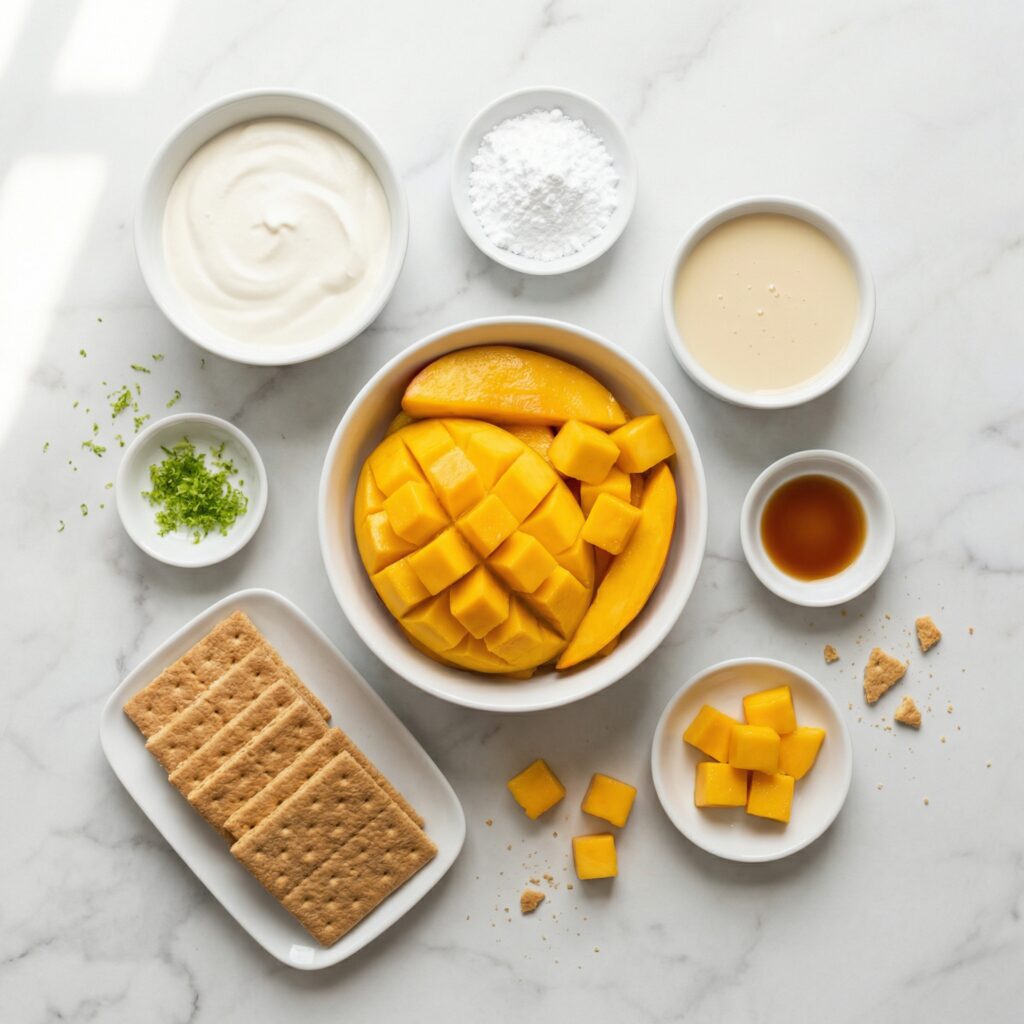
    • 4–5 ripe mangoes (preferably sweet, golden varieties)
    • 2 cups heavy whipping cream (cold)
    • 1 can (14 oz) sweetened condensed milk
    • 2 packs graham crackers

    That’s it—just four simple ingredients for a dessert that tastes like sunshine.


    Step 1: Prepare the Mangoes

    Start by peeling the mangoes and slicing the flesh away from the pit. Cut the mangoes into thin, even slices.

    Try to choose mangoes that are ripe but firm. Overripe mangoes can become mushy and release too much juice, while underripe mangoes may taste tart.

    Set aside a handful of the prettiest slices for the top layer decoration.


    Step 2: Make the Cream Mixture

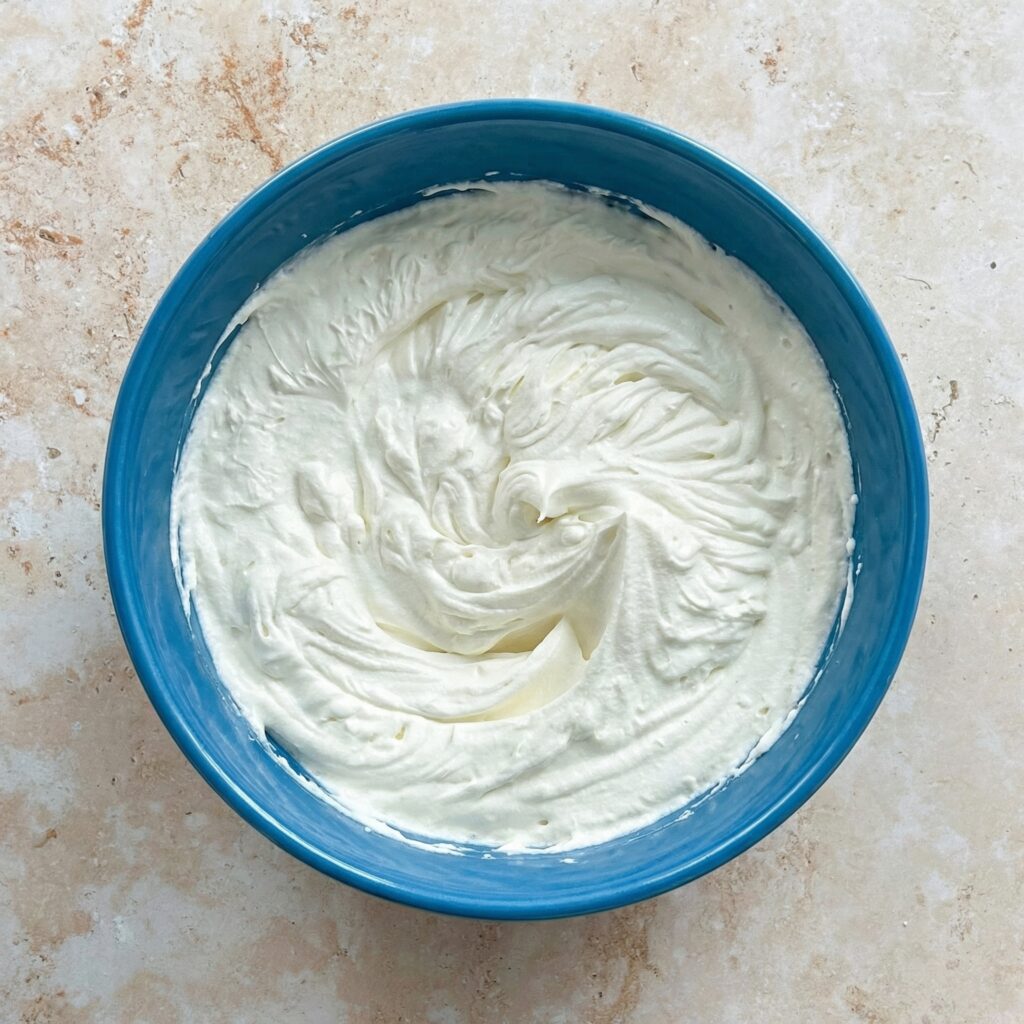
    In a large chilled mixing bowl, pour in the cold heavy whipping cream. Using a hand mixer or stand mixer, whip on medium speed until soft peaks begin to form.

    Gradually add the sweetened condensed milk while continuing to whip. Beat until the mixture thickens to stiff peaks. The cream should hold its shape but still look smooth and fluffy.

    Be careful not to overwhip, as this can cause the cream to become grainy.

    This cream layer is what gives mango float its rich, melt-in-your-mouth texture.


    Step 3: Prepare Your Dish

    Choose a rectangular glass or ceramic dish (8×8 or 9×13 inches works well depending on how thick you want the layers).

    There’s no need to grease the dish since this is a chilled dessert.


    Step 4: Create the First Layer

    Start by arranging a single layer of graham crackers on the bottom of the dish. Break crackers as needed to fully cover the base.

    Spread a generous layer of the whipped cream mixture evenly over the graham crackers.

    Use a spatula to smooth it out into an even layer.


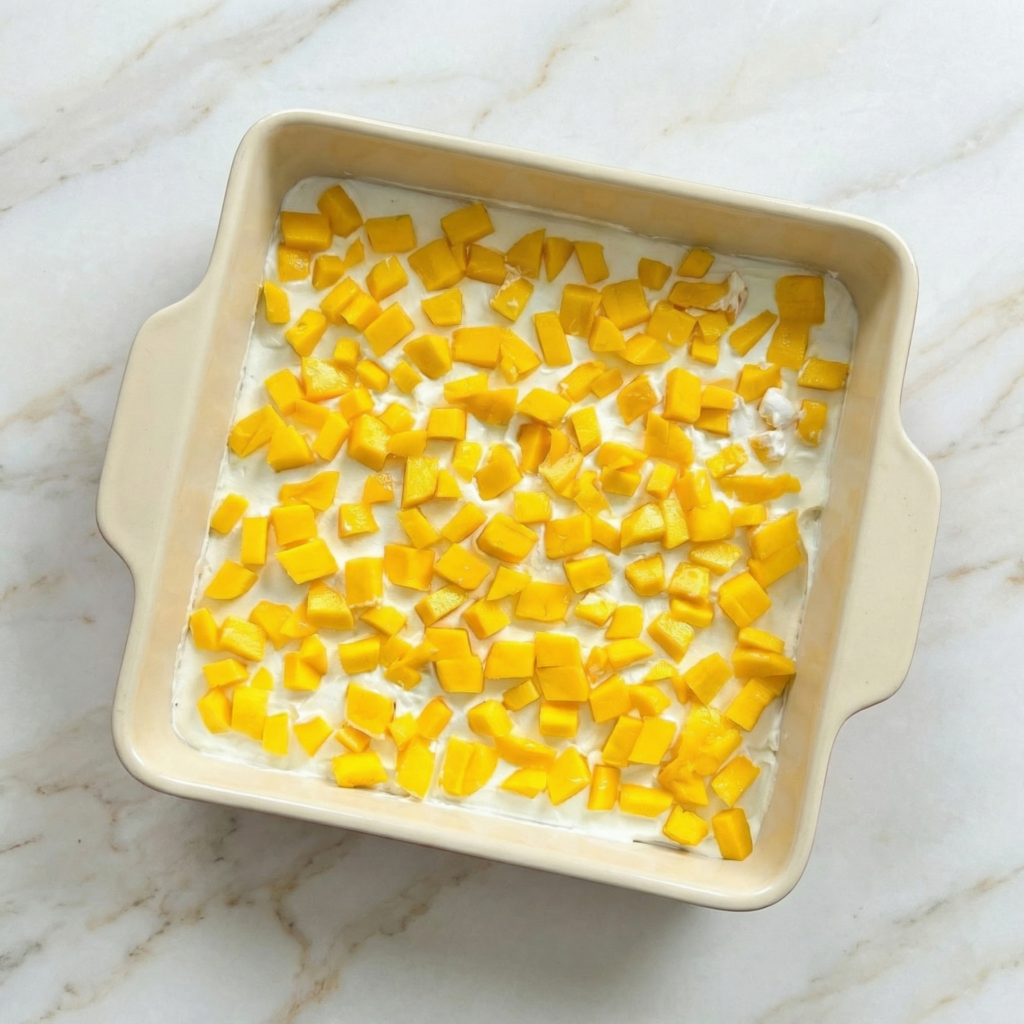
    Step 5: Add the Mango Layer

    Arrange a layer of sliced mangoes over the cream. Try to cover the entire surface so each bite has fruit.

    Don’t overcrowd the mangoes—just enough for a balanced layer.


    Step 6: Repeat the Layers

    Repeat the layering process:

    1. Graham crackers
    2. Cream mixture
    3. Mango slices

    Continue layering until you run out of ingredients, finishing with a layer of cream on top.

    Most dishes will yield 3 to 4 layers depending on thickness.


    Step 7: Decorate the Top

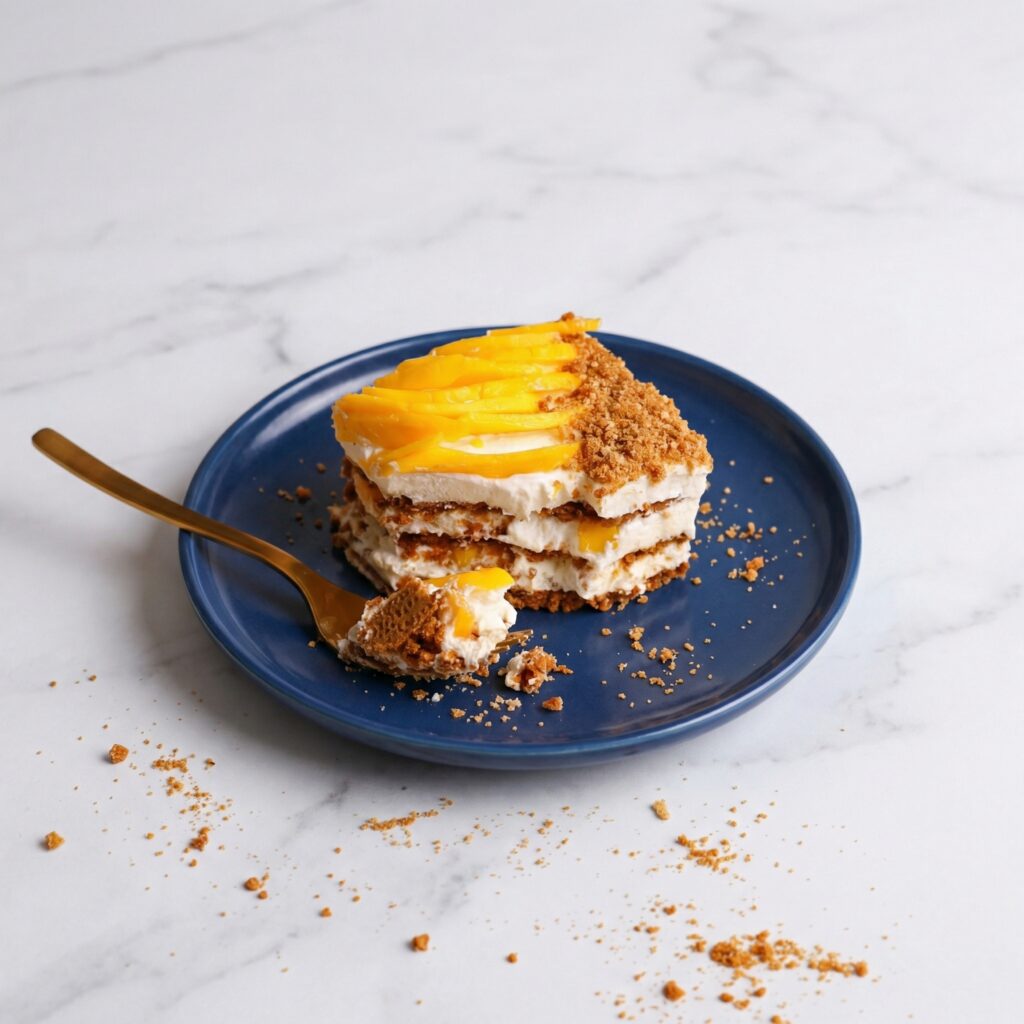
    Use your reserved mango slices to decorate the top layer. You can create neat rows, overlapping slices, or even a simple fan pattern for a more elegant look.

    For extra flair, you can crush a graham cracker and sprinkle crumbs lightly over the top.


    Step 8: Chill to Set

    Cover the dish with plastic wrap and refrigerate for at least 6 hours, though overnight is best.

    During this time, the graham crackers absorb moisture from the cream and soften into a cake-like texture.

    This chilling step is essential—don’t rush it.


    Step 9: Slice and Serve

    Once fully chilled, slice into squares or rectangles using a sharp knife. Wipe the knife clean between cuts for neat slices.

    Serve cold straight from the refrigerator.

    Each bite should be creamy, fruity, and lightly sweet with a soft, layered texture.


    Tips for the Perfect Mango Float

    • Use cold cream for better whipping results.
    • Chill overnight for the best texture.
    • Use ripe, sweet mangoes for natural sweetness.
    • Don’t skip the layering balance—keep cream and fruit evenly distributed.
    • For cleaner slices, briefly chill the dish in the freezer for 20–30 minutes before cutting.

    Storage and Make-Ahead

    Mango float keeps well in the refrigerator for up to 3 days.

    Cover tightly to prevent it from absorbing other refrigerator odors.

    Freezing is optional if you prefer a firmer, ice cream-like texture. Just thaw slightly before serving.


    Optional Variations

    Want to customize your mango float?

    • Add a thin layer of crushed graham crumbs between layers for extra texture.
    • Drizzle a little caramel sauce between layers.
    • Mix small mango cubes into the cream for added fruit distribution.
    • Add a splash of vanilla extract to the whipped cream for deeper flavor.

    Why This Dessert Is So Loved

    No-bake mango float is more than just a dessert—it’s a celebration staple and comfort food classic. It’s simple enough for beginners yet impressive enough for gatherings.

    The contrast between soft graham layers, airy cream, and juicy mango slices makes it refreshing yet indulgent. Every spoonful feels light but satisfying.

    And the best part? You don’t need an oven, complicated techniques, or fancy tools—just layering and patience while it chills.


    If you’re looking for a guaranteed crowd-pleaser that tastes like tropical sunshine, this no-bake mango float delivers every single time. Creamy, fruity, and effortlessly delicious, it’s the kind of dessert that disappears fast—so you might want to make an extra batch.

  • No Oven, All Indulgence: The Ultimate No-Bake Banoffee Pie

    No Oven, All Indulgence: The Ultimate No-Bake Banoffee Pie

    If you’re craving something rich, creamy, and irresistibly sweet—but don’t want to turn on the oven—this No-Bake Banoffee Pie is exactly what you need. With a buttery biscuit crust, luscious caramel filling, fresh banana slices, and fluffy whipped cream, this dessert delivers big flavor with minimal effort.

    Banoffee pie, a beloved British classic, gets its name from “banana” and “toffee.” Traditionally baked, this version skips the oven entirely while keeping all the indulgence. It’s perfect for warm days, last-minute guests, or when you simply want an easy yet impressive dessert.

    Let’s walk through it step by step.


    Why You’ll Love This No-Bake Version

    • No oven required
    • Simple, accessible ingredients
    • Minimal prep time
    • Make-ahead friendly
    • Perfect balance of creamy, crunchy, and sweet

    The secret is creating a firm crust that sets in the refrigerator and layering it with rich dulce de leche and fresh bananas.


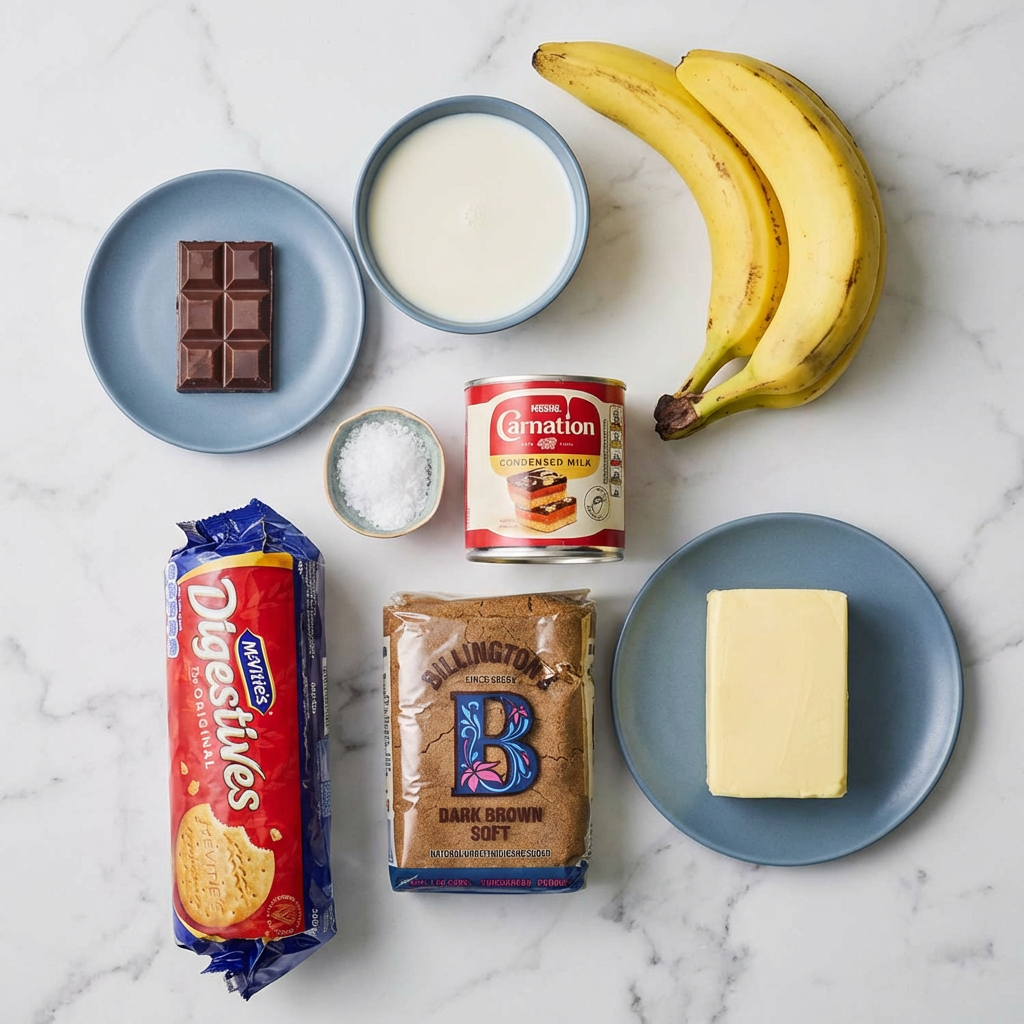
    Ingredients You’ll Need

    For the Crust:

    • 2 cups (200g) graham cracker crumbs or crushed digestive biscuits
    • ½ cup (113g) unsalted butter, melted
    • 2 tablespoons granulated sugar

    For the Filling:

    • 1½ cups dulce de leche (store-bought or canned caramel)
    • 3–4 ripe but firm bananas

    For the Topping:

    • 1½ cups heavy whipping cream
    • 2 tablespoons powdered sugar
    • 1 teaspoon vanilla extract

    Optional garnish:

    • Chocolate shavings or cocoa powder

    Step 1: Prepare the Crust

    In a medium mixing bowl, combine the graham cracker crumbs, melted butter, and sugar. Stir until the mixture resembles wet sand and holds together when pressed between your fingers.

    Press the mixture firmly into a 9-inch pie dish, covering the bottom and slightly up the sides. Use the bottom of a measuring cup to pack it down tightly—this helps it hold its shape once chilled.

    Place the crust in the refrigerator for at least 30–45 minutes to firm up.

    Tip: The firmer you press the crust, the cleaner your slices will be later.


    Step 2: Prepare the Caramel Layer

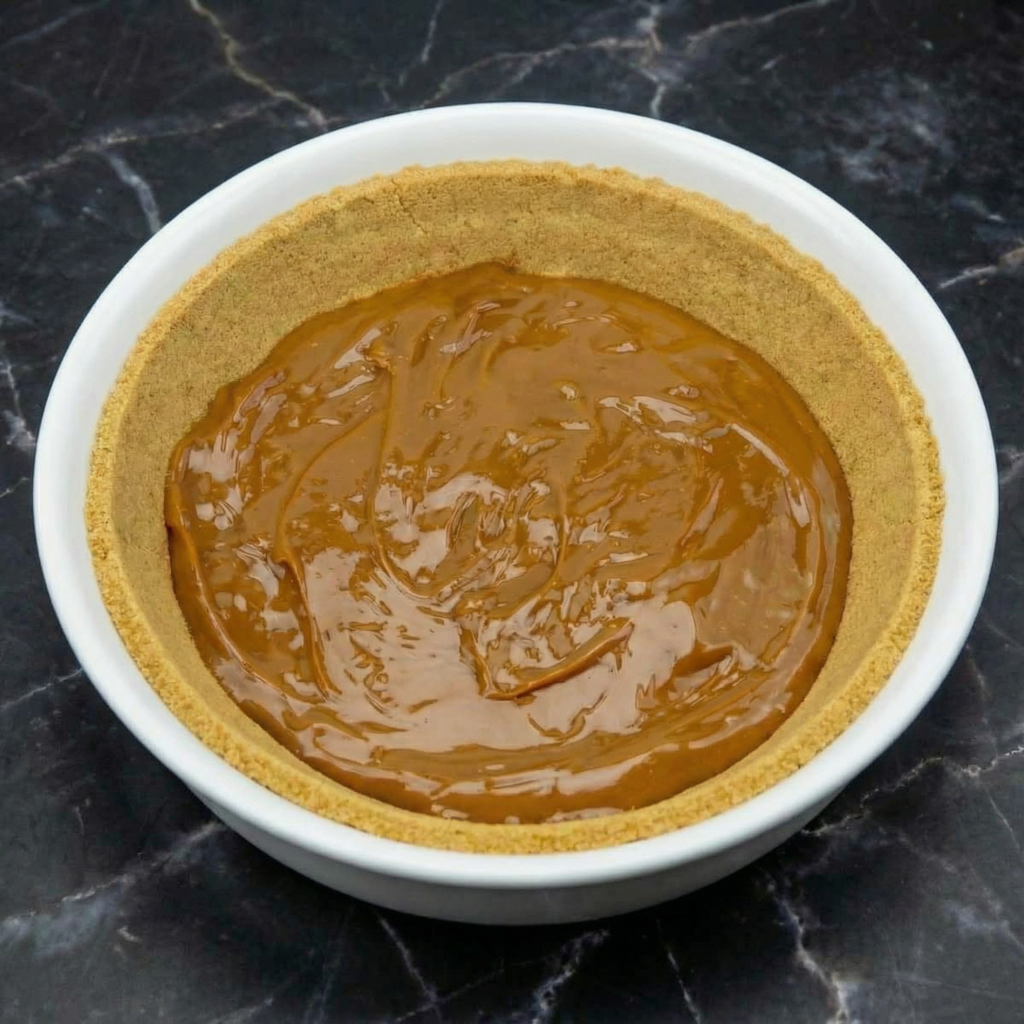
    While the crust chills, stir your dulce de leche until smooth and spreadable. If it’s too thick, warm it gently in the microwave for 10–15 seconds to loosen it.

    Once the crust is firm, spread the dulce de leche evenly across the base. Use an offset spatula or spoon to smooth it into an even layer.

    Return the pie to the refrigerator for about 15 minutes to let the caramel set slightly before adding bananas.

    This step keeps the layers neat and defined.


    Step 3: Slice and Layer the Bananas

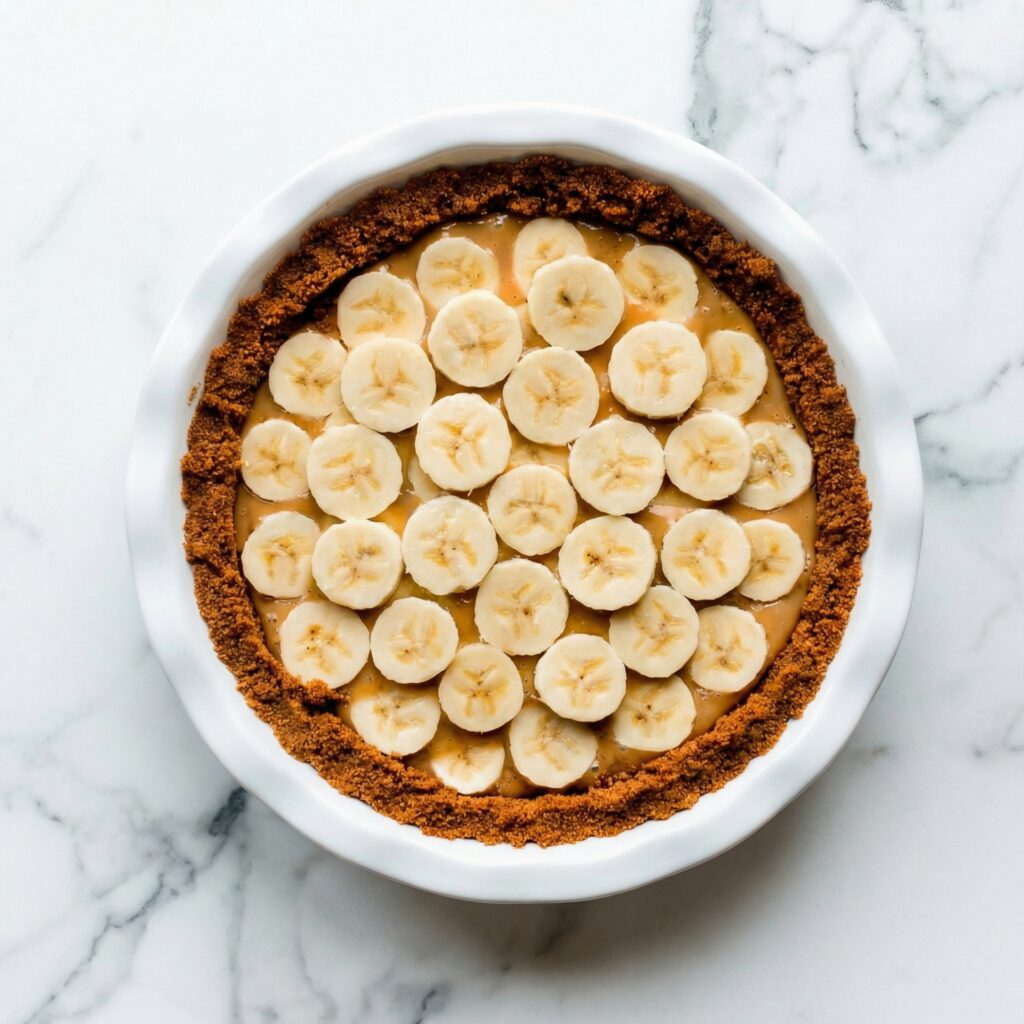
    Peel the bananas and slice them into even rounds, about ¼-inch thick.

    Arrange the banana slices evenly over the caramel layer. You can slightly overlap them, but aim for a consistent layer across the pie.

    Choose bananas that are ripe but still firm. Overripe bananas can become mushy and overly sweet.

    Optional tip: Lightly brush the banana slices with lemon juice to slow browning if making ahead.


    Step 4: Whip the Cream

    In a chilled mixing bowl, add the heavy whipping cream, powdered sugar, and vanilla extract.

    Using a hand mixer or stand mixer, beat on medium-high speed until soft peaks form. Continue whipping until stiff peaks form, meaning the cream holds its shape when you lift the beaters.

    Be careful not to overwhip, as it can turn grainy or begin separating.

    The whipped cream should be thick, fluffy, and smooth.


    Step 5: Add the Final Layer

    Spoon the whipped cream over the banana layer. Spread evenly, or create decorative swirls with the back of a spoon.

    For a polished finish, garnish with chocolate shavings, grated dark chocolate, or a light dusting of cocoa powder.

    This topping adds visual appeal and a subtle chocolate note that pairs beautifully with banana and caramel.


    Step 6: Chill to Set

    Refrigerate the assembled pie for at least 2 hours before serving. This allows the layers to firm up and makes slicing much easier.

    For best results, chill 3–4 hours if time allows.

    The longer it chills (within reason), the better the structure.


    Step 7: Slice and Serve

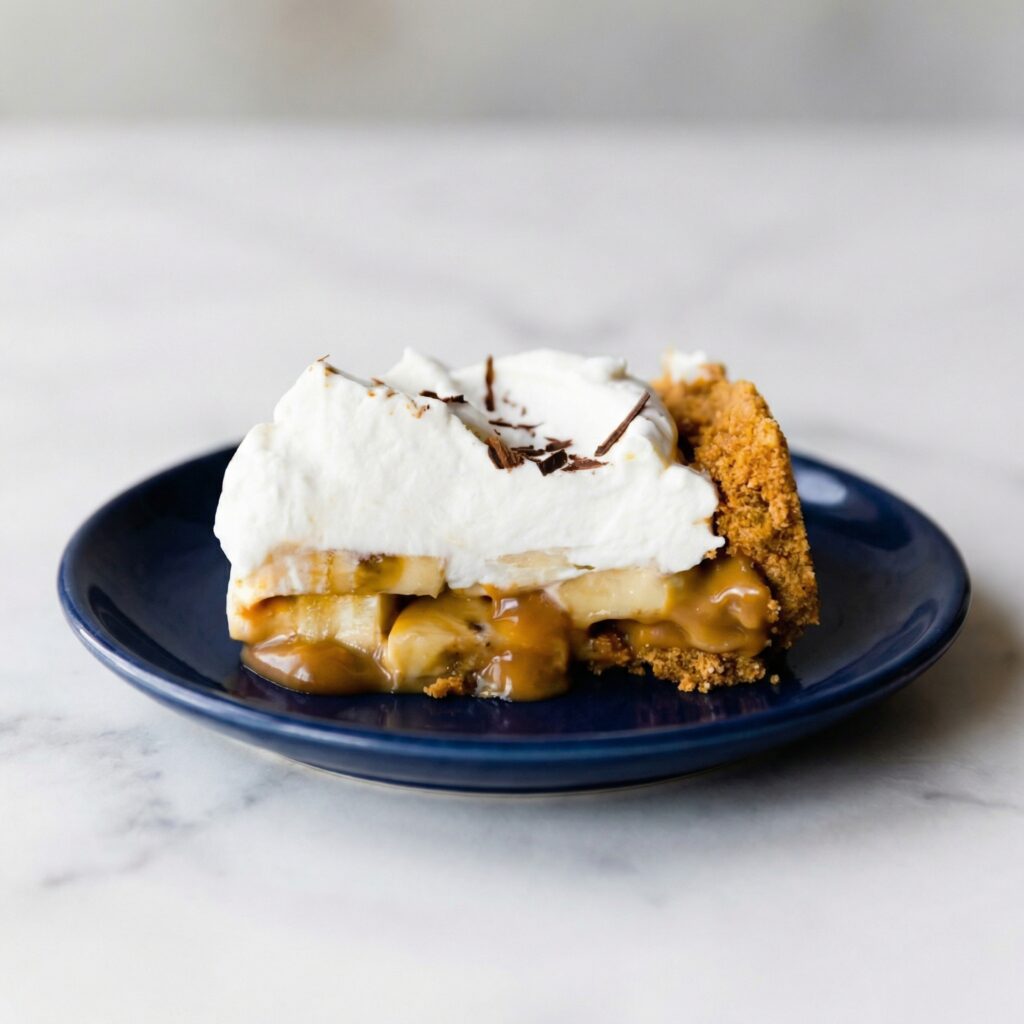
    Use a sharp knife dipped in warm water for clean slices. Wipe the blade between cuts for neat presentation.

    Each slice should show distinct layers:

    • Firm, buttery crust
    • Thick caramel
    • Fresh banana
    • Cloud-like whipped cream

    Serve chilled for the best texture and flavor balance.


    Tips for the Perfect No-Bake Banoffee Pie

    • Press the crust very firmly to prevent crumbling.
    • Chill between layers to keep structure clean.
    • Use full-fat whipping cream for stable peaks.
    • Avoid overripe bananas.
    • Serve within 24 hours for the freshest appearance.

    Make-Ahead and Storage

    This pie can be made up to one day in advance. Store covered in the refrigerator.

    It’s best enjoyed within 1–2 days, as bananas may begin to brown and release moisture over time.

    Freezing is not recommended because whipped cream and bananas change texture when thawed.


    Optional Variations

    Want to customize it?

    • Add a thin layer of melted chocolate over the crust before caramel.
    • Sprinkle flaky sea salt over the caramel for a salted twist.
    • Use chocolate cookie crumbs instead of graham crackers.
    • Add a drizzle of chocolate sauce on top before serving.

    This No-Bake Banoffee Pie proves that you don’t need an oven to create a show-stopping dessert. With its buttery crust, silky caramel, fresh bananas, and fluffy whipped cream, it’s a guaranteed crowd-pleaser.

    It’s rich yet balanced, simple yet impressive, and easy enough for beginner bakers. Whether you’re hosting guests or treating yourself, this chilled dessert delivers comfort and indulgence in every bite.

    No baking. No stress. Just layers of sweet, creamy perfection.

  • Decadent & Delicate: How to Make Perfect Chocolate Macarons from Scratch

    Decadent & Delicate: How to Make Perfect Chocolate Macarons from Scratch

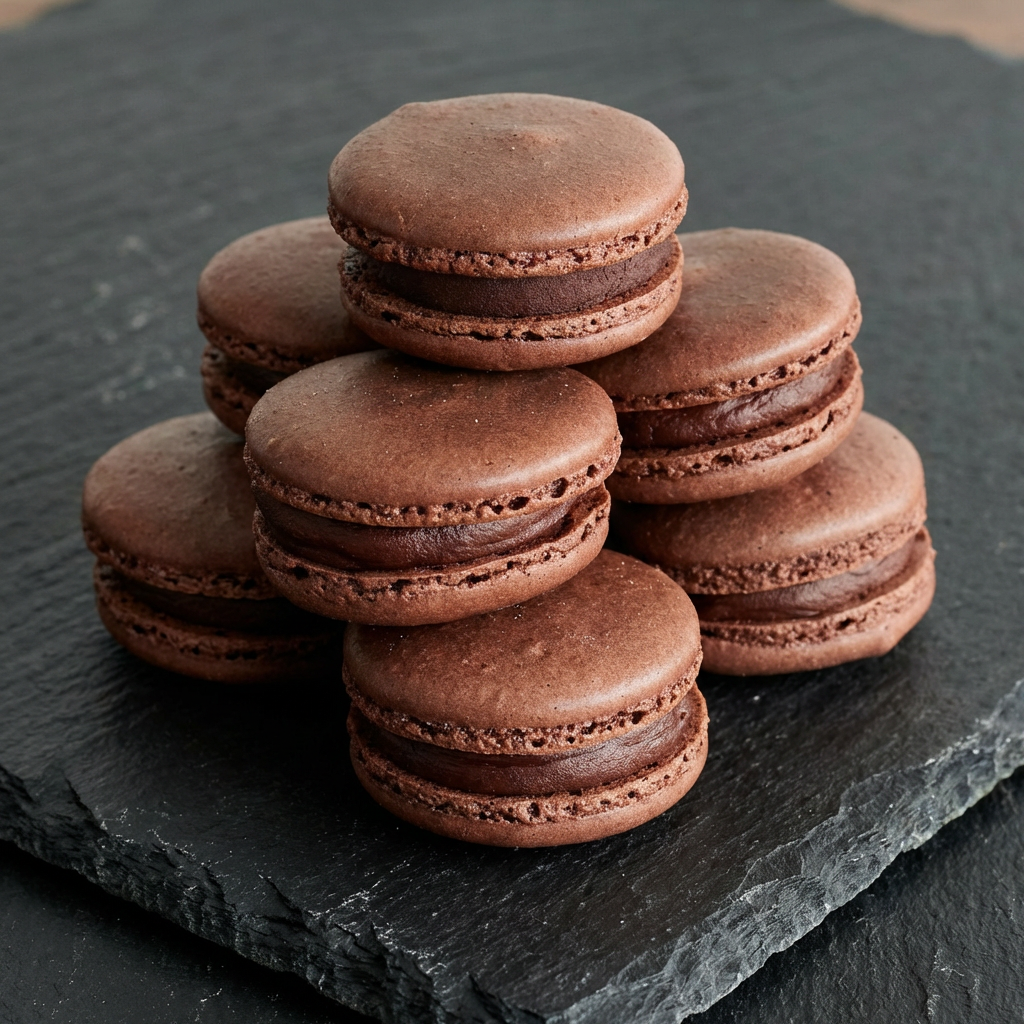
    Chocolate macarons are the ultimate show-stopping treat—crisp on the outside, chewy in the center, and filled with luscious chocolate ganache.

    These elegant French sandwich cookies may seem intimidating, but with careful technique and attention to detail, you can absolutely master them at home.

    This step-by-step guide will walk you through everything you need to know to create beautiful, bakery-style chocolate macarons with smooth tops, ruffled “feet,” and rich chocolate flavor in every bite.


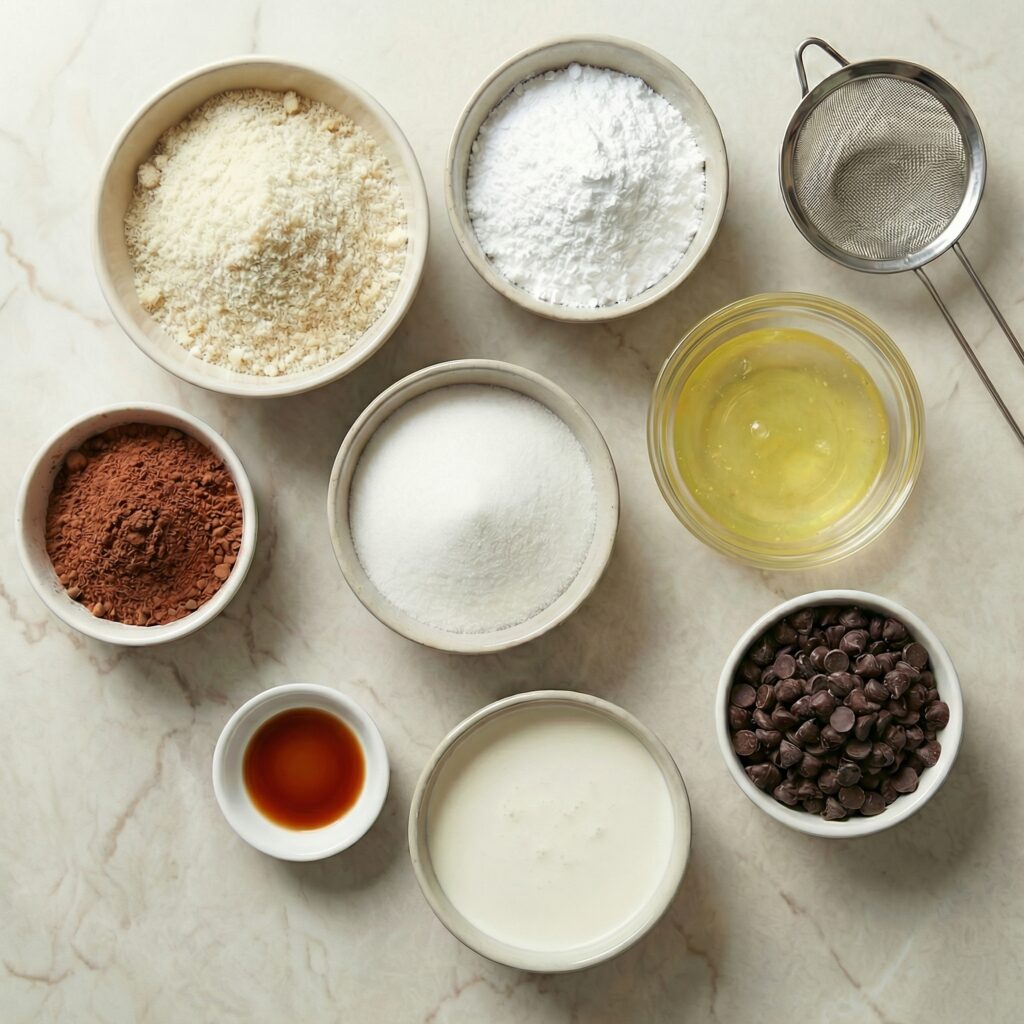
    Ingredients You’ll Need

    For the Chocolate Macaron Shells:

    • 1 cup (100g) almond flour, finely sifted
    • 1 ¾ cups (200g) powdered sugar
    • 2 tablespoons unsweetened cocoa powder
    • 3 large egg whites (room temperature)
    • ¼ cup (50g) granulated sugar
    • ¼ teaspoon cream of tartar (optional, stabilizes meringue)
    • ½ teaspoon vanilla extract

    For the Chocolate Ganache Filling:

    • ¾ cup (120g) semi-sweet chocolate chips or chopped chocolate
    • ½ cup (120ml) heavy cream
    • 1 tablespoon unsalted butter (optional, for shine)

    Step 1: Prepare Your Workspace

    Macarons require precision. Line two baking sheets with parchment paper or silicone mats.

    If you want evenly sized macarons, place a printed template underneath the parchment as a guide.

    Make sure your mixing bowls and beaters are completely clean and grease-free—any oil can prevent the egg whites from whipping properly.


    Step 2: Sift the Dry Ingredients

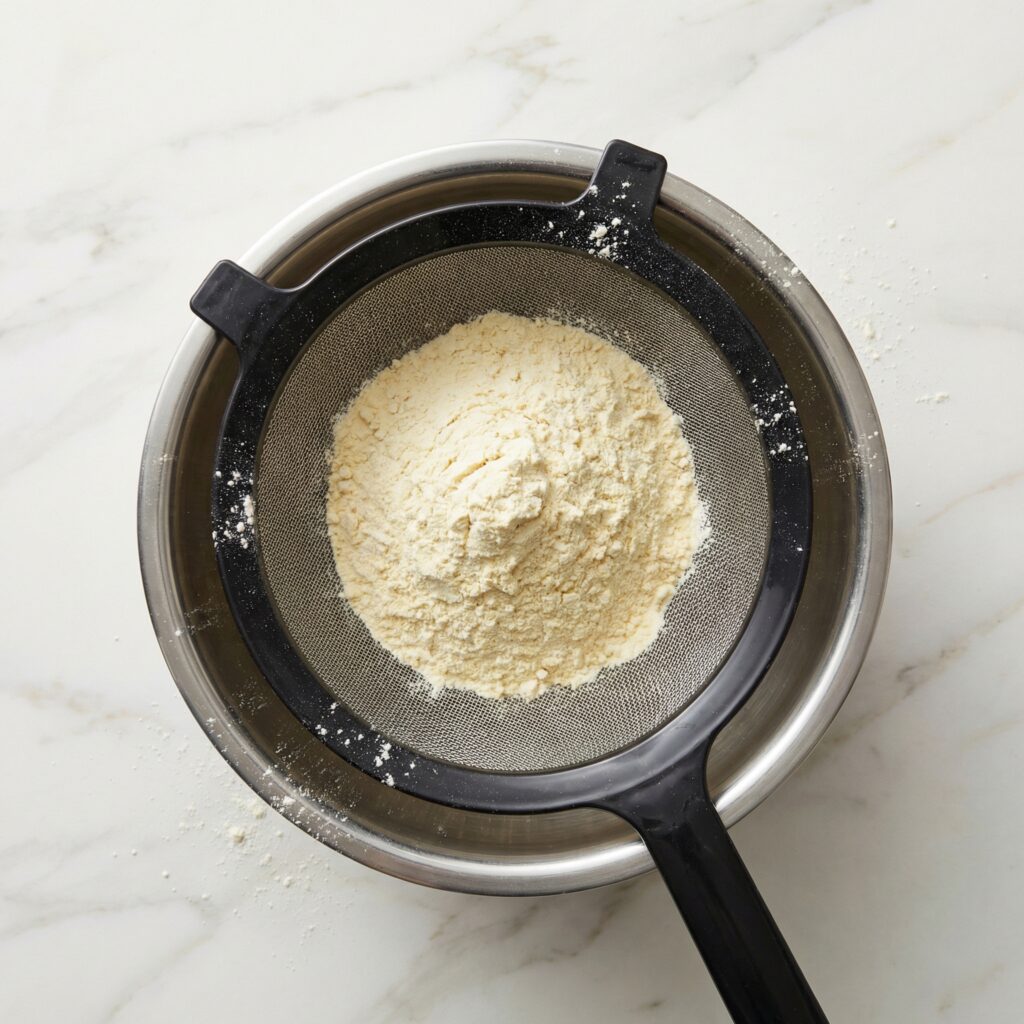
    In a large bowl, sift together the almond flour, powdered sugar, and cocoa powder.

    Sifting is crucial to remove lumps and ensure smooth macaron shells. If needed, pulse the mixture briefly in a food processor before sifting to achieve a fine texture.

    Set aside while you prepare the meringue.


    Step 3: Make the Meringue

    In a clean mixing bowl, beat the room-temperature egg whites on medium speed until foamy. Add the cream of tartar if using. Gradually sprinkle in the granulated sugar while continuing to beat.

    Increase the speed to medium-high and whip until stiff, glossy peaks form. The meringue should hold its shape firmly when you lift the beaters. Add vanilla extract and mix briefly to combine.


    Step 4: The Macaronage (Folding Process)

    Add the sifted dry ingredients to the meringue in two additions. Using a silicone spatula, gently fold the mixture by sweeping around the bowl and cutting through the center. Rotate the bowl as you fold.

    This step—called macaronage—is critical. The batter should flow slowly like lava when lifted with a spatula. If it’s too thick, the shells will be lumpy; if overmixed, they will spread too much. Aim for a smooth, glossy batter that forms ribbons and settles back into itself within 10–15 seconds.


    Step 5: Pipe the Macarons

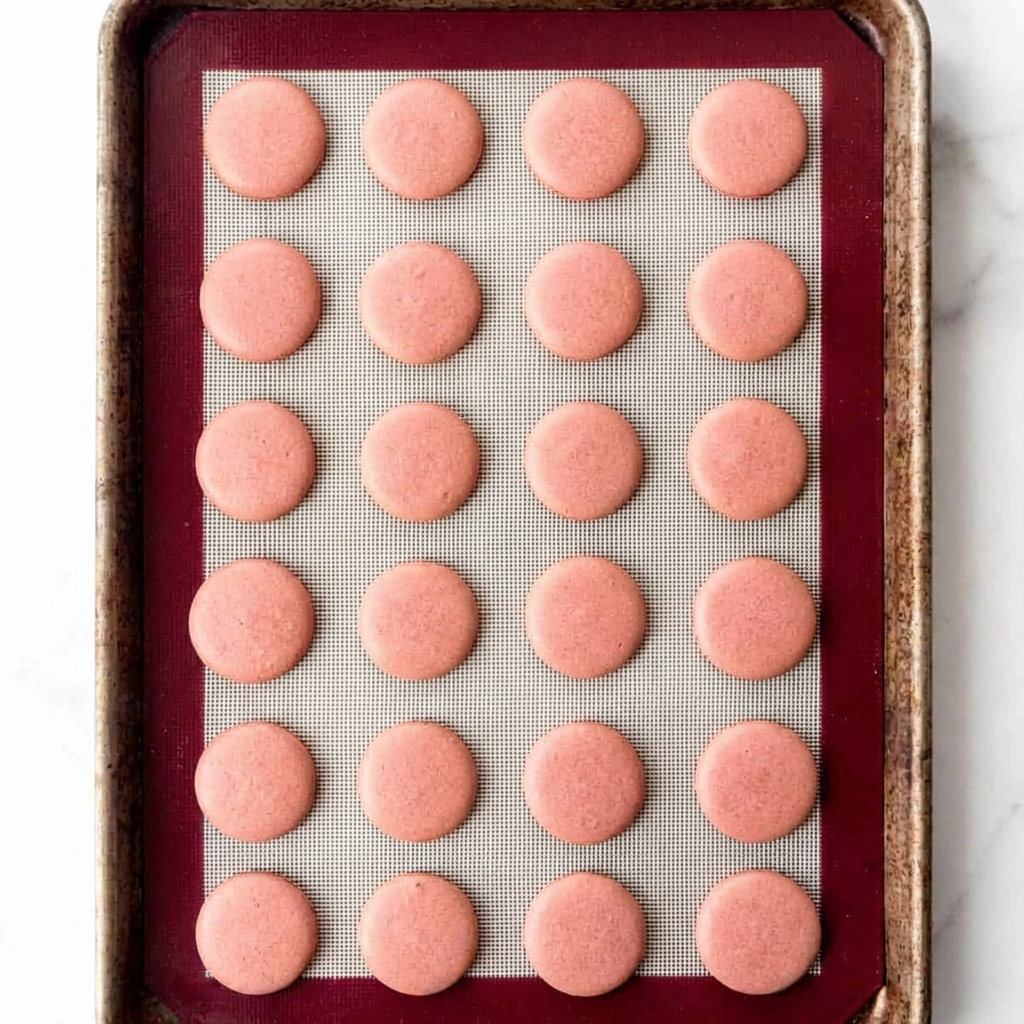
    Transfer the batter to a piping bag fitted with a round tip. Hold the bag vertically and pipe small, even circles onto the prepared baking sheets. Leave space between each macaron.

    Once piped, tap the baking sheets firmly on the counter several times to release air bubbles. Use a toothpick to pop any visible bubbles on the surface.


    Step 6: Rest the Shells

    Allow the piped macarons to rest at room temperature for 30–60 minutes, or until a thin skin forms on the surface. Gently touch the tops—if the batter doesn’t stick to your finger, they are ready to bake.

    This resting period helps develop the iconic “feet” at the base of each macaron.


    Step 7: Bake to Perfection

    Preheat your oven to 300°F (150°C). Bake one tray at a time on the center rack for 15–18 minutes. The macarons are done when they have risen with visible feet and do not wobble when gently touched.

    Remove from the oven and allow them to cool completely before attempting to remove them from the parchment. Trying to lift them too early may cause sticking.


    Step 8: Make the Chocolate Ganache

    While the shells cool, heat the heavy cream in a small saucepan until just simmering (do not boil). Pour the hot cream over the chopped chocolate in a heatproof bowl. Let sit for 1–2 minutes, then stir until smooth and glossy.

    Add butter if desired for extra shine and richness. Let the ganache cool until thick enough to pipe.


    Step 9: Assemble the Macarons

    Match similar-sized shells together. Pipe a small amount of ganache onto the flat side of one shell, then gently press another shell on top to form a sandwich.

    Repeat with remaining shells and filling.


    Step 10: Mature for Best Flavor

    For the best texture and flavor, place the assembled macarons in an airtight container and refrigerate for 24 hours. This resting period allows the filling to soften the shells slightly, creating the perfect chewy center.

    Bring to room temperature before serving.


    Tips for Perfect Chocolate Macarons

    1. Weigh your ingredients for accuracy. Macarons are sensitive to measurement errors.
    2. Avoid humidity—moist air can affect how shells dry and bake.
    3. Don’t skip resting time—it’s essential for developing feet.
    4. Use room-temperature egg whites for better volume.
    5. Practice patience—macarons improve with experience.

    Storage

    • Store filled macarons in the refrigerator for up to 5 days.
    • Freeze for up to 1 month in an airtight container. Thaw in the refrigerator before serving.

    Chocolate macarons are delicate, elegant, and deeply satisfying. With crisp shells, chewy centers, and silky ganache filling, they strike the perfect balance between texture and flavor.

    While they require attention to detail, the reward is a tray of bakery-worthy treats that look as stunning as they taste.

    Once you master these Chocolate Macarons, you’ll feel confident experimenting with flavors, fillings, and colors—turning your kitchen into your very own French pâtisserie.

  • The Ultimate Oreo Cheesecake: Creamy, Crunchy, and Impossible to Resist

    The Ultimate Oreo Cheesecake: Creamy, Crunchy, and Impossible to Resist

    If you’re looking for a dessert that guarantees wide eyes and empty plates, Oreo cheesecake is it.

    This indulgent classic combines a buttery Oreo crust, an ultra-creamy vanilla cheesecake filling, and generous chunks of chocolate sandwich cookies in every bite. It’s rich without being heavy, sweet without being overwhelming, and impressive enough for special occasions while still being totally achievable at home.

    Whether you’re baking for a celebration or simply craving something decadent, this step-by-step guide will help you create a smooth, crack-free Oreo cheesecake that looks as good as it tastes.


    Why Oreo Cheesecake Always Wins

    Oreo cheesecake works because it balances textures and flavors beautifully:

    • A crunchy chocolate cookie crust
    • A silky, tangy cream cheese filling
    • Chunks of Oreos that soften slightly as they bake

    The contrast between creamy and crunchy makes every forkful exciting, while the familiar Oreo flavor keeps it comforting and nostalgic.


    Ingredients You’ll Need

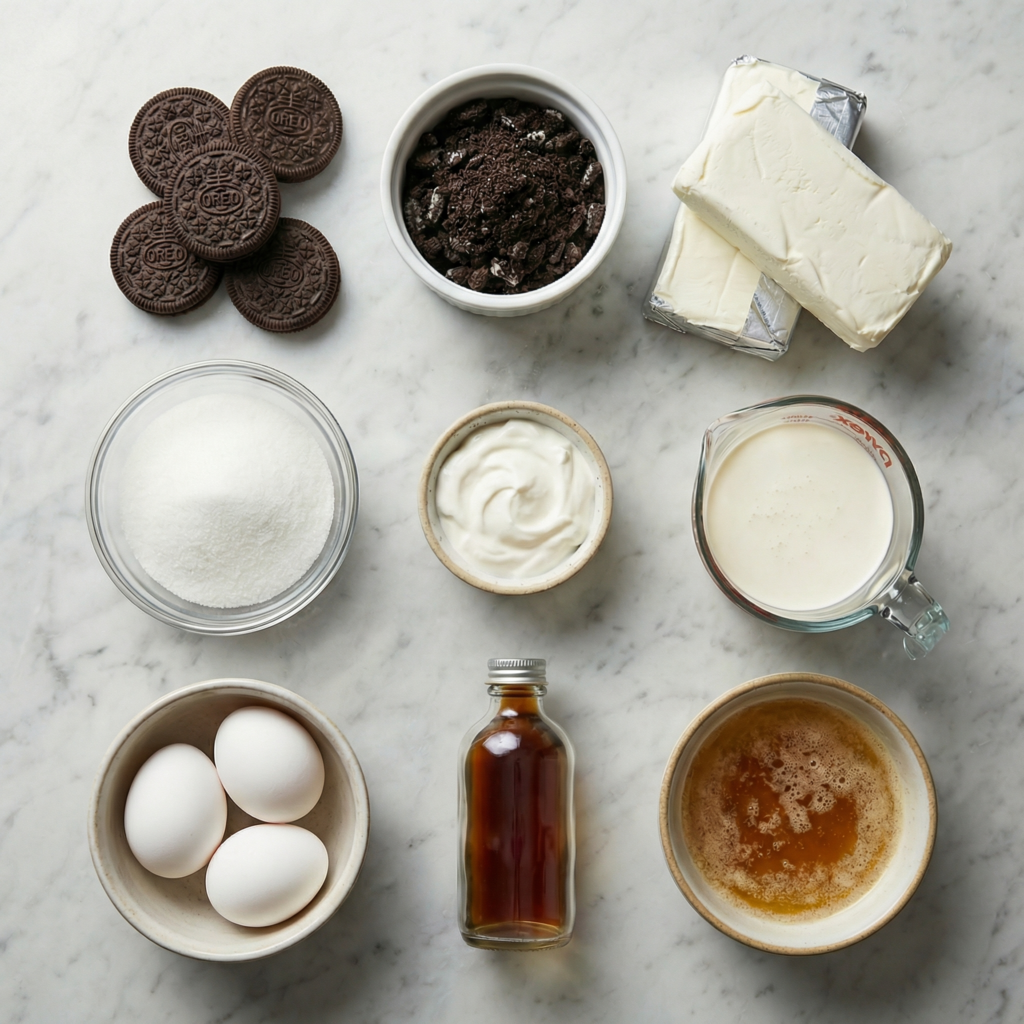
    Before you begin, make sure all ingredients are at room temperature for the smoothest batter.

    For the crust:

    • 24 Oreo cookies, finely crushed (filling included)
    • 5 tablespoons unsalted butter, melted

    For the cheesecake filling:

    • 3 packages (8 oz / 225 g each) cream cheese
    • ¾ cup granulated sugar
    • 3 large eggs
    • 1 cup sour cream
    • 1 teaspoon vanilla extract
    • 12 Oreo cookies, roughly chopped

    Optional topping:

    • Whipped cream
    • Extra crushed Oreos

    Step-by-Step Instructions

    Step 1: Prepare the Pan and Oven

    Preheat your oven to 160°C / 325°F. Lightly grease a 9-inch springform pan and wrap the outside with foil to protect against leaks during baking.

    This small step prevents soggy crusts and ensures even baking.


    Step 2: Make the Oreo Crust

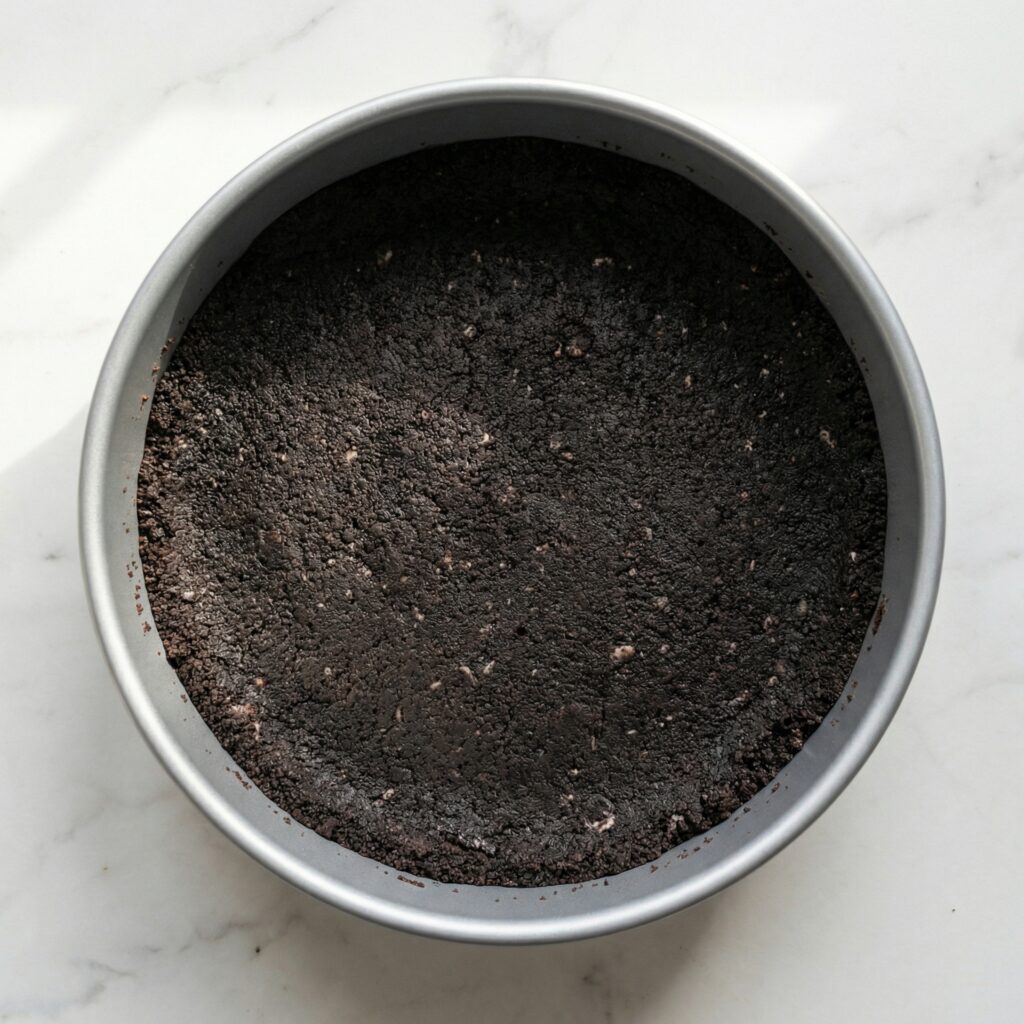
    Combine the crushed Oreos and melted butter in a bowl until the mixture resembles wet sand. Press it firmly into the bottom of the prepared pan using the bottom of a glass.

    Bake the crust for 10 minutes, then set aside to cool. Pre-baking helps the crust stay crisp under the creamy filling.


    Step 3: Beat the Cream Cheese

    In a large bowl, beat the cream cheese on low speed until smooth and creamy. Scrape down the sides of the bowl to remove lumps.

    Mixing on low speed prevents excess air, which helps avoid cracks later.


    Step 4: Add Sugar and Eggs

    Add the sugar and mix until just combined. Then add the eggs one at a time, mixing gently after each addition.

    Avoid overmixing—this keeps the cheesecake dense and velvety rather than airy.


    Step 5: Add Sour Cream and Vanilla

    Mix in the sour cream and vanilla extract until smooth. The sour cream adds richness and a subtle tang that balances the sweetness of the Oreos.

    Fold in the chopped Oreos gently, distributing them evenly throughout the batter.


    Step 6: Assemble and Bake

    Pour the cheesecake batter over the cooled crust and smooth the top.

    Place the pan in a large roasting pan and carefully add hot water halfway up the sides to create a water bath. Bake for 55–65 minutes, until the edges are set but the center still jiggles slightly.


    Step 7: Cool Gradually

    Turn off the oven, crack the door open, and let the cheesecake cool inside for 1 hour. This gradual cooling prevents sudden temperature changes that cause cracks.

    Afterward, remove from the oven and let it cool completely at room temperature.


    Step 8: Chill for Best Texture

    Refrigerate the cheesecake for at least 4 hours, preferably overnight. Chilling allows the flavors to develop and the texture to set properly.


    Tips for a Perfect Oreo Cheesecake

    • Room-temperature ingredients ensure smooth batter
    • Low oven temperature prevents overbaking
    • Water bath keeps the cheesecake creamy
    • Patience during chilling makes slicing clean and beautiful

    These details turn a good cheesecake into a great one.


    Serving Suggestions

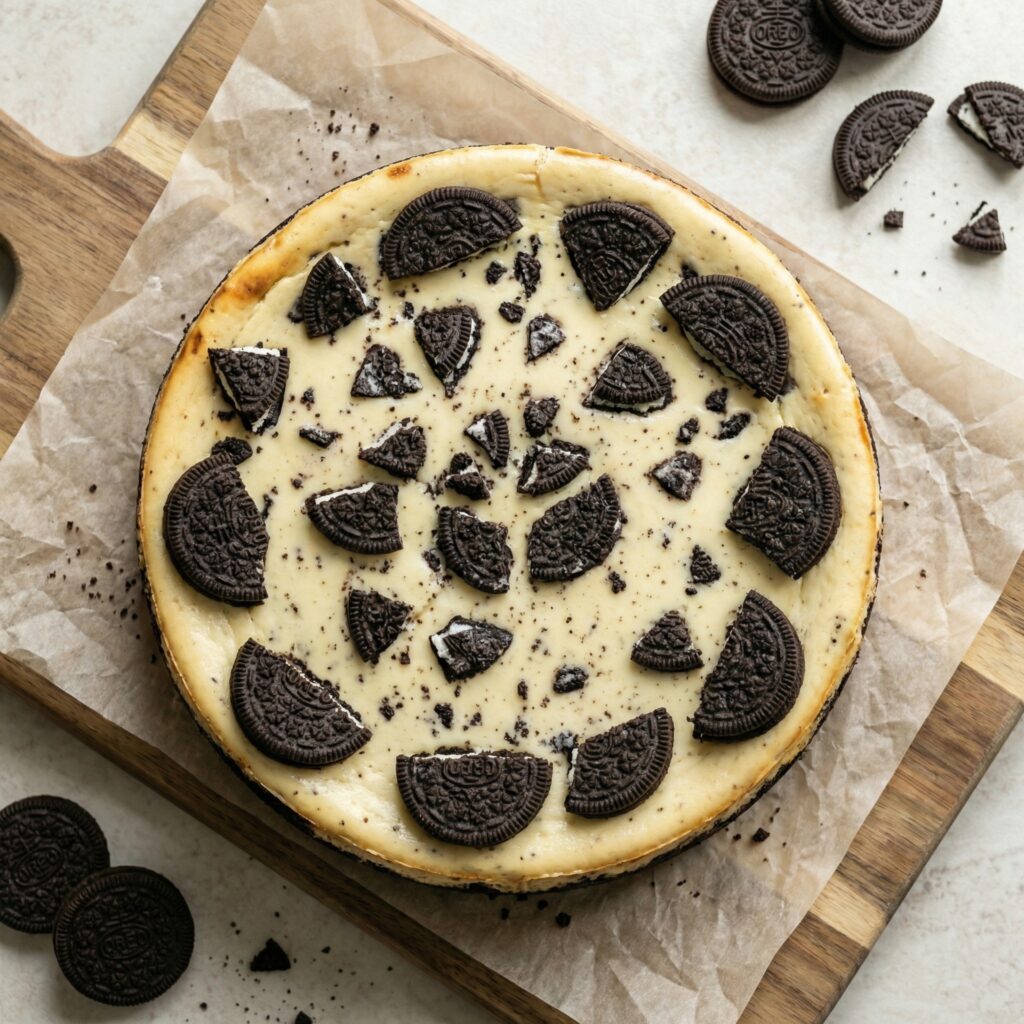
    Before serving, top the cheesecake with whipped cream and extra crushed Oreos for a bakery-style finish. Use a sharp knife wiped clean between slices for perfect presentation.

    Serve plain, or drizzle with chocolate sauce for extra indulgence.


    Final Thoughts

    This Oreo cheesecake recipe is the kind of dessert that never goes out of style. It’s rich, creamy, and packed with cookies and cream flavor in every bite. Best of all, it’s surprisingly simple when you follow the steps carefully.

    Once you master this recipe, it’s bound to become your go-to cheesecake for birthdays, holidays, and everything in between.

  • Tiramisu Magic: How to Make This Classic Italian Dessert at Home

    Tiramisu Magic: How to Make This Classic Italian Dessert at Home

    Few desserts can match the luxurious, melt-in-your-mouth appeal of Tiramisu.

    This iconic Italian treat combines coffee-soaked ladyfingers, creamy mascarpone filling, and a dusting of cocoa powder to create a dessert that feels both indulgent and elegant.

    Many assume Tiramisu is complicated, but with the right ingredients and clear steps, anyone can master it at home. Whether you’re impressing guests or treating yourself, this guide will walk you through the process, step by step.


    Ingredients You’ll Need

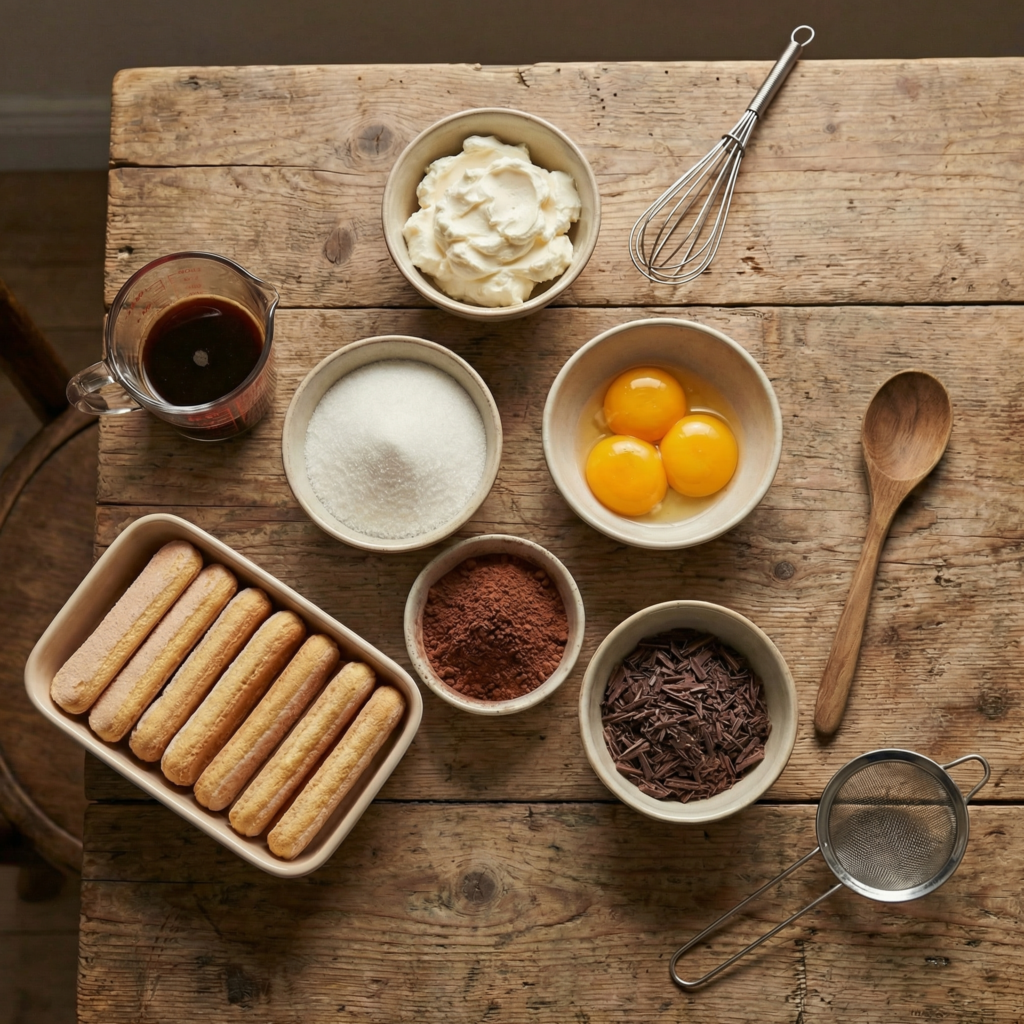
    Before you start, gather all the ingredients. Quality matters, as Tiramisu is all about simple components coming together perfectly. Here’s what you’ll need:

    • 6 large egg yolks, room temperature
    • 3/4 cup granulated sugar
    • 1 cup mascarpone cheese, room temperature
    • 1 1/2 cups heavy cream
    • 2 cups strong brewed espresso or coffee, cooled
    • 1/4 cup coffee liqueur (optional, like Kahlua)
    • 24–30 ladyfinger cookies (savoiardi)
    • Unsweetened cocoa powder for dusting
    • Dark chocolate shavings (optional garnish)

    Step 1: Brew Your Coffee

    Start by brewing strong espresso or coffee. The coffee flavor is essential because it infuses the ladyfingers, giving Tiramisu its characteristic taste. Allow the coffee to cool completely before using. If you’re adding coffee liqueur, mix it into the cooled coffee now for an extra depth of flavor.


    Step 2: Make the Egg Mixture

    In a heatproof bowl, whisk together the egg yolks and sugar. Place the bowl over a pot of simmering water to create a double boiler. Continuously whisk for 5–7 minutes until the mixture becomes pale, smooth, and slightly thickened. This process gently cooks the eggs, making them safe to eat while incorporating air for a light texture.


    Step 3: Add the Mascarpone

    Remove the egg mixture from heat and let it cool slightly. Gently fold in the mascarpone cheese until fully combined. The mixture should be smooth and creamy, without lumps. This mascarpone filling is what makes Tiramisu rich and indulgent, so handle it carefully to maintain its silky texture.


    Step 4: Whip the Cream

    In a separate bowl, whip the heavy cream until soft peaks form. Gently fold the whipped cream into the mascarpone mixture. Folding instead of stirring keeps the mixture light and airy. This step ensures your Tiramisu has a delicate, melt-in-your-mouth consistency rather than a dense heaviness.


    Step 5: Prepare the Ladyfingers

    Quickly dip each ladyfinger into the cooled coffee. Avoid soaking them for too long—they should be moist but not soggy. A quick 1–2 second dip on each side is perfect. The coffee flavor penetrates the cookies without making them fall apart during assembly.


    Step 6: Assemble Your Tiramisu

    Begin by laying a layer of coffee-dipped ladyfingers in the bottom of your serving dish or individual cups. Spread half of the mascarpone mixture evenly over the cookies. Repeat the process: another layer of soaked ladyfingers followed by the remaining mascarpone cream. Proper layering ensures that each bite has the perfect balance of coffee-soaked cookies and creamy filling.


    Step 7: Chill and Set

    Cover your Tiramisu with plastic wrap and refrigerate for at least 4 hours, ideally overnight. Chilling allows the flavors to meld and the dessert to firm up, giving you the classic creamy yet structured texture. Don’t rush this step—proper chilling is key to achieving authentic Tiramisu.


    Step 8: Dust with Cocoa Powder

    Before serving, generously sift unsweetened cocoa powder over the top. For an extra touch of elegance, add dark chocolate shavings. The cocoa adds a slightly bitter contrast to the sweet mascarpone, balancing the flavors perfectly while giving your Tiramisu a stunning presentation.


    Step 9: Serve and Enjoy

    Slice carefully and serve chilled. Each bite should reveal the distinct layers of coffee-soaked ladyfingers and creamy mascarpone, topped with a dusting of cocoa.

    Tiramisu is best enjoyed fresh but can be stored in the fridge for up to three days if properly covered. Every spoonful delivers the perfect combination of richness, sweetness, and coffee flavor that makes Tiramisu irresistible.


    Tips for the Perfect Tiramisu

    1. Use fresh, high-quality ingredients – mascarpone, espresso, and cocoa powder make a big difference.
    2. Avoid over-soaking ladyfingers – quick dips prevent sogginess and maintain structure.
    3. Fold, don’t stir – folding preserves the airy texture of the whipped cream.
    4. Chill properly – flavors develop and textures improve after refrigeration.
    5. Customize flavors – add vanilla extract, orange zest, or a sprinkle of cinnamon for a unique twist.

    Tiramisu is more than just a dessert—it’s a classic Italian experience. Its layers of creamy mascarpone, coffee-soaked ladyfingers, and cocoa make it a sophisticated yet comforting treat.

    With this step-by-step guide, you can confidently create the perfect Tiramisu at home that will impress anyone lucky enough to taste it. Whether you’re serving it at a dinner party, celebrating a special occasion, or indulging on a quiet evening, this Tiramisu is guaranteed to delight.


    Get ready to wow your friends and family with your homemade Tiramisu. Brew the coffee, whip the cream, and enjoy every decadent bite of this classic Italian masterpiece!