Tag: dessert bread

  • Swirled with Sweet Spice: The Ultimate Cinnamon Quick Bread You’ll Make Again and Again

    Swirled with Sweet Spice: The Ultimate Cinnamon Quick Bread You’ll Make Again and Again

    There’s something timeless about the warm aroma of cinnamon drifting through your kitchen.

    Cinnamon quick bread is soft, tender, and beautifully swirled with sweet spice—perfect for breakfast, brunch, or an afternoon treat with coffee. Best of all, since it’s a quick bread, there’s no yeast and no rising time required.

    Just mix, swirl, bake, and enjoy. This step-by-step guide will show you exactly how to create a moist, bakery-style cinnamon quick bread with a rich cinnamon sugar ribbon in every slice.
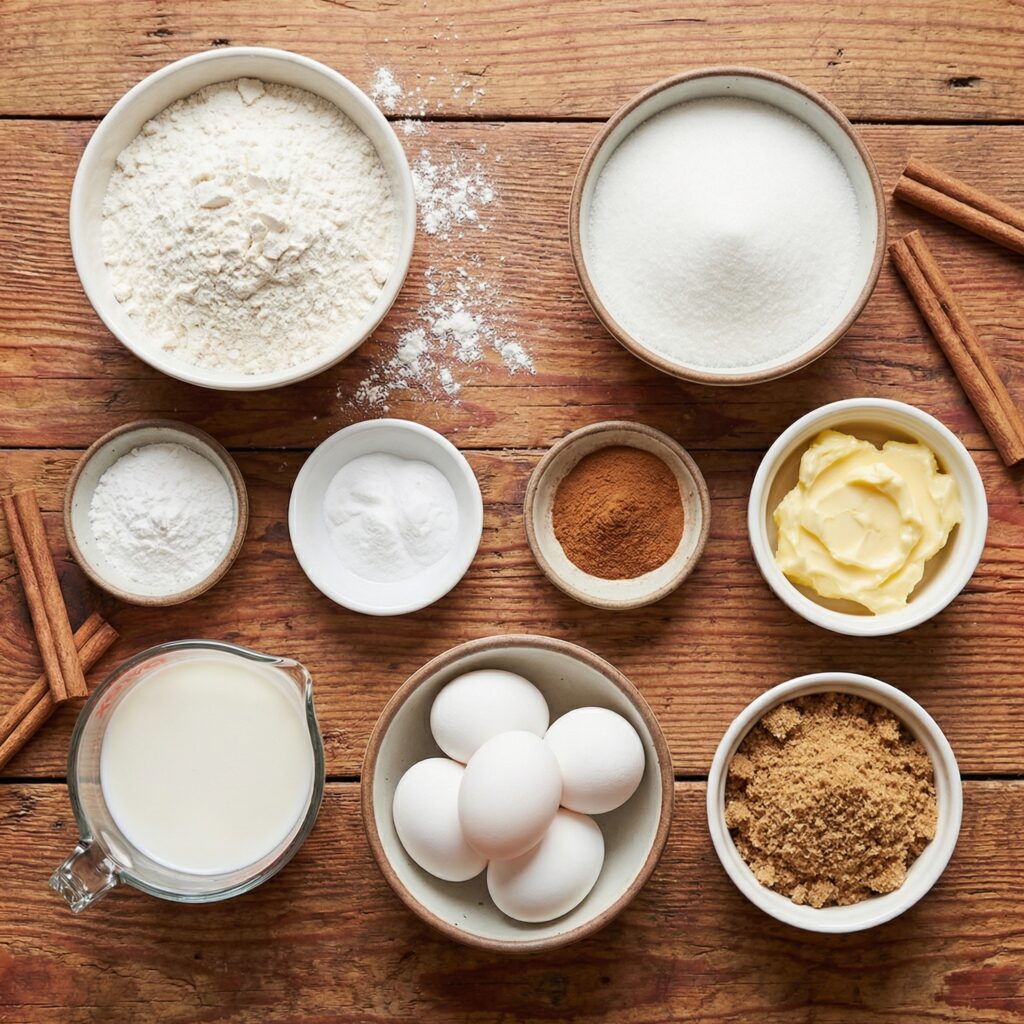

    Ingredients You’ll Need

    For the Bread Batter:

    • 2 cups (250g) all-purpose flour
    • 1 cup (200g) granulated sugar
    • 1 teaspoon baking soda
    • ½ teaspoon baking powder
    • ½ teaspoon salt
    • 1 teaspoon ground cinnamon
    • 2 large eggs
    • 1 cup (240ml) buttermilk (or milk + 1 tablespoon vinegar)
    • ½ cup (120ml) vegetable oil or melted butter
    • 1 teaspoon vanilla extract

    For the Cinnamon Swirl:

    • ⅓ cup (65g) brown sugar
    • 1 tablespoon ground cinnamon
    • 1 tablespoon melted butter

    Optional Glaze:

    • ½ cup powdered sugar
    • 1–2 tablespoons milk
    • ¼ teaspoon vanilla extract

    Step 1: Preheat and Prepare Your Pan

    Preheat your oven to 350°F (175°C). Lightly grease a standard 9×5-inch loaf pan with butter or nonstick spray.

    For easy removal, you can also line the pan with parchment paper, leaving an overhang on the sides.

    Preparing the pan properly ensures your bread releases cleanly after baking.


    Step 2: Mix the Dry Ingredients

    In a large mixing bowl, whisk together the flour, sugar, baking soda, baking powder, salt, and cinnamon.

    Mixing the dry ingredients first ensures even distribution of the leavening agents and spice, giving the bread a consistent texture and flavor throughout.


    Step 3: Combine the Wet Ingredients

    In a separate bowl, whisk together the eggs, buttermilk, oil (or melted butter), and vanilla extract until smooth.

    The buttermilk adds moisture and a slight tang, while the oil keeps the bread soft and tender for days.


    Step 4: Combine Wet and Dry Mixtures

    Pour the wet ingredients into the bowl of dry ingredients. Using a spatula or wooden spoon, gently stir until just combined.

    Be careful not to overmix—this can develop too much gluten and make the bread dense. The batter should be smooth but slightly thick, with no visible streaks of flour.


    Step 5: Prepare the Cinnamon Swirl

    In a small bowl, mix together the brown sugar, ground cinnamon, and melted butter until combined.

    This mixture will create the sweet, gooey ribbon that makes cinnamon quick bread so irresistible.


    Step 6: Layer and Swirl

    Pour half of the batter into the prepared loaf pan and spread evenly. Sprinkle half of the cinnamon swirl mixture over the batter.

    Add the remaining batter on top and gently smooth it out. Sprinkle the rest of the cinnamon mixture over the top layer. Using a knife or skewer, gently swirl the cinnamon sugar into the batter with a few figure-eight motions. Avoid over-swirling—you want distinct ribbons of cinnamon throughout the bread.


    Step 7: Bake to Golden Perfection

    Place the loaf pan in the preheated oven and bake for 50–60 minutes, or until a toothpick inserted into the center comes out clean or with just a few moist crumbs.

    If the top begins to brown too quickly, loosely tent the bread with aluminum foil during the last 10–15 minutes of baking.


    Step 8: Cool Before Removing

    Once baked, remove the bread from the oven and let it cool in the pan for 10–15 minutes.

    Then carefully transfer it to a wire rack to cool completely. Cooling allows the crumb to set and prevents the bread from becoming gummy when sliced.


    Step 9: Add the Optional Glaze

    For an extra touch of sweetness, whisk together powdered sugar, milk, and vanilla extract until smooth.

    Drizzle the glaze over the cooled bread, allowing it to cascade down the sides. Let it set for 10–15 minutes before slicing.


    Step 10: Slice and Serve

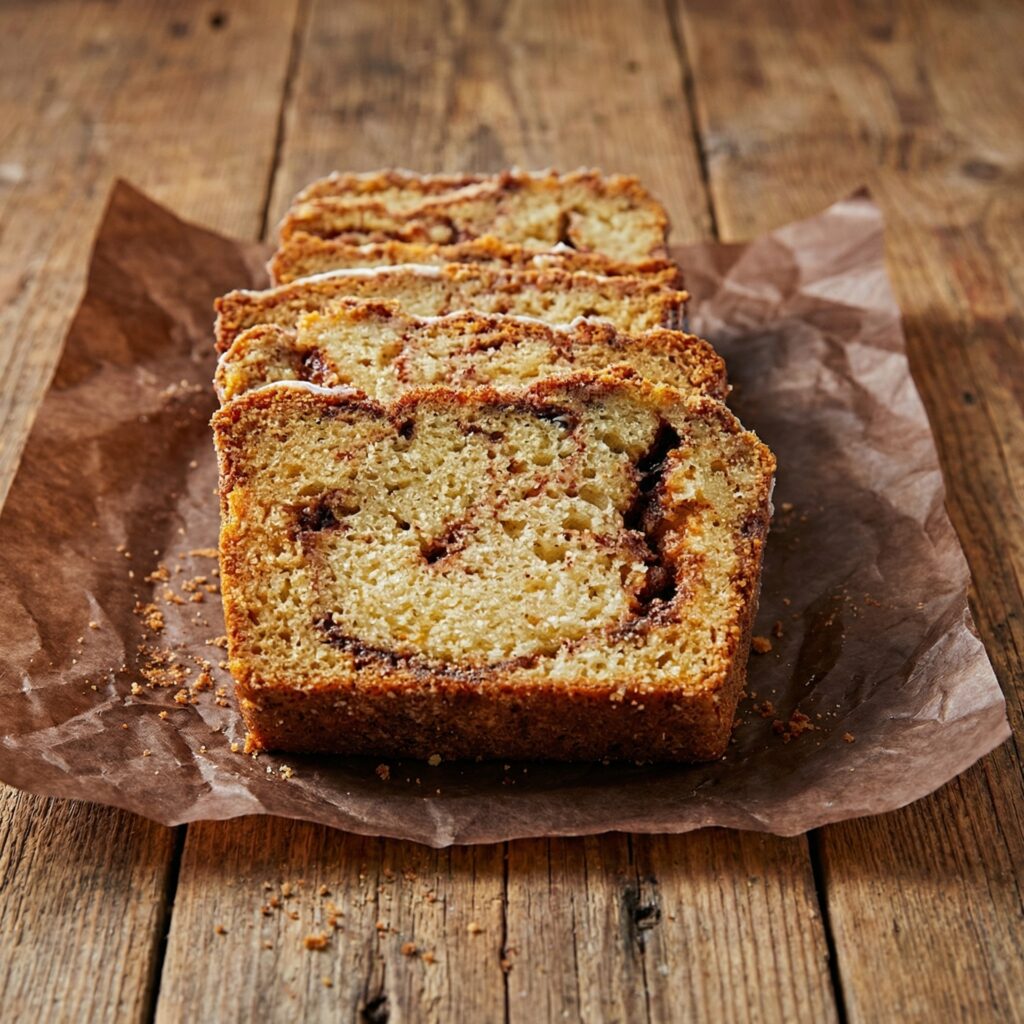
    Use a sharp serrated knife to slice the bread. Each slice should reveal beautiful swirls of cinnamon sugar running throughout the soft, tender crumb.

    Serve warm with butter, alongside coffee or tea, or as a comforting afternoon snack.

    Tips for the Best Cinnamon Quick Bread

    1. Don’t overmix the batter – Stir just until combined to keep the bread tender.
    2. Use room-temperature ingredients – They incorporate more smoothly into the batter.
    3. Measure flour correctly – Spoon it into the measuring cup and level it off to avoid dense bread.
    4. Let it cool fully before slicing – This ensures clean slices and proper texture.
    5. Customize it – Add chopped nuts, raisins, or a streusel topping for extra texture.

    Storage and Freezing

    • Store cinnamon quick bread in an airtight container at room temperature for up to 3 days.
    • Refrigerate for up to 5 days if glazed.
    • Freeze slices individually wrapped for up to 3 months. Thaw at room temperature or warm gently in the microwave.
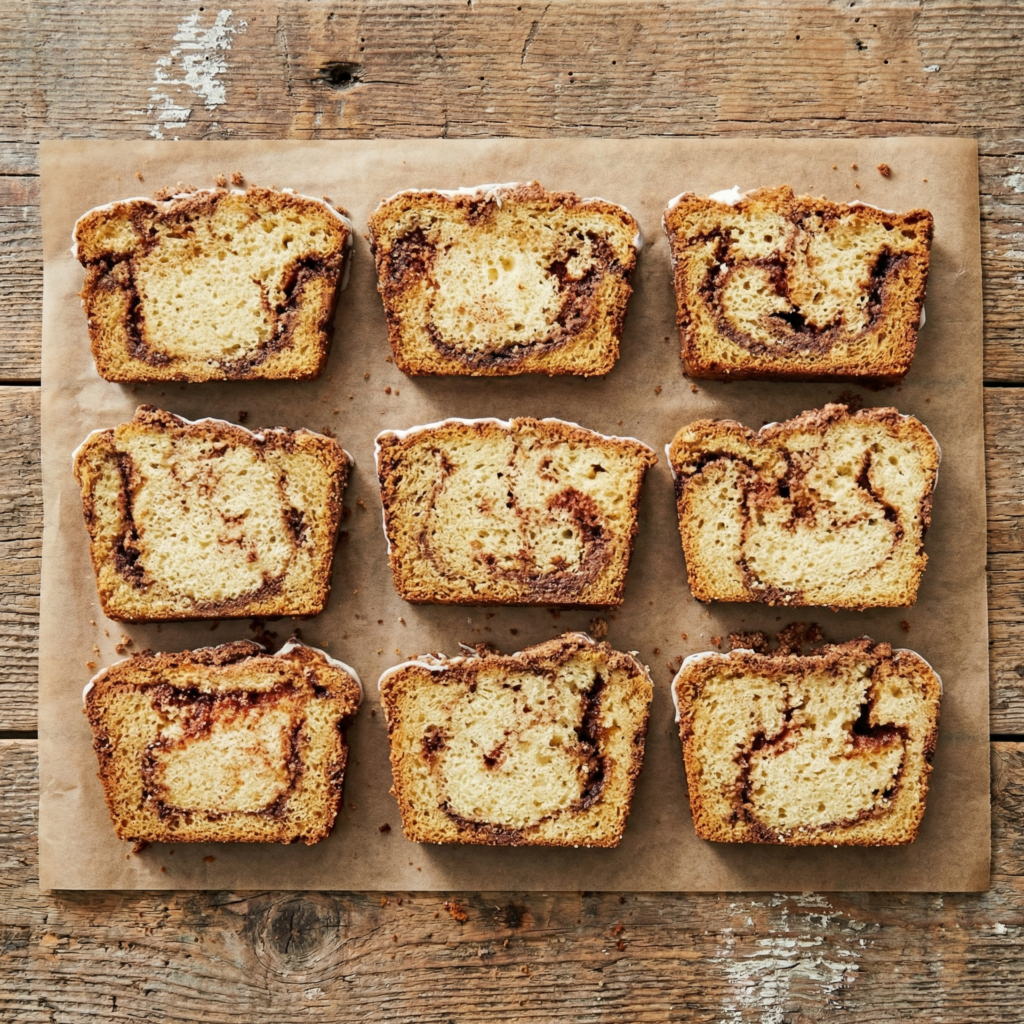
    Cinnamon quick bread is the kind of recipe you’ll turn to again and again. It’s simple enough for beginner bakers yet impressive enough to share with friends and family. The soft crumb, sweet cinnamon swirl, and optional glaze create a comforting loaf that feels both nostalgic and indulgent.

    With minimal prep and everyday ingredients, you can fill your kitchen with the warm scent of cinnamon and enjoy a homemade treat that tastes like it came straight from a bakery. One slice is never enough—and luckily, this recipe makes it easy to bake another loaf whenever the craving strikes.

  • Chocolate Sourdough Bread

    Chocolate Sourdough Bread

    Indulge in the rich, comforting flavor of this deeply chocolate sourdough bread. This isn’t a marbled loaf, but a uniformly dark, cocoa-infused bread with a subtle tang from slow fermentation and sweet pockets of melted chocolate chips.

    With a crisp crust and a soft, tender crumb, it’s a luxurious treat perfect for afternoon tea, decadent French toast, or as a special homemade gift for any chocolate lover.

    The Science of a Uniform Chocolate Crumb

    This bread achieves its consistent dark color and rich flavor through complete cocoa integration and enriched dough chemistry. Unlike marbled breads, the cocoa powder is incorporated into the entire dough during mixing, ensuring every bite carries the deep, bitter-sweet notes of chocolate.

    Cocoa powder is hydrophilic (water-loving) and contains starch and fiber, which absorb liquid and can make dough stiff. To counter this, the hydration is slightly increased, and the dough is given a long autolyse to fully hydrate the cocoa and flour.

    The added sugar and oil tenderize the crumb and balance cocoa’s bitterness, while the robust sourdough fermentation cuts through the richness, preventing the loaf from being overly sweet. The chocolate chips are added during the final folds to distribute them evenly without overworking the dough.

    Ingredients

    For the Dough (Makes one loaf):

    • 500g (about 4 cups) bread flour
    • 330g (about 1 ⅓ cups + 2 tbsp) warm water
    • 100g (about ½ cup) active sourdough starter (100% hydration, at peak)
    • 50g (about ½ cup) unsweetened cocoa powder (Dutch-process preferred)
    • 60g (about ⅓ cup) brown sugar or granulated sugar
    • 30g (about 2 tbsp) neutral oil (vegetable, sunflower) or melted butter
    • 10g (2 tsp) fine sea salt
    • 150g (about 1 cup) dark chocolate chips or chopped chocolate

    For Dusting & Topping (Optional):

    • Rice flour, for dusting the banneton
    • Rolled oats or pearl sugar, for topping before baking

    Instructions

    1. Mix the Dough & Autolyse: In a large bowl, whisk together the warm water, active starter, and cocoa powder until smooth and no lumps remain. Add the bread flour and brown sugar.

    Mix with a spatula or your hands until a shaggy dough forms with no dry flour. Cover and let rest (autolyse) for 1 hour. This allows the cocoa and flour to fully hydrate.

    2. Add Salt & Oil: After the autolyse, add the salt and oil to the dough. Mix thoroughly, squeezing and folding the dough in the bowl until the salt and oil are fully incorporated. The dough will be sticky and dark.

    3. Bulk Fermentation with Folds: Cover the bowl and let the dough rise at room temperature (70-75°F / 21-24°C) for 5-6 hours. During the first 2.5 hours, perform 4-5 sets of stretch and folds, spaced 30 minutes apart. After the third set of folds, gently incorporate the chocolate chips by sprinkling them over the dough and folding them in.

    Complete the remaining folds. Let the dough rest undisturbed for the remainder of bulk fermentation. It should look puffy, have bubbles, and increase by about 50-60%.

    4. Shape & Cold Proof: Gently turn the dough out onto a lightly floured surface. Shape it into a tight round (boule) or oval (batard), being careful not to pop the visible bubbles. Place it seam-side up in a well-floured banneton or proofing basket. Cover and place in the refrigerator for 12-16 hours (overnight) for a cold proof.

    5. Bake: Preheat a Dutch oven or combo cooker in your oven at 425°F (220°C) for 1 hour. Carefully remove the cold dough from the fridge and invert it onto a piece of parchment paper. If desired, mist the top lightly with water and sprinkle with rolled oats or pearl sugar.

    Score the top with a sharp lame or razor—a simple “X” or single slash works well. Transfer the dough (on the parchment) into the preheated Dutch oven, cover, and bake for 30 minutes. Remove the lid and bake for another 20-25 minutes until the crust is firm and sounds hollow when tapped.

    6. Cool Completely: Transfer the loaf to a wire rack and let it cool completely for at least 4 hours before slicing. This is crucial for the crumb to set and the chocolate to solidify, ensuring clean slices.

    Pro-Tips for a Perfect Chocolate Loaf

    • Use Dutch-Process Cocoa: It has a richer, less acidic flavor than natural cocoa and gives a darker color.
    • Ensure a Smooth Cocoa Paste: Whisking the cocoa with water and starter first prevents dry lumps in your dough.
    • Higher Hydration: Cocoa absorbs a lot of water. The dough will be stickier than a plain loaf—avoid adding too much extra flour.
    • Add Chips During Folds: Incorporating chocolate chips during bulk fermentation prevents them from sinking to the bottom during baking.
    • Cold Proof for Flavor: The overnight rest deepens the chocolate flavor and makes the dough easier to handle.
    • Lower Baking Temperature: Sugar and chocolate can cause quicker browning. Baking at 425°F instead of the typical 450°F prevents burning.
    • Wait to Slice: The molten chocolate will smear if you cut the bread warm.
    • Storage: Store in a paper bag for 1-2 days to keep the crust crisp. For longer storage, wrap in plastic and freeze for up to 2 months.

    This Chocolate Sourdough Bread is a deeply satisfying, decadent twist on a classic loaf.