Tag: date night dinner

  • Sweet, Spicy, and Totally Irresistible: Spicy Honey-Ginger Chicken Bowls with Tender Chicken Strips

    Sweet, Spicy, and Totally Irresistible: Spicy Honey-Ginger Chicken Bowls with Tender Chicken Strips

    If you’re craving a meal that’s bold, sticky, and bursting with flavor, these Spicy Honey-Ginger Chicken Bowls are exactly what you need.

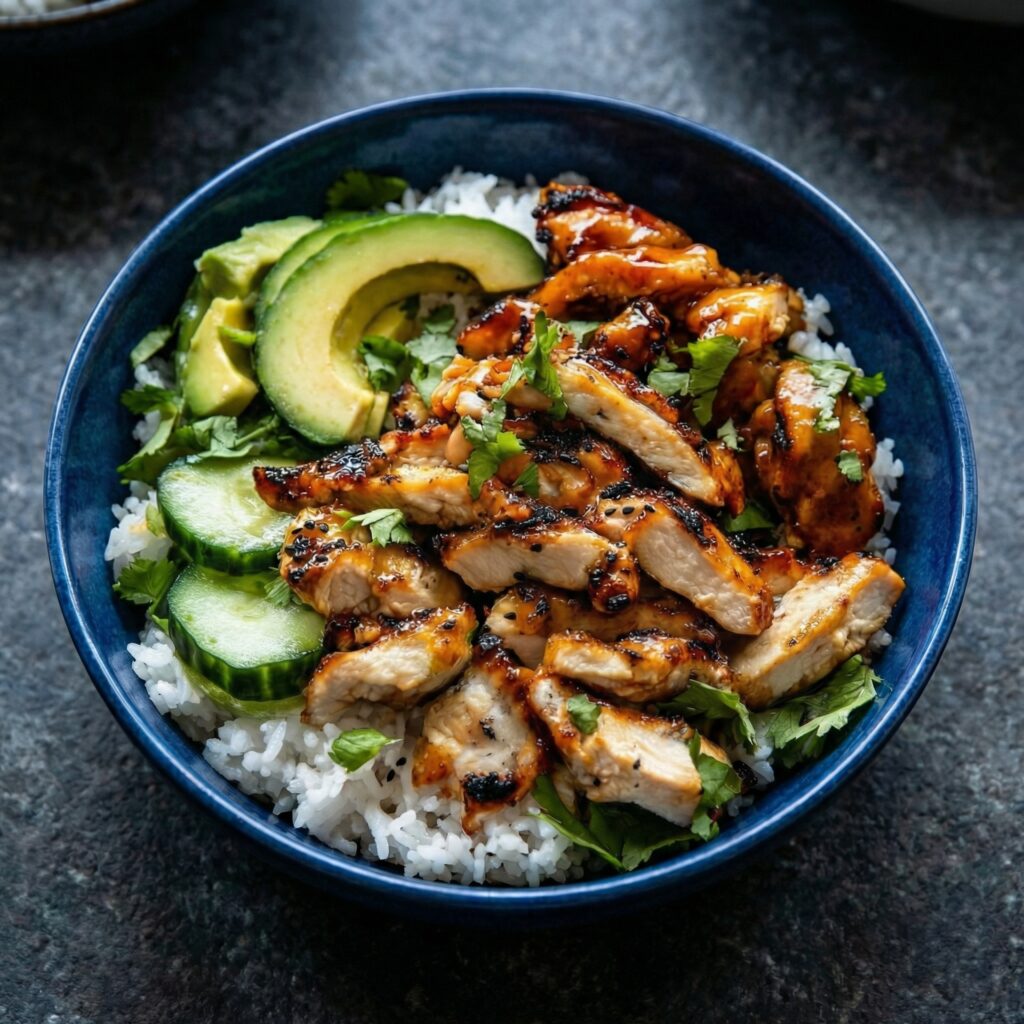
    Juicy chicken strips are seared until golden and caramelized, then coated in a sticky honey-ginger sauce that balances sweet, spicy, and savory notes perfectly. Served over fluffy rice with crisp vegetables, this dish is colorful, satisfying, and packed with flavor in every bite.

    Cutting the chicken into strips ensures quick, even cooking and creates maximum surface area for that glossy, irresistible glaze. Whether for a weeknight dinner or a meal prep favorite, this recipe will become a go-to.


    Why You’ll Love This Recipe

    • Tender, juicy chicken strips with a crispy exterior
    • Sweet, spicy, and savory honey-ginger glaze
    • Quick to make and packed with flavor
    • Perfect for bowls, meal prep, or casual dinners
    • Fully customizable with vegetables and toppings

    The combination of sticky sauce, fresh vegetables, and fluffy rice makes every bite a balanced and satisfying experience.
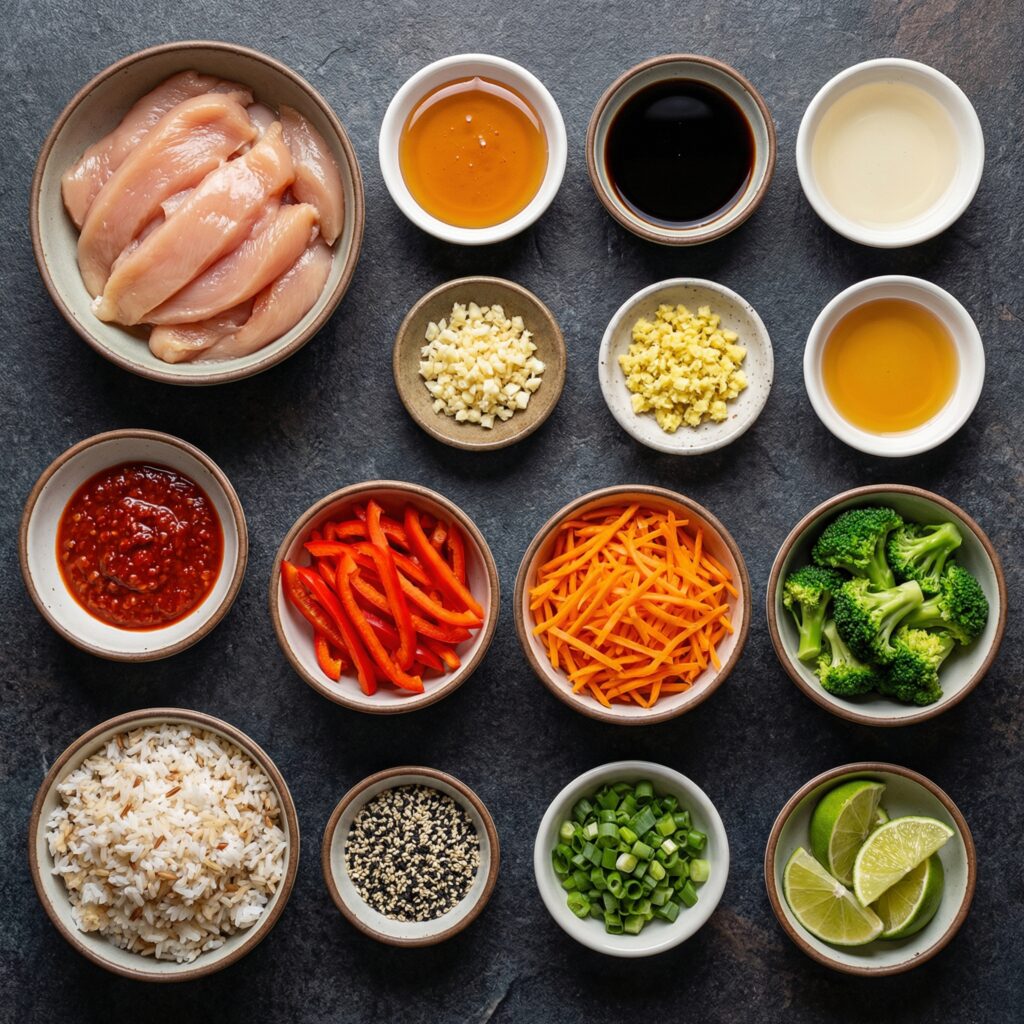

    Ingredients You’ll Need

    For the Chicken:

    • 1½ pounds boneless, skinless chicken breasts or thighs, cut into strips
    • Salt and black pepper, to taste
    • 2 tablespoons cornstarch
    • 1 tablespoon olive oil

    For the Spicy Honey-Ginger Sauce:

    • ⅓ cup low-sodium soy sauce
    • 3 tablespoons honey
    • 1 tablespoon rice vinegar
    • 1 tablespoon freshly grated ginger
    • 3 cloves garlic, minced
    • 1 teaspoon sesame oil
    • 1–2 teaspoons sriracha (adjust to taste)
    • 1 tablespoon cornstarch mixed with 2 tablespoons water (slurry)

    For the Bowls:

    • 3 cups cooked jasmine rice
    • 1 cup steamed broccoli
    • 1 cup shredded carrots
    • 1 cup sliced cucumbers
    • ½ cup shelled edamame
    • 2 green onions, sliced
    • Sesame seeds for garnish

    Step 1: Cook the Rice

    Start by preparing your rice according to package instructions. Fluff with a fork once cooked and keep warm.

    Jasmine rice works beautifully due to its soft texture and subtle fragrance, though brown rice or quinoa are excellent alternatives.


    Step 2: Prep the Chicken Strips

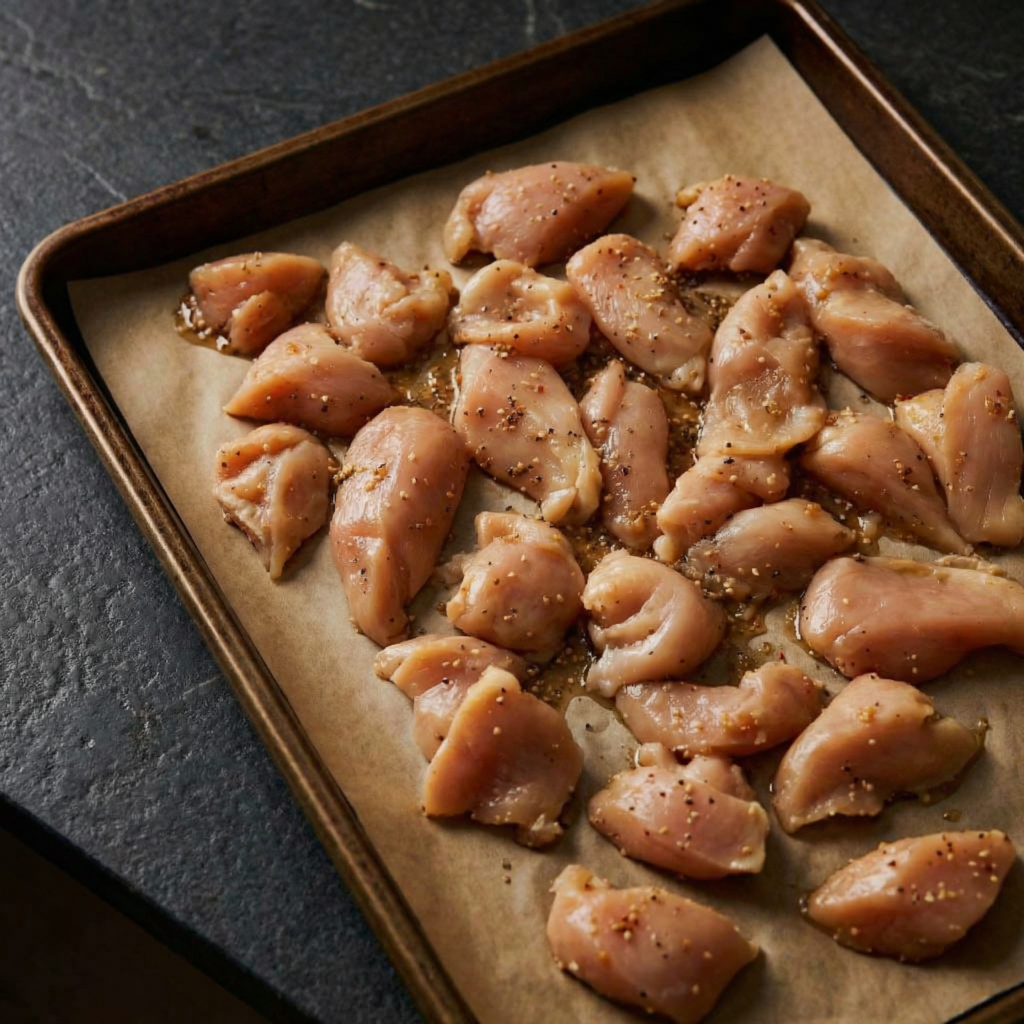
    Slice the chicken into even strips, about ½ inch thick. Pat the strips dry with paper towels—this is crucial for proper browning.

    Season both sides with salt and black pepper, then toss lightly with cornstarch. The cornstarch helps create a delicate crust that clings perfectly to the honey-ginger sauce later.


    Step 3: Sear the Chicken

    Heat olive oil in a large skillet over medium-high heat.

    Place the chicken strips in a single layer, being careful not to overcrowd the pan.

    Cook for 3–4 minutes on the first side without moving them to get a nice sear. Flip and cook for another 2–3 minutes until golden brown and cooked through (internal temperature should reach 165°F/75°C).

    Remove the chicken from the skillet and set aside.


    Step 4: Make the Honey-Ginger Sauce

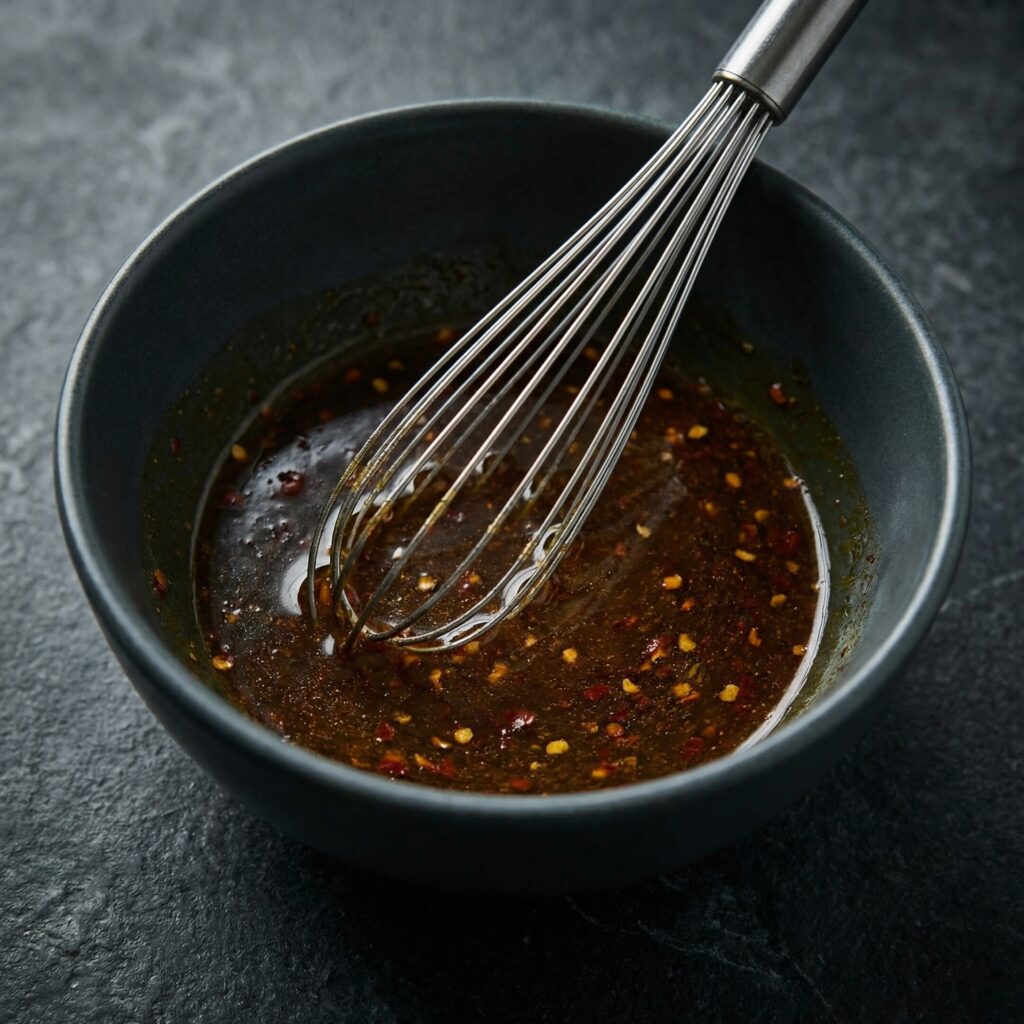
    Lower the heat to medium. In the same skillet (don’t wipe it clean—the browned bits add flavor), combine soy sauce, honey, rice vinegar, grated ginger, garlic, sesame oil, and sriracha.

    Stir and let the mixture simmer for 2–3 minutes so the garlic and ginger infuse the sauce.

    Add the cornstarch slurry and stir continuously until the sauce thickens into a glossy glaze, about 1–2 minutes.

    Step 5: Coat the Chicken in the Sauce

    Return the cooked chicken strips to the skillet.

    Toss gently to coat each strip in the honey-ginger glaze. Let simmer for 2–3 minutes so the sauce clings to the chicken and becomes sticky and luscious.

    Step 6: Prepare the Vegetables

    While the chicken simmers, prepare the vegetables:

    • Steam the broccoli until tender-crisp.
    • Slice the cucumbers thinly.
    • Shred the carrots if needed.
    • Warm the edamame if frozen.

    These fresh, crisp vegetables add texture and color, balancing the richness of the sauce.


    Step 7: Assemble the Bowls

    Divide the warm rice among serving bowls.

    Place the glazed chicken strips on top.

    Arrange broccoli, carrots, cucumbers, and edamame around the chicken.

    Drizzle extra sauce from the skillet over the rice, and sprinkle with sliced green onions and sesame seeds.


    Step 8: Serve and Enjoy

    Serve immediately while hot and glossy.

    For added brightness, squeeze fresh lime over the bowls. If you like more heat, drizzle additional sriracha.

    Every bite should have tender chicken, sticky glaze, fluffy rice, and refreshing vegetables—a perfect balance of flavors and textures.


    Tips for Success

    • Cut chicken evenly for uniform cooking.
    • Don’t overcrowd the skillet; sear in batches if needed.
    • Pat chicken dry to get a proper crust.
    • Adjust honey and sriracha to taste for your preferred sweet-heat balance.
    • If the sauce thickens too much, add a splash of water to loosen it.

    Flavor Variations

    • Swap broccoli for snap peas or bell peppers.
    • Top with crushed peanuts for crunch.
    • Add a soft-boiled egg for extra richness.
    • Serve over noodles instead of rice.

    These simple tweaks make the dish versatile and customizable to your preference.


    Storage & Meal Prep

    Store chicken, sauce, rice, and vegetables separately in airtight containers in the refrigerator for up to 4 days.

    Reheat the chicken gently in a skillet with a splash of water to loosen the sauce. Assemble bowls fresh for the best texture.


    Final Thoughts

    Spicy Honey-Ginger Chicken Bowls are a vibrant, flavorful, and balanced meal. Cutting the chicken into strips ensures fast cooking and maximum surface area for that sticky glaze, while crisp vegetables and fluffy rice provide perfect contrast.

    With a combination of sweet, savory, and spicy notes in every bite, this dish is satisfying, colorful, and simple enough for weeknights but impressive enough for entertaining.

    Prepare this recipe, and you’ll have a crowd-pleasing, restaurant-quality bowl that’s full of bold flavor and comfort in every bite.
  • Baked Feta Pasta: The Creamy, Roasted Tomato Sensation You’ll Make on Repeat

    Baked Feta Pasta: The Creamy, Roasted Tomato Sensation You’ll Make on Repeat

    Few dishes have taken home kitchens by storm quite like Baked Feta Pasta.

    With just a handful of simple ingredients, this recipe transforms into a creamy, tangy, roasted tomato sauce that clings beautifully to tender pasta. It’s rich without being heavy, vibrant without being complicated, and best of all—it practically cooks itself in the oven.

    If you’re looking for a cozy, crowd-pleasing meal that requires minimal effort but delivers maximum flavor, this is it. Let’s walk through it step by step so you can master this viral favorite with confidence.


    Why You’ll Love This Recipe

    • Minimal prep work
    • Oven does most of the cooking
    • Creamy without heavy cream
    • Perfect for weeknights or entertaining
    • Easily customizable

    The magic happens when the feta bakes alongside juicy cherry tomatoes, creating a silky sauce with almost no stirring required.


    Ingredients You’ll Need

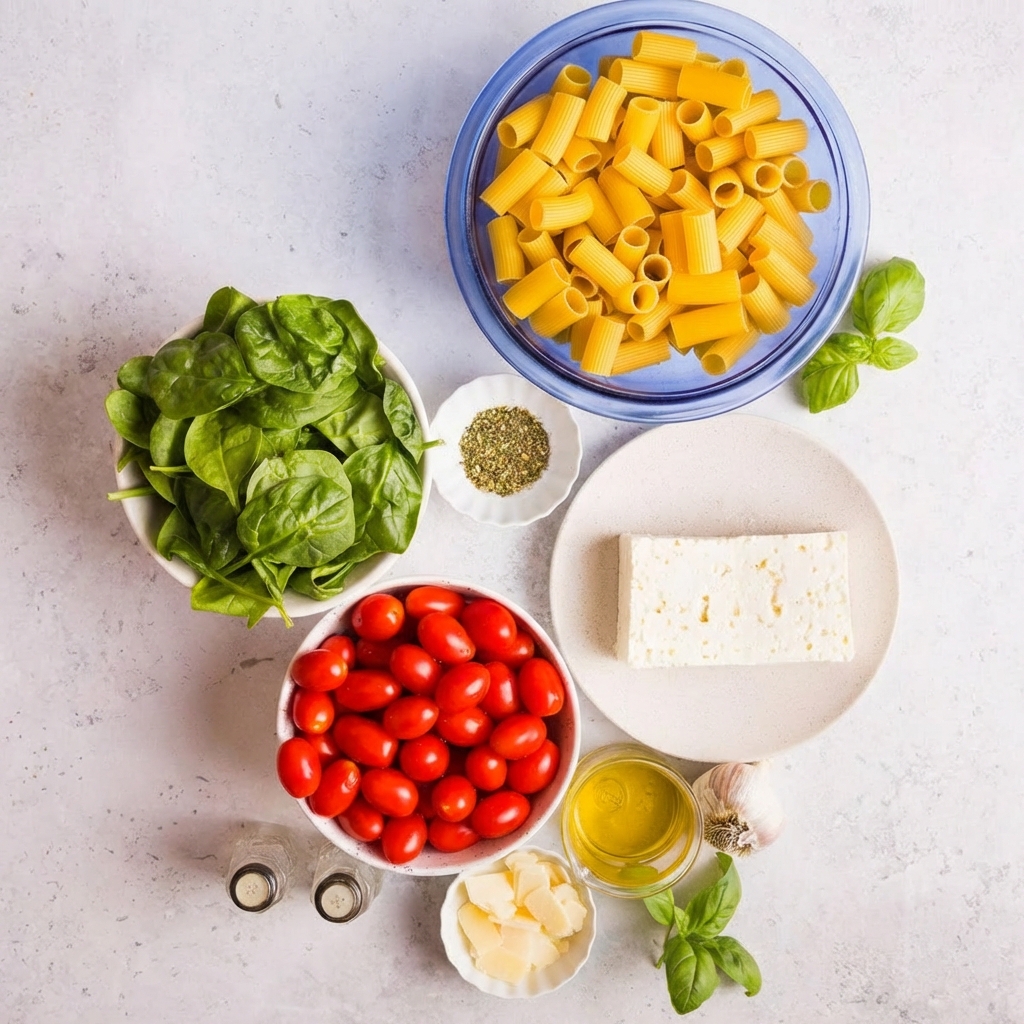
    • 2 pints cherry or grape tomatoes
    • 1 block (7–8 ounces) feta cheese
    • ¼ cup olive oil
    • 3–4 cloves garlic, minced
    • ½ teaspoon red pepper flakes (optional)
    • ½ teaspoon dried oregano
    • Salt and freshly ground black pepper
    • 12 ounces pasta (penne, rigatoni, or rotini work well)
    • Fresh basil leaves
    • Optional: grated Parmesan for serving

    Step 1: Preheat the Oven

    Preheat your oven to 400°F (200°C).

    Choose a medium-sized baking dish—large enough to hold the tomatoes in a single layer while leaving space in the center for the feta.


    Step 2: Prepare the Tomatoes

    Add the cherry tomatoes to the baking dish.

    Drizzle with olive oil and sprinkle with salt, pepper, oregano, and red pepper flakes. Toss gently to coat.

    Spread the tomatoes evenly around the dish.

    The oil helps the tomatoes roast and caramelize, intensifying their natural sweetness.


    Step 3: Add the Feta

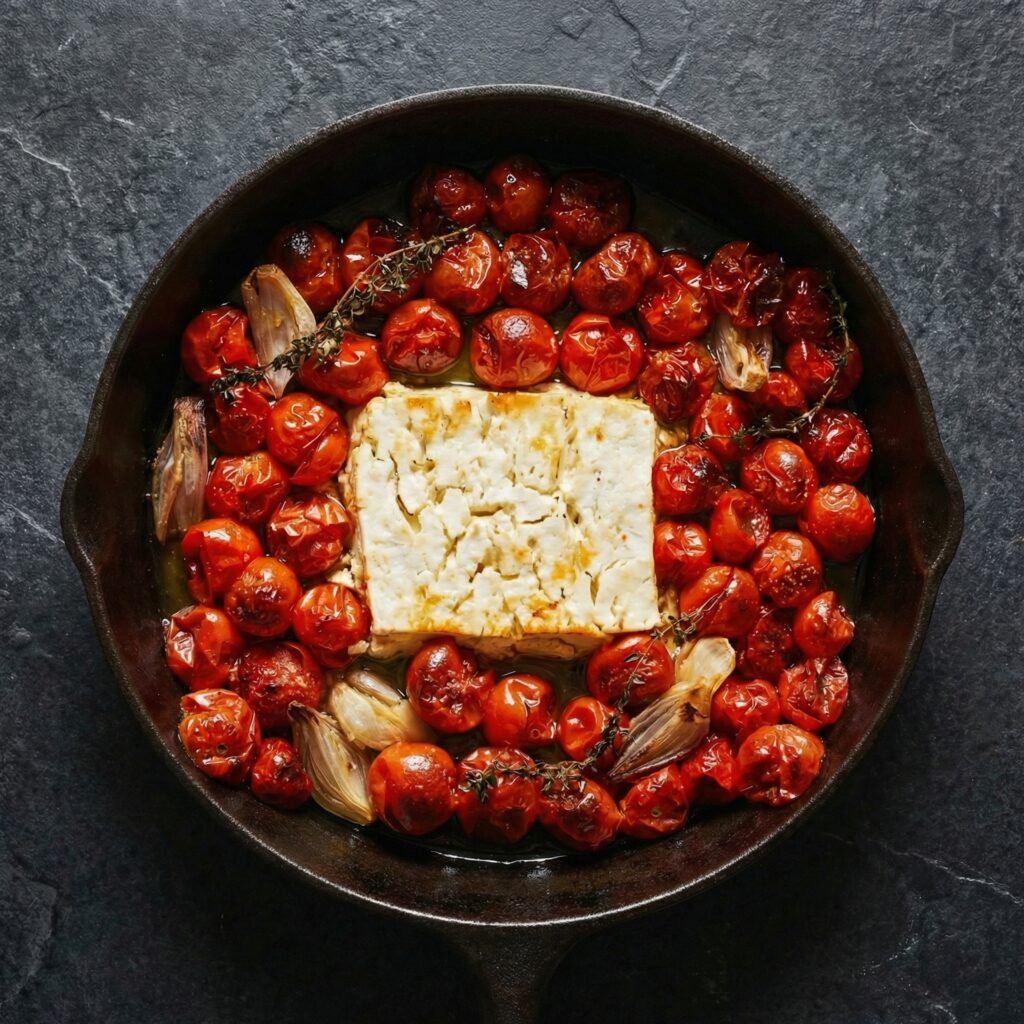
    Place the block of feta in the center of the tomatoes.

    Drizzle a little extra olive oil over the top of the feta and sprinkle lightly with black pepper.

    Add the minced garlic around the tomatoes (not directly on top of the feta to prevent burning).

    This setup allows the tomatoes to blister and burst while the feta softens into creamy perfection.


    Step 4: Bake Until Golden and Jammy

    Transfer the dish to the oven and bake for 30–35 minutes.

    You’ll know it’s ready when:

    • The tomatoes have burst and released their juices
    • The feta is soft and lightly golden on top
    • The garlic is fragrant

    For extra color, switch the oven to broil for 2–3 minutes at the end, watching carefully to avoid burning.


    Step 5: Cook the Pasta

    While the feta and tomatoes bake, bring a large pot of salted water to a boil.

    Cook the pasta according to package instructions until al dente.

    Reserve about ½ cup of pasta water before draining. This starchy water helps loosen and emulsify the sauce later.

    Drain the pasta and set aside.


    Step 6: Create the Creamy Sauce

    Once the baking dish comes out of the oven, use a spoon to gently mash the softened feta and roasted tomatoes together.

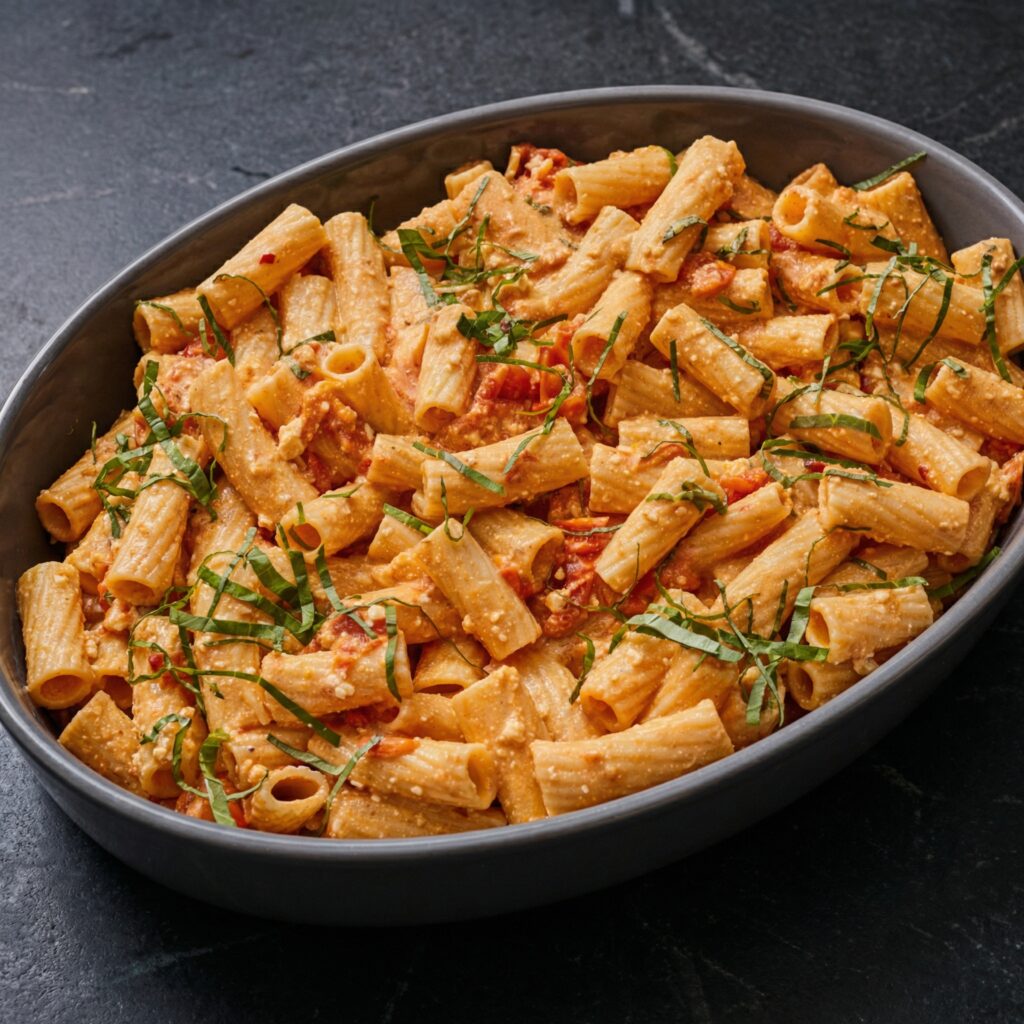
    Stir until everything blends into a creamy, rosy-colored sauce. The feta will melt into the tomato juices, creating a rich yet tangy base.

    If the sauce seems thick, add a splash of reserved pasta water to loosen it.


    Step 7: Combine Pasta and Sauce

    Add the cooked pasta directly into the baking dish.

    Toss thoroughly until every piece of pasta is coated in the creamy feta-tomato sauce.

    If needed, add more pasta water a tablespoon at a time to reach your desired consistency.

    The heat from the pasta will help bring everything together into a silky, cohesive dish.


    Step 8: Finish With Fresh Herbs

    Tear fresh basil leaves and stir them into the pasta.

    The basil adds brightness and freshness that balances the richness of the feta.

    Taste and adjust seasoning—add more salt, pepper, or red pepper flakes if desired.

    Serve immediately with an optional sprinkle of grated Parmesan.


    Tips for Success

    Use block feta. Pre-crumbled feta doesn’t melt as smoothly.

    Don’t overcrowd the tomatoes. They should roast, not steam.

    Reserve pasta water. It’s the secret to achieving a silky sauce.

    Taste before adding salt. Feta is naturally salty.


    Easy Variations

    This recipe is wonderfully adaptable. Try these ideas:

    • Add baby spinach after mixing for extra greens.
    • Stir in cooked chicken or shrimp for added protein.
    • Toss in sun-dried tomatoes for deeper flavor.
    • Use whole wheat pasta for a heartier option.
    • Add a splash of balsamic glaze for subtle sweetness.

    You can even swap cherry tomatoes for grape tomatoes or a mix of both.


    Storage and Reheating

    Store leftovers in an airtight container in the refrigerator for up to 4 days.

    When reheating, add a splash of water or milk before warming to restore creaminess.

    The flavors deepen overnight, making leftovers especially delicious.


    Final Thoughts

    Baked Feta Pasta is proof that simple ingredients can create extraordinary results. Roasted tomatoes, creamy feta, and perfectly cooked pasta combine into a dish that feels indulgent yet effortless.

    Whether you’re cooking for yourself, your family, or entertaining friends, this recipe delivers bold flavor with minimal effort and cleanup.

    Preheat that oven, grab a block of feta, and prepare to fall in love with one of the easiest—and most satisfying—pasta dishes you’ll ever make.

  • Quick, Cheesy, and Bursting with Flavor: How to Make a 4-Ingredient Pesto Tortellini Bake

    Quick, Cheesy, and Bursting with Flavor: How to Make a 4-Ingredient Pesto Tortellini Bake

    Sometimes the simplest recipes are the most satisfying. If you’re craving a hearty, cheesy, and flavorful pasta dish but don’t want to spend hours in the kitchen, this 4-Ingredient Pesto Tortellini Bake is your new go-to.

    With just four ingredients, you can create a comforting, melty, and delicious baked pasta dish that’s perfect for weeknight dinners, potlucks, or any time you need a quick but impressive meal.

    This recipe combines tender tortellini, vibrant pesto, creamy mozzarella, and savory Parmesan to create layers of flavor in every bite. Follow along, and you’ll have a bubbling, golden, cheesy pasta bake ready in under 30 minutes.

    Why You’ll Love This 4-Ingredient Pesto Tortellini Bake

    • Ready in under 30 minutes
    • Requires only four ingredients
    • Cheesy, gooey, and comforting
    • Perfect for weeknight dinners or meal prep
    • Minimal cleanup

    Despite its simplicity, this dish tastes like something straight from a gourmet Italian kitchen. The secret is using quality ingredients and letting the flavors shine through.


    Ingredients You’ll Need

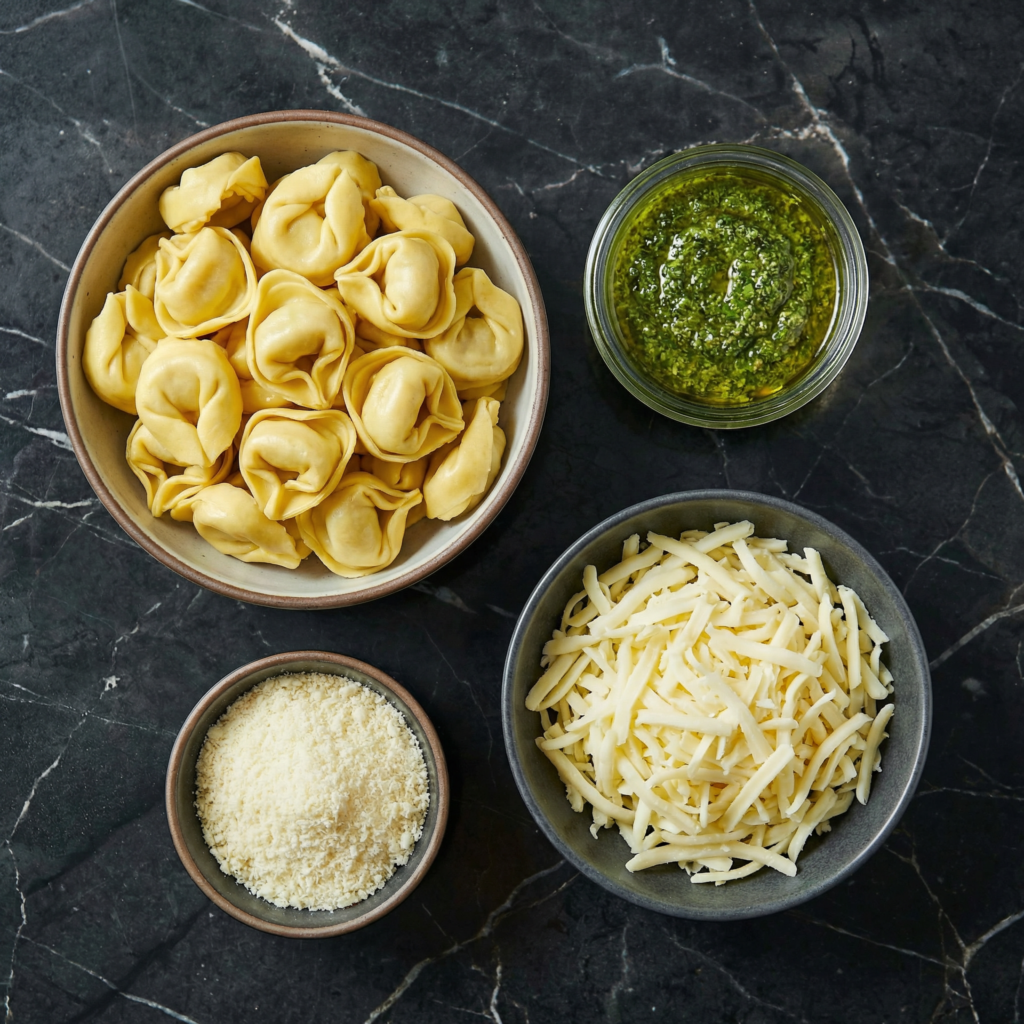
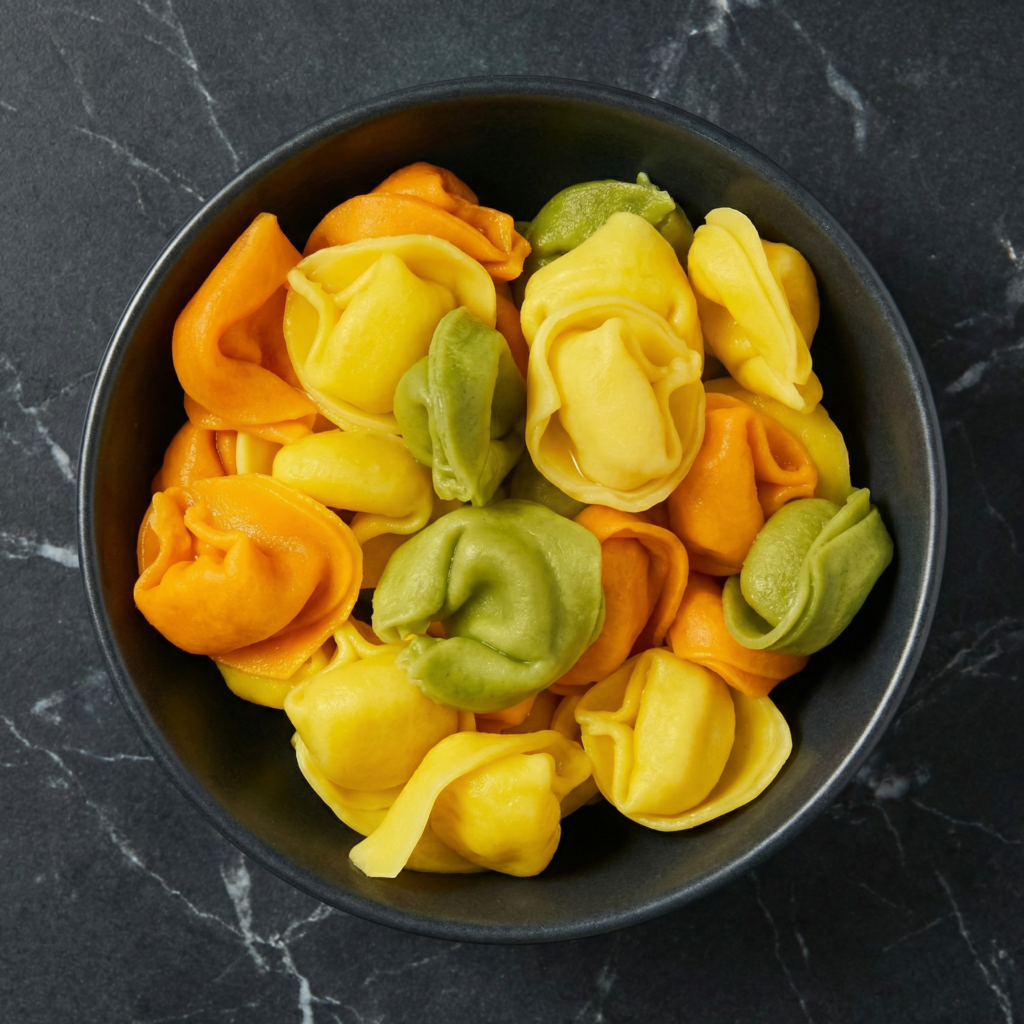
    • 1 pound (450 g) refrigerated or frozen cheese tortellini
    • 1 cup (240 ml) prepared pesto (store-bought or homemade)
    • 2 cups (200 g) shredded mozzarella cheese
    • ½ cup (50 g) grated Parmesan cheese

    Optional garnish: fresh basil leaves, cherry tomatoes, or a sprinkle of red pepper flakes.


    Step 1: Preheat Your Oven

    Preheat your oven to 375°F (190°C). Lightly grease a 9×13-inch baking dish with cooking spray or a drizzle of olive oil.

    Preheating ensures the tortellini bake evenly and the cheese melts perfectly, creating a golden, bubbly top.


    Step 2: Cook the Tortellini

    Bring a large pot of salted water to a boil. Add the tortellini and cook until just al dente—usually 1–2 minutes less than package instructions.

    Drain the pasta and set aside. If using frozen tortellini, check the package instructions; some brands can be added directly to the baking dish without boiling.

    Toss the cooked tortellini with a small drizzle of olive oil to prevent sticking.


    Step 3: Mix in the Pesto

    In a large mixing bowl, combine the cooked tortellini with the pesto. Stir gently until each tortellini is coated evenly in the vibrant green sauce.

    The pesto is the star flavor here, so don’t be shy—make sure every piece of tortellini is well coated.


    Step 4: Layer the Cheese

    Transfer half of the pesto-coated tortellini into the prepared baking dish. Sprinkle half of the mozzarella and half of the Parmesan over the layer.

    Add the remaining tortellini and top with the rest of the mozzarella and Parmesan.

    Layering the cheese ensures that every bite has a perfect balance of creamy, melty mozzarella and salty, nutty Parmesan.


    Step 5: Bake Until Golden and Bubbly

    Cover the baking dish loosely with foil and bake in the preheated oven for 15 minutes.

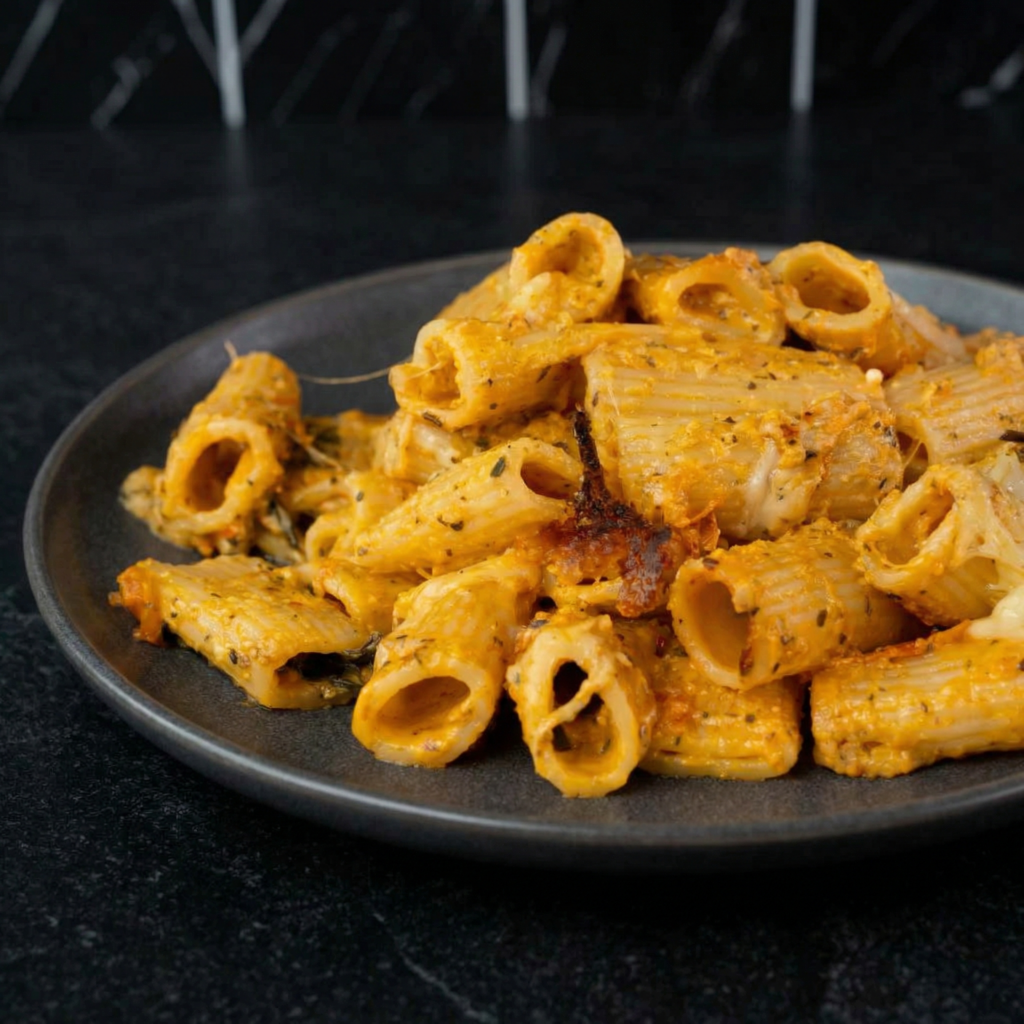
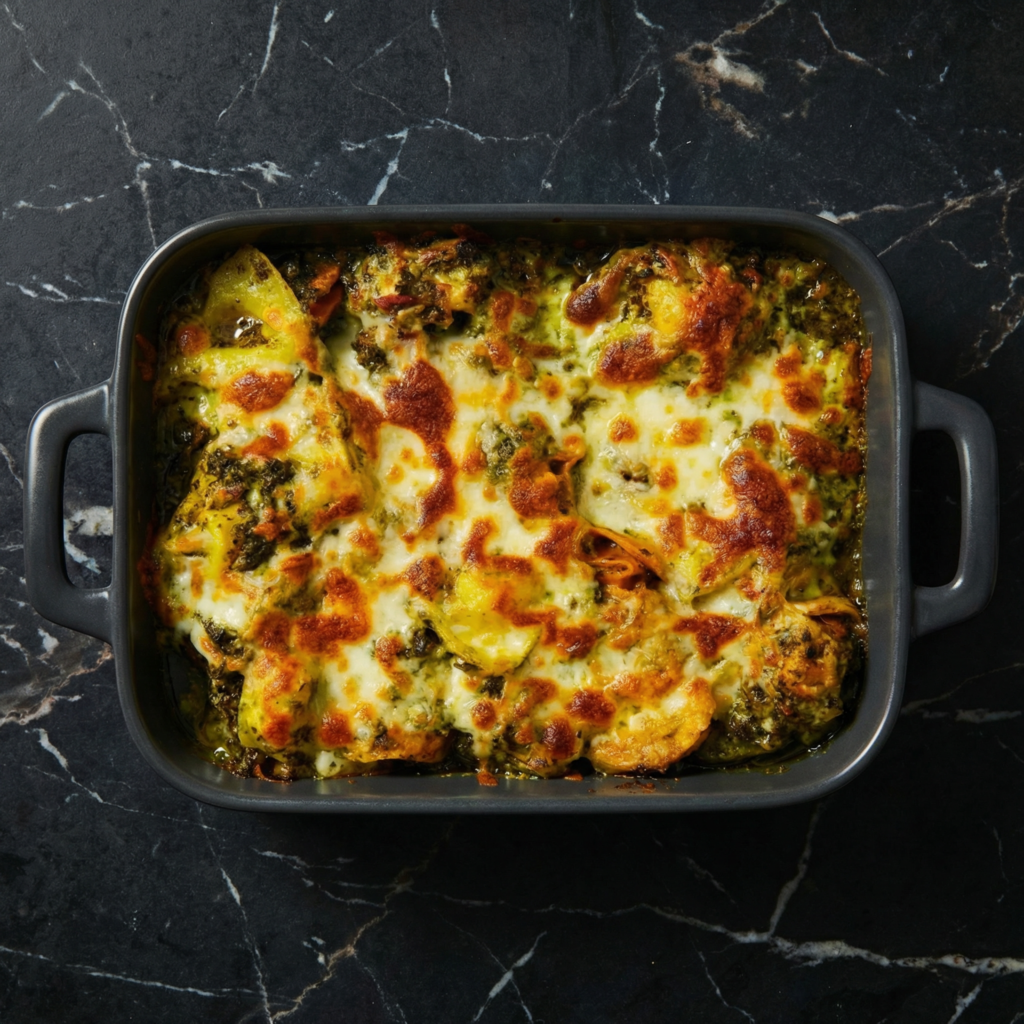
    Remove the foil and bake for another 5–10 minutes, or until the cheese is melted, bubbly, and lightly golden on top.

    For an extra crispy finish, broil for 1–2 minutes, keeping a close eye to prevent burning.


    Step 6: Rest and Garnish

    Once baked, allow the dish to rest for 5 minutes. This helps the cheese set slightly, making serving easier.

    Optional: top with fresh basil leaves, halved cherry tomatoes, or a sprinkle of red pepper flakes for color and extra flavor.

    Slice and serve directly from the baking dish.


    Flavor and Texture Highlights

    • Tender, cheesy tortellini coated in fragrant pesto
    • Melty mozzarella for gooey indulgence
    • Nutty Parmesan for depth and slight saltiness
    • Golden, slightly crisp top adds texture contrast

    The combination of creamy, cheesy, and herbaceous flavors makes this dish irresistible. It’s rich without being heavy and full of comforting Italian flavor.


    Tips for the Perfect Pesto Tortellini Bake

    • Use quality pesto: Fresh or high-quality store-bought pesto makes a huge difference.
    • Don’t overcook tortellini: Slightly undercooked pasta will finish cooking in the oven, keeping it tender but not mushy.
    • Even cheese distribution: Make sure the mozzarella and Parmesan are evenly layered for consistent flavor.
    • Make it ahead: Assemble in advance, cover tightly, and refrigerate. Add 5–10 extra minutes to baking time if chilled.
    • Customize: Add cooked chicken, cherry tomatoes, or spinach to bulk up the dish.

    Optional Variations

    • Creamy Version: Stir in ½ cup heavy cream or cream cheese with the pesto for extra richness.
    • Vegan Option: Use dairy-free cheese and vegan pesto for a plant-based version.
    • Garlic Parmesan Crunch: Mix ¼ cup breadcrumbs with 1 tablespoon olive oil and sprinkle on top before baking for a crisp topping.
    • Spicy Twist: Add a pinch of crushed red pepper flakes to the pesto mix for a subtle heat.

    Storage and Reheating

    • Store leftovers in an airtight container in the refrigerator for up to 3 days.
    • Reheat in the oven at 350°F (175°C) for 10–15 minutes or in the microwave for 1–2 minutes until heated through.
    • This dish can also be assembled and frozen before baking. Bake from frozen, adding 10–15 extra minutes to cooking time.

    Why This Recipe Works

    This 4-Ingredient Pesto Tortellini Bake works because it focuses on simple, high-quality ingredients that complement each other perfectly. The tortellini provides structure and a soft, pillowy base, while the pesto adds aromatic herb flavor.

    The combination of mozzarella and Parmesan creates creamy, melty cheese that contrasts beautifully with the tender pasta. Baking allows the flavors to meld while giving the dish a golden, bubbly top that’s both visually appealing and delicious.


    With just four ingredients, you can make a pasta dish that feels indulgent, elegant, and comforting. This 4-Ingredient Pesto Tortellini Bake is quick, easy, and perfect for busy nights when you want maximum flavor with minimal effort.

    The creamy cheese, tender pasta, and vibrant pesto create a dish that’s sure to be a family favorite and a recipe you’ll return to again and again.

    Every bite delivers creamy, cheesy, herbaceous comfort—proof that sometimes the simplest recipes are the most unforgettable.

  • Perfectly Seared Sesame Tuna with Fluffy Rice: A Restaurant-Style Dinner at Home

    Perfectly Seared Sesame Tuna with Fluffy Rice: A Restaurant-Style Dinner at Home

    If you’re craving a light, flavorful, and elegant dinner, Sesame Seared Tuna with Rice is a showstopper.

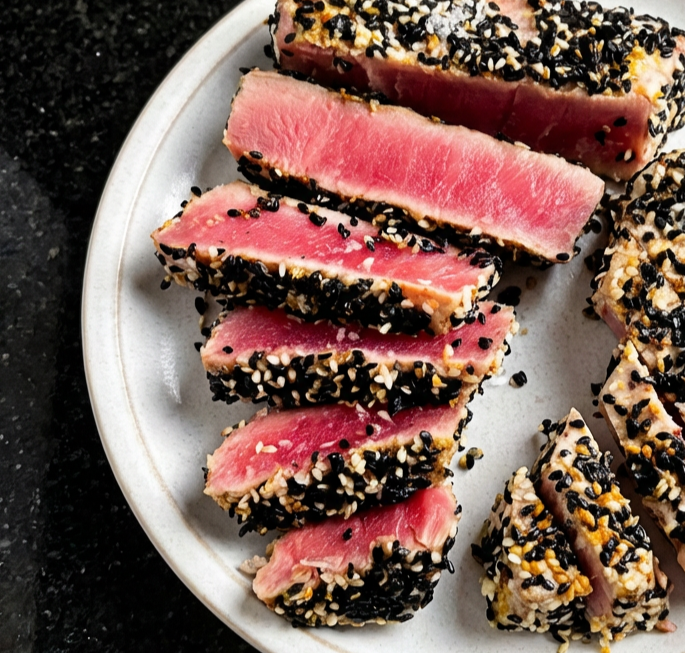
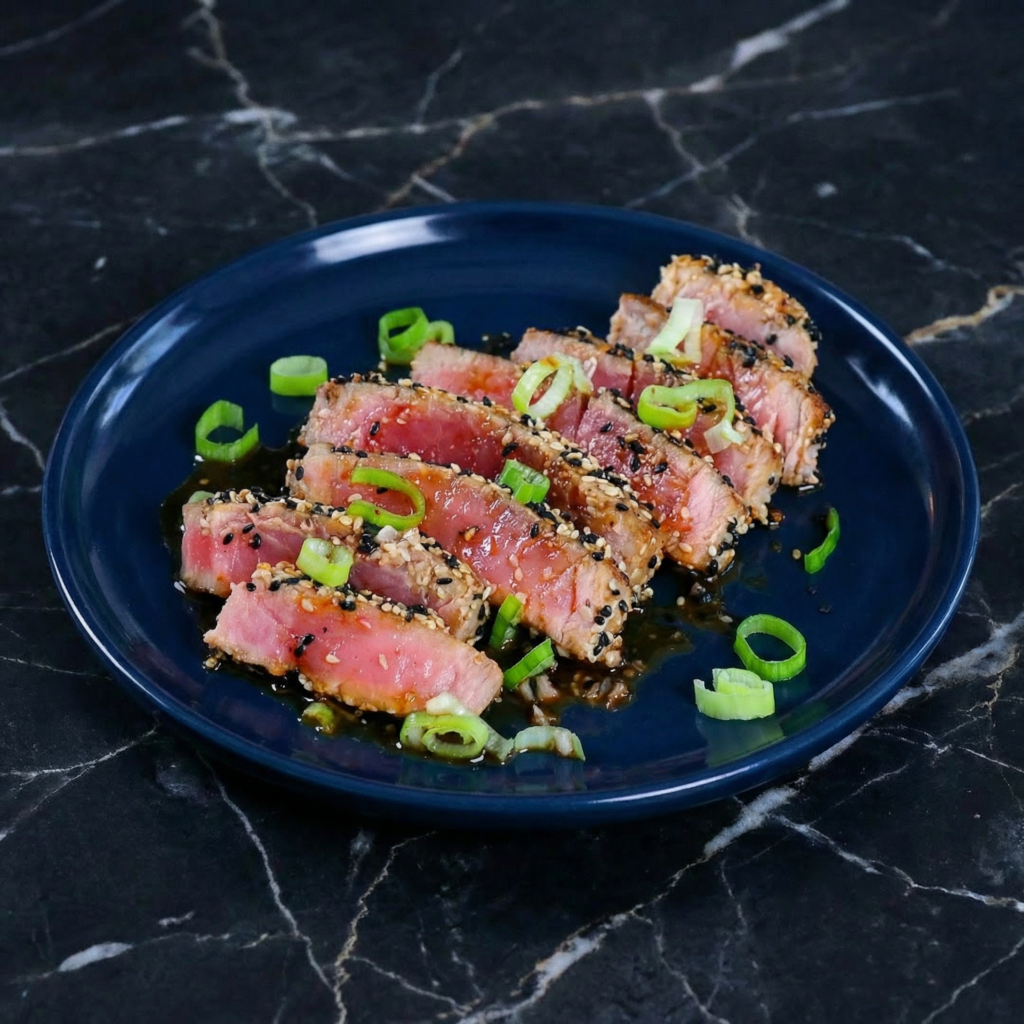
    With a tender, pink center, a nutty sesame crust, and perfectly cooked rice on the side, this dish feels gourmet without requiring hours in the kitchen. It’s fresh, healthy, and bursting with umami, making it ideal for weeknight dinners, date nights, or any time you want a meal that impresses both the eyes and the palate.

    In this step-by-step guide, you’ll learn how to sear tuna perfectly, create a crisp sesame crust, and pair it with fluffy rice for a balanced, restaurant-quality plate.


    Why You’ll Love This Sesame Seared Tuna

    • Quick and easy: ready in under 30 minutes
    • Tender tuna with a crisp, nutty crust
    • Balanced, healthy meal with protein and grains
    • Elegant enough for entertaining
    • Customizable with vegetables or sauces

    This recipe proves that a few high-quality ingredients, treated with care, can produce a dish that tastes extraordinary.


    Ingredients You’ll Need

    For the Tuna:

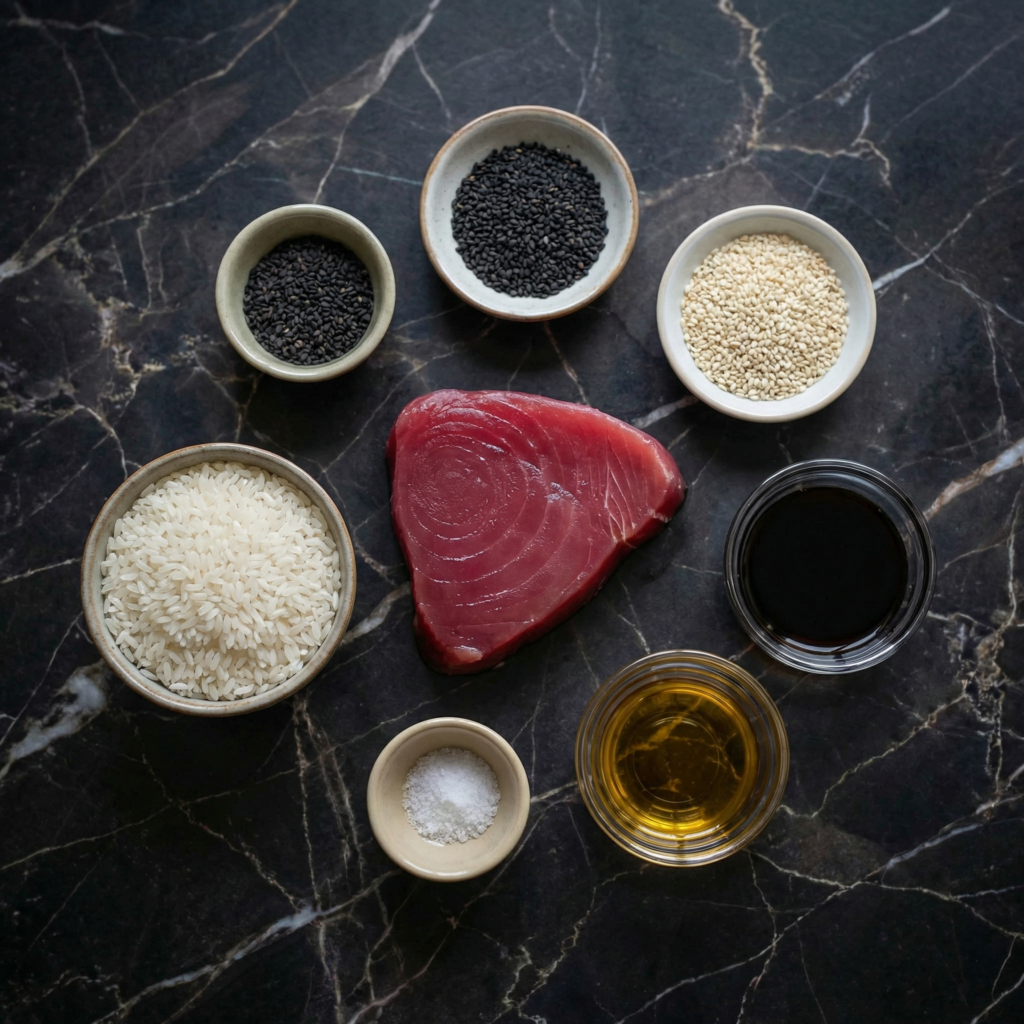
    • 2 tuna steaks (about 6 ounces each)
    • 2 tablespoons sesame seeds (white, black, or a mix)
    • 1 tablespoon olive oil
    • Salt and pepper to taste

    For the Rice:

    • 1 cup jasmine or sushi rice
    • 2 cups water or low-sodium chicken/vegetable broth
    • Pinch of salt

    Optional Accompaniments:

    • Soy sauce or tamari
    • Sliced avocado
    • Steamed or sautéed vegetables (like bok choy, snap peas, or carrots)
    • Pickled ginger

    Step 1: Prepare the Rice

    Rinse 1 cup of rice under cold water until the water runs clear. This removes excess starch, ensuring fluffy, separate grains.

    In a medium saucepan, combine the rice with 2 cups of water or broth and a pinch of salt. Bring to a boil over medium-high heat.

    Once boiling, reduce the heat to low, cover, and simmer for 15–18 minutes, or until all liquid is absorbed. Turn off the heat and let it sit, covered, for 5 minutes. Fluff with a fork before serving.

    Perfectly cooked rice serves as the neutral, slightly fragrant base for the rich, savory tuna.


    Step 2: Prepare the Tuna

    Pat the tuna steaks dry with paper towels. Moisture will prevent a proper sear.

    Season both sides lightly with salt and pepper.

    Place sesame seeds on a shallow plate. Press each side of the tuna steak into the sesame seeds so that both sides are evenly coated. The sesame seeds create a nutty crust and add visual appeal.


    Step 3: Heat the Pan

    Heat a non-stick or cast-iron skillet over medium-high heat.

    Add 1 tablespoon of olive oil and allow it to shimmer but not smoke.

    The pan must be hot enough to sear quickly, locking in juices while creating a crisp, golden crust.


    Step 4: Sear the Tuna

    Place the tuna steaks in the hot pan. Sear without moving for about 1–2 minutes per side, depending on thickness.

    For a rare center, aim for 1 minute per side. For medium-rare, cook 2 minutes per side. Avoid overcooking—tuna is best served pink in the center for tenderness.

    Remove the tuna from the pan and let it rest for a few minutes. Resting allows juices to redistribute for maximum flavor.


    Step 5: Slice and Plate

    Using a sharp knife, slice the tuna against the grain into ¼-inch thick slices. Arrange neatly over a bed of fluffy rice.

    If desired, add steamed or sautéed vegetables alongside. Top with soy sauce, a drizzle of sesame oil, or pickled ginger for added flavor complexity.


    Flavor and Texture Highlights

    • Crispy sesame crust adds nutty flavor and crunch
    • Tender, juicy tuna melts in your mouth
    • Fluffy, aromatic rice balances the rich protein
    • Optional vegetables add freshness and texture contrast

    Every bite delivers layers of flavor: savory, nutty, slightly salty, and fresh.


    Tips for Perfect Sesame Seared Tuna

    • Use sushi-grade tuna: Ensures safety and optimal flavor for rare preparation.
    • Pat dry: Moisture prevents proper searing.
    • Don’t overcook: Tuna cooks quickly; aim for rare to medium-rare for tenderness.
    • Even sesame coating: Press firmly so seeds stick well.
    • Hot pan: Quick sear ensures crisp crust without overcooking the center.

    Optional Variations

    • Spicy Tuna: Brush with sriracha or chili oil before searing.
    • Ginger Soy Glaze: Drizzle a mixture of soy sauce, rice vinegar, and grated ginger over tuna.
    • Sesame Rice: Stir a teaspoon of toasted sesame oil into the rice for extra flavor.
    • Avocado & Cucumber Salad: Serve alongside for a fresh, creamy element.
    • Ponzu Sauce: Add a citrusy, tangy ponzu drizzle for a light, zesty twist.

    Storage and Meal Prep

    • Tuna is best enjoyed fresh, but rice can be cooked in advance and stored in an airtight container for up to 3 days.
    • Leftover rice pairs well with eggs, vegetables, or stir-fries.
    • If you need to prep ahead, sear tuna last and slice just before serving for best texture.

    Why This Recipe Works

    This Sesame Seared Tuna with Rice works because of contrast: the crunchy, nutty sesame crust meets the silky, rare tuna, and fluffy, slightly seasoned rice provides a neutral base.

    Cooking tuna quickly at high heat preserves moisture and natural flavor, while sesame seeds add texture and aromatic richness. A few simple seasonings and fresh accompaniments elevate this dish to restaurant quality without complicated techniques.


    Serving Suggestions

    • Serve as a light, elegant weeknight dinner.
    • Pair with a crisp white wine like Sauvignon Blanc or a light sake.
    • Add a small side salad for balance.
    • Garnish with sesame seeds, microgreens, or thinly sliced scallions for presentation.

    With its delicate, seared exterior, nutty sesame flavor, and perfectly cooked rice, this Sesame Seared Tuna with Rice is a dish that looks impressive and tastes incredible.

    Minimal ingredients, maximum flavor, and quick preparation make it ideal for busy nights, special dinners, or when you want to treat yourself to a healthy, gourmet meal at home.

    Tender, seared, nutty, and fresh—each bite is a perfectly balanced combination of textures and flavors, proving that restaurant-quality meals can be effortlessly recreated in your own kitchen.

  • Creamy, Cheesy, and Comforting: How to Make Classic Scalloped Potatoes

    Creamy, Cheesy, and Comforting: How to Make Classic Scalloped Potatoes

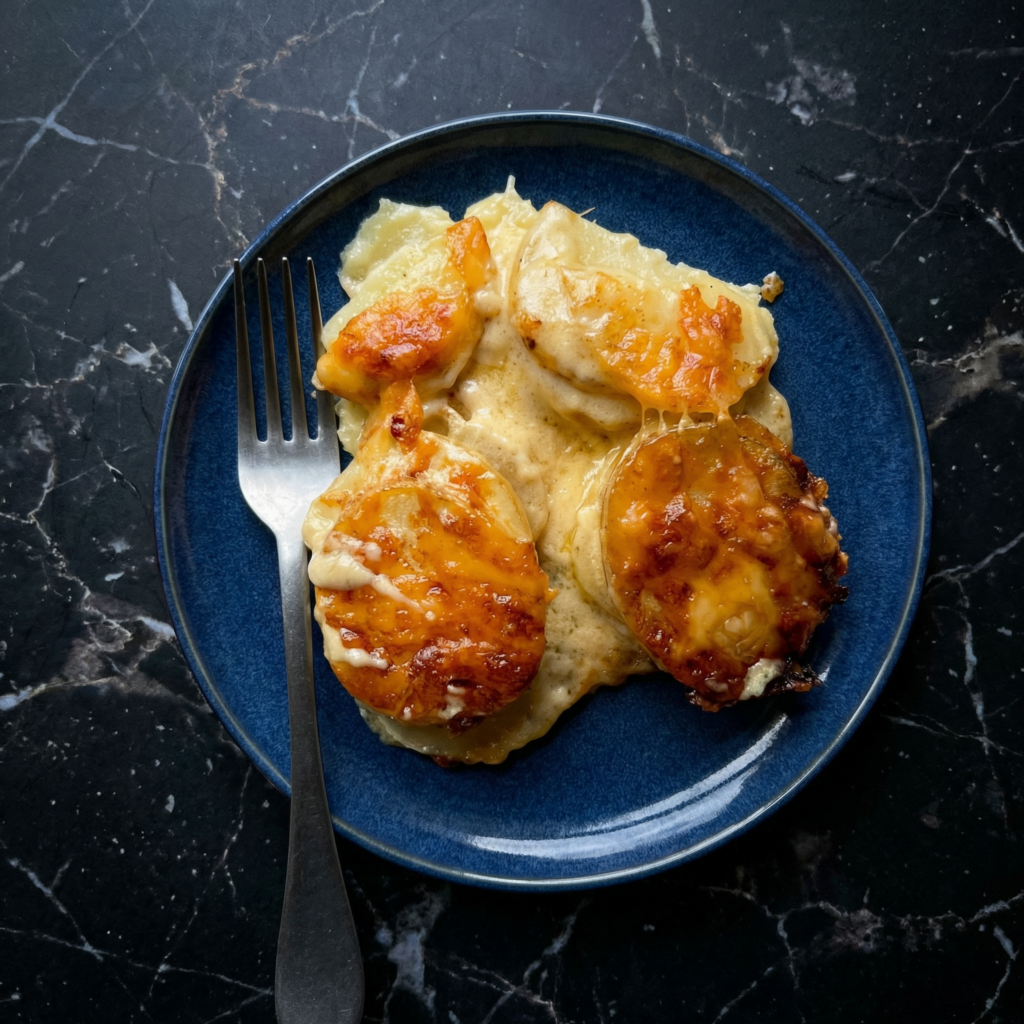
    Few side dishes capture the essence of comfort food quite like scalloped potatoes. Layered with tender slices of potato, creamy sauce, and melted cheese, this dish is perfect for holiday dinners, family gatherings, or simply a cozy weeknight meal. Scalloped potatoes are deceptively simple to make but deliver a rich, decadent flavor that everyone will love.

    This step-by-step guide will walk you through making classic scalloped potatoes with a creamy, cheesy sauce and perfectly tender layers. By following these steps, you’ll end up with a golden, bubbling dish that’s as beautiful as it is delicious.


    Why You’ll Love These Scalloped Potatoes

    • Creamy, cheesy, and comforting
    • Perfectly tender potato slices
    • Baked to golden perfection with a bubbly top
    • Great as a side dish for any meal
    • Easily customizable with herbs, spices, or additional cheese varieties

    The combination of tender potatoes and a rich, flavorful sauce makes scalloped potatoes a dish that never goes out of style.


    Ingredients You’ll Need

    For the Potatoes:

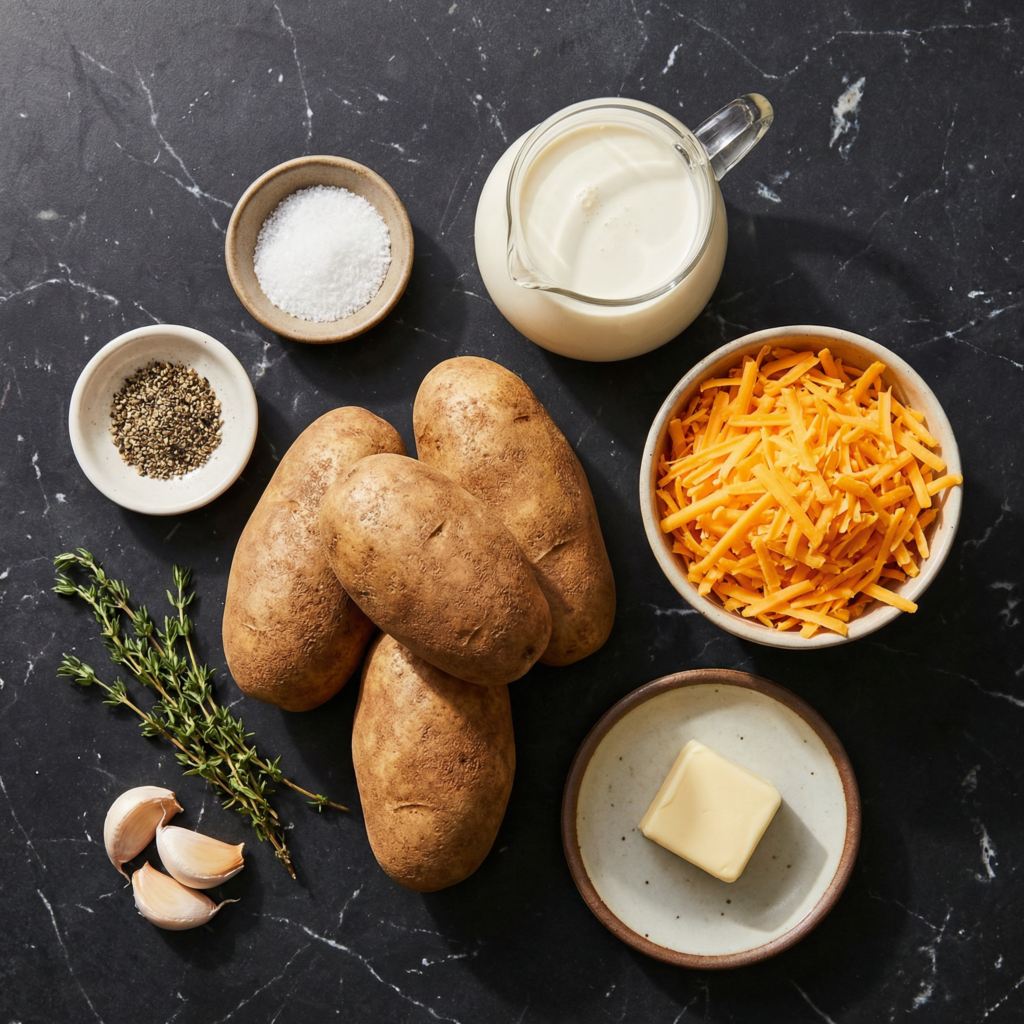
    • 3 pounds (1.4 kg) russet or Yukon gold potatoes, peeled and thinly sliced
    • 2 tablespoons unsalted butter
    • 2 tablespoons all-purpose flour
    • 2 cups (480 ml) whole milk, warmed
    • 1 cup (100 g) shredded sharp cheddar cheese
    • ½ cup (50 g) grated Parmesan cheese
    • 2 teaspoons garlic powder or 2 cloves garlic, minced
    • 1 teaspoon salt
    • ½ teaspoon black pepper
    • Optional: ½ teaspoon paprika or dried thyme for garnish

    Step 1: Preheat and Prepare

    Preheat your oven to 375°F (190°C).

    Grease a 9×13-inch baking dish with butter or nonstick spray. This will prevent the potatoes from sticking and make cleanup easier.


    Step 2: Prepare the Creamy Cheese Sauce

    In a medium saucepan over medium heat, melt the butter. Add the flour and whisk constantly for 1–2 minutes to form a roux. This cooks out the raw flour taste and will thicken the sauce.

    Gradually whisk in the warm milk, making sure to eliminate any lumps. Continue to cook until the sauce begins to thicken, about 5–7 minutes.

    Remove from heat and stir in ¾ cup of cheddar cheese, garlic, salt, and pepper until melted and smooth.

    The cheese sauce should be creamy, slightly thick, and full of flavor—it will coat the potatoes beautifully.


    Step 3: Slice the Potatoes

    Peel the potatoes and slice them into ¼-inch thick rounds. Use a sharp knife or mandoline for even slices, which ensures uniform cooking.

    Even slices allow the potatoes to cook at the same rate and create an attractive layered presentation.


    Step 4: Layer the Potatoes

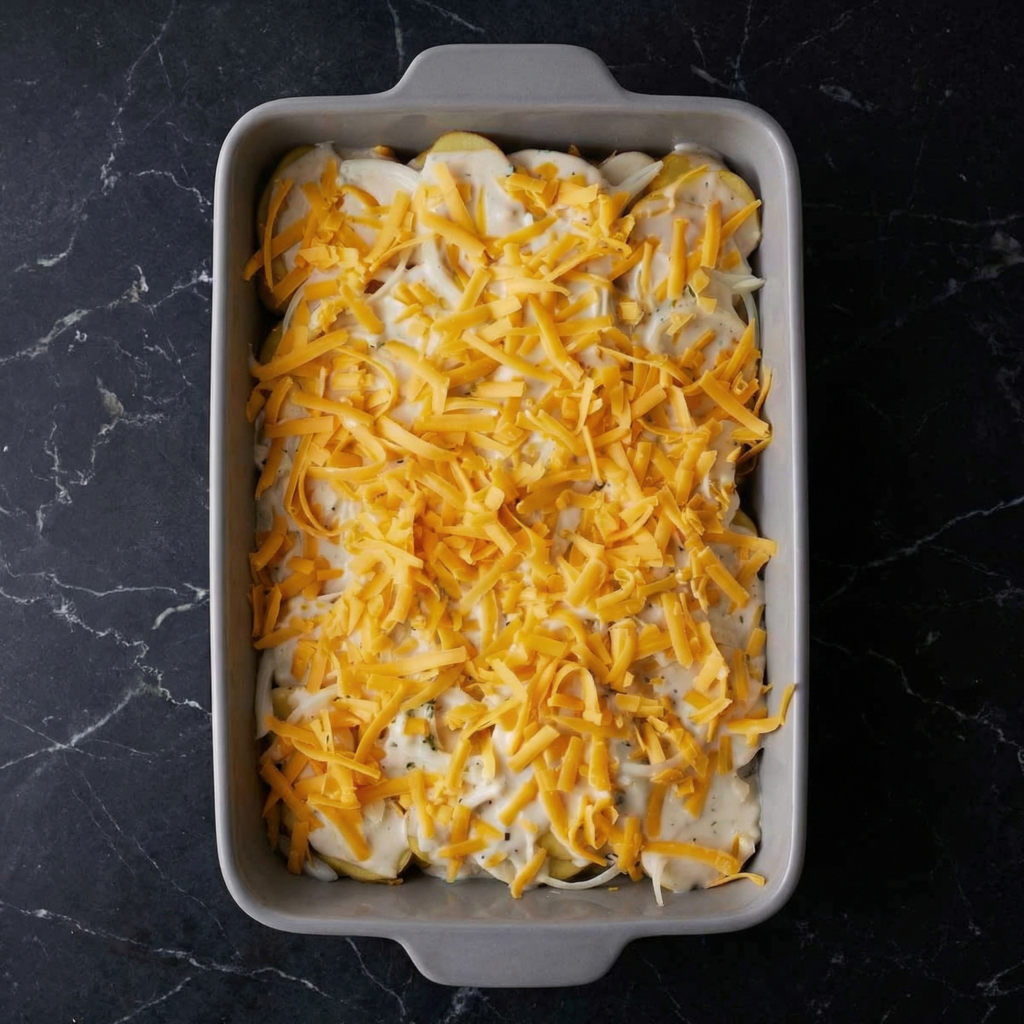
    Arrange a layer of potato slices in the bottom of the prepared baking dish. Pour a portion of the cheese sauce over the layer, spreading it evenly.

    Repeat the layers, alternating potatoes and sauce, until all potatoes and sauce are used. Sprinkle the remaining cheddar and Parmesan on top for a golden, cheesy crust.

    Optional: Sprinkle paprika or dried thyme over the top for color and added flavor.


    Step 5: Cover and Bake

    Cover the baking dish tightly with aluminum foil to prevent the top from browning too quickly while the potatoes cook through.

    Bake in the preheated oven for 45 minutes.


    Step 6: Uncover and Finish Baking

    Remove the foil and bake for an additional 20–25 minutes, or until the potatoes are tender and the top is golden brown and bubbling.

    Check for doneness by inserting a knife into the center—potatoes should slide easily without resistance.


    Step 7: Rest Before Serving

    Let the scalloped potatoes rest for 5–10 minutes before serving.

    Resting allows the sauce to thicken slightly, making the dish easier to serve and giving the flavors time to meld together.


    Flavor and Texture Highlights

    • Tender potato slices cooked to perfection
    • Creamy, cheesy sauce with rich flavor
    • Golden, bubbly top with slightly crisp edges
    • Subtle garlic and spice notes enhance the richness

    Every bite offers a balance of soft potatoes and rich, savory sauce, with just the right amount of cheese pull.


    Tips for Perfect Scalloped Potatoes

    • Use starchy potatoes like Russet for fluffier layers or Yukon Gold for a creamier texture.
    • Slice potatoes evenly to ensure uniform cooking.
    • Warm the milk before adding to the roux to prevent lumps.
    • Cover during the initial bake to prevent the top from burning.
    • Let the dish rest before serving to thicken the sauce.

    Optional Variations

    • Bacon and Onion: Add cooked bacon bits and sautéed onions between layers.
    • Herb-Infused: Mix fresh rosemary, thyme, or sage into the cheese sauce.
    • Extra Cheesy: Use a blend of cheeses like Gruyère, Fontina, or mozzarella for depth of flavor.
    • Spicy Kick: Add a pinch of cayenne or red pepper flakes to the cheese sauce.
    • Vegetable Boost: Layer in thin slices of zucchini, sweet potato, or cauliflower for variety.

    Storage and Serving

    • Serve immediately for the best texture.
    • Store leftovers in an airtight container in the refrigerator for up to 3 days.
    • Reheat covered in the oven at 350°F (175°C) until warmed through.
    • Can be prepared ahead and baked just before serving—cover and refrigerate overnight.

    Why This Recipe Works

    Classic scalloped potatoes succeed because of the combination of thinly sliced potatoes, a flavorful cheese sauce, and layered baking. Covering the dish during the initial bake ensures tender potatoes, while uncovering allows a golden, bubbly top.

    The balance of creamy sauce, cheese, and tender potatoes creates a dish that is comforting, decadent, and universally loved.


    With its tender, flavorful layers, rich cheese sauce, and golden baked top, these classic scalloped potatoes are a comforting, elegant side dish for any meal.

    Perfect for holiday feasts, cozy dinners, or special occasions, every bite delivers creamy, cheesy goodness that will leave everyone asking for seconds. Whether served alongside roasted meats, vegetables, or enjoyed on their own, scalloped potatoes are the ultimate comfort food.

  • Flavor-Packed and Irresistible: How to Make Halal Cart-Style Chicken and Rice with White Sauce at Home

    Flavor-Packed and Irresistible: How to Make Halal Cart-Style Chicken and Rice with White Sauce at Home

    If you’ve ever wandered the streets of New York City and smelled the savory aroma of a Halal food cart, you know the magic of tender chicken over fluffy rice, drizzled with tangy white sauce, and paired with a kick of red hot sauce.

    It’s comforting, addictive, and packed with bold Middle Eastern-inspired flavors. The good news? You can recreate that Halal cart-style chicken and rice right in your own kitchen without waiting in line.

    This step-by-step guide will show you how to prepare juicy, spiced chicken, perfectly seasoned rice, and the signature creamy white sauce, so you can enjoy the ultimate Halal cart experience anytime.


    Why You’ll Love This Halal Cart-Style Chicken and Rice

    • Juicy, marinated chicken with Middle Eastern spices
    • Fluffy, aromatic rice with subtle seasoning
    • Creamy white sauce and optional hot sauce for flavor balance
    • Easy to make at home for dinner or meal prep
    • Customizable for protein, spice level, and sides

    The magic comes from layering flavors—from the garlic and spices in the chicken to the tangy, creamy white sauce that makes every bite irresistible.


    Ingredients You’ll Need

    For the Chicken:

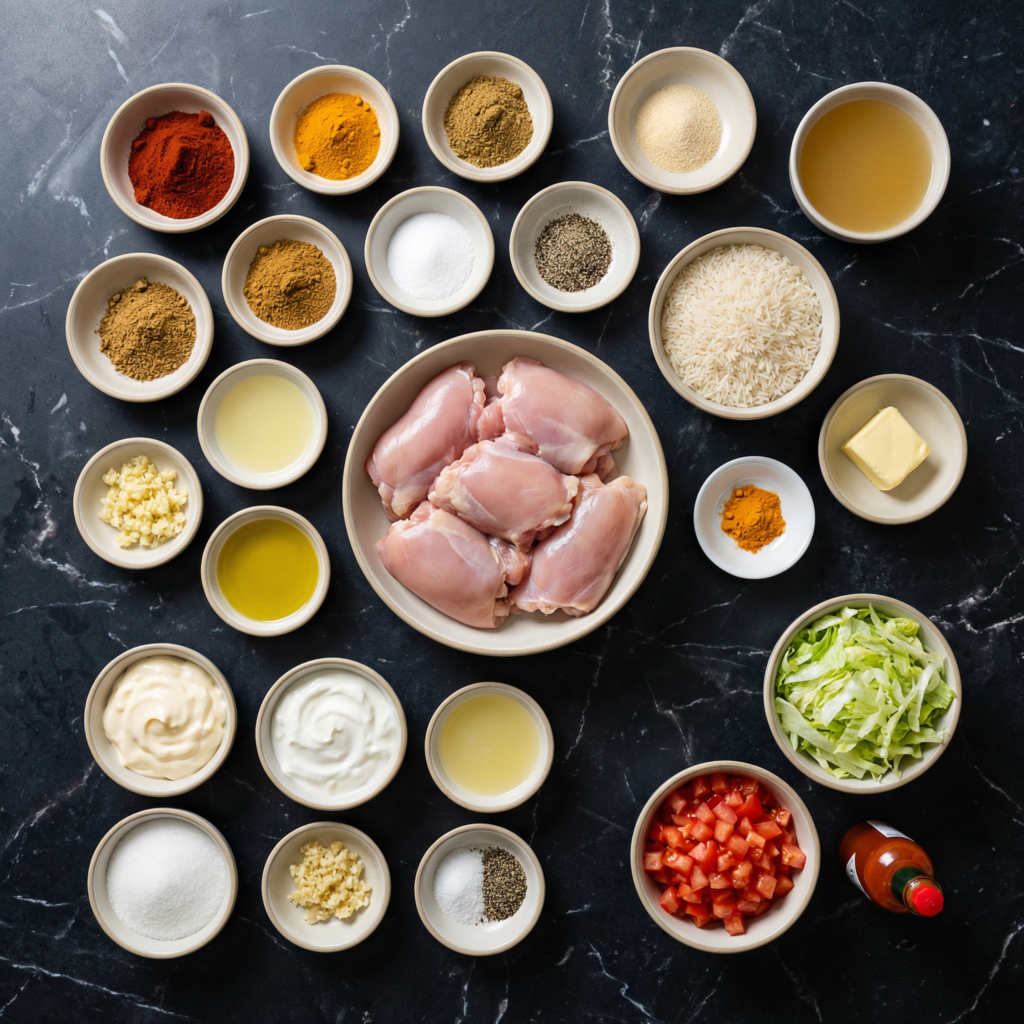
    • 1½ pounds boneless, skinless chicken thighs or breasts, cut into bite-sized pieces
    • 2 tablespoons olive oil
    • 2 teaspoons ground cumin
    • 1 teaspoon ground coriander
    • 1 teaspoon paprika
    • ½ teaspoon turmeric
    • ½ teaspoon ground cinnamon (optional)
    • 2 cloves garlic, minced
    • Juice of 1 lemon
    • Salt and black pepper, to taste

    For the Rice:

    • 2 cups long-grain white rice (or basmati for extra aroma)
    • 4 cups water or chicken broth
    • 1 tablespoon vegetable oil or butter
    • 1 teaspoon turmeric (for color)
    • 1 teaspoon ground cumin
    • ½ teaspoon garlic powder
    • Salt, to taste

    For the White Sauce (Signature Creamy Sauce):

    • ½ cup mayonnaise
    • ½ cup plain Greek yogurt or sour cream
    • 1 teaspoon garlic powder
    • 1 teaspoon sugar
    • 1 tablespoon lemon juice
    • Salt, to taste
    • Optional: 1–2 tablespoons water to thin

    Optional Hot Sauce:

    • Store-bought chili sauce or sriracha for added heat

    Garnish:

    • Chopped fresh parsley
    • Diced onions or pickled vegetables (optional)

    Step 1: Marinate the Chicken

    In a medium bowl, combine olive oil, cumin, coriander, paprika, turmeric, cinnamon (if using), minced garlic, lemon juice, salt, and black pepper.

    Add the chicken pieces and toss until evenly coated. Cover and refrigerate for at least 30 minutes, or up to 2 hours for deeper flavor.

    Marinating ensures the chicken is tender, flavorful, and packed with aromatic spices.


    Step 2: Cook the Rice

    Rinse the rice under cold water until the water runs clear to remove excess starch.

    In a medium saucepan, heat vegetable oil or butter over medium heat. Add the rice, turmeric, cumin, and garlic powder. Stir for 1–2 minutes to toast the spices lightly.

    Add water or chicken broth and a pinch of salt. Bring to a boil, then reduce heat to low, cover, and simmer for 15–18 minutes, or until rice is fluffy and water is absorbed.

    Fluff with a fork and set aside.


    Step 3: Cook the Chicken

    Heat a large skillet or sauté pan over medium-high heat. Add a drizzle of oil if needed.

    Add the marinated chicken in a single layer. Cook for 6–8 minutes, turning occasionally, until the chicken is golden brown on the edges and cooked through.

    Optional: For extra flavor, you can broil the chicken for 1–2 minutes at the end to mimic the slight char of a Halal cart grill.


    Step 4: Prepare the White Sauce

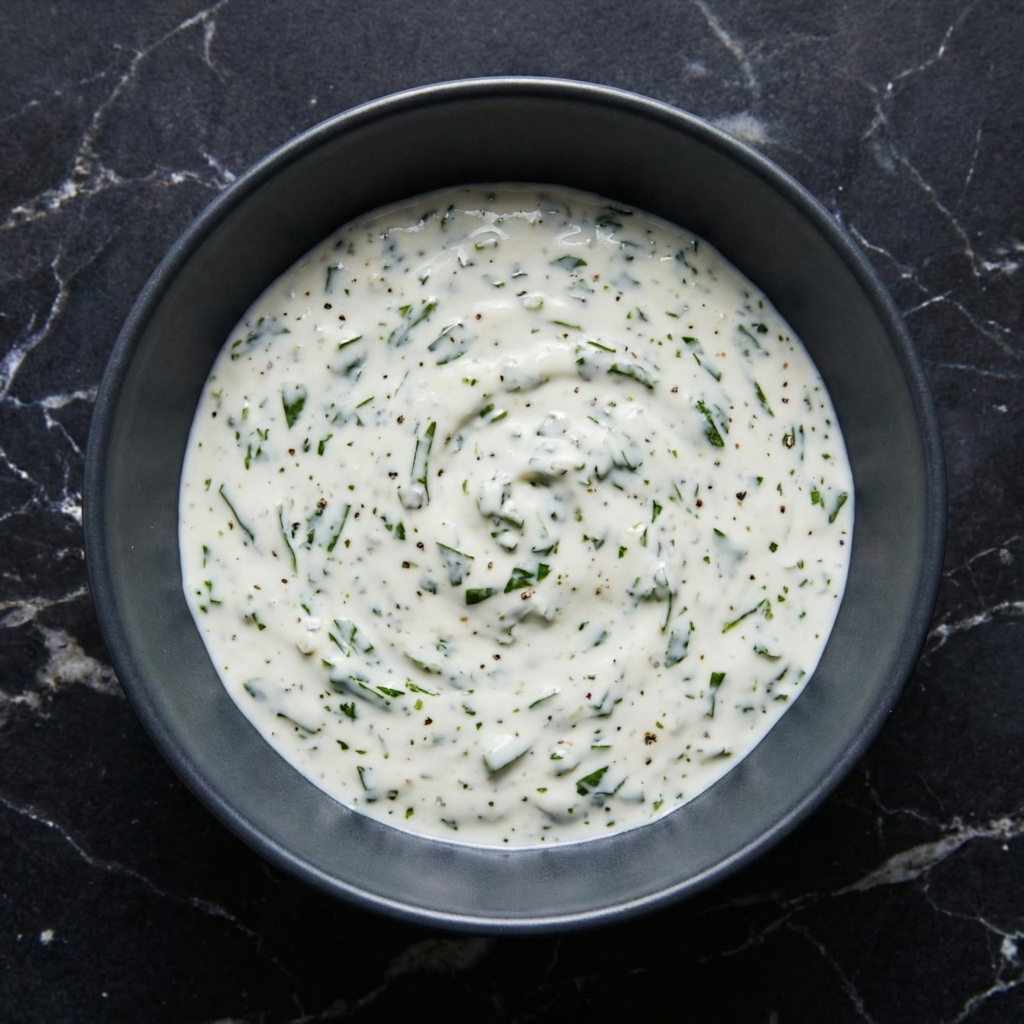
    In a small bowl, combine mayonnaise, Greek yogurt or sour cream, garlic powder, sugar, lemon juice, and salt.

    Whisk until smooth. If the sauce is too thick, add 1–2 tablespoons of water to reach a pourable consistency.

    Taste and adjust: more lemon juice for tang, sugar for balance, or garlic for extra punch.


    Step 5: Assemble Your Halal Cart Chicken and Rice

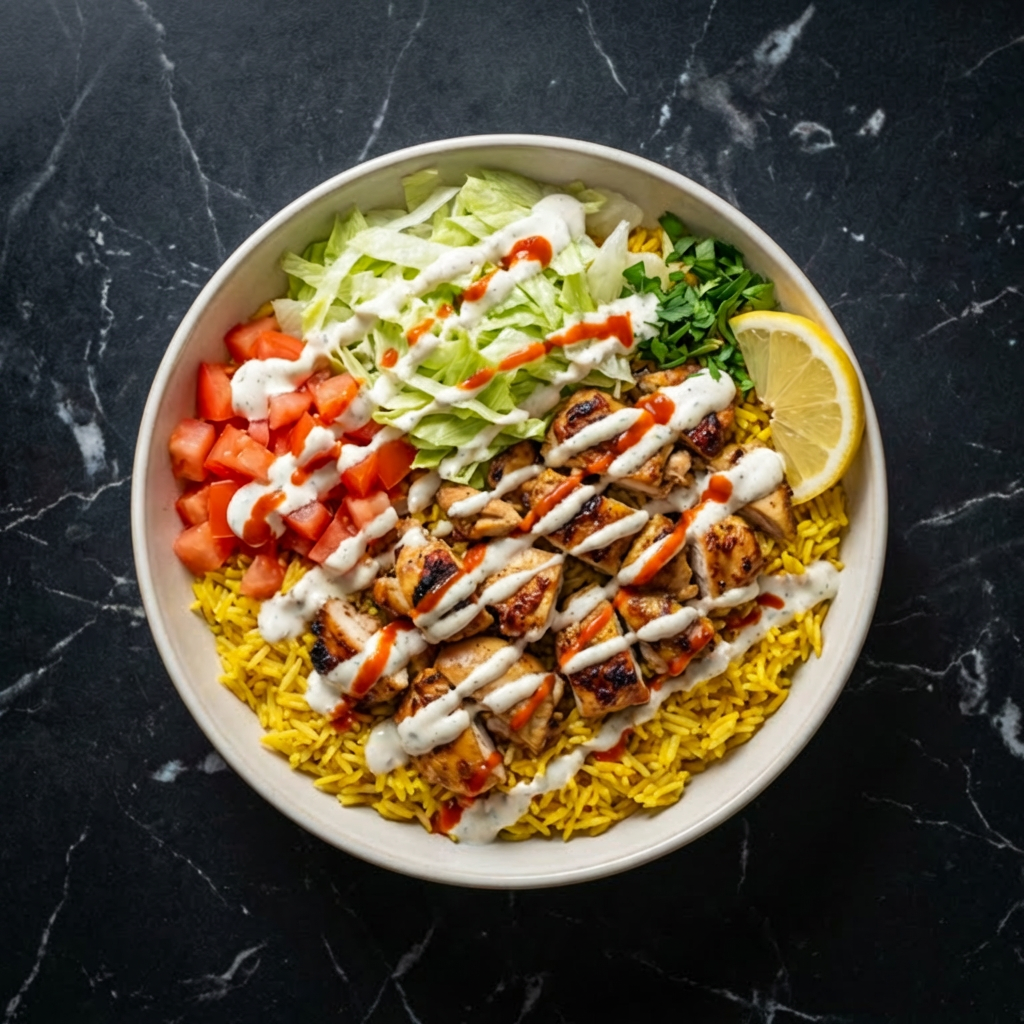
    Place a generous scoop of rice on each plate.

    Top with cooked chicken, ensuring even distribution.

    Drizzle the creamy white sauce generously over the chicken and rice.

    Add a few dashes of hot sauce if you like spice.

    Garnish with chopped parsley, diced onions, or pickled vegetables for an authentic finish.


    Flavor and Texture Highlights

    • Juicy, spiced chicken with a slightly caramelized edge
    • Fluffy, golden rice infused with cumin and turmeric
    • Tangy, creamy white sauce that balances the savory flavors
    • Optional heat from red chili sauce adds complexity
    • Fresh garnishes add crunch and brightness

    Every bite is layered, bold, and satisfying—just like the classic Halal cart experience.


    Tips for Perfect Halal Cart Chicken and Rice

    • Use chicken thighs for juicier, more flavorful meat.
    • Toast the rice with spices before simmering for extra aroma.
    • Marinate the chicken longer for more tender and flavorful results.
    • Drizzle sauce generously—the white sauce is key to authenticity.
    • Serve immediately for best texture, or store rice and chicken separately for meal prep.

    Optional Variations

    • Protein Swap: Use beef, lamb, or tofu for a different twist.
    • Brown Rice Version: Swap white rice for brown rice for added fiber.
    • Extra Veggies: Add roasted peppers, carrots, or zucchini for a complete meal.
    • Spice Level: Adjust hot sauce or add crushed red pepper flakes to taste.
    • Meal Prep Friendly: Store chicken, rice, and sauce separately for easy reheating during the week.

    Storage and Meal Prep

    • Cooked chicken and rice can be stored in airtight containers in the refrigerator for up to 3–4 days.
    • White sauce can be stored separately in a sealed container for up to a week.
    • Reheat chicken in a skillet or oven to maintain juiciness; reheat rice with a splash of water.

    Why This Recipe Works

    This Halal cart-style chicken and rice works because it balances tender, aromatic chicken with perfectly seasoned rice and a creamy, tangy sauce. Layering flavors and textures—from the spiced meat to the creamy drizzle and optional heat—replicates the authentic street food experience.

    It’s easy, customizable, and perfect for anyone craving that iconic Halal cart flavor from the comfort of home.


    With tender, spiced chicken, fluffy golden rice, and creamy white sauce, this Halal Cart-Style Chicken and Rice recipe brings the bold, iconic flavors of NYC street food right to your kitchen.

    Easy to prepare, customizable, and utterly satisfying, it’s a must-try for fans of flavorful, comforting meals.

  • Bright & Fresh: Oven-Baked Salmon with Avocado Cucumber Salsa and Fluffy Rice

    Bright & Fresh: Oven-Baked Salmon with Avocado Cucumber Salsa and Fluffy Rice

    If you want a healthy, vibrant meal that feels elegant but requires minimal effort, this Oven-Baked Salmon with Avocado Cucumber Salsa and Rice is the perfect choice. Baking the salmon in the oven ensures even cooking, tender texture, and hands-off convenience—no splattering stovetop required.

    Paired with cool, creamy avocado cucumber salsa and fluffy rice, this dish delivers the perfect balance of warm and fresh, rich and bright. Let’s walk through it step by step so you can recreate this flavorful meal at home.


    Why Bake the Salmon?

    Oven-baking salmon is:

    • Easier and less messy than pan-searing
    • Great for cooking multiple fillets at once
    • Consistent and beginner-friendly
    • Perfect for juicy, evenly cooked fish

    The gentle heat keeps the salmon moist while allowing the seasoning to shine.


    Ingredients You’ll Need

    For the Rice:

    • 1½ cups jasmine or long-grain white rice
    • 2 cups water
    • ½ teaspoon salt

    For the Oven-Baked Salmon:

    • 4 salmon fillets (about 6 oz each)
    • 1 tablespoon olive oil
    • Salt and black pepper to taste
    • 1 teaspoon garlic powder
    • 1 teaspoon paprika
    • Juice of ½ lemon

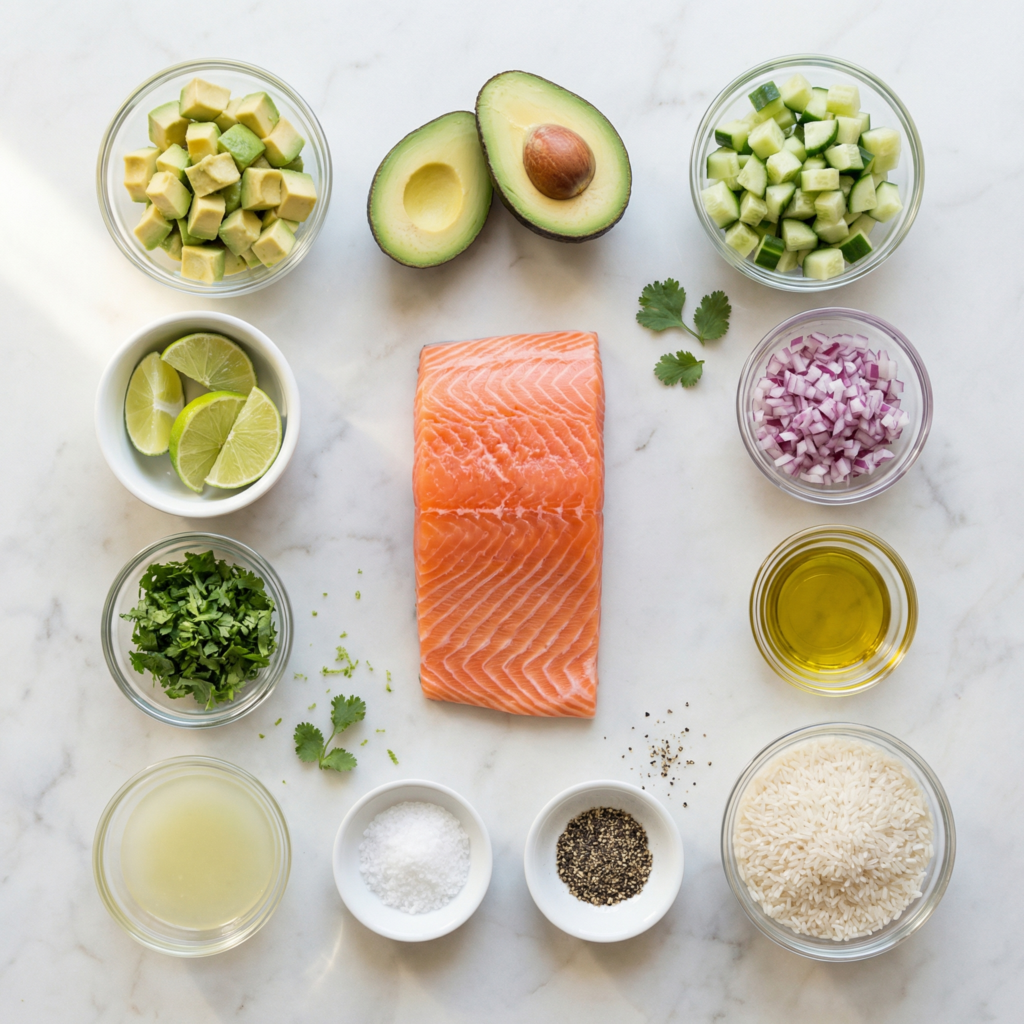
    For the Avocado Cucumber Salsa:

    • 1 ripe avocado, diced
    • 1 cup cucumber, finely chopped
    • 2 tablespoons red onion, finely diced
    • Juice of ½ lemon or lime
    • Salt to taste
    • Optional: chopped fresh cilantro

    Step 1: Preheat the Oven

    Preheat your oven to 400°F (200°C).

    Line a baking sheet with parchment paper or lightly grease a baking dish. This prevents sticking and makes cleanup easy.


    Step 2: Cook the Rice

    Start the rice first so everything finishes at the same time.

    Rinse the rice under cold water until the water runs mostly clear. This removes excess starch and keeps the rice fluffy.

    In a medium saucepan, combine the rinsed rice, water, and salt. Bring to a boil over medium-high heat.

    Once boiling, reduce to low, cover, and simmer for 15 minutes. Do not lift the lid during cooking.

    After 15 minutes, remove from heat and let it sit covered for 5–10 minutes. Fluff gently with a fork before serving.


    Step 3: Prepare the Salmon

    Pat the salmon fillets dry with paper towels. Removing surface moisture helps the seasoning adhere better.

    Place the fillets on the prepared baking sheet.

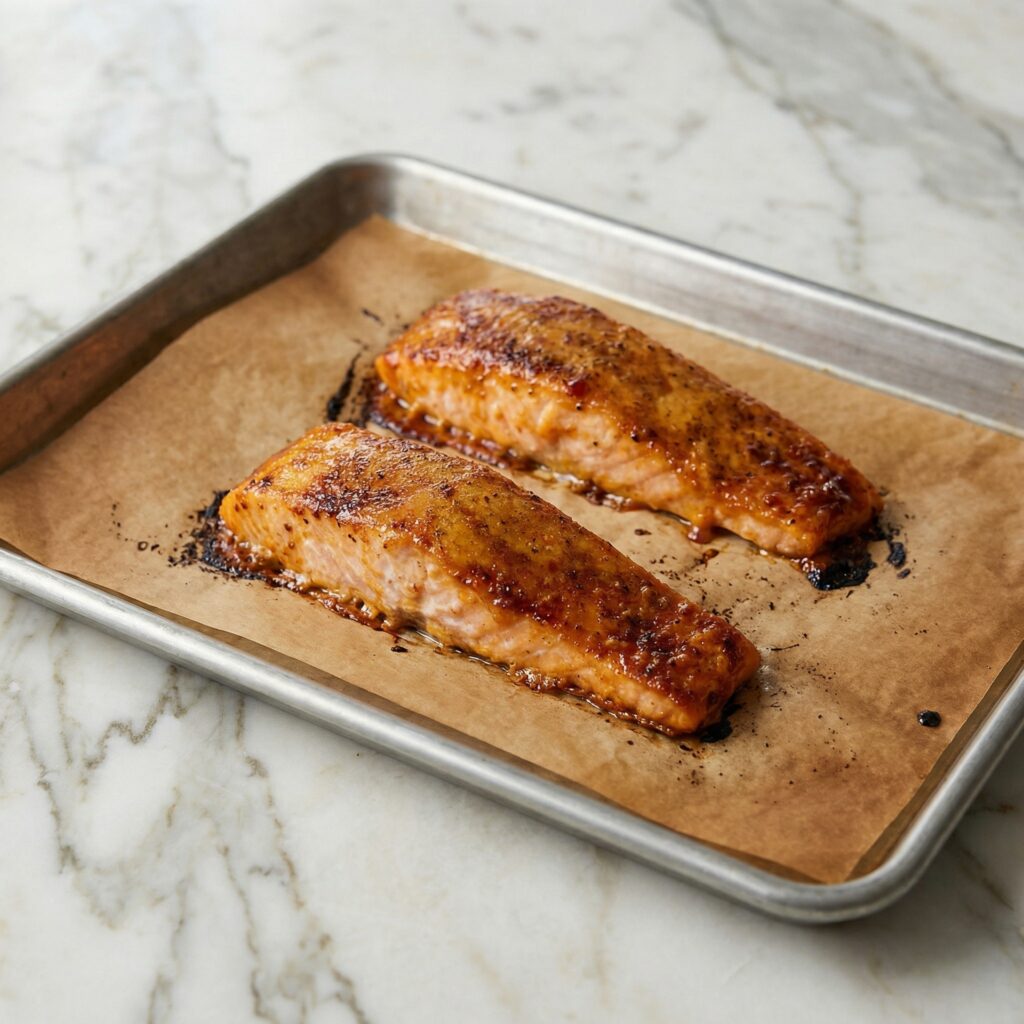
    Drizzle olive oil evenly over the salmon. Season generously with salt, black pepper, garlic powder, and paprika. Squeeze fresh lemon juice over the top for brightness.

    Let the seasoned salmon sit for about 5–10 minutes while the oven finishes preheating.


    Step 4: Bake the Salmon

    Place the baking sheet in the preheated oven.

    Bake for 12–15 minutes, depending on thickness. A general rule is about 4–6 minutes per half-inch of thickness.

    The salmon is done when:

    • It flakes easily with a fork
    • The center is opaque
    • Internal temperature reaches about 125–130°F (52–54°C) for medium

    Avoid overcooking—salmon can dry out quickly.

    If you prefer slightly golden edges, broil for the last 1–2 minutes.


    Step 5: Prepare the Avocado Cucumber Salsa

    While the salmon bakes, make the salsa.

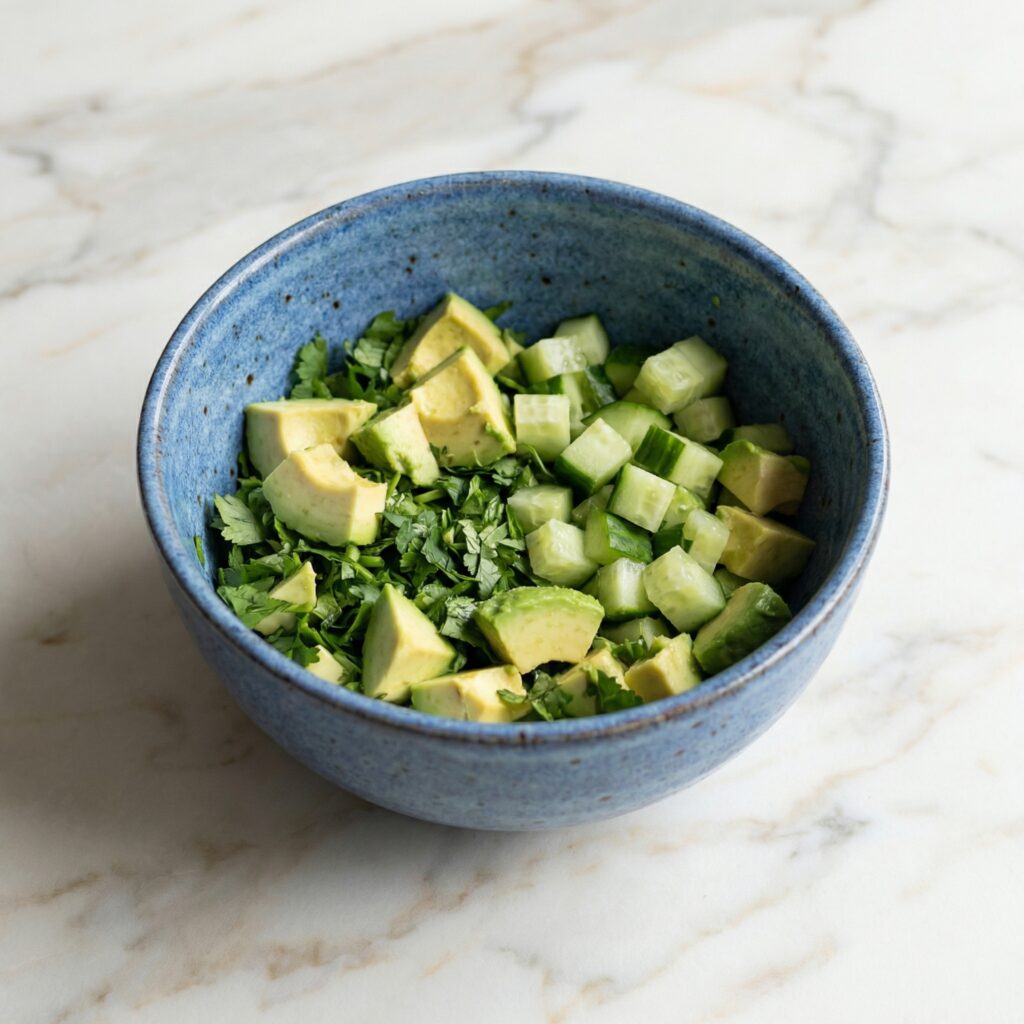
    In a bowl, gently combine diced avocado, chopped cucumber, and red onion.

    Add lemon or lime juice and a pinch of salt. Toss gently to combine without mashing the avocado.

    If using cilantro, fold it in last.

    Place the salsa in the refrigerator until ready to serve.

    Keeping it chilled enhances the refreshing contrast against the warm salmon.


    Step 6: Rest the Salmon

    Once baked, remove the salmon from the oven and let it rest for about 3–5 minutes.

    Resting allows the juices to redistribute and keeps the fish tender.


    Step 7: Assemble the Dish

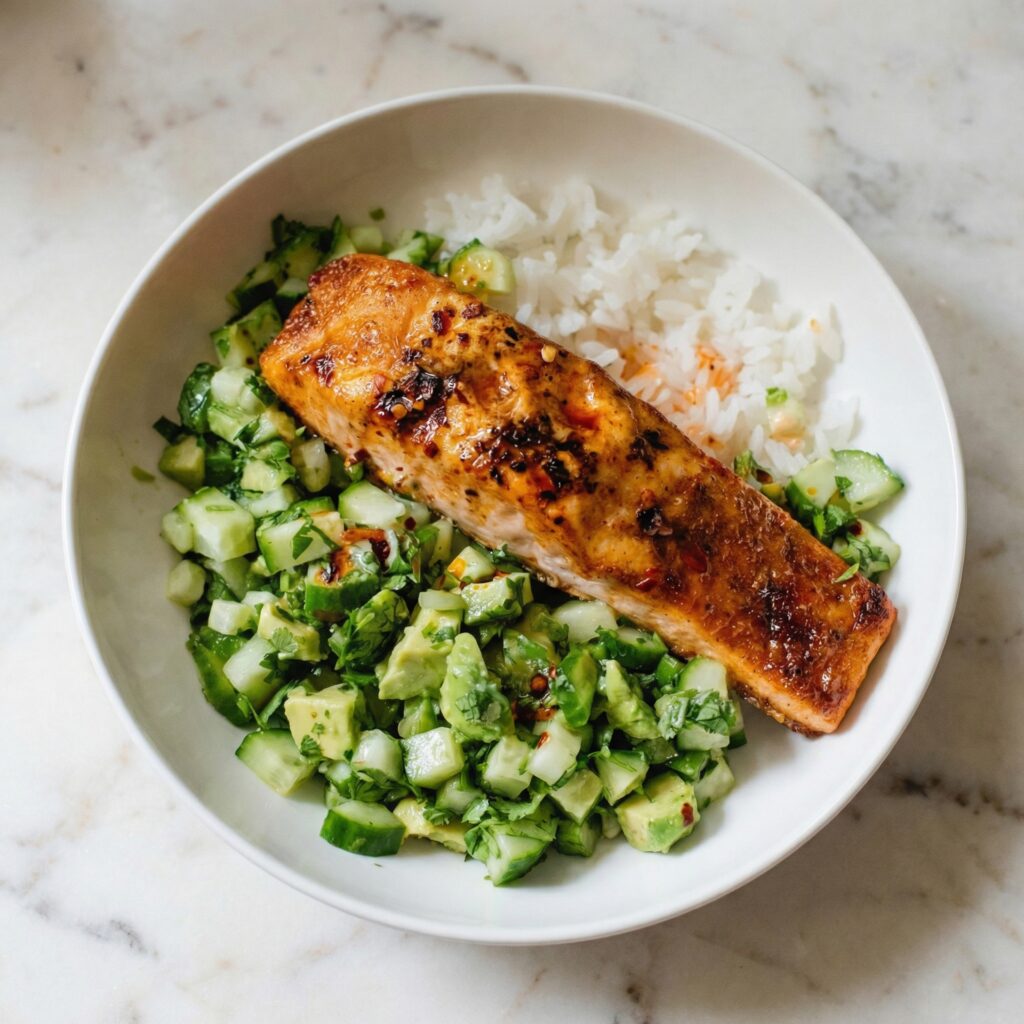
    Spoon a generous serving of fluffy rice onto each plate or bowl.

    Place a warm salmon fillet on top.

    Spoon the chilled avocado cucumber salsa over the salmon.

    The cool salsa melts slightly against the warm fish, creating a beautiful temperature contrast.


    Flavor and Texture Balance

    This dish offers:

    • Tender, flaky baked salmon
    • Creamy avocado richness
    • Crisp cucumber crunch
    • Bright citrus notes
    • Soft, comforting rice

    Every bite feels fresh yet satisfying.


    Tips for Perfect Oven-Baked Salmon

    • Use salmon fillets of similar thickness for even cooking.
    • Don’t overcrowd the baking sheet.
    • Line the pan for easy cleanup.
    • Bake just until flaky—avoid drying it out.
    • Let it rest before serving.

    Optional Variations

    Want to customize?

    • Add diced mango to the salsa for sweetness.
    • Sprinkle red pepper flakes for heat.
    • Use coconut rice for a tropical twist.
    • Drizzle honey over salmon before baking for subtle caramelization.
    • Add a dollop of Greek yogurt mixed with lemon for extra creaminess.

    Storage and Meal Prep

    Store leftovers in airtight containers for up to 2 days.

    Keep salsa separate from salmon and rice to maintain freshness.

    Reheat salmon and rice gently in the microwave or oven at low heat. Add fresh salsa just before serving.

    This recipe makes an excellent meal prep option for healthy lunches.


    Why This Recipe Works

    Baking the salmon keeps the cooking simple and hands-off, while the fresh salsa adds brightness and texture. The rice anchors the dish, making it filling and balanced.

    It’s clean, flavorful, and visually beautiful—perfect for both casual dinners and special occasions.


    Oven-Baked Salmon with Avocado Cucumber Salsa and Rice proves that wholesome meals can be exciting and satisfying. With fresh ingredients and simple techniques, you’ll create a dish that feels vibrant, balanced, and restaurant-worthy—right from your own kitchen.

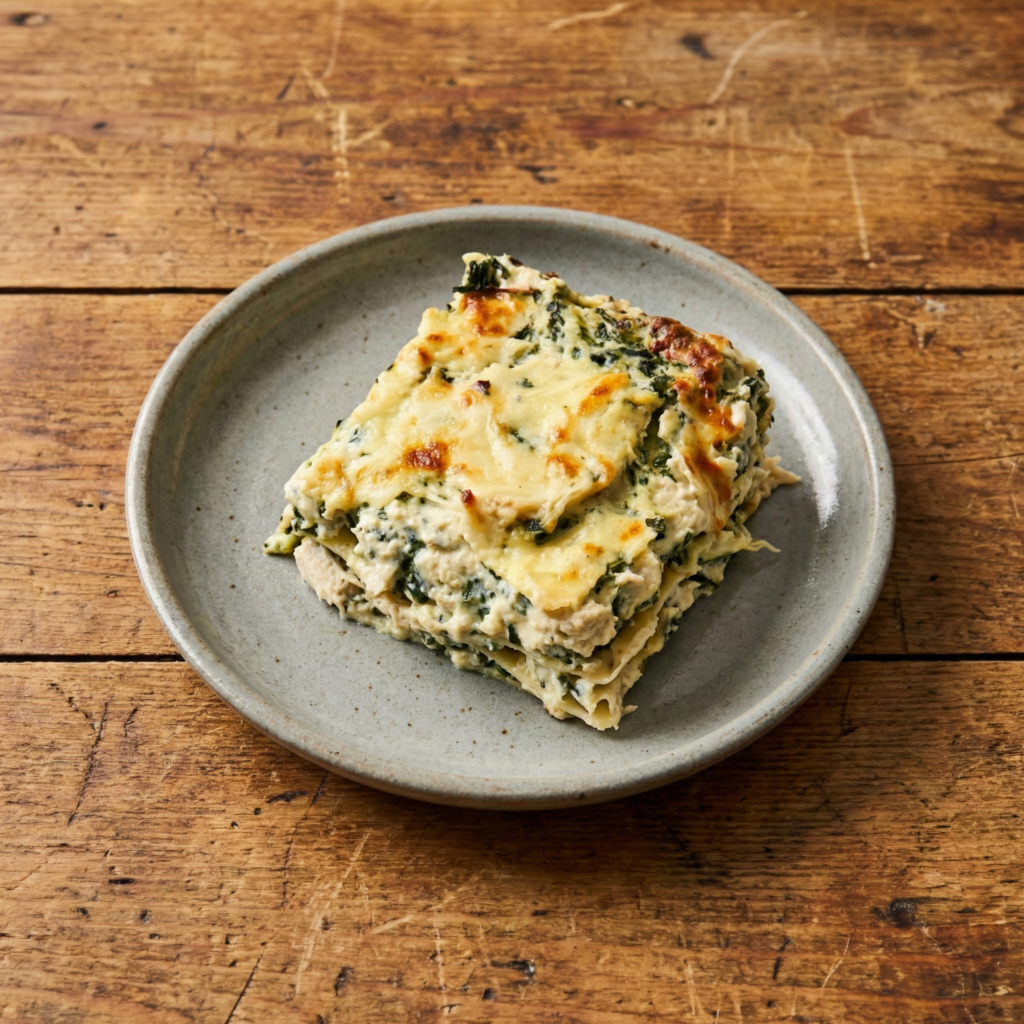
  • Creamy, Cheesy, and Absolutely Decadent: How to Make Chicken Alfredo Lasagna at Home

    Creamy, Cheesy, and Absolutely Decadent: How to Make Chicken Alfredo Lasagna at Home

    If you love the rich, creamy flavors of Alfredo sauce but also crave the comforting layers of lasagna, then Chicken Alfredo Lasagna is the ultimate dish for you.

    This recipe combines tender, shredded chicken, smooth Alfredo sauce, perfectly cooked pasta, and layers of melty cheese to create a decadent, family-friendly meal.

    Unlike traditional tomato-based lasagna, this version is creamy, garlicky, and irresistibly cheesy, making it perfect for dinner parties, weekend indulgence, or a cozy family meal.

    Follow this step-by-step guide to make a restaurant-quality Chicken Alfredo Lasagna right in your own kitchen.


    Ingredients You’ll Need

    For the Chicken:

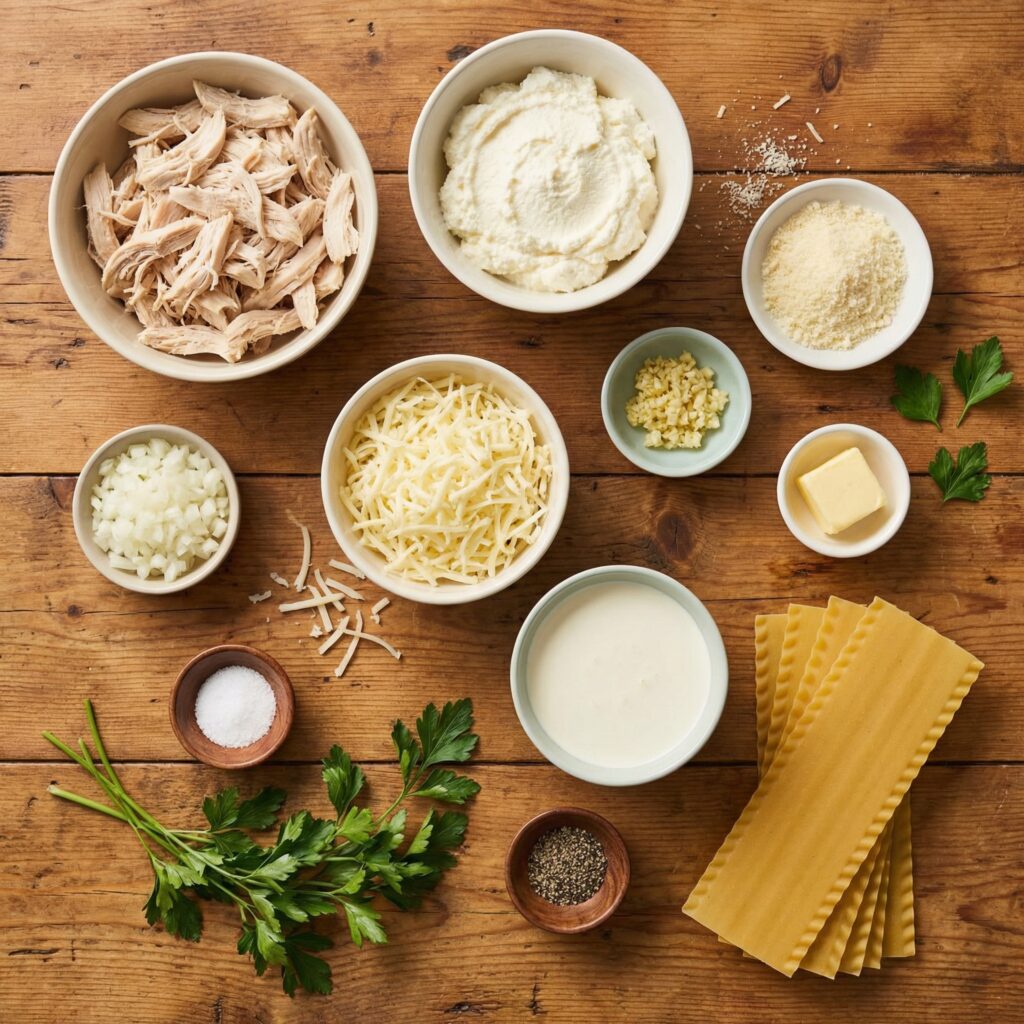
    • 2 cups cooked chicken, shredded (rotisserie chicken works perfectly)
    • 1 teaspoon garlic powder
    • Salt and black pepper, to taste

    For the Alfredo Sauce:

    • 4 tablespoons unsalted butter
    • 3 cloves garlic, minced
    • 2 tablespoons all-purpose flour
    • 2 cups whole milk
    • 1 cup heavy cream
    • 1 cup freshly grated Parmesan cheese
    • ½ teaspoon salt
    • ¼ teaspoon black pepper
    • ¼ teaspoon nutmeg (optional, adds warmth)

    For the Lasagna Layers:

    • 9–12 no-boil lasagna noodles (or traditional noodles, cooked)
    • 2 cups shredded mozzarella cheese
    • 1 cup shredded provolone or fontina cheese
    • Fresh parsley, chopped, for garnish

    Step 1: Prepare the Chicken

    If you haven’t done so already, cook and shred your chicken. Rotisserie chicken saves time and adds flavor, but you can also poach or bake chicken breasts.

    Season the shredded chicken with garlic powder, salt, and pepper. Set aside until ready to layer in the lasagna.


    Step 2: Make the Alfredo Sauce

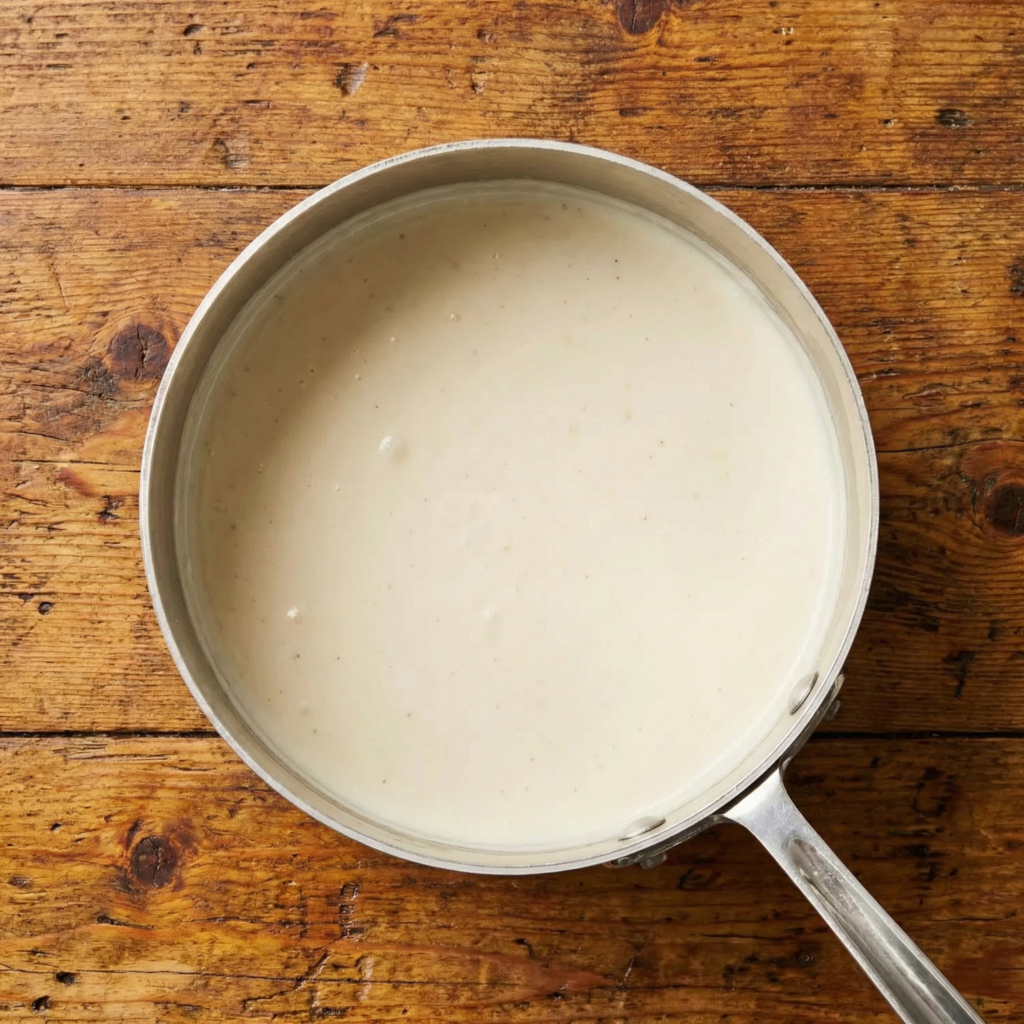
    In a medium saucepan over medium heat, melt butter. Add minced garlic and sauté for 30–60 seconds until fragrant, taking care not to burn it. Sprinkle in flour and whisk continuously for 1–2 minutes to form a roux.

    Slowly pour in milk and heavy cream, whisking constantly to avoid lumps. Bring to a gentle simmer and let the sauce thicken, about 4–5 minutes. Remove from heat and stir in Parmesan cheese, salt, pepper, and optional nutmeg until smooth. Taste and adjust seasoning as needed.


    Step 3: Preheat the Oven

    Preheat your oven to 375°F (190°C).

    Lightly grease a 9×13-inch baking dish with butter or nonstick cooking spray to prevent sticking.


    Step 4: Layer the Lasagna

    Start by spreading a thin layer of Alfredo sauce on the bottom of the baking dish. This prevents the noodles from sticking and adds a creamy base.

    Next, place a layer of lasagna noodles over the sauce, slightly overlapping if necessary. Spread a portion of shredded chicken evenly over the noodles, then drizzle more Alfredo sauce on top. Sprinkle a mix of mozzarella and provolone cheeses evenly.

    Repeat the layers: noodles → chicken → sauce → cheese, until all ingredients are used. The final layer should be noodles topped generously with Alfredo sauce and shredded cheese.


    Step 5: Cover and Bake

    Cover the dish with aluminum foil to prevent the top from browning too quickly. Bake in the preheated oven for 25 minutes.

    Then remove the foil and bake for an additional 15–20 minutes, until the top is golden and bubbly.


    Step 6: Let It Rest

    Remove the lasagna from the oven and allow it to rest for 10–15 minutes before slicing.

    Resting helps the layers set and makes serving easier while keeping the creamy texture intact.


    Step 7: Serve and Garnish

    Slice the lasagna into squares and serve warm.

    Garnish with freshly chopped parsley for color and freshness.

    Pair with a crisp green salad or garlic bread to complete the meal.


    Tips for the Perfect Chicken Alfredo Lasagna

    1. Use freshly grated Parmesan – Pre-grated cheese can be coated with anti-caking agents, affecting how smoothly it melts.
    2. No-boil noodles save time – But ensure your sauce is generous enough to soften them completely.
    3. Shred chicken finely – This helps distribute it evenly and ensures each bite has chicken.
    4. Adjust cheese ratios – Use more mozzarella for stretchiness or add fontina for a richer flavor.
    5. Optional vegetables – Add spinach, mushrooms, or roasted red peppers between layers for extra flavor and texture.

    Storage and Reheating

    • Store leftover lasagna in an airtight container in the refrigerator for up to 3 days.
    • Reheat slices in the microwave or oven at 350°F (175°C) for 10–15 minutes until warmed through.
    • For freezing, wrap portions tightly in foil or plastic wrap and freeze for up to 2 months. Thaw overnight in the refrigerator before reheating.

    This Chicken Alfredo Lasagna is rich, cheesy, and creamy without being overwhelming.

    The tang of the Parmesan, the melt-in-your-mouth noodles, and the tender chicken make it a crowd-pleaser for family dinners, potlucks, or special occasions. Each bite is comfort food perfection, combining creamy sauce, cheesy layers, and hearty protein in a single, satisfying dish.

    With just a little prep and layering, you can enjoy homemade, restaurant-quality lasagna in the comfort of your kitchen. Once you try it, this creamy, cheesy, chicken-filled lasagna will become a staple for special dinners and family favorites alike.

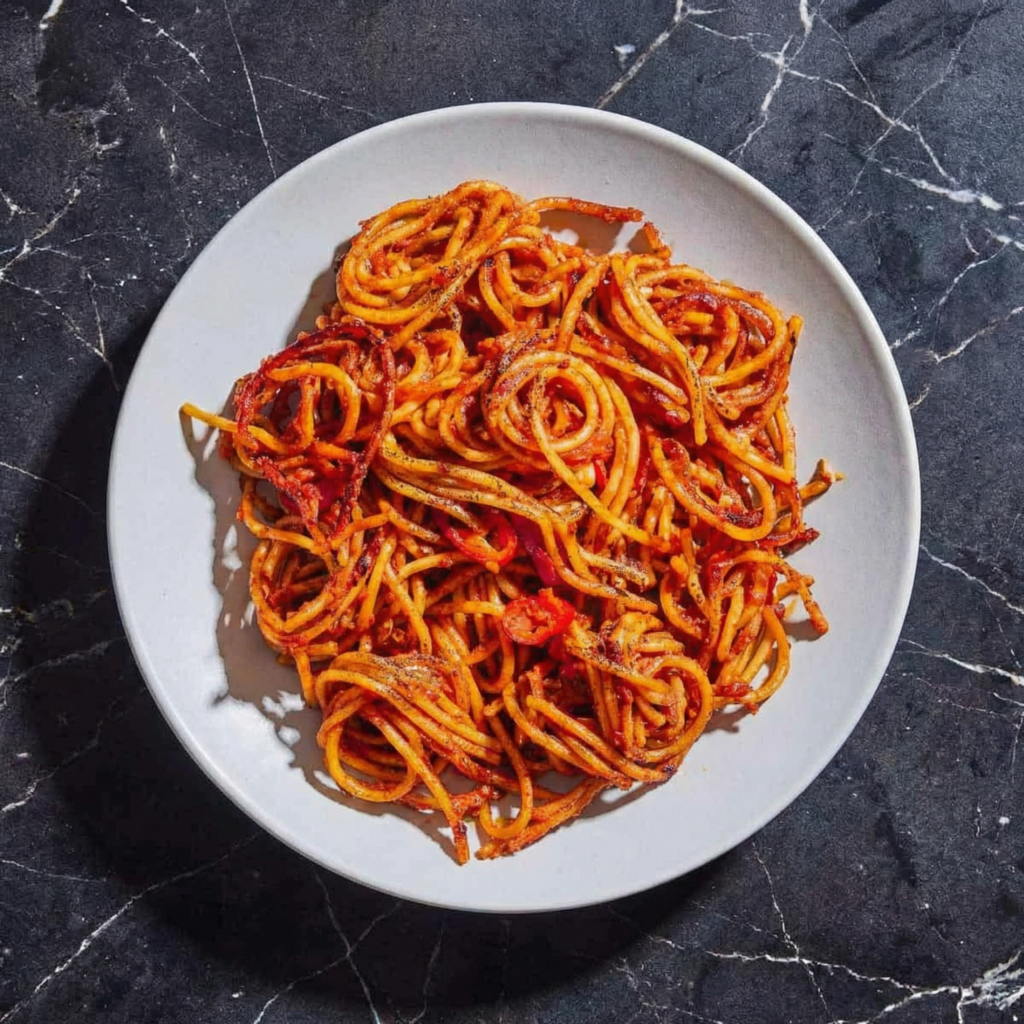
  • Fiery, Crispy, and Utterly Addictive: How to Make Spaghetti All’Assassina at Home

    Fiery, Crispy, and Utterly Addictive: How to Make Spaghetti All’Assassina at Home

    If you’re looking for a pasta dish that’s bold, intense, and completely unforgettable, Spaghetti All’Assassina is the answer.

    Hailing from Bari, Italy, this “killer spaghetti” earns its name from the dramatic, almost theatrical way it’s prepared—spaghetti is cooked directly in a spicy, rich tomato sauce that clings to every strand and forms a delectably crispy crust at the bottom of the pan.

    Unlike traditional pasta dishes, there’s no boiling water beforehand; the pasta cooks entirely in the sauce, absorbing every bit of flavor and spice. With this step-by-step guide, you can recreate this fiery, restaurant-quality pasta at home, guaranteed to impress anyone brave enough to take on the heat.


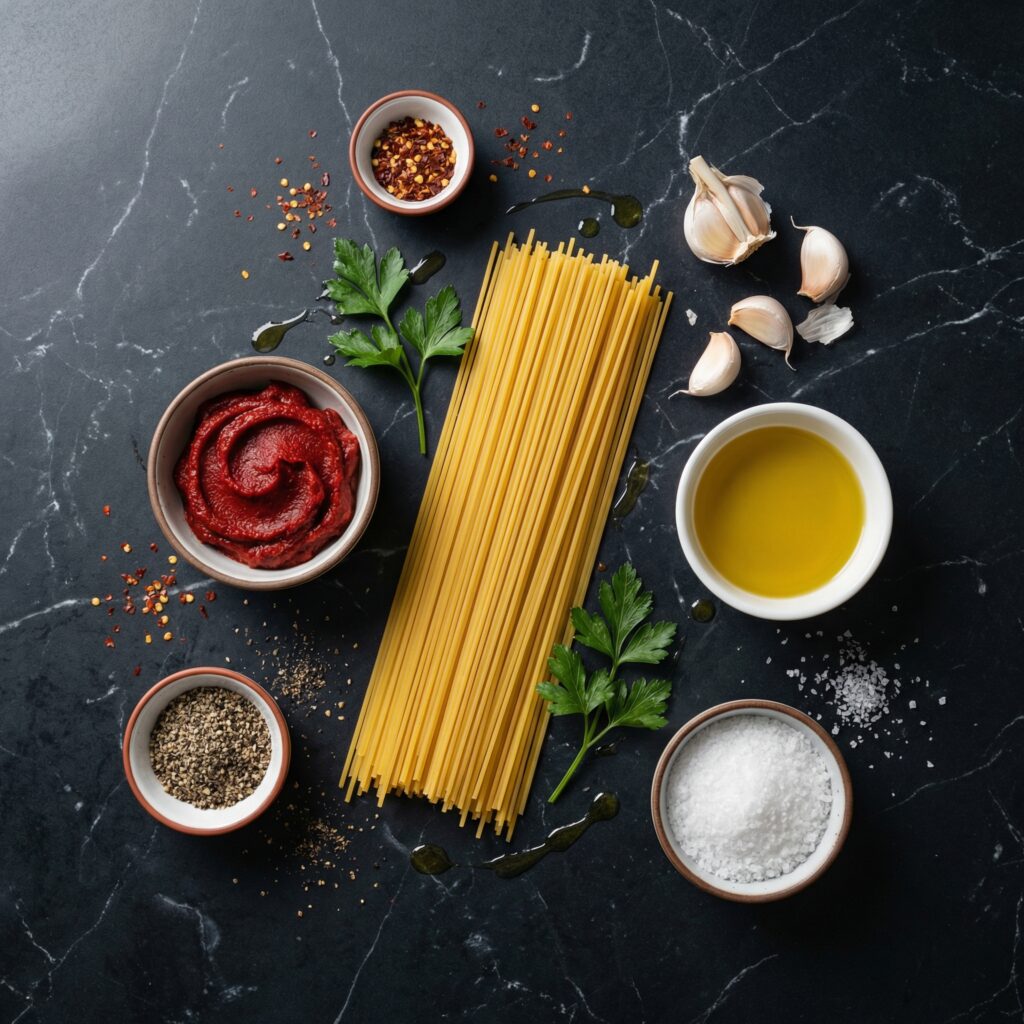
    Ingredients You’ll Need

    For authentic Spaghetti All’Assassina, fresh, high-quality ingredients are key. Here’s what you’ll need for about 2–3 servings:

    • 200g spaghetti (preferably spaghetti No. 5)
    • 400g canned peeled tomatoes, crushed by hand or blended
    • 3 tbsp extra virgin olive oil
    • 3 cloves garlic, minced
    • 1–2 tsp red chili flakes (adjust based on spice tolerance)
    • 1 tsp sweet paprika (optional, adds depth)
    • 1 tsp tomato paste
    • 1 cup pasta cooking water (or more as needed)
    • Salt, to taste
    • Freshly ground black pepper, to taste
    • Optional: grated Pecorino Romano or Parmigiano-Reggiano for serving

    Step 1: Prepare the Ingredients

    Before you start, crush your tomatoes, mince the garlic, and measure out the chili flakes, olive oil, and tomato paste.

    Spaghetti All’Assassina is all about timing—having ingredients ready ensures that the pasta cooks evenly and absorbs maximum flavor.


    Step 2: Heat the Oil and Garlic

    In a large, heavy-bottomed skillet or sauté pan, heat olive oil over medium heat.

    Add the minced garlic and sauté for 30–45 seconds until fragrant, taking care not to burn it. The garlic infuses the oil with a rich aroma that forms the base of the sauce.


    Step 3: Add the Chili and Paprika

    Sprinkle in the red chili flakes and, if using, the sweet paprika. Stir for a few seconds to toast the spices lightly, releasing their natural oils and enhancing their flavor.

    This step gives the dish its signature kick and deep color.


    Step 4: Build the Sauce

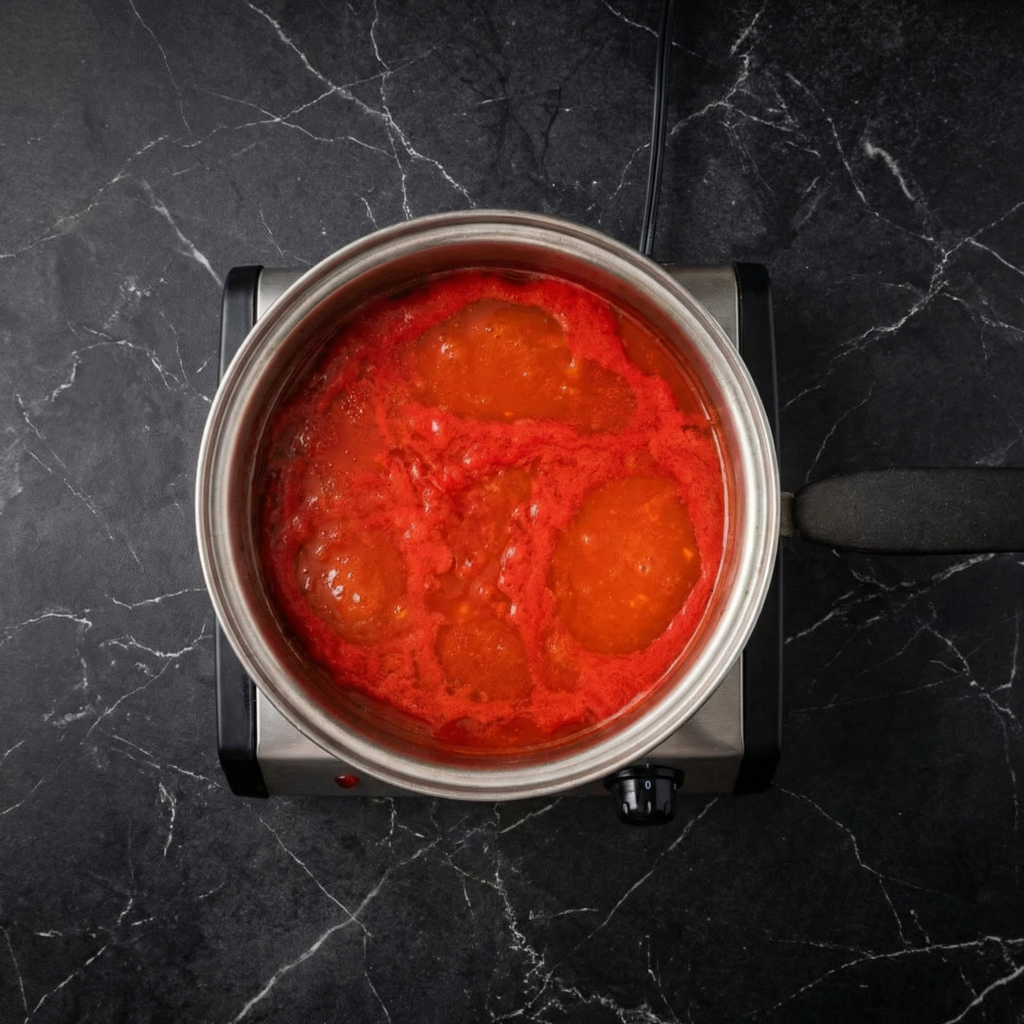
    Add the tomato paste and water to the pan, stirring to combine with the spiced oil. Then, pour in the crushed tomatoes. Season with salt and pepper to taste.

    Allow the sauce to simmer gently for 5–7 minutes, stirring occasionally, until it thickens slightly and the flavors meld.


    Step 5: Add the Spaghetti

    Unlike traditional pasta recipes, you do not boil the spaghetti first. Break the dry spaghetti in half if necessary and add it directly to the simmering sauce.

    Stir well to coat the strands with sauce, ensuring they don’t stick together. The pasta will gradually absorb the tomato sauce and the fiery flavors of the chili.


    Step 6: Create the Crispy Bottom (The “Soccarata”)

    One of the defining characteristics of Spaghetti All’Assassina is the crispy, caramelized layer of pasta that forms at the bottom of the pan, called the “soccarata.”

    Once the pasta is nearly done, stop stirring for a few minutes and let it sit over medium heat. The bottom will crisp slightly, creating a deep, toasted flavor that contrasts beautifully with the tender spaghetti above.


    Step 7: Check for Seasoning

    Taste the spaghetti and adjust salt, pepper, or chili flakes as needed.

    The dish should have a perfect balance of heat, acidity from the tomatoes, and savory depth from the garlic and oil.


    Step 8: Serve the Spaghetti

    Once the pasta is fully cooked and the bottom layer is golden and crisp, transfer the spaghetti to serving plates.

    Use a spatula to scoop some of the “soccarata” from the bottom for each portion—this crispy element is what makes Spaghetti All’Assassina truly special. Sprinkle with grated Pecorino Romano or Parmigiano-Reggiano if desired.


    Step 9: Enjoy Immediately

    Spaghetti All’Assassina is best enjoyed fresh and piping hot, straight from the pan.

    The contrast between tender pasta and the crispy, slightly charred bottom is what makes this dish unique. Pair with a simple green salad or crusty bread to complete the meal, and be prepared for an intense, flavorful experience.


    Tips for Perfect Spaghetti All’Assassina

    1. Don’t pre-boil the pasta – cooking it directly in the sauce is essential.
    2. Use a heavy-bottomed pan – this ensures even heat and helps form the soccarata.
    3. Adjust chili to taste – the dish should be spicy but balanced.
    4. Break the spaghetti if necessary – makes it easier to stir and coat with sauce.
    5. Patience is key – let the bottom crisp for a few minutes without stirring for the perfect texture.

    Spaghetti All’Assassina is a bold and unforgettable Italian dish that transforms simple ingredients into something extraordinary.

    The tender pasta, intense tomato-chili sauce, and crispy caramelized soccarata make it a meal that’s both dramatic and deeply satisfying. With this recipe, you can bring a taste of Bari’s streets into your home—fiery, crispy, and utterly addictive.


    Ready to experience the thrill of Spaghetti All’Assassina in your own kitchen?

    Follow these steps carefully, and you’ll have a pasta dish that’s tender, crispy, and packed with fiery Italian flavor in every bite.
  • Classic Beef Wellington Recipe: The Ultimate Step-by-Step Guide for Perfect Results

    Classic Beef Wellington Recipe: The Ultimate Step-by-Step Guide for Perfect Results

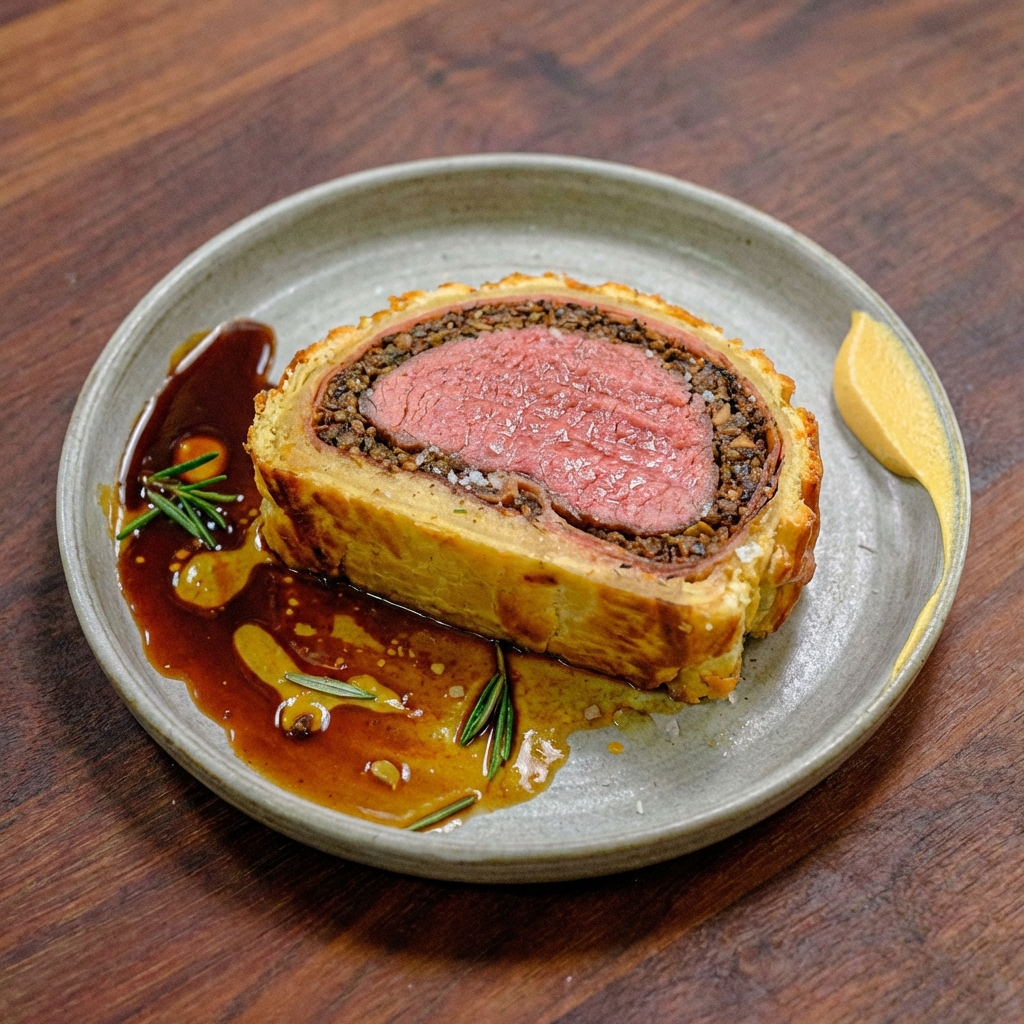
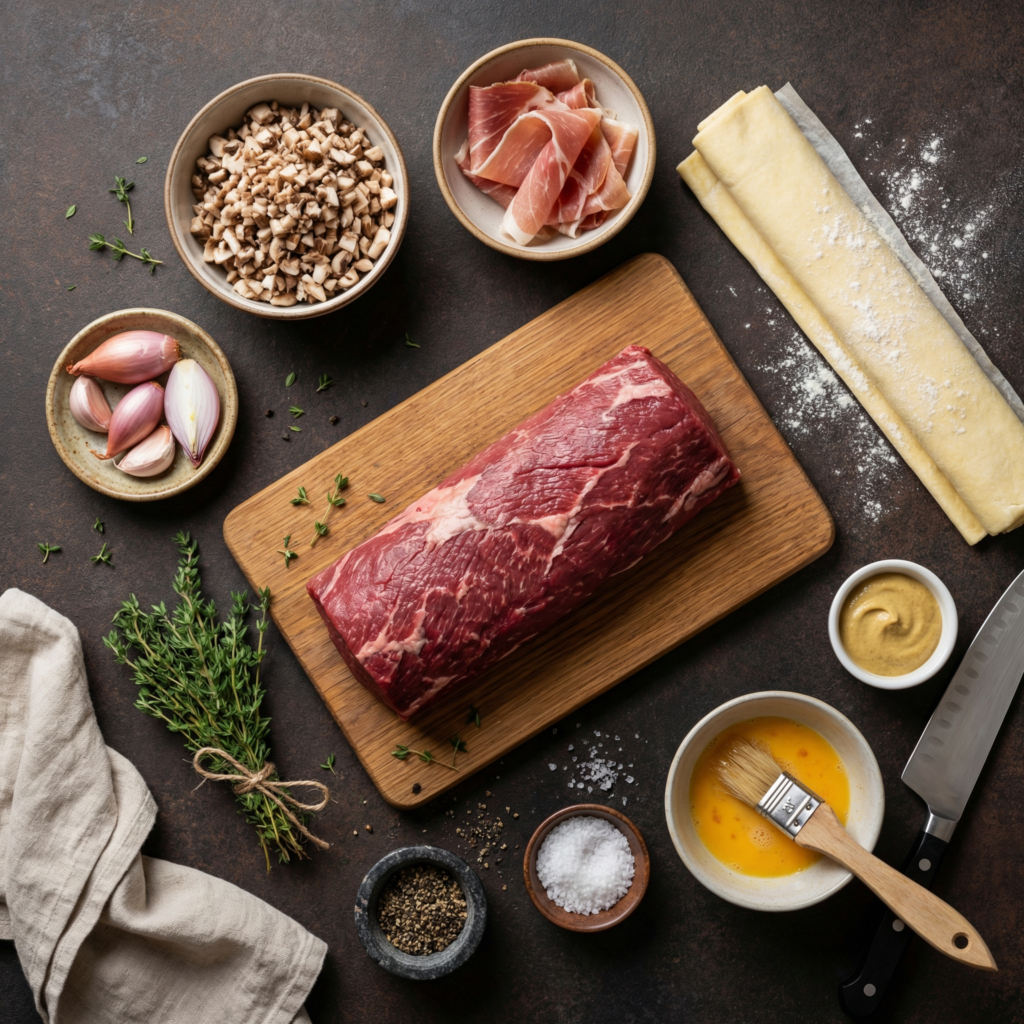
    If you’ve ever wanted to make a restaurant-quality Beef Wellington, this step-by-step recipe shows you exactly how to create a perfectly cooked beef tenderloin wrapped in mushroom duxelles, prosciutto, and golden puff pastry.

    This classic Beef Wellington recipe delivers a juicy center, crisp pastry exterior, and rich savory flavor that makes it ideal for holidays, dinner parties, or special occasions.

    This easy Beef Wellington guide simplifies every step so even home cooks can confidently prepare this elegant centerpiece.

    Why This Is the Best Beef Wellington Recipe

    Beef Wellington is famous for its luxurious flavor and impressive presentation. When done correctly, the contrast between flaky pastry and tender beef creates one of the most iconic dishes in classic French and British cuisine.
    Reasons to love this recipe:

    • Step-by-step instructions for beginners
    • Perfect medium-rare beef every time
    • Crispy puff pastry that doesn’t get soggy
    • Ideal for holidays, Christmas, and celebrations
    • Restaurant-style gourmet dinner at home

    Ingredients for Beef Wellington

    Using high-quality ingredients ensures the best flavor and texture.

    Main Ingredients

    • 2–3 lb beef tenderloin (center-cut)
    • Salt and freshly ground black pepper
    • 2 tablespoons olive oil
    • 2 tablespoons Dijon mustard

    Mushroom Duxelles

    • 1 lb mushrooms, finely chopped
    • 2 tablespoons butter
    • 2 cloves garlic, minced
    • 2 shallots, finely chopped
    • Salt and pepper to taste
    • Fresh thyme leaves

    Assembly

    • 8–10 slices prosciutto
    • 1 sheet puff pastry, thawed
    • 1 egg, beaten (egg wash)

    How to Make Beef Wellington (Step-by-Step)

    Step 1: Prepare the Beef Tenderloin

    Pat the beef dry with paper towels and season generously with salt and pepper.

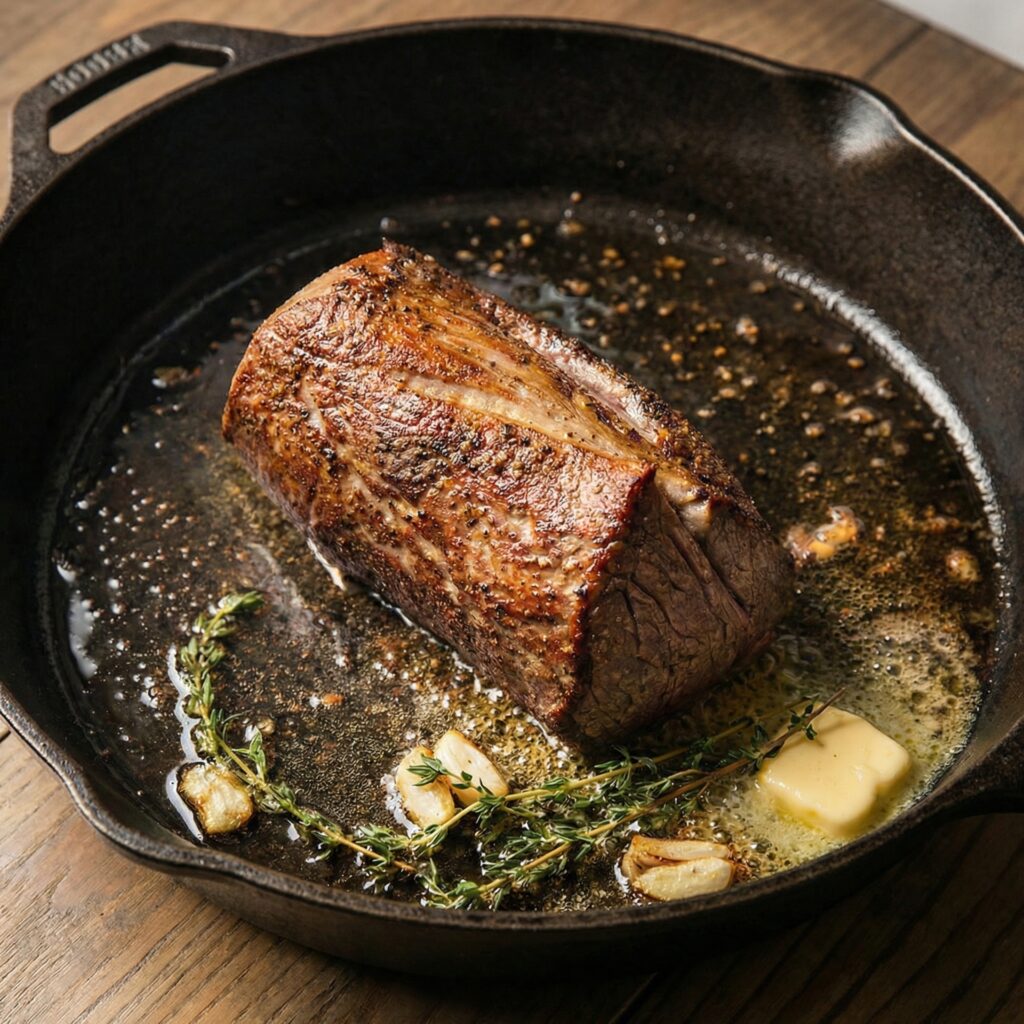
    Heat olive oil in a large skillet over high heat and sear the beef on all sides until browned, about 1–2 minutes per side. This locks in flavor and creates a rich crust.

    Remove from heat and brush the tenderloin with Dijon mustard while still warm. Let cool completely before assembling.

    Step 2: Make the Mushroom Duxelles

    In the same pan, melt butter over medium heat. Add chopped mushrooms, shallots, garlic, thyme, salt, and pepper.

    Cook until the mixture becomes dry and paste-like, about 10–15 minutes. Removing excess moisture is essential to prevent soggy pastry.

    Transfer to a plate and allow the mixture to cool fully.

    Step 3: Wrap with Prosciutto

    Lay plastic wrap on your work surface and arrange prosciutto slices slightly overlapping to form a rectangle large enough to wrap the beef. Spread the cooled mushroom duxelles evenly over the prosciutto.

    Place the seared tenderloin on top and use the plastic wrap to roll everything tightly into a cylinder. Twist the ends to secure and refrigerate for 20–30 minutes to help maintain shape.

    Step 4: Wrap in Puff Pastry

    Roll out the puff pastry on a lightly floured surface until large enough to enclose the beef completely. Remove the beef from the plastic wrap and place it in the center of the pastry.

    Fold the pastry over the beef, sealing the edges tightly. Trim any excess pastry and place the Wellington seam-side down on a baking sheet lined with parchment paper.

    Brush the entire surface with egg wash for a glossy golden finish.

    Step 5: Chill Before Baking

    Refrigerate the assembled Wellington for another 15–20 minutes. Chilling helps the pastry stay crisp and prevents shrinking during baking.

    Step 6: Bake to Perfection

    Preheat the oven to 400°F (200°C). Bake the Beef Wellington for 40–45 minutes, or until the pastry is deep golden brown and an internal thermometer reads:

    • 125°F for rare
    • 135°F for medium-rare
    • 145°F for medium

    Let the Wellington rest for at least 10 minutes before slicing to retain juices.

    Pro Tips for Perfect Beef Wellington

    • Use center-cut beef tenderloin for even cooking.
    • Ensure the mushroom duxelles is dry to keep pastry crisp.
    • Chill between wrapping steps for better structure.
    • Use a meat thermometer for precise doneness.
    • Rest the meat before slicing to prevent juice loss.

    Serving Suggestions

    Beef Wellington pairs beautifully with classic steakhouse sides, including:

    • Garlic mashed potatoes
    • Roasted asparagus or green beans
    • Red wine reduction sauce
    • Creamy mushroom sauce
    • Buttered carrots or roasted root vegetables

    These sides balance the richness of the pastry and tender beef.

    Make-Ahead and Storage Tips

    You can assemble Beef Wellington up to 24 hours ahead and refrigerate until ready to bake. This makes it an excellent option for holiday meal preparation.

    Leftovers can be stored in the refrigerator for up to 3 days and reheated gently in the oven at 325°F to maintain pastry texture.

    Frequently Asked Questions

    What cut of beef is best for Beef Wellington?
    Beef tenderloin is ideal because of its tenderness and uniform shape, ensuring even cooking.

    How do I keep the pastry from getting soggy?
    Cook the mushroom mixture until dry, chill the wrapped beef before baking, and avoid excess moisture.

    Can I make individual Beef Wellingtons?
    Yes, smaller individual portions cook faster and are perfect for elegant dinner parties.

    Final Thoughts

    This classic Beef Wellington recipe is one of the most impressive dishes you can prepare at home.

    With tender beef, flavorful mushroom duxelles, savory prosciutto, and buttery puff pastry, it delivers a gourmet dining experience that rivals fine restaurants.

    By following these step-by-step Beef Wellington instructions, you can confidently create a stunning holiday centerpiece or celebratory meal that will leave guests truly impressed.