Tag: comfort food

  • Crispy Pork Schnitzel Recipe: Easy German-Style Classic in 30 Minutes

    Crispy Pork Schnitzel Recipe: Easy German-Style Classic in 30 Minutes

    If you’re craving a crispy pork schnitzel that’s golden on the outside, juicy on the inside, and unbelievably easy to make at home, you’re in the right place.

    This authentic German pork schnitzel recipe uses simple pantry ingredients and delivers restaurant-quality results in under 30 minutes.

    Perfect for busy weeknights or a comforting weekend meal, this easy pork schnitzel pairs beautifully with potatoes, salad, or spaetzle—and it’s a guaranteed crowd-pleaser.


    What Is Pork Schnitzel?

    Pork schnitzel is a breaded pork cutlet, pounded thin, coated in breadcrumbs, and pan-fried until crispy.

    Originating from Germany and Austria, this dish is known for its light, crunchy crust and tender meat.

    Ingredients for Crispy Pork Schnitzel

    • 4 boneless pork chops (center-cut or pork loin)
    • 1 cup all-purpose flour
    • 2 large eggs
    • 1½ cups breadcrumbs (panko or traditional)
    • 1 teaspoon salt
    • ½ teaspoon black pepper
    • ½ teaspoon paprika (optional)
    • Vegetable oil or canola oil, for frying
    • Lemon wedges, for serving

    Optional additions for extra flavor:

    • Garlic powder
    • Onion powder
    • Fresh parsley, chopped

    How to Make Pork Schnitzel

    Step 1: Pound the Pork Cutlets

    Place the pork chops between two pieces of plastic wrap or parchment paper. Using a meat mallet, pound them to about ¼-inch thickness. This ensures even cooking and ultra-tender schnitzel.


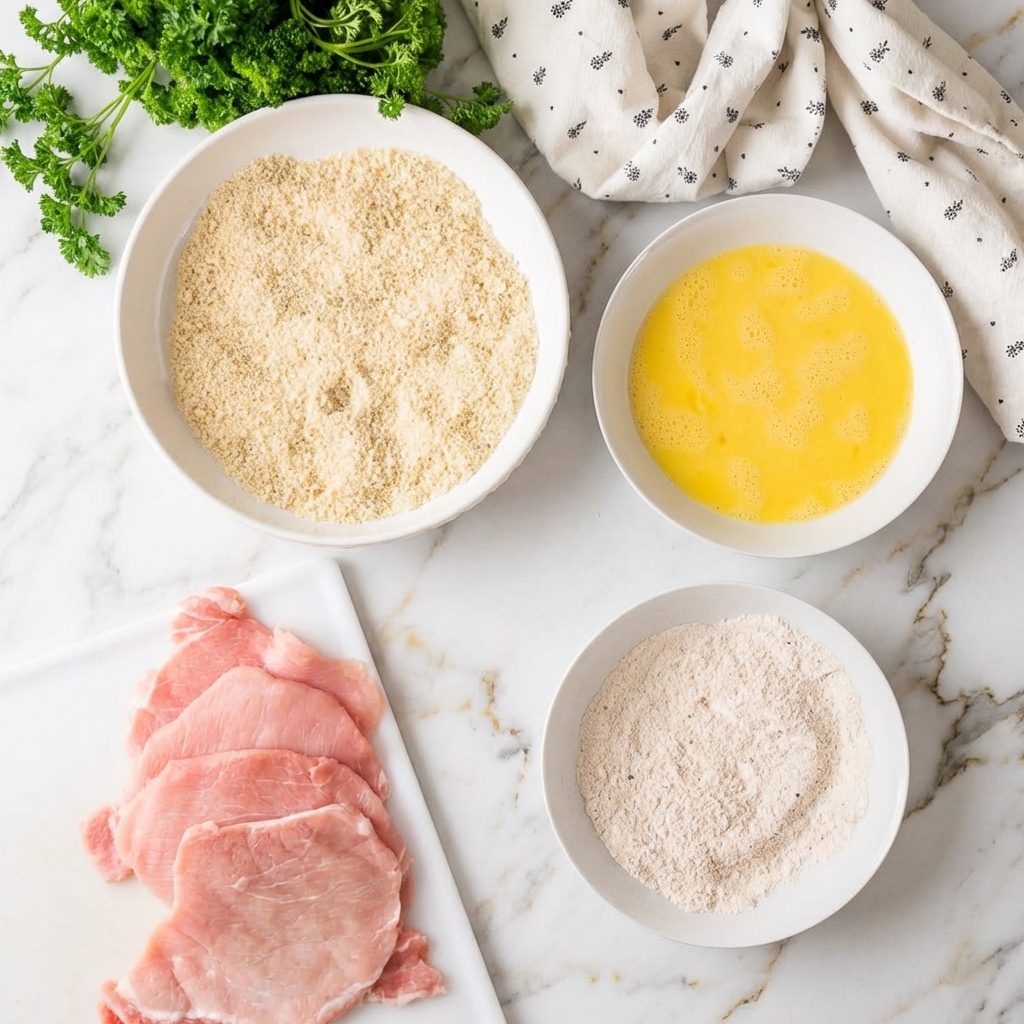
    Step 2: Set Up the Breading Station

    Prepare three shallow bowls:

    1. Flour seasoned with salt, pepper, and paprika
    2. Beaten eggs
    3. Breadcrumbs

    Step 3: Bread the Pork Schnitzel

    Dredge each pork cutlet in flour, shaking off excess. Dip into the eggs, then coat thoroughly in breadcrumbs. Press gently so the crumbs stick.

    For extra crunch, use panko breadcrumbs.


    Step 4: Heat the Oil

    Heat about ½ inch of oil in a large skillet over medium-high heat. The oil is ready when breadcrumbs sizzle immediately upon contact.


    Step 5: Fry Until Golden and Crispy

    Carefully place the pork schnitzel in the hot oil. Fry for 2–3 minutes per side, or until golden brown and cooked through.

    Do not overcrowd the pan.

    Step 6: Serve Immediately

    Serve hot with lemon wedges. The squeeze of fresh lemon enhances the crispy coating and balances the richness.


    Best Side Dishes for Pork Schnitzel

    • German potato salad
    • Mashed potatoes or fries
    • Cucumber salad
    • Spaetzle
    • Simple green salad

    Tips for the Best Pork Schnitzel

    • Don’t press the schnitzel while frying—it releases juices and ruins crispiness
    • Use neutral oil with a high smoke point
    • Serve immediately for maximum crunch
    • Avoid thick pork chops—they won’t cook evenly

    Frequently Asked Questions

    Can I bake pork schnitzel instead of frying?

    Yes! Bake at 425°F (220°C) for 18–22 minutes, flipping halfway.

    It won’t be as crispy as pan-fried but still delicious.

    Can I make pork schnitzel ahead of time?

    Schnitzel is best fresh, but you can bread the pork up to 8 hours ahead and refrigerate until ready to fry.


    Final Thoughts

    This crispy pork schnitzel recipe is everything you want in a classic comfort dish—fast, flavorful, and irresistibly crunchy.

    Whether you’re new to German cooking or just want a foolproof easy pork schnitzel recipe, this one delivers every time.

  • Juicy Ribeye Steak Recipe: Perfect Pan-Seared Ribeye Steak at Home

    Juicy Ribeye Steak Recipe: Perfect Pan-Seared Ribeye Steak at Home

    If you’ve been searching for how to cook ribeye steak, perfect pan-seared ribeye, or juicy ribeye steak recipe, you’re in the right place.

    This easy ribeye steak recipe delivers a restaurant-quality steak at home with a golden crust, buttery flavor, and tender center—no grill required.

    Whether you’re cooking for date night or a quick high-protein dinner, this ribeye steak recipe is simple, fast, and foolproof.

    Why Ribeye Steak Is the Best Cut

    Ribeye is known for its rich marbling, which melts during cooking and creates an incredibly juicy, flavorful steak.

    Compared to sirloin or filet mignon, ribeye delivers the best balance of tenderness and beefy flavor—making it ideal for pan-searing.

    Ingredients for Ribeye Steak

    • 1 ribeye steak (1–1½ inches thick)
    • 1 tablespoon olive oil
    • 2 tablespoons butter
    • 2 cloves garlic (crushed)
    • 2 sprigs fresh rosemary or thyme
    • Salt (kosher or sea salt)
    • Freshly Ground Black Pepper

    Step-by-Step: How to Cook Ribeye Steak

    Step 1: Bring Steak to Room Temperature

    Remove the ribeye steak from the refrigerator 30 minutes before cooking.

    This ensures even cooking and a tender result—one of the most important ribeye steak tips.

    Step 2: Season Generously

    Pat the steak dry with paper towels. Season both sides liberally with salt and black pepper.

    A dry surface helps create the perfect steak crust.

    Step 3: Heat the Pan

    Place a heavy skillet (cast iron is best) over high heat. Add olive oil and heat until it just begins to smoke.

    This is key for pan-searing ribeye steak.

    Step 4: Sear the Ribeye Steak

    Carefully place the steak in the hot pan.

    • Sear for 3–4 minutes per side without moving it
    • This creates a deep, golden-brown crust

    Step 5: Butter Baste for Flavor

    Lower heat to medium.

    Add butter, garlic, and herbs.

    Tilt the pan and continuously spoon the melted butter over the steak for 1–2 minutes. This step adds rich flavor and moisture.

    Step 6: Check Steak Doneness

    Use a meat thermometer for accuracy:

    • Rare: 120–125°F
    • Medium-Rare: 130–135°F
    • Medium: 140–145°F

    Step 7: Rest Before Serving

    Remove steak from pan and let it rest for 5–10 minutes.

    Resting allows the juices to redistribute, giving you a juicy ribeye steak every time.

    Best Side Dishes for Ribeye Steak

    • Garlic mashed potatoes
    • Roasted vegetables
    • Creamy mac and cheese
    • Fresh garden salad

    Pro Tips for the Best Ribeye Steak

    • Always use a thick-cut ribeye for best results
    • Don’t overcrowd the pan
    • Let the steak rest—never skip this step
    • Use cast iron for maximum sear

    Final Thoughts

    This easy ribeye steak recipe proves you don’t need a grill or fancy tools to make a perfect ribeye steak at home.

    With simple ingredients and the right technique, you’ll get a steak that’s tender, juicy, and packed with flavor every single time.

  • Homemade Chicken Pot Pie with Flaky Crust

    Homemade Chicken Pot Pie with Flaky Crust

    In the world of comfort food, chicken pot pie reigns supreme. It’s the culinary equivalent of a warm hug—a savory, creamy filling brimming with tender chicken and vegetables, all encased in a buttery, flaky pastry that shatters with every forkful. While store-bought versions can’t compare, many home cooks are intimidated by the idea of making it from scratch.

    Let this recipe be your guide. We’ll walk through creating a rich, flavorful filling from a simple homemade sauce (no canned soup here) and a pie crust so good you might never buy frozen again. Whether you make one large pie to feed a crowd or individual portions for a special touch, this chicken pot pie delivers that deeply satisfying, nostalgic flavor that turns an ordinary dinner into a memorable occasion.

    It’s a labor of love that pays off in spades with every golden, bubbling bite.

    The Anatomy of a Perfect Pot Pie: Filling & Crust Harmony

    A great pot pie achieves a delicate balance. The filling must be thick enough to hold its shape when sliced, yet creamy and luxurious. The secret is a well-made velouté sauce—a roux-thickened chicken broth that forms a silky, savory base. Sautéing the vegetables (a classic mirepoix of onions, carrots, and celery) before adding the liquid builds a foundational flavor that can’t be achieved by simply boiling them in the sauce. Using shredded rotisserie chicken or leftover roasted chicken adds depth and saves time.

    The crust is equally important. A true pot pie crust is sturdy enough to contain the filling but remains tender and flaky. Using a combination of butter (for flavor) and shortening or lard (for flakiness) creates the ideal texture. The key is keeping all ingredients cold and handling the dough as little as possible to prevent gluten development, which leads to toughness. When this flaky lid bakes over the hot filling, it steams from below and browns from above, creating the perfect edible vessel for the creamy treasure beneath.

    Ingredients

    For the Flaky Pie Crust (or use 1 store-bought pie crust for top only):

    • 1 ¼ cups all-purpose flour
    • ½ teaspoon salt
    • 6 tablespoons cold unsalted butter, cubed
    • ¼ cup cold vegetable shortening or lard
    • 3-5 tablespoons ice water

    For the Chicken Filling:

    • 4 tablespoons unsalted butter
    • 1 medium yellow onion, diced
    • 3 medium carrots, diced
    • 2 celery stalks, diced
    • ⅓ cup all-purpose flour
    • 2 ½ cups chicken broth
    • ½ cup heavy cream or whole milk
    • 3 cups cooked, shredded chicken (rotisserie works great)
    • 1 cup frozen peas
    • 2 tablespoons fresh parsley, chopped
    • 1 teaspoon dried thyme
    • Salt and black pepper to taste
    • 1 egg, beaten (for egg wash)

    Instructions

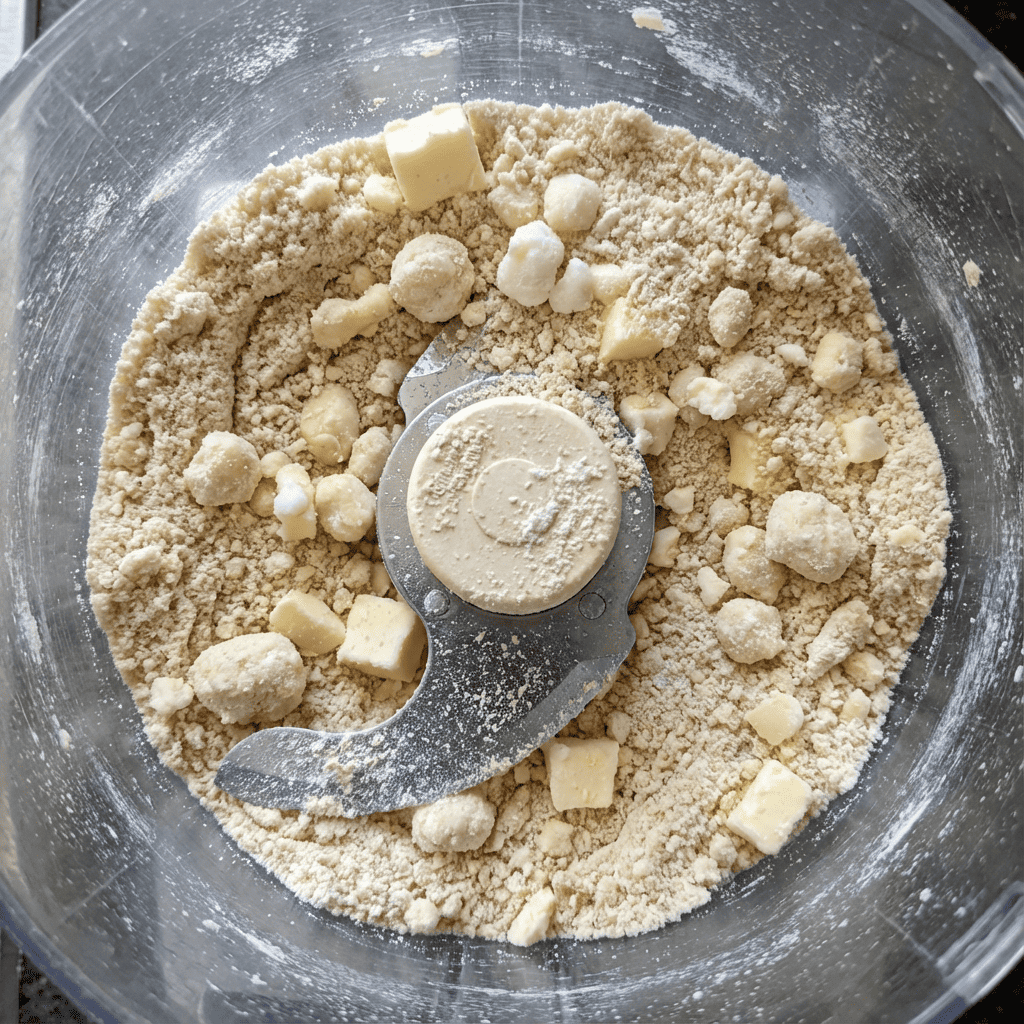
    1. Make the Pie Crust: In a food processor, pulse flour and salt. Add cold butter and shortening; pulse until mixture resembles coarse crumbs with pea-sized pieces. Drizzle in ice water, 1 tbsp at a time, pulsing until dough just begins to clump. Turn out onto plastic wrap, form into a disc, wrap tightly, and refrigerate for at least 1 hour.

    2. Cook the Vegetables: Preheat oven to 400°F (200°C). In a large skillet or Dutch oven, melt butter over medium heat. Add onion, carrots, and celery. Cook, stirring, for 8-10 minutes until onions are soft and carrots begin to soften.

    3. Make the Sauce: Sprinkle the flour over the cooked vegetables. Cook, stirring constantly, for 1-2 minutes to cook out the raw flour taste. Gradually whisk in the chicken broth, ensuring no lumps form. Bring to a simmer and cook until thickened, about 3-5 minutes. Stir in the heavy cream.

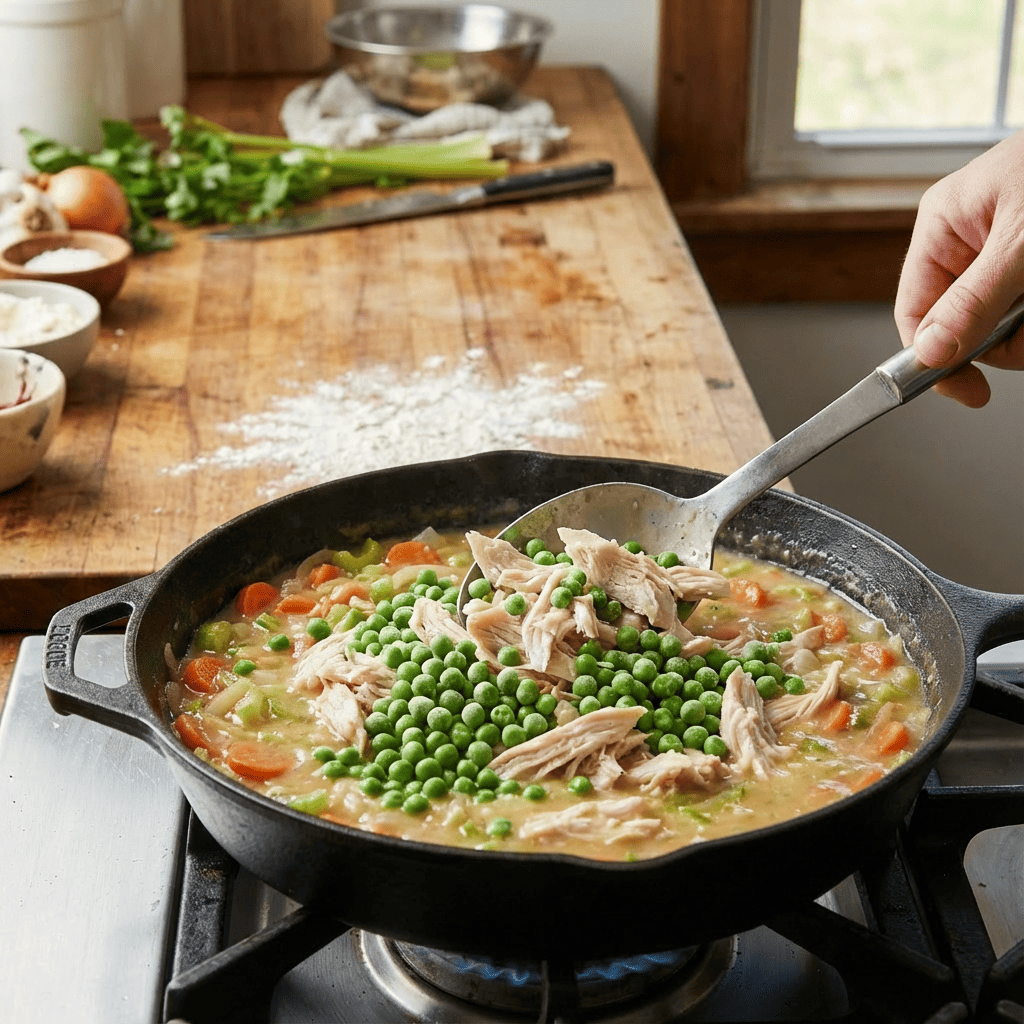
    4. Finish the Filling: Remove from heat. Stir in the shredded chicken, frozen peas, parsley, and thyme. Season generously with salt and pepper. Taste and adjust seasoning—it should be well-seasoned. Pour the filling into a 9-inch deep-dish pie plate or a 2-quart baking dish.

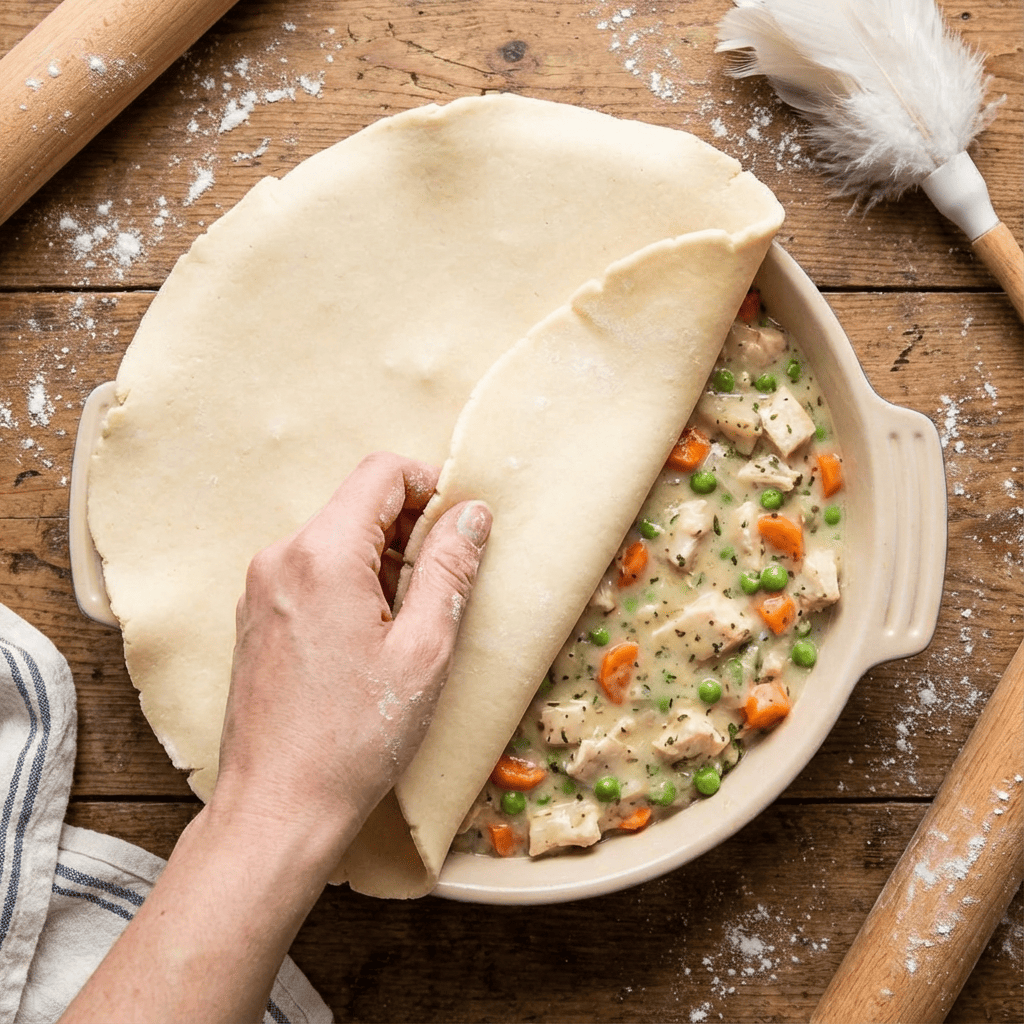
    5. Top with Crust: On a floured surface, roll the chilled dough into a circle about 1 inch larger than your dish. Carefully drape the crust over the filling. Trim any excess, then crimp the edges to seal. Cut 4-5 small slits in the center to vent steam. Brush the top lightly with beaten egg wash.

    6. Bake: Place the pot pie on a baking sheet (to catch any drips). Bake for 35-45 minutes, until the crust is deeply golden brown and the filling is bubbly around the edges. If the crust browns too quickly, tent it loosely with foil.

    7. Rest and Serve: Let the pot pie cool on a wire rack for at least 15 minutes before serving. This allows the filling to set slightly for cleaner slices. Serve warm.

    Tips for Pot Pie Perfection

    Time-Savers: Use a store-bought refrigerated pie crust for the top only, or use pre-chopped mirepoix from the grocery store.

    Make-Ahead: The filling can be made and refrigerated for up to 2 days. Assemble with cold filling and crust just before baking; you may need to add 5-10 minutes to the bake time.

    Freezing: Assemble the unbaked pot pie, wrap tightly, and freeze. Bake from frozen, adding 20-30 minutes to the bake time, covering with foil if the crust browns too much.

    Individual Pies: Divide the filling among 4-6 oven-safe ramekins. Top with smaller rounds of crust for personal pot pies.

    Adding Flair: For extra richness, stir a splash of white wine into the broth, or add a teaspoon of poultry seasoning to the filling. This classic chicken pot pie is the epitome of hearty, homemade comfort—a dish that nourishes both body and soul.

  • The Best Classic Lasagna Recipe

    The Best Classic Lasagna Recipe

    There are few dishes in the world that command the universal love and respect of a truly great lasagna. It’s more than a meal; it’s an event. A labor of love that fills your home with the unmistakable, soul-warming aroma of simmering tomatoes, herbs, and browning cheese.

    This recipe is my ode to that classic, the one I’ve refined over years of family dinners and gatherings. It delivers everything you want: a rich, deeply flavored meat sauce, a creamy, perfectly seasoned ricotta layer, sheets of pasta that hold their structure, and that iconic blanket of bubbly, golden cheese.

    While it requires time and patience, each step is simple and the payoff is monumental. This lasagna is what Sunday dinners and holiday tables are made for—a dish that promises and delivers pure, unadulterated comfort with every single, layered forkful.

    The Philosophy of Layered Perfection

    Building a legendary lasagna is about understanding the role of each component and treating it with care. The foundation is a slow-simmered meat sauce. Using a combination of ground beef and Italian sausage creates a complex flavor base, while a long, gentle simmer allows the tomatoes to sweeten and the herbs to infuse every bite.

    The ricotta mixture is more than just cheese; it’s enriched with egg for stability, Parmesan for saltiness, and fresh parsley for brightness. It should be a flavorful layer in its own right. The choice of pasta is crucial. No-boil noodles are a fantastic modern shortcut that actually absorb moisture from the sauce, becoming perfectly tender without turning mushy. Finally, the cheese blend—a mix of mozzarella for that iconic stretch and Parmesan for sharpness—creates the glorious, browned top.

    Assembling the lasagna is a meditative process, creating a structure that bakes into a cohesive, sliceable unit where every layer sings in harmony.

    Ingredients

    For the Meat Sauce:

    • 1 tablespoon olive oil
    • 1 pound lean ground beef
    • 1 pound mild Italian sausage, casings removed
    • 1 large yellow onion, finely diced
    • 4 cloves garlic, minced
    • 1 (28 oz) can crushed tomatoes
    • 2 (15 oz) cans tomato sauce
    • 1 (6 oz) can tomato paste
    • 1/2 cup red wine or water
    • 2 tablespoons sugar
    • 2 teaspoons dried basil
    • 2 teaspoons dried oregano
    • 1 teaspoon fennel seeds (optional)
    • Salt and black pepper to taste

    For the Ricotta Filling:

    • 32 oz (4 cups) whole milk ricotta cheese
    • 1 large egg
    • 1 cup grated Parmesan cheese
    • 1/4 cup fresh parsley, finely chopped
    • 1/2 teaspoon salt
    • 1/4 teaspoon black pepper

    For Assembly:

    • 12 no-boil lasagna noodles
    • 4 cups shredded low-moisture mozzarella cheese (16 oz)
    • Additional Parmesan for topping

    Instructions

    Instructions

    1. Make the Meat Sauce: 

      In a large Dutch oven or heavy pot, heat olive oil over medium-high heat. Add ground beef and Italian sausage. Cook, breaking up with a spoon, until no pink remains. Drain excess fat if desired. Add diced onion and cook for 5 minutes until softened. Add garlic and cook for 1 minute until fragrant. Stir in crushed tomatoes, tomato sauce, tomato paste, wine, sugar, basil, oregano, fennel seeds, salt, and pepper. Bring to a simmer, then reduce heat to low. Cover and simmer for at least 1 hour, stirring occasionally. The longer it simmers (up to 3 hours), the better the flavor.

    2. Make the Ricotta Filling: 

      While sauce simmers, in a medium bowl, combine ricotta cheese, egg, 1 cup of Parmesan, chopped parsley, salt, and pepper. Mix until well blended. Set aside.

    3. Preheat Oven & Prep Pan:

      Preheat oven to 375°F (190°C). Lightly grease a 9×13 inch deep baking dish.

    4. Assemble the Lasagna:

      Spread 1 ½ cups of meat sauce evenly over the bottom of the dish. Arrange 4 no-boil noodles over the sauce (they will expand). Spread 1/3 of the ricotta mixture over the noodles. Sprinkle with 1 cup of shredded mozzarella. Spoon 1 ½ cups of meat sauce over the cheese. Repeat layers twice more (noodles, ricotta, mozzarella, sauce). For the final layer, top with the last 4 noodles, the remaining meat sauce, the last cup of mozzarella, and a generous sprinkle of Parmesan.

    5. Bake:

      Cover the dish tightly with aluminum foil (tent it slightly so it doesn’t touch the cheese). Bake for 25 minutes. Remove foil and bake for an additional 25-30 minutes, until the top is golden and bubbly and the edges are lightly browned.

    6. Rest and Serve:

      Remove lasagna from oven and let it rest, uncovered, for at least 20-30 minutes before slicing. This allows the layers to set, ensuring you get clean, perfect squares. Garnish with fresh basil or parsley before serving.

    Frequently Asked Questions (FAQ)

    Can I make this lasagna ahead of time?

    Absolutely! Assemble the entire lasagna, cover tightly, and refrigerate for up to 2 days before baking. You may need to add 10-15 minutes to the baking time if starting from cold. You can also freeze the assembled, unbaked lasagna for up to 3 months. Thaw in the refrigerator overnight before baking.

    Can I use regular lasagna noodles that need to be boiled?

    Yes. Cook them according to package directions until al dente, drain, and lay them flat on clean kitchen towels to prevent sticking before assembling.

    Can I make it vegetarian?

    Definitely. Omit the meat and add 2 cups of finely chopped mushrooms and 1 cup of lentils (cooked) to the sauce for a hearty vegetarian version.

    Why is my lasagna watery/soupy?

    This is usually due to: 1) Not simmering the sauce long enough to reduce, 2) Using fresh mozzarella (which has more water), or 3) Not letting it rest before slicing. Using no-boil noodles and a thick sauce solves this.

    How do I store and reheat leftovers?

    Store covered in the fridge for up to 5 days. Reheat individual portions in the microwave or cover the whole dish with foil and reheat in a 350°F oven until warmed through.

    Pro Tips for Lasagna Mastery

    For the best flavor, make the meat sauce a day ahead. Use whole milk ricotta for the creamiest filling. When assembling, spread the ricotta mixture carefully to avoid moving the noodles. The final rest is non-negotiable for clean slices—use this time to make a green salad and garlic bread. This lasagna freezes beautifully; bake half now and freeze the other half for a future effortless feast.

    It’s a recipe designed to feed a crowd and warm hearts, a true testament to the power of layered, homemade goodness.