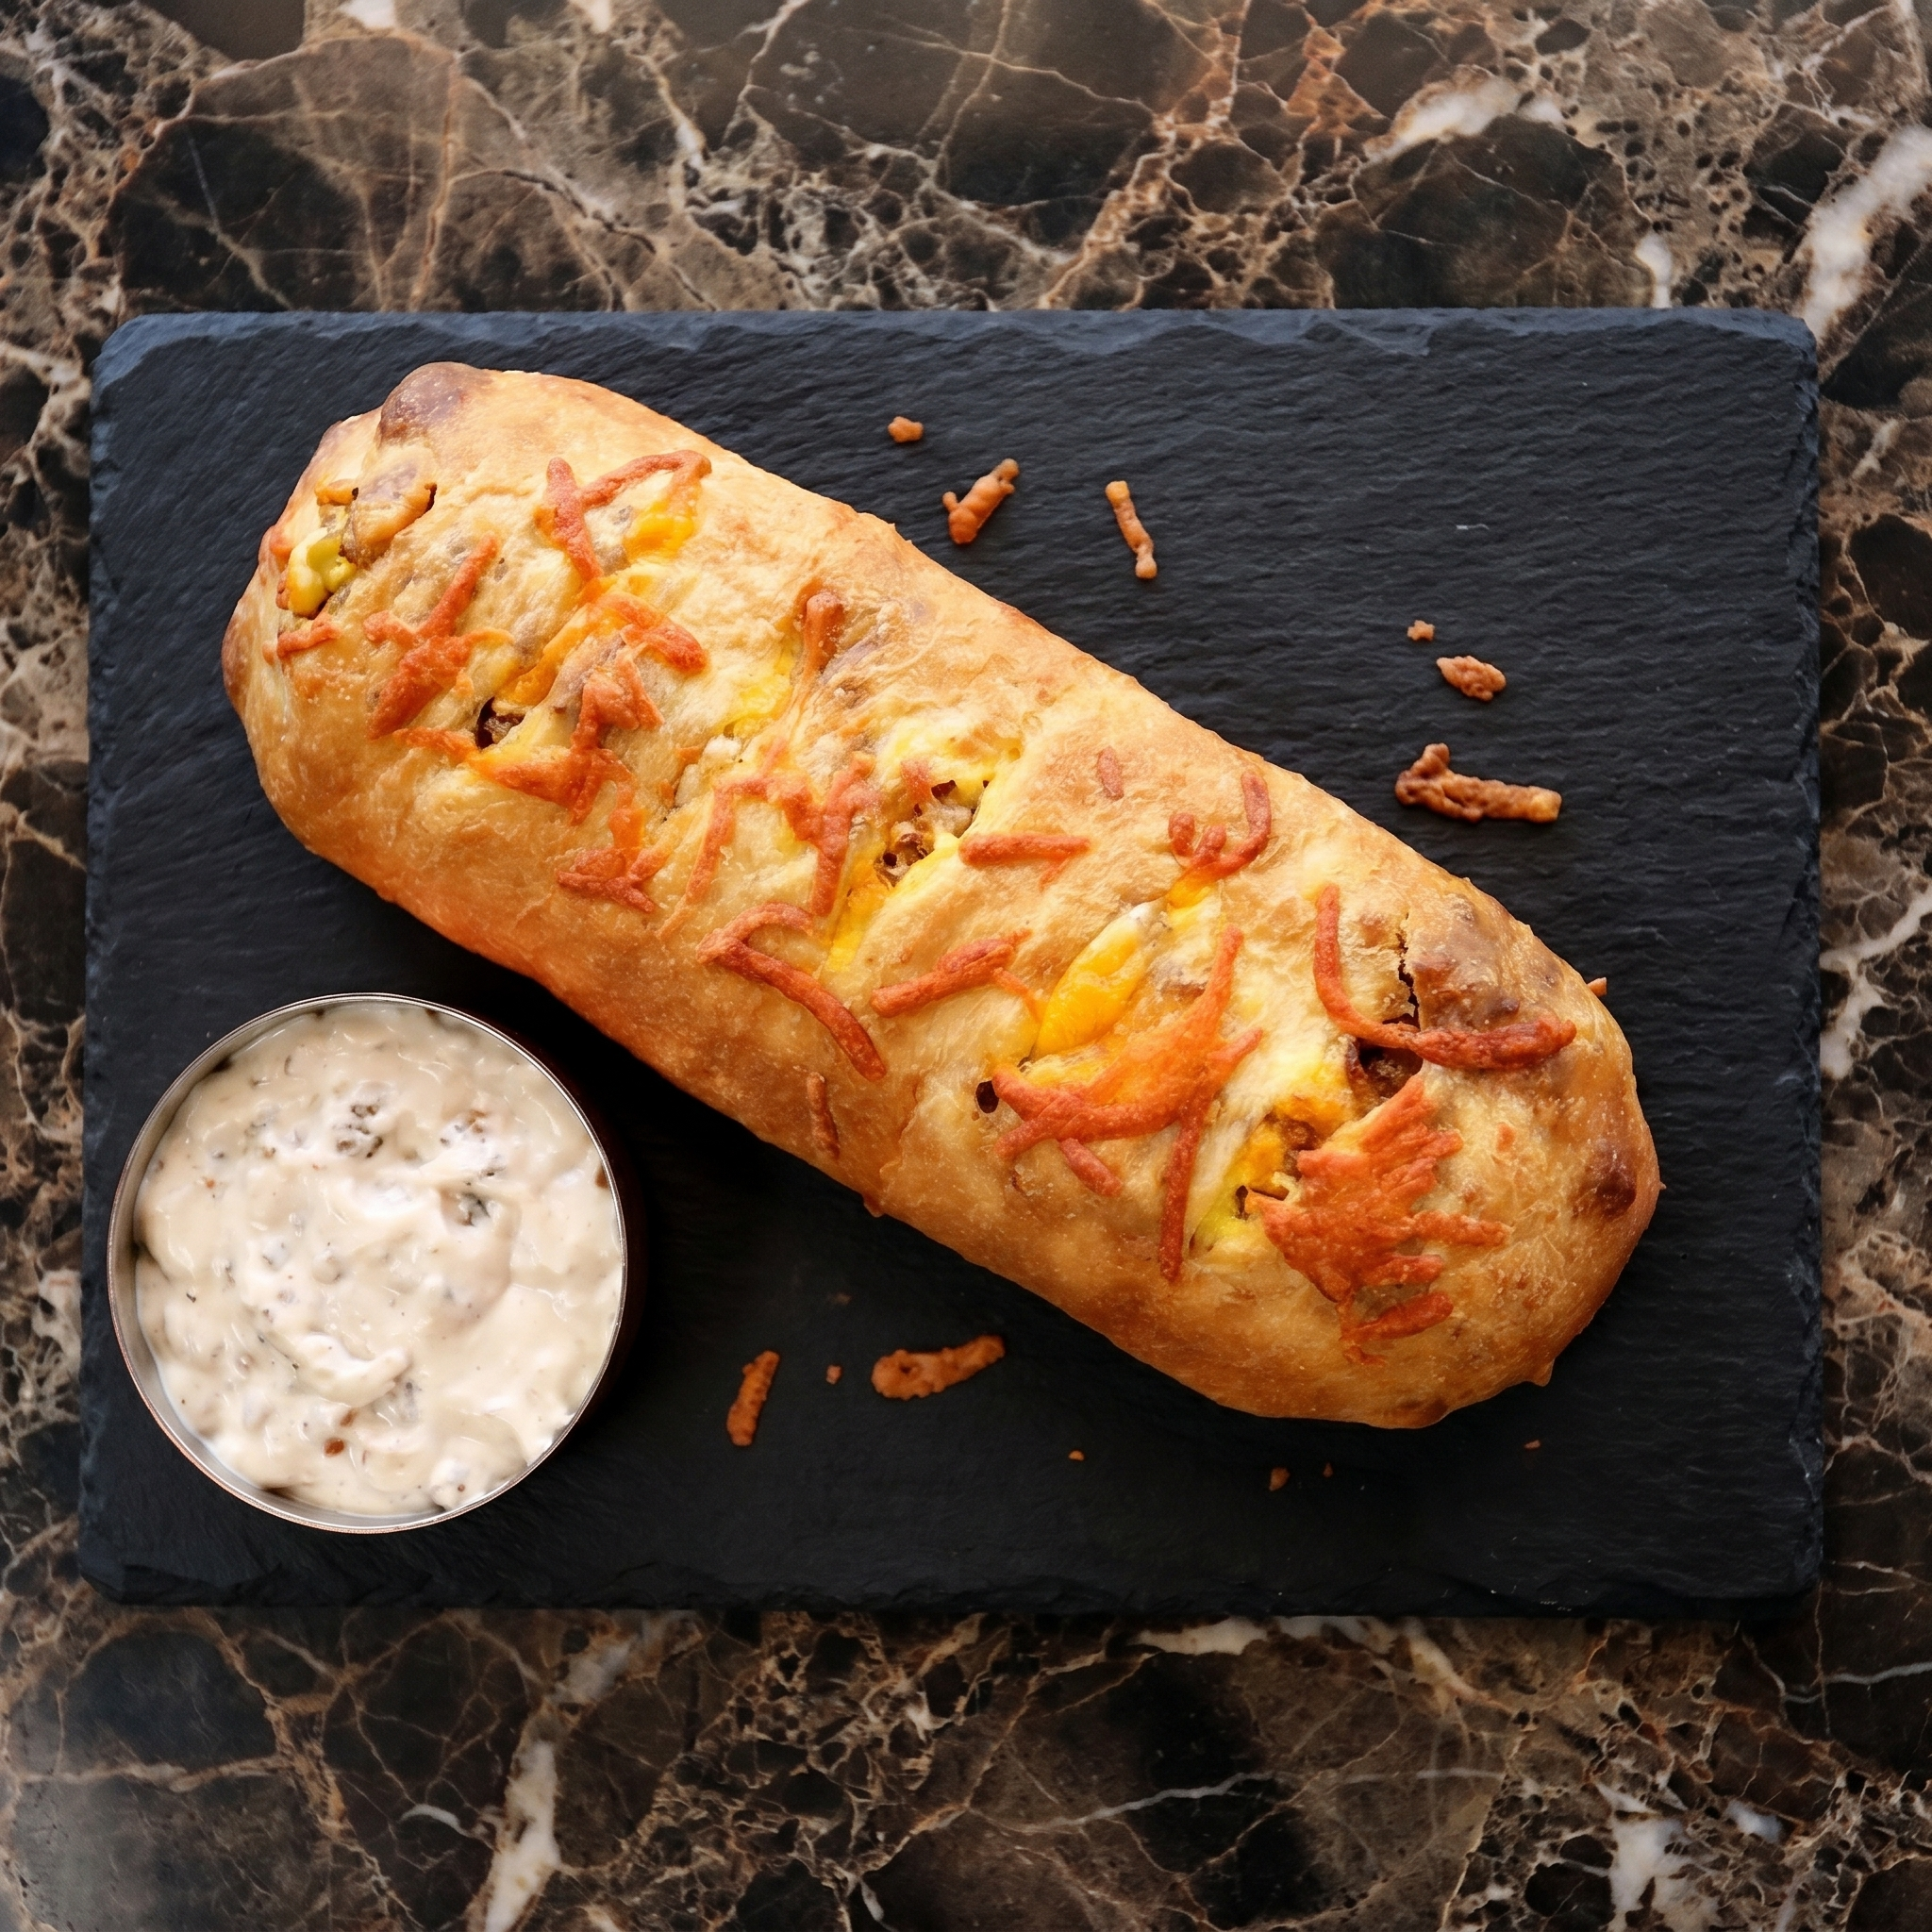
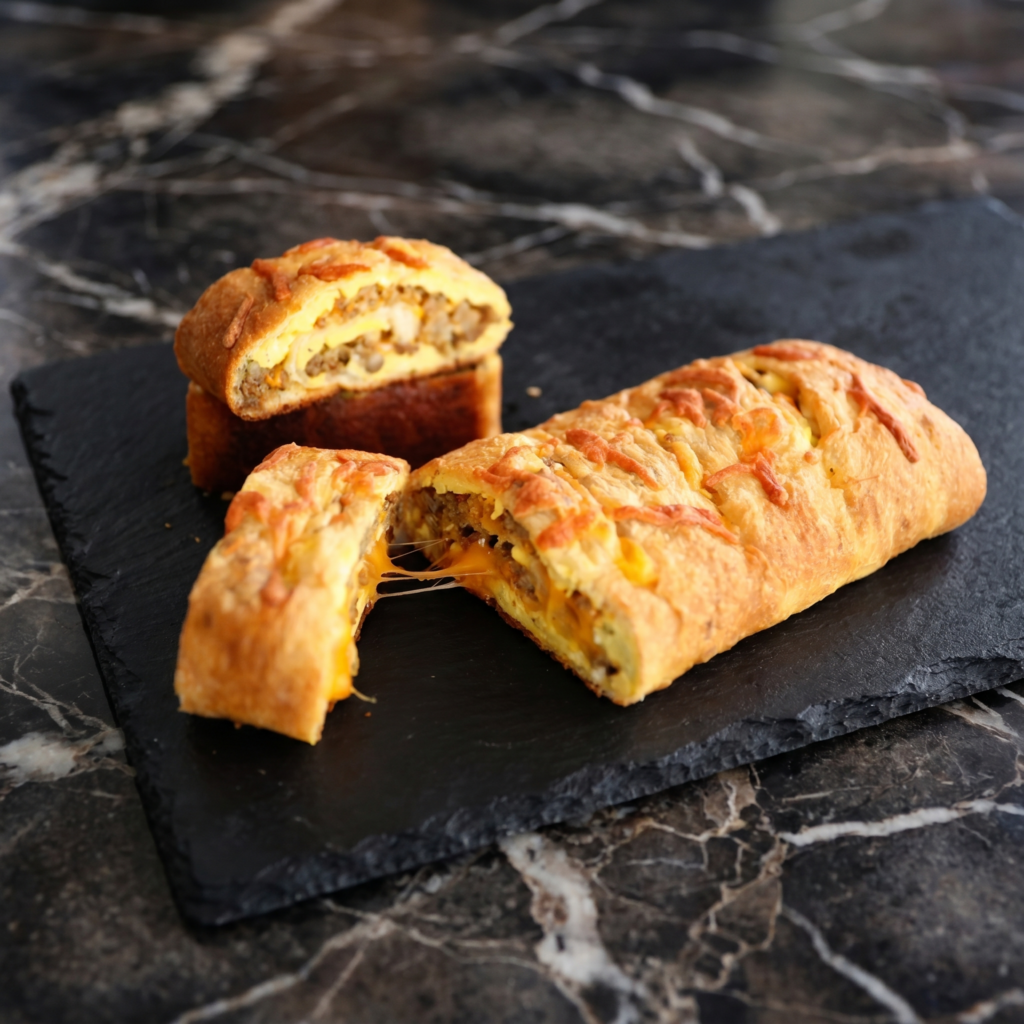
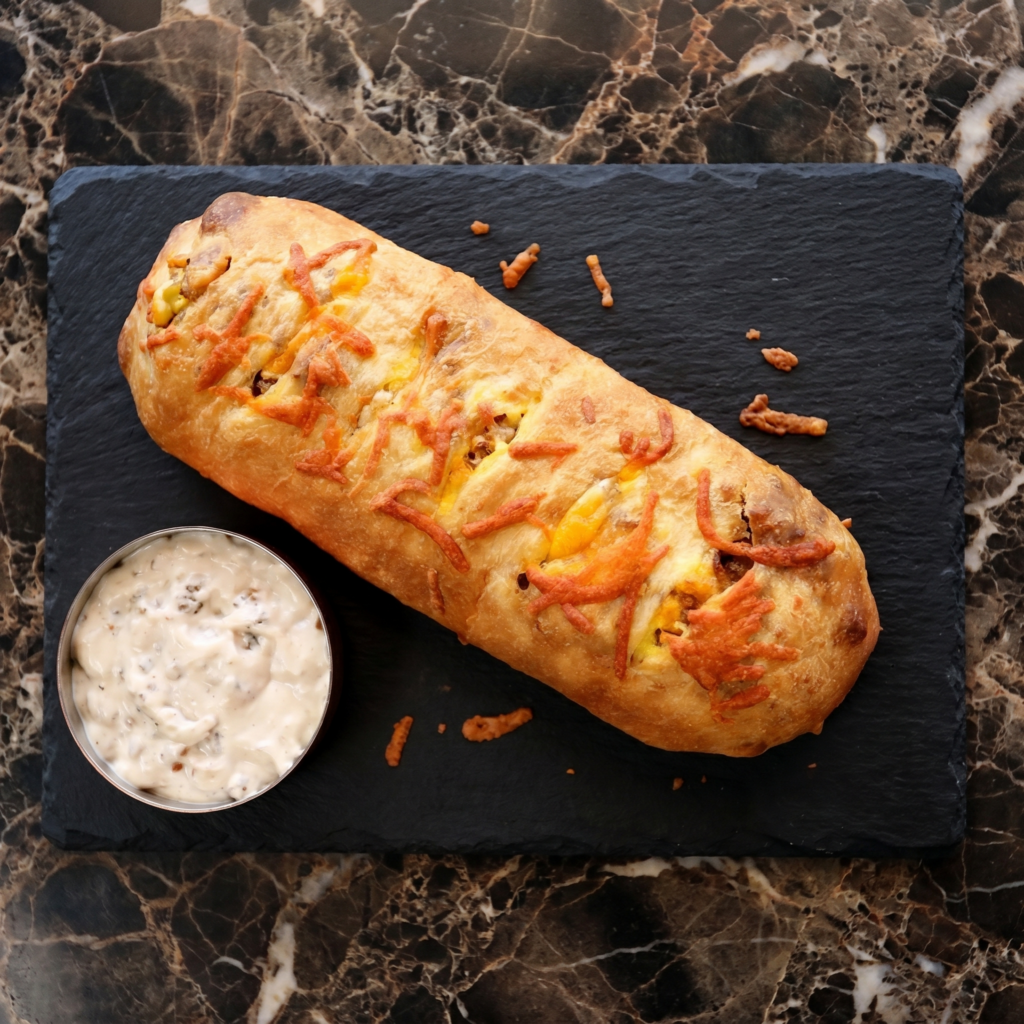
Breakfast stromboli is the breakfast you didn’t know you needed. Pizza dough. Scrambled eggs. Sausage. Bacon. Cheese. Hot sauce. Rolled up. Baked until golden. Slice into rings. Breakfast done differently. 30 minutes.
Ingredients
Serves 4-6.
1 lb (450g) pizza dough, room temperature
6 large eggs
2 tbsp milk
½ lb (225g) breakfast sausage, cooked and crumbled
4 slices bacon, cooked and crumbled
1½ cups shredded cheddar or mozzarella cheese
2 green onions, sliced (optional)
Hot sauce (optional)
1 egg, beaten (for egg wash)
Salt and pepper to taste
Marinara or ranch for dipping (optional)
Step-by-Step Instructions
Step 1: Preheat & Prep
Preheat oven to 400°F (200°C). Line a baking sheet with parchment paper.
Step 2: Scramble Eggs
Whisk eggs, milk, salt, and pepper. Scramble in a skillet over medium heat until soft and just set (don’t overcook). Let cool slightly.
Step 3: Roll & Fill
Roll pizza dough into a 10×14 inch rectangle. Layer scrambled eggs, sausage, bacon, cheese, and green onions down the center. Add a dash of hot sauce if desired.
Fold the long sides over the filling, overlapping slightly. Pinch the seam to seal. Pinch ends closed. Place seam-side down on baking sheet.
Step 4: Egg Wash & Bake
Brush with beaten egg. Cut small slits on top for steam.
Bake 18-22 minutes until deep golden brown.
Step 5: Serve
Cool 5 minutes. Slice into rings. Serve with marinara or ranch for dipping. Breakfast rolled up. Genius.
Summary
Prep Time: 15 min | Bake Time: 22 min | Total: 37 min
Yield: 4-6 servings | Difficulty: Easy
Storage Notes
Fridge: 4 days. Reheat in oven or air fryer at 350°F for 5-7 minutes. Not freezer-friendly (eggs get rubbery). Great for brunch parties — assemble ahead, bake fresh.
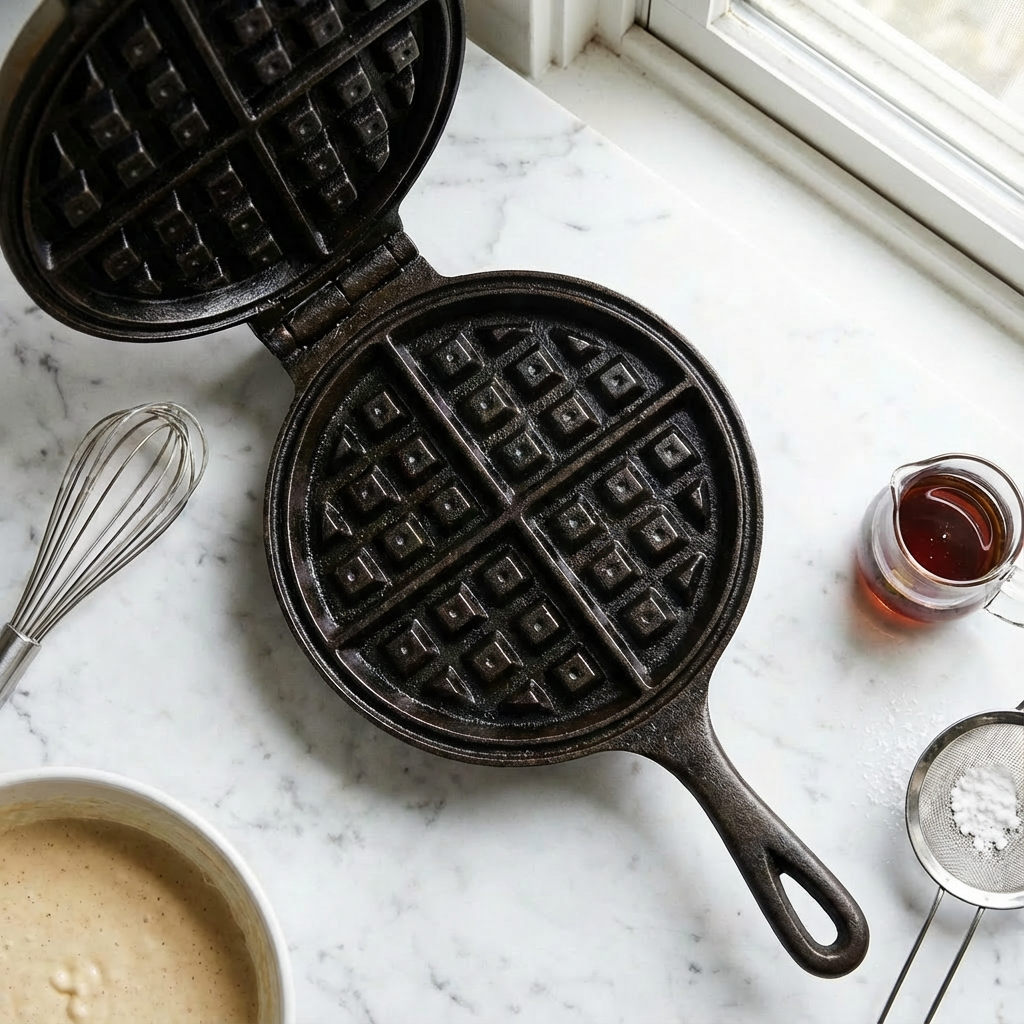
True Belgian waffles are a different species altogether from their American counterparts. They are made from a yeasted batter (or dough) that rests overnight, developing incredible flavor and a light, airy structure. When cooked in a deep-pocketed waffle iron, they emerge with a shatteringly crisp, caramelized exterior and a soft, almost brioche-like interior.
These waffles are substantial yet delicate, and their deep grids are engineered to hold pools of melted butter, syrup, and fruit. While they require planning ahead, the active work is minimal, and the result is a spectacular, restaurant-quality breakfast that’s worth the wait.
The Science of the Crisp Exterior & Airy Interior
The magic of an authentic Belgian waffle lies in the yeast and the high sugar content. The overnight fermentation allows yeast to slowly consume sugars, producing carbon dioxide and flavorful organic compounds.
This creates a network of tiny air bubbles throughout the batter, resulting in an exceptionally light and tender crumb. The high amount of sugar (and often pearl sugar in Liège-style waffles) isn’t just for sweetness; it caramelizes on the hot iron, creating a thin, crisp, glossy shell. The use of both butter and oil ensures richness while contributing to browning.
A Belgian waffle iron, with its deeper grids and higher clamping pressure, not only shapes the waffle but also provides more surface area for this caramelization and crisping to occur, creating the iconic contrast between the crunchy exterior and fluffy interior.
Ingredients
For the Overnight Batter:
2 ¼ teaspoons (1 packet / 7g) active dry yeast
¼ cup (60ml) warm water (105-115°F / 40-46°C)
1 teaspoon granulated sugar
2 cups (480ml) warm whole milk
½ cup (1 stick / 113g) unsalted butter, melted and cooled slightly
2 tablespoons light brown sugar
1 teaspoon salt
2 teaspoons vanilla extract
2 large eggs, lightly beaten
2 cups (250g) all-purpose flour
For Cooking & Serving:
Non-stick cooking spray or melted butter, for the iron
Powdered sugar, fresh berries, whipped cream, maple syrup
Instructions
1. The Activated Yeast: In a small bowl, dissolve 1 tsp sugar in the warm water. Sprinkle the yeast over the top and let stand for 5-10 minutes until foamy.
2. The Combined Liquid Base: In a large bowl, whisk together the warm milk, melted butter, brown sugar, salt, and vanilla extract.
3. The Mixed Batter Before Resting: Whisk the foamy yeast mixture and the beaten eggs into the milk mixture. Gradually whisk in the flour until just combined and smooth. The batter will be thick but pourable.
4. The Overnight-Risen Batter: Cover the bowl tightly with plastic wrap. Let it rest at room temperature for 1 hour, then refrigerate overnight (8-12 hours). The batter will rise, become bubbly, and almost double.
5. The Prepared Waffle Iron: Preheat your Belgian waffle iron according to manufacturer’s instructions until very hot. Grease the grids lightly with cooking spray or melted butter.
6. The Portioned Batter: Gently stir the risen batter to deflate it slightly. It will be very airy. Ladle the appropriate amount of batter onto the center of the lower grid (about ½ to ⅔ cup for a standard round Belgian iron).
7. The Cooking Waffle: Close the lid and cook according to your iron’s instructions, usually for 4-5 minutes. Do not open the lid early. Steam will escape from the sides as it cooks.
8. The Finished, Golden Waffle: The waffle is done when the steam nearly stops and it is deeply golden brown and crisp. Carefully remove it with a fork.
9. The Served Waffle: Serve immediately while hot and crisp. Dust with powdered sugar and top with fresh berries, whipped cream, and/or maple syrup as desired.
Pro-Tips for Waffle Perfection
Plan Ahead: The overnight rest is non-negotiable for flavor and texture.
Don’t Overmix: Mix the batter just until the flour is incorporated to avoid developing gluten, which can make the waffles tough.
Batter Consistency: The batter should be thick like a brownie batter. If it seems too thick after resting, you can gently fold in a tablespoon or two of milk.
Hot Iron is Key: A properly preheated iron ensures immediate caramelization and prevents sticking.
Resist Peeking: Opening the iron too early can tear the waffle and release steam needed for the rise.
Keep Waffles Warm & Crisp: Place cooked waffles in a single layer on a wire rack in a 200°F (95°C) oven. This keeps them warm and prevents them from getting soggy.
No Belgian Waffle Iron? A deep-pocketed “American” style iron can work, but the waffles will be thinner. You may need to reduce the batter amount per waffle.
Flavor Variations: Add ½ teaspoon of cinnamon or cardamom to the dry ingredients. Fold in fresh blueberries or chocolate chips into the batter just before cooking.
Make Ahead & Freeze: Let cooked waffles cool completely on a rack, then freeze in a single layer. Reheat in a toaster or oven for a quick, excellent breakfast.
Serving: Authentic Belgian waffles are often served simply with a dusting of powdered sugar, as their rich, caramelized flavor stands on its own.
These Authentic Belgian Waffles turn an ordinary morning into a luxurious event.
Imagine the cozy, spiced flavor of carrot cake in a form you can happily eat for breakfast. These Carrot Cake Pancakes deliver exactly that: light, fluffy pancakes packed with finely shredded carrots, warm cinnamon and ginger, and studded with toasted walnuts or pecans. They’re wholesome enough to feel like a proper meal but special enough to feel like a treat.
Drizzled with a tangy-sweet cream cheese glaze instead of maple syrup, they transform your weekend brunch or holiday morning into a celebration. It’s the perfect way to enjoy the essence of dessert, first thing in the morning.
The Science of the Moist, Fluffy Cake-Pancake
These pancakes achieve their distinct texture—moist yet fluffy—through a careful balance of wet and dry ingredients and the power of baking powder. The shredded carrot adds natural moisture and sweetness but can weigh down the batter.
To counter this, the batter uses a combination of baking powder and baking soda for a strong, immediate rise that creates airy pockets. The acidity in buttermilk (or the DIY substitute) activates the baking soda, producing carbon dioxide bubbles that further lighten the batter. The fat from oil or melted butter coats the flour proteins, ensuring tenderness.
The result is a pancake that has the spiced, moist crumb of carrot cake but the light, airy structure of a perfect breakfast pancake, capable of holding all those delicious add-ins without becoming dense.
Ingredients
For the Pancakes:
1 ¼ cups (156g) all-purpose flour
2 teaspoons baking powder
1 teaspoon baking soda
1 teaspoon ground cinnamon
½ teaspoon ground ginger
¼ teaspoon ground nutmeg
¼ teaspoon salt
1 large egg
¼ cup (50g) light brown sugar, packed
1 cup (240ml) buttermilk*
¼ cup (60ml) vegetable oil or melted butter
1 teaspoon vanilla extract
1 ½ cups (about 150g) finely grated carrots (from 2-3 medium carrots)
⅓ cup (40g) chopped toasted walnuts or pecans (optional)
⅓ cup (55g) raisins (optional)
*No buttermilk? Make a DIY version: add 1 tbsp lemon juice or vinegar to a measuring cup, then add milk to reach 1 cup. Stir and let sit 5 minutes.
For the Cream Cheese Glaze:
4 oz (113g) cream cheese, softened
¾ cup (90g) powdered sugar, sifted
¼ cup (60ml) milk or cream
½ teaspoon vanilla extract
Instructions
1. The Whisked Dry Ingredients: In a large bowl, whisk together the flour, baking powder, baking soda, cinnamon, ginger, nutmeg, and salt until thoroughly combined.
2. The Prepared Wet Ingredients: In a separate medium bowl, whisk the egg and brown sugar until smooth. Whisk in the buttermilk, oil (or melted butter), and vanilla extract until the mixture is homogenous.
3. The Grated Carrots: Peel and finely grate fresh carrots using a box grater. You should have about 1 ½ cups of lightly packed, fluffy grated carrot.
4. The Combined Pancake Batter: Pour the wet ingredients into the dry ingredients. Stir with a spatula until just combined and no large dry streaks remain; the batter will be lumpy. Gently fold in the grated carrots, and optional nuts and raisins.
5. The Cooking Pancakes on the Griddle: Heat a lightly greased griddle or non-stick skillet over medium heat. For each pancake, pour about ¼ cup of batter. Cook until bubbles form on the surface and the edges look set, about 2-3 minutes.
6. The Flipped, Golden Pancakes: Flip the pancakes and cook for another 1-2 minutes on the second side, until golden brown and cooked through.
7. The Stack of Cooked Pancakes: Transfer cooked pancakes to a warm plate or baking sheet in a low oven. Continue with the remaining batter. You should have about 8-10 medium pancakes.
8. The Smooth Cream Cheese Glaze: While pancakes cook, make the glaze. In a medium bowl, beat the softened cream cheese until smooth. Gradually beat in the powdered sugar, milk, and vanilla until you have a smooth, drizzle-able consistency.
9. The Finished, Glazed Pancake Stack: Drizzle the warm stack of pancakes generously with the cream cheese glaze. Sprinkle with extra chopped nuts if desired. Serve immediately.
Pro-Tips for Perfect Pancakes
Finely Grate the Carrots: Large shreds can make the pancakes prone to breaking and give a stringy texture. A fine grate blends in seamlessly.
Don’t Overmix the Batter: Lumps are good! Overmixing develops gluten, leading to tough pancakes. Mix until the flour is just incorporated.
Rest the Batter (Optional but Helpful): Letting the batter sit for 5-10 minutes after mixing allows the flour to fully hydrate and can result in slightly fluffier pancakes.
Medium Heat is Key: Too hot and the outside burns before the inside cooks; too low and they’ll be pale and greasy.
Keep Them Warm: Place cooked pancakes on a baking sheet in a 200°F (95°C) oven while you finish the batch.
Glaze Consistency: Adjust the milk in the glaze a teaspoon at a time until it’s thick but pourable. For a thicker frosting, use less milk.
Make Ahead: The dry mix can be pre-measured. The glaze can be made 1-2 days ahead and stored in the fridge; let it come to room temp and stir before using.
Freezing: Cooked, unglazed pancakes freeze beautifully. Reheat in a toaster or oven.
Variations: Add a handful of shredded coconut to the batter. For a pineapple-carrot cake version, add ⅓ cup of crushed, drained pineapple.
Serving: While the cream cheese glaze is classic, these are also delicious with maple syrup, Greek yogurt, or a simple dusting of powdered sugar.
These Carrot Cake Pancakes turn an ordinary morning into something truly special.
Wake up to a burst of spring flavor with these stunning Strawberry Lemon Cheesecake Rolls. Imagine soft, pillowy sweet roll dough wrapped around a ribbon of creamy, tangy cheesecake filling and juicy fresh strawberries, all finished with a zesty lemon glaze.
They combine the comforting warmth of a homemade roll with the bright, fresh taste of strawberries and lemon. While they look like they came from a fancy bakery, the process is straightforward—a simple enriched dough, an easy no-cook filling, and a glaze that comes together in minutes. Perfect for Easter, Mother’s Day, or a special weekend brunch, these rolls are guaranteed to impress and delight everyone at the table.
The Science of a Tender Roll & Stable Filling
The perfection of these rolls hinges on two key elements: the enriched dough and the stabilized filling. The dough is enriched with butter, eggs, and milk, which tenderize the gluten, resulting in a soft, fluffy, and rich crumb that can hold the moist filling without becoming soggy. A proper rise is crucial for developing flavor and texture.
The cheesecake filling gets its pipeable, non-runny consistency from a clever technique: combining cream cheese with a thickener. Cornstarch (or flour) is mixed with the sugar before being blended into the cream cheese. This starch absorbs excess moisture released from the strawberries during baking, preventing a soggy, leaking filling. Macerating the strawberries with a little sugar draws out some juice beforehand, which further protects the dough’s structure. This balance ensures every bite has a defined, creamy swirl and tender bread.
Ingredients
For the Sweet Roll Dough:
¾ cup (180ml) whole milk, warmed to about 110°F
2 ¼ teaspoons (1 packet) instant yeast
⅓ cup (65g) granulated sugar
1 large egg, room temperature
¼ cup (½ stick / 57g) unsalted butter, melted and cooled
1 teaspoon vanilla extract
½ teaspoon salt
3 – 3 ½ cups (375-440g) all-purpose flour, divided
1 tablespoon heavy cream or milk (optional, for creaminess)
Instructions
1. Make the Dough: In the bowl of a stand mixer, combine warm milk, yeast, and ⅓ cup sugar. Let sit for 5 minutes until foamy. Add egg, melted butter, vanilla, salt, and 3 cups of flour. Using the dough hook, mix on low until combined, then increase speed to medium and knead for 5-7 minutes, adding more flour 1 tablespoon at a time if needed, until dough is soft, smooth, and slightly tacky. Place in a greased bowl, cover, and let rise in a warm place for 1-2 hours, until doubled.
2. Macerate Strawberries & Make Filling: While dough rises, toss diced strawberries with 1 tablespoon sugar and set aside for 20 minutes. Drain excess liquid. For the filling, beat cream cheese, ¼ cup sugar, cornstarch, and vanilla until completely smooth. Gently fold in the drained strawberries.
3. Shape the Rolls: Punch down risen dough. On a lightly floured surface, roll into a 10×15 inch rectangle. Spread the strawberry cheesecake filling evenly over the dough, leaving a ½-inch border on one long edge. Tightly roll up the dough, starting from the long side with filling. Pinch the seam to seal.
4. Cut & Second Rise: Using a sharp knife or unflavored dental floss, cut the log into 12 even rolls. Place them in a greased 9×13 inch baking dish. Cover and let rise for 30-45 minutes, until puffy.
5. Bake: Preheat oven to 350°F (175°C). Bake rolls for 25-30 minutes, until golden brown on top. If the filling bubbles heavily, it’s normal.
6. Make Glaze & Finish: While rolls bake, whisk together powdered sugar, 2 tablespoons lemon juice, zest, and cream (if using) until smooth. Add more juice for a thinner consistency. Let rolls cool in pan for 10 minutes, then drizzle generously with lemon glaze.
7. Serve: Serve warm. Store leftovers covered in the refrigerator for up to 3 days. Reheat gently.
Pro-Tips for Perfect, Leak-Free Rolls
Proper Dough Texture: The dough should be soft and slightly sticky, but not so wet that it can’t be handled. Adding flour gradually is key.
Drain Those Berries: Draining the macerated strawberries is the most important step to prevent a soggy, leaking mess. Pat them gently with a paper towel if needed.
Cornstarch is Your Friend: The cornstarch in the filling acts as a stabilizer, absorbing berry juices during baking. Don’t skip it.
Sharp Cutting Tool: Use a sharp serrated knife or dental floss to cut the rolls cleanly without squishing them.
Don’t Overbake: The rolls are done when they’re golden. Overbaking can dry out the dough.
Glaze Consistency: For a thick glaze that sits on top, use less lemon juice. For a thinner, drizzle-able glaze that soaks in slightly, add more juice.
Make Ahead: Assemble the rolls up through step 4, cover tightly, and refrigerate overnight. In the morning, let them sit at room temp for 30 minutes while the oven preheats, then bake as directed.
These Strawberry Lemon Cheesecake Rolls are a beautiful, flavorful celebration in every bite.