Blog

  • Honey Sriracha Chicken: Sweet Heat, Sticky Wings

    Honey Sriracha Chicken: Sweet Heat, Sticky Wings

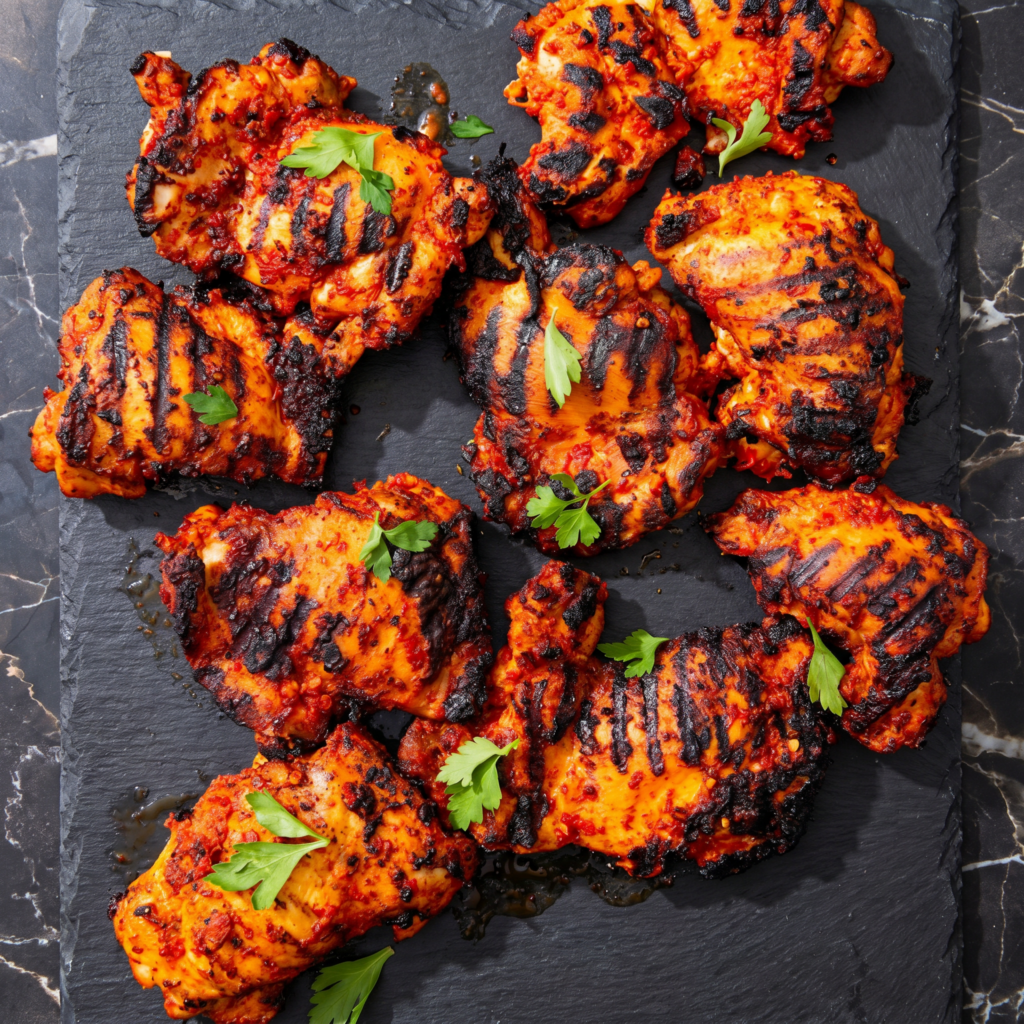
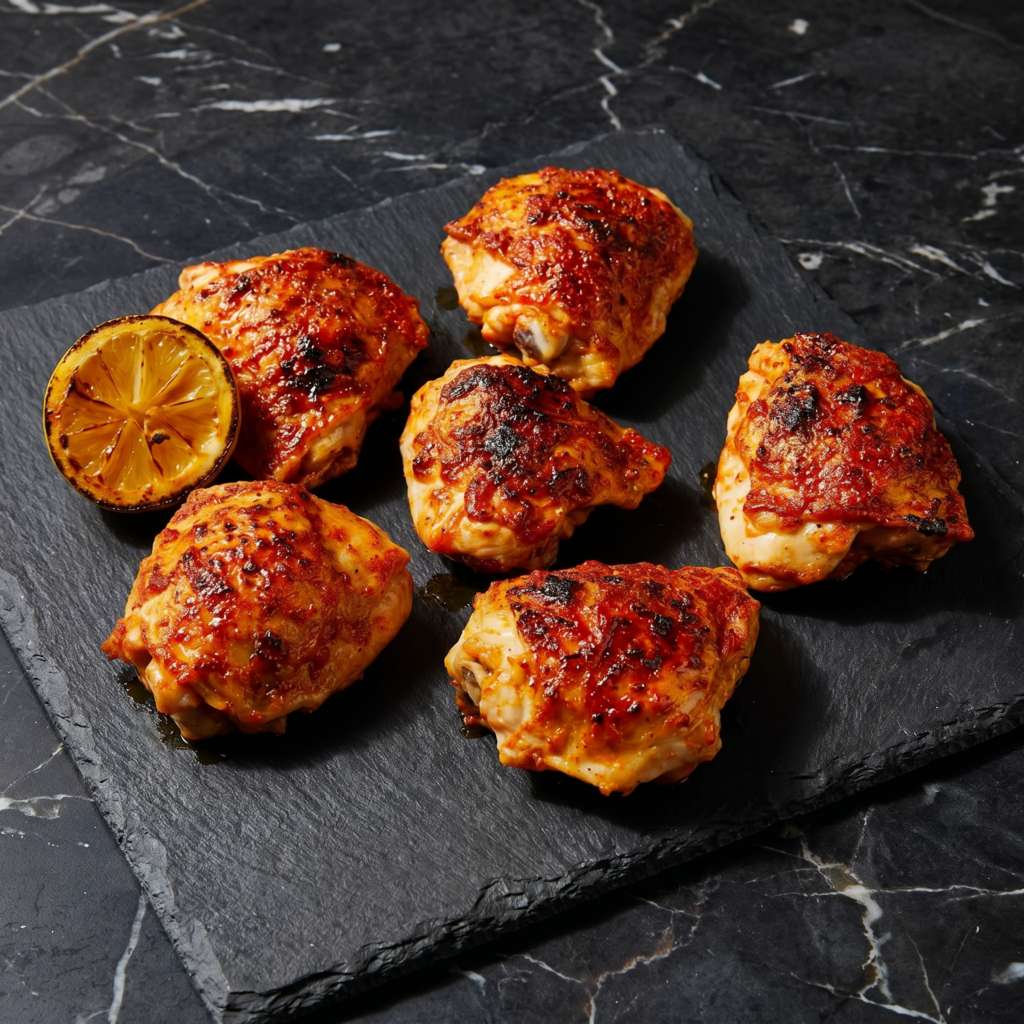
    This is the chicken you make when you want something sticky, spicy, sweet, and completely addictive. The honey-sriracha glaze is a perfect balance—the honey brings floral sweetness and that signature sticky gloss, while the sriracha adds heat, garlic, and a tangy vinegar kick. The chicken itself is baked until crispy and caramelized at the edges, then tossed in the glaze just before serving. No deep frying. No complicated techniques. Just a sheet pan, a saucepan, and chicken that will have people licking their fingers.

    The Science of Sticky Glaze & Why Baking Powder Creates Crispy Skin

    The honey-sriracha glaze works because of sugar and acid. Honey is primarily fructose and glucose. When heated, these sugars caramelize, creating deep, complex flavors while the sauce thickens into a sticky syrup. The sriracha provides heat from chili peppers, but also vinegar and garlic, which add tang and savory depth. A touch of soy sauce and rice vinegar balance the sweetness and prevent the glaze from being cloying. The chicken gets its crispy skin from baking powder, not oil. Baking powder is alkaline. When combined with salt and applied to chicken skin, it raises the pH of the skin’s surface, which breaks down proteins and allows them to crisp and brown faster in the oven. It also creates tiny bubbles on the skin’s surface, increasing surface area for maximum crunch. This is the same technique used for oven-fried wings. Baking soda works too but is much stronger—use a quarter of the amount or the chicken will taste metallic.

    Ingredients

    For the Chicken:

    • 2 lbs (900g) chicken wings (drumettes and flats) or boneless skinless thighs
    • 1 tablespoon baking powder (aluminum-free recommended)
    • 1 teaspoon salt
    • ½ teaspoon black pepper
    • ½ teaspoon garlic powder (optional)

    For the Honey Sriracha Glaze:

    • ½ cup (120 ml) honey
    • ¼ cup (60 ml) sriracha sauce
    • 2 tablespoons soy sauce (low sodium recommended)
    • 1 tablespoon rice vinegar (or apple cider vinegar)
    • 2 cloves garlic, minced
    • 1 teaspoon sesame oil
    • 1 tablespoon cornstarch mixed with 2 tablespoons cold water (slurry, optional for thicker glaze)

    For Serving:

    • Sesame seeds, toasted (white or black)
    • Green onions, thinly sliced
    • Ranch or blue cheese dressing (optional, for dipping)
    • Lime wedges (optional)

    Instructions

    1. Preheat the Oven: Preheat your oven to 425°F (220°C). Line a baking sheet with aluminum foil (for easy cleanup) and place a wire rack on top. The wire rack allows air to circulate under the chicken, making it crispy on all sides.

    2. Prep the Chicken: Pat the chicken wings completely dry with paper towels. This is essential—moisture is the enemy of crispy skin. In a large bowl, whisk together the baking powder, salt, black pepper, and garlic powder (if using).

    3. Coat the Chicken: Add the dried chicken wings to the bowl with the baking powder mixture. Toss with your hands until every wing is evenly coated in a thin, dusty layer. The baking powder should be visible as a light white dusting on the skin.

    4. Arrange on the Rack: Place the coated chicken wings on the wire rack in a single layer, skin-side up, with a little space between each wing. Do not overcrowd—if wings are touching, they will steam instead of crisp.

    5. Bake the Chicken: Bake for 40–45 minutes, rotating the pan halfway through, until the chicken is deep golden-brown, crispy, and the skin is crackly. For extra crispy wings, broil for the last 2–3 minutes (watch carefully—they burn fast).

    6. Make the Honey Sriracha Glaze: While the chicken bakes, combine the honey, sriracha, soy sauce, rice vinegar, minced garlic, and sesame oil in a small saucepan. Whisk together. Bring to a simmer over medium heat, stirring occasionally. Cook for 2–3 minutes until the honey is fully incorporated and the mixture is fragrant.

    7. Thicken the Glaze (Optional): If you prefer a thicker, stickier glaze, give the cornstarch slurry a quick stir and pour it into the simmering sauce while whisking constantly. Cook for 30–45 seconds until the sauce thickens. If you prefer a thinner glaze that soaks into the chicken more, skip the cornstarch.

    8. Toss the Chicken in Glaze: Remove the chicken from the oven. Transfer the hot wings to a large bowl. Pour the warm honey sriracha glaze over the chicken. Toss gently with tongs or a spatula until every wing is evenly coated in the glossy, sticky sauce.

    9. Garnish and Serve: Transfer the glazed wings to a serving platter. Sprinkle generously with toasted sesame seeds and sliced green onions. Serve immediately with ranch or blue cheese dressing for dipping (to cool the heat) and lime wedges on the side. Eat with your hands and plenty of napkins.

    Pro-Tips for Honey Sriracha Chicken Greatness

    • Pat the chicken bone-dry: This is the most important step for crispy skin. Use multiple paper towels and really press to absorb all surface moisture.
    • Baking powder, not baking soda: Baking soda is much stronger and will leave a metallic taste. Use aluminum-free baking powder for the best results.
    • Use a wire rack: Baking directly on the sheet pan traps steam underneath the chicken, making the bottom soggy. A wire rack allows air to circulate for 360-degree crispiness.
    • Don’t overcrowd the pan: Wings need space for air to circulate. If your pan is small, bake in two batches.
    • Adjust the heat level: ¼ cup sriracha gives a solid medium-high heat. For mild, use 2 tablespoons sriracha + 2 tablespoons ketchup. For extra spicy, add 1 teaspoon red pepper flakes or a splash of chili oil.
    • Make it a meal: Serve over steamed rice with roasted broccoli or snap peas. The extra glaze soaks into the rice beautifully.
    • Boneless thighs: This recipe works great with boneless, skinless chicken thighs. Cut into bite-sized pieces, coat with baking powder mixture, bake for 20–25 minutes (less time than wings), then toss in glaze.
    • Double the glaze: If you love sauce (like I do), double the glaze ingredients. Keep the cornstarch slurry the same—you can always add more if needed.
    • Leftovers: Reheat in an air fryer or oven (not microwave) to restore crispiness. The glaze will reliquefy and re-stick. These wings are sticky, spicy, sweet, and completely addictive. Make extra—they disappear fast.

  • Gyoza: Crispy, Juicy, Japanese Pan-Fried Dumplings

    Gyoza: Crispy, Juicy, Japanese Pan-Fried Dumplings

    Gyoza are the perfect food. A thin, chewy wrapper envelops a juicy, savory filling of pork, cabbage, garlic, and ginger. They’re pan-fried to create a golden, crispy lace crust on the bottom while the top stays soft and tender. Steam finishes the cooking, ensuring the filling stays moist. Dip them in a simple sauce of soy sauce, rice vinegar, and chili oil, and you have a dish that’s impossible to stop eating. Yes, folding takes practice. No, they don’t have to be perfect. Make a big batch, freeze half, and thank yourself later.

    The Science of the Crispy Lace Bottom & Why Cabbage Needs Salt

    The signature gyoza crust comes from a starch slurry—a mixture of water, flour, and sometimes potato starch—that’s added to the pan during steaming. As the water evaporates, the starch left behind crisps into a golden, lacy network that fuses the dumplings together. This crust is the best part. The filling’s juiciness depends on cabbage preparation. Raw cabbage contains a lot of water. If added directly to the filling, that water will release during cooking, turning the interior soggy and causing the wrappers to tear. The solution: salt the shredded cabbage, let it sit for 15 minutes, then squeeze out the excess water. This removes moisture while keeping the cabbage’s texture and flavor. The pork fat provides juiciness—don’t use lean ground pork. The fat renders during cooking and bastes the filling from the inside.

    Ingredients

    For the Filling:

    • 1 lb (450g) ground pork (not lean — 80/20 is ideal)
    • 2 cups (150g) green cabbage, finely shredded
    • ½ cup (60g) garlic chives (nira) or green onions, finely chopped
    • 2 cloves garlic, minced
    • 1 tablespoon fresh ginger, grated
    • 2 tablespoons soy sauce
    • 1 tablespoon sake (or dry sherry)
    • 1 tablespoon sesame oil
    • 1 teaspoon salt (for the cabbage)
    • ¼ teaspoon white pepper

    For the Gyoza Wrappers:

    • 1 package (about 40–50) round gyoza wrappers (available frozen or refrigerated)
    • Small bowl of water for sealing

    For Cooking:

    • 2 tablespoons vegetable oil
    • ½ cup (120 ml) water
    • 1 teaspoon flour or potato starch (optional, for extra crispy lace)

    For the Dipping Sauce:

    • ¼ cup (60 ml) soy sauce
    • ¼ cup (60 ml) rice vinegar
    • 1 teaspoon chili oil (rayu) or to taste
    • 1 clove garlic, thinly sliced (optional)

    Instructions

    1. Prep the Cabbage: Finely shred the cabbage. Place it in a bowl, sprinkle with 1 teaspoon of salt, and toss to combine. Let sit for 15 minutes. This draws out excess moisture. After 15 minutes, squeeze handfuls of cabbage over the sink to remove as much liquid as possible. Use your hands—really squeeze. Transfer the squeezed cabbage to a clean bowl.

    2. Make the Filling: To the squeezed cabbage, add the ground pork, chopped garlic chives (or green onions), minced garlic, grated ginger, soy sauce, sake, sesame oil, and white pepper. Mix vigorously with your hands or a spatula until the mixture becomes sticky and slightly paste-like. This kneading step is important—it develops the protein structure that keeps the filling moist and cohesive. The filling should be uniform, with no dry spots.

    3. Set Up Your Folding Station: Lay out a clean, dry surface. Place the gyoza wrappers nearby (cover with a damp cloth to prevent drying). Put the filling in a bowl. Place a small bowl of water for sealing. Have a baking sheet lined with parchment paper ready for finished gyoza.

    4. Fold the Gyoza: Hold a wrapper in your non-dominant hand. Place 1 teaspoon of filling in the center (don’t overfill). Dip your fingertip in water and moisten the outer half of the wrapper’s edge. Fold the wrapper in half over the filling, creating a half-moon. Press the edges together to seal, but leave the top edge open. With your thumbs and index fingers, create 4–6 pleats along one side, pressing each pleat against the flat side to seal. The finished dumpling should stand upright slightly on its flat bottom. Place on the parchment-lined baking sheet, pleat-side up, making sure dumplings don’t touch. Repeat with remaining wrappers.

    5. Make the Dipping Sauce: In a small bowl, combine soy sauce, rice vinegar, chili oil, and sliced garlic (if using). Set aside.

    6. Pan-Fry the Gyoza (First Batch): Heat a large nonstick skillet or cast-iron pan over medium-high heat. Add 1 tablespoon of vegetable oil and swirl to coat. Carefully place gyoza in the pan, flat-bottom side down, in a single layer. Do not crowd—leave a little space between each dumpling. Fry for 2–3 minutes until the bottoms are golden-brown and crispy. Peek underneath to check.

    7. Steam the Gyoza: Once the bottoms are golden, add ¼ cup of water to the pan (and ½ teaspoon flour if you want extra crispy lace). Cover immediately with a lid. Reduce heat to medium-low. Steam for 3–4 minutes until the water has mostly evaporated and the wrappers are translucent and cooked through.

    8. Crisp the Bottoms (Final Step): Remove the lid. Increase heat back to medium-high. Let any remaining water evaporate, then cook for another 30–60 seconds until the bottoms become dark golden-brown and extra crispy. The starch from the flour (if added) will create a lacy, crackling crust.

    9. Serve: Carefully slide a spatula under the gyoza to release them. Invert the pan onto a plate to serve them bottom-side up (showing off the crispy crust) or transfer them directly. Serve immediately with the dipping sauce. Repeat with remaining gyoza or freeze the uncooked ones for later (see pro-tips).

    Pro-Tips for Gyoza Greatness

    • Squeeze the cabbage firmly: This is the most important step for juicy dumplings. Wet cabbage = soggy filling and broken wrappers. Don’t be shy.
    • Knead the filling well: The mixture should feel sticky and almost paste-like. This binds the ingredients together and prevents the filling from crumbling.
    • Don’t overfill the wrappers: 1 teaspoon is plenty. Overfilled dumplings burst during cooking and won’t seal properly.
    • Keep wrappers covered: Gyoza wrappers dry out fast. Cover the stack with a damp paper towel while you work.
    • Pleating takes practice: Your first few gyoza will be ugly. By dumpling #20, you’ll see improvement. By #40, you’ll be a pro. Ugly gyoza still taste amazing.
    • Freeze uncooked gyoza: Place them on a parchment-lined baking sheet (not touching) and freeze until solid, then transfer to a freezer bag. Cook from frozen—add 1–2 minutes to the steam time.
    • Don’t skip the starch slurry for extra crunch: Adding a little flour to the steaming water creates a lacy, crispy “wing” (hane) that connects the dumplings—this is how restaurants do it.
    • Nonstick pan is your friend: Gyoza are sticky. A good nonstick skillet makes release much easier.
    • Leftover gyoza: Reheat in a dry pan over medium heat—never microwave (makes them rubbery). These dumplings are a project, but a fun one. Make them with friends, make a mess, and eat standing over the pan. That’s the gyoza way.

  • Takoyaki: Golden Octopus Balls, Osaka Soul

    Takoyaki: Golden Octopus Balls, Osaka Soul

    Takoyaki (たこ焼き) translates to “octopus fried” — but that doesn’t capture the magic. These golden spheres from Osaka are crispy and brown on the outside, soft and almost molten on the inside, with a tender piece of octopus in the center. They’re cooked in a special cast-iron pan with semi-spherical molds, then turned repeatedly until perfectly round. Topped with sweet-salty takoyaki sauce, creamy Japanese mayonnaise, dancing bonito flakes, and green seaweed powder, they’re pure street food joy. Yes, you need the pan. No, you won’t regret buying it.

    The Science of the Custardy Interior & Why You Need Dashi

    Takoyaki’s unique texture comes from a batter that’s much thinner and wetter than pancake batter. The high liquid content (dashi, eggs, flour) creates steam as it cooks, which puffs up the balls and leaves the inside soft and almost pudding-like. The dashi is non-negotiable — it’s a Japanese stock made from kombu (kelp) and bonito flakes. Dashi provides umami and a subtle oceanic flavor that defines authentic takoyaki. Water or plain broth will not work. The cooking method is a low-and-slow rotation. Unlike pancakes that you flip once, takoyaki requires constant turning over 5–7 minutes. This repeated rotation creates the round shape while the exterior sets into a crisp shell and the interior remains custardy. The octopus is parcooked before adding — raw octopus would release water into the batter and make the inside soggy.

    Ingredients

    For the Batter:

    • 1 cup (120g) all-purpose flour
    • 2 cups (480 ml) dashi (Japanese stock — see note)
    • 2 large eggs
    • 1 teaspoon soy sauce
    • ½ teaspoon salt

    For the Fillings:

    • 4 oz (115g) cooked octopus, cut into ½-inch (1.25 cm) chunks (about 24–30 pieces)
    • ¼ cup (30g) green onions (scallions), finely chopped
    • ¼ cup (30g) pickled red ginger (beni shoga or kizami shoga), finely chopped
    • Vegetable oil for greasing the pan

    For the Toppings:

    • Takoyaki sauce (or okonomiyaki sauce)
    • Japanese mayonnaise (Kewpie brand recommended)
    • Aonori (dried green seaweed flakes)
    • Bonito flakes (katsuobushi)
    • Extra pickled ginger (optional)

    Special Equipment:

    • Takoyaki pan (cast iron or electric, 16–24 molds)
    • Takoyaki turning picks or bamboo skewers

    Instructions

    1. Make the Dashi (if not using instant): If using instant dashi powder, dissolve 1 teaspoon powder in 2 cups hot water. If making from scratch, simmer a 4-inch piece of kombu in 2 cups water (don’t boil), remove kombu, add a handful of bonito flakes, steep for 5 minutes, then strain. Set aside to cool slightly.

    2. Make the Batter: In a large bowl, whisk together the flour, dashi, eggs, soy sauce, and salt until smooth. The batter should be thin and runny—thinner than pancake batter. Let it rest for 15–20 minutes. This allows the flour to hydrate fully and reduces lumps.

    3. Prep the Fillings: Finely chop the green onions and pickled ginger. Cut the cooked octopus into small, bite-sized chunks (about ½ inch). Keep each filling in separate small bowls near the stove.

    4. Heat the Takoyaki Pan: Place the takoyaki pan over medium heat. Generously brush each semi-spherical mold with vegetable oil, including the flat surface between molds. Heat until the oil shimmers—a drop of batter should sizzle immediately.

    5. Fill the Molds: Pour the batter into a measuring cup with a spout for easy pouring. Fill each mold completely to the brim—the batter will overflow slightly. This is correct. Working quickly, drop 1–2 pieces of octopus into each mold, followed by a sprinkle of green onions and pickled ginger.

    6. The First Turn (30–45 seconds): After 30–45 seconds, the bottom of each ball will have set and turned golden-brown. Using a takoyaki pick or bamboo skewer, drag the excess batter from between the molds into each ball, then turn each ball 90 degrees. The uncooked batter will spill out—this becomes the next side. Don’t worry about perfection yet.

    7. Continue Turning (Every 30 seconds): Over the next 5–7 minutes, keep turning each ball every 30–45 seconds. Use two picks for better control. The balls will gradually become round as the batter cooks and sets. Add small drizzles of extra batter into any holes or gaps. The outside should become deep golden-brown and crisp, while the inside stays soft.

    8. Final Crisping: Once the balls are perfectly round and uniformly golden-brown (about 6–8 minutes total), brush a tiny amount of oil over them and let them cook for another 30 seconds to crisp the exterior.

    9. Sauce and Serve: Transfer the takoyaki to a plate. Drizzle generously with takoyaki sauce (dark brown, sweet-savory), then zigzag with Japanese mayonnaise. Sprinkle with aonori (green seaweed powder) and a generous handful of bonito flakes—they will dance and move from the heat. Top with extra pickled ginger if desired. Serve immediately with toothpicks or small forks.

    Pro-Tips for Takoyaki Perfection

    • Dashi is essential: Do not substitute water or chicken broth. Dashi’s umami is what makes takoyaki taste like takoyaki. Instant dashi powder (hondashi) is fine and widely available at Asian grocery stores or online.
    • Cooked octopus only: Buy pre-cooked octopus at Japanese or Korean markets. Boil raw octopus for 20–30 minutes until tender, then cool before cutting.
    • Rest the batter: Those 15–20 minutes allow the gluten to relax and the flour to hydrate, resulting in a softer interior.
    • Don’t be afraid of overflow: Overfilling the molds is correct. The excess batter becomes the material you use to build the round shape during turning.
    • Use two turning picks: One pick is frustrating. Two picks give you control to rotate each ball smoothly.
    • Low and slow heat: Medium heat is ideal. Too high and the outside burns before the inside sets. Too low and the balls become dense and greasy.
    • Kewpie mayonnaise is worth it: Japanese mayonnaise has a different flavor (more egg yolk, MSG, and rice vinegar) that pairs perfectly with takoyaki. American mayo is not the same.
    • Bonito flakes dance: The heat from the takoyaki makes the paper-thin bonito flakes curl and move. This is not a defect—it’s the visual signature of the dish.
    • Leftover batter: Use extra batter to make okonomiyaki or Japanese pancakes. The first few takoyaki will be ugly. By the end of the batch, you’ll be a pro. This is the taste of Osaka festivals, and now it’s your kitchen.
  • Po’ Boy Sandwich: Louisiana Crisp, Creole Soul

    Po’ Boy Sandwich: Louisiana Crisp, Creole Soul

    The Po’ Boy (short for “poor boy”) was born in New Orleans during a 1929 streetcar strike, when former streetcar drivers turned sandwich makers served fried oyster sandwiches to their striking colleagues for free. Today, it’s Louisiana’s most famous sandwich—and for good reason. A perfectly fried seafood filling (shrimp, oysters, or catfish) tucked into crusty-yet-soft French bread, dressed with lettuce, tomato, pickles, and a tangy, spicy remoulade sauce. It’s crunchy, creamy, briny, and completely unforgettable. This recipe delivers the real deal at home.

    The Science of a Shatter-Crisp Crust That Stays Put & The Bread Factor

    The Po’ Boy’s signature crunch comes from a wet-dry-wet dredging station: first seasoned flour, then an egg-milk wash, then a cornmeal-and-flour mixture. The cornmeal is the secret weapon—its irregular, granular particles create a jagged, craggy surface that gets maximally crispy in hot oil. Unlike a smooth flour-only coating, cornmeal stays crunchy longer, even under the moisture of the remoulade and tomato juices. The bread is equally important. A true Po’ Boy uses New Orleans-style French bread—crisp and flaky on the outside, but light and airy inside, not dense like a baguette. If you can’t find it, a soft hoagie roll or Italian bread works, but avoid anything too chewy. The bread should compress slightly when bitten, not fight back. The “dressed” toppings (lettuce, tomato, pickle, sauce) aren’t just garnish—they provide coolness, acidity, and moisture that balance the rich, fried seafood.

    Ingredients

    For the Fried Shrimp (or Oysters):

    • 1 lb (450g) large shrimp, peeled, deveined, tails off (or shucked oysters)
    • Vegetable oil for frying (about 4–6 cups / 1–1.5 liters)

    For the Dredging Station:

    • ½ cup (60g) all-purpose flour (for first dredge)
    • 1 teaspoon Cajun or Creole seasoning (like Tony Chachere’s)
    • ½ teaspoon salt
    • ¼ teaspoon black pepper
    • 2 large eggs
    • ¼ cup (60 ml) milk
    • 1 cup (120g) yellow cornmeal (fine or medium grind)
    • ½ cup (60g) all-purpose flour (for final dredge)
    • 1 teaspoon additional Cajun seasoning

    For the Creole Remoulade Sauce:

    • ½ cup (120g) mayonnaise
    • 2 tablespoons Creole mustard (or whole grain mustard)
    • 1 tablespoon hot sauce (like Crystal or Tabasco)
    • 1 tablespoon ketchup
    • 1 teaspoon paprika
    • 1 clove garlic, minced
    • 1 teaspoon prepared horseradish (optional)
    • 1 teaspoon lemon juice

    For the Sandwich Assembly:

    • 1 loaf French bread (soft style, about 12 inches / 30 cm), or 2 smaller loaves
    • 1 cup shredded iceberg lettuce
    • 1 medium tomato, thinly sliced
    • Dill pickle slices
    • Hot sauce for serving (optional)

    Instructions

    1. Make the Remoulade Sauce: In a small bowl, whisk together the mayonnaise, Creole mustard, hot sauce, ketchup, paprika, minced garlic, horseradish (if using), and lemon juice until smooth. The sauce should be pale pink, creamy, and tangy. Refrigerate until ready to use. Can be made up to 3 days ahead.

    2. Set Up the Dredging Station: Prepare three shallow bowls. Bowl 1: Mix ½ cup flour, 1 teaspoon Cajun seasoning, ½ teaspoon salt, and ¼ teaspoon pepper. Bowl 2: Whisk together the eggs and milk until smooth. Bowl 3: Mix 1 cup cornmeal, ½ cup flour, and 1 additional teaspoon Cajun seasoning. Line a plate or wire rack at the end for the dredged shrimp.

    3. Dredge the Shrimp: Pat the shrimp completely dry with paper towels. Working one at a time, dredge each shrimp in the seasoned flour (Bowl 1), shaking off excess. Then dip into the egg wash (Bowl 2), letting excess drip off. Finally, coat in the cornmeal mixture (Bowl 3), pressing gently to adhere. Place on a wire rack. Repeat with all shrimp. Let the coated shrimp rest for 10 minutes—this helps the coating set.

    4. Heat the Oil: Pour vegetable oil into a heavy-bottomed pot or Dutch oven to a depth of about 2 inches (5 cm). Heat to 350°F (175°C). Use a deep-fry thermometer. No thermometer? A pinch of flour dropped in should sizzle immediately.

    5. Fry the Shrimp: Carefully add the shrimp to the hot oil in batches (do not overcrowd). Fry for 2–3 minutes until golden-brown and crisp. The shrimp should float and the coating should be dark golden. Remove with a slotted spoon and drain on a wire rack (not paper towels—paper towels trap steam). Repeat with remaining shrimp.

    6. Prep the Bread: While the shrimp fry, slice the French bread loaf lengthwise, but not all the way through—leave one side hinged like a book. Open it up. If desired, toast the inside of the bread under a broiler for 1–2 minutes until lightly crisp. This helps prevent sogginess.

    7. Dress the Bread: Spread a generous amount of remoulade sauce on both sides of the inside of the bread. On the bottom half, layer the shredded lettuce, tomato slices, and pickle slices. The lettuce acts as a moisture barrier between the hot shrimp and the bread.

    8. Pile on the Shrimp: Arrange the hot, crispy fried shrimp on top of the dressed vegetables. The shrimp should be mounded high—this is a Po’ Boy, not a skinny sandwich. Drizzle with a little more remoulade if desired.

    9. Close, Press, and Serve: Close the sandwich gently, pressing down slightly so the bread compresses around the fillings. Slice diagonally into two or three pieces. Serve immediately with extra hot sauce on the side. Eat with napkins—lots of napkins.

    Pro-Tips for a True NOLA Po’ Boy

    • Use Louisiana-style hot sauce: Crystal or Tabasco has the right vinegar tang. Frank’s RedHot is close but not quite authentic.
    • Cornmeal is non-negotiable: It creates the signature craggy, shatter-crisp crust. Flour-only coatings are too smooth.
    • Don’t skip the rest after dredging: Those 10 minutes let the coating hydrate and adhere, preventing “bald spots” where the coating falls off during frying.
    • Fry in small batches: Overcrowding drops the oil temperature, and the shrimp will absorb oil instead of crisping.
    • Drain on a wire rack, not paper towels: Paper towels trap steam and make the crust soft. A wire rack keeps air circulating.
    • Shrimp vs. oysters: Shrimp are more common outside Louisiana; oysters are the classic. Both work. If using oysters, pat them very dry and fry for 2–3 minutes (they cook faster).
    • Lettuce goes directly on the bread: This isn’t decorative—it’s a moisture barrier. Hot shrimp on bare bread = soggy bread.
    • Eat immediately: A Po’ Boy has a 10-minute window of perfection. After that, the steam softens the crunch.
    • Make it a “debris” Po’ Boy: Add shredded roast beef with gravy under the shrimp for a “dressed and debris” sandwich—a New Orleans specialty. This is messy, magnificent, and tastes like the French Quarter. Laissez les bons temps rouler!
  • Spicy Korean Fried Chicken (Yangnyeom Chicken)

    Spicy Korean Fried Chicken (Yangnyeom Chicken)

    Korean fried chicken is in a league of its own. Unlike its American counterpart, this chicken is double-fried to achieve a paper-thin, shatteringly crisp crust that stays crunchy even after being drenched in sauce.

    The most iconic version? Yangnyeom chicken—tossed in a sticky, fiery gochujang-based glaze that balances sweet, spicy, savory, and tangy in perfect harmony. This is the chicken that has taken the world by storm, appearing in K-dramas, Korean BBQ restaurants, and street food stalls across Seoul.

    While it looks like a project, the double-frying technique is surprisingly straightforward, and the sauce comes together in minutes. Whether you’re hosting a game day gathering, a K-drama watch party, or simply craving something bold and satisfying, this spicy Korean fried chicken is guaranteed to impress.

    Ingredients

    For the Chicken:

    • 2 lbs (900g) chicken wings or drumettes
    • 1 teaspoon salt
    • 1 teaspoon black pepper
    • 1 teaspoon grated ginger (optional)
    • ½ cup (60g) potato starch or cornstarch
    • ¼ cup (30g) all-purpose flour (optional, for extra crunch)
    • Neutral oil for frying (vegetable, canola, or peanut oil)

    For the Yangnyeom Sauce:

    • ¼ cup (60g) gochujang (Korean red chili paste)
    • 2 tablespoons gochugaru (Korean red chili flakes, optional for extra heat)
    • 3 tablespoons soy sauce
    • 3 tablespoons honey or corn syrup
    • 2 tablespoons brown sugar
    • 1 tablespoon rice vinegar or apple cider vinegar
    • 1 tablespoon sesame oil
    • 3 cloves garlic, minced
    • 1 teaspoon grated ginger

    For Garnish and Serving:

    • 2 tablespoons toasted sesame seeds
    • 2 green onions, thinly sliced
    • Pickled radish (danmuji), for serving (optional)
    • Extra sesame oil for drizzling

    Instructions

    1. Prepare the Chicken: Pat the chicken wings completely dry with paper towels. In a large bowl, season with salt, pepper, and grated ginger (if using). Toss to coat. Let sit for 15 to 30 minutes at room temperature.

    2. Coat the Chicken: In a large bowl or resealable bag, combine the potato starch and flour (if using). Add the chicken and toss until each piece is evenly coated. Shake off any excess starch. Let the coated chicken rest for 10 to 15 minutes—this allows the coating to hydrate slightly, ensuring it adheres during frying.

    3. First Fry: In a heavy-bottomed pot or Dutch oven, heat 2 to 3 inches of oil to 325°F to 340°F (165°C to 170°C). Working in batches, carefully add the chicken in a single layer, avoiding overcrowding.

    Fry for 8 to 10 minutes, turning occasionally, until the chicken is cooked through and the coating is pale golden but not deeply browned. Remove with a spider skimmer and drain on a wire rack. Repeat with remaining chicken. Let the chicken rest for 10 to 15 minutes between fries.

    4. Make the Yangnyeom Sauce: While the chicken rests, prepare the sauce. In a small saucepan, combine the gochujang, gochugaru (if using), soy sauce, honey, brown sugar, rice vinegar, sesame oil, minced garlic, and grated ginger.

    Cook over medium-low heat, stirring constantly, until the sugar dissolves and the sauce thickens slightly, about 3 to 4 minutes. Remove from heat and set aside.

    5. Second Fry: Increase the oil temperature to 350°F to 375°F (175°C to 190°C). Fry the chicken again in batches for 3 to 5 minutes, until deep golden brown, shatteringly crisp, and the coating sounds hollow when tapped. Drain on a wire rack.

    6. Coat the Chicken: Transfer the hot fried chicken to a large bowl. Pour the yangnyeom sauce over the chicken and toss quickly to coat evenly. The sauce should cling to the chicken without making it soggy.

    7. Garnish and Serve: Transfer the coated chicken to a serving platter. Sprinkle generously with toasted sesame seeds and sliced green onions. Serve immediately with pickled radish on the side for a refreshing contrast. The chicken is best enjoyed fresh, while the coating remains impossibly crisp.

    This Spicy Korean Fried Chicken delivers the addictive combination of crunch, heat, and sweetness that has made it a global phenomenon—a true showstopper for any occasion.

  • Authentic Elotes: Mexican Street Corn

    Authentic Elotes: Mexican Street Corn

    Elotes, or Mexican street corn, is one of the most beloved street foods in Mexico—grilled corn on the cob slathered in a creamy mixture of mayonnaise and Mexican crema, then rolled in crumbled cotija cheese and sprinkled with chili powder and fresh cilantro.

    It’s the perfect combination of smoky, creamy, tangy, and spicy. Whether you’re at a street fair in Mexico City or grilling in your own backyard, elotes are pure summer bliss. This authentic recipe captures all the flavors of this iconic dish.

    Ingredients

    For the Elotes (serves 4):

    • 4 ears fresh corn, husked
    • ¼ cup (60g) mayonnaise
    • ¼ cup (60ml) Mexican crema or sour cream
    • ½ cup (50g) cotija cheese, crumbled
    • 1 teaspoon chili powder or Tajín
    • ¼ cup fresh cilantro, chopped
    • 1 lime, cut into wedges
    • Salt to taste

    Instructions

    1. Preheat the Grill: Preheat your grill to medium-high heat (about 400°F / 200°C).

    2. Grill the Corn: Place the husked corn directly on the grill grates. Grill for 10-12 minutes, turning occasionally, until the corn is tender and charred in spots.

    3. Make the Sauce: While the corn grills, in a small bowl, combine the mayonnaise and Mexican crema. Mix well.

    4. Coat the Corn: Remove the corn from the grill. While still hot, brush or spread the creamy sauce generously over each ear of corn.

    5. Add Toppings: Sprinkle the crumbled cotija cheese over the sauced corn, turning to coat. The cheese will stick to the creamy sauce. Sprinkle with chili powder and fresh cilantro.

    6. Serve: Serve immediately with lime wedges for squeezing over the top.

    Pro-Tips for Elote Perfection

    • Get a Good Char: Don’t be afraid of char marks—they add smoky flavor.
    • Work Quickly: Apply the sauce and toppings while the corn is still hot so everything sticks.
    • Use Cotija Cheese: It’s salty and crumbly—perfect for elotes. Feta can substitute in a pinch.
    • Try Tajín: Tajín is a Mexican seasoning made with chili, lime, and salt—it’s perfect on elotes.
    • Make It a Meal: Serve elotes as a side for tacos, grilled meats, or at your next barbecue.
    • Esquites Option: For a bowl version, cut the grilled corn off the cob and toss with the sauce and toppings—serve in cups.
    • Double the Sauce: Make extra sauce—you’ll want it.
    • Fresh Corn is Best: Fresh, sweet corn is ideal, but this works with frozen corn on the cob too (thaw first).

    These Authentic Elotes are Mexican street corn at its finest—absolutely delicious.

  • Classic Jelly Doughnuts (Soft, Pillowy, Jam-Filled)

    Classic Jelly Doughnuts (Soft, Pillowy, Jam-Filled)

    There’s something magical about biting into a soft, pillowy doughnut and discovering that hidden pocket of sweet, tangy jam inside. Jelly doughnuts are a universal pleasure—whether you call them sufganiyot for Hanukkah, Berliners in Germany, or just your favorite treat from the local bakery.

    This recipe delivers doughnuts that are impossibly light and tender, with a crisp golden exterior giving way to an airy interior. Filled with raspberry jam and dusted with powdered sugar, they’re pure bliss. Making them at home is a project, but the reward—warm, fresh doughnuts—is absolutely worth it.

    Ingredients

    For the Doughnut Dough (makes about 12-15 doughnuts):

    • 1 cup (240ml) whole milk, warmed to 110°F (43°C)
    • 2 ¼ teaspoons (1 packet) active dry yeast
    • ¼ cup (50g) granulated sugar
    • 3 ½ cups (440g) all-purpose flour, plus more for rolling
    • ½ teaspoon salt
    • 2 large eggs, room temperature
    • ¼ cup (60g) unsalted butter, melted and cooled
    • 1 teaspoon vanilla extract
    • Vegetable or peanut oil, for frying

    For the Filling and Topping:

    • 1 ½ cups (about 450g) seedless raspberry jam (or strawberry, apricot)
    • 1 cup (120g) powdered sugar, for dusting
    • Additional granulated sugar for coating (optional)

    Instructions

    1. Activate the Yeast: In a small bowl, combine the warm milk, yeast, and a pinch of sugar. Let sit for 5-10 minutes until foamy and bubbly.

    2. Mix the Dough: In a large bowl or stand mixer fitted with the dough hook, combine the flour, remaining sugar, and salt. Add the yeast mixture, eggs, melted butter, and vanilla. Mix on low speed until a shaggy dough forms, then knead on medium-low for 5-7 minutes until smooth and elastic. The dough should be soft and slightly tacky but not sticky.

    3. First Rise: Transfer the dough to a lightly oiled bowl, cover with plastic wrap or a damp towel, and let rise in a warm place until doubled in size, about 1-2 hours.

    4. Roll and Cut: Punch down the dough and turn it out onto a lightly floured surface. Roll to about ½-inch thickness. Use a 3-inch round cutter to cut out circles. Place on a parchment-lined baking sheet, spacing about 2 inches apart. Gather scraps, re-roll, and cut additional circles.

    5. Second Rise: Cover the cut doughnuts loosely with plastic wrap or a kitchen towel and let rise until puffy and nearly doubled, about 30-45 minutes.

    6. Heat the Oil: In a heavy-bottomed pot or deep fryer, heat about 3 inches of oil to 350°F (175°C). Use a thermometer to maintain temperature.

    7. Fry the Doughnuts: Carefully place 2-3 doughnuts into the hot oil (don’t overcrowd). Fry for 1-2 minutes per side, until golden brown. Use a slotted spoon or spider strainer to flip and remove. Drain on a wire rack set over a baking sheet (not paper towels—they’ll get greasy).

    8. Cool Slightly: Let the doughnuts cool just until you can handle them, about 5-10 minutes. They should still be warm.

    9. Fill with Jam: Transfer the raspberry jam to a piping bag fitted with a Bismarck tip (a long, narrow tip) or a round tip. Insert the tip into the side of each doughnut and gently squeeze until you feel the doughnut expand slightly. Don’t overfill—about 1-2 tablespoons per doughnut.

    10. Dust and Serve: Generously dust the filled doughnuts with powdered sugar. Serve immediately—they’re best the day they’re made.

    Pro-Tips for Jelly Doughnut Perfection

    • Use a Thermometer: Maintaining the correct oil temperature is crucial. Too cool = greasy doughnuts; too hot = burnt outside, raw inside.
    • Don’t Overcrowd the Fryer: Frying too many at once drops the oil temperature. Work in small batches.
    • Drain on a Rack: Paper towels trap steam and make doughnuts soggy. A wire rack keeps them crisp.
    • Fill While Warm: Slightly warm doughnuts are easier to fill and the jam spreads beautifully.
    • Use Seedless Jam: Seeds can clog your piping tip. Seedless raspberry jam gives the smoothest result.
    • Don’t Overfill: Too much jam will burst out the sides. A gentle squeeze until the doughnut expands slightly is perfect.
    • Serve Fresh: Jelly doughnuts are at their absolute best the day they’re made.
    • Variations: Try different jams (strawberry, apricot), pastry cream, or chocolate hazelnut spread.

    These Classic Jelly Doughnuts are soft, pillowy, and absolutely delicious.

  • Sausage Rolls: Buttery, Flaky, Aussie-British Perfection

    Sausage Rolls: Buttery, Flaky, Aussie-British Perfection

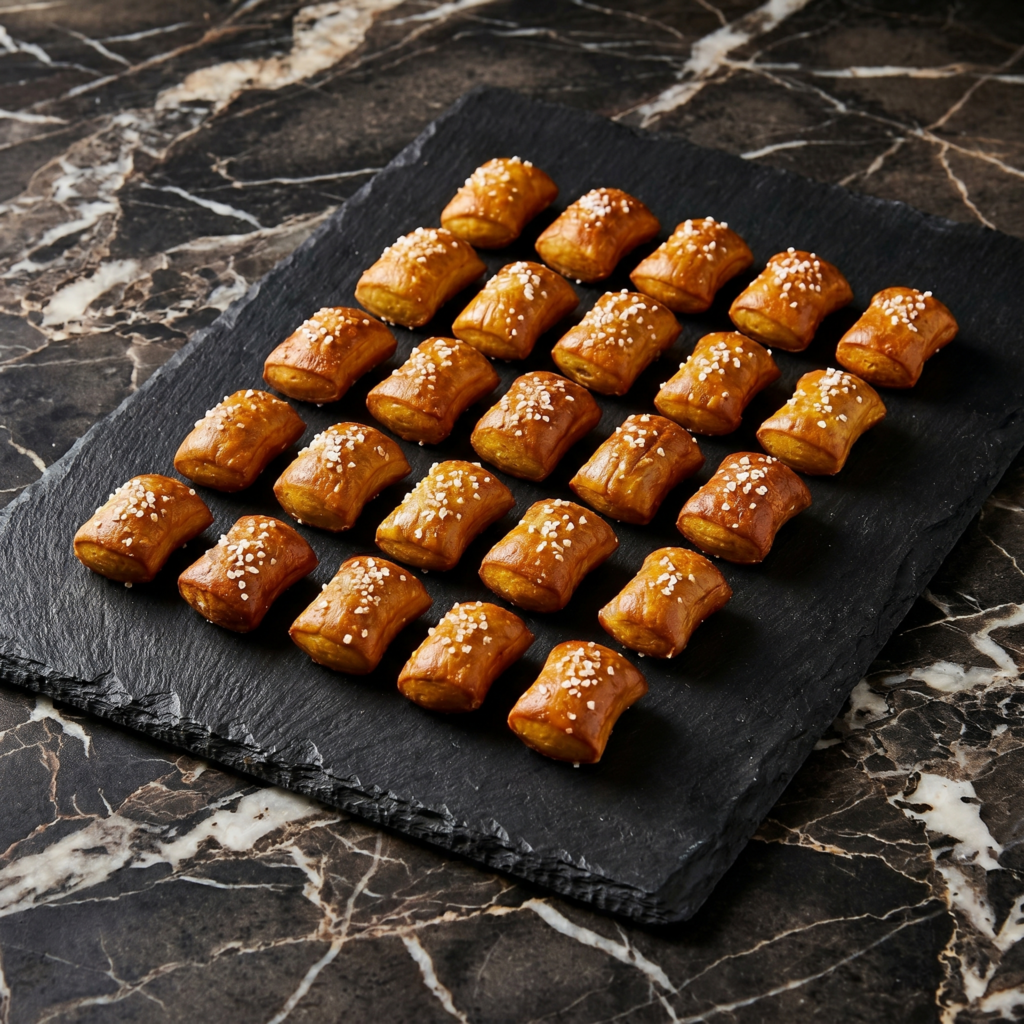
    Sausage rolls are exactly what they sound like—sausage meat wrapped in buttery puff pastry—but they’re so much more than the sum of their parts. The pastry is golden, flaky, and shatteringly crisp. The filling is juicy, savory, and seasoned with herbs, onion, and a hint of spice. They’re a staple of Australian and British bakeries, and once you’ve made them at home, you’ll never buy frozen ones again. The best part? They’re incredibly easy. Store-bought puff pastry does the heavy lifting. You just mix the filling, roll, slice, egg wash, and bake.

    The Science of Puff Pastry & Why You Need Breadcrumbs in Sausage Meat

    Puff pastry rises because of layers of butter trapped between layers of dough. When the pastry hits the hot oven, the water in the butter turns to steam, forcing the layers apart and creating hundreds of flaky, airy sheets. This is why you should keep the pastry cold until it goes into the oven—if the butter melts before baking, the layers collapse and you get dense, greasy pastry, not flaky pastry. The sausage filling needs breadcrumbs (or panko) for a specific reason: they absorb excess moisture and fat from the meat as it cooks, preventing the filling from shrinking away from the pastry or making the bottom soggy. Breadcrumbs also lighten the texture, keeping the sausage roll juicy but not dense. Egg wash isn’t just for color—it helps the pastry seal at the seam and creates a glossy, golden-brown finish.

    Ingredients

    For the Sausage Filling:

    • 1 lb (450g) ground pork (not lean — 80/20 is ideal)
    • ½ cup (50g) breadcrumbs or panko
    • 1 small onion, very finely chopped or grated
    • 2 cloves garlic, minced
    • 1 teaspoon fresh thyme leaves (or ½ teaspoon dried)
    • 1 teaspoon fresh rosemary, finely chopped (or ½ teaspoon dried)
    • 1 teaspoon fennel seeds (optional, for sausage flavor)
    • 1 teaspoon salt
    • ½ teaspoon black pepper
    • ¼ teaspoon nutmeg (optional, but traditional)
    • 1 large egg (for the filling, binds everything)

    For the Pastry & Assembly:

    • 1 sheet (about 8 oz / 225g) all-butter puff pastry, thawed if frozen
    • 1 large egg (for egg wash)
    • 1 tablespoon milk or water (for egg wash)
    • Sesame seeds or poppy seeds for topping (optional)

    For Serving:

    • Tomato chutney, ketchup, or HP sauce

    Instructions

    1. Preheat the Oven: Preheat your oven to 400°F (200°C). Line a baking sheet with parchment paper.

    2. Make the Sausage Filling: In a large bowl, combine the ground pork, breadcrumbs, finely chopped onion, minced garlic, thyme, rosemary, fennel seeds (if using), salt, pepper, nutmeg, and the egg. Mix with your hands until everything is evenly combined. Do not overmix—overworking makes the filling dense. The mixture should be moist but hold its shape when pressed.

    3. Roll the Filling into Logs: On a lightly floured surface or piece of plastic wrap, divide the filling into 2 equal portions. Roll each portion into a log about 12 inches (30 cm) long, roughly the same length as your puff pastry sheet. Set aside.

    4. Prepare the Puff Pastry: Unroll the puff pastry sheet on a lightly floured surface. If it comes folded, gently roll it out to smooth the creases. Cut the pastry lengthwise into 2 long rectangles (each about 12 x 4 inches / 30 x 10 cm).

    5. Assemble the Sausage Rolls: Place one sausage filling log along the center of each pastry rectangle. Brush one long edge of the pastry with water (this helps the seal stick). Fold the pastry over the filling, enclosing it completely. Press the seam firmly to seal. You should have a long, filled pastry log. Repeat with the second rectangle.

    6. Crimp and Slice: Use a fork to press along the sealed seam for a decorative edge (optional). Place the logs seam-side down on the prepared baking sheet. Using a sharp knife, score or slice each log into 4–6 equal pieces (about 2–3 inches / 5–7 cm each). Do not separate them completely—just cut through the pastry so they’re easy to break apart after baking.

    7. Egg Wash and Top: In a small bowl, whisk together the egg and milk or water. Brush the egg wash generously over the top and sides of each sausage roll (avoid the cut sides if you want them to puff more). Sprinkle with sesame seeds or poppy seeds if desired.

    8. Bake: Bake for 20–25 minutes until the pastry is deep golden-brown, puffed, and flaky, and the filling is cooked through (internal temperature of 165°F / 74°C). Rotate the baking sheet halfway through for even browning.

    9. Serve: Let the sausage rolls cool on the baking sheet for 5 minutes. Break them apart along the scored lines. Transfer to a serving platter. Serve warm or at room temperature with tomato chutney, ketchup, or HP sauce on the side.

    Pro-Tips for Sausage Roll Greatness

    • Keep the puff pastry cold: Warm pastry is sticky and hard to work with, and the butter can melt before baking. If the pastry gets soft, pop it in the fridge for 10 minutes.
    • Don’t overmix the filling: Mix just until combined. Overworked sausage meat becomes dense and rubbery instead of tender and juicy.
    • Grate the onion: Finely grated onion melts into the filling, adding moisture and flavor without chunks.
    • Use all-butter puff pastry: The flavor is vastly superior to margarine-based pastry. Look for brands like Dufour or Pepperidge Farm.
    • Seal the seam well: A poorly sealed sausage roll will burst open in the oven, leaking fat and making a mess. Press firmly, then crimp with a fork.
    • Seam-side down: Placing the rolls seam-side down keeps them closed during baking and creates a smoother top.
    • Score, don’t separate: Cutting through the pastry before baking (but leaving the rolls attached) gives you clean, even slices while keeping the pastry edges from drying out.
    • Freeze for later: Assemble uncooked sausage rolls on a parchment-lined baking sheet and freeze until solid. Transfer to a freezer bag. Bake from frozen—add 8–10 minutes to the baking time.
    • Make mini sausage rolls: Use the same recipe but cut the pastry into 3 narrower strips and make bite-sized rolls (about 1.5 inches long). Bake for 15–18 minutes.
    • Add cheese or apple: Grate some sharp cheddar into the filling or add finely chopped apple for a sweet-savory twist. These sausage rolls are dangerously good. Make a double batch—one for now, one for the freezer. You’ll thank yourself later.
  • Perfect Rice Krispie Treats (Buttery, Gooey, Irresistible)

    Perfect Rice Krispie Treats (Buttery, Gooey, Irresistible)

    Rice Krispie treats are pure nostalgia—the no-bake classic that everyone loves. But there’s a world of difference between a good Rice Krispie treat and a perfect one. The perfect version is buttery, impossibly gooey, and perfectly chewy with that signature marshmallow pull in every bite.

    It’s not too hard, not too soft, and absolutely packed with that toasty cereal flavor. This recipe delivers that perfection every time, with a few simple tricks: using good butter, a touch of vanilla, and a sprinkle of flaky salt to balance the sweetness. They come together in minutes, disappear even faster, and are guaranteed to make everyone smile.

    Ingredients

    For the Rice Krispie Treats (makes one 9×13 pan, about 12-16 treats):

    • ¼ cup (60g) unsalted butter
    • 1 package (10 oz / 280g) mini marshmallows (about 6 cups)
    • ½ teaspoon vanilla extract
    • ¼ teaspoon salt (if using unsalted butter)
    • 6 cups (about 180g) Rice Krispies cereal
    • Flaky sea salt, for sprinkling

    Instructions

    1. Prep the Pan: Grease a 9×13-inch baking dish with butter or non-stick spray. Set aside.

    2. Melt the Butter: In a large pot or Dutch oven over low heat, melt the butter completely.

    3. Add Marshmallows: Add the mini marshmallows to the melted butter. Stir constantly with a silicone spatula or wooden spoon until the marshmallows are completely melted and the mixture is smooth. Remove from heat immediately.

    4. Add Vanilla and Salt: Stir in the vanilla extract and salt (if using) until combined.

    5. Add Cereal: Add the Rice Krispies cereal all at once. Fold gently until the cereal is evenly coated with the marshmallow mixture. Be careful not to crush the cereal—you want those crispy pieces intact.

    6. Transfer to Pan: Scrape the mixture into the prepared pan. Using a lightly buttered spatula or your buttered hands, gently press the mixture into an even layer. Don’t press too hard—you want them chewy, not dense.

    7. Sprinkle with Salt: Immediately sprinkle the top with flaky sea salt.

    8. Cool and Set: Let the treats cool completely at room temperature until set, about 1 hour.

    9. Cut and Serve: Cut into squares with a sharp knife. Serve and enjoy!

    Pro-Tips for Rice Krispie Treat Perfection

    • Use Fresh Marshmallows: Stale marshmallows won’t melt smoothly and can result in grainy treats. Use a fresh bag for best results.
    • Low Heat Is Key: Melting over low heat prevents the sugar from crystallizing and ensures a smooth, gooey texture.
    • Work Quickly: The marshmallow mixture sets up fast. Have your cereal measured and pan ready before you start melting.
    • Don’t Overpress: Pressing too firmly creates dense, hard treats. Gentle pressure keeps them light and chewy.
    • Butter Your Utensils: A lightly buttered spatula or buttered hands prevent sticking when pressing the mixture into the pan.
    • Flaky Salt Finish: Don’t skip this—the salt balances the sweetness and adds sophistication.
    • Customize: Add mix-ins like chocolate chips, sprinkles, or peanut butter chips after removing from heat. Swirl in some peanut butter or Nutella for extra indulgence.
    • Storage: Keep in an airtight container at room temperature for up to 3 days. They’ll stay soft and chewy.

    These Perfect Rice Krispie Treats are buttery, gooey, and absolutely irresistible.

  • Perfect Crinkle Cookies (Fudgy, Crackled, Powdered Sugar)

    Perfect Crinkle Cookies (Fudgy, Crackled, Powdered Sugar)

    Crinkle cookies are a showstopper—deep, dark chocolate cookies with a dramatic crackled surface, generously dusted with powdered sugar that contrasts beautifully against the fudgy interior. They look like they came from a fancy bakery, but they’re surprisingly simple to make.

    The secret is in the dough: it’s intentionally soft and needs plenty of chilling, but the result is a cookie that’s rich, fudgy, and absolutely irresistible. Every bite has that perfect brownie-like texture, with just the right amount of sweetness. Whether for holiday cookie plates, bake sales, or just because, these crinkle cookies never fail to impress.

    Ingredients

    For the Crinkle Cookies (makes about 24-30 cookies):

    • ½ cup (1 stick / 113g) unsalted butter
    • 4 oz (115g) semi-sweet or bittersweet chocolate, chopped
    • 1 cup (200g) granulated sugar
    • 2 large eggs, room temperature
    • 1 teaspoon vanilla extract
    • 1 ½ cups (190g) all-purpose flour
    • ½ cup (45g) unsweetened cocoa powder (Dutch-process preferred)
    • 1 teaspoon baking powder
    • ½ teaspoon salt

    For Rolling:

    • ½ cup (100g) granulated sugar
    • 1 cup (120g) powdered sugar

    Instructions

    1. Melt Butter and Chocolate: In a medium saucepan over low heat, melt the butter and chopped chocolate together, stirring constantly until smooth. Remove from heat and let cool slightly.

    2. Add Sugar: Whisk the granulated sugar into the melted chocolate mixture until well combined.

    3. Add Eggs and Vanilla: Add the eggs one at a time, whisking vigorously after each addition until the batter becomes smooth and glossy. Whisk in the vanilla extract.

    4. Combine Dry Ingredients: In a separate bowl, whisk together the flour, cocoa powder, baking powder, and salt.

    5. Mix Wet and Dry: Gradually add the flour mixture to the wet ingredients, folding with a spatula until just combined. Do not overmix. The dough will be soft and slightly sticky.

    6. Chill the Dough: Cover the bowl and refrigerate for at least 2 hours, preferably 3-4 hours or overnight. Chilling is essential—the dough needs to be firm enough to roll.

    7. Preheat and Prep: Preheat your oven to 350°F (175°C). Line baking sheets with parchment paper.

    8. Set Up Rolling Sugars: Place the granulated sugar in one shallow bowl and the powdered sugar in another shallow bowl.

    9. Scoop and Roll: Using a cookie scoop or tablespoon, portion the chilled dough into 1½-tablespoon balls. Roll each ball first in the granulated sugar to coat completely, then roll generously in the powdered sugar. Make sure they’re heavily coated—this creates the crackled effect.

    10. Place on Baking Sheets: Place the coated dough balls on the prepared baking sheets, leaving about 2 inches between each cookie.

    11. Bake: Bake for 10-12 minutes, until the edges are set and the cookies have puffed and cracked. The centers will still look soft—that’s perfect. Do not overbake.

    12. Cool: Let cookies cool on the baking sheet for 5 minutes, then transfer to wire racks to cool completely. The cracks will become more pronounced as they cool.

    Pro-Tips for Crinkle Cookie Perfection

    • Chill Thoroughly: This dough is very soft. Chilling for at least 2 hours is essential—overnight is even better.
    • Don’t Skip the Double Roll: Rolling first in granulated sugar helps the powdered sugar adhere and creates a better crackle.
    • Be Generous with Powdered Sugar: Heavy coating creates those beautiful white cracks against the dark chocolate.
    • Don’t Overbake: Pull cookies when edges are set but centers still look soft. They’ll continue baking from residual heat and stay fudgy.
    • Room Temperature Eggs: Cold eggs can seize the chocolate mixture. Let them warm up first.
    • Use Good Chocolate: Quality chocolate makes a difference in flavor. Semi-sweet or bittersweet is ideal.
    • Make Ahead: Dough can be refrigerated for up to 3 days or frozen for 3 months. Roll in sugars just before baking.
    • Variations: Try adding peppermint extract for holiday cookies, or roll in colored sugar for festive occasions.

    These Perfect Crinkle Cookies are fudgy, crackled, and absolutely beautiful.