Blog

  • Classic Zucchini Bread: The Secret to a Perfectly Moist, Spiced Loaf

    Classic Zucchini Bread: The Secret to a Perfectly Moist, Spiced Loaf

    Zucchini bread is the ultimate culinary sleight of hand: a vegetable transformed into a sweet, tender, and irresistibly spiced treat. This classic recipe is the one you’ll return to year after year—a forgiving, one-bowl wonder that yields loaves with a beautiful domed top, a crackly sugar crust, and an impossibly moist interior that stays fresh for days.

    The secret lies not just in the shredded zucchini, but in the perfect balance of oil, sugar, and warm spices that let the vegetable’s subtle sweetness shine. Whether you’re looking for a clever way to use up a garden glut, a portable breakfast, or a comforting afternoon snack, this zucchini bread is the delicious, versatile answer.

    The Science of “Hidden” Moisture & Structure

    The magic of zucchini bread is a brilliant manipulation of moisture. Grated zucchini is about 95% water. When baked, this water slowly steams out, but not before it hydrates the surrounding flour and creates an exceptionally moist crumb.

    However, moisture alone would make a soggy, dense loaf. The structure comes from the careful balance of oil and eggs. The oil coats the flour proteins, inhibiting gluten development and ensuring tenderness, while the eggs provide proteins that coagulate to set the loaf’s structure as it bakes.

    The sugar does triple duty: it sweetens, it tenderizes by interfering with gluten, and it caramelizes at the edges to create that beautiful, crisp crust.

    The moderate oven temperature is key—it’s hot enough to create a good rise and set the structure before the zucchini releases all its water, but not so hot that the crust burns before the center is done.

    Ingredients

    For Two 9×5-inch Loaves or One 10-inch Bundt:

    • 3 cups (about 1 lb / 450g) grated zucchini (2-3 medium), unpeeled*
    • 3 cups (375g) all-purpose flour
    • 2 teaspoons baking soda
    • ½ teaspoon baking powder
    • 1 teaspoon salt
    • 2 teaspoons ground cinnamon
    • ½ teaspoon ground nutmeg
    • 3 large eggs, at room temperature
    • 1 cup (200g) granulated sugar
    • 1 cup (200g) packed light brown sugar
    • 1 cup (240ml) vegetable oil or melted coconut oil
    • 1 tablespoon vanilla extract
    • 1 cup (120g) chopped walnuts or pecans (optional)
    • 1 cup (170g) chocolate chips (optional)

    *Do not drain the zucchini after grating. The moisture is essential.

    Instructions

    1. Prep: Preheat oven to 350°F (175°C). Grease and flour two 9×5-inch loaf pans. Grate the zucchini using the large holes of a box grater. No need to squeeze it dry.

    2. Whisk Dry Ingredients: In a large bowl, whisk together the flour, baking soda, baking powder, salt, cinnamon, and nutmeg.

    3. Mix Wet Ingredients: In another large bowl, whisk the eggs vigorously until frothy. Add both sugars and whisk until combined and slightly pale. Slowly stream in the oil while whisking constantly, then whisk in the vanilla.

    4. Combine & Fold: Add the dry ingredients to the wet ingredients. Stir with a spatula until just combined and no dry flour remains—do not overmix. Fold in the grated zucchini, and the nuts or chocolate chips if using. The batter will be thick.

    5. Bake: Divide the batter evenly between the prepared pans. Bake for 50-65 minutes, or until a toothpick inserted into the center of a loaf comes out clean or with a few moist crumbs. The tops will be deeply golden brown and spring back when lightly pressed.

    6. Cool Completely: Let the loaves cool in the pans on a wire rack for 20 minutes. Then, run a knife around the edges and carefully turn them out onto the rack to cool completely before slicing. This prevents a gummy texture.

    7. Storage: Once completely cool, wrap tightly in plastic wrap or store in an airtight container at room temperature for up to 4 days, or freeze for up to 3 months.

    8. Pro-Tip: For an extra-special touch, sprinkle the top of the batter in the pans with a tablespoon of turbinado sugar before baking for a sparkling, crunchy crust.

    Pro-Tips for Zucchini Bread Perfection

    • Don’t Drain the Zucchini: The natural moisture is your secret weapon for a moist loaf. Draining it will result in dry bread.
    • Room Temperature Eggs: They incorporate more easily into the batter, creating a better emulsion for a uniform rise.
    • Measure Flour Correctly: For accuracy, spoon flour into your measuring cup and level it off. Packing the cup can lead to a dense loaf.
    • The Toothpick Test: Check a few minutes before the minimum bake time. Overbaking is the enemy of moisture.
    • The Long Cool-Down: Slicing into warm zucchini bread is tempting, but it will be gummy. The structure needs time to set as it cools.
    • Grating Size: Large shreds give visible texture and moisture pockets; fine shreds will virtually disappear.
    • Flavor Boosters: Add 1 teaspoon of orange zest or replace ½ cup of oil with applesauce for a lighter version.
    • Freezing for Later: Slice the cooled loaf, wrap slices individually, and freeze for instant, ready-to-toast portions.

    This Classic Zucchini Bread is more than a recipe—it’s a delicious tradition.

  • Perfect Guacamole Recipe: The Only 5-Minute, Authentic Dip You Need

    Perfect Guacamole Recipe: The Only 5-Minute, Authentic Dip You Need

    Great guacamole isn’t just a dip—it’s a vibrant, textured celebration of fresh ingredients. This recipe cuts through the noise of bland, mayonnaise-laden versions and gets straight to the soul of the dish: perfectly ripe avocados, sharp onion, fiery chiles, and bright citrus, all brought together with a gentle hand.

    The magic happens in under five minutes and requires no special equipment, just a bowl and fork. The result is a balance of creamy, crunchy, tangy, and spicy that’s utterly irresistible with tortilla chips, on tacos, or straight off the spoon. Master this simple formula, and you’ll never settle for store-bought again.

    The Science of Avoiding Brown, Mushy Guacamole

    The enemy of perfect guacamole is oxidation—the chemical reaction that turns avocado flesh an unappetizing brown. The key weapon is acid, primarily from lime juice. The citric acid lowers the pH on the avocado’s surface, dramatically slowing down the enzymatic browning process.

    Mixing the juice with the diced onion first not only flavors the onion but creates an acidic buffer. The second defense is physical: leaving the avocado pits in the finished guacamole is an old wives’ tale with a kernel of truth. While the pit only protects the guacamole directly underneath it, pressing plastic wrap directly onto the surface of the dip (creating an airtight seal that limits oxygen exposure) is the true professional method for storage.

    Finally, the texture is preserved by mashing coarsely with a fork rather than puréeing, which maintains delightful chunks and prevents the release of excess oils that can make the dip seem greasy.

    Ingredients

    For the Guacamole (Serves 4-6):

    • 3 ripe Hass avocados*
    • ¼ cup finely chopped white onion
    • 1-2 serrano or jalapeño peppers, finely chopped (seeds removed for less heat)
    • ¼ cup chopped fresh cilantro
    • 2-3 tablespoons fresh lime juice (from 1-2 limes)
    • ½ teaspoon kosher salt, or to taste
    • Optional: 1 small Roma tomato, seeds and pulp removed, diced

    *Ripe avocados yield gently to a soft squeeze and have dark, bumpy skin.

    Instructions

    1. Prep the Aromatics: In a medium bowl, combine the chopped onion, chile pepper, and half of the lime juice. Let this mixture sit for 5-10 minutes. This step “cooks” the raw bite out of the onion and infuses the lime juice with flavor.

    2. Cut & Scoop the Avocados: Cut the avocados in half, remove the pits, and scoop the flesh into the bowl with the onion mixture.

    3. Mash & Season: Using a fork or a potato masher, coarsely mash the avocado with the onion and lime juice. You want a chunky texture, not a smooth purée. Add the remaining lime juice, chopped cilantro, and salt. Fold gently to combine.

    4. Taste & Adjust: Taste your guacamole. Does it need more salt? More lime for brightness? More chile for heat? Adjust now. If using, gently fold in the diced tomato at the very end.

    5. Serve Immediately: For the best texture and brightest color, serve the guacamole right away. Transfer to a serving bowl.

    6. Storage Hack: To store, press a piece of plastic wrap directly onto the surface of the guacamole, eliminating all air pockets. Refrigerate for up to 24 hours. The top layer may still darken slightly; simply stir it in before serving.

    7. Pro-Tip for a Crowd: You can prep the onion, chile, cilantro, and lime juice ahead of time. Just before serving, mash in the avocados and season. This prevents browning and saves time.

    Pro-Tips for Guacamole Mastery

    • The Ripeness Test: A ripe avocado’s stem nub should flick off easily, revealing green underneath (not brown).
    • Use a Fork, Not a Food Processor: Over-mixing releases too much oil and turns your dip into a smooth, less interesting paste. Chunky texture is key.
    • Salt is Your Friend: Salt doesn’t just add savoriness; it helps break down the avocado slightly, making it creamier. Don’t undersalt.
    • The Great Tomato Debate: Traditional Mexican guacamole often omits tomato. If you add it, remove the watery seeds and pulp first to prevent a soggy dip.
    • Customize Your Heat: For mild guacamole, use jalapeño and remove all seeds and ribs. For more heat, use a serrano and include some seeds.
    • The Ultimate Flavor Boost: For a deeply authentic touch, add a tablespoon of finely chopped fresh Mexican oregano or epazote.

    With these tips, your guacamole will be the uncontested star of any gathering.

  • Perfect Deviled Eggs: The Only Recipe You’ll Ever Need

    Perfect Deviled Eggs: The Only Recipe You’ll Ever Need

    No party spread is truly complete without a platter of deviled eggs. This iconic appetizer sits at the intersection of simplicity and perfection: a humble hard-boiled egg transformed into a vehicle for creamy, tangy, savory bliss. While endlessly adaptable, mastering the classic version is a essential culinary rite of passage.

    This recipe delivers that timeless ideal—a velvety-smooth filling that’s rich but not heavy, perfectly seasoned, and piped into glossy white cups just waiting for that final dusting of paprika. They’re the bite-sized proof that the best party foods are often the most straightforward, and with a few key techniques, you can ensure yours are the ones guests rave about.

    The Science of the Perfect Hard-Boil & Emulsified Filling

    The journey to deviled egg excellence begins with the egg itself. The goal is a fully set yolk without the dreaded gray-green sulfur ring. Starting eggs in cold water and bringing them to a boil ensures even heating from shell to core, minimizing protein shock and cracks.

    The immediate ice bath after cooking is non-negotiable; it rapidly halts the cooking process, prevents overcooking, and creates a temperature shock that contracts the egg inside its shell, making peeling infinitely easier. The filling’s texture is a study in emulsion.

    The crumbled egg yolks are rich in fat and lecithin, a powerful natural emulsifier. When mixed with the water and fat in mayonnaise and the acidic tang of mustard and vinegar, the lecithin helps bind these elements into a cohesive, creamy, and stable mixture that won’t separate. Mashing while still slightly warm and pressing through a sieve guarantees the signature ultra-smooth, lump-free base that’s essential for elegant piping.

    Ingredients

    For the Deviled Eggs (Makes 24 halves):

    • 12 large eggs
    • ½ cup (112g) mayonnaise
    • 2 teaspoons yellow mustard or Dijon mustard
    • 1 teaspoon white vinegar or apple cider vinegar
    • ¼ teaspoon salt, or to taste
    • ⅛ teaspoon black pepper
    • Paprika, for garnish
    • Fresh chives or parsley, for garnish (optional)

    Instructions

    1. Perfect Hard-Boiled Eggs: Place eggs in a single layer in a large saucepan. Cover with cold water by at least 1 inch. Bring to a full, rolling boil over high heat. Once boiling, immediately cover the pot and remove it from the heat. Let stand for 12 minutes.

    2. The Ice Bath: While eggs stand, prepare a large bowl of ice water. After 12 minutes, use a slotted spoon to transfer the hot eggs directly into the ice bath. Let them cool completely, about 15 minutes.

    3. Peel & Halve: Gently tap each egg on the counter and roll to crackle the shell. Peel under cool running water to help remove shell fragments. Slice each peeled egg in half lengthwise.

    4. Make the Filling: Gently pop the yolks into a medium bowl. Arrange the hollow egg white halves on a serving platter. Mash the yolks with a fork until they resemble fine crumbs. For an ultra-smooth filling, press the mashed yolks through a fine-mesh sieve into the bowl.

    5. Season & Mix: To the yolks, add mayonnaise, mustard, vinegar, salt, and pepper. Stir vigorously with a spoon or spatula until completely smooth and creamy. Taste and adjust seasoning.

    6. Fill the Eggs: Spoon the filling into a piping bag fitted with a star or large round tip, or into a zip-top bag with a corner snipped off. Pipe the filling generously into each egg white half. Alternatively, spoon the filling in with a teaspoon.

    7. Garnish & Chill: Lightly dust the tops with paprika. Garnish with a tiny piece of fresh chive or parsley if desired. Cover loosely with plastic wrap and refrigerate for at least 30 minutes before serving to allow flavors to meld.

    8. Pro-Tip for Make-Ahead: You can prepare the components up to 2 days ahead. Store peeled, halved egg whites and the yolk filling separately in airtight containers in the fridge. Pipe or fill just before serving.

    Pro-Tips for Flawless Deviled Eggs Every Time

    • Use Slightly Older Eggs: Eggs that are 7-10 days old peel more easily than super-fresh ones.
    • The Ice Bath is Mandatory: This is the single biggest factor in easy peeling and preventing rubbery whites.
    • Sieve for Supreme Smoothness: Pressing the yolks through a sieve is the secret restaurant trick for an impeccably velvety filling with no graininess.
    • Season Aggressively: The filling should taste bold on its own, as it’s mellowed by the plain egg white. Don’t be shy with salt, pepper, and acidity.
    • The Mayo Matters: Use a high-quality, full-fat mayonnaise like Hellmann’s or Duke’s for the best flavor and stability.
    • Get Creative with Mix-Ins: Fold in finely chopped pickles (or pickle relish), crisp cooked bacon, horseradish, sriracha, or fresh herbs for endless variations.
    • Serving Savvy: Use a deviled egg platter with indentations to keep them from sliding, or secure them on a regular platter with a bed of lettuce or parsley.

    Master this classic, and you hold the key to a lifetime of successful gatherings.

  • Hot Spinach & Artichoke Dip: The 5-Ingredient, One-Pan Party Hero

    Hot Spinach & Artichoke Dip: The 5-Ingredient, One-Pan Party Hero

    No party spread is complete without a vessel of warm, gooey, utterly irresistible spinach and artichoke dip. Forget complicated recipes with a dozen ingredients—this version delivers maximum flavor and comfort with just five essentials, all cooked and served in one single skillet.

    The magic happens right on your stovetop and under the broiler, transforming simple ingredients into a creamy, tangy, vegetable-studded masterpiece with a perfectly bronzed, cheesy crust. In 20 minutes flat, you’ll have a dip that commands attention, fosters community (everyone gathers around it), and disappears faster than you can say, “Save me some for the chips.” This isn’t just a dip; it’s the main event.

    The Science of Creamy Emulsion & The Flavor Bomb

    This dip’s luxurious texture and deep flavor are a lesson in kitchen chemistry. The base starts with cream cheese, a unique dairy product high in both fat and protein. When gently melted, its proteins help create a stable, smooth emulsion that won’t separate, providing the dip’s signature rich and velvety body.

    The addition of sour cream or mayo introduces acidity and more fat, cutting through the richness and boosting flavor while contributing to a silky mouthfeel.

    The real transformation comes from the frozen spinach and artichokes. As they heat, they release water, but because we’ve squeezed them thoroughly, we control the moisture. This concentrated vegetable essence mingles with the dairy, creating a deeply savory, umami-packed base.

    Finally, the broiler step isn’t just for looks. The intense, direct heat triggers the Maillard reaction on the surface cheeses, creating complex new flavor compounds and that irresistible browned, slightly crispy top that contrasts perfectly with the creamy interior.

    Ingredients

    For the Dip (The Core 5):

    • 1 (8 oz) block cream cheese, softened
    • 1 (14 oz) can artichoke hearts, drained and chopped
    • 1 (10 oz) package frozen chopped spinach, thawed and squeezed VERY dry
    • 1 cup (4 oz) shredded mozzarella cheese, divided
    • ½ cup sour cream or full-fat mayonnaise

    The Essential Flavor Boosters:

    • 1 clove garlic, minced (or ½ tsp garlic powder)
    • ½ cup grated Parmesan cheese
    • ¼ teaspoon black pepper
    • Pinch of salt (taste first—cheese and artichokes are salty)

    Instructions

    1. Prep is Key: Thaw the spinach completely. Place it in a clean kitchen towel or several layers of paper towels and WRING it out with all your might until it feels nearly dry. This is the single most important step for a thick, not watery, dip. Drain and roughly chop the artichoke hearts.

    2. Mix the Base: In a medium bowl, combine the softened cream cheese and sour cream (or mayo) until smooth. Stir in the garlic, half of the mozzarella (½ cup), all of the Parmesan, and black pepper.

    3. Fold in the Veggies: Gently fold in the bone-dry spinach and chopped artichokes until evenly distributed. The mixture will be thick.

    4. Cook & Melt: Preheat your oven’s broiler. Transfer the dip mixture to a 9 or 10-inch oven-safe skillet (cast iron is ideal). Cook over medium-low heat on the stovetop for 5-7 minutes, stirring constantly, until the dip is hot and the cheeses have melted into a cohesive, creamy mass.

    5. Top & Broil: Smooth the top of the hot dip with a spatula. Sprinkle the remaining ½ cup of mozzarella evenly over the surface. Place the skillet under the broiler, 4-6 inches from the heat, for 2-4 minutes. WATCH CLOSELY. Broil just until the top is spotty golden brown and bubbly.

    6. Serve Immediately: Carefully remove the skillet (handle will be HOT!). Let it cool for 2-3 minutes before serving directly from the skillet with your chosen dippers. The dip is at its peak—creamy, hot, and stretchy—right out of the oven.

    7. Make Ahead Tip: Prepare the dip through Step 3. Cover and refrigerate for up to 24 hours. When ready, proceed with Steps 4 & 5, adding a few extra minutes to the stovetop heating time since you’re starting from cold.

    Pro-Tips for Dip Perfection & Ultimate Dipping Strategy

    • Squeeze Until No More Drops: Seriously, squeeze the spinach again. Watery spinach is the arch-nemesis of a great dip.
    • Use the Broiler, Not the Oven: The broiler gives you instant, controlled browning without overcooking and drying out the dip underneath.
    • Serve in the Cooking Vessel: The cast iron skillet retains heat beautifully, keeping your dip warm for the entire party. Just remember to warn guests the handle is hot.
    • Flavor Variations: Add a dash of hot sauce, a squeeze of lemon juice, or substitute ¼ cup of the mozzarella with pepper jack for a kick. For a decadent twist, top with crumbled cooked bacon before broiling.
    • The Dipper Doctrine: Offer a variety for textural contrast: sturdy, thick-cut baguette slices or toasted pita chips stand up to scooping; crispy tortilla chips add salt and crunch; and fresh, cold vegetables like bell pepper strips or endive leaves provide a refreshing, crisp contrast to the rich, hot dip.

    This Hot Spinach & Artichoke Dip isn’t just a recipe—it’s a guarantee of a good time.

  • Cranberry Brie Bites: The Ultimate Festive 5-Ingredient Appetizer

    Cranberry Brie Bites: The Ultimate Festive 5-Ingredient Appetizer

    Elegant, effortless, and exploding with flavor—these Cranberry Brie Bites are the holy grail of holiday entertaining. They combine all the beloved elements of a baked brie wheel (creamy, gooey cheese, sweet-tart cranberry, buttery pastry, and a nutty crunch) into perfectly portioned, mess-free finger food. Using store-bought puff pastry and cranberry sauce makes them incredibly simple to assemble, yet they bake up looking like they came from a gourmet caterer.

    The warm, flaky pastry cups cradle the molten brie, which pairs magically with the bright pop of cranberry and the toasty pecan. Ready in under 30 minutes, these bites are guaranteed to be the first platter emptied at your Thanksgiving, Christmas, or New Year’s Eve gathering.

    The Science of the Perfect Flaky Cup & Melted Cheese

    The magic of this appetizer lies in the behavior of two key ingredients under heat: puff pastry and brie cheese. Puff pastry is a laminated dough with hundreds of alternating layers of dough and butter. In a hot oven, the water in the butter turns to steam, forcing the layers apart and creating a tall, airy, and shatteringly flaky cup.

    Using a mini muffin tin is crucial—it contains the pastry’s dramatic rise, directing it upward to form a sturdy vessel. Brie, a soft-ripened cheese, has a high fat and moisture content. When baked, its proteins break down quickly, causing it to melt into a luxurious, creamy pool rather than turning oily or rubbery.

    The rind is entirely edible and helps contain the melt, making it the perfect choice for a neat, contained filling. Baking them together allows the pastry to become crisp just as the cheese reaches its perfect molten state, creating an irresistible textural contrast in every bite.

    Ingredients

    For the Bites:

    • 1 sheet frozen puff pastry, thawed (from a 17.3 oz box)
    • 1 (8 oz) wheel or wedge of brie cheese
    • ½ cup whole berry cranberry sauce (jellied or homemade)
    • 24 pecan halves
    • Fresh rosemary or thyme, for garnish (optional)

    Optional Additions:

    • 1 tablespoon honey, for drizzling
    • A pinch of flaky sea salt

    Instructions

    1. Prep: Preheat oven to 400°F (200°C). Lightly grease a 24-cup mini muffin tin.

    2. Cut the Pastry: On a lightly floured surface, roll the thawed puff pastry sheet out slightly to smooth any seams. Using a pizza cutter or sharp knife, cut the sheet into 24 equal squares (approx. 2×2 inches each).

    3. Form the Cups: Gently press each pastry square into a cup of the prepared mini muffin tin, letting the corners point upwards. This creates the classic, rustic “cup” shape.

    4. Prep the Brie: Cut the brie into 24 small cubes (about ½-inch). It’s easier to cube if the brie is cold. A small piece of the rind is fine on each cube—it adds flavor and structure.

    5. Assemble: Place one cube of brie into each pastry cup. Top with about 1 teaspoon of cranberry sauce, then gently press one pecan half on top.

    6. Bake: Bake for 12-15 minutes, or until the puff pastry is deeply golden brown and puffed, and the brie is visibly melted and bubbly around the edges.

    7. Garnish & Serve: Let the bites cool in the tin for 2-3 minutes. Use a small offset spatula or spoon to carefully transfer them to a serving platter. Garnish with fresh rosemary or thyme, and drizzle with honey or sprinkle with flaky salt if desired. Serve warm.

    8. Make Ahead Tip: Assemble the bites in the muffin tin up to 4 hours ahead. Cover and refrigerate until ready to bake. Bake directly from the fridge, adding 1-2 minutes to the baking time.

    Pro-Tips for Flawless, Impressive Bites Every Time

    • Thaw Pastry Properly: Thaw puff pastry in the refrigerator overnight, or on the counter for about 40 minutes. It should be pliable but still cold to the touch for best results.
    • Don’t Overfill: The brie will expand as it melts. Use a cube no larger than ½-inch to prevent overflow.
    • Pecan Placement: Press the pecan lightly into the cranberry sauce so it adheres and toasts slightly during baking.
    • Grease the Tin Well: A light coating of butter or non-stick spray ensures the golden pastry cups release easily without breaking.
    • Serve Immediately: These bites are at their absolute peak within 10 minutes of leaving the oven, when the pastry is crisp and the cheese is gloriously gooey.
    • Variations: Substitute the cranberry sauce with fig jam, apricot preserves, or a spicy pepper jelly. Swap pecans for walnuts or a sprinkle of chopped pistachios. For a savory twist, add a tiny piece of prosciutto under the brie.

    These Cranberry Brie Bites are the perfect marriage of simplicity and sophistication, making you look like a hosting pro with minimal effort.

  • Feta & Herb Foldovers: The Flaky, 4-Ingredient Appetizer That Bakes in 15 Minutes

    Feta & Herb Foldovers: The Flaky, 4-Ingredient Appetizer That Bakes in 15 Minutes

    When the craving for something crispy, cheesy, and savory hits, these Feta & Herb Foldovers are your five-star solution with one-star effort. We’re harnessing the undeniable magic of frozen puff pastry—a secret weapon for instant elegance—and filling it with the classic, bold flavors of tangy feta and aromatic fresh herbs.

    In the oven’s heat, the pastry performs its alchemy, exploding into a hundred delicate, shattering layers that cradle the warm, creamy-salty filling. With barely more effort than opening a package, you can transform four simple ingredients into an impressive platter of gourmet-looking pastries. They’re as fitting for a cocktail party as they are for a solo afternoon indulgence.

    The Alchemy of the Flaky Pocket & Salty Filling

    The magic here is a delicious lesson in food science and contrasts. Puff pastry is a masterpiece of engineering: hundreds of paper-thin layers of dough separated by solid butter. In a hot oven, the butter melts and the water within it vaporizes into steam, violently pushing each layer apart to create that iconic, airy, and crisp architecture.

    The feta filling plays a crucial dual role. Its crumbly texture and high salt content provide a powerful flavor punch that stands up to the rich pastry. Crucially, its low moisture content (compared to a wetter cheese) means it won’t release steam and sog out the delicate layers from the inside, ensuring the pastry shell bakes up supremely crisp. A tight seal around the filling is essential—it acts as a pressure vessel, containing the steam to maximize the “puff” and locking in the flavorful cheese.

    Ingredients

    For the Foldovers:

    • 1 sheet (about 8-9 oz) frozen puff pastry, thawed but cold
    • 1 cup (about 150g) good-quality feta cheese, crumbled
    • 2-3 tablespoons fresh dill or parsley, finely chopped
    • 1 large egg, beaten (for egg wash)

    Optional Enhancements:

    • 1 teaspoon lemon zest
    • Freshly cracked black pepper
    • 1 tablespoon toasted sesame seeds or everything bagel seasoning
    • A pinch of dried oregano or chili flakes
    • 1 finely chopped green onion

    Instructions

    1. Prep: Preheat oven to 400°F (200°C). Line a baking sheet with parchment paper. Lightly beat the egg in a small bowl for the egg wash.

    2. Make the Filling: In a medium bowl, gently combine the crumbled feta and chopped herbs (and any optional additions like lemon zest or pepper). Avoid over-mixing to keep the feta’s texture.

    3. Roll & Cut the Pastry: On a lightly floured surface, unfold the thawed puff pastry sheet. Roll it gently with a rolling pin just to smooth any seams into a roughly 10×10 inch square. Using a pizza cutter or sharp knife, cut the sheet into 9 or 12 equal squares.

    4. Fill & Fold: Place a heaping tablespoon of the feta mixture in the center of each square. Using a pastry brush or your finger, brush a light coating of egg wash around all four edges of the square.

    5. Seal to Form a Triangle: Fold one corner of the square over the filling to meet the opposite corner, creating a triangle. Press down firmly on the edges with your fingers, then use the tines of a fork to crimp and seal the two open sides completely. This step is non-negotiable for a leak-proof pastry.

    6. Top & Bake: Place the sealed triangles on the prepared baking sheet. Brush the tops lightly with the remaining egg wash. If using, sprinkle with sesame seeds. Bake for 14-17 minutes, or until the pastries are dramatically puffed and a deep, golden brown.

    7. Cool & Serve: Let the foldovers cool on the sheet for at least 5 minutes before serving. The filling will be very hot. They are at their absolute peak served warm, when the contrast between the crisp shell and soft, tangy center is most pronounced.

    8. Make Ahead Tip: Assemble the foldovers completely, place them on the parchment-lined sheet, and freeze until solid. Transfer to a freezer bag. Bake from frozen, adding 3-5 minutes to the baking time. No thawing needed.

    Pro-Tips for Perfect, Professional-Looking Foldovers

    • Keep Pastry Cold: Work quickly and use cold pastry for maximum puff. If it becomes soft and sticky, pop it in the fridge for 10 minutes.
    • The Fork Crimp is Key: Don’t skip crimping with a fork after pressing the edges. This creates a physical seal that’s much stronger than fingers alone.
    • Don’t Overfill: Too much filling will prevent a good seal and cause leaks during baking. A heaping tablespoon is perfect.
    • Drain Feta Well: If your feta is very wet or packed in brine, pat it dry with a paper towel before crumbling. Excess moisture is the enemy of flakiness.
    • Variations: Add a teaspoon of chopped sun-dried tomatoes, Kalamata olives, or a thin slice of pepperoni to the filling before folding. For a sweet-savory twist, add a few pine nuts.
    • Serving: Pair with a simple side of tzatziki or a dollop of good-quality honey for drizzling.

    These Feta & Herb Foldovers are a brilliant reminder that the most impressive bites are often hiding in your freezer.

  • Cheesy Olive Puffs: The 3-Ingredient Party Appetizer Everyone Loves

    Cheesy Olive Puffs: The 3-Ingredient Party Appetizer Everyone Loves

    When you need a crowd-pleasing appetizer that’s impressively easy, look no further than these retro-chic Cheesy Olive Puffs. A classic from decades of potlucks and holiday parties, these bites deliver a perfect combination of flavors and textures: flaky, buttery crescent roll dough wrapped around a tangy, creamy cheese filling, all anchored by a salty, briny green olive.

    The magic happens in the oven as the dough puffs into golden layers and the cheese melts into a luscious center. With just three main ingredients and 20 minutes of active time, you can whip up a tray of these irresistible bites that disappear faster than you can make them. They’re the ultimate no-stress, high-reward party food.

    The Science of the Perfect Flaky Puff & Creamy Filling

    The success of this simple appetizer lies in the interplay between the laminated dough and the high-fat filling. Crescent roll dough is a form of laminated pastry, meaning thin layers of dough are separated by solid fat (butter or shortening). In the heat of the oven, the water in the dough and fat turns to steam, forcing the layers apart and creating that iconic, shatteringly flaky texture.

    The cream cheese filling acts as both flavor agent and insulator. Its high fat and moisture content protect the olive from drying out and help steam the dough from the inside, while also creating a rich, melty contrast to the crisp exterior. Wrapping the dough securely around the filling is key—it creates a seal that contains the steam, ensuring the puff bakes up tall and the cheese stays contained, resulting in a beautiful, self-contained package of flavor.

    Ingredients

    For the Puffs:

    • 1 (8 oz) tube refrigerated crescent roll dough
    • 4 oz (½ block) cream cheese, softened to room temperature
    • 24-30 small pimiento-stuffed green olives, well-drained

    Optional Enhancements:

    • ¼ cup shredded sharp cheddar or Parmesan cheese
    • ½ teaspoon garlic powder or onion powder
    • 1 tablespoon fresh chopped herbs (chives, parsley)
    • Everything bagel seasoning or sesame seeds, for topping

    Instructions

    1. Prep: Preheat oven to 375°F (190°C). Line a baking sheet with parchment paper. Drain the olives thoroughly on a paper towel.

    2. Make the Filling: In a small bowl, mix the softened cream cheese until smooth. Stir in any optional additions like shredded cheese, garlic powder, or herbs.

    3. Separate & Shape the Dough: Unroll the crescent dough and separate it into the pre-cut triangles along the perforations.

    4. Fill & Roll: Place about 1 teaspoon of the cream cheese mixture onto the wide end of each dough triangle. Place one drained olive on top of the cheese. Gently roll the dough triangle up from the wide end, wrapping it around the olive and cheese completely. Pinch the seams and ends to seal tightly. Ensure the olive is fully enclosed.

    5. Arrange & Top (Optional): Place the sealed rolls seam-side down on the prepared baking sheet, about 2 inches apart. If desired, brush the tops lightly with beaten egg or milk and sprinkle with everything bagel seasoning or sesame seeds.

    6. Bake: Bake for 12-15 minutes, or until the puffs are puffed and deep golden brown all over.

    7. Cool & Serve: Let the puffs cool on the baking sheet for 5 minutes. They are best served warm, when the dough is at its flakiest and the cheese is deliciously creamy.

    8. Make Ahead Tip: Assemble the puffs, place them on the baking sheet, and freeze until solid. Transfer to a freezer bag. Bake from frozen, adding 3-5 minutes to the baking time.

    Pro-Tips for Flawless, Foolproof Olive Puffs

    • Seal Tightly: The most important step is pinching the dough seams well. An unsealed puff will leak cheese during baking and may not puff properly.
    • Drain Olives Well: Excess brine will make the dough soggy and prevent it from becoming flaky. Pat olives dry with a paper towel.
    • Room Temperature Cream Cheese: This is essential for a smooth, spreadable filling that won’t tear the delicate dough.
    • Don’t Overfill: Use about 1 teaspoon of cheese per puff. Too much filling will cause leakage and make the dough difficult to seal.
    • Variations: Use black olives, kalamata olives (pitted), or even a small cube of pepper jack cheese for a spicy kick. For a fancy twist, wrap the olive and cheese in a half-slice of prosciutto before wrapping in dough.
    • Serving: Serve with a side of warm marinara sauce or ranch dressing for dipping.

    These Cheesy Olive Puffs prove that the most memorable party foods are often the simplest to make.

  • The Best Classic Lasagna Recipe

    The Best Classic Lasagna Recipe

    There are few dishes in the world that command the universal love and respect of a truly great lasagna. It’s more than a meal; it’s an event. A labor of love that fills your home with the unmistakable, soul-warming aroma of simmering tomatoes, herbs, and browning cheese.

    This recipe is my ode to that classic, the one I’ve refined over years of family dinners and gatherings. It delivers everything you want: a rich, deeply flavored meat sauce, a creamy, perfectly seasoned ricotta layer, sheets of pasta that hold their structure, and that iconic blanket of bubbly, golden cheese.

    While it requires time and patience, each step is simple and the payoff is monumental. This lasagna is what Sunday dinners and holiday tables are made for—a dish that promises and delivers pure, unadulterated comfort with every single, layered forkful.

    The Philosophy of Layered Perfection

    Building a legendary lasagna is about understanding the role of each component and treating it with care. The foundation is a slow-simmered meat sauce. Using a combination of ground beef and Italian sausage creates a complex flavor base, while a long, gentle simmer allows the tomatoes to sweeten and the herbs to infuse every bite.

    The ricotta mixture is more than just cheese; it’s enriched with egg for stability, Parmesan for saltiness, and fresh parsley for brightness. It should be a flavorful layer in its own right. The choice of pasta is crucial. No-boil noodles are a fantastic modern shortcut that actually absorb moisture from the sauce, becoming perfectly tender without turning mushy. Finally, the cheese blend—a mix of mozzarella for that iconic stretch and Parmesan for sharpness—creates the glorious, browned top.

    Assembling the lasagna is a meditative process, creating a structure that bakes into a cohesive, sliceable unit where every layer sings in harmony.

    Ingredients

    For the Meat Sauce:

    • 1 tablespoon olive oil
    • 1 pound lean ground beef
    • 1 pound mild Italian sausage, casings removed
    • 1 large yellow onion, finely diced
    • 4 cloves garlic, minced
    • 1 (28 oz) can crushed tomatoes
    • 2 (15 oz) cans tomato sauce
    • 1 (6 oz) can tomato paste
    • 1/2 cup red wine or water
    • 2 tablespoons sugar
    • 2 teaspoons dried basil
    • 2 teaspoons dried oregano
    • 1 teaspoon fennel seeds (optional)
    • Salt and black pepper to taste

    For the Ricotta Filling:

    • 32 oz (4 cups) whole milk ricotta cheese
    • 1 large egg
    • 1 cup grated Parmesan cheese
    • 1/4 cup fresh parsley, finely chopped
    • 1/2 teaspoon salt
    • 1/4 teaspoon black pepper

    For Assembly:

    • 12 no-boil lasagna noodles
    • 4 cups shredded low-moisture mozzarella cheese (16 oz)
    • Additional Parmesan for topping

    Instructions

    Instructions

    1. Make the Meat Sauce: 

      In a large Dutch oven or heavy pot, heat olive oil over medium-high heat. Add ground beef and Italian sausage. Cook, breaking up with a spoon, until no pink remains. Drain excess fat if desired. Add diced onion and cook for 5 minutes until softened. Add garlic and cook for 1 minute until fragrant. Stir in crushed tomatoes, tomato sauce, tomato paste, wine, sugar, basil, oregano, fennel seeds, salt, and pepper. Bring to a simmer, then reduce heat to low. Cover and simmer for at least 1 hour, stirring occasionally. The longer it simmers (up to 3 hours), the better the flavor.

    2. Make the Ricotta Filling: 

      While sauce simmers, in a medium bowl, combine ricotta cheese, egg, 1 cup of Parmesan, chopped parsley, salt, and pepper. Mix until well blended. Set aside.

    3. Preheat Oven & Prep Pan:

      Preheat oven to 375°F (190°C). Lightly grease a 9×13 inch deep baking dish.

    4. Assemble the Lasagna:

      Spread 1 ½ cups of meat sauce evenly over the bottom of the dish. Arrange 4 no-boil noodles over the sauce (they will expand). Spread 1/3 of the ricotta mixture over the noodles. Sprinkle with 1 cup of shredded mozzarella. Spoon 1 ½ cups of meat sauce over the cheese. Repeat layers twice more (noodles, ricotta, mozzarella, sauce). For the final layer, top with the last 4 noodles, the remaining meat sauce, the last cup of mozzarella, and a generous sprinkle of Parmesan.

    5. Bake:

      Cover the dish tightly with aluminum foil (tent it slightly so it doesn’t touch the cheese). Bake for 25 minutes. Remove foil and bake for an additional 25-30 minutes, until the top is golden and bubbly and the edges are lightly browned.

    6. Rest and Serve:

      Remove lasagna from oven and let it rest, uncovered, for at least 20-30 minutes before slicing. This allows the layers to set, ensuring you get clean, perfect squares. Garnish with fresh basil or parsley before serving.

    Frequently Asked Questions (FAQ)

    Can I make this lasagna ahead of time?

    Absolutely! Assemble the entire lasagna, cover tightly, and refrigerate for up to 2 days before baking. You may need to add 10-15 minutes to the baking time if starting from cold. You can also freeze the assembled, unbaked lasagna for up to 3 months. Thaw in the refrigerator overnight before baking.

    Can I use regular lasagna noodles that need to be boiled?

    Yes. Cook them according to package directions until al dente, drain, and lay them flat on clean kitchen towels to prevent sticking before assembling.

    Can I make it vegetarian?

    Definitely. Omit the meat and add 2 cups of finely chopped mushrooms and 1 cup of lentils (cooked) to the sauce for a hearty vegetarian version.

    Why is my lasagna watery/soupy?

    This is usually due to: 1) Not simmering the sauce long enough to reduce, 2) Using fresh mozzarella (which has more water), or 3) Not letting it rest before slicing. Using no-boil noodles and a thick sauce solves this.

    How do I store and reheat leftovers?

    Store covered in the fridge for up to 5 days. Reheat individual portions in the microwave or cover the whole dish with foil and reheat in a 350°F oven until warmed through.

    Pro Tips for Lasagna Mastery

    For the best flavor, make the meat sauce a day ahead. Use whole milk ricotta for the creamiest filling. When assembling, spread the ricotta mixture carefully to avoid moving the noodles. The final rest is non-negotiable for clean slices—use this time to make a green salad and garlic bread. This lasagna freezes beautifully; bake half now and freeze the other half for a future effortless feast.

    It’s a recipe designed to feed a crowd and warm hearts, a true testament to the power of layered, homemade goodness.

  • Roasted Sweet Potato & Kale Salad with Maple Dijon Dressing

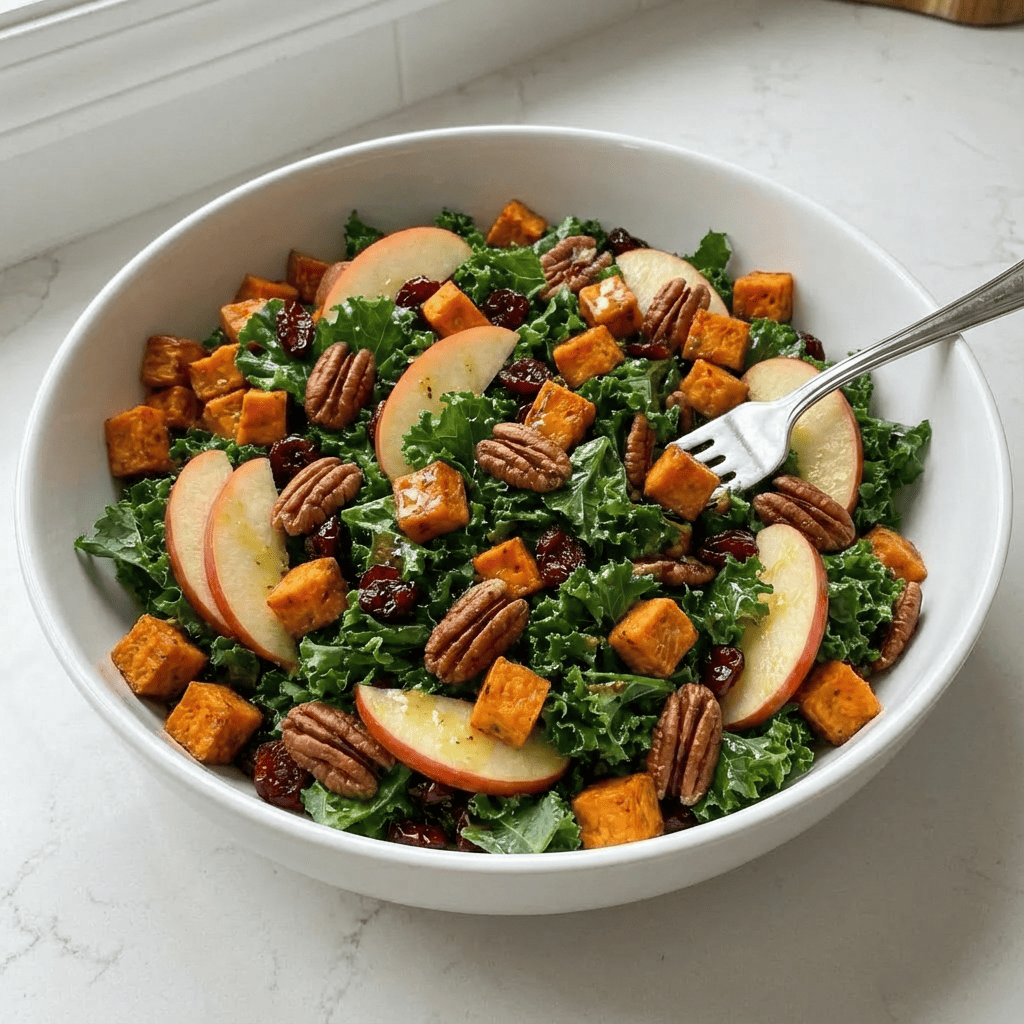
    Roasted Sweet Potato & Kale Salad with Maple Dijon Dressing

    Salads in the colder months need to be substantial. They need to be more than just lettuce—they need to be a meal that satisfies, warms from the inside out, and celebrates the robust produce of the season.

    This Roasted Sweet Potato & Kale Salad is exactly that. It’s a textural and flavorful masterpiece that turns the humble kale salad into a nourishing centerpiece. We start with hearty kale, massaged until tender, then pile it high with caramelized cubes of roasted sweet potato, crisp apple slices for a fresh bite, tart dried cranberries, and buttery toasted pecans for crunch. The crowning glory is a simple, whisk-together maple Dijon dressing that ties every element together with its perfect balance of sweet, tangy, and savory notes.

    This salad is as beautiful as it is delicious, making it ideal for a healthy weeknight dinner, an impressive lunch to pack, or a standout side dish on your holiday table. It’s proof that a salad can be both comforting and incredibly vibrant.

    The Secret to a Truly Enjoyable Kale Salad

    Kale has a reputation for being tough and bitter, but when treated correctly, it becomes the most delicious and sturdy green for a salad. The key is a technique called “massaging.” Rubbing the torn kale leaves with a little oil and salt for just 60-90 seconds breaks down the tough, fibrous cell structure. This process tenderizes the leaves, deepens their color to a beautiful dark green, and mellows any bitter edge, transforming them into a silky, flavorful base that actually welcomes dressing instead of repelling it.

    Pairing this tender kale with warm roasted sweet potatoes is a stroke of genius. The residual heat from the potatoes, when tossed with the kale, slightly wilts it further, creating a wonderful contrast with the cold, crisp apple. This salad also excels because of its make-ahead nature. Unlike delicate greens, massaged kale and roasted vegetables hold up beautifully for days, making this the ultimate meal-prep lunch that only gets better as the flavors marinate.

    Ingredients

    For the Salad:

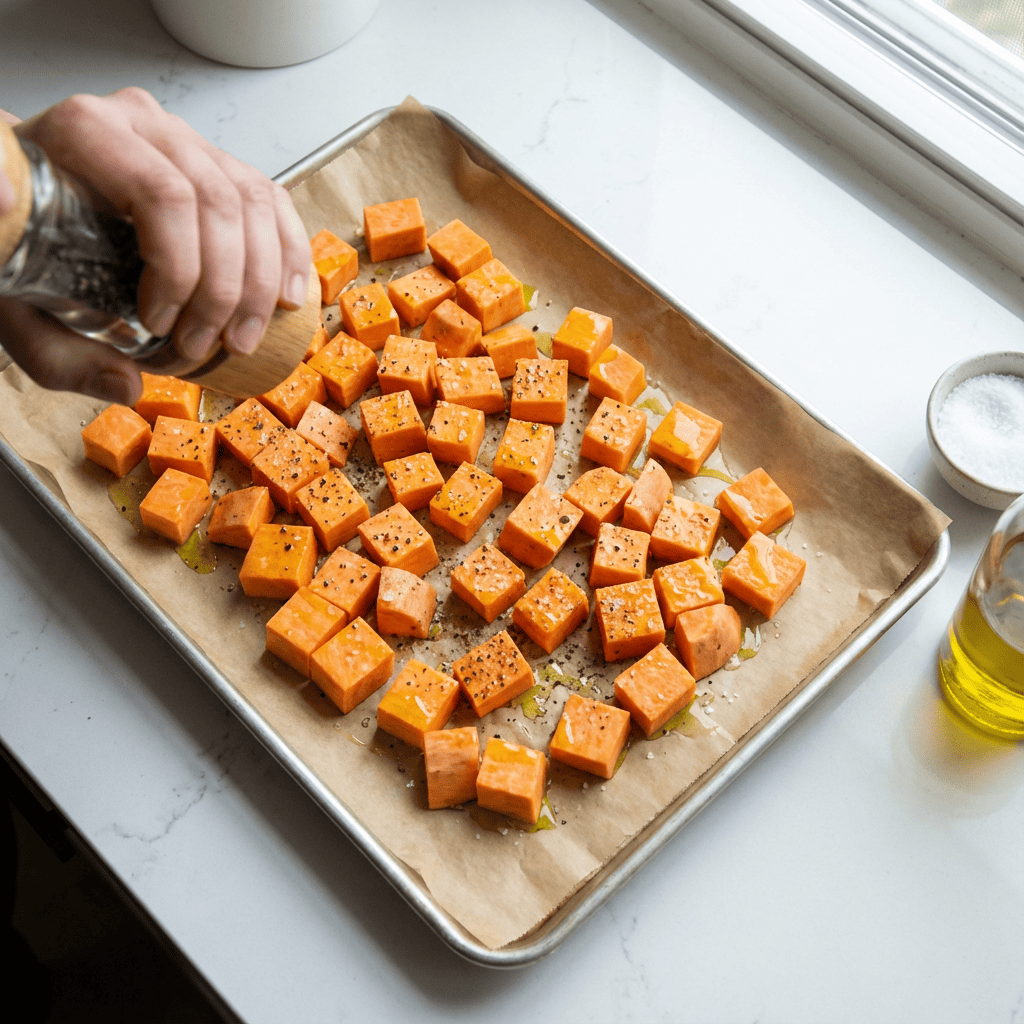
    • 2 medium sweet potatoes (about 1.5 lbs), peeled and cubed
    • 1 tablespoon olive oil
    • Salt and black pepper
    • 1 large bunch curly or Lacinato kale, stems removed and leaves torn
    • 1 tablespoon olive oil (for massaging)
    • 1 crisp apple (like Honeycrisp or Fuji), thinly sliced
    • 1/2 cup dried cranberries
    • 1/2 cup pecans, toasted and roughly chopped
    • Optional: 1/2 cup crumbled goat cheese or feta

    For the Maple Dijon Dressing:

    • 1/4 cup extra-virgin olive oil
    • 2 tablespoons apple cider vinegar
    • 1 tablespoon pure maple syrup
    • 1 tablespoon Dijon mustard
    • 1 small garlic clove, minced
    • 1/4 teaspoon salt, plus more to taste
    • 1/8 teaspoon black pepper

    Instructions

    1. Roast the Sweet Potatoes: Preheat your oven to 400°F (200°C). Toss the cubed sweet potatoes with 1 tablespoon of olive oil, salt, and pepper on a parchment-lined baking sheet. Spread in a single layer. Roast for 25-30 minutes, tossing halfway, until tender and caramelized at the edges. Let cool slightly.

    2. Massage the Kale: While potatoes roast, place the torn kale leaves in a large salad bowl. Drizzle with 1 tablespoon of olive oil and a generous pinch of salt. Using clean hands, scrunch and massage the kale for 60-90 seconds. You’ll feel the leaves soften and darken in color. Set aside.

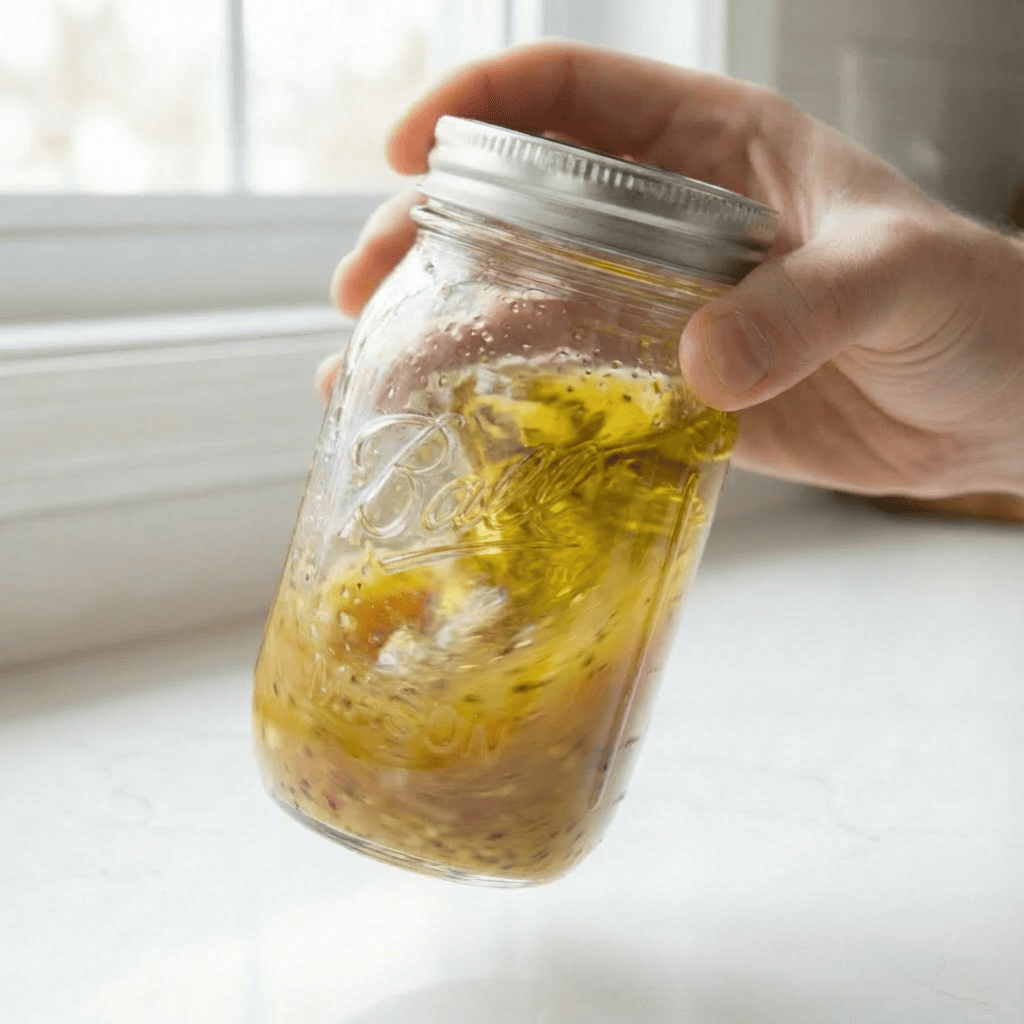
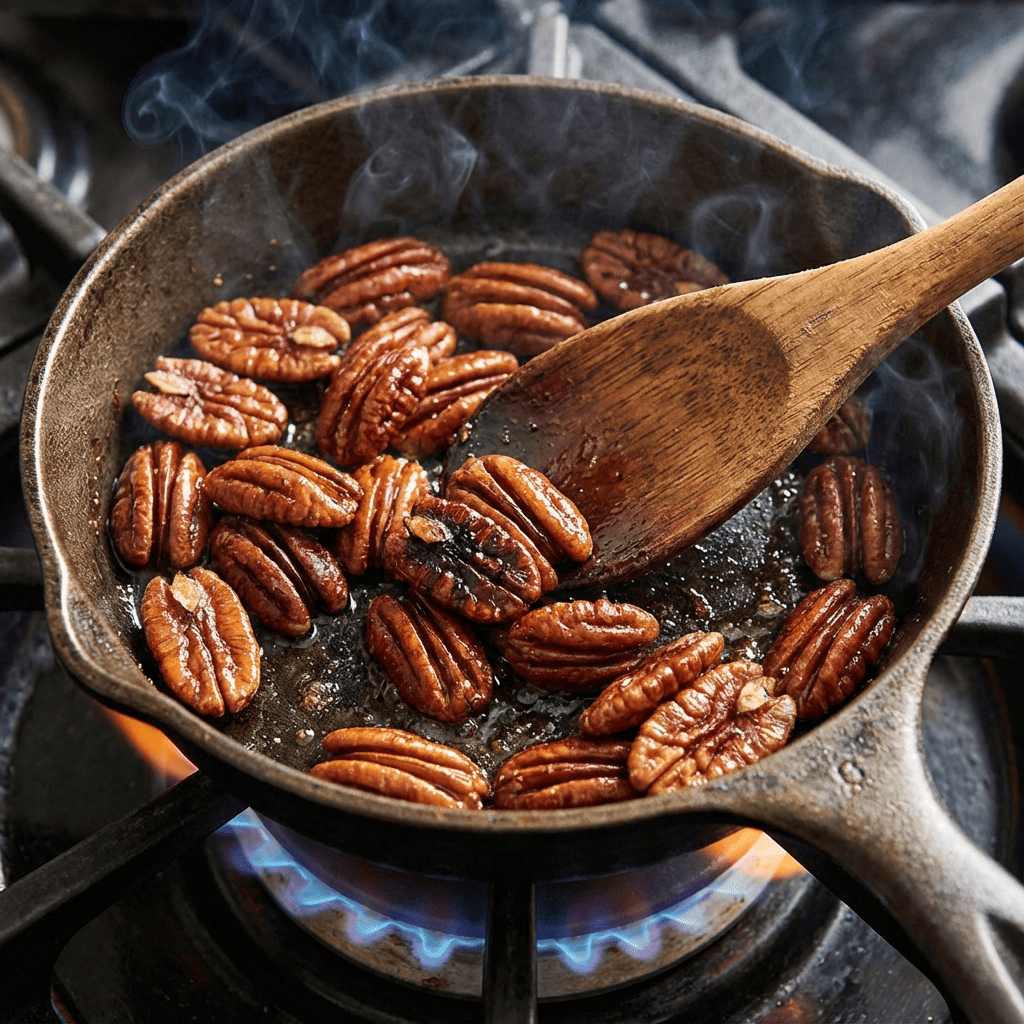
    3. Make the Dressing & Toast Pecans: In a small jar or bowl, combine all dressing ingredients: olive oil, apple cider vinegar, maple syrup, Dijon mustard, minced garlic, salt, and pepper. Shake or whisk vigorously until emulsified. Taste and adjust seasoning. In a small dry skillet over medium heat, toast the pecans for 3-5 minutes, stirring frequently, until fragrant. Chop when cool.

    4. Assemble the Salad: To the bowl of massaged kale, add the warm roasted sweet potatoes, sliced apple, dried cranberries, and most of the toasted pecans. If using, add the crumbled cheese.

    5. Dress and Serve: Pour about 3/4 of the dressing over the salad. Toss thoroughly until everything is evenly coated. Taste and add more dressing if desired. Let the salad sit for 5-10 minutes to allow the kale to absorb the flavors. Top with the remaining pecans and serve.

    Make-Ahead Tips & Customizations

    This salad is a meal-prep dream. Roast the sweet potatoes and store them separately. Wash, dry, and massage the kale, then store it in an airtight container—it will stay perfect for 3 days. Assemble individual portions in jars or containers: dressing on the bottom, then sweet potatoes, then apples/cranberries, with the kale and nuts on top to stay crisp. When ready to eat, just shake it up.

    For a protein boost, add a can of rinsed chickpeas (roast them with the sweet potatoes for extra crunch) or top with grilled chicken or salmon.

    You can swap the pecans for walnuts or pumpkin seeds, and the apple for pear. The massaged kale base won’t wilt, making this salad perfect for potlucks and gatherings where it needs to sit out. This recipe is a versatile blueprint for a healthy, hearty, and deeply satisfying salad that will become a staple in your seasonal rotation.

  • One-Pan Pizza Chicken Bake

    One-Pan Pizza Chicken Bake

    Craving pizza but want something a little lighter, faster, and packed with protein? Enter Pizza Chicken—the genius weeknight dinner that delivers every bit of that crave-worthy pizza flavor without the dough. Imagine juicy, seasoned chicken breasts acting as your personal “pizza crust,” topped with tangy marinara, a blanket of gooey, browned cheese, and all your favorite toppings.

    This one-pan wonder comes together in under 30 minutes and uses simple ingredients you likely already have. It’s the perfect solution for busy nights, a hit with kids and adults alike, and endlessly customizable. Whether you keep it classic with pepperoni or get creative with veggies, this dish proves you don’t need bread to have a pizza party. It’s comfort food that feels indulgent but fits perfectly into a balanced meal.

    Why This Recipe Becomes an Instant Weeknight Favorite

    The magic of this recipe lies in its simplicity and clever layering of flavors. By searing the chicken breasts first, you create a golden-brown crust that locks in juices and adds a ton of savory depth—no bland, baked chicken here. The searing also creates fond (those tasty browned bits) in the pan, which the marinara sauce deglazes, infusing it with even more flavor. Using a high-quality, flavorful marinara is key, as it acts as both a sauce and a steaming liquid to finish cooking the chicken through gently in the oven.
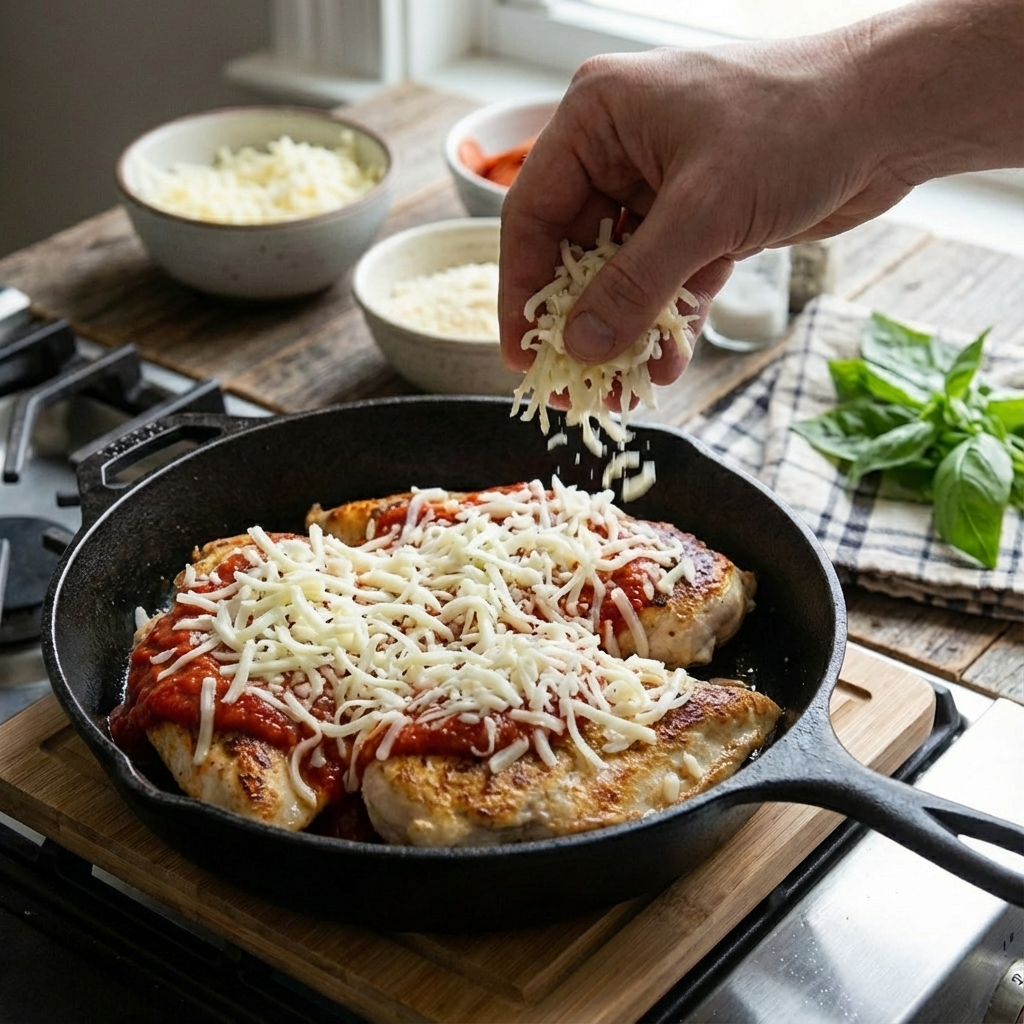
    The cheese selection is crucial: a combination of low-moisture mozzarella for that iconic stretch and Parmesan for a salty, nutty punch. Baking it just until the cheese is molten and spotted with brown ensures the chicken stays tender. It’s a masterclass in efficient cooking, transforming basic chicken into a fun, shareable, and utterly satisfying meal with minimal cleanup.
    Ingredients

    For the Chicken:

    • 4 boneless, skinless chicken breasts (about 1.5-2 lbs)
    • 1 tablespoon Italian seasoning
    • 1 teaspoon garlic powder
    • ½ teaspoon salt
    • ¼ teaspoon black pepper
    • 1 tablespoon olive oil

    For the “Pizza” Toppings:

    • 1 ½ cups marinara sauce
    • 2 cups shredded low-moisture mozzarella cheese
    • ½ cup grated Parmesan cheese
    • ½ cup sliced pepperoni
    • ¼ cup sliced black olives (optional)
    • ¼ cup sliced bell peppers or mushrooms (optional)
    • 2 tablespoons sliced fresh basil or parsley for garnish

    Instructions

    1. Prep Chicken & Oven: Preheat your oven to 400°F (200°C). Pat the chicken breasts completely dry with paper towels. This is essential for a good sear. In a small bowl, mix the Italian seasoning, garlic powder, salt, and pepper. Rub this seasoning mix evenly over both sides of each chicken breast.

    2. Sear the Chicken: Heat the olive oil in a large, oven-safe skillet (like cast iron or stainless steel) over medium-high heat. Once the oil is shimmering, add the chicken breasts. Sear without moving for 4-5 minutes, until a deep golden-brown crust forms. Flip and sear the other side for 3-4 minutes. The chicken will not be fully cooked through.

    3. Add Sauce & Toppings: Remove the skillet from heat. Spoon the marinara sauce over each chicken breast, spreading it evenly. Sprinkle the shredded mozzarella and Parmesan cheese over the sauce, covering the chicken completely. Artfully arrange the pepperoni and any other optional toppings (olives, peppers) over the cheese.

    4. Bake: Carefully transfer the skillet to the preheated oven. Bake for 15-18 minutes, or until the chicken is cooked through (reaches 165°F internally) and the cheese is melted, bubbly, and has golden-brown spots.

    5. Garnish & Serve: Remove the skillet from the oven (remember the handle is hot!). Let it rest for 5 minutes. The chicken will continue to cook slightly, and the juices will redistribute. Garnish with fresh basil or parsley. Serve directly from the skillet, with a side salad or roasted vegetables.

    Tips for Perfect Pizza Chicken Every Time

    • Even Cooking: For best results, use chicken breasts of similar size and thickness. If they are very thick, you can pound them to an even ½-inch thickness before seasoning.
    • Pan Choice: An oven-safe skillet is non-negotiable for this one-pan method. Cast iron is ideal for the perfect sear and even baking.
    • Customize Your “Pizza”: This recipe is a blueprint! Make a “Hawaiian” version with ham and pineapple, a “Veggie Lovers” with mushrooms, onions, and bell peppers, or a “Margherita” with fresh mozzarella slices and basil after baking.
    • Keto/Low-Carb: This recipe is naturally low in carbs—just ensure your marinara sauce has no added sugar.
    • Storage: Leftovers keep well in an airtight container in the fridge for 3-4 days. Reheat gently in the oven or microwave.

    This One-Pan Pizza Chicken Bake is more than a recipe; it’s a quick, delicious system for getting a fun, flavorful dinner on the table with a smile.