Blog

  • Chia Seed Pudding (Overnight Magic in a Jar)

    Chia Seed Pudding (Overnight Magic in a Jar)

    Let’s talk about breakfast magic. You know, the kind where you do almost nothing and wake up to something amazing? That’s chia seed pudding. It’s the breakfast that makes itself while you sleep, transforming a few simple ingredients into a creamy, dreamy, pudding-like masterpiece by morning.

    Chia seeds are tiny powerhouses—they absorb liquid, plump up, and create this incredible tapioca-like texture that’s both satisfying and nourishing. Packed with protein, fiber, and omega-3s, it’s a breakfast that actually keeps you full.

    And the best part? It’s a blank canvas. Chocolate, vanilla, berry, coconut—you decide. Mix it in a jar before bed, grab it from the fridge in the morning, and spend your extra time feeling brilliant.

    The Science of Chia: How Tiny Seeds Become Pudding

    Chia seeds are little magicians. When they meet liquid, they form a gel-like coating around each seed thanks to their soluble fiber. This process, called gelation, is what transforms a thin liquid into a thick, creamy pudding. The seeds absorb up to 10 times their weight in liquid, plumping up and creating that signature tapioca-like texture.

    The key to perfect chia pudding is ratio and patience. Too many seeds and you get a solid block; too few and it never sets. The magic ratio is 4 tablespoons of chia seeds to 1 cup of liquid. And patience is non-negotiable—they need at least 4 hours (overnight is best) to work their magic. Stir them once after 15-20 minutes to break up any clumps, then let them do their thing. Science never tasted so good.

    Ingredients

    For the Base Chia Pudding (Makes 2 servings):

    • ½ cup (80g) chia seeds (white or black)
    • 2 cups (480ml) milk of choice (dairy, almond, oat, coconut, etc.)
    • 1-2 tablespoons maple syrup, honey, or agave (adjust to taste)
    • 1 teaspoon vanilla extract
    • Pinch of salt

    Flavor Variations (Choose Your Adventure):

    • Chocolate: Add 2 tablespoons cocoa powder
    • Berry: Swirl in ¼ cup berry puree after setting
    • Coconut: Use coconut milk and add ¼ cup shredded coconut
    • Peanut Butter: Add 2 tablespoons peanut butter

    For Topping (The Best Part):

    • Fresh berries, sliced banana, mango, etc.
    • Granola or chopped nuts
    • Shredded coconut
    • Drizzle of nut butter
    • Mint sprigs for garnish

    Instructions

    1. Choose Your Container: Grab a jar, bowl, or any container with a lid. Mason jars are perfect because you can make, store, and eat from the same vessel .

    2. Add Chia Seeds: Pour ½ cup of chia seeds into your container. No need to rinse them—they’re ready to go .

    3. Add Sweetener and Flavorings: Add your maple syrup (or honey), vanilla extract, pinch of salt, and any flavor additions like cocoa powder or peanut butter .

    4. Add Milk: Pour in 2 cups of your chosen milk. Give it a quick stir to begin combining .

    5. Whisk Thoroughly: Whisk vigorously for about 1 minute to break up any clumps of chia seeds. This initial mixing is crucial for a smooth, clump-free pudding .

    6. Wait and Whisk Again: Let the mixture sit for 15-20 minutes, then whisk again. This second whisking breaks up any seeds that have started to clump together at the bottom. It’s the secret to perfectly uniform texture .

    7. Cover and Refrigerate: Put the lid on your container and place it in the refrigerator. Let it set for at least 4 hours, but overnight is best. The longer it sits, the thicker and creamier it becomes .

    8. Check Consistency: In the morning, your pudding should be thick, creamy, and spoonable. If it’s too thick for your liking, stir in a splash of milk until it reaches your desired consistency .

    9. Stir and Portion: Give the pudding a good stir. If you made a big batch, portion it into individual jars or bowls for the week ahead .

    10. Top and Serve: Add your favorite toppings—fresh berries, granola, a drizzle of peanut butter, shredded coconut. The toppings are where you can get creative every single day .

    11. Enjoy: Grab a spoon and dig into your overnight masterpiece. Breakfast is served, and you barely did a thing .

    Pro-Tips for Chia Pudding Greatness

    • Whisk Twice: The initial whisk and the 15-minute re-whisk are non-negotiable for clump-free pudding. Don’t skip it .
    • Patience is a Virtue: Chia pudding needs time. 4 hours minimum, overnight ideal. Rushing it results in runny pudding .
    • Adjust to Your Taste: Like it thicker? Add more chia seeds next time. Like it thinner? Add a splash more milk. You’re in control .
    • Meal Prep Hero: Make a big batch on Sunday and portion into jars for grab-and-go breakfasts all week. It keeps for up to 5 days .
    • Toppings Right Before Serving: Add granola and fresh fruit just before eating to keep them crunchy and fresh, not soggy .
  • Peanut Butter Cottage Cheese Ice Cream (Wait, What?)

    Peanut Butter Cottage Cheese Ice Cream (Wait, What?)

    Yes, you read that right. Cottage cheese. Ice cream. Together. Before you scroll past, hear us out: this is the creamiest, most protein-packed, ridiculously delicious frozen treat you’ll ever make. It’s thick, luscious, and tastes exactly like peanut butter frozen yogurt—but with zero ice cream maker, zero added sugar (if you choose), and a secret ingredient that’s been hiding in your fridge this whole time.

    The cottage cheese blends into absolute silky perfection, leaving no trace of its existence except for a massive protein boost and a texture that’ll make you do a double take. One scoop and you’ll be a believer. Cottage cheese ice cream is here, and it’s amazing.

    The Secret to Silky Smooth Cottage Cheese Ice Cream

    Let’s address the elephant in the room: cottage cheese has a texture. But here’s the thing—when you blend it long enough, it transforms completely. The secret is high-speed blending for a full 2-3 minutes until every last curd is pulverized into absolute silkiness. A good blender is your best friend here.

    The other secret? Freeze your banana. A frozen ripe banana adds natural sweetness and that creamy, scoopable texture that makes this feel like real ice cream. And finally, a little pinch of salt elevates the peanut butter flavor and balances everything. The result is a dessert that’s protein-packed, naturally sweetened, and so good you’ll never believe what’s in it.

    Ingredients

    For the Peanut Butter Cottage Cheese Ice Cream (Makes about 2 servings):

    • 1 cup (225g) cottage cheese (full-fat or 2%, small curd)
    • 1 large ripe banana, peeled and frozen
    • ¼ cup (65g) creamy peanut butter
    • 1-2 tablespoons maple syrup or honey (optional, depending on sweetness preference)
    • ½ teaspoon vanilla extract
    • Pinch of salt
    • 2-3 tablespoons milk (dairy or plant-based), only if needed to blend

    For Topping (Optional but Highly Recommended):

    • Extra drizzle of peanut butter
    • Chopped peanuts
    • Chocolate chips or shaved dark chocolate

    Instructions

    1. Freeze Your Banana: The night before or at least 4 hours ahead, peel a ripe banana, slice it into chunks, and place it in a freezer bag or container. Freeze until solid .

    2. Gather Your Ingredients: Measure out your cottage cheese, peanut butter, maple syrup (if using), vanilla, and salt. Having everything ready makes the blending process smooth .

    3. Combine in Blender: Add the cottage cheese, frozen banana chunks, peanut butter, maple syrup, vanilla extract, and salt to a high-speed blender. A small blender or food processor works best for this .

    4. Blend Until Silky: Start blending on low, gradually increasing to high. Blend for a full 2-3 minutes, stopping to scrape down the sides as needed. The mixture will go from chunky to thick to impossibly smooth and creamy. Be patient—this takes time .

    5. Check Consistency: The mixture should be thick, smooth, and the consistency of soft-serve ice cream. If it’s too thick to blend, add milk one tablespoon at a time just until it moves. You want it as thick as possible while still blending .

    6. Taste and Adjust: Give it a taste. Want it sweeter? Add a little more maple syrup. More peanut butter-y? Another spoonful of peanut butter. Blend briefly to incorporate .

    7. Serve Immediately (Soft-Serve Style): For soft-serve consistency, scoop the mixture into a bowl immediately. It will be thick, creamy, and ready to eat right away .

    8. Freeze for Scoopable Ice Cream: For a firmer, scoopable texture, transfer the mixture to a freezer-safe container. Smooth the top, cover, and freeze for 2-3 hours. If freezing longer than 3 hours, let it sit at room temperature for 10-15 minutes to soften before scooping .

    9. Add Toppings: Before serving, drizzle with extra peanut butter, sprinkle with chopped peanuts, or add chocolate chips for extra indulgence .

    10. Enjoy: Scoop, savor, and marvel at the fact that this is basically healthy .

    Pro-Tips for Cottage Cheese Ice Cream Greatness

    • Use Full-Fat Cottage Cheese: It yields the creamiest, richest result. Low-fat works but will be slightly less luxurious .
    • Blend Longer Than You Think: A full 2-3 minutes is non-negotiable for breaking down those curds into silky smoothness. Don’t rush it .
    • Frozen Banana is Key: It adds natural sweetness and that creamy, ice-cream-like texture. Don’t skip it .
    • Small Blender = Better Results: A smaller blender or food processor handles small batches better than a large one. If using a big blender, you may need to double the recipe .
    • Customize Endlessly: Swap peanut butter for almond butter or cookie butter. Add cocoa powder for chocolate version. Toss in chocolate chips or swirl in jam .
  • Creamy, Cheesy, Classic: How to Make Old-Fashioned Macaroni and Cheese

    Creamy, Cheesy, Classic: How to Make Old-Fashioned Macaroni and Cheese

    Few comfort foods are as universally beloved as old-fashioned macaroni and cheese.

    With tender pasta enveloped in a rich, creamy cheese sauce and a golden, slightly crunchy topping, it’s the kind of dish that evokes childhood memories and satisfies every craving for warmth and indulgence.

    While boxed mac and cheese has its place, nothing beats the real deal—made from scratch with love, simple ingredients, and a focus on creamy, cheesy perfection.

    Here’s your ultimate guide to making old-fashioned macaroni and cheese, step by step.


    Ingredients You’ll Need

    Gather your ingredients ahead of time for a smooth cooking process.

    For the pasta:

    • 12 oz elbow macaroni (or any small pasta shape)
    • 1 teaspoon salt (for the boiling water)

    For the cheese sauce:

    • 4 tablespoons unsalted butter
    • 4 tablespoons all-purpose flour
    • 3 cups milk (whole milk preferred)
    • 1 teaspoon Dijon mustard (optional, for depth)
    • ½ teaspoon salt
    • ¼ teaspoon black pepper
    • ¼ teaspoon paprika (optional, for color and subtle flavor)
    • 2 cups sharp cheddar cheese, shredded
    • 1 cup Gruyère or Monterey Jack cheese, shredded (optional for creaminess)

    For the topping:

    • ½ cup breadcrumbs (plain or panko)
    • 2 tablespoons unsalted butter, melted
    • 2 tablespoons Parmesan cheese, grated
    • Pinch of paprika for color (optional)

    Step 1: Preheat the Oven

    Preheat your oven to 350°F (175°C).

    Greasing a 9×13-inch baking dish or lightly spraying it with nonstick cooking spray will prevent sticking and make cleanup easier.


    Step 2: Cook the Pasta

    Bring a large pot of salted water to a boil.

    Add the macaroni and cook according to package instructions until just al dente.

    Remember, the pasta will continue to cook slightly in the oven, so avoid overcooking.

    Drain the pasta and set aside.


    Step 3: Make the Cheese Sauce

    In a medium saucepan over medium heat, melt the butter until fully melted and slightly foamy.

    Sprinkle in the flour, whisking constantly to form a smooth roux.

    Cook for 1–2 minutes to remove the raw flour taste.

    Gradually add the milk, whisking continuously to prevent lumps.

    Bring the mixture to a gentle simmer until it thickens, about 3–5 minutes.

    Stir in the Dijon mustard, salt, black pepper, and paprika.

    Remove the sauce from the heat and stir in the shredded cheeses until smooth and fully melted.

    Taste and adjust seasoning if needed.

    The cheese sauce should be creamy, rich, and slightly thickened.


    Step 4: Combine Pasta and Cheese Sauce

    Add the drained pasta to the cheese sauce, stirring until every piece is coated evenly.

    Pour the cheesy macaroni mixture into the prepared baking dish, spreading it out evenly.


    Step 5: Prepare the Topping

    In a small bowl, combine the breadcrumbs, melted butter, Parmesan cheese, and a pinch of paprika.

    Mix until the crumbs are evenly coated. Sprinkle the breadcrumb mixture evenly over the macaroni and cheese.

    This topping will give your dish that golden, crunchy texture that contrasts beautifully with the creamy pasta underneath.


    Step 6: Bake the Macaroni and Cheese

    Place the baking dish in the preheated oven and bake for 25–30 minutes, or until the top is golden brown and crispy and the cheese sauce is bubbling around the edges.

    For an extra-crispy topping, broil for the last 2–3 minutes, watching closely to prevent burning.


    Step 7: Cool Slightly and Serve

    Remove the macaroni and cheese from the oven and let it cool for 5 minutes before serving.

    This allows the cheese sauce to set slightly, making it easier to scoop perfect portions.


    Pro Tips for Perfect Old-Fashioned Macaroni and Cheese

    1. Use sharp cheddar – The bold flavor balances the creaminess perfectly.
    2. Don’t overcook pasta – Al dente pasta absorbs flavors without becoming mushy.
    3. Make a roux carefully – Cooking the butter and flour removes the raw taste and ensures a silky sauce.
    4. Add a little extra cheese to the sauce – This ensures maximum creaminess and flavor.
    5. Top with panko breadcrumbs – Panko gives a superior crunch compared to regular breadcrumbs.

    Variations to Try

    • Extra Cheesy Mac & Cheese: Mix in extra cheddar or add cream cheese for richness.
    • Bacon Mac & Cheese: Stir in crispy bacon bits before baking for a smoky flavor.
    • Spicy Mac & Cheese: Add a pinch of cayenne pepper or diced jalapeños to the cheese sauce.
    • Veggie Mac & Cheese: Fold in cooked broccoli, peas, or roasted red peppers for added nutrition and color.

    Wrapping Up

    Old-fashioned macaroni and cheese is more than just a meal—it’s nostalgia in a dish.

    The creamy cheese sauce, tender pasta, and golden breadcrumb topping create a perfect combination of flavors and textures that will satisfy kids and adults alike.

    Unlike boxed versions, homemade mac and cheese allows you to control the ingredients, the cheese blend, and the richness, making every bite a decadent treat.

    Whether served as a main course for dinner, a side dish for a holiday meal, or a comfort-food indulgence on a cozy night in, old-fashioned macaroni and cheese never fails to impress.

    With these step-by-step instructions, you can make a perfectly creamy, golden, cheesy casserole that will have everyone asking for seconds.

    So grab your cheese, pasta, and butter, and get ready to enjoy the ultimate in creamy, cheesy, golden-baked comfort food.

    There’s nothing quite like homemade mac and cheese straight from the oven—a classic dish done right.

  • Comfort in a Crust: How to Make Classic Chicken Pot Pie

    Comfort in a Crust: How to Make Classic Chicken Pot Pie

    Few dishes evoke the warmth and nostalgia of home quite like chicken pot pie.

    With tender chunks of chicken, hearty vegetables, and a creamy, savory sauce nestled under a golden, flaky crust, it’s the ultimate comfort food.

    Whether you’re cooking for your family or preparing a meal to impress guests, making chicken pot pie from scratch is easier than it seems—and the results are far superior to store-bought versions.

    Follow this step-by-step guide, and you’ll create a pot pie that’s rich, flavorful, and utterly satisfying.


    Ingredients You’ll Need

    Gather all ingredients before starting to make the process smooth and stress-free.

    For the filling:

    • 2 tablespoons unsalted butter
    • 1 small onion, finely chopped
    • 2 cloves garlic, minced
    • 2 medium carrots, diced
    • 2 celery stalks, diced
    • 1 cup frozen peas
    • 2 cups cooked chicken, shredded or diced (rotisserie chicken works great)
    • ¼ cup all-purpose flour
    • 2 cups chicken broth
    • 1 cup whole milk or heavy cream
    • 1 teaspoon dried thyme
    • ½ teaspoon salt
    • ¼ teaspoon black pepper

    For the crust:

    • 1 package (2 sheets) refrigerated pie crusts, or homemade pie dough
    • 1 egg, beaten (for egg wash)

    Optional garnish: Fresh parsley, chopped


    Step 1: Preheat the Oven

    Preheat your oven to 400°F (200°C).

    Grease a 9-inch pie dish with butter or nonstick cooking spray to prevent sticking. If using a deep-dish pie pan, you may need to adjust cooking time slightly.


    Step 2: Cook the Vegetables

    In a large skillet over medium heat, melt the butter.

    Add the onion, carrots, and celery, cooking for about 5–6 minutes until the vegetables are tender but not mushy.

    Add the garlic and cook for another 30 seconds, until fragrant.


    Step 3: Make the Creamy Filling

    Sprinkle the flour over the cooked vegetables and stir well to coat. Cook for 1–2 minutes to eliminate the raw flour taste.

    Gradually add the chicken broth while stirring constantly to prevent lumps. Bring the mixture to a simmer until it thickens slightly.

    Add the milk or cream, dried thyme, salt, and black pepper, stirring until the sauce is smooth and creamy. Stir in the shredded chicken and frozen peas.

    Simmer for 2–3 minutes, then remove from heat.

    The filling should be thick enough to hold together but still saucy enough to coat the vegetables and chicken.


    Step 4: Prepare the Pie Crust

    Roll out one sheet of pie crust and fit it into the bottom of the greased pie dish.

    Make sure the crust covers the bottom and sides evenly.

    Pour the chicken and vegetable filling into the crust, spreading it evenly.

    Roll out the second pie crust and place it over the filling.

    Trim any excess dough around the edges and crimp the edges together with a fork or your fingers to seal the pie.

    Cut a few small slits in the top crust to allow steam to escape during baking.


    Step 5: Apply Egg Wash

    Brush the top crust with the beaten egg.

    This will give your pie a beautiful golden-brown finish.

    You can also sprinkle a little salt or freshly cracked black pepper on top for extra flavor.


    Step 6: Bake the Chicken Pot Pie

    Place the pie in the preheated oven and bake for 30–40 minutes, or until the crust is golden brown and the filling is bubbling through the vents.

    If the crust begins to brown too quickly, cover the edges with foil to prevent burning.


    Step 7: Cool Slightly and Serve

    Remove the pie from the oven and let it cool for 5–10 minutes before slicing.

    This resting time allows the filling to set slightly, making it easier to serve without spilling.

    Garnish with fresh parsley if desired.


    Step 8: Slice and Enjoy

    Use a sharp knife to cut the pie into wedges.

    Each slice should reveal a creamy, savory filling encased in a flaky, golden crust.

    Serve warm with a side salad or steamed vegetables for a complete meal.


    Pro Tips for Perfect Chicken Pot Pie

    1. Use cooked chicken – Rotisserie chicken or leftover roasted chicken works perfectly.
    2. Don’t overcook vegetables – Slightly tender vegetables hold up well in the creamy filling.
    3. Thicken properly – Make sure your filling isn’t too runny, or the pie may become soggy.
    4. Egg wash matters – Brushing the crust with egg gives a shiny, golden finish.
    5. Vent the top crust – Small slits allow steam to escape and prevent a soggy top.

    Variations to Try

    • Cheesy Chicken Pot Pie: Add ½ cup shredded cheddar or Gruyère to the filling for extra richness.
    • Herb-Infused: Mix in fresh thyme, rosemary, or parsley for a fragrant flavor boost.
    • Vegetarian Version: Replace chicken with mushrooms, cauliflower, and other hearty vegetables.
    • Mini Pot Pies: Use muffin tins or small ramekins for individual servings—perfect for parties.

    Wrapping Up

    Chicken pot pie is the ultimate comfort food: creamy, savory, and enveloped in a golden, flaky crust.

    Making it from scratch allows you to control the flavors, textures, and quality of ingredients, resulting in a meal that’s far superior to frozen or store-bought options.

    Whether for a cozy weeknight dinner or a special family gathering, this recipe delivers a hearty, satisfying dish that pleases everyone at the table.

    The combination of tender chicken, vegetables, creamy sauce, and buttery crust is timeless, making chicken pot pie a staple for any comfort-food lover.

    With this guide, you can confidently prepare a pot pie that’s perfectly balanced—rich and indulgent, yet homey and comforting.

    Serve it with a simple salad or steamed veggies, and enjoy the ultimate in warm, cheesy, savory satisfaction. Chicken pot pie isn’t just a meal—it’s a hug in a dish.

  • Sizzling and Flavorful: How to Make Classic Kung Pao Chicken at Home

    Sizzling and Flavorful: How to Make Classic Kung Pao Chicken at Home

    Few dishes pack the perfect balance of heat, sweetness, and savory depth like Kung Pao Chicken.

    This classic Sichuan stir-fry combines tender chicken, crisp vegetables, and crunchy peanuts all coated in a flavorful, slightly spicy sauce that leaves your taste buds tingling.

    Making it at home is easier than you think, and the results are far superior to takeout, with fresh ingredients, vibrant textures, and bold flavors.

    This step-by-step guide will show you how to master Kung Pao Chicken from start to finish, ensuring every bite bursts with authentic taste.

    Whether you’re cooking for a weeknight dinner or impressing guests, this recipe delivers a flavorful punch with every bite.


    Why You’ll Love This Recipe

    • Quick and easy stir-fry, ready in under 30 minutes
    • Sweet, savory, and mildly spicy sauce
    • Crisp vegetables and crunchy peanuts for texture
    • Customizable spice level
    • Made with fresh ingredients, no mystery sauces

    Kung Pao Chicken is a perfect dish for anyone who loves bold, layered flavors without spending hours in the kitchen.


    Ingredients You’ll Need

    For the Chicken:

    • 1 pound boneless, skinless chicken thighs or breasts, cut into bite-sized pieces
    • 1 tablespoon soy sauce
    • 1 tablespoon Shaoxing wine (or dry sherry)
    • 1 teaspoon cornstarch
    • ½ teaspoon salt

    For the Sauce:

    • 3 tablespoons soy sauce
    • 1 tablespoon rice vinegar
    • 1 tablespoon hoisin sauce
    • 1 tablespoon sugar
    • 1 teaspoon sesame oil
    • 1 teaspoon cornstarch
    • 2 tablespoons water

    For the Stir-Fry:

    • 2 tablespoons vegetable oil
    • 8–10 dried red chilies, halved and seeds removed (adjust to taste)
    • 3 cloves garlic, minced
    • 1-inch piece ginger, minced
    • 4 green onions, chopped
    • 1 red bell pepper, diced
    • ½ cup unsalted roasted peanuts

    Optional for garnish: toasted sesame seeds


    Step 1: Marinate the Chicken

    In a medium bowl, combine chicken pieces with soy sauce, Shaoxing wine, cornstarch, and salt.

    Mix well and let it sit for at least 15 minutes.

    Marinating the chicken ensures tenderness and helps the cornstarch create a light coating when stir-fried, which allows the sauce to cling better.


    Step 2: Prepare the Sauce

    In a small bowl, whisk together soy sauce, rice vinegar, hoisin sauce, sugar, sesame oil, cornstarch, and water until smooth.

    Set aside. This sauce will thicken quickly once added to the hot stir-fry.


    Step 3: Prep the Vegetables and Aromatics

    Dice the red bell pepper and chop green onions.

    Mince garlic and ginger finely.

    Remove seeds from dried red chilies if you prefer a milder dish.

    Having all ingredients prepped before cooking is essential, as stir-frying happens fast.


    Step 4: Stir-Fry the Chicken

    Heat a wok or large skillet over medium-high heat and add vegetable oil.

    Add the marinated chicken in a single layer.

    Cook for 3–4 minutes, stirring occasionally, until the chicken is lightly golden and almost cooked through.

    Remove chicken from the wok and set aside.

    This ensures the chicken stays tender and doesn’t overcook while you stir-fry the aromatics.


    Step 5: Toast the Dried Chilies and Aromatics

    In the same wok, add the dried red chilies and stir-fry for about 30 seconds until fragrant.

    Add garlic and ginger and stir-fry another 30 seconds, being careful not to burn them.

    The toasted chilies release their smoky, spicy aroma, which forms the foundation of the dish’s signature flavor.


    Step 6: Stir-Fry the Vegetables

    Add red bell pepper and the white parts of the green onions to the wok.

    Stir-fry for 2–3 minutes until the peppers are slightly tender but still crisp.

    Crisp vegetables add a vibrant texture contrast to the tender chicken and crunchy peanuts.


    Step 7: Combine Chicken and Sauce

    Return the cooked chicken to the wok.

    Give the prepared sauce a quick stir, then pour it over the chicken and vegetables.

    Stir continuously as the sauce thickens and coats every piece evenly, creating a glossy, flavorful finish.

    This step takes about 1–2 minutes, depending on the heat.


    Step 8: Add Peanuts and Green Onion Tops

    Add the roasted peanuts and the green parts of the onions.

    Toss everything together for another 30 seconds.

    The peanuts add crunch, while the green onion tops provide a fresh, aromatic finish.


    Step 9: Serve Immediately

    Serve your Kung Pao Chicken hot over steamed jasmine rice or alongside fried rice.

    Optional garnishes include a sprinkle of toasted sesame seeds for extra texture and visual appeal.

    Enjoy the contrast of tender chicken, crisp vegetables, and nutty crunch coated in a rich, slightly spicy sauce.


    Tips for Perfect Kung Pao Chicken

    • Prep everything first: Stir-frying is fast, so ingredients must be ready.
    • Control the spice: Adjust the number of dried chilies to suit your heat tolerance.
    • Cook in batches if needed: Overcrowding the wok lowers the heat and leads to steaming rather than stir-frying.
    • Use high heat: This ensures quick cooking and helps vegetables stay crisp.
    • Toss quickly: Continuous stirring prevents burning and ensures even coating with the sauce.

    Attention to these details makes a huge difference in flavor and texture.


    Make-Ahead and Storage

    Leftovers can be stored in an airtight container in the refrigerator for up to 3 days.

    Reheat gently in a skillet over medium heat, adding a splash of water if the sauce has thickened too much.

    Avoid microwaving for long periods, which can soften vegetables and make the chicken less tender.


    Flavor Variations

    Once you’ve mastered the classic version, try these variations:

    • Swap peanuts for cashews for a slightly different texture
    • Add sliced zucchini or snow peas for extra veggies
    • Include a drizzle of chili oil for more heat
    • Replace chicken with shrimp or tofu for a protein twist

    Each variation maintains the core flavors while adding your personal touch.


    Final Thoughts

    Kung Pao Chicken is a perfect example of how simple ingredients and proper technique can create a dish bursting with flavor and texture.

    The combination of tender chicken, crisp vegetables, crunchy peanuts, and a spicy, savory sauce makes it a family favorite and a go-to weeknight meal.

    Cooking it at home allows you to balance spice, sweetness, and tang, delivering a more flavorful, fresher version than most takeout options.

    With this step-by-step guide, you’ll be able to create classic Kung Pao Chicken that’s crispy, aromatic, and utterly satisfying every time.

    Sizzling, flavorful, and perfectly balanced—this homemade Kung Pao Chicken will soon become a staple in your dinner rotation.

  • Golden Perfection: How to Make Authentic Portuguese Egg Tarts

    Golden Perfection: How to Make Authentic Portuguese Egg Tarts

    Few desserts can rival the sweet, creamy, caramelized delight of Portuguese egg tarts, also known as pastéis de nata.

    With a crisp, flaky puff pastry shell and a rich, velvety custard filling topped with a signature caramelized surface, these tarts are a treat that captures the heart of Portuguese cuisine.

    While they may look sophisticated, making them at home is a rewarding experience that doesn’t require professional pastry skills.

    Follow this step-by-step guide to create egg tarts that are golden, creamy, and utterly irresistible.


    Ingredients You’ll Need

    Before starting, gather all ingredients to ensure smooth preparation.

    For the pastry shell:

    • 1 package of frozen puff pastry (about 8 sheets), thawed
    • 1 tablespoon all-purpose flour (for dusting)

    For the custard filling:

    • 1 cup whole milk
    • ½ cup heavy cream
    • ½ cup granulated sugar
    • 3 tablespoons all-purpose flour
    • 6 large egg yolks
    • 1 teaspoon vanilla extract
    • 1 tablespoon lemon zest (optional, for subtle aroma)
    • ½ teaspoon ground cinnamon (optional, for flavor)

    Step 1: Preheat the Oven

    Preheat your oven to 500°F (260°C).

    Place a baking tray in the oven to heat as well. Using a hot baking surface helps achieve the signature caramelized top on Portuguese egg tarts.


    Step 2: Prepare the Puff Pastry

    Lightly flour your work surface and roll out the puff pastry sheets. Cut the pastry into circles slightly larger than the openings of your muffin tin or tart molds.

    Gently press the pastry circles into the cups, ensuring the sides are evenly lined. Chill the pastry-lined molds in the refrigerator for 15 minutes to prevent shrinking during baking.


    Step 3: Make the Custard Filling

    In a medium saucepan, combine milk, heavy cream, and lemon zest (if using).

    In a separate bowl, whisk together sugar and flour until smooth.

    Gradually add the milk mixture to the flour and sugar, whisking constantly to prevent lumps.

    Return the mixture to the saucepan over medium heat. Stir continuously until the custard thickens slightly, about 5–7 minutes. Remove from heat and allow it to cool slightly.

    In another bowl, lightly beat the egg yolks. Gradually whisk the egg yolks into the slightly cooled custard, along with vanilla extract and cinnamon if using.

    Mix until fully incorporated, creating a smooth, velvety filling.


    Step 4: Fill the Pastry Shells

    Remove the chilled pastry-lined molds from the refrigerator. Carefully pour the custard filling into each pastry shell, filling about ¾ of the way.

    Avoid overfilling to prevent spillage during baking.


    Step 5: Bake the Egg Tarts

    Place the filled tarts on the preheated baking tray and bake for 12–15 minutes.

    The high temperature will help the custard set quickly and create the iconic caramelized, slightly blistered top.

    Keep a close eye on the tarts in the final minutes to ensure the custard doesn’t burn but achieves those signature dark spots.


    Step 6: Cool Slightly and Serve

    Once baked, remove the tarts from the oven and let them cool for 5–10 minutes.

    This resting period allows the custard to set while keeping the pastry crisp.

    Serve warm for the ultimate creamy and flaky experience.


    Step 7: Optional Garnish

    Sprinkle a tiny pinch of cinnamon or powdered sugar over the tarts before serving.

    Some enjoy them with a light drizzle of caramel or a touch of lemon zest for added flavor complexity.


    Pro Tips for Perfect Portuguese Egg Tarts

    1. Use high-quality puff pastry – Proper layering is key for crisp, flaky shells.
    2. High oven temperature – Achieves the signature caramelized spots on the custard.
    3. Do not overcook the custard – The filling should be creamy, not dry or rubbery.
    4. Chill the pastry before filling – Helps prevent shrinkage during baking.
    5. Watch the baking closely – A few seconds can make the difference between a perfect caramelized top and a burnt custard.

    Variations and Twists

    • Classic Cinnamon: Sprinkle extra cinnamon for a spiced aroma.
    • Coffee Egg Tarts: Add 1 teaspoon instant coffee to the custard for a mocha twist.
    • Citrus Zest: Incorporate orange or lemon zest for a fresh, bright flavor.
    • Mini Egg Tarts: Use mini muffin tins for bite-sized treats perfect for parties or tea time.
    • Chocolate Twist: Add a thin layer of chocolate ganache at the bottom of the pastry before pouring the custard.

    Wrapping Up

    Portuguese egg tarts are a perfect balance of flaky pastry and silky custard with a golden, caramelized top that delights the eyes and palate alike.

    While they may seem intimidating at first glance, following these steps ensures a successful, delicious outcome.

    Making these tarts at home is rewarding—not only do you get to enjoy their warm, creamy goodness fresh out of the oven, but you also gain the satisfaction of mastering a classic dessert that has charmed generations.

    Whether for breakfast, dessert, or a special gathering, these pastéis de nata will impress anyone lucky enough to enjoy them.

    From preparing the crisp puff pastry shells to whisking the velvety custard and achieving the iconic caramelized top, each step is essential for the perfect balance of texture and flavor.

    Serve them with a hot cup of coffee or tea, and you have a delightful treat that transports you straight to the streets of Lisbon.

    Indulge yourself and your loved ones with homemade Portuguese egg tarts—golden, creamy, and absolutely irresistible.

    With patience, attention to detail, and a little love, these tarts are a masterpiece of dessert perfection.

  • Crispy, Fiery, and Unforgettable: Mastering Classic Spicy Fried Chicken

    Crispy, Fiery, and Unforgettable: Mastering Classic Spicy Fried Chicken

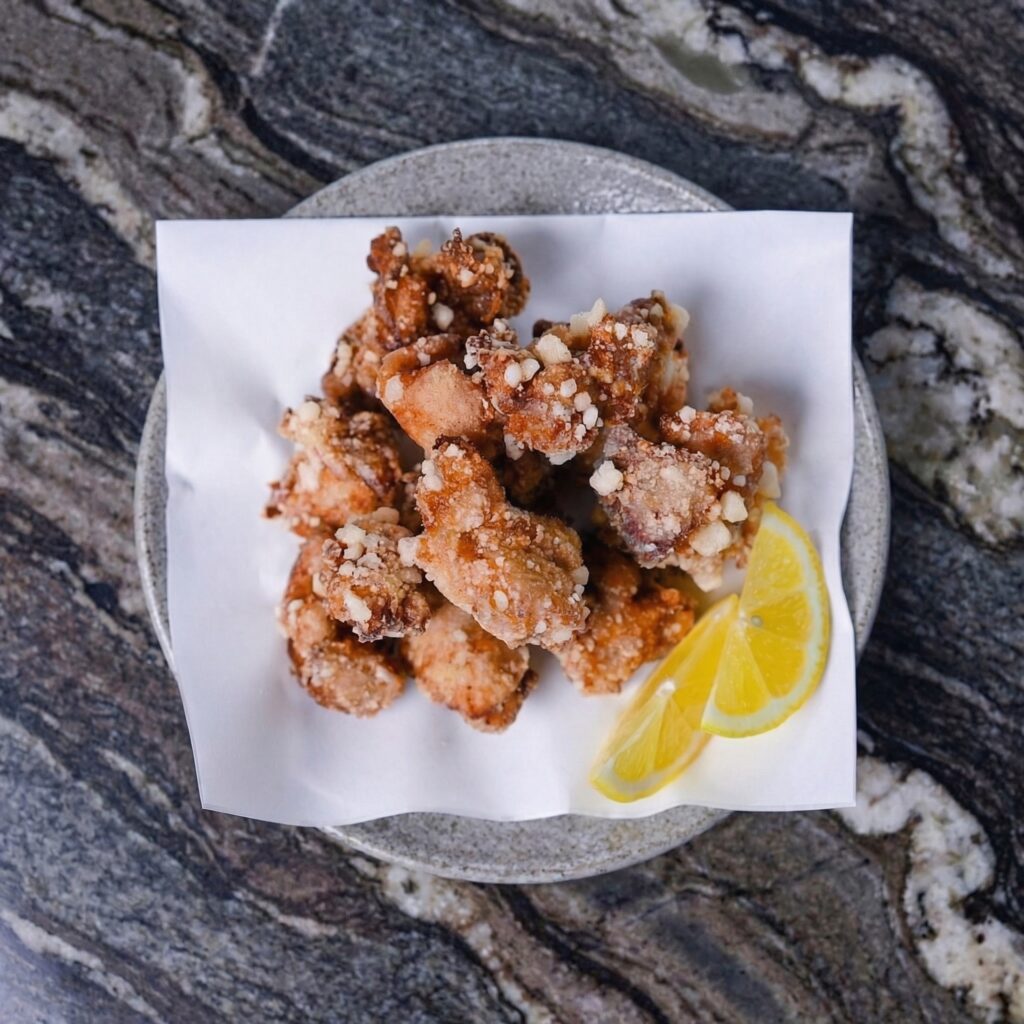
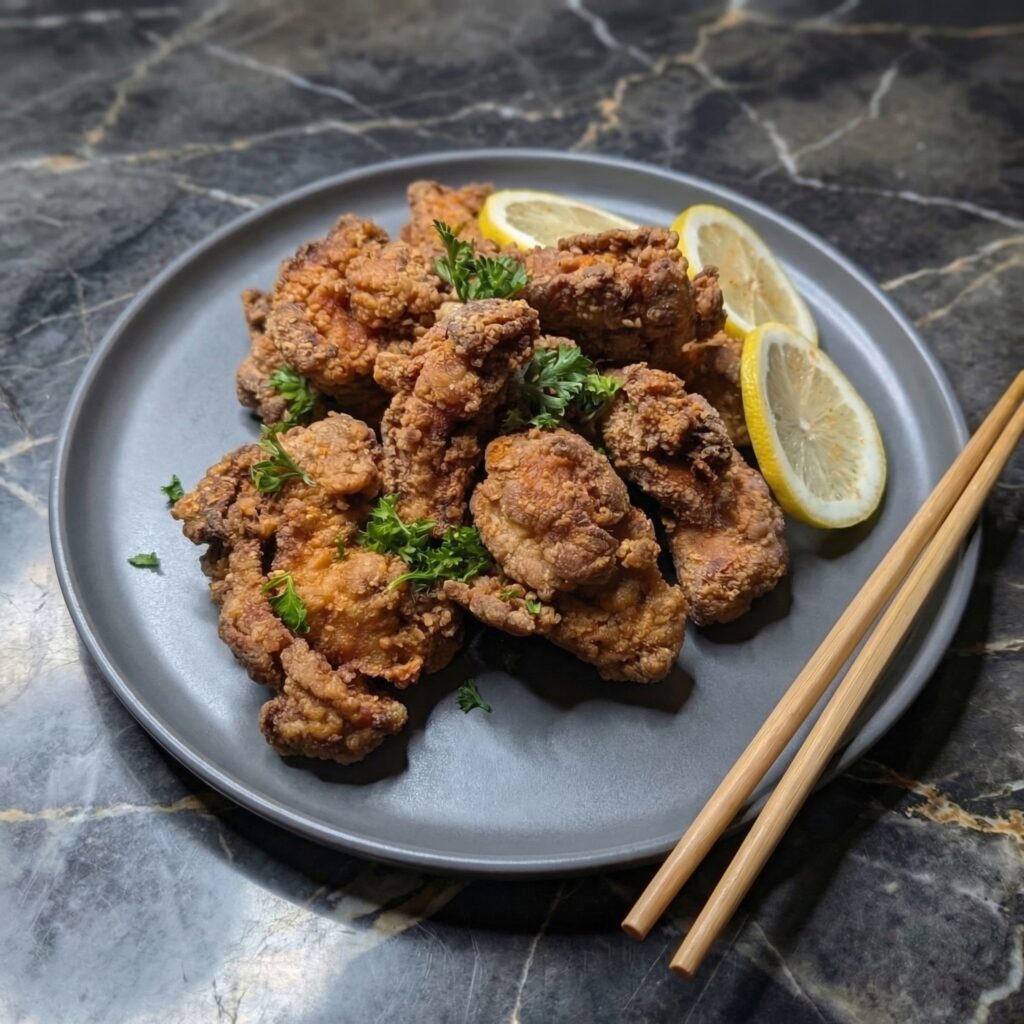
    Few dishes can match the irresistible combination of crispy skin, juicy meat, and bold, fiery flavor that defines classic spicy fried chicken. From backyard cookouts to late-night cravings, this dish is comfort food elevated with a kick.

    Making it at home allows you to control every element—from the heat level to the crunch—resulting in a perfectly golden, mouthwatering masterpiece.

    This step-by-step guide will teach you how to make classic spicy fried chicken that’s crunchy on the outside, tender on the inside, and packed with flavor.

    Whether you’re a beginner or a seasoned cook, you’ll love how achievable this iconic dish is.


    Why You’ll Love This Recipe

    • Extra-crispy coating with a perfect crunch
    • Juicy, flavorful chicken with a spicy kick
    • Perfect for dinners, gatherings, or meal prep
    • Simple pantry ingredients with big flavor
    • Completely customizable heat level

    Classic spicy fried chicken is all about technique and seasoning, and once mastered, it becomes an all-time favorite.


    Ingredients You’ll Need

    For the Chicken:

    • 3–4 pounds chicken pieces (legs, thighs, wings, or breasts)
    • 2 cups buttermilk
    • 1 teaspoon hot sauce (optional, for extra heat)
    • Salt and black pepper to taste

    For the Coating:

    • 2 cups all-purpose flour
    • 1 tablespoon paprika
    • 1 tablespoon cayenne pepper (adjust to taste)
    • 1 teaspoon garlic powder
    • 1 teaspoon onion powder
    • 1 teaspoon dried thyme or oregano
    • ½ teaspoon black pepper
    • 1 teaspoon salt

    For Frying:

    • Vegetable oil or canola oil, for deep frying (enough to fill 2–3 inches in a heavy skillet or Dutch oven)

    Optional for serving: lemon wedges, honey, or hot sauce for drizzling.


    Step 1: Brine the Chicken (Optional but Recommended)

    For extra juiciness, soak the chicken in a simple brine for 1–2 hours or overnight.

    A basic brine can be made with 4 cups water, ¼ cup salt, and ¼ cup sugar. Rinse the chicken after brining and pat dry.

    Brining ensures each bite is tender and flavorful all the way through.


    Step 2: Marinate in Buttermilk

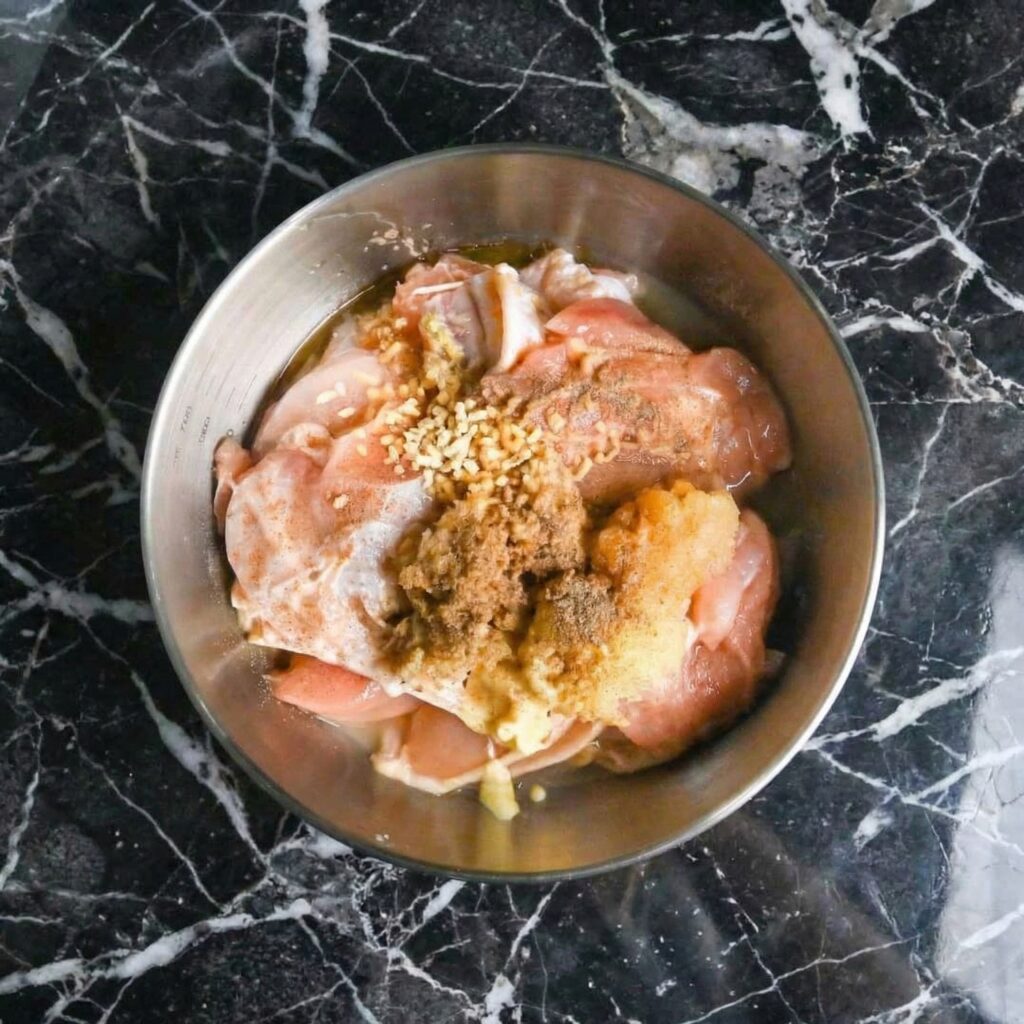
    In a large bowl, mix the buttermilk with 1 teaspoon hot sauce and a pinch of salt and pepper.

    Submerge the chicken pieces completely and refrigerate for at least 2 hours, preferably overnight.

    The acidity of the buttermilk tenderizes the meat while imparting subtle tang that complements the spicy coating.


    Step 3: Prepare the Flour Coating

    In a shallow dish, combine flour, paprika, cayenne pepper, garlic powder, onion powder, dried thyme, salt, and black pepper.

    Mix thoroughly so that all spices are evenly distributed.

    This seasoned flour is the secret to achieving that flavorful, fiery crust.


    Step 4: Dredge the Chicken

    Remove the chicken from the buttermilk, allowing excess to drip off.

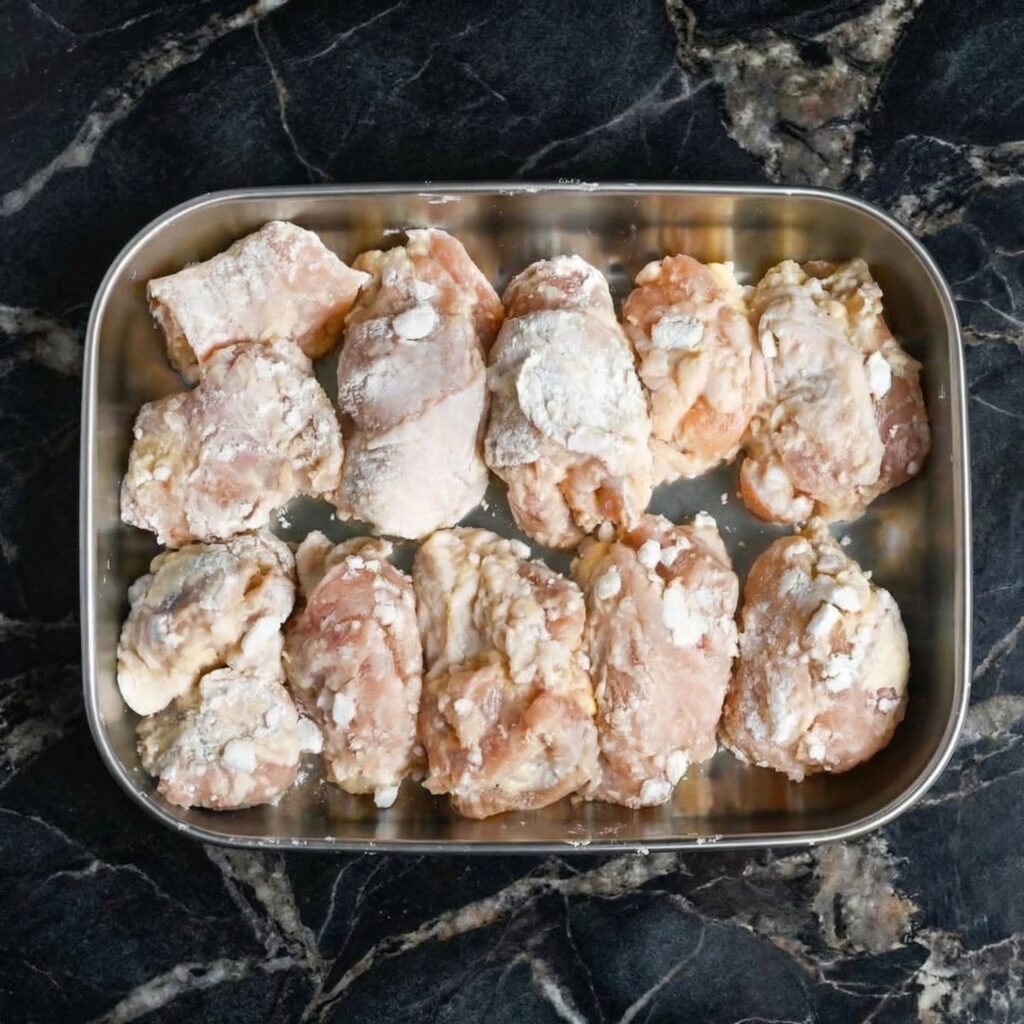
    Coat each piece thoroughly in the seasoned flour mixture. Press gently so the flour adheres well.

    For extra crunch, double dredge by dipping back into the buttermilk and then into the flour again.

    Place coated pieces on a wire rack while preparing the oil. Avoid stacking to prevent sticking.


    Step 5: Heat the Oil

    Pour oil into a heavy skillet, deep frying pan, or Dutch oven until it reaches 2–3 inches deep.

    Heat to 350°F (175°C) using a candy or deep-fry thermometer.

    Maintaining the proper temperature is crucial: too low and the chicken absorbs oil; too high and the coating burns before the meat cooks.


    Step 6: Fry the Chicken

    Carefully lower a few pieces of chicken into the hot oil. Do not overcrowd the pan.

    Fry for 12–15 minutes for wings or smaller pieces, and 18–20 minutes for larger thighs or breasts, turning occasionally for even browning.

    The crust should turn golden brown, crispy, and flavorful.

    Check doneness with a thermometer: chicken should reach an internal temperature of 165°F (74°C).


    Step 7: Drain and Rest

    Remove chicken from the oil and place on a wire rack set over a baking sheet.

    This allows excess oil to drain and keeps the crust crunchy. Avoid paper towels, which can make the coating soggy.

    Let rest for 5–10 minutes before serving.


    Step 8: Serve and Enjoy

    Serve your classic spicy fried chicken hot with your favorite sides: coleslaw, mashed potatoes, cornbread, or pickles.

    Optional extras: drizzle honey for a sweet-spicy contrast or squeeze fresh lemon for brightness.

    The combination of heat, crunch, and juicy meat makes this dish irresistible.


    Tips for Extra Crispy, Spicy Chicken

    • Keep the chicken cold before frying for better crust adherence.
    • Maintain oil temperature for even cooking.
    • Double dredge for extra crunchy exterior.
    • Use a wire rack instead of paper towels to preserve crispiness.
    • Adjust cayenne pepper to control heat level.

    Small adjustments can make a big difference in texture and flavor.


    Make-Ahead and Storage

    Cooked fried chicken can be stored in the refrigerator for up to 3 days.

    Reheat in a 375°F oven for 10–12 minutes to restore crispiness.

    Avoid microwaving, which can make the coating soft and chewy.

    Leftover chicken also makes excellent sandwiches or salads.


    Variations

    Once you’ve mastered the classic version, try these variations:

    • Honey Hot Chicken: drizzle honey over the fried chicken before serving.
    • Buttermilk-Brined Extra Hot: increase cayenne and add hot sauce to the brine.
    • Southern Style: add a teaspoon of smoked paprika and a pinch of cayenne for deeper flavor.
    • Crunchy Cornflake Coating: mix crushed cornflakes with the flour for extra crunch.

    The possibilities are endless while maintaining the crispy, spicy foundation.


    Final Thoughts

    Classic spicy fried chicken is a dish that never goes out of style. With its crispy, golden exterior, tender, juicy interior, and bold kick of spice, it’s comfort food at its finest.

    While it might seem intimidating, this recipe shows that with proper preparation, attention to temperature, and seasoning, you can make restaurant-quality fried chicken at home.

    Whether for family dinners, parties, or a weekend indulgence, this spicy fried chicken will become a go-to favorite. Crispy, flavorful, and fiery, it’s a dish that will leave everyone coming back for seconds.

    Golden, spicy, and utterly irresistible—classic fried chicken done right.

  • Homemade Yogurt (It’s Like Magic, But You’re the Wizard)

    Homemade Yogurt (It’s Like Magic, But You’re the Wizard)

    Let’s be honest: making your own yogurt sounds like something that requires a degree in microbiology or at least a very intimidating piece of equipment. But here’s the truth: homemade yogurt is nothing short of magic, and you are absolutely the wizard. All it takes is milk, a little store-bought yogurt to get things started, a pot, a jar, and some patience. That’s it.

    No fancy machines, no complicated techniques. Just you, transforming plain old milk into thick, creamy, probiotic-rich yogurt that tastes better than anything you can buy. It’s cheaper, you control the ingredients, and there’s something deeply satisfying about eating food you made with nothing but heat and time. Ready to feel like a wizard? Let’s do this.

    The Science of Yogurt: How Milk Becomes Magic

    Yogurt-making is a beautiful example of friendly bacteria doing amazing things. When milk is heated, its proteins unwind and restructure, creating a thicker final texture. Then, when it cools to the right temperature (about 110°F), you add a small amount of existing yogurt containing live active cultures.

    These bacteria—Lactobacillus bulgaricus and Streptococcus thermophilus—get to work, feasting on the lactose in the milk and producing lactic acid. That acid causes the milk proteins to coagulate and thicken, transforming liquid milk into silky, tangy yogurt.

    The magic happens during the incubation period, when the mixture is kept warm for several hours. The longer it incubates, the tangier and thicker it becomes. You’re not just making food; you’re hosting a bacterial party, and the result is delicious.

    Ingredients

    For the Homemade Yogurt:

    • 4 cups (1 liter) whole milk (or 2%, but whole milk = creamier yogurt)
    • 2 tablespoons plain yogurt with live active cultures (store-bought or from a previous batch)

    Optional Add-Ins After Yogurt is Made:

    • Honey or maple syrup, for sweetness
    • Vanilla extract
    • Fresh fruit or jam
    • Granola

    Instructions

    1. Heat the Milk: Pour the milk into a heavy-bottomed saucepan. Heat it over medium heat, stirring occasionally to prevent scorching, until it reaches 180°F (82°C) on a kitchen thermometer.

    This step denatures the proteins, which helps create a thicker yogurt. If you don’t have a thermometer, heat until the milk is steaming and small bubbles form around the edges—do not let it come to a full boil .

    2. Cool the Milk: Remove the pot from the heat and let the milk cool to 110°F (43°C). You can speed this up by placing the pot in an ice bath or cold water, stirring occasionally. Patience here is key—if the milk is too hot, it will kill the good bacteria; too cold, and they won’t activate .

    3. Temper the Starter: In a small bowl, place the 2 tablespoons of plain yogurt with live active cultures. Add a few tablespoons of the warm (110°F) milk and whisk until smooth. This tempers the yogurt and prevents temperature shock .

    4. Combine: Pour the tempered yogurt mixture back into the pot of warm milk. Whisk gently but thoroughly to ensure the cultures are evenly distributed throughout the milk .

    5. Incubate (The Magic Step): Pour the milk mixture into a clean glass jar or container with a lid. Now you need to keep it warm (around 110°F) for 6-12 hours to allow the cultures to work. Here are some foolproof methods:


    Oven with light on: Place the jar in the oven with the oven light on (do not turn the oven on). The light bulb provides gentle, consistent warmth.


    Cooler with warm water: Place the jar in a small cooler and fill with warm water (around 110°F) until it reaches the level of the yogurt. Close the cooler.


    Instant Pot: Use the yogurt setting if you have one.


    Wrapped in a towel: Wrap the jar in a thick towel or blanket and place it in a warm spot (like near a radiator or in a sunny window).
    Let it incubate undisturbed for at least 6 hours. The longer it incubates, the tangier and thicker it becomes .

    6. Check for Doneness: After 6-8 hours, gently tilt the jar. The yogurt should be set, thick, and custard-like. It may have a thin layer of yellowish liquid (whey) on top—that’s normal and can be stirred in or poured off .

    7. Refrigerate: Place the lid on the jar and transfer the yogurt to the refrigerator. Chill for at least 4 hours to stop the fermentation process and allow it to fully set. It will continue to thicken as it cools .

    8. Save Some for Next Time: Before you dig in, spoon out 2 tablespoons of your homemade yogurt into a small container. This becomes your starter for your next batch. Label it and keep it in the fridge for up to a week .

    9. Serve and Enjoy: Spoon your beautiful homemade yogurt into a bowl. Add honey, fresh berries, granola, or anything your heart desires. Taste that tangy, creamy perfection and feel immensely proud of yourself .

    10. Store: Keep your homemade yogurt refrigerated in an airtight container for up to 2 weeks .

    Pro-Tips for Yogurt Greatness

    • Use Whole Milk for Creamiest Results: Whole milk yields thick, luxurious yogurt. Lower-fat milks work but will be thinner. For extra thickness, add ¼ cup of powdered milk to the milk before heating .
    • Temperature Matters: Too hot kills the cultures; too cold and they won’t activate. An instant-read thermometer is your best friend here .
    • Patience is a Virtue: The longer you incubate, the tangier and thicker your yogurt becomes. If you like mild yogurt, go for 6-7 hours. For serious tang, let it go 10-12 hours .
    • Save Your Starter: Always reserve a few tablespoons of your homemade yogurt to start the next batch. It’s like having a never-ending yogurt supply .
    • Strain for Greek Yogurt: For thick, Greek-style yogurt, line a strainer with cheesecloth or a clean kitchen towel and place it over a bowl. Spoon in your yogurt and let it drain in the refrigerator for 2-4 hours. The longer it drains, the thicker it gets. Save the whey—it’s great in smoothies!
  • Homemade BBQ Sauce (So Good You’ll Never Buy It Again)

    Homemade BBQ Sauce (So Good You’ll Never Buy It Again)

    Let’s be honest: most store-bought BBQ sauce is fine. It’s convenient, it’s there, it does the job. But fine is not what we’re after here.

    This Homemade BBQ Sauce is the real deal. It’s tangy from apple cider vinegar, smoky from real smoked paprika, sweet with a perfect balance of brown sugar and molasses, and has just enough kick to keep things interesting. It’s thick, glossy, and clings to every rib, chicken wing, or fry it meets.

    The best part? It comes together in about 20 minutes with ingredients you probably already have in your pantry. Once you taste this, you’ll never reach for that plastic bottle again. Fair warning: you’re about to become the official BBQ sauce supplier for every summer cookout.

    The Secret to Rich, Complex, Balances Flavor

    Great BBQ sauce is all about balance. You need sweetness, tanginess, smokiness, and heat all working together in harmony. The sweetness here comes from a combination of brown sugar and molasses—brown sugar for caramel notes, molasses for that deep, almost bitter complexity that keeps the sauce from being cloying.

    The tang comes from apple cider vinegar and a hit of Worcestershire sauce, which also adds umami depth. The smokiness? That’s all about smoked paprika. Regular paprika won’t cut it here—smoked paprika is what gives the sauce that authentic, campfire, cookout flavor.

    And the secret to a thick, glossy, clingy texture? A slow simmer. Letting the sauce bubble gently for 15-20 minutes concentrates the flavors and thickens it to perfection. Patience is rewarded.

    Ingredients

    For the Homemade BBQ Sauce (Makes about 2 cups):

    • 1 tablespoon olive oil
    • 1 small onion, finely chopped (about ½ cup)
    • 3 cloves garlic, minced
    • 1 cup (240ml) ketchup
    • ½ cup (120ml) apple cider vinegar
    • ½ cup (120ml) water
    • ¼ cup (60ml) Worcestershire sauce
    • ¼ cup (60ml) molasses (not blackstrap, unless you want a more bitter flavor)
    • ½ cup (100g) packed brown sugar (light or dark)
    • 2 tablespoons tomato paste
    • 1 tablespoon smoked paprika
    • 1 teaspoon chili powder
    • 1 teaspoon garlic powder
    • ½ teaspoon onion powder
    • ½ teaspoon black pepper
    • ½ teaspoon salt
    • ¼ teaspoon cayenne pepper (optional, for heat)
    • ½ teaspoon liquid smoke (optional, for extra smokiness)

    Instructions

    1. Sauté the Aromatics: In a medium saucepan, heat the olive oil over medium heat. Add the finely chopped onion and cook until soft and translucent, about 4-5 minutes. Add the minced garlic and cook for another minute until fragrant. This base builds the savory foundation of the sauce .

    2. Add the Liquid Ingredients: Pour in the ketchup, apple cider vinegar, water, Worcestershire sauce, and molasses. Stir everything together until combined. The mixture will look a little thin and messy right now—don’t worry, it will come together .

    3. Add the Brown Sugar and Tomato Paste: Add the brown sugar and tomato paste. Whisk until the tomato paste is fully dissolved and the sugar is incorporated .

    4. Add the Spices: Add the smoked paprika, chili powder, garlic powder, onion powder, black pepper, salt, and cayenne (if using). Whisk thoroughly until all the spices are evenly distributed. This is where the magic happens—the sauce will start to smell incredible .

    5. Simmer: Bring the sauce to a gentle boil, then reduce the heat to low. Let it simmer uncovered for 15-20 minutes, stirring occasionally. The sauce will thicken and darken as it cooks, and the flavors will meld and deepen. For a thicker sauce, simmer longer; for a thinner sauce, simmer less time .

    6. Taste and Adjust: After simmering, give it a taste. This is your moment to customize. Want it sweeter? Add a tablespoon more brown sugar. Want more tang? A splash more vinegar. Want it spicier? Another pinch of cayenne. Adjust to your perfect balance .

    7. Blend (Optional, for Smoothness): If you prefer a completely smooth sauce with no onion bits, carefully transfer the sauce to a blender and blend until smooth. Alternatively, use an immersion blender directly in the pot. This step is optional—many people love the texture of the onions .

    8. Cool Slightly: Remove the sauce from heat and let it cool for a few minutes. It will continue to thicken as it cools .

    9. Store: Pour the finished BBQ sauce into a clean mason jar or airtight container. Let it cool completely to room temperature, then seal and refrigerate .

    10. Serve and Enjoy: Use it immediately on grilled meats, as a dipping sauce for fries or onion rings, or as a secret ingredient in baked beans. It will keep in the refrigerator for up to 3 weeks .

    Pro-Tips for BBQ Sauce Greatness

    • Use Smoked Paprika: This is non-negotiable. Smoked paprika is what gives the sauce that authentic, smoky BBQ flavor. Regular paprika just won’t deliver .
    • Don’t Rush the Simmer: The 15-20 minute simmer is essential for thickening and developing deep, complex flavors. Rushing this step results in a thinner, less flavorful sauce .
    • Customize to Your Taste: This recipe is a starting point. Make it your own—add bourbon for warmth, chipotle for smokey heat, or pineapple juice for a tropical twist .
    • Store in Glass: Glass jars are ideal for storing BBQ sauce. They don’t retain odors or stains and seal tightly .
    • Double the Batch: This sauce is so good, you’ll want extra. It makes a fantastic homemade gift—just tie a ribbon around a mason jar and attach a “grilling instructions” tag .
  • The Best Green Smoothie (It’s Green. It’s Dreamy. It’s Actually Delicious.)

    The Best Green Smoothie (It’s Green. It’s Dreamy. It’s Actually Delicious.)

    Let’s be real: green smoothies have a reputation. They’re often described as “earthy” or “an acquired taste,” which is code for “kinda tastes like lawn clippings.” This is not that smoothie. This is the green smoothie that converts skeptics, the one that makes you actually excited to drink your vegetables.

    It’s creamy, perfectly sweet, and impossibly smooth, with zero grassy flavor and everything delicious. The secret? A handful of spinach (you genuinely can’t taste it), a ripe banana for creaminess, frozen fruit for that thick, milkshake-like texture, and a splash of almond milk to bring it all together.

    It’s packed with nutrients, takes five minutes to make, and tastes like a tropical treat. Breakfast? Snack? Post-workout fuel? Yes, yes, and yes.

    The Secret to a Smooth, Creamy, Never-Gritty Green Smoothie

    There’s an art to the perfect green smoothie texture. Nobody wants a gritty, watery, or separated drink. The secrets are all in the order of ingredients and the right ratio. First, always add your liquid first. This helps the blades move freely and creates a vortex that pulls everything down.

    Second, the banana factor. A ripe (or even better, frozen) banana is the secret to creaminess. Its natural pectin and soft texture create that thick, smooth, milkshake-like consistency.

    Third, frozen fruit over fresh. Frozen fruit eliminates the need for ice, which can water down the flavor, and gives you that thick, frosty texture that makes smoothies feel indulgent.

    And finally, blend long enough. Give it a full 60-90 seconds to ensure every last bit of spinach is completely pulverized. The result? A smooth, creamy, vibrant green dream.

    Ingredients

    For The Best Green Smoothie (Makes 1 large or 2 small servings):

    • 1 cup (240ml) unsweetened almond milk (or milk of choice)
    • 1 large handful fresh spinach (about 2 cups, loosely packed)
    • 1 medium ripe banana (fresh or frozen)
    • 1 cup (140g) frozen mango chunks (or frozen pineapple)
    • ½ cup (75g) frozen strawberries or banana (optional, for extra sweetness)
    • 1 tablespoon chia seeds or ground flaxseed (optional, for fiber and omega-3s)
    • ½ scoop vanilla protein powder (optional, for a protein boost)

    For Garnish (Optional but Pretty):

    • Chia seeds
    • Fresh mint sprig
    • Slice of banana or strawberry

    Instructions

    1. Liquid First: Pour the almond milk (or your milk of choice) into your blender first. This helps the blades move freely and ensures everything blends smoothly .

    2. Add the Spinach: Toss in the large handful of fresh spinach. Don’t worry about packing it down—just let it float on top of the liquid .

    3. Add the Banana: Peel the banana and break it into chunks. Add it to the blender. If you’re using a fresh banana, your smoothie will be delicious but slightly thinner. For a thicker, creamier texture, use a frozen banana (peel and slice before freezing) .

    4. Add Frozen Fruit: Add the frozen mango chunks and any other frozen fruit you’re using. The frozen fruit is what gives the smoothie that thick, frosty, milkshake-like texture without needing ice .

    5. Add Boosters (Optional): If you’re using chia seeds, flaxseed, or protein powder, add them now. These add fiber, healthy fats, and staying power .

    6. Blend: Start blending on low speed, gradually increasing to high. Blend for a full 60-90 seconds, until the smoothie is completely smooth and creamy. You shouldn’t see any flecks of spinach or fruit—it should be a uniform, vibrant green .

    7. Check Consistency: If the smoothie is too thick, add a splash more liquid and blend again. If it’s too thin, add a few more frozen fruit chunks and blend again .

    8. Taste and Adjust: Give it a taste. If you’d like it sweeter, add a teaspoon of honey or maple syrup, or a few extra frozen strawberries. Blend briefly to incorporate .

    9. Pour and Garnish: Pour the smoothie into a tall glass. Sprinkle with a few chia seeds, add a fresh mint sprig, or perch a slice of banana or strawberry on the rim for that extra touch of beauty .

    10. Enjoy Immediately: Green smoothies are best enjoyed right away while they’re cold, thick, and fresh. Sip slowly and feel amazing about all those nutrients .

    Pro-Tips for Smoothie Greatness

    • Liquid First, Always: This simple step prevents air pockets and helps everything blend smoothly. It also protects your blender blades .
    • Use Frozen Fruit, Not Ice: Ice melts and waters down your smoothie. Frozen fruit keeps it thick, cold, and flavorful. Stock your freezer with bags of frozen mango and strawberries .
    • Ripe Bananas Are Key: The riper the banana, the sweeter and creamier your smoothie. Spotty, brown bananas are perfect. Peel and freeze them for an even thicker texture .
    • Don’t Fear the Spinach: A full handful of spinach sounds like a lot, but we promise you cannot taste it. The fruit completely masks it, and you get all the nutrients.
    • Blend Longer Than You Think: Give it a full 60-90 seconds to ensure every last bit of spinach is pulverized. A quick blitz leaves flecks of green and a less smooth texture .