Category: quick_meals

  • Yakisoba (Japanese Stir-Fried Noodles)

    Yakisoba (Japanese Stir-Fried Noodles)

    If you’ve ever been to a Japanese festival or street food stall, you’ve likely encountered yakisoba—the irresistible stir-fried noodles sizzling on a hot griddle, filling the air with a sweet-savory aroma.

    This classic Japanese dish combines tender wheat noodles with thinly sliced pork, cabbage, carrots, and onions, all tossed in a thick, tangy sauce that’s similar to Worcestershire but uniquely Japanese.

    Topped with a drizzle of Japanese mayonnaise, a sprinkle of aonori (seaweed), and a side of pickled ginger, it’s a complete meal that comes together in under 20 minutes. Better than takeout and endlessly customizable, yakisoba is the perfect quick weeknight dinner.

    Ingredients

    For the Yakisoba:

    • 3 packs (about 18 oz / 500g) fresh yakisoba noodles (or 10 oz dried ramen-style noodles)
    • 2 tablespoons vegetable oil, divided
    • ½ lb (225g) pork belly or pork shoulder, thinly sliced
    • ½ onion, thinly sliced
    • 1 carrot, julienned
    • 2 cups cabbage, thinly sliced
    • 2 green onions, cut into 2-inch pieces

    For the Yakisoba Sauce:

    • 3 tablespoons Worcestershire sauce
    • 2 tablespoons oyster sauce
    • 1 tablespoon soy sauce
    • 1 tablespoon ketchup
    • 1 tablespoon sugar
    • 1 teaspoon sesame oil

    For Topping:

    • Japanese mayonnaise (Kewpie)
    • Aonori (dried seaweed flakes)
    • Pickled red ginger (beni shoga)

    Instructions

    1. Prepare the Noodles: If using fresh yakisoba noodles, place them in a colander and pour boiling water over them to separate. Drain well and toss with a little oil to prevent sticking. If using dried noodles, cook according to package directions, drain, and rinse with cold water.

    2. Make the Sauce: In a small bowl, whisk together the Worcestershire sauce, oyster sauce, soy sauce, ketchup, sugar, and sesame oil. Set aside.

    3. Stir-Fry the Pork and Vegetables: Heat a large wok or skillet over high heat. Add 1 tablespoon of oil. Add the pork and stir-fry for 2 to 3 minutes until browned.

    Remove and set aside. Add the remaining 1 tablespoon of oil to the wok. Add the onion and carrot, stir-frying for 1 minute. Add the cabbage and stir-fry for another 1 to 2 minutes until slightly wilted but still crisp.

    4. Add the Noodles and Sauce: Return the pork to the wok. Add the noodles and the prepared sauce. Toss everything together using tongs or two spatulas for 2 to 3 minutes until the noodles are evenly coated and heated through. Add the green onions and toss for another 30 seconds.

    5. Serve: Transfer the yakisoba to serving plates or bowls. Drizzle with Japanese mayonnaise, sprinkle with aonori, and top with a small pile of pickled red ginger. Serve immediately.

    This Yakisoba brings the vibrant flavors of Japanese street food to your kitchen—quick, satisfying, and endlessly customizable.

  • Shrimp Pad Thai

    Shrimp Pad Thai

    Pad Thai is Thailand’s most famous street food—a stir-fried noodle dish that perfectly balances sweet, sour, salty, and savory flavors. This Shrimp Pad Thai recipe captures all that magic in your own kitchen.

    Tender rice noodles are tossed with juicy shrimp, scrambled eggs, crisp bean sprouts, and crunchy peanuts, all coated in a tangy tamarind-based sauce. The key to great Pad Thai is having all your ingredients prepped and ready before you start cooking—the stir-fry itself comes together in minutes.

    With a few authentic ingredients and simple techniques, you can create a dish that rivals any Thai restaurant. Serve with a squeeze of fresh lime and a sprinkle of crushed peanuts for the perfect finish.

    Ingredients

    For the Pad Thai Sauce:

    • 3 tablespoons tamarind paste (or 2 tbsp tamarind concentrate + 1 tbsp water)
    • 3 tablespoons fish sauce
    • 2 tablespoons palm sugar or brown sugar
    • 1 tablespoon rice vinegar (optional, for extra tang)
    • 1 teaspoon paprika or Thai chili powder (for color and heat)

    For the Pad Thai:

    • 8 oz (225g) dried flat rice noodles (about ¼-inch wide)
    • 2 tablespoons vegetable oil or peanut oil
    • 2 shallots, thinly sliced
    • 2 cloves garlic, minced
    • ½ lb (225g) large shrimp, peeled and deveined
    • 2 large eggs
    • 2 cups (150g) bean sprouts, divided
    • ½ cup (60g) crushed roasted peanuts, divided
    • 3 green onions, cut into 1-inch pieces
    • ¼ cup fresh cilantro, chopped
    • Lime wedges, for serving
    • Red pepper flakes or Thai chili powder (optional)

    Instructions

    1. Prepare the Noodles: Soak the rice noodles in warm water for 20 to 30 minutes until pliable but still firm. Drain and set aside. (Do not overcook—they will finish cooking in the wok.)

    2. Make the Sauce: In a small bowl, whisk together the tamarind paste, fish sauce, sugar, rice vinegar (if using), and paprika. Set aside.

    3. Stir-Fry the Pad Thai: Heat a large wok or skillet over high heat. Add the oil and swirl to coat. Add the shallots and garlic, stir-frying for 30 seconds until fragrant.

    Add the shrimp and cook for 1 to 2 minutes per side until pink and opaque. Push the shrimp to one side of the wok. Crack the eggs into the empty side and scramble until just set, about 30 seconds.

    4. Add Noodles and Sauce: Add the soaked noodles to the wok. Pour the sauce over the noodles. Toss everything together using tongs or two spatulas, stirring continuously for 2 to 3 minutes until the noodles are tender and evenly coated with the sauce.

    5. Add Vegetables and Peanuts: Add half of the bean sprouts (about 1 cup), half of the crushed peanuts (about ¼ cup), and the green onions. Toss for another 1 to 2 minutes until the bean sprouts are slightly wilted but still crisp.

    6. Serve: Transfer the Pad Thai to a serving platter or individual bowls. Top with the remaining bean sprouts, crushed peanuts, and fresh cilantro. Serve immediately with lime wedges and red pepper flakes on the side.

    This Shrimp Pad Thai delivers the vibrant, complex flavors of Thailand—a perfect balance of sweet, sour, salty, and nutty in every bite.

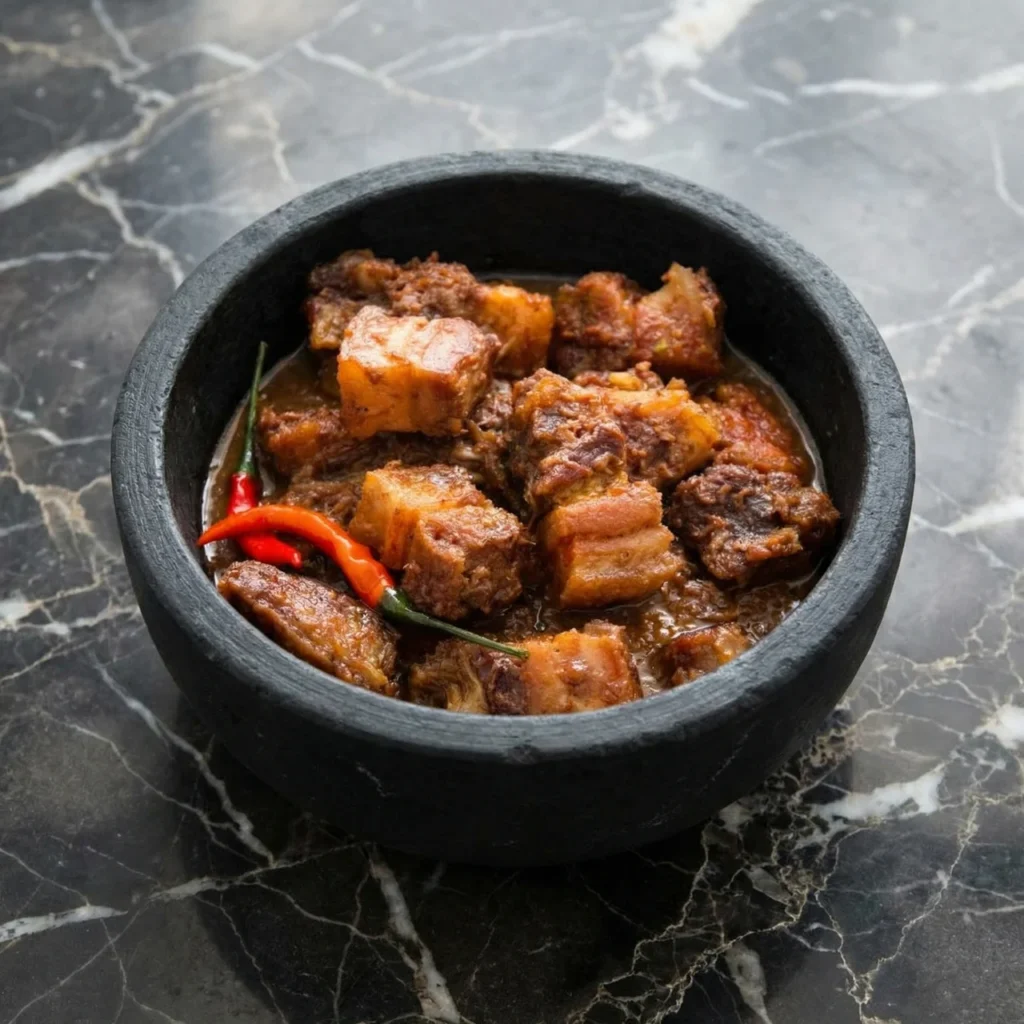
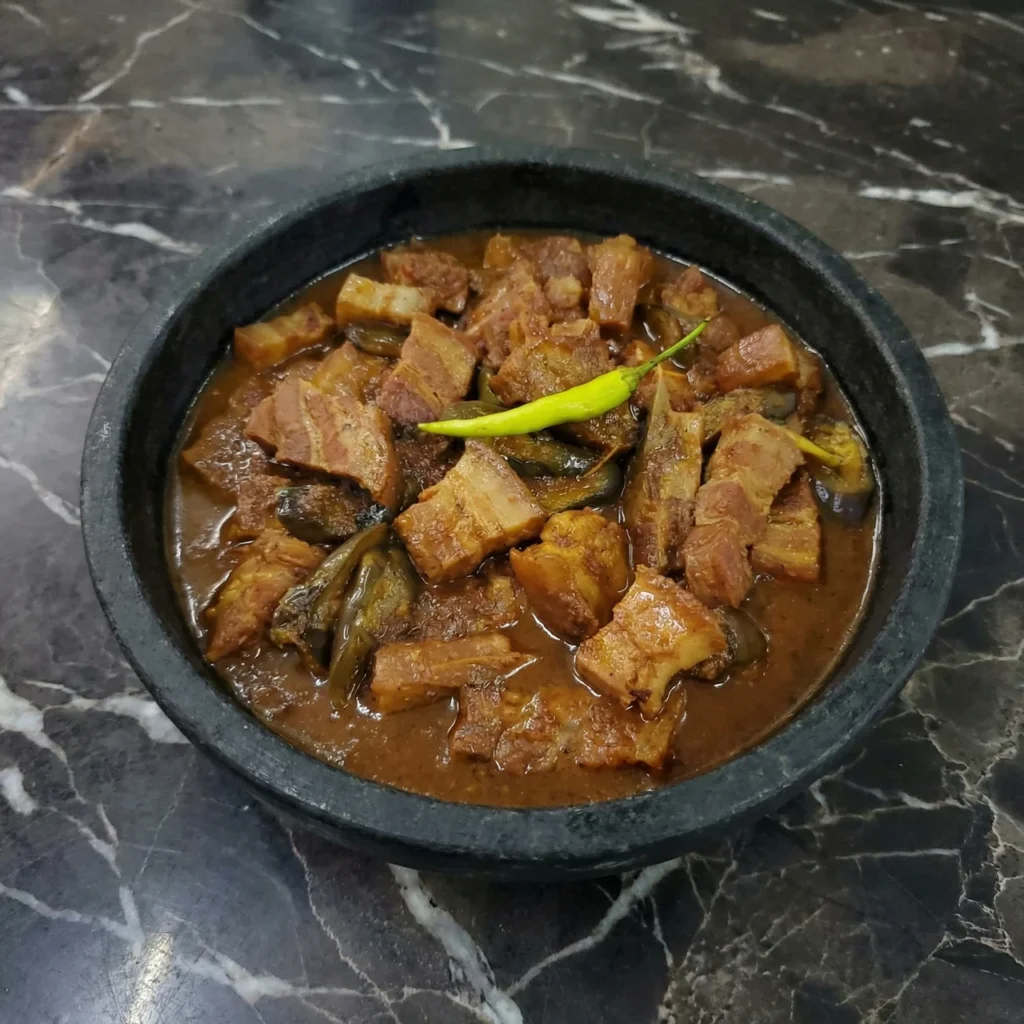
  • Pork Estofado (Filipino Braised Pork Stew)

    Pork Estofado (Filipino Braised Pork Stew)

    In the rich tapestry of Filipino cuisine, pork estofado stands out as a dish of remarkable depth and character. This slow-braised pork stew combines tender pork shoulder with a sweet-savory sauce of soy, vinegar, and sugar, infused with garlic, onions, and bay leaves.

    What makes it truly unique is the addition of fried saba bananas—a type of plantain that adds a subtle sweetness and hearty texture that perfectly complements the rich, caramelized sauce.

    The result is a dish that’s both comforting and elegant, perfect for special occasions like Noche Buena (Christmas Eve) or a cozy family dinner. Serve it with steamed rice to soak up every drop of that glorious sauce.

    Ingredients

    For the Pork Estofado:

    • 2 lbs (900g) pork shoulder or pork butt, cut into 2-inch chunks
    • 2 tablespoons vegetable oil
    • 1 medium onion, diced
    • 4 cloves garlic, minced
    • ½ cup (120ml) soy sauce
    • ½ cup (120ml) vinegar (cane, white, or apple cider)
    • ½ cup (100g) brown sugar, packed
    • 1 cup (240ml) water or beef broth
    • 2 bay leaves
    • 1 teaspoon whole peppercorns
    • 4 saba bananas or plantains, peeled and sliced lengthwise (or into 2-inch pieces)
    • Salt and black pepper, to taste
    • Fresh parsley or green onions, chopped, for garnish

    For Serving:

    • Steamed white rice

    Instructions

    1. Sear the Pork: Pat the pork chunks dry with paper towels. Season lightly with salt and pepper. Heat the vegetable oil in a large Dutch oven or heavy-bottomed pot over medium-high heat.

    Working in batches to avoid overcrowding, sear the pork until golden brown on all sides, about 3 to 4 minutes per batch. Remove and set aside.

    2. Sauté Aromatics: Reduce heat to medium. Add the onion to the pot and cook for 3 to 4 minutes until softened. Add the garlic and cook for 1 minute until fragrant.

    3. Build the Sauce: Return the seared pork to the pot. Add the soy sauce, vinegar, brown sugar, water, bay leaves, and peppercorns. Stir to combine.

    Bring to a boil, then reduce heat to low. Cover and simmer for 1½ to 2 hours, stirring occasionally, until the pork is fork-tender and the sauce has reduced and thickened.

    4. Fry the Bananas: While the pork simmers, heat a separate skillet over medium heat with a little oil. Fry the saba bananas until golden brown on both sides, about 2 to 3 minutes per side. Set aside.

    5. Add Bananas and Finish: When the pork is tender, add the fried bananas to the pot. Gently stir to coat with the sauce. Simmer for another 5 to 10 minutes to allow the bananas to absorb the flavors. Taste and adjust seasoning with additional salt, pepper, or sugar if needed.

    6. Serve: Transfer to a serving bowl. Garnish with fresh parsley or green onions. Serve hot with steamed white rice.

    This Pork Estofado is a celebration of Filipino flavors—sweet, savory, and deeply comforting.

  • Beef Caldereta (Filipino Beef Stew)

    Beef Caldereta (Filipino Beef Stew)

    Beef caldereta is the undisputed king of Filipino party dishes. Rich, hearty, and deeply flavorful, this beef stew is a celebration in a bowl—tender chunks of beef slow-cooked until melt-in-your-mouth tender, potatoes and carrots that soak up the savory sauce, and a signature hint of liver spread that adds an irreplaceable depth of flavor.

    Every family has their own version, but the constants are the same: a thick, tomato-based sauce, a touch of heat from chili peppers, and the festive addition of olives and bell peppers. Traditionally served at birthdays, fiestas, and Christmas gatherings, caldereta is the kind of dish that brings everyone to the table. Serve it with steaming white rice, and you have a meal that’s pure comfort.

    Ingredients

    For the Beef Caldereta:

    • 2 lbs (900g) beef chuck or brisket, cut into 2-inch cubes
    • 2 tablespoons vegetable oil
    • 1 medium onion, diced
    • 4 cloves garlic, minced
    • 2 medium potatoes, peeled and cut into 1-inch cubes
    • 2 medium carrots, peeled and cut into 1-inch chunks
    • 1 red bell pepper, seeded and cut into 1-inch pieces
    • 1 green bell pepper, seeded and cut into 1-inch pieces
    • 1 can (15 oz / 425g) tomato sauce
    • 2 tablespoons tomato paste
    • 1 cup (240ml) beef broth or water
    • 2 tablespoons liver spread or liver paste
    • 2 tablespoons soy sauce
    • 2 bay leaves
    • 1 teaspoon black pepper
    • ½ teaspoon salt, plus more to taste
    • ¼ cup green olives (optional)
    • 1-2 bird’s eye chilies or red pepper flakes (optional, for heat)

    For Serving:

    • Steamed white rice
    • Fresh parsley or green onions, chopped, for garnish

    Instructions

    1. Sear the Beef: Pat the beef cubes dry with paper towels. Season with salt and pepper. Heat the oil in a large Dutch oven or heavy-bottomed pot over medium-high heat. Working in batches, sear the beef until golden brown on all sides, about 3 to 4 minutes per batch. Remove and set aside.

    2. Sauté Aromatics: Reduce heat to medium. Add the onion to the pot and cook for 3 to 4 minutes until softened. Add the garlic and cook for 1 minute until fragrant.

    3. Build the Sauce: Return the seared beef to the pot. Add the tomato sauce, tomato paste, beef broth, soy sauce, bay leaves, and black pepper. Stir to combine. Bring to a boil, then reduce heat to low. Cover and simmer for 1½ to 2 hours, stirring occasionally, until the beef is fork-tender.

    4. Add Vegetables: Add the potatoes and carrots. Continue to simmer for another 15 to 20 minutes until the vegetables are tender.

    5. Add Liver Spread and Finishing Ingredients: Stir in the liver spread, bell peppers, olives (if using), and chilies (if using). Simmer for another 10 minutes, uncovered, until the sauce thickens and the bell peppers are tender-crisp. Taste and adjust seasoning with additional salt if needed.

    6. Serve: Transfer to a serving bowl. Garnish with fresh parsley or green onions. Serve hot with steamed white rice.

    This Beef Caldereta is a celebration of Filipino cooking—rich, hearty, and deeply satisfying.

  • Breakfast Sausage Casserole

    Breakfast Sausage Casserole

    When you need to feed a crowd for breakfast or brunch, this breakfast sausage casserole is your answer. It’s the ultimate comfort food—savory sausage, fluffy eggs, melted cheese, and soft bread cubes all baked together into one glorious dish.

    The best part? You can assemble it the night before, let it soak overnight, and simply pop it in the oven in the morning. Perfect for holidays, family gatherings, or lazy weekends when you want something warm and satisfying without spending hours in the kitchen. Serve it with fresh fruit or a simple green salad for a complete meal.

    Ingredients

    For the Casserole:

    • 1 lb (450g) breakfast sausage (mild or spicy)
    • 1 medium onion, diced
    • 1 red bell pepper, diced (optional)
    • 6 cups cubed bread (about 6-8 slices, brioche, challah, or sourdough)
    • 2 cups (225g) shredded cheddar cheese, divided
    • 8 large eggs
    • 2 cups (480ml) whole milk or half-and-half
    • 1 teaspoon salt
    • ½ teaspoon black pepper
    • ½ teaspoon garlic powder
    • ½ teaspoon onion powder
    • ¼ teaspoon paprika (optional)
    • 2 tablespoons fresh parsley or chives, chopped (for garnish)

    For Serving (optional):

    • Hot sauce
    • Fresh fruit

    Instructions

    1. Cook the Sausage: In a large skillet over medium heat, cook the breakfast sausage, breaking it up with a spatula, until browned and cooked through, about 5 to 7 minutes. Add the diced onion and bell pepper (if using) during the last 3 minutes of cooking. Drain excess fat and set aside to cool slightly.

    2. Prepare the Bread: Grease a 9×13-inch baking dish with butter or non-stick spray. Spread the bread cubes evenly in the bottom of the dish. Top with the cooked sausage mixture and half of the shredded cheese (about 1 cup).

    3. Make the Custard: In a large bowl, whisk together the eggs, milk, salt, pepper, garlic powder, onion powder, and paprika until well combined and smooth.

    4. Assemble and Soak: Pour the egg mixture evenly over the bread and sausage. Press down gently with a spatula to ensure all the bread is submerged. Sprinkle the remaining cheese on top. Cover with plastic wrap and refrigerate for at least 4 hours, or overnight (8 to 12 hours).

    5. Bake: Preheat your oven to 350°F (175°C). Remove the casserole from the refrigerator and let sit at room temperature for 15 to 20 minutes while the oven preheats.

    Bake uncovered for 45 to 55 minutes, until the casserole is puffed, golden brown, and a knife inserted in the center comes out clean. If the top is browning too quickly, tent loosely with foil.

    6. Rest and Serve: Remove from the oven and let rest for 10 to 15 minutes before serving. This allows the casserole to set for cleaner slices. Garnish with fresh parsley or chives. Serve warm with hot sauce if desired.

    This Breakfast Sausage Casserole is the ultimate make-ahead breakfast—hearty, cheesy, and guaranteed to please a crowd.

  • Savory French Toast

    Savory French Toast

    French toast doesn’t always have to be sweet. Enter savory French toast—a crispy, golden, cheese-laden masterpiece that’s perfect for those who crave something rich and satisfying in the morning.

    Thick slices of bread are dipped in a savory egg custard, pan-fried until crispy, then layered with melted cheese and crispy bacon, and crowned with a perfectly fried egg.

    The result is a breakfast (or brunch, or dinner) that’s indulgent, comforting, and absolutely delicious. Serve it with a drizzle of maple syrup for a sweet-savory twist or hot sauce for a spicy kick. Either way, it’s a game-changer.

    Ingredients

    For the Savory French Toast:

    • 4 thick slices of bread (brioche, challah, or sourdough)
    • 3 large eggs
    • ½ cup (120ml) whole milk or half-and-half
    • ½ teaspoon salt
    • ¼ teaspoon black pepper
    • ½ teaspoon garlic powder
    • ½ teaspoon onion powder
    • ¼ teaspoon smoked paprika (optional)
    • 2 tablespoons unsalted butter or olive oil, for frying

    For the Toppings:

    • 4 slices bacon, cooked crispy
    • ½ cup (55g) shredded cheese (cheddar, Gruyère, or mozzarella)
    • 2 to 4 large eggs, for topping (1 per serving)
    • Fresh chives or parsley, chopped, for garnish
    • Optional: maple syrup, hot sauce, or sriracha

    Instructions

    1. Cook the Bacon: In a skillet over medium heat, cook the bacon until crispy, about 5 to 7 minutes. Transfer to a paper towel-lined plate to drain. Set aside.

    2. Make the Custard: In a shallow dish, whisk together the eggs, milk, salt, pepper, garlic powder, onion powder, and smoked paprika until well combined and smooth.

    3. Soak the Bread: Dip each slice of bread into the custard, allowing it to soak for 20 to 30 seconds per side, until fully saturated but not falling apart. Let any excess drip off.

    4. Cook the French Toast: Heat a large skillet or griddle over medium heat. Add the butter or oil. Place the soaked bread slices in the skillet and cook for 3 to 4 minutes per side, until golden brown and crispy. Remove and keep warm.

    5. Fry the Topping Eggs: In the same skillet or a separate nonstick pan, fry the eggs sunny-side up until the whites are set and the yolks are still runny, about 2 to 3 minutes. Season with salt and pepper.

    6. Assemble: Place the cooked French toast slices on plates. Top with shredded cheese (the residual heat will melt it), crispy bacon, and a fried egg. Garnish with fresh chives or parsley.

    7. Serve: Serve immediately with maple syrup, hot sauce, or sriracha on the side if desired. Break the egg yolk and let it run over the French toast for maximum flavor.

    This Savory French Toast is a delicious twist on a classic—crispy, cheesy, and endlessly customizable.

  • Longganisa Breakfast Plate (Filipino Sausage Breakfast)

    Longganisa Breakfast Plate (Filipino Sausage Breakfast)

    In the Philippines, breakfast is often a celebration of bold flavors, and the Longganisa Breakfast Plate—known as Longsilog—is a beloved favorite. This iconic meal features longganisa (sweet or garlicky Filipino sausages), sinangag (garlic fried rice), and itlog (a fried egg with a runny yolk).

    The combination is pure magic: the sweet, savory, slightly tangy sausage, the aromatic, garlicky rice, and the rich, velvety yolk that ties everything together. Served with fresh tomatoes and a spiced vinegar dip, this breakfast plate is hearty, satisfying, and perfect for any time of day. Whether you’re making it for a lazy weekend morning or a special occasion, Longsilog is a taste of Filipino comfort at its finest.

    Ingredients

    For the Longganisa:

    • 1 lb (450g) longganisa sausages (Filipino sweet or garlic sausages)
    • 2 tablespoons water (for steaming)
    • 1 tablespoon vegetable oil (if needed)

    For the Garlic Fried Rice (Sinangag):

    • 3 cups cooked day-old jasmine rice, cold
    • 4 cloves garlic, thinly sliced or minced
    • 2 tablespoons vegetable oil
    • Salt, to taste

    For the Eggs:

    • 2 to 4 large eggs (1 to 2 per serving)
    • 1 tablespoon vegetable oil or butter
    • Salt and pepper, to taste

    For Serving:

    • 2 ripe tomatoes, sliced
    • Fresh parsley or green onions, chopped (optional)
    • Spiced vinegar (sukang maasim with garlic and chili) or plain vinegar

    Instructions

    1. Cook the Longganisa: Place the longganisa sausages in a skillet with 2 tablespoons of water. Cover and cook over medium heat for 5 to 7 minutes, allowing the sausages to steam and cook through.

    Remove the lid and continue cooking, turning occasionally, until the water evaporates and the sausages are golden brown and caramelized, about 5 minutes more. If the sausages are lean, add a tablespoon of oil to help them brown. Remove and set aside.

    2. Make the Garlic Fried Rice: While the sausages cook, heat the oil in a large skillet or wok over medium heat. Add the sliced garlic and cook, stirring frequently, until golden brown and crisp, about 2 to 3 minutes.

    Remove half of the crispy garlic and set aside for garnish. Add the cold rice to the skillet, breaking up any clumps with a spatula. Stir-fry for 3 to 5 minutes until the rice is heated through and evenly coated with garlic oil. Season with salt to taste. Keep warm.

    3. Fry the Eggs: In a separate nonstick skillet, heat the oil or butter over medium heat. Crack the eggs into the skillet and cook sunny-side up until the whites are set and the yolks are still runny, about 2 to 3 minutes. Season with salt and pepper.

    4. Assemble the Plate: Divide the garlic fried rice among plates. Arrange the longganisa alongside the rice. Top with a fried egg. Add sliced tomatoes on the side. Garnish with the reserved crispy garlic and fresh parsley or green onions if desired.

    5. Serve: Serve immediately with spiced vinegar on the side for dipping the longganisa. Encourage diners to break the egg yolk and mix it into the rice for the ultimate experience.

    This Longganisa Breakfast Plate brings the vibrant, comforting flavors of a Filipino morning to your table—sweet, savory, and utterly satisfying.

  • Crispy Fried Chicken Skin

    Crispy Fried Chicken Skin

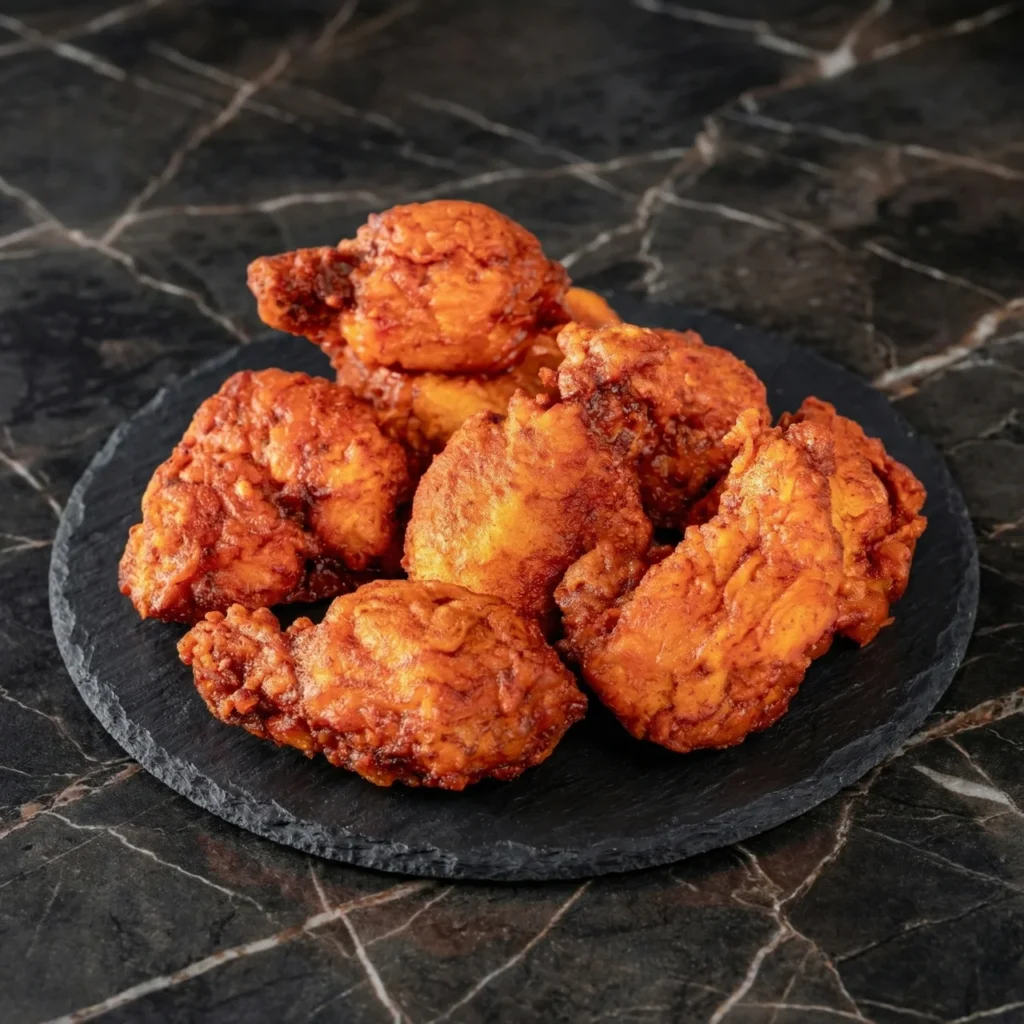
    Let’s be honest: the best part of fried chicken is often the skin. So why not make it the star? Crispy fried chicken skin—sometimes called chicken crackling or chicharron de pollo—is a golden, shatteringly crisp snack that transforms a humble byproduct into pure indulgence.

    Made from chicken skins that are rendered, seasoned, and fried until perfectly crispy, these crunchy morsels are perfect as a snack, a topping for salads and ramen, a taco filling, or simply eaten by the handful. It’s also a fantastic way to practice zero-waste cooking, using parts of the chicken that often get discarded.

    The process is simple: dry the skins thoroughly, season, and fry until golden and crisp. The result is an addictive, keto-friendly snack that’s impossible to resist.

    Ingredients

    For the Fried Chicken Skin:

    • 1 lb (450g) chicken skins (from about 8-10 chicken thighs or a whole chicken)
    • 1 teaspoon salt
    • ½ teaspoon black pepper
    • ½ teaspoon garlic powder
    • ½ teaspoon smoked paprika (optional)
    • Neutral oil for frying (vegetable, canola, or peanut oil), if not using rendered fat

    Optional Seasonings:

    • Cayenne pepper or red pepper flakes
    • Ranch seasoning powder
    • Everything bagel seasoning
    • Parmesan cheese and herbs

    For Serving:

    • Dipping sauce (ranch, sriracha mayo, honey mustard)

    Instructions

    1. Prepare the Chicken Skins: If you’re starting with whole chicken thighs or a whole chicken, carefully remove the skin, leaving as much fat attached as possible. Pat the skins completely dry with paper towels. Remove any large chunks of fat. Cut the skins into 1 to 2-inch pieces for even cooking.

    2. Season the Skins: In a bowl, toss the chicken skins with salt, pepper, garlic powder, and smoked paprika (if using). Let sit for 10 to 15 minutes at room temperature.

    3. Render the Fat (Optional): If you want to render the fat for frying, place the skins in a cold skillet and heat over medium-low heat. Cook slowly for 10 to 15 minutes, stirring occasionally, until the fat has rendered and the skins are golden.

    Remove the skins and increase the heat for the final crisp. Alternatively, skip this step and fry directly in oil.

    4. Heat the Oil: In a heavy-bottomed skillet or Dutch oven, heat about ½ inch of oil to 325°F to 350°F (165°C to 175°C). Use a deep-fry thermometer for accuracy.

    5. Fry the Chicken Skins: Working in batches to avoid overcrowding, carefully add the chicken skins to the hot oil. Fry for 3 to 5 minutes, stirring occasionally, until golden brown and crispy. The skins will bubble and puff up as they cook.

    Remove with a slotted spoon or spider skimmer and drain on a paper towel-lined plate or wire rack.

    6. Season and Serve: Season immediately with additional salt or your favorite seasonings while still hot. Serve warm as a snack, salad topping, or taco filling.

    These Crispy Fried Chicken Skins are a crunchy, savory treat that proves the best things often come from humble beginnings.

  • Crispy Fried Cheese Wontons

    Crispy Fried Cheese Wontons

    If you’ve ever been to a Chinese restaurant, you’ve likely encountered these golden, crispy pockets of creamy goodness: fried cheese wontons. Sometimes called cream cheese wontons or crab rangoon (when made with crab), these little parcels are the ultimate party appetizer—crunchy on the outside, warm and melty on the inside, and completely addictive.

    The filling is a simple blend of cream cheese, a touch of sugar, and a hint of garlic and onion, creating a savory-sweet flavor that pairs perfectly with sweet chili sauce or sweet and sour sauce.

    The best part? They come together in minutes with store-bought wonton wrappers. Fry them up for game day, potlucks, or any time you’re craving that irresistible takeout experience at home.

    Ingredients

    For the Cheese Wontons:

    • 8 oz (225g) cream cheese, softened
    • 2 tablespoons granulated sugar
    • ½ teaspoon garlic powder
    • ¼ teaspoon onion powder
    • 2 green onions, finely chopped (optional)
    • ½ teaspoon salt
    • 24 square wonton wrappers
    • Water or beaten egg, for sealing
    • Neutral oil for frying (vegetable, canola, or peanut oil)

    Optional Add-Ins:

    • ¼ cup imitation crab meat, finely chopped (for crab rangoon)
    • ¼ cup cooked small shrimp, finely chopped
    • 1 teaspoon Worcestershire sauce

    For Serving:

    • Sweet chili sauce
    • Sweet and sour sauce
    • Duck sauce

    Instructions

    1. Make the Filling: In a medium bowl, combine the softened cream cheese, sugar, garlic powder, onion powder, green onions (if using), and salt. Mix until smooth and well combined. If adding crab or shrimp, fold it in now.

    2. Prepare the Wonton Wrappers: Lay the wonton wrappers on a clean work surface. Keep them covered with a damp paper towel to prevent drying out. Have a small bowl of water or beaten egg ready for sealing.

    3. Fill and Seal: Place about 1 teaspoon of filling in the center of each wonton wrapper. Dip your finger in water or egg wash and moisten the edges of the wrapper. Fold the wrapper over the filling to form a triangle, pressing the edges firmly to seal.

    Press out any air bubbles. For a traditional “money bag” shape, bring the two opposite corners together and pinch. Place on a parchment-lined tray and keep covered.

    4. Heat the Oil: In a heavy-bottomed pot or Dutch oven, heat 2 to 3 inches of oil to 350°F (175°C). Use a deep-fry thermometer for accuracy.

    5. Fry the Wontons: Working in batches to avoid overcrowding, carefully add the wontons to the hot oil. Fry for 2 to 3 minutes, turning occasionally, until golden brown and crispy. Remove with a slotted spoon or spider skimmer and drain on a paper towel-lined plate or wire rack.

    6. Serve: Arrange the fried cheese wontons on a serving platter. Serve immediately with sweet chili sauce, sweet and sour sauce, or your favorite dipping sauce.

    These Fried Cheese Wontons are a crispy, creamy, irresistible appetizer that’s sure to be the hit of any party.

  • Banana Fritters (Maruya)

    Banana Fritters (Maruya)

    There are snacks, and then there are snacks that transport you straight back to childhood. For many Filipinos, banana fritters—or maruya—are exactly that: the warm, crispy, caramelized treat sold by street vendors, served at birthday parties, and made by grandmothers on lazy afternoons.

    Made with saba bananas (or plantains), these fritters feature sweet, ripe bananas coated in a light, crispy batter and fried until golden and lacy. The result is a perfect contrast of textures: a delicate, crunchy exterior giving way to a soft, sweet, almost custard-like banana center.

    Dust them with powdered sugar, drizzle with honey, or enjoy them plain—they’re pure comfort in every bite. Best of all, they come together in minutes with just a handful of ingredients.

    Ingredients

    For the Banana Fritters:

    • 4 ripe saba bananas or plantains (or 6 regular ripe bananas)
    • ¾ cup (95g) all-purpose flour
    • ¼ cup (30g) rice flour or cornstarch (optional, for extra crispiness)
    • ¼ cup (50g) granulated sugar
    • ½ teaspoon baking powder
    • ¼ teaspoon salt
    • 1 large egg
    • ½ cup (120ml) milk or water
    • 1 teaspoon vanilla extract (optional)
    • Vegetable oil, for frying

    For Serving:

    • Powdered sugar, for dusting
    • Honey or maple syrup (optional)
    • Vanilla ice cream (optional)

    Instructions

    1. Prepare the Bananas: Peel the bananas. If using saba or plantains, slice them lengthwise into ¼-inch thick strips or cut into halves. If using regular bananas, slice them in half lengthwise, then cut each half into 2 to 3 pieces.

    2. Make the Batter: In a medium bowl, whisk together the all-purpose flour, rice flour (if using), sugar, baking powder, and salt. Add the egg, milk, and vanilla extract. Whisk until smooth.

    The batter should be thick enough to coat the bananas but still pourable. If too thick, add a tablespoon of water at a time to thin.

    3. Heat the Oil: In a large skillet or deep pot, heat about 1 inch of oil to 350°F (175°C). To test, drop a small amount of batter into the oil—it should sizzle and float to the surface.

    4. Coat and Fry: Working in batches, dip each banana piece into the batter, letting any excess drip off. Carefully place into the hot oil. Fry for 2 to 3 minutes per side, until golden brown and crispy. The fritters should puff up slightly and develop a lacy, crisp crust.

    5. Drain: Using a slotted spoon or spider skimmer, transfer the fritters to a paper towel-lined plate or wire rack to drain excess oil.

    6. Serve: Dust with powdered sugar while still warm. Drizzle with honey or serve with vanilla ice cream if desired. Serve immediately—they’re best enjoyed hot and crispy.

    These Banana Fritters are a simple, nostalgic treat that brings warmth and sweetness to any occasion.