Category: quick_meals

  • Sizzling Garlic Shrimp Delight: How to Make Gambas al Ajillo at Home

    Sizzling Garlic Shrimp Delight: How to Make Gambas al Ajillo at Home

    Few dishes are as quick, flavorful, and crowd-pleasing as Gambas al Ajillo. This classic Spanish tapa features succulent shrimp sautéed in fragrant garlic, olive oil, and a touch of heat, delivering a dish that’s both simple and sensational.

    Perfect as an appetizer, a light dinner, or part of a larger Spanish-inspired meal, Gambas al Ajillo is all about high-quality ingredients and quick, precise cooking.

    In this step-by-step guide, you’ll learn how to make restaurant-style Gambas al Ajillo at home, ensuring every shrimp is tender, garlicky, and infused with flavor.


    Why You’ll Love Gambas al Ajillo

    • Ready in under 15 minutes
    • Bursting with garlic and olive oil flavor
    • Slightly spicy with a gentle kick
    • Perfect with crusty bread or over rice
    • Elegant enough for entertaining yet easy for weeknights

    Despite its simplicity, the combination of garlic, olive oil, and perfectly cooked shrimp makes this dish feel luxurious.


    Ingredients You’ll Need

    • 1 pound (450 g) large shrimp, peeled and deveined (tails optional)
    • 6–8 cloves garlic, thinly sliced
    • ¼ cup (60 ml) extra virgin olive oil
    • ½ teaspoon crushed red pepper flakes (adjust to taste)
    • Salt to taste
    • 2 tablespoons chopped fresh parsley
    • Lemon wedges, for serving
    • Crusty bread or cooked rice, for serving

    Step 1: Prepare the Shrimp

    Rinse the shrimp under cold water and pat dry with paper towels. Dry shrimp sear better and prevent excess water from diluting the garlic oil.

    Season lightly with salt. You can also add a small pinch of paprika or smoked paprika for a subtle smoky flavor if desired.


    Step 2: Slice the Garlic

    Peel and thinly slice the garlic cloves. Thin slices allow the garlic to infuse the oil without burning.

    Avoid mincing too finely—tiny bits can overcook and taste bitter.


    Step 3: Heat the Olive Oil

    In a large skillet or sauté pan, add the olive oil and place over medium heat.

    Add the sliced garlic and crushed red pepper flakes to the oil. Stir constantly for 1–2 minutes until the garlic becomes fragrant and just begins to turn golden.

    Tip: Do not rush this step by turning the heat too high—garlic can burn quickly, creating a bitter taste.


    Step 4: Sear the Shrimp

    Add the shrimp in a single layer. Let them cook undisturbed for 1–2 minutes on one side until the edges turn pink and slightly caramelized.

    Flip the shrimp and cook for an additional 1–2 minutes on the other side. Shrimp cook very quickly; overcooking results in rubbery texture.

    As the shrimp cook, they’ll release some natural juices that mix with the garlic oil, creating a rich, flavorful sauce.


    Step 5: Add Fresh Parsley

    Remove the skillet from heat and sprinkle chopped fresh parsley over the shrimp.

    The parsley adds a bright, herbal note that balances the richness of the garlic and olive oil.


    Step 6: Plate and Serve

    Transfer the shrimp and garlic oil to a serving dish. Spoon some of the garlic-infused oil over the top.

    Serve immediately with lemon wedges on the side. The acidity of the lemon enhances the natural sweetness of the shrimp and adds a refreshing brightness.

    This dish pairs beautifully with:

    • Crusty bread to soak up the garlicky oil
    • Steamed or Spanish-style rice
    • A fresh green salad
    • Chilled white wine or sparkling water

    Flavor and Texture Highlights

    • Tender, juicy shrimp with a slight bite
    • Fragrant garlic infused olive oil
    • Gentle heat from crushed red pepper flakes
    • Bright freshness from parsley and lemon
    • Perfect dipping sauce with bread or over rice

    Each bite delivers an irresistible combination of savory, spicy, and aromatic flavors.


    Tips for Perfect Gambas al Ajillo

    • Use fresh, high-quality shrimp—they cook quickly and provide the best flavor.
    • Slice garlic thinly, and cook gently to avoid burning.
    • Do not overcook the shrimp; they should be just pink and tender.
    • Adjust the amount of red pepper flakes to control spiciness.
    • Serve immediately—Gambas al Ajillo is best hot from the pan.

    Optional Variations

    • Sherry or White Wine: Add 1–2 tablespoons of dry sherry or white wine to deglaze the pan for extra depth of flavor.
    • Smoky Paprika: Sprinkle a small pinch of smoked paprika over the shrimp before cooking.
    • Mushrooms: Sauté sliced mushrooms in the garlic oil before adding the shrimp.
    • Chili Oil: Replace red pepper flakes with a drizzle of chili oil for a different type of heat.
    • Herbs: Swap parsley for cilantro or fresh oregano for a unique twist.

    Storage and Meal Prep

    • Gambas al Ajillo is best served fresh; shrimp lose their texture and flavor when reheated.
    • Leftover garlic oil can be stored in the refrigerator for up to one week and used to sauté vegetables, drizzle over pasta, or flavor bread.
    • If you want to prepare ahead, you can peel and devein the shrimp and slice garlic in advance.

    Why This Recipe Works

    The magic of Gambas al Ajillo lies in its simplicity. High-quality shrimp, gently sautéed garlic, and olive oil create layers of flavor without complicated techniques.

    Quick cooking preserves the shrimp’s natural sweetness, while the garlic-infused oil and red pepper flakes give the dish depth and aroma. A finishing touch of fresh parsley and a squeeze of lemon elevates the dish, making it both balanced and visually appealing.


    With tender, garlicky shrimp, aromatic olive oil, and a touch of heat, this Gambas al Ajillo recipe delivers restaurant-quality flavor in your own kitchen.

    It’s quick, elegant, and packed with flavor, making it perfect for weeknights, entertaining, or any occasion that calls for a delicious seafood dish.

    Each bite is a burst of flavor: crispy garlic, slightly spicy oil, and succulent shrimp, complemented by bright parsley and a squeeze of fresh lemon. Serve with crusty bread or fluffy rice to soak up the irresistible garlic-infused sauce, and you’ll understand why this Spanish classic has been beloved for generations.

  • Bold, Briny, and Bursting with Flavor: How to Make Classic Pasta Puttanesca at Home

    Bold, Briny, and Bursting with Flavor: How to Make Classic Pasta Puttanesca at Home

    If you love pasta that delivers punchy, vibrant flavors in every bite, Pasta Puttanesca is your ultimate go-to. Hailing from Southern Italy, this dish is famous for its bold combination of tomatoes, olives, capers, garlic, and anchovies—a salty, briny symphony that’s quick to make yet packed with depth. It’s a perfect weeknight dinner, a crowd-pleasing meal for friends, or a sophisticated dish for a cozy night in.

    What makes Pasta Puttanesca remarkable is its simplicity. With pantry staples and fresh ingredients, you can create a dish that tastes like it simmered all day in a professional Italian kitchen. This step-by-step guide will take you through crafting a traditional, flavorful Pasta Puttanesca that’s perfectly balanced, quick, and unforgettable.


    Why You’ll Love Pasta Puttanesca

    • Bold, savory, and briny flavors
    • Quick and easy to prepare in under 30 minutes
    • Uses simple pantry ingredients you probably already have
    • Perfectly balanced with salty, tangy, and aromatic notes
    • Pairs beautifully with crusty bread and a green salad

    The magic of Pasta Puttanesca is in its sauce: briny olives, tangy capers, and salty anchovies blend with aromatic garlic and chili flakes to create a sauce that clings beautifully to every strand of pasta.


    Ingredients You’ll Need

    For the Pasta:

    • 12 oz (340 g) spaghetti or linguine
    • Salt, for pasta water

    For the Sauce:

    • 3 tablespoons extra virgin olive oil
    • 4 cloves garlic, thinly sliced or minced
    • 4–6 anchovy fillets, finely chopped
    • 1 teaspoon red pepper flakes (adjust to taste)
    • 1 can (14 oz/400 g) diced tomatoes or crushed tomatoes
    • ½ cup pitted black olives, roughly chopped (Kalamata preferred)
    • 2 tablespoons capers, rinsed
    • 1 teaspoon dried oregano
    • ½ teaspoon black pepper
    • Optional: ¼ cup chopped fresh parsley for garnish

    Step 1: Cook the Pasta

    Bring a large pot of salted water to a boil. Add the spaghetti and cook until al dente, following package instructions.

    Reserve ½ cup of pasta water before draining. This starchy water will help bind the sauce to the noodles.

    Drain the pasta and set aside, keeping it warm.


    Step 2: Sauté the Aromatics

    While the pasta cooks, heat olive oil in a large skillet over medium heat.

    Add garlic, red pepper flakes, and anchovies. Sauté for 1–2 minutes until the garlic is fragrant and the anchovies start to dissolve into the oil.

    This step is crucial—it infuses the oil with the umami-rich flavors that form the backbone of the sauce.


    Step 3: Build the Sauce

    Add diced tomatoes to the skillet. Stir to combine and bring to a gentle simmer.

    Mix in olives, capers, oregano, and black pepper.

    Simmer for 6–8 minutes, stirring occasionally, until the sauce thickens slightly and flavors meld. Taste and adjust seasoning—anchovies add saltiness, but you may want a pinch of extra salt depending on your preference.


    Step 4: Combine Pasta and Sauce

    Add the cooked pasta directly into the skillet with the sauce.

    Toss to coat evenly, adding reserved pasta water a tablespoon at a time until the sauce clings beautifully to the noodles.

    This technique ensures that every strand of spaghetti is coated with the flavorful, briny sauce.


    Step 5: Finish and Garnish

    Remove from heat and stir in chopped fresh parsley if desired.

    Serve immediately with extra black pepper and a drizzle of olive oil for brightness.

    Optional: sprinkle with grated Parmesan or Pecorino cheese, though traditional Puttanesca often goes without.


    Flavor and Texture Highlights

    • Briny, salty bursts from olives, capers, and anchovies
    • Slight heat from red pepper flakes
    • Rich, savory umami from garlic and anchovy-infused oil
    • Bright, fresh notes from optional parsley
    • Perfectly coated pasta that absorbs every bit of sauce

    Every bite is a complex, satisfying combination of bold flavors and satisfying textures.


    Tips for Perfect Pasta Puttanesca

    • Use quality anchovies—they dissolve into the sauce and provide deep umami without fishiness.
    • Don’t skip the pasta water—it helps bind the sauce and makes it silky.
    • Adjust heat carefully—start with 1 teaspoon of red pepper flakes and add more if desired.
    • Serve immediately—Pasta Puttanesca is best fresh; reheating can intensify the saltiness.
    • Balance flavors—taste before serving; add a splash of lemon juice if the sauce feels too salty or tangy.

    Optional Variations

    • Protein Additions: Add cooked shrimp, grilled chicken, or seared scallops for extra heartiness.
    • Vegetarian Version: Omit anchovies; add roasted red peppers or sun-dried tomatoes for depth.
    • Whole Wheat or Gluten-Free: Swap spaghetti for whole wheat or gluten-free pasta for dietary preference.
    • Extra Sauce: Double the sauce ingredients for a more saucy, restaurant-style plate.
    • Herbal Twist: Add fresh basil or thyme for aromatic complexity.

    Storage and Make-Ahead

    • Cooked Pasta Puttanesca can be stored in an airtight container in the refrigerator for up to 2 days.
    • Reheat gently in a skillet with a splash of pasta water to restore sauce consistency.
    • For meal prep, store pasta and sauce separately to prevent noodles from becoming mushy.

    Why This Recipe Works

    Pasta Puttanesca works because it balances bold, briny flavors with the natural sweetness of tomatoes and aromatic garlic. Anchovies provide deep umami, while olives and capers add tang and complexity. Quick cooking preserves freshness, while tossing the pasta in the sauce ensures every bite is perfectly coated.

    This dish proves that simple ingredients, when combined thoughtfully, can produce a restaurant-quality meal that’s vibrant, hearty, and irresistibly delicious.


    With tender, al dente pasta coated in a bold, briny sauce, Pasta Puttanesca delivers complex flavors in a simple, quick meal.

    Perfect for weeknight dinners or impressing friends, it’s an Italian classic that celebrates pantry staples and proves that flavor doesn’t need to be complicated. Serve with a crisp green salad and crusty bread for the ultimate Italian dining experience at home.

  • Fresh, Zesty & Vibrant: How to Make Lemongrass Vermicelli Salad at Home

    Fresh, Zesty & Vibrant: How to Make Lemongrass Vermicelli Salad at Home

    There’s nothing quite like a dish that feels light, refreshing, and packed with bold flavors all at once.

    Enter the Lemongrass Vermicelli Salad—a Vietnamese-inspired bowl that combines tender vermicelli noodles, fragrant lemongrass, crisp vegetables, fresh herbs, and a tangy, savory dressing. Perfect for lunch, dinner, or even a make-ahead meal, this salad is an explosion of texture and flavor in every bite.

    Whether you’re a fan of Asian cuisine or just looking for a vibrant, healthy dish, this step-by-step guide will help you assemble a restaurant-quality Lemongrass Vermicelli Salad that’s fresh, balanced, and utterly delicious.


    Why You’ll Love This Salad

    • Light, healthy, and refreshing
    • Perfectly balanced flavors: tangy, savory, and slightly sweet
    • Quick to prepare with simple ingredients
    • Fully customizable with proteins or extra vegetables
    • Ideal for meal prep, parties, or solo lunches

    The magic of this salad lies in the lemongrass—its fragrant, citrusy aroma infuses the noodles and dressing for a uniquely bright flavor profile.


    Ingredients You’ll Need

    For the Vermicelli Salad:

    • 6 oz (170 g) rice vermicelli noodles
    • 1 cup shredded carrots
    • 1 cup cucumber, julienned
    • 1 red bell pepper, thinly sliced
    • ½ cup bean sprouts (optional)
    • ½ cup fresh herbs: mint, cilantro, and Thai basil
    • Optional protein: grilled chicken, shrimp, or tofu

    For the Lemongrass:

    • 2 stalks lemongrass, finely minced (white parts only)
    • 1 teaspoon vegetable oil
    • 1 clove garlic, minced
    • 1 teaspoon sugar

    For the Dressing (Nuoc Cham-inspired):

    • 3 tablespoons fish sauce (or soy sauce for vegetarian)
    • 2 tablespoons lime juice
    • 1 tablespoon sugar
    • 1 garlic clove, minced
    • 1 small chili, minced (optional for heat)
    • 2 tablespoons water

    For Garnish:

    • Crushed roasted peanuts
    • Lime wedges
    • Extra herbs

    Step 1: Prepare the Vermicelli Noodles

    Bring a large pot of water to a boil. Remove from heat, add the rice vermicelli noodles, and let them soak for 4–5 minutes or until tender but firm.

    Drain and rinse under cold water to stop the cooking process. Toss lightly with a teaspoon of vegetable oil to prevent sticking and set aside.


    Step 2: Sauté the Lemongrass

    Heat 1 teaspoon vegetable oil in a small skillet over medium heat. Add minced lemongrass, garlic, and sugar.

    Sauté for 1–2 minutes until fragrant, being careful not to burn the garlic.

    This lemongrass mixture will add a fragrant, citrusy note to your noodles and enhance the salad’s overall flavor.


    Step 3: Make the Dressing

    In a small bowl, whisk together fish sauce, lime juice, sugar, minced garlic, chili (if using), and water until the sugar dissolves.

    Taste and adjust balance—add more lime for acidity, sugar for sweetness, or fish sauce for saltiness.


    Step 4: Prep the Vegetables and Herbs

    While the noodles soak and the lemongrass sautés, prepare the vegetables:

    • Shred carrots
    • Julienne cucumber
    • Thinly slice red bell pepper
    • Wash and roughly chop fresh herbs

    For proteins, grill or pan-sear chicken, shrimp, or tofu until fully cooked and flavorful. Slice into bite-sized pieces for easy mixing.


    Step 5: Combine the Noodles and Lemongrass

    Place the drained noodles in a large mixing bowl. Add the sautéed lemongrass and garlic mixture, tossing gently to coat the noodles evenly.

    This step infuses the noodles with subtle citrusy aroma and sweetness, creating the base for the salad.


    Step 6: Assemble the Salad

    Add the prepared vegetables, herbs, and optional protein to the noodles. Pour the dressing over the top and toss gently to combine, ensuring everything is coated evenly.

    Balance is key—each forkful should have noodles, vegetables, herbs, and a hint of protein.


    Step 7: Garnish and Serve

    Transfer the salad to serving bowls. Sprinkle with crushed roasted peanuts and additional fresh herbs for extra flavor and crunch.

    Serve immediately with lime wedges for a fresh citrus boost.

    Optional: drizzle extra dressing on top if desired for more tanginess.


    Flavor and Texture Highlights

    A perfect Lemongrass Vermicelli Salad balances:

    • Tender, fragrant noodles
    • Crisp, fresh vegetables
    • Bright, citrusy lemongrass aroma
    • Savory-sweet-tangy dressing
    • Crunchy peanuts and fresh herbs

    Every bite combines soft, crunchy, and aromatic elements for an unforgettable experience.


    Tips for the Perfect Salad

    • Use only the white, tender parts of lemongrass for the best flavor.
    • Rinse noodles under cold water to stop cooking and prevent clumping.
    • Chop vegetables uniformly for even texture and visual appeal.
    • Make dressing ahead of time—flavors deepen as it sits.
    • Adjust heat by adding more chili or leaving it out entirely.

    Optional Variations

    • Protein Swap: Add grilled shrimp, pork, or marinated tofu.
    • Noodle Alternatives: Try soba noodles, rice sticks, or spiralized vegetables for a low-carb option.
    • Extra Crunch: Toasted cashews or sesame seeds make a delicious topping.
    • Vegan Dressing: Use soy sauce or tamari instead of fish sauce for vegetarian or vegan versions.
    • Spicy Kick: Add sriracha, chili oil, or fresh chilies to elevate heat.

    Storage and Meal Prep

    Store noodles, vegetables, and protein separately in airtight containers in the fridge for up to 2–3 days.

    Assemble bowls when ready to eat to maintain freshness and crispness of the vegetables.

    Dressing can be stored in a sealed container for up to a week.


    Why This Recipe Works

    The Lemongrass Vermicelli Salad works because it balances bright, fragrant, and savory flavors with multiple textures. The tender noodles, crisp vegetables, fresh herbs, and zesty dressing create a harmony that feels light yet satisfying.

    It’s customizable, quick to prepare, and ideal for any occasion—from weekday lunches to dinner parties.


    With fresh herbs, zesty lemongrass, and vibrant vegetables, this Lemongrass Vermicelli Salad is a refreshing, crave-worthy dish you can make at home.

    Perfectly balanced, customizable, and full of color, it proves that healthy meals can be just as exciting and flavorful as indulgent ones.

  • Sweet, Savory & Tropical: 5-Ingredient Pineapple Pork with Coconut Rice

    Sweet, Savory & Tropical: 5-Ingredient Pineapple Pork with Coconut Rice

    If you’re craving something bold, comforting, and bursting with tropical flavor—but don’t want a long grocery list—this 5-Ingredient Pineapple Pork with Coconut Rice is your new go-to dinner.

    It’s sweet, savory, slightly tangy, and perfectly creamy all at once. Juicy pork simmers in pineapple until caramelized and tender, then gets spooned over fluffy coconut rice that soaks up every drop of flavor.

    Best of all? You only need five core ingredients to make it happen.


    The 5 Simple Ingredients

    1. 1½ pounds pork tenderloin (or pork shoulder, sliced thin)
    2. 1 (20 oz) can pineapple chunks (with juice)
    3. 1 cup soy sauce
    4. 1 (13.5 oz) can full-fat coconut milk
    5. 1½ cups jasmine rice

    That’s it. No complicated sauces, no specialty items—just pantry staples working together beautifully.


    Why This Recipe Works

    The magic lies in contrast:

    • Salty soy sauce balances sweet pineapple
    • Rich coconut milk softens and rounds out bold flavors
    • Jasmine rice absorbs everything for a complete, satisfying dish

    With minimal ingredients, technique matters most. Let’s walk through it step by step.


    Step 1: Rinse and Start the Coconut Rice

    Begin with the rice so it’s ready when the pork finishes.

    Rinse 1½ cups jasmine rice under cold water until the water runs mostly clear. This removes excess starch and keeps the rice fluffy instead of sticky.

    In a medium saucepan, combine:

    • Rinsed rice
    • 1 can coconut milk
    • ½ cup water (to balance thickness)

    Bring to a gentle boil over medium heat. Once bubbling, reduce to low, cover, and simmer for 15–18 minutes.

    Do not lift the lid while it cooks—steam is essential for even cooking.

    When finished, remove from heat and let sit covered for 5–10 minutes. Fluff with a fork before serving.


    Step 2: Prepare the Pork

    While the rice cooks, slice the pork into thin strips or bite-sized chunks. Thin slicing helps it cook quickly and evenly.

    If using pork tenderloin, trim any silver skin before slicing. If using pork shoulder, cut against the grain for tenderness.

    Pat the pork dry with paper towels. This helps it brown better in the pan.


    Step 3: Sear the Pork

    Heat a large skillet over medium-high heat. You don’t need extra oil if using well-marbled pork, but you can add a light drizzle if desired.

    Add the pork in a single layer. Avoid overcrowding—cook in batches if necessary.

    Let it sear undisturbed for 2–3 minutes to develop color. Then stir and cook another 2–3 minutes until browned on most sides.

    This browning step builds flavor and prevents the dish from tasting flat.


    Step 4: Add Pineapple and Soy Sauce

    Once the pork is nicely browned, pour in:

    • The entire can of pineapple chunks (juice included)
    • 1 cup soy sauce

    Stir to combine and bring to a simmer.

    The pineapple juice and soy sauce create a sweet-savory glaze that thickens as it reduces. The pineapple also begins to caramelize slightly, adding depth and brightness.


    Step 5: Simmer Until Tender and Glossy

    Reduce heat to medium-low and let the mixture simmer uncovered for 10–15 minutes.

    During this time:

    • The sauce reduces and thickens
    • The pork becomes tender
    • The pineapple softens and intensifies in flavor

    Stir occasionally to prevent sticking.

    If the sauce thickens too quickly, add a splash of water. You’re looking for a glossy, slightly syrupy consistency that coats the pork.


    Step 6: Taste and Adjust

    Because soy sauce brands vary in saltiness, give it a quick taste. The pineapple should balance the salt with sweetness.

    If it tastes too salty, add a spoonful of pineapple juice or a splash of water. If you prefer it deeper and saltier, let it reduce another minute or two.

    This simple balance step ensures restaurant-quality flavor.


    Step 7: Assemble the Dish

    Spoon a generous portion of coconut rice into bowls.

    Top with the pineapple pork mixture, making sure to drizzle some of that glossy sauce over the rice.

    The creamy coconut rice absorbs the sweet-savory glaze, creating the perfect bite every time.


    Texture and Flavor Notes

    This dish delivers:

    • Tender, juicy pork
    • Sweet bursts of caramelized pineapple
    • Savory umami depth from soy sauce
    • Creamy, fragrant coconut rice

    The flavors are bold but balanced, making it feel both comforting and exciting.


    Tips for Success

    Use full-fat coconut milk. Light coconut milk won’t give the same creamy texture.

    Don’t skip browning the pork. That golden crust adds essential depth.

    Let the sauce reduce. Thin sauce won’t cling to the meat or rice properly.

    Slice against the grain. This keeps the pork tender.


    Optional Add-Ins (If You Want to Go Beyond 5 Ingredients)

    While this recipe shines as-is, you can elevate it with:

    • A squeeze of lime
    • Fresh cilantro
    • Red pepper flakes for heat
    • Green onions for crunch

    But even without extras, it stands beautifully on its own.


    Storage and Reheating

    Store leftovers in an airtight container in the refrigerator for up to 3 days.

    Reheat gently in a skillet over medium-low heat with a splash of water to loosen the sauce. The microwave works too—just cover to retain moisture.

    This dish reheats surprisingly well and makes excellent next-day lunches.


    Why You’ll Make This Again

    This 5-Ingredient Pineapple Pork with Coconut Rice proves that you don’t need a complicated ingredient list to create bold, satisfying meals. It’s weeknight-friendly, budget-conscious, and feels like a mini tropical escape in a bowl.

    The contrast between creamy rice and glossy sweet-savory pork makes every bite layered and exciting. It’s comforting enough for family dinner yet impressive enough to serve guests.

    When you want something flavorful, simple, and deeply satisfying, this recipe delivers—no extra fuss required.

    One skillet. One saucepan. Five ingredients. Big flavor.

  • The Ultimate Fried Chicken Sandwich: Crispy, Juicy, and Worth the Mess

    The Ultimate Fried Chicken Sandwich: Crispy, Juicy, and Worth the Mess

    Few things hit harder than a perfectly made fried chicken sandwich. We’re talking shatteringly crisp coating, tender and juicy chicken, a soft toasted bun, and just enough sauce to bring everything together.

    It’s indulgent, comforting, and incredibly satisfying—and the best part is that you can make a restaurant-quality version right at home.

    This step-by-step guide walks you through everything, from seasoning the chicken to building the sandwich so every bite delivers crunch, flavor, and balance. Whether you’re cooking for friends or treating yourself, this fried chicken sandwich is a guaranteed favorite.


    Why This Fried Chicken Sandwich Works

    A great fried chicken sandwich is all about contrast:

    • Crispy exterior paired with juicy chicken
    • Savory seasoning balanced with a touch of sweetness
    • Soft buns against crunchy coating

    This recipe focuses on technique just as much as ingredients, ensuring consistent results even if it’s your first time frying.


    Ingredients You’ll Need

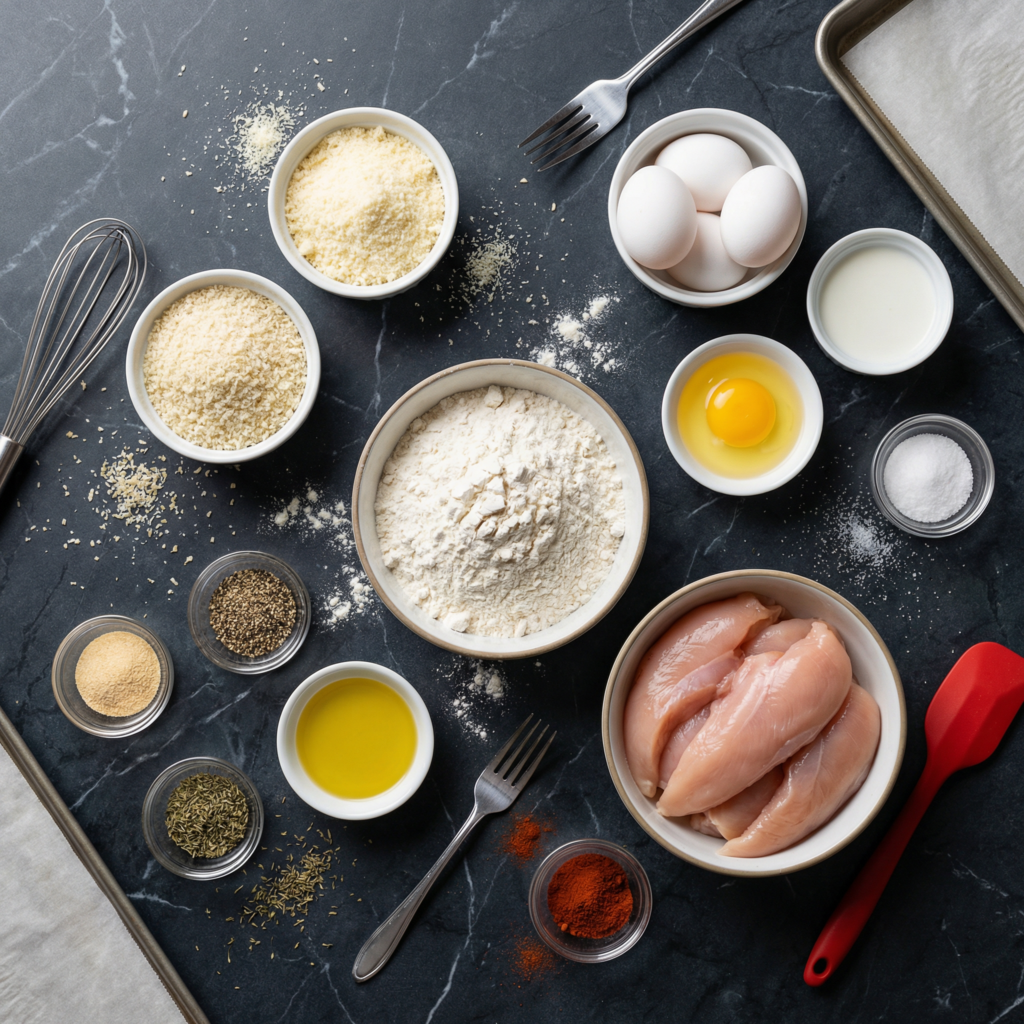
    Gather everything before you start—organization makes frying much easier.

    For the chicken:

    • 2 large boneless, skinless chicken breasts
    • 1 cup buttermilk
    • 1 teaspoon salt
    • ½ teaspoon black pepper
    • ½ teaspoon paprika
    • ½ teaspoon garlic powder

    For the breading:

    • 1 ½ cups all-purpose flour
    • 1 teaspoon salt
    • 1 teaspoon paprika
    • ½ teaspoon cayenne pepper (optional)
    • ½ teaspoon onion powder

    For frying:

    • Vegetable or canola oil

    For assembling:

    • 4 brioche buns
    • Butter for toasting
    • Dill pickles
    • Lettuce (optional)
    • Mayo or spicy sauce of choice

    Step-by-Step Instructions

    Step 1: Prepare the Chicken

    Slice each chicken breast horizontally to create thinner cutlets. This helps the chicken cook evenly and keeps the sandwich from being too bulky.

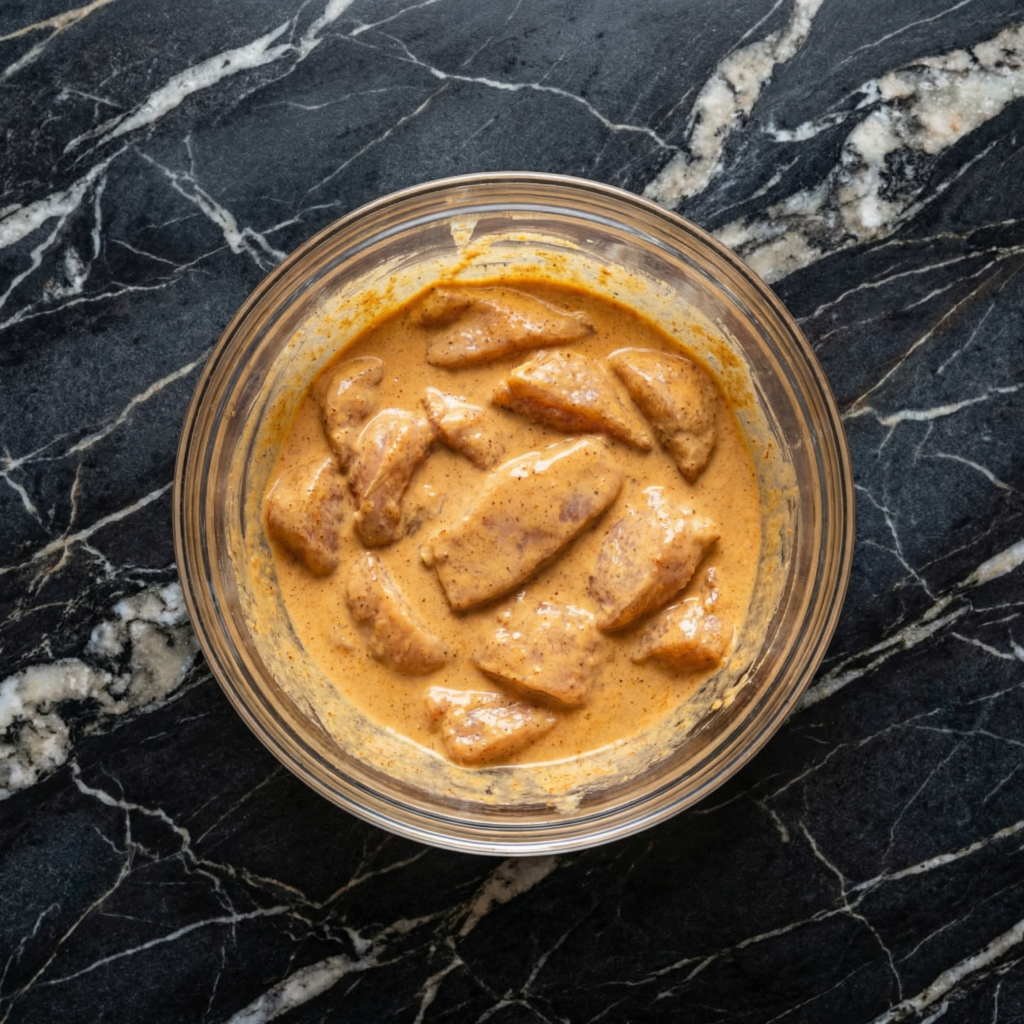
    Place the chicken in a bowl and add buttermilk, salt, pepper, paprika, and garlic powder. Mix well, cover, and refrigerate for at least 30 minutes—or up to overnight for deeper flavor.


    Step 2: Set Up the Breading Station

    In a shallow bowl, whisk together the flour, salt, paprika, cayenne, and onion powder.

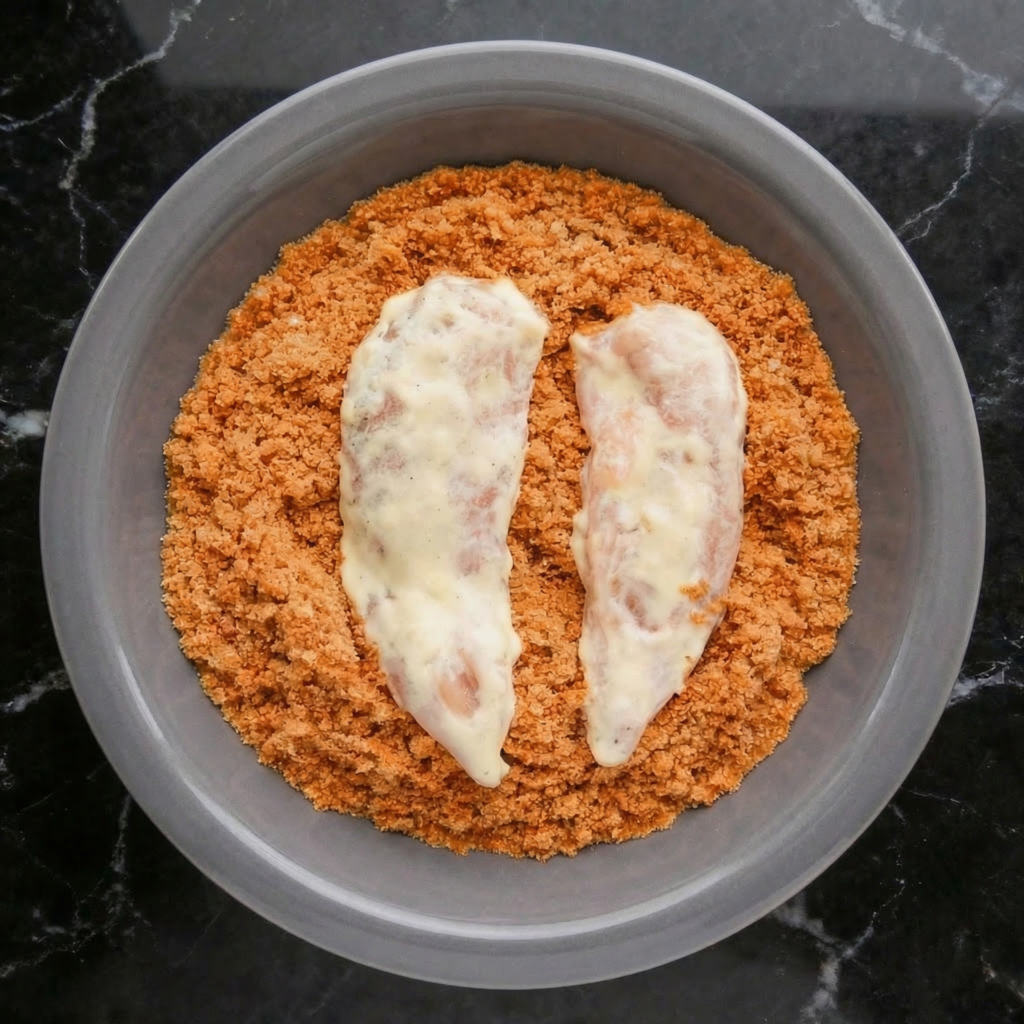
    Remove the chicken from the buttermilk, allowing excess to drip off, then dredge each piece thoroughly in the seasoned flour. Press firmly so the coating sticks well.

    For extra crunch, dip the chicken back into the buttermilk and then into the flour a second time.


    Step 3: Heat the Oil

    Pour oil into a deep skillet or heavy-bottomed pan until it reaches about 1½ inches deep. Heat to 175°C / 350°F.

    If you don’t have a thermometer, test the oil by dropping in a small pinch of flour—it should sizzle immediately.


    Step 4: Fry the Chicken

    Carefully place the breaded chicken into the hot oil, working in batches to avoid overcrowding. Fry for 5–7 minutes per side, turning once, until golden brown and fully cooked.

    Transfer to a wire rack or paper towel-lined plate to drain excess oil.


    Step 5: Toast the Buns

    While the chicken rests, butter the cut sides of the brioche buns and toast them in a skillet until golden brown. Toasting adds flavor and keeps the buns from getting soggy.


    Step 6: Build the Sandwich

    Start with the bottom bun and spread a generous layer of mayo or sauce. Add lettuce if using, followed by the crispy fried chicken. Top with dill pickles for brightness and crunch.

    Finish with the top bun and press gently to set the sandwich.


    Step 7: Serve Hot

    Serve immediately while the chicken is at its crispiest. Pair with fries, coleslaw, or a simple salad for a complete meal.


    Tips for Extra-Crispy Fried Chicken

    • Don’t rush the marinade—buttermilk tenderizes the chicken
    • Double dredge for thicker, crunchier coating
    • Maintain oil temperature for even frying
    • Rest after frying to lock in juices

    These small steps make a huge difference.


    Variations to Try

    Once you master the classic, experiment:

    • Add hot honey for a sweet-spicy twist
    • Use spicy mayo or chipotle sauce
    • Swap lettuce for crunchy slaw
    • Add melted cheese for an indulgent upgrade

    The fried chicken sandwich is endlessly customizable.


    Final Thoughts

    This fried chicken sandwich recipe proves you don’t need a deep fryer or fast-food drive-thru to enjoy an incredible sandwich.

    With the right seasoning, proper frying technique, and thoughtful assembly, you get a sandwich that’s crispy, juicy, and completely irresistible.

    Once you make it at home, it’s hard to go back to anything else.

  • Classic Buffalo Chicken Wings

    Classic Buffalo Chicken Wings

    Bring the authentic sports bar experience home with these Classic Buffalo Chicken Wings. This recipe guarantees wings with shatteringly crisp skin and juicy meat, perfectly coated in the iconic balance of spicy, tangy, and buttery sauce. Paired with cool, creamy blue cheese dressing and crisp celery, they’re the ultimate crowd-pleasing appetizer for game day, parties, or any craving for legendary wings.

    The Science of Crispy Skin & Balanced Sauce

    The secret to wings that stay crispy even after saucing lies in a two-step cooking process: thorough drying and a dual-temperature fry. Patting the wings completely dry and letting them air-uncovered in the fridge removes surface moisture, which is the enemy of crispness.

    The first fry at a lower temperature (275°F / 135°C) gently renders out the fat under the skin without aggressively browning the exterior. The second fry at high heat (400°F / 205°C) then rapidly blisters and crisps the skin, creating a sturdy, crackly exterior that can hold sauce without turning soggy.

    The classic Buffalo sauce itself is an emulsion of Frank’s RedHot sauce and melted butter—the butter rounds out the vinegar’s sharpness and helps the sauce cling to the wings, while the cayenne pepper-based hot sauce provides the authentic flavor foundation that cannot be replicated with other brands.

    Ingredients

    For the Wings:

    • 2 lbs (900g) chicken wings, split into drumettes and flats, tips removed
    • 2 teaspoons baking powder (NOT baking soda)
    • 1 teaspoon kosher salt
    • ½ teaspoon garlic powder
    • ½ teaspoon black pepper
    • Vegetable or peanut oil, for frying (4-6 cups)

    For the Classic Buffalo Sauce:

    • ½ cup (120ml) Frank’s RedHot Original Cayenne Pepper Sauce
    • 6 tablespoons (85g) unsalted butter
    • 1 tablespoon white vinegar
    • ½ teaspoon Worcestershire sauce
    • ¼ teaspoon garlic powder
    • ¼ teaspoon cayenne pepper (optional, for extra heat)

    For Serving:

    • Blue cheese or ranch dressing
    • Celery sticks
    • Carrot sticks

    Instructions

    1. Dry & Season the Wings: Pat the wing pieces completely dry with paper towels—this is critical. Place them in a large bowl. In a small bowl, mix the baking powder, salt, garlic powder, and black pepper. Sprinkle the mixture over the wings and toss thoroughly until each piece is evenly coated.

    Arrange the wings in a single layer on a wire rack set over a baking sheet. Refrigerate, uncovered, for at least 4 hours, or ideally overnight. This drying step is non-negotiable for crispness.

    2. First Fry (Low-Temperature Render): Heat oil in a large, heavy pot or Dutch oven to 275°F (135°C). Working in batches to avoid crowding, fry the wings for 10-12 minutes. They will not be browned at this stage; this step cooks them through and starts to render fat. Remove with a slotted spoon or spider and drain on a fresh wire rack. Let the oil return to temperature between batches.

    3. Second Fry (High-Temperature Crisp): Increase the oil temperature to 400°F (205°C). Fry the wings again, in batches, for 6-8 minutes until deeply golden brown and extremely crisp. Drain on the wire rack. The wings should feel very light and sound hollow when tapped.

    4. Make the Buffalo Sauce: While the wings fry for the second time, combine the Frank’s RedHot, butter, vinegar, Worcestershire, and garlic powder in a small saucepan. Heat over low, stirring until the butter melts and the sauce is smooth and emulsified. Keep warm.

    5. Sauce & Serve: Place the hot, crispy wings in a large, clean bowl. Pour the warm sauce over them. Toss vigorously until evenly coated. Transfer to a platter and serve immediately with blue cheese dressing and celery sticks.

    Pro-Tips for Wing Mastery

    • Baking Powder, Not Soda: Baking powder alkalizes the skin’s surface, helping it crisp and brown without any soapy taste.
    • Dry Thoroughly: The overnight fridge dry is the single best thing you can do for crispy wings.
    • Double-Fry Method: Don’t skip the two-temperature fry—it’s the professional technique for wings that stay crispy for hours.
    • Use a Thermometer: Maintaining correct oil temperatures is essential. A deep-fry/candy thermometer is your best tool.
    • Frank’s is Non-Negotiable: The original Buffalo wing sauce was made with Frank’s RedHot. Its unique flavor profile is key to authenticity.
    • Butter Ratio: The butter should mellow the heat but not make the sauce greasy. Adjust to your taste.
    • Sauce While Hot: Toss the wings in sauce the moment they come out of the fryer for maximum adhesion.
    • Baking Option: For an oven method, after the overnight dry, bake on a wire rack at 425°F (220°C) for 40-50 minutes, flipping halfway, until very crisp.

    These Classic Buffalo Chicken Wings are a guaranteed hit.

  • Smash Burger Tacos: The Ultimate Crispy Smashburger Taco Recipe Everyone Is Obsessed With

    Smash Burger Tacos: The Ultimate Crispy Smashburger Taco Recipe Everyone Is Obsessed With

    If you love juicy smash burgers and crispy tacos, this viral Smash Burger Tacos recipe combines both into one irresistible dish.

    Featuring seasoned ground beef smashed directly onto tortillas, crispy seared edges, melted cheese, and fresh toppings, these easy smash burger tacos deliver bold flavor in under 30 minutes. Perfect for weeknight dinners, game-day meals, or casual entertaining, this recipe has quickly become one of the most popular TikTok smash burger taco recipes for good reason.

    This step-by-step guide shows you exactly how to make restaurant-style smash burger tacos at home with simple ingredients and perfect results every time.


    Why You’ll Love These Smash Burger Tacos

    This smashburger taco recipe combines the best textures and flavors—crispy beef, soft tortillas, melted cheese, and fresh toppings.

    Reasons this recipe stands out:

    • Quick and easy 30-minute meal
    • Crispy smash burger edges for maximum flavor
    • Family-friendly and customizable
    • Perfect for parties, cookouts, or taco nights
    • Minimal ingredients with big flavor payoff

    Ingredients for Smash Burger Tacos

    Using simple ingredients makes this recipe fast and accessible.

    Main Ingredients

    • 1 pound ground beef (80/20 recommended)
    • 8 small flour tortillas
    • Salt and black pepper
    • 8 slices American cheese or cheddar cheese
    • 1 tablespoon cooking oil (if needed)

    Classic Burger Toppings

    • Shredded lettuce
    • Diced tomatoes
    • Pickles
    • Sliced onions

    Burger Sauce (Optional but Recommended)

    • ½ cup mayonnaise
    • 2 tablespoons ketchup
    • 1 tablespoon mustard
    • 1 tablespoon pickle relish
    • ½ teaspoon garlic powder

    How to Make Smash Burger Tacos (Step-by-Step)

    Step 1: Prepare the Burger Sauce

    In a small bowl, mix mayonnaise, ketchup, mustard, relish, and garlic powder until smooth. Refrigerate while preparing the tacos so the flavors blend together. This simple homemade sauce adds the classic burger taco flavor.


    Step 2: Divide the Ground Beef

    Divide the ground beef into 8 equal portions (about 2 ounces each). Roll lightly into balls without packing too tightly to keep the burgers tender.


    Step 3: Press Beef onto Tortillas

    Place each tortilla flat on a clean surface. Spread one portion of ground beef evenly across one side of the tortilla, pressing it thin so it covers most of the surface. Season lightly with salt and pepper.

    This step is key to achieving the signature crispy smash burger taco crust.


    Step 4: Heat the Skillet

    Heat a large cast-iron skillet or flat-top griddle over medium-high heat. If your pan is well-seasoned, oil may not be necessary, but lightly greasing the surface can help prevent sticking.


    Step 5: Cook the Beef Side First

    Place each tortilla beef-side down onto the hot skillet. Press gently with a spatula to ensure even contact with the pan. Cook for about 2–3 minutes until the beef develops a crispy brown crust.


    Step 6: Flip and Add Cheese

    Carefully flip the tortilla so the tortilla side touches the pan. Immediately place a slice of cheese on top of the cooked beef. Cook for another 1–2 minutes until the tortilla becomes lightly golden and the cheese melts.


    Step 7: Remove and Add Toppings

    Transfer the cooked smash burger taco to a plate. Add shredded lettuce, diced tomatoes, onions, pickles, and a drizzle of the prepared burger sauce.


    Step 8: Fold and Serve

    Fold the taco in half and serve immediately while hot and crispy. Repeat with remaining tortillas and beef portions.


    Pro Tips for the Best Smash Burger Tacos

    • Use 80/20 ground beef for the best flavor and crisp edges.
    • Spread the beef thinly to create a proper smashburger crust.
    • Cook on high heat for better caramelization.
    • Add cheese immediately after flipping for perfect melting.
    • Serve immediately to maintain crispiness.

    Easy Smash Burger Taco Variations

    This burger taco recipe is easy to customize depending on flavor preferences.

    Popular variations include:

    • Bacon Smash Burger Tacos: Add crispy bacon strips before folding.
    • Spicy Smash Tacos: Add jalapeños or spicy mayo.
    • BBQ Burger Tacos: Drizzle barbecue sauce instead of burger sauce.
    • Double Cheeseburger Tacos: Add extra cheese slices.
    • Low-Carb Version: Use low-carb tortillas.

    Serving Suggestions

    These crispy smash burger tacos pair perfectly with:

    • French fries
    • Onion rings
    • Coleslaw
    • Pickle spears
    • Potato wedges
    • Classic milkshakes

    They also make excellent party foods when served in smaller taco portions for gatherings.


    Storage and Reheating Tips

    Smash burger tacos are best eaten fresh, but leftovers can be stored in an airtight container in the refrigerator for up to 2 days. Reheat in a skillet over medium heat to restore crispness. Avoid microwaving if possible, as it softens the tortilla.

    For meal prep, prepare toppings and sauce ahead of time, then cook tacos fresh for the best texture.


    Frequently Asked Questions

    Can I use corn tortillas instead of flour tortillas?
    Yes, but flour tortillas hold the beef better and provide the classic smash burger taco texture.

    What cheese works best for smash burger tacos?
    American cheese melts smoothly and gives the classic burger flavor, but cheddar, Monterey Jack, or pepper jack also work well.

    Why are my smash burger tacos not crispy?
    The pan may not be hot enough, or the beef layer may be too thick. Ensure high heat and press the beef thinly onto the tortilla.


    Final Thoughts

    These Smash Burger Tacos are the ultimate fusion comfort food, combining the crispy edges of a smashburger with the convenience of handheld tacos.

    With juicy seasoned beef, melted cheese, fresh toppings, and creamy burger sauce wrapped in a lightly toasted tortilla, this viral recipe delivers bold flavor with minimal effort.

    Whether you’re planning taco night, a casual family dinner, or a game-day spread, this easy smash burger tacos recipe is guaranteed to become a repeat favorite thanks to its simplicity, crunch, and irresistible burger-inspired taste.

  • Classic Chicken Cacciatore: The Ultimate Italian Hunter’s Chicken Recipe

    Classic Chicken Cacciatore: The Ultimate Italian Hunter’s Chicken Recipe

    Why You’ll Love This Chicken Cacciatore Recipe

    Chicken Cacciatore, also known as Italian hunter’s chicken, is beloved for its rustic flavors and simple preparation.

    Slow simmering allows the chicken to absorb the savory tomato and herb sauce, creating a comforting meal that tastes even better the next day.

    Reasons this recipe stands out:

    • Classic Italian comfort food
    • One-pan meal with simple ingredients
    • Perfect for meal prep and leftovers
    • Rich tomato garlic herb sauce
    • Beginner-friendly step-by-step method

    Ingredients for Chicken Cacciatore

    Using fresh herbs and quality tomatoes creates the best flavor for this traditional Chicken Cacciatore recipe.

    Main Ingredients

    • 6 bone-in, skin-on chicken thighs (or mixed chicken pieces)
    • Salt and black pepper
    • 2 tablespoons olive oil
    • 1 medium onion, sliced
    • 1 red bell pepper, sliced
    • 1 green bell pepper, sliced
    • 4 cloves garlic, minced

    Sauce

    • 1 can (28 oz) crushed tomatoes
    • ½ cup chicken broth
    • ½ cup dry red wine (optional but recommended)
    • 1 teaspoon dried oregano
    • 1 teaspoon dried basil
    • ½ teaspoon red pepper flakes (optional)
    • 1 bay leaf

    Finishing

    • Fresh parsley or basil for garnish

    How to Make Chicken Cacciatore (Step-by-Step)

    Step 1: Season the Chicken

    Pat the chicken pieces dry with paper towels and season generously with salt and black pepper. Proper seasoning before cooking ensures deeper flavor throughout the dish.


    Step 2: Sear the Chicken

    Heat olive oil in a large skillet or Dutch oven over medium-high heat. Place the chicken skin-side down and sear for 4–5 minutes until golden brown. Flip and cook another 3–4 minutes. Remove the chicken and set aside.

    Searing locks in flavor and helps build the base of the sauce.


    Step 3: Sauté the Vegetables

    In the same pan, add sliced onions and bell peppers. Cook for 5 minutes until softened. Stir in minced garlic and cook for another 30 seconds until fragrant.

    The browned bits left from the chicken add extra flavor to the vegetables.


    Step 4: Deglaze the Pan

    Pour in the red wine and scrape the bottom of the pan to release flavorful browned bits. Let the wine simmer for 2–3 minutes to cook off the alcohol while concentrating flavor.

    If not using wine, substitute additional chicken broth.


    Step 5: Add the Tomato Sauce

    Stir in crushed tomatoes, chicken broth, oregano, basil, red pepper flakes, and bay leaf. Mix well and bring the sauce to a gentle simmer.


    Step 6: Return the Chicken to the Pan

    Place the seared chicken pieces back into the sauce, skin-side up. Reduce heat to low, cover, and simmer for 35–40 minutes, or until the chicken is fully cooked and tender.

    Slow simmering allows the chicken to absorb the rich tomato herb flavors.


    Step 7: Adjust Seasoning

    Taste the sauce and adjust salt and pepper as needed. If the sauce is too thick, add a small splash of broth. For a thicker consistency, simmer uncovered for a few extra minutes.


    Step 8: Garnish and Serve

    Remove the bay leaf and garnish with freshly chopped parsley or basil. Serve hot over pasta, mashed potatoes, polenta, or crusty Italian bread for a complete classic Italian dinner.


    Pro Tips for Perfect Chicken Cacciatore

    • Use bone-in chicken for deeper flavor.
    • Brown the chicken well before simmering.
    • Allow the sauce to simmer gently, not boil.
    • Use quality canned tomatoes for richer taste.
    • Let the dish rest 5 minutes before serving for best flavor.

    Serving Suggestions

    This homemade Chicken Cacciatore pairs beautifully with:

    • Spaghetti or fettuccine
    • Creamy polenta
    • Garlic bread
    • Roasted vegetables
    • Simple green salad

    The rich tomato sauce also works perfectly spooned over rice or rustic country bread.


    Make-Ahead and Storage Tips

    Chicken Cacciatore tastes even better the next day as the flavors continue to develop.

    • Refrigerator: Store in an airtight container for up to 4 days
    • Freezer: Freeze portions for up to 2 months
    • Reheat: Warm gently on the stovetop with a splash of broth to loosen the sauce

    This makes it an excellent meal prep Italian chicken recipe for busy weeks.


    Easy Recipe Variations

    • Mushroom Chicken Cacciatore: Add sliced mushrooms when sautéing vegetables.
    • Slow Cooker Version: Transfer everything to a slow cooker and cook on low for 6–7 hours.
    • Boneless Chicken Option: Use boneless thighs for faster cooking.
    • Spicy Cacciatore: Increase red pepper flakes for extra heat.

    Frequently Asked Questions

    What does “Cacciatore” mean?
    “Cacciatore” means “hunter-style” in Italian, referring to rustic dishes cooked with tomatoes, herbs, onions, and peppers.

    Can I make Chicken Cacciatore without wine?
    Yes, simply substitute chicken broth for the wine while maintaining great flavor.

    What is the best cut of chicken for Chicken Cacciatore?
    Bone-in thighs are preferred because they remain juicy and flavorful during simmering.


    Final Thoughts

    This Classic Chicken Cacciatore recipe brings authentic Italian comfort food straight to your kitchen with minimal effort and maximum flavor.

    Tender braised chicken simmered in a rich tomato herb sauce creates a satisfying meal perfect for weeknight dinners or special gatherings.

    Once you try this easy homemade Chicken Cacciatore, it’s sure to become a staple recipe thanks to its hearty ingredients, simple cooking method, and timeless Italian taste.

  • Salsa Fresca (Pico de Gallo): Fresh Tomato & Onion Salsa Recipe

    Salsa Fresca (Pico de Gallo): Fresh Tomato & Onion Salsa Recipe

    Pico de Gallo, or Salsa Fresca, is the essence of fresh Mexican flavor. Unlike blended salsas, this condiment celebrates texture: a bright, chunky mixture of ripe tomatoes, crisp white onion, spicy jalapeño, and fragrant cilantro, all brought to life with a generous squeeze of lime juice.

    It’s incredibly simple to make but requires a few key techniques to balance flavors and achieve the perfect consistency. This versatile salsa is more than a dip; it’s a fresh topping for tacos, grilled fish, scrambled eggs, and a vibrant side for any meal.

    The Art of Freshness & Balance

    The success of Pico de Gallo hinges on the quality of ingredients and textural contrast. Using ripe, in-season tomatoes is non-negotiable for sweet, deep flavor. The key to taming the raw bite of onion is a brief soak in cold water or a rinse under running water, which washes away the harsh sulfur compounds.

    For consistent heat, remove the jalapeño seeds and ribs for mild salsa, or include them for more spice. The final, critical step is salting and resting. Salt draws moisture from the tomatoes and onions, creating a light, flavorful brine that coats every piece. Allowing the salsa to sit for 15-30 minutes before serving lets the flavors marry and mellow, transforming it from chopped ingredients into a cohesive, vibrant condiment.

    Ingredients

    For the Salsa (makes about 3 cups):

    • 1 ½ lbs (about 4-5 medium) ripe Roma or vine-ripened tomatoes
    • ½ medium white onion
    • 1-2 jalapeño peppers
    • ½ cup packed fresh cilantro leaves and tender stems, chopped
    • 2-3 tablespoons fresh lime juice (from 1-2 limes)
    • ¾ teaspoon fine sea salt, plus more to taste
    • Optional: 1 small clove garlic, minced

    For Serving: Tortilla chips, on tacos, with grilled meats or fish.

    Instructions

    1. The Prepared & Rinsed Diced Onion: Finely dice the white onion. Place the diced onion in a fine-mesh strainer and rinse thoroughly under cold running water for about 30 seconds. Shake off excess water and pat lightly with a paper towel. This step removes the pungent, sulfuric bite, leaving a crisp, clean onion flavor.

    2. The Diced & Seeded Ingredients: Core the tomatoes and cut them into a uniform ¼-inch dice. If desired, scoop out and discard some of the watery seed pulp for a less watery salsa. Finely dice the jalapeño(s), removing seeds and ribs for less heat. Roughly chop the cilantro.

    3. The Combined, Unseasoned Mixture: In a medium glass or ceramic bowl (not metal, which can react with the acid), gently combine the diced tomatoes, rinsed diced onion, diced jalapeño, and chopped cilantro. The mixture will look bright and colorful but dry and distinct.

    4. The Seasoned & Juicy Salsa: Drizzle the fresh lime juice over the vegetable mixture. Sprinkle the salt evenly over the top. Using a large spoon, gently fold everything together until just combined.

    5. The Rested & Marinated Final Salsa: Let the salsa sit at room temperature for at least 15 minutes, or up to 1 hour, stirring once or twice. During this time, the salt will draw out the tomatoes’ juices, creating a light, flavorful liquid in the bottom of the bowl. The flavors will meld and mellow. Taste and adjust with more salt or lime juice as needed. Serve immediately, or refrigerate for up to 3 days (flavor is best within 24 hours).

    Pro-Tips for Perfect Pico

    • Choose the Right Tomatoes: Firm Roma (plum) tomatoes are ideal as they have less watery pulp than beefsteaks.
    • Rinse the Onion: Don’t skip this step—it’s the secret to eliminating harsh onion breath and sharpness.
    • Control the Heat: For mild salsa, use only one jalapeño and remove all seeds and white ribs. For more heat, include the seeds or use serrano peppers.
    • Chop Consistently: Aim for a uniform dice so every scoop has a bit of everything.
    • Use Fresh Lime Juice: Bottled juice lacks the bright, floral notes of fresh lime.
    • Salt Liberally: Salt is what makes the flavors pop and draws out the juices. Don’t be shy.
    • Let it Rest: The resting period is when the magic happens, transforming chopped veggies into salsa.
    • Drain if Needed: If your tomatoes are very juicy, you can drain some of the excess liquid after resting before serving.
    • Make it Ahead: You can chop all ingredients (except salt and lime) a few hours ahead and store them separately in the fridge. Combine, season, and rest 30 minutes before serving.
  • Crispy Pork Schnitzel Recipe: Easy German-Style Classic in 30 Minutes

    Crispy Pork Schnitzel Recipe: Easy German-Style Classic in 30 Minutes

    If you’re craving a crispy pork schnitzel that’s golden on the outside, juicy on the inside, and unbelievably easy to make at home, you’re in the right place.

    This authentic German pork schnitzel recipe uses simple pantry ingredients and delivers restaurant-quality results in under 30 minutes.

    Perfect for busy weeknights or a comforting weekend meal, this easy pork schnitzel pairs beautifully with potatoes, salad, or spaetzle—and it’s a guaranteed crowd-pleaser.


    What Is Pork Schnitzel?

    Pork schnitzel is a breaded pork cutlet, pounded thin, coated in breadcrumbs, and pan-fried until crispy.

    Originating from Germany and Austria, this dish is known for its light, crunchy crust and tender meat.

    Ingredients for Crispy Pork Schnitzel

    • 4 boneless pork chops (center-cut or pork loin)
    • 1 cup all-purpose flour
    • 2 large eggs
    • 1½ cups breadcrumbs (panko or traditional)
    • 1 teaspoon salt
    • ½ teaspoon black pepper
    • ½ teaspoon paprika (optional)
    • Vegetable oil or canola oil, for frying
    • Lemon wedges, for serving

    Optional additions for extra flavor:

    • Garlic powder
    • Onion powder
    • Fresh parsley, chopped

    How to Make Pork Schnitzel

    Step 1: Pound the Pork Cutlets

    Place the pork chops between two pieces of plastic wrap or parchment paper. Using a meat mallet, pound them to about ¼-inch thickness. This ensures even cooking and ultra-tender schnitzel.


    Step 2: Set Up the Breading Station

    Prepare three shallow bowls:

    1. Flour seasoned with salt, pepper, and paprika
    2. Beaten eggs
    3. Breadcrumbs

    Step 3: Bread the Pork Schnitzel

    Dredge each pork cutlet in flour, shaking off excess. Dip into the eggs, then coat thoroughly in breadcrumbs. Press gently so the crumbs stick.

    For extra crunch, use panko breadcrumbs.


    Step 4: Heat the Oil

    Heat about ½ inch of oil in a large skillet over medium-high heat. The oil is ready when breadcrumbs sizzle immediately upon contact.


    Step 5: Fry Until Golden and Crispy

    Carefully place the pork schnitzel in the hot oil. Fry for 2–3 minutes per side, or until golden brown and cooked through.

    Do not overcrowd the pan.

    Step 6: Serve Immediately

    Serve hot with lemon wedges. The squeeze of fresh lemon enhances the crispy coating and balances the richness.


    Best Side Dishes for Pork Schnitzel

    • German potato salad
    • Mashed potatoes or fries
    • Cucumber salad
    • Spaetzle
    • Simple green salad

    Tips for the Best Pork Schnitzel

    • Don’t press the schnitzel while frying—it releases juices and ruins crispiness
    • Use neutral oil with a high smoke point
    • Serve immediately for maximum crunch
    • Avoid thick pork chops—they won’t cook evenly

    Frequently Asked Questions

    Can I bake pork schnitzel instead of frying?

    Yes! Bake at 425°F (220°C) for 18–22 minutes, flipping halfway.

    It won’t be as crispy as pan-fried but still delicious.

    Can I make pork schnitzel ahead of time?

    Schnitzel is best fresh, but you can bread the pork up to 8 hours ahead and refrigerate until ready to fry.


    Final Thoughts

    This crispy pork schnitzel recipe is everything you want in a classic comfort dish—fast, flavorful, and irresistibly crunchy.

    Whether you’re new to German cooking or just want a foolproof easy pork schnitzel recipe, this one delivers every time.