Category: quick_meals

  • Fall-Off-The-Bone BBQ Ribs: Smoky, Tender and Sticky

    Fall-Off-The-Bone BBQ Ribs: Smoky, Tender and Sticky

    There’s nothing quite like a rack of perfectly cooked BBQ ribs—tender, smoky meat that falls right off the bone, coated in a sticky-sweet glaze with just the right amount of char. Whether you’re firing up the smoker or using your oven, this recipe delivers ribs that are absolutely irresistible.

    The secret is a flavorful dry rub, low-and-slow cooking, and a final slather of BBQ sauce that caramelizes into a sticky, finger-licking glaze. Serve with extra sauce, pickles, and plenty of napkins.

    Ingredients

    For the Dry Rub (makes enough for 2 racks):

    • ¼ cup (50g) brown sugar
    • 2 tablespoons paprika
    • 1 tablespoon black pepper
    • 1 tablespoon salt
    • 1 tablespoon garlic powder
    • 1 tablespoon onion powder
    • 1 teaspoon cayenne pepper (optional, for heat)
    • 1 teaspoon cumin
    • 1 teaspoon chili powder

    For the Ribs:

    • 2 racks baby back ribs or spare ribs (about 4-5 lbs total)
    • ½ cup apple juice or apple cider (for wrapping)
    • ¼ cup brown sugar (for wrapping)
    • ¼ cup butter, cut into thin slices (for wrapping)
    • 1½ cups your favorite BBQ sauce

    Instructions

    1. Make the Dry Rub: In a small bowl, combine all rub ingredients. Mix well.

    2. Prep the Ribs: Remove the thin membrane from the back of each rack of ribs (this helps the rub penetrate and makes them more tender). Pat the ribs dry with paper towels.

    3. Apply the Rub: Generously coat both sides of the ribs with the dry rub, pressing it into the meat. Wrap in plastic wrap and refrigerate for at least 1 hour, preferably 4-8 hours or overnight.

    4. Preheat the Oven (or Smoker): Preheat your oven to 250°F (120°C). If using a smoker, preheat to 225-250°F with your choice of wood (hickory, apple, or cherry work well).

    5. First Stage (3 hours): Place the ribs on a baking sheet lined with foil (for oven method) or directly on the smoker grates. Cook for 3 hours, meat-side up.

    6. Second Stage (2 hours, wrapped): Remove the ribs and place each rack on a large sheet of heavy-duty foil. Drizzle with apple juice, sprinkle with brown sugar, and dot with butter. Wrap tightly and return to the oven or smoker for 2 hours.

    7. Third Stage (1 hour, sauced): Carefully remove the ribs from the foil (reserve the juices for serving if desired). Place back on the baking sheet or smoker. Brush generously with BBQ sauce on both sides. Cook for another hour, brushing with additional sauce halfway through.

    8. Rest and Serve: Let the ribs rest for 10-15 minutes before slicing between the bones. Serve with extra BBQ sauce.

    Pro-Tips for BBQ Rib Perfection

    • Remove the Membrane: This thin layer on the back of the ribs prevents the rub from penetrating and can be tough. Slide a knife under it and pull it off with a paper towel.
    • Let the Rub Sit: Overnight in the fridge gives the best flavor.
    • Don’t Peek: Keep the oven or smoker closed to maintain consistent temperature.
    • Save the Wrapping Juices: The liquid left in the foil is liquid gold—skim the fat and add it to your BBQ sauce or serve on the side.
    • Test for Doneness: Ribs are done when the meat has pulled back from the bones by about ½ inch and a toothpick slides in easily.
    • Char the Sauce: For extra flavor, finish the ribs on a hot grill or under the broiler for 2-3 minutes to caramelize the sauce.
    • Let Them Rest: Resting allows the juices to redistribute.
    • Plenty of Napkins: These are finger-licking ribs—have napkins ready!

    These Fall-Off-The-Bone BBQ Ribs are smoky, tender, and absolutely sticky.

  • Garlic Lime Grilled Shrimp Skewers

    Garlic Lime Grilled Shrimp Skewers

    Grilled shrimp skewers are the perfect summer meal—quick, healthy, and absolutely bursting with flavor. Marinated in a bright mixture of garlic, lime, olive oil, and herbs, these shrimp cook in just minutes on the grill, developing beautiful char marks while staying juicy and tender.

    Serve them as an appetizer, over rice or salad for a light meal, or tucked into tacos. This recipe comes together in under 30 minutes, making it perfect for busy weeknights or casual entertaining.

    Ingredients

    For the Shrimp Skewers (serves 4):

    • 1½ lbs (680g) large shrimp (16-20 count), peeled and deveined, tails on or off
    • 3 tablespoons olive oil
    • 3 cloves garlic, minced
    • Zest of 1 lime
    • 3 tablespoons fresh lime juice (about 1½ limes)
    • 2 tablespoons fresh parsley or cilantro, chopped
    • 1 teaspoon honey or sugar (optional)
    • ½ teaspoon salt
    • ¼ teaspoon black pepper
    • ¼ teaspoon red pepper flakes (optional, for heat)
    • Wooden or metal skewers (if wooden, soak in water for 30 minutes)

    For Serving:

    • Lime wedges
    • Fresh parsley or cilantro
    • Grilled vegetables, rice, or salad

    Instructions

    1. Prep the Skewers: If using wooden skewers, soak them in water for at least 30 minutes to prevent burning.

    2. Make the Marinade: In a medium bowl, whisk together the olive oil, minced garlic, lime zest, lime juice, chopped herbs, honey (if using), salt, pepper, and red pepper flakes.

    3. Marinate the Shrimp: Pat the shrimp dry with paper towels. Add them to the bowl with the marinade and toss to coat. Cover and refrigerate for 15-20 minutes—no longer, or the lime juice will start to cook the shrimp.

    4. Thread the Skewers: Thread the shrimp onto the skewers, piercing through both the head and tail end so they lie flat. Leave a little space between each shrimp for even cooking.

    5. Preheat the Grill: Preheat your grill to medium-high heat (about 400-450°F / 200-230°C). Clean and oil the grates well.

    6. Grill the Shrimp: Place the skewers on the hot grill. Cook for 2-3 minutes per side, until the shrimp are opaque, pink, and have nice grill marks. Be careful not to overcook—they cook very quickly!

    7. Serve: Remove from the grill and transfer to a serving platter. Garnish with fresh herbs and lime wedges. Serve immediately.

    Pro-Tips for Grilled Shrimp Skewer Perfection

    • Use Large Shrimp: Larger shrimp (16-20 per pound) are easier to handle on the grill and less likely to overcook.
    • Don’t Over-Marinate: The acid in the lime juice can start to cook the shrimp, making them tough. 15-20 minutes is plenty.
    • Double-Skewer: For easier flipping, thread shrimp onto two parallel skewers—they’ll stay in place better.
    • Oil the Grates: A well-oiled grill prevents sticking and ensures those beautiful grill marks.
    • Watch Carefully: Shrimp cook in minutes—as soon as they turn opaque and pink, they’re done.
    • Don’t Overcrowd: Leave space between shrimp on the skewer for even cooking.
    • Serve Immediately: Grilled shrimp are best right off the grill.
    • Variations: Try different herbs (cilantro, oregano, dill) or add a teaspoon of cumin or chili powder to the marinade.

    These Garlic Lime Grilled Shrimp Skewers are quick, juicy, and absolutely flavorful.

  • Ultimate Patty Melt: Diner Classic, Perfected

    Ultimate Patty Melt: Diner Classic, Perfected

    The patty melt is the quintessential diner classic—a juicy beef patty, sweet caramelized onions, and melted Swiss cheese sandwiched between two slices of buttery, toasted rye bread. It’s like a cheeseburger and a grilled cheese had a beautiful baby.

    This version takes the time to properly caramelize the onions, uses quality Swiss cheese, and gets that perfect golden-crisp exterior on the rye bread. Served with a pickle spear and some crispy fries, it’s pure comfort food perfection.

    Ingredients

    For the Caramelized Onions:

    • 2 large onions, thinly sliced
    • 2 tablespoons butter or olive oil
    • 1 teaspoon brown sugar (optional)
    • Salt to taste

    For the Patties:

    • 1 lb (450g) ground beef (80/20)
    • Salt and freshly ground black pepper

    For Assembly:

    • 8 slices rye bread
    • 8 slices Swiss cheese
    • 4 tablespoons (60g) unsalted butter, softened

    For Serving:

    • Pickle spears
    • Crispy fries or potato chips

    Instructions

    1. Caramelize the Onions: In a large skillet, melt the butter over medium-low heat. Add the sliced onions and a pinch of salt. Cook slowly, stirring occasionally, for 20-25 minutes until the onions are soft, golden brown, and caramelized. If desired, stir in the brown sugar during the last 5 minutes. Remove from heat and set aside.

    2. Form the Patties: Divide the ground beef into 4 equal portions. Shape each portion into a thin, oblong patty slightly larger than the bread (they’ll shrink during cooking). Season both sides generously with salt and pepper.

    3. Cook the Patties: Heat a large skillet or griddle over medium-high heat. Cook the patties for 2-3 minutes per side for medium doneness. Remove to a plate and set aside.

    4. Assemble the Sandwiches: Butter one side of each slice of rye bread. Place 4 slices, butter-side down, on a work surface. Top each with a slice of Swiss cheese, a beef patty, a generous portion of caramelized onions, another slice of Swiss cheese, and finally another slice of rye bread (butter-side up).

    5. Grill the Sandwiches: Wipe out the skillet and return to medium heat. Carefully place the assembled sandwiches in the skillet. Cook for 3-4 minutes per side, pressing gently with a spatula, until the bread is golden brown and crisp and the cheese is melted.

    6. Serve: Remove from the skillet, let rest for a minute, then slice in half. Serve immediately with pickle spears and crispy fries.

    Pro-Tips for Patty Melt Perfection

    • Caramelize Onions Slowly: Low and slow is the key to sweet, jammy onions. Don’t rush this step.
    • Use 80/20 Ground Beef: The fat content keeps the patty juicy and flavorful.
    • Make Thin Patties: Thin patties cook quickly and fit perfectly in the sandwich.
    • Butter the Bread Generously: This creates that signature golden, crispy crust.
    • Use Good Swiss Cheese: High-quality Swiss melts better and has more flavor.
    • Press Gently: Pressing the sandwich with a spatula while grilling ensures even browning and melting.
    • Serve Immediately: Patty melts are best hot and fresh.
    • Dipping Sauce: Serve with a side of Russian dressing or Thousand Island for dipping.

    This Ultimate Patty Melt is a diner classic, perfected—absolutely delicious.

  • Classic Deviled Eggs: Creamy, Tangy and Perfect for Parties

    Classic Deviled Eggs: Creamy, Tangy and Perfect for Parties

    Deviled eggs are the ultimate party appetizer—creamy, tangy, and impossibly satisfying. They’re the first thing to disappear at potlucks, picnics, and holiday gatherings. This classic recipe delivers perfectly cooked hard-boiled eggs with a silky smooth filling that’s tangy from mustard and pickle relish, with just the right amount of mayo.

    Topped with a sprinkle of paprika, they’re as beautiful as they are delicious. While simple, the technique matters: perfectly boiled eggs, a smooth filling, and careful piping make all the difference. Once you master these, you’ll be asked to bring them to every gathering.

    Ingredients

    For the Deviled Eggs (makes 12 deviled egg halves):

    • 6 large eggs (older eggs peel more easily)
    • 3 tablespoons mayonnaise
    • 1 teaspoon Dijon mustard (or yellow mustard)
    • 1 teaspoon white vinegar or pickle juice
    • 1 teaspoon sweet pickle relish (optional)
    • Salt and white pepper to taste
    • Paprika, for garnish
    • Fresh parsley or chives, for garnish (optional)

    Optional Add-Ins:

    • 1 teaspoon prepared horseradish (for a kick)
    • 1 tablespoon crumbled bacon
    • 1 teaspoon hot sauce

    Instructions

    1. Hard Boil the Eggs: Place the eggs in a single layer in a saucepan and cover with cold water by about 1 inch. Bring to a boil over high heat. Once boiling, remove from heat, cover, and let sit for 12 minutes.

    2. Ice Bath: While the eggs cook, prepare a large bowl of ice water. Transfer the eggs to the ice bath and let cool completely, about 10 minutes. This stops the cooking and makes peeling easier.

    3. Peel the Eggs: Gently tap each egg on the counter to crack the shell, then roll it between your hands to loosen the shell. Peel under running water to help remove any stubborn pieces.

    4. Slice and Remove Yolks: Slice each egg in half lengthwise. Gently remove the yolks and place them in a medium bowl. Arrange the egg white halves on a serving platter.

    5. Make the Filling: Mash the yolks with a fork until finely crumbled. Add the mayonnaise, mustard, vinegar (or pickle juice), pickle relish (if using), salt, and pepper. Mix until smooth. For an ultra-smooth filling, press through a fine-mesh sieve or use a small food processor.

    6. Fill the Eggs: Transfer the filling to a piping bag fitted with a star tip (or use a zip-top bag with a corner snipped off). Pipe the filling into each egg white half, dividing evenly.

    7. Garnish and Serve: Sprinkle with paprika and garnish with fresh parsley or chives if desired. Refrigerate until ready to serve. Serve chilled.

    Pro-Tips for Deviled Egg Perfection

    • Use Older Eggs: Fresh eggs are harder to peel. Eggs that are a week or two old are ideal.
    • Don’t Overcook: Overcooked eggs develop a green ring around the yolk and a rubbery texture. The 12-minute rest method is foolproof.
    • Ice Bath Is Essential: Shocking the eggs in ice water stops the cooking and makes peeling much easier.
    • Peel Under Running Water: The water helps separate the shell from the egg white.
    • Make Filling Smooth: For the silkiest texture, press the yolk mixture through a fine-mesh sieve or use a food processor.
    • Pipe for Presentation: Piping the filling creates beautiful, uniform deviled eggs.
    • Make Ahead: You can prepare the filling and whites separately a day ahead. Fill just before serving.
    • Variations: Try adding bacon, horseradish, hot sauce, or fresh herbs.

    These Classic Deviled Eggs are creamy, tangy, and perfect for parties.

  • Ultimate Italian Meatball Sub: Hearty, Cheesy and Irresistible

    Ultimate Italian Meatball Sub: Hearty, Cheesy and Irresistible

    The Italian meatball sub is the king of sandwiches—tender, flavorful meatballs simmered in rich marinara sauce, piled into a crusty sub roll, and topped with melted provolone and Parmesan cheese. It’s hearty, satisfying, and pure comfort food.

    Whether you’re watching the game, feeding a crowd, or just craving something delicious, this meatball sub delivers. The key is homemade meatballs (or good quality store-bought), a rich sauce, and plenty of cheese. Toast the roll, pile on the meatballs, and broil until the cheese is bubbly and golden. Perfection.

    Ingredients

    For the Meatballs:

    • 1 lb (450g) ground beef
    • ½ lb (225g) ground pork
    • 1 cup breadcrumbs
    • ½ cup grated Parmesan cheese
    • ¼ cup fresh parsley, chopped
    • 2 cloves garlic, minced
    • 1 teaspoon salt
    • ½ teaspoon black pepper
    • 2 large eggs, beaten
    • ¼ cup milk
    • 2 tablespoons olive oil, for browning

    For the Marinara Sauce:

    • 2 tablespoons olive oil
    • 1 small onion, finely chopped
    • 3 cloves garlic, minced
    • 1 (28 oz / 800g) can crushed tomatoes
    • 1 teaspoon dried basil
    • 1 teaspoon dried oregano
    • ½ teaspoon sugar
    • Salt and pepper to taste
    • Fresh basil, for garnish

    For Assembly:

    • 4 crusty Italian sub rolls
    • 8 slices provolone cheese
    • ¼ cup grated Parmesan cheese
    • Butter or olive oil, for toasting rolls

    Instructions

    1. Make the Meatballs: In a large bowl, combine the ground beef, ground pork, breadcrumbs, Parmesan, parsley, garlic, salt, pepper, eggs, and milk. Mix gently with your hands until just combined—do not overmix. Form into 1½-inch meatballs (about 16-20 meatballs).

    2. Brown the Meatballs: In a large skillet or Dutch oven, heat the olive oil over medium-high heat. Working in batches, brown the meatballs on all sides, about 5-7 minutes per batch. Transfer to a plate and set aside.

    3. Make the Marinara: In the same pot, add the olive oil for the sauce. Add the onion and cook until softened, about 5 minutes. Add the garlic and cook for 1 minute. Stir in the crushed tomatoes, basil, oregano, sugar, salt, and pepper. Bring to a simmer.

    4. Simmer the Meatballs: Return the meatballs to the pot, nestling them into the sauce. Cover and simmer over low heat for 20-30 minutes, until the meatballs are cooked through and the flavors meld.

    5. Preheat Broiler: Preheat your oven’s broiler to high.

    6. Prepare the Rolls: Split the sub rolls open, but don’t cut all the way through. Place them on a baking sheet, cut-side up. Lightly toast under the broiler for 1-2 minutes until golden.

    7. Assemble the Subs: Remove the rolls from the oven. Place 4-5 meatballs in each roll, along with plenty of marinara sauce. Top each with 2 slices of provolone cheese and a sprinkle of Parmesan.

    8. Broil: Return the sandwiches to the oven and broil for 2-3 minutes, until the cheese is melted, bubbly, and golden brown.

    9. Serve: Remove from the oven, garnish with fresh basil, and serve immediately.

    Pro-Tips for Meatball Sub Perfection

    • Don’t Overmix Meatballs: Overmixing makes them tough. Mix gently until just combined.
    • Brown the Meatballs Well: That browned crust adds tons of flavor.
    • Simmer in Sauce: Letting the meatballs simmer in the sauce makes them incredibly flavorful.
    • Use Crusty Rolls: A sturdy roll is essential—it won’t get soggy.
    • Toast the Rolls: This adds texture and prevents sogginess.
    • Plenty of Cheese: Don’t skimp—provolone melts beautifully, and Parmesan adds salty depth.
    • Make Ahead: The meatballs and sauce can be made a day ahead and reheated.
    • Freezer Friendly: Meatballs and sauce freeze beautifully for up to 3 months.

    This Ultimate Italian Meatball Sub is hearty, cheesy, and absolutely irresistible.

  • Crispy Fish Tacos: Baja-Style Perfection

    Crispy Fish Tacos: Baja-Style Perfection

    Baja-style fish tacos are the stuff of dreams—crispy, beer-battered fish filets served in warm corn tortillas with creamy slaw, fresh pico de gallo, and a drizzle of crema. They’re the perfect combination of textures and flavors: crunchy, creamy, fresh, and a little bit spicy.

    Originating in Baja California, Mexico, these tacos have become a beloved favorite everywhere. This recipe delivers that authentic experience at home, with tips for achieving the crispiest beer batter and all the classic toppings.

    Ingredients

    For the Beer-Battered Fish:

    • 1 lb (450g) cod or other firm white fish, cut into 3-4 inch strips
    • 1 cup (125g) all-purpose flour
    • ½ cup (65g) cornstarch
    • 1 teaspoon baking powder
    • 1 teaspoon salt
    • ½ teaspoon black pepper
    • ½ teaspoon paprika
    • ¼ teaspoon cayenne pepper (optional)
    • 1½ cups (360ml) ice-cold beer (lager or pilsner)
    • Vegetable oil, for frying

    For the Creamy Slaw:

    • 2 cups shredded purple cabbage
    • ¼ cup mayonnaise
    • 2 tablespoons sour cream or Mexican crema
    • 1 tablespoon lime juice
    • 1 teaspoon honey or sugar
    • ¼ cup chopped cilantro
    • Salt to taste

    For the Crema:

    • ½ cup sour cream or Mexican crema
    • 2 tablespoons mayonnaise
    • 1 tablespoon lime juice
    • 1 teaspoon hot sauce (optional)
    • Salt to taste

    For Assembly:

    • 8-12 corn tortillas
    • Pico de gallo or fresh salsa
    • Fresh cilantro, chopped
    • Lime wedges
    • Crumbled cotija cheese (optional)

    Instructions

    1. Make the Crema: In a small bowl, whisk together the sour cream, mayonnaise, lime juice, hot sauce, and salt. Refrigerate until ready to use.

    2. Make the Slaw: In a medium bowl, whisk together the mayonnaise, sour cream, lime juice, honey, and salt. Add the shredded cabbage and cilantro. Toss to coat. Refrigerate until ready to use.

    3. Make the Batter: In a large bowl, whisk together the flour, cornstarch, baking powder, salt, pepper, paprika, and cayenne. Gradually whisk in the ice-cold beer until the batter is smooth and the consistency of thin pancake batter. Keep the batter cold (set the bowl in an ice bath if needed).

    4. Heat the Oil: In a heavy-bottomed pot or deep fryer, heat about 2 inches of oil to 350°F (175°C).

    5. Coat and Fry the Fish: Pat the fish strips dry with paper towels. Dip each piece into the batter, allowing excess to drip off. Carefully lower into the hot oil. Fry in small batches for 3-4 minutes, turning occasionally, until golden brown and crispy. Drain on a wire rack.

    6. Warm the Tortillas: While the fish fries, warm the tortillas in a dry skillet or microwave until soft and pliable. Keep covered.

    7. Assemble the Tacos: Place a piece of crispy fish on each tortilla. Top with creamy slaw, pico de gallo, a drizzle of crema, and a sprinkle of cilantro. Serve with lime wedges.

    8. Serve Immediately: These tacos are best enjoyed right away, while the fish is still crispy.

    Pro-Tips for Crispy Fish Taco Perfection

    • Keep the Batter Cold: Ice-cold batter hitting hot oil creates the crispiest crust. Set the bowl in an ice bath.
    • Use a Thermometer: Maintaining oil temperature is crucial for crispy, not greasy, fish.
    • Don’t Overcrowd: Fry in small batches to keep oil temperature steady.
    • Drain on a Rack: Paper towels can make the coating soggy. A wire rack keeps it crispy.
    • Warm Tortillas Properly: Cold tortillas crack and aren’t as flavorful.
    • Double Corn Tortillas: Use two small corn tortillas per taco for sturdiness.
    • Customize Toppings: Add sliced avocado, pickled onions, or a spicy salsa for variety.
    • Serve Immediately: Fish tacos wait for no one—the crispy fish needs to be enjoyed right away.

    These Crispy Fish Tacos are Baja-style perfection—absolutely delicious.

  • Garlic Butter Salmon: Easy, Elegant and Ready in 15 Minutes

    Garlic Butter Salmon: Easy, Elegant and Ready in 15 Minutes

    Garlic butter salmon is the perfect weeknight dinner—quick, easy, and elegant enough for company. Perfectly seared salmon fillets with crispy skin are bathed in a rich, nutty garlic butter sauce with fresh lemon and parsley.

    It comes together in under 15 minutes, making it ideal for busy nights when you still want something special. The key is a hot skillet for that perfect sear, and a simple pan sauce that comes together in the same pan. Serve it with roasted vegetables, rice, or a simple salad for a complete meal.

    Ingredients

    For the Salmon (serves 4):

    • 4 (6 oz / 170g each) salmon fillets, skin on or off
    • Salt and freshly ground black pepper to taste
    • 1 tablespoon olive oil
    • 2 tablespoons unsalted butter

    For the Garlic Butter Sauce:

    • 3 tablespoons unsalted butter
    • 4 cloves garlic, minced
    • 2 tablespoons fresh lemon juice (about ½ lemon)
    • ¼ cup fresh parsley, chopped
    • Lemon zest from ½ lemon (optional)
    • Salt to taste

    For Serving:

    • Lemon wedges
    • Fresh parsley

    Instructions

    1. Prepare the Salmon: Remove salmon from the refrigerator 10-15 minutes before cooking to take the chill off. Pat the fillets completely dry with paper towels—this is essential for crispy skin. Season both sides generously with salt and pepper.

    2. Heat the Skillet: Heat a large skillet (preferably cast iron or non-stick) over medium-high heat. Add the olive oil and 2 tablespoons of butter. Swirl to coat.

    3. Sear the Salmon: Place the salmon fillets in the hot skillet, skin-side down if they have skin. Cook without moving for 4-5 minutes, until the skin is golden and crispy and the fish releases easily from the pan.

    4. Flip and Finish: Carefully flip the salmon fillets. Cook for another 2-4 minutes, depending on thickness, until the salmon is cooked to your desired doneness (125°F / 52°C for medium-rare, 135°F / 57°C for medium). Remove salmon to a plate and tent loosely with foil.

    5. Make the Garlic Butter Sauce: Reduce heat to medium-low. Add the remaining 3 tablespoons butter to the same skillet. Once melted, add the minced garlic and cook for 30-60 seconds until fragrant but not browned.

    Stir in the lemon juice, parsley, and lemon zest (if using). Season with salt to taste. Scrape up any browned bits from the bottom of the pan.

    6. Serve: Spoon the garlic butter sauce over the salmon fillets. Serve immediately with lemon wedges and additional fresh parsley.

    Pro-Tips for Garlic Butter Salmon Perfection

    • Pat the Salmon Dry: This is essential for crispy skin and a good sear. Use paper towels and be thorough.
    • Don’t Move the Fish: Let it cook undisturbed until it releases easily from the pan—this ensures a beautiful crust.
    • Use a Thermometer: For perfectly cooked salmon, use an instant-read thermometer. 125°F for medium-rare, 135°F for medium.
    • Don’t Overcook: Salmon continues to cook from residual heat. Remove it from the pan when it’s just shy of your desired doneness.
    • Save the Skin: The crispy skin is delicious—don’t remove it.
    • Fresh Garlic Only: Garlic powder won’t give the same flavor. Use fresh garlic.
    • Make It a Meal: Serve with roasted asparagus, rice, or a simple green salad.
    • Double the Sauce: The sauce is so good you might want extra.

    This Garlic Butter Salmon is easy, elegant, and absolutely delicious.

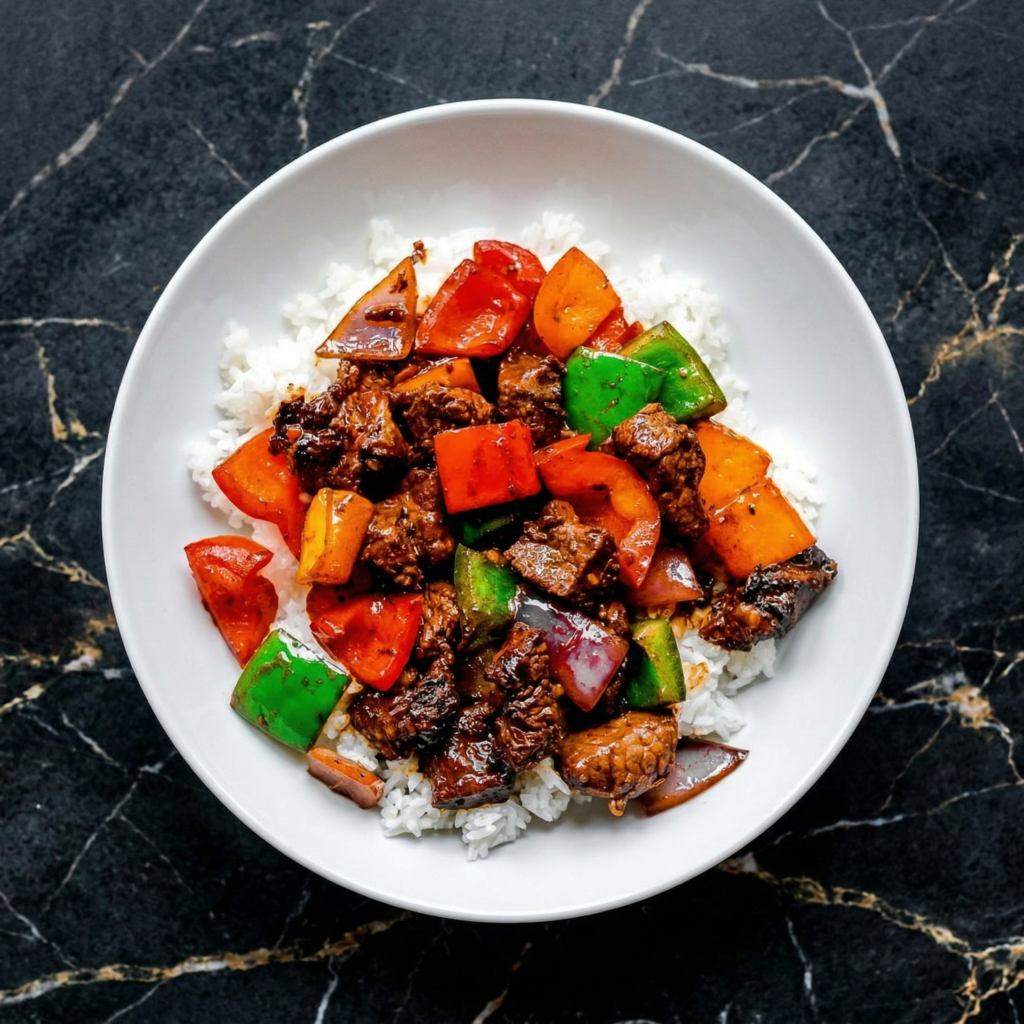
  • Chinese Pepper Steak: Better Than Takeout

    Chinese Pepper Steak: Better Than Takeout

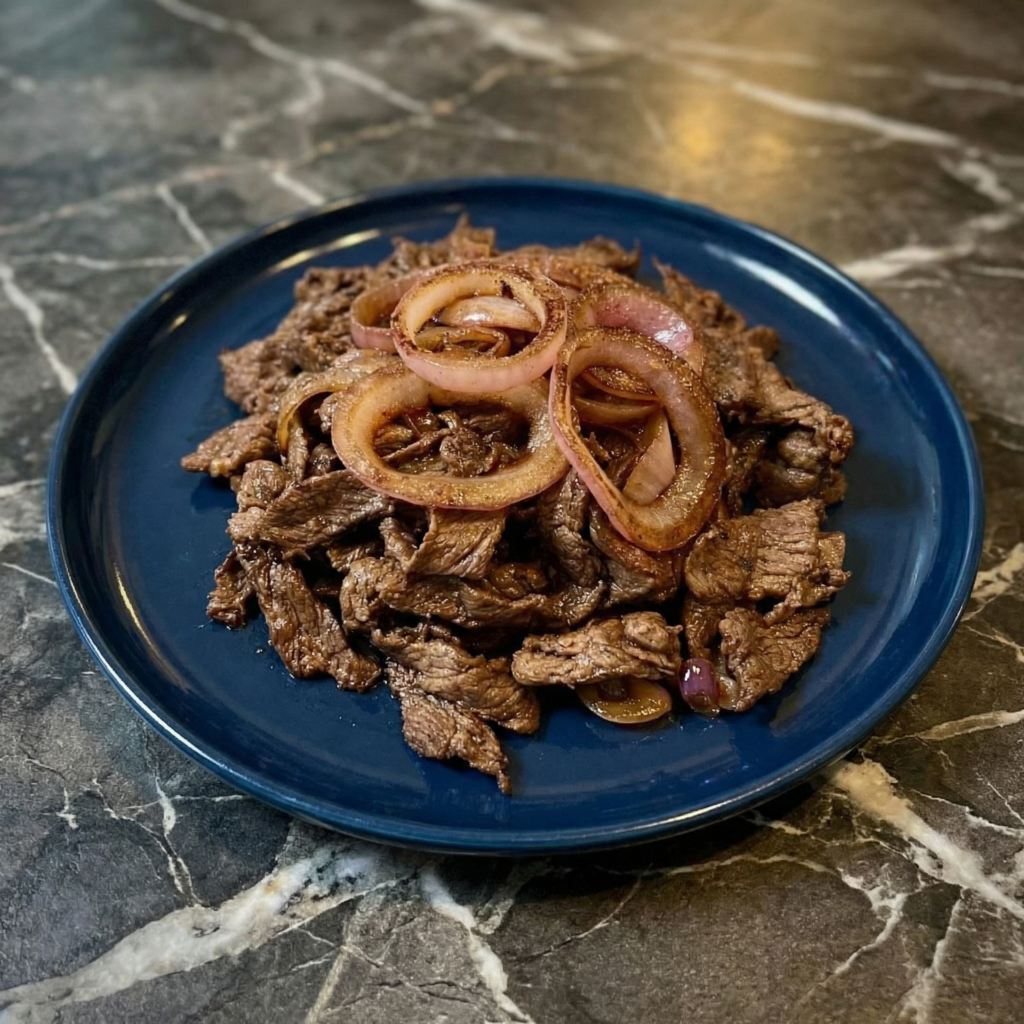
    Chinese pepper steak is a beloved takeout classic—tender strips of beef stir-fried with crisp bell peppers and onions in a rich, savory black pepper sauce. It’s quick, satisfying, and surprisingly easy to make at home.

    The key is velveting the beef for tenderness, getting a good sear on the meat, and creating a sauce that’s perfectly balanced between savory, sweet, and peppery. Serve it over steamed rice for a weeknight dinner that beats any delivery.

    Ingredients

    For the Beef:

    • 1 lb (450g) flank steak or sirloin, thinly sliced against the grain
    • 2 teaspoons soy sauce
    • 1 teaspoon dark soy sauce (optional, for color)
    • 1 tablespoon cornstarch
    • 1 teaspoon vegetable oil
    • ¼ teaspoon white pepper

    For the Sauce:

    • ½ cup (120ml) beef broth
    • 2 tablespoons soy sauce
    • 1 tablespoon oyster sauce
    • 1 tablespoon dark soy sauce
    • 1 teaspoon sugar
    • 1 teaspoon freshly ground black pepper (or more to taste)
    • 1 tablespoon cornstarch mixed with 2 tablespoons water (slurry)

    For the Stir-Fry:

    • 3 tablespoons vegetable oil, divided
    • 1 green bell pepper, sliced into strips
    • 1 red bell pepper, sliced into strips
    • 1 medium onion, sliced
    • 3 cloves garlic, minced
    • 1 tablespoon fresh ginger, grated
    • 3 green onions, cut into 2-inch lengths (optional)

    Instructions

    1. Prepare the Beef: In a bowl, combine the sliced beef with soy sauce, dark soy (if using), cornstarch, oil, and white pepper. Mix well until each piece is coated. Let marinate for 15-20 minutes while you prepare the other ingredients.

    2. Make the Sauce: In a small bowl, whisk together the beef broth, soy sauce, oyster sauce, dark soy sauce, sugar, and black pepper. Set aside. In a separate tiny bowl, prepare the cornstarch slurry.

    3. Sear the Beef: Heat your wok or largest skillet over high heat until smoking. Add 2 tablespoons of oil and swirl to coat. Add the beef in a single layer (work in batches if needed).

    Let sear without moving for 1 minute until browned on one side. Stir-fry for another 30-60 seconds until just cooked through. Transfer to a plate and set aside.

    4. Stir-Fry Vegetables: Add the remaining 1 tablespoon oil to the wok. Add the bell peppers and onion. Stir-fry for 2-3 minutes until crisp-tender. Add the garlic and ginger and stir-fry for 30 seconds until fragrant.

    5. Add Sauce: Give the sauce a quick stir and pour it into the wok. Bring to a simmer and cook for 1-2 minutes.

    6. Thicken Sauce: Stir the cornstarch slurry again and slowly add it to the wok while stirring constantly. Cook until the sauce thickens and becomes glossy, about 30 seconds.

    7. Combine: Return the beef to the wok along with the green onions (if using). Toss everything together until the beef is heated through and coated in the sauce, about 1 minute.

    8. Serve: Transfer to a serving platter and serve immediately with steamed rice.

    Pro-Tips for Pepper Steak Perfection

    • Slice Beef Thinly Against the Grain: This ensures tender bites. Freeze the beef for 20-30 minutes before slicing for easier cutting.
    • Velvet the Beef: The cornstarch marinade is essential for that tender, silky texture.
    • High Heat Is Key: A screaming-hot wok creates a good sear and keeps vegetables crisp.
    • Work in Batches: Don’t overcrowd the pan—it lowers the temperature and steams the ingredients instead of searing them.
    • Fresh Black Pepper: Use freshly ground black pepper for the best flavor.
    • Don’t Overcook Vegetables: They should be crisp-tender, not soft.
    • Serve Immediately: This dish is best fresh, right out of the wok.
    • Make It Spicy: Add sliced chili peppers or red pepper flakes for extra heat.

    This Chinese Pepper Steak is better than takeout—absolutely delicious.

  • Beef Kofta Skewers: Middle Eastern Grilled Perfection

    Beef Kofta Skewers: Middle Eastern Grilled Perfection

    Beef kofta skewers are a Middle Eastern classic—juicy, spiced ground beef molded onto skewers and grilled to perfection. The combination of warm spices like cumin, coriander, and paprika, along with fresh parsley and onion, creates incredibly flavorful and tender meat.

    Served with creamy tahini sauce, warm pita, and a fresh salad, they make for an unforgettable meal. Whether you’re grilling outdoors or using a grill pan indoors, these kofta skewers are sure to impress.

    Ingredients

    For the Beef Kofta:

    • 1½ lbs (680g) ground beef (80/20)
    • ½ cup finely chopped onion
    • ¼ cup finely chopped fresh parsley
    • 2 cloves garlic, minced
    • 1 teaspoon ground cumin
    • 1 teaspoon ground coriander
    • 1 teaspoon paprika
    • ½ teaspoon ground cinnamon
    • ½ teaspoon cayenne pepper (optional, for heat)
    • 1 teaspoon salt
    • ½ teaspoon black pepper
    • 2 tablespoons breadcrumbs or panko (optional, for binding)
    • Metal or wooden skewers (if wooden, soak in water for 30 minutes)

    For the Tahini Sauce:

    • ½ cup (120g) tahini
    • ¼ cup (60ml) water (plus more as needed)
    • 3 tablespoons lemon juice
    • 2 cloves garlic, minced
    • ¼ teaspoon salt

    For Serving:

    • Warm pita bread
    • Sliced tomatoes, cucumbers, and red onions
    • Fresh parsley
    • Lemon wedges

    Instructions

    1. Make the Tahini Sauce: In a small bowl, whisk together the tahini, water, lemon juice, garlic, and salt until smooth. Add more water as needed to reach a pourable consistency. Set aside.

    2. Prepare the Kofta Mixture: In a large bowl, combine the ground beef, chopped onion, parsley, garlic, cumin, coriander, paprika, cinnamon, cayenne, salt, pepper, and breadcrumbs (if using). Mix gently with your hands until just combined—do not overmix or the kofta will be tough.

    3. Chill the Mixture: Cover the bowl and refrigerate for at least 30 minutes (up to 2 hours). This helps the flavors meld and makes the mixture easier to shape.

    4. Shape the Kofta: Divide the mixture into 8-10 equal portions. Take a portion and mold it around a skewer, forming a long, sausage-like shape about 1 inch thick and 4-5 inches long.

    Press firmly so it adheres to the skewer. Place on a baking sheet lined with parchment paper. Repeat with remaining portions.

    5. Preheat the Grill: Preheat your grill, grill pan, or broiler to medium-high heat. Oil the grates well to prevent sticking.

    6. Grill the Kofta: Place the kofta skewers on the hot grill. Cook for 8-12 minutes, turning occasionally, until the kofta are charred on the outside and cooked through (internal temperature of 160°F / 71°C).

    7. Rest: Remove from the grill and let rest for 5 minutes before serving.

    8. Serve: Serve the kofta skewers with warm pita bread, tahini sauce, fresh vegetables, and lemon wedges. To eat, slide the kofta off the skewer into a pita, add toppings, and drizzle with tahini.

    Pro-Tips for Beef Kofta Perfection

    • Use 80/20 Ground Beef: The fat content keeps the kofta juicy. Leaner beef will be dry.
    • Don’t Overmix: Overmixing can make the kofta tough and dense. Mix just until combined.
    • Chill Before Shaping: Chilled mixture is much easier to shape and stays on the skewers better.
    • Wet Your Hands: Lightly wet hands when shaping to prevent sticking.
    • Oil the Grates: A well-oiled grill prevents sticking and ensures beautiful grill marks.
    • Don’t Overcook: Kofta should be cooked through but still juicy—160°F is perfect.
    • Soak Wooden Skewers: If using wooden skewers, soak them in water for 30 minutes to prevent burning.
    • Make It a Feast: Serve with hummus, tabbouleh, and fattoush for a complete Middle Eastern spread.

    These Beef Kofta Skewers are Middle Eastern grilled perfection—absolutely delicious.

  • Potato Pavé: Layered Potato Perfection

    Potato Pavé: Layered Potato Perfection

    Potato pavé is the epitome of French culinary elegance—thinly sliced potatoes layered with cream and butter, pressed, chilled, then cut into rectangles and fried until golden and crispy.

    The result is a potato dish that’s crispy on the outside, impossibly tender and creamy within, with beautiful visible layers. It’s like the most luxurious potato gratin, transformed into a stunning individual serving.

    While it takes time and patience, the result is absolutely worth it—a show-stopping side dish that will impress any guest.

    Ingredients

    For the Potato Pavé (serves 6-8):

    • 2 lbs (900g) Yukon Gold or Russet potatoes
    • 1 cup (240ml) heavy cream
    • 2 cloves garlic, minced
    • 1 teaspoon salt
    • ½ teaspoon white pepper
    • ¼ teaspoon freshly grated nutmeg
    • 2 tablespoons unsalted butter, melted
    • Fresh thyme leaves (optional)
    • Vegetable oil or clarified butter, for frying
    • Flaky sea salt, for finishing

    Instructions

    1. Prep the Potatoes: Peel the potatoes and use a mandoline to slice them paper-thin (about 1/16 inch). As you work, place the slices in a bowl of cold water to prevent browning.

    2. Prepare the Cream Mixture: In a large bowl, whisk together the heavy cream, minced garlic, salt, white pepper, and nutmeg.

    3. Layer the Potatoes: Drain the potato slices and pat them completely dry with kitchen towels. Add them to the cream mixture and toss to coat each slice. Begin layering the potatoes in a parchment-lined loaf pan or terrine mold, arranging them in even layers.

    Press down firmly as you go to eliminate air pockets. Pour any remaining cream mixture over the top. Dot with melted butter and sprinkle with fresh thyme if using.

    4. Bake: Cover the pan with foil and place it in a larger baking dish. Add hot water to the larger dish to create a water bath (bain-marie). Bake at 325°F (165°C) for 1½ to 2 hours, until the potatoes are completely tender when pierced with a knife.

    5. Press Overnight: Remove the pavé from the water bath and let cool to room temperature. Place another piece of parchment paper on top of the pavé, then weight it down with heavy cans or another pan. Refrigerate overnight (at least 8 hours). This pressing is essential for creating the compact layers.

    6. Slice the Pavé: The next day, remove the pavé from the pan by lifting the parchment. Use a sharp knife to cut the pavé into rectangles (about 1½ x 3 inches).

    7. Pan-Fry: Heat a large non-stick skillet over medium-high heat with a generous amount of oil or clarified butter. Working in batches, fry the potato pavé rectangles for 3-4 minutes per side, until golden brown and crispy on all sides. Drain briefly on a wire rack.

    8. Serve: Sprinkle with flaky sea salt and fresh thyme. Serve immediately.

    Pro-Tips for Potato Pavé Perfection

    • Use a Mandoline: Even, paper-thin slices are essential for the layered effect and even cooking.
    • Dry the Slices Thoroughly: After soaking, pat the potatoes completely dry so the cream mixture adheres properly.
    • Press Firmly: The overnight pressing is crucial for creating those beautiful compact layers.
    • Don’t Skip the Water Bath: It ensures gentle, even cooking and prevents the edges from drying out.
    • Chill Completely: The pavé must be completely chilled and set before slicing, or it will fall apart.
    • Use a Sharp Knife: A sharp knife is essential for clean, neat rectangles.
    • Fry in Batches: Don’t overcrowd the pan—it lowers the temperature and prevents crisping.
    • Serve Immediately: Potato pavé is best fresh and hot, with that perfect crispy exterior.

    This Potato Pavé is layered potato perfection—absolutely elegant.