Category: desserts

  • Mini Pumpkin Pie Bites with Graham Cracker Crust

    Mini Pumpkin Pie Bites with Graham Cracker Crust

    Transform the classic Thanksgiving dessert into a charming, shareable treat. These Mini Pumpkin Pie Bites deliver all the beloved flavors of the season—spiced pumpkin, creamy filling, and a buttery graham cracker crust—in a perfectly portable, two-bite package.

    They’re surprisingly easy to make, require no rolling of pastry dough, and are a guaranteed hit on any holiday dessert table or as a festive snack.

    The Science of a Stable Mini Filling & No-Soggy Crust

    Creating the perfect mini pie involves two key challenges: a filling that sets firmly in a small space and a crust that stays crisp. The filling uses a higher ratio of egg to pumpkin than a full-sized pie. The eggs provide the protein structure needed to set the filling firmly without a long bake time, which would overcook the crust.

    Using evaporated milk instead of regular milk or cream adds richness and proteins that also aid in setting. For the crust, a pre-baked (par-baked) graham cracker shell is essential. The butter in the crust solidifies during this initial bake, creating a moisture barrier that prevents the wet pumpkin filling from making the base soggy.

    Ingredients

    For the Graham Cracker Crust:

    • 1 ½ cups (150g) graham cracker crumbs (about 12 full sheets)
    • ¼ cup (50g) granulated sugar
    • 6 tablespoons (85g) unsalted butter, melted
    • Pinch of salt

    For the Pumpkin Filling:

    • 1 cup (245g) canned pure pumpkin puree (not pumpkin pie filling)
    • ⅓ cup (67g) packed light brown sugar
    • 1 large egg plus 1 egg yolk, room temperature
    • ¼ cup (60ml) evaporated milk or heavy cream
    • 1 teaspoon vanilla extract
    • 1 teaspoon pumpkin pie spice*
    • ¼ teaspoon salt

    For Serving (optional): Whipped cream or whipped topping.

    Note: You can make your own blend: ½ tsp cinnamon + ¼ tsp ginger + ⅛ tsp nutmeg + ⅛ tsp allspice or cloves.

    Instructions

    1. Make & Pre-Bake the Crusts: Preheat oven to 325°F (165°C). In a bowl, mix graham cracker crumbs, sugar, melted butter, and salt until it resembles wet sand. Press about 1 tablespoon of the mixture firmly into the bottom and up the sides of each cup of a 24-cup mini muffin tin.

    Use a small glass or tamper to compact it. Bake for 6-8 minutes until fragrant. Let cool while you make the filling. Leave the oven on.

    2. Prepare the Pumpkin Filling: In a medium bowl, whisk the pumpkin puree and brown sugar until smooth. Add the whole egg, egg yolk, evaporated milk, vanilla, pumpkin pie spice, and salt. Whisk vigorously until the mixture is completely smooth and uniform in color.

    3. Fill the Crusts: Spoon or pipe the pumpkin filling into the cooled crusts, filling each to just below the rim (about 1 heaping teaspoon each). The filling will not rise much.

    4. Bake Until Set: Bake for 15-18 minutes, until the filling is set around the edges and the center only has a slight jiggle when you gently shake the pan. Do not overbake.

    5. Cool Completely: Let the pies cool in the muffin tin on a wire rack for 30 minutes. Then, carefully run a small offset spatula or knife around the edge of each to loosen. Gently lift each pie bite out and transfer to the rack to cool completely, about 1 hour. They will firm up as they cool.

    6. Serve & Store: Once completely cool, top with a small dollop of whipped cream if desired. Store leftovers in an airtight container in the refrigerator for up to 4 days. Serve chilled or at room temperature.

    Pro-Tips for Perfect Mini Pies

    • Press the Crust Firmly: A well-compacted crust is essential for the bites to hold together when removed from the pan. Use a tamper or the bottom of a small shot glass.
    • Use Pure Pumpkin Puree: Ensure you buy 100% pumpkin, not the pre-sweetened “pumpkin pie filling.”
    • Room Temperature Eggs: They incorporate more smoothly into the filling, preventing a lumpy texture.
    • Don’t Overfill: Leave a tiny gap at the top to make removal easier and prevent spillover.
    • The Jiggle Test: The centers should look slightly underdone when you take them out—they will set fully as they cool. Overbaking can cause cracking.
    • Chill for Clean Removal: If any bites are stubborn, place the entire pan in the fridge for 15 minutes; the chilled butter in the crust will firm up and release.

    These Mini Pumpkin Pie Bites are the ultimate festive, fuss-free holiday dessert.

  • Chewy Chocolate Chip Quinoa Cookies

    Chewy Chocolate Chip Quinoa Cookies

    Who says healthy can’t be indulgent? These cookies are a game-changer, combining the soft, chewy texture of a classic chocolate chip cookie with the wholesome, protein-rich goodness of quinoa.

    The cooked quinoa adds a delightful, slightly nutty flavor and a unique, tender bite that makes these cookies satisfying and delicious. Packed with oats and dark chocolate, they’re the perfect treat for when you want something sweet that also fuels your day.

    The Science of Quinoa in Baking & Moisture Retention

    Incorporating cooked quinoa into cookies is a clever way to add nutrition without compromising texture. The key lies in quinoa’s composition: it’s a complete protein and contains starches that help bind the dough and retain moisture.

    When cooked and cooled, the quinoa grains are soft and slightly sticky, which helps create a chewy, dense crumb rather than a cakey one. The quinoa’s natural moisture also means the cookies stay soft for days.

    Using a combination of oats and all-purpose flour provides structure while maintaining a hearty, whole-grain feel. The high ratio of brown sugar adds moisture and caramel notes, enhancing the quinoa’s nuttiness.

    Ingredients

    For the Cookies:

    • 1 cup (120g) all-purpose flour (or gluten-free 1:1 blend)
    • 1 cup (90g) old-fashioned rolled oats
    • ½ teaspoon baking soda
    • ½ teaspoon baking powder
    • ½ teaspoon salt
    • ½ cup (1 stick / 113g) unsalted butter, softened
    • ¾ cup (150g) packed light brown sugar
    • ¼ cup (50g) granulated sugar
    • 1 large egg, room temperature
    • 1 teaspoon vanilla extract
    • 1 ½ cups (about 225g) cooked and cooled quinoa*
    • 1 cup (170g) dark chocolate chips or chunks

    Note: Cook ½ cup (90g) dry quinoa according to package directions to yield about 1 ½ cups cooked. Spread it on a plate to cool completely before using.

    Instructions

    1. Combine Dry Ingredients: In a medium bowl, whisk together the flour, oats, baking soda, baking powder, and salt. Set aside.

    2. Cream Butter & Sugars: In a large bowl, beat the softened butter, brown sugar, and granulated sugar together with an electric mixer until light and fluffy, about 2-3 minutes.

    3. Add Wet Ingredients: Beat in the egg and vanilla extract until fully combined. The mixture may look slightly curdled if the egg is cold—this is okay.

    4. Incorporate Quinoa & Dry Mix: Using a spatula, stir in the cooled, cooked quinoa until evenly distributed. Gradually add the flour-oat mixture, stirring just until no dry streaks remain. Gently fold in the chocolate chips.

    5. Chill the Dough (Optional but Recommended): For thicker, chewier cookies, cover the bowl and refrigerate the dough for at least 30 minutes. This prevents excessive spreading.

    6. Scoop & Bake: Preheat oven to 350°F (175°C). Line baking sheets with parchment paper. Scoop 2-tablespoon portions of dough, roll into balls, and place 2 inches apart on the sheets. Slightly flatten the tops with your palm. Bake for 12-14 minutes, until the edges are golden brown but the centers still look soft.

    7. Cool & Serve: Let cookies cool on the baking sheet for 5 minutes before transferring to a wire rack to cool completely. They will firm up as they cool. Enjoy warm or at room temperature.

    Pro-Tips for Perfect Quinoa Cookies

    • Cool the Quinoa Thoroughly: Warm quinoa will melt the butter and cause the cookies to spread too much. Spread it on a plate to cool quickly.
    • Don’t Overmix: Once the flour is added, mix just until combined to avoid tough cookies.
    • Chill for Thickness: Chilling the dough solidifies the butter, resulting in a thicker, chewier cookie. If you’re in a rush, you can bake immediately, but they will spread more.
    • Use a Scoop for Evenness: A cookie scoop ensures uniform size and even baking.
    • Underbake Slightly: Take them out when the centers look soft for the ultimate chewy texture.
    • Storage: Store cooled cookies in an airtight container at room temperature for up to 4 days. They also freeze beautifully for up to 2 months.

    These Chewy Chocolate Chip Quinoa Cookies are a deliciously smart way to enjoy a classic treat.

  • Classic Brazilian Brigadeiros

    Classic Brazilian Brigadeiros

    Brigadeiros are the heart and soul of Brazilian celebration—a simple, no-bake confection that is unbelievably rich, fudgy, and fun. With just three core ingredients, they transform into decadent little truffles with a deep chocolate flavor and a uniquely soft, chewy texture.

    Rolled in chocolate sprinkles (granulado), they are a staple at birthday parties, gatherings, and a beloved treat for all ages. Once you try one, you’ll understand why Brazil is obsessed.

    The Science of the Perfect Fudge Consistency

    The magic of a brigadeiro lies in the cooked condensed milk mixture. Sweetened condensed milk is essentially milk with its water removed and sugar added. When heated with cocoa powder and butter, the sugars caramelize slightly and the proteins thicken, transforming the liquid into a soft, pliable fudge.

    The key is cooking it to the exact right stage—the “bottom of the pan” test. As you stir, the mixture will thicken and start to pull away from the bottom of the saucepan, leaving a clear path for a few seconds before slowly filling back in. This indicates enough moisture has evaporated to create a mixture that will hold its shape when rolled but remain soft and chewy when cooled.

    Ingredients

    For the Brigadeiro Mixture:

    • 1 (14 oz / 397g) can of sweetened condensed milk
    • ¼ cup (25g) unsweetened cocoa powder, sifted
    • 2 tablespoons unsalted butter, plus extra for greasing hands
    • Pinch of salt (optional)

    For Coating:

    • ½ cup (about 60g) chocolate sprinkles (granulado)

    Instructions

    1. Cook the Fudge Base: In a medium non-stick saucepan, combine the sweetened condensed milk, sifted cocoa powder, 2 tablespoons of butter, and a pinch of salt. Cook over medium-low heat, stirring constantly and scraping the bottom and sides of the pan with a heatproof spatula.

    2. Cook to the Perfect Consistency: Continue cooking and stirring for 10-15 minutes. The mixture will gradually thicken, bubble slowly, and darken in color.

    It is done when you can run your spatula through the center and the mixture takes 2-3 seconds to fill back in, leaving a clear path on the bottom of the pan. It should be thick enough to hold its shape slightly when a spoonful is dropped.

    3. Chill the Mixture: Immediately pour the hot fudge mixture into a lightly buttered plate or shallow dish. Spread it out to cool faster. Let it cool to room temperature, then cover with plastic wrap (pressed directly onto the surface) and refrigerate for at least 2 hours, or until completely cold and firm enough to handle.

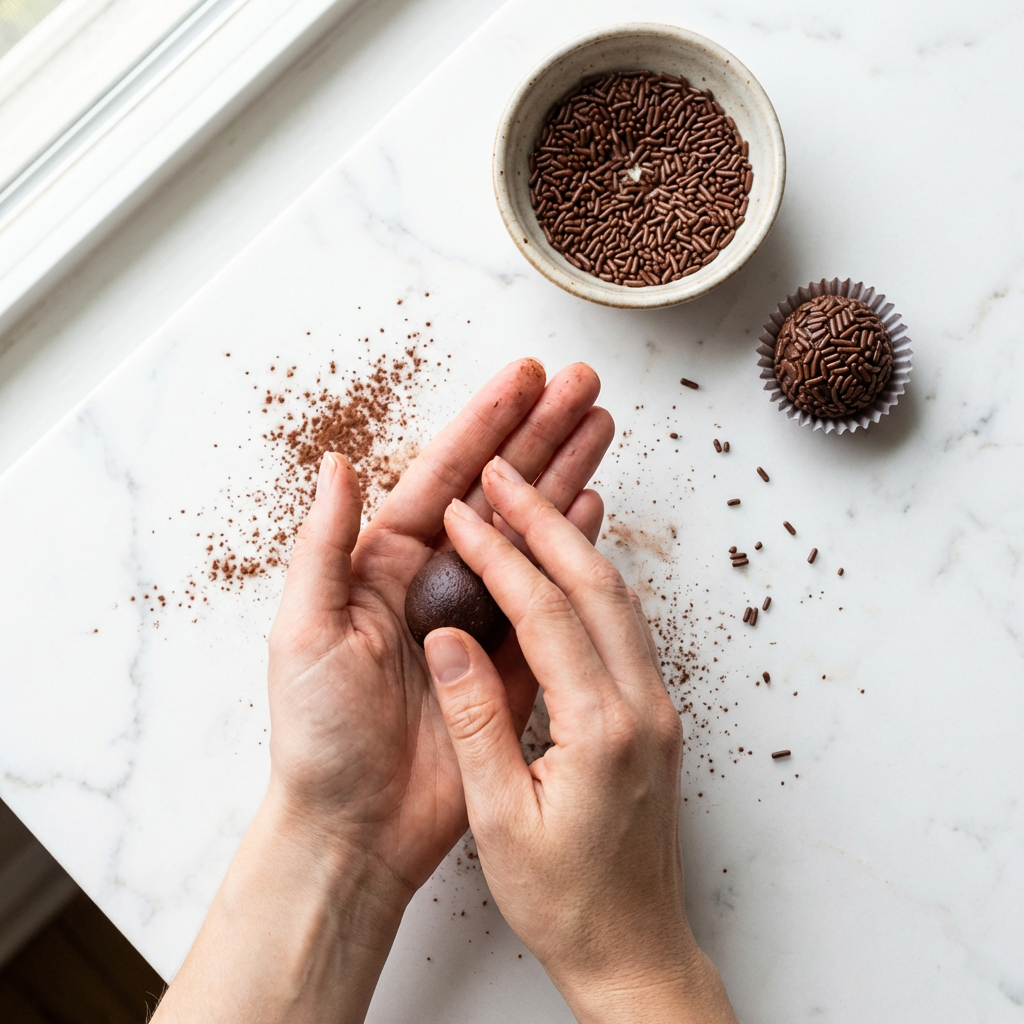
    4. Roll into Balls: Place the chocolate sprinkles in a shallow bowl. Lightly butter your palms. Scoop about 1 teaspoon of the chilled mixture and roll it quickly between your buttered hands into a smooth, round ball (about 1-inch in diameter). If the mixture becomes too sticky, chill it again for 15 minutes.

    5. Coat in Sprinkles: Immediately roll each ball in the chocolate sprinkles until fully covered. Place the finished brigadeiro in a paper candy cup or on a parchment-lined tray.

    6. Serve or Store: Brigadeiros can be served at room temperature or slightly chilled. They will keep in an airtight container in the refrigerator for up to 1 week. For the best texture, let them sit at room temperature for 15 minutes before serving.

    Pro-Tips for Brigadeiro Success

    • Use a Non-Stick Pan & Spatula: This prevents scorching and makes stirring and cleaning much easier.
    • Low and Slow Cooking: Cook over medium-low heat and stir constantly. Rushing with high heat will burn the mixture.
    • The “Pan Test” is Key: Do not stop cooking before the mixture passes the “clear bottom” test. If undercooked, the balls will be too soft and sticky to roll; if overcooked, they will be too hard and crumbly.
    • Butter Your Hands: This is essential to prevent the sticky mixture from adhering to your palms while rolling. Re-butter as needed.
    • Work with Cold Mixture: The fudge must be thoroughly chilled. If it warms up and becomes sticky while rolling, return it to the fridge.
    • Authentic Sprinkles: Seek out “granulado” or chocolate jimmies. The tiny round nonpareil sprinkles are not traditional and will not coat as well.

    These Classic Brazilian Brigadeiros are pure, joyful indulgence.

  • Classic Genoise Sponge Cake

    Classic Genoise Sponge Cake

    The Genoise is the workhorse of the patisserie world—a versatile, elegant sponge cake that is deceptively simple in ingredients but requires precision in technique. Unlike American cakes that use chemical leaveners, the Genoise gets its remarkable volume solely from air whipped into the eggs.

    Enriched with melted butter for flavor and tenderness, it has a fine, uniform crumb that soaks up syrups beautifully, making it the ideal base for layered tortes, rolled cakes, and sophisticated desserts like tiramisu.

    The Science of the Ribbon Stage & Stabilizing the Foam

    The entire structure of a Genoise relies on the egg foam. Whole eggs and sugar are warmed gently over a water bath (bain-marie) to about 110°F (43°C) to dissolve the sugar and make the eggs more elastic.

    They are then whipped at high speed until they reach the “ribbon stage”: the mixture becomes very thick, pale, and falls from the whisk in a thick ribbon that holds its shape on the surface for several seconds. This creates a stable network of tiny air bubbles.

    The flour is then sifted and folded in with extreme care to avoid deflating this delicate foam. Finally, warm melted butter is folded in, which adds flavor but must be incorporated gently to maintain volume.

    Ingredients

    For the Genoise Sponge:

    • 4 large eggs, at room temperature
    • ⅔ cup (135g) granulated sugar
    • 1 teaspoon vanilla extract
    • Pinch of salt
    • 1 cup (125g) cake flour, sifted
    • ¼ cup (½ stick / 57g) unsalted butter, melted and cooled slightly

    Instructions

    1. Prepare Pan & Oven: Preheat oven to 350°F (175°C). Grease the bottom (not the sides) of an 8-inch round cake pan. Line the bottom with parchment paper. Do not grease the sides, as the batter needs to cling to them to rise properly.

    2. Warm & Whip Eggs to Ribbon Stage: In a large heatproof bowl, combine the eggs, sugar, vanilla, and salt. Place the bowl over a pot of simmering water (bain-marie), ensuring the bottom of the bowl does not touch the water.

    Whisk constantly by hand until the mixture is just warm to the touch (about 110°F / 43°C) and the sugar is dissolved—it will feel smooth, not grainy. Remove from heat.

    3. Achieve Full Volume: Using a hand mixer or stand mixer fitted with the whisk attachment, whip the warm egg mixture on high speed for 5-8 minutes. It is ready when it is very thick, pale yellow, and has tripled in volume. When you lift the whisk, the batter should fall in a thick ribbon that holds its shape on the surface for at least 3 seconds.

    4. Fold in Flour & Butter: Sift half of the cake flour over the egg foam. Using a large balloon whisk or flexible spatula, gently fold until mostly incorporated. Sift the remaining flour over the top and fold just until no dry streaks remain.

    Take about 1 cup of this batter and fold it into the slightly warm melted butter in a separate bowl to lighten it. Then, gently fold this butter mixture back into the main batter until just combined.

    5. Bake Immediately: Pour the batter into the prepared pan and gently smooth the top. Tap the pan lightly on the counter to release large air bubbles. Bake for 25-30 minutes, until the top is golden brown, springs back when lightly touched, and the edges just begin to pull away from the pan.

    6. Cool Upside Down: Immediately upon removing from the oven, run a thin knife around the edge of the pan to loosen the cake. Invert the cake onto a wire rack and remove the pan. Peel off the parchment paper. Let the cake cool completely upside down on the rack. This prevents it from collapsing.

    Pro-Tips for a Light, Tall Genoise

    • Room Temperature Eggs are Essential: Cold eggs will not whip to the necessary volume.
    • Dissolve the Sugar Completely: The warming step is crucial. If the sugar isn’t fully dissolved, the eggs won’t whip properly and the cake may be grainy.
    • Whip to Full Ribbon Stage: Do not under-whip. The ribbon must hold its shape. This is your only leavening.
    • Use Cake Flour: Its lower protein content is essential for a tender crumb. If you must substitute, use 7/8 cup all-purpose flour + 2 tablespoons cornstarch per cup of cake flour.
    • Fold with a Light Hand: Use a whisk or spatula in a gentle “J” folding motion. Over-mixing or stirring will deflate the batter.
    • Cool Upside Down: This traditional step helps stretch the delicate cake structure as it cools, preventing sinking.

    This Classic Genoise Sponge Cake is the first step to creating stunning, professional-quality desserts.

  • Ultimate Devil’s Food Cake with Chocolate Frosting

    Ultimate Devil’s Food Cake with Chocolate Frosting

    This is the chocolate cake of all chocolate cakes. Devil’s food is defined by its deep, almost reddish-brown color, supremely moist and tender crumb, and intense chocolate flavor achieved by using both cocoa powder and melted dark chocolate.

    Paired with a tangy, silky chocolate sour cream frosting that cuts through the richness, this cake is a show-stopping, decadent masterpiece perfect for any celebration where only the deepest chocolate will do.

    The Science of Deep Color & Extreme Moistness

    What separates devil’s food from other chocolate cakes is its unique pH balance and moisture content. The recipe uses a combination of natural cocoa powder (which is acidic) and baking soda.

    When combined with a hot liquid like coffee, this creates a chemical reaction that deepens the cake’s color to a rich mahogany and tenderizes the crumb dramatically.

    Additionally, using oil instead of butter and incorporating buttermilk or sour cream ensures the cake stays incredibly moist for days. The melted chocolate in the batter adds fat and cocoa solids for a more complex, fudgy flavor than cocoa powder alone can provide.

    Ingredients

    For the Devil’s Food Cake:

    • 1 ¾ cups (219g) all-purpose flour
    • ¾ cup (75g) unsweetened natural cocoa powder
    • 2 teaspoons baking soda
    • 1 teaspoon baking powder
    • 1 teaspoon salt
    • 2 cups (400g) granulated sugar
    • 2 large eggs, room temperature
    • ½ cup (120ml) vegetable oil
    • 1 cup (240g) full-fat sour cream, room temperature
    • 2 teaspoons vanilla extract
    • 4 oz (115g) bittersweet chocolate, melted and slightly cooled
    • 1 cup (240ml) hot strong brewed coffee or hot water

    For the Chocolate Sour Cream Frosting:

    • 12 oz (340g) semi-sweet or bittersweet chocolate, finely chopped
    • 1 ½ cups (3 sticks / 340g) unsalted butter, softened
    • 1 cup (240g) full-fat sour cream, room temperature
    • 1 teaspoon vanilla extract
    • Pinch of salt
    • 3-4 cups (360-480g) confectioners’ sugar, sifted

    Instructions

    1. Bake the Cake Layers: Preheat oven to 350°F (175°C). Grease and flour three 8-inch round cake pans and line the bottoms with parchment. Sift flour, cocoa, baking soda, baking powder, and salt. In a large bowl, whisk sugar, eggs, and oil until combined. Whisk in sour cream and vanilla, then the melted chocolate.

    Alternately add the dry ingredients and hot coffee in three additions, beginning and ending with dry, mixing until just smooth (batter will be thin). Divide evenly among pans. Bake for 25-30 minutes until a toothpick comes out clean. Cool in pans 10 minutes, then turn out onto wire racks to cool completely.

    2. Make the Frosting Base: Melt the chopped chocolate in a heatproof bowl over simmering water or in short bursts in the microwave. Let cool until lukewarm.

    In a large bowl, beat the softened butter until creamy. Beat in the room-temperature sour cream, vanilla, and salt until combined (it may look curdled—this is okay). Beat in the lukewarm melted chocolate until smooth.

    3. Finish the Frosting: With the mixer on low, gradually add 3 cups of sifted confectioners’ sugar. Beat on medium-high for 2-3 minutes until very smooth, light, and spreadable. If too soft for piping, add more sugar, ¼ cup at a time. If too thick, add a teaspoon of milk.

    4. Assemble & Crumb Coat: Place one cake layer on a serving plate. Spread with about ¾ cup of frosting. Repeat with the second layer. Top with the third layer. Apply a thin layer of frosting over the entire cake to seal in crumbs. Refrigerate for 30 minutes to set.

    5. Frost the Cake: Use the remaining frosting to generously frost the top and sides of the chilled cake, creating a smooth finish. A bench scraper or offset spatula works best.

    6. Decorate & Serve: Decorate with chocolate shavings, curls, or a drizzle of melted chocolate. Let the cake sit at room temperature for at least 1 hour before slicing for the best texture. Store covered at room temperature for up to 2 days, or refrigerated for up to 5 days.

    Pro-Tips for the Ultimate Devil’s Food Cake

    • Use Natural Cocoa Powder: Do not substitute Dutch-process cocoa. The acid in natural cocoa is needed to react with the baking soda for the correct rise and color.
    • Room Temperature Ingredients: Eggs, sour cream, and butter for the frosting must be at room temperature to emulsify properly and prevent a greasy or lumpy texture.
    • Hot Coffee Enhances Flavor: The coffee intensifies the chocolate flavor without adding a coffee taste. You can use hot water, but coffee is highly recommended.
    • Thin Batter is Normal: Don’t be alarmed—the batter will be quite liquid. This contributes to the cake’s exceptional moisture.
    • Cool Cake Layers Completely: Frosting a warm cake is a recipe for sliding layers and melted frosting.
    • Frosting Consistency: The sour cream frosting is rich and tangy. If your kitchen is warm, chill the frosting for 15 minutes before the final coat for better spreadability.

    This Ultimate Devil’s Food Cake is a chocolate lover’s dream come true.

  • Classic Palmiers (French Elephant Ear Cookies)

    Classic Palmiers (French Elephant Ear Cookies)

    Palmiers are the ultimate example of culinary alchemy: transforming a sheet of store-bought puff pastry and a pile of sugar into elegant, shatteringly crisp, caramelized cookies. Their beautiful heart shape and glass-like crunch make them look like they came from a fancy patisserie, yet they are deceptively simple to make.

    With just a few folds, a sprinkle of sugar, and a hot oven, you can create these irresistible treats that are perfect for any occasion.

    The Science of Caramelization & The “Double-Fold”

    The magic of a perfect palmier lies in two processes: laminated layers and sugar caramelization. Store-bought puff pastry is made up of hundreds of thin layers of dough separated by butter. When baked, the water in the butter and dough turns to steam, pushing the layers apart to create incredible flakiness.

    The heavy coating of granulated sugar plays a dual role: it draws out moisture from the pastry’s surface, promoting crispness, and it melts and caramelizes in the oven’s heat, creating that signature glossy, sweet, crunchy exterior.

    The classic “double-fold” technique—rolling each side inward to meet at the center—creates the tight, concentric layers that fan out into the iconic heart shape during baking.

    Ingredients

    For the Palmiers:

    • 1 sheet (about 8-9 oz) frozen puff pastry, thawed according to package directions
    • ½ cup (100g) granulated sugar, plus more for sprinkling
    • 2 tablespoons unsalted butter, melted (optional, for extra richness)
    • Pinch of fine sea salt (optional)

    For Finishing (optional):

    • Confectioners’ sugar, for dusting

    Instructions

    1. Prepare the Sugared Surface: Unfold the thawed puff pastry sheet on a piece of parchment paper. If it has creases, gently roll it with a rolling pin to smooth them out. Brush lightly with melted butter (if using).

    Sprinkle the entire surface evenly with ¼ cup of the granulated sugar and a tiny pinch of salt. Use the rolling pin to gently press the sugar into the dough.

    2. Fold into the Classic Heart Shape: Imagine a center line running the length of the pastry. Fold one long side inward so it reaches the imaginary center line. Repeat with the opposite long side, so the two folds meet in the middle but do not overlap. You should now have a long, rectangular strip with two folds.

    Sprinkle the top with another 2 tablespoons of sugar. Now, fold one side over the other, as if closing a book. You will have a long, narrow log consisting of six layers of pastry. Wrap in plastic and refrigerate for 30 minutes to firm up.

    3. Slice & Coat: Preheat oven to 400°F (200°C). Line a baking sheet with parchment paper. Remove the chilled log from the fridge. Using a sharp knife, slice the log into ½-inch thick pieces. Dip both cut sides of each slice into the remaining sugar to coat thoroughly.

    4. Bake Until Golden & Caramelized: Place the slices cut-side up on the prepared baking sheet, spaced about 2 inches apart (they will spread significantly). Bake for 10 minutes. The sugar will begin to melt and bubble. Carefully flip each palmier with a thin spatula. Bake for another 5-8 minutes, until deeply golden brown and caramelized on both sides.

    5. Cool & Crisp Up: Transfer the palmiers to a wire rack. They will be soft when hot but will become perfectly crisp as they cool. Let cool completely.

    6. Serve: Once completely cool, dust lightly with confectioners’ sugar if desired. Serve at room temperature. They are best the day they are made but can be stored in an airtight container for 2-3 days.

    Pro-Tips for Perfectly Crisp, Caramelized Palmiers

    • Use Cold Puff Pastry: Work with the pastry while it’s still cold from the fridge for clean folds and to prevent the butter from melting.
    • Generous Sugar Coating: Don’t be shy with the sugar—it’s what creates the signature caramelized crunch and glossy finish.
    • Sharp Knife for Slicing: Use a very sharp knife and a clean sawing motion to slice the log without squashing the delicate layers.
    • Watch Closely While Baking: Sugar can go from perfectly caramelized to burnt quickly. The second side often needs less time than the first.
    • Space Them Out: The palmiers will spread and release sugar syrup as they bake. Giving them ample space prevents sticking and merging.
    • Cool on a Rack: This allows air to circulate, preventing sogginess and ensuring maximum crispness.

    These Classic Palmiers are a simple yet spectacular way to elevate everyday ingredients.

  • Classic Angel Food Cake with Fresh Berries

    Classic Angel Food Cake with Fresh Berries

    Angel food cake is a marvel of baking—a towering, snow-white confection that is as light as air. It contains no butter or egg yolks, deriving its incredible volume and texture solely from perfectly whipped egg whites.

    The result is a sweet, delicate, and fat-free cake with a uniquely soft yet springy crumb. Served simply with a cascade of fresh berries and a dusting of sugar, it is the epitome of an elegant, refreshing dessert.

    The Science of a Sky-High Rise & Stable Structure

    The entire structure of an angel food cake depends on the meringue. Egg whites are whipped with sugar to stiff, glossy peaks, creating a foam that is stabilized by the sugar and the acid from cream of tartar.

    This foam is strong enough to hold the weight of the flour, which is carefully folded in to avoid deflating the precious air bubbles. The tube pan is not just a tradition; it’s essential. The center tube allows heat to penetrate the dense batter from all sides, helping the cake climb up the sides of the pan for maximum height.

    Cooling the cake upside down is critical—it stretches the delicate web of egg proteins downward, preventing the cake from collapsing under its own weight as it cools.

    Ingredients

    For the Cake:

    • 1 ¾ cups (350g) granulated sugar, divided
    • 1 cup (120g) cake flour, sifted
    • ¼ teaspoon salt
    • 12 large egg whites, at room temperature (about 1 ½ cups)
    • 1 ½ teaspoons cream of tartar
    • 1 ½ teaspoons vanilla extract
    • ½ teaspoon almond extract (optional but traditional)

    For Serving:

    • 2 cups fresh mixed berries (strawberries, blueberries, raspberries)
    • Confectioners’ sugar, for dusting
    • Lightly sweetened whipped cream (optional)

    Instructions

    1. Prepare the Dry Mix & Pan: Preheat oven to 350°F (175°C). In a food processor, pulse ¾ cup (150g) of the sugar with the cake flour and salt until very fine and well combined. Sift this mixture twice and set aside. Do not grease your 10-inch tube pan with a removable bottom. The batter needs to cling to the sides to rise properly.

    2. Whip the Egg Whites to Stiff Peaks: In a spotlessly clean, grease-free bowl of a stand mixer, combine the egg whites and cream of tartar. Whip on medium speed until soft peaks form.

    With the mixer running, gradually add the remaining 1 cup (200g) of sugar, about 2 tablespoons at a time. Increase speed to medium-high and whip until the meringue is thick, glossy, and holds very stiff peaks when the beater is lifted. Beat in the vanilla and almond extract.

    3. Fold in the Flour Mixture: Sift about one-quarter of the flour-sugar mixture over the meringue. Using a large balloon whisk or a flexible spatula, gently fold until mostly incorporated. Repeat in three more additions, folding just until the dry ingredients disappear and no streaks remain. Be gentle and efficient to avoid deflating the meringue.

    4. Bake Immediately: Gently spoon the batter into the ungreased tube pan. Smooth the top with a spatula. Run a thin knife or skewer through the batter in a circular motion to eliminate any large air pockets. Bake for 35-40 minutes, until the top is golden brown, dry, and springs back when lightly touched.

    5. Cool Upside Down: Immediately upon removing from the oven, invert the pan onto its cooling legs or over the neck of a bottle. Let the cake cool completely upside down, about 2 hours. This prevents collapse.

    6. Release & Serve: Once completely cool, run a thin, flexible knife around the edges of the pan and the center tube. Gently push the removable bottom up to release the cake. Use a knife to separate the cake from the bottom. Transfer to a serving plate. Top with fresh berries, dust with confectioners’ sugar, and serve with whipped cream if desired.

    Pro-Tips for a Perfect, Lofty Angel Food Cake

    • Spotlessly Clean Bowl & Tools: Any trace of grease or yolk will prevent the egg whites from whipping to their full volume. Wipe your bowl and whisk with lemon juice or vinegar before starting.
    • Room Temperature Egg Whites: They whip up much higher and faster than cold ones.
    • Measure Flour by Weight: For the most accurate and tender result, weigh your cake flour.
    • Do Not Grease the Pan: The batter needs to cling to the sides as it rises. A non-stick pan is fine, but do not add butter or spray.
    • Cool Upside Down: This is non-negotiable. If your tube pan doesn’t have legs, invert it over the neck of a wine or soda bottle.
    • Cut with a Serrated Knife: Use a sawing motion with a serrated knife for clean, beautiful slices without compressing the airy crumb.

    This Classic Angel Food Cake is a testament to the magic of simple ingredients handled with care.

  • Classic 5-Layer Cake with Chocolate Buttercream

    Classic 5-Layer Cake with Chocolate Buttercream

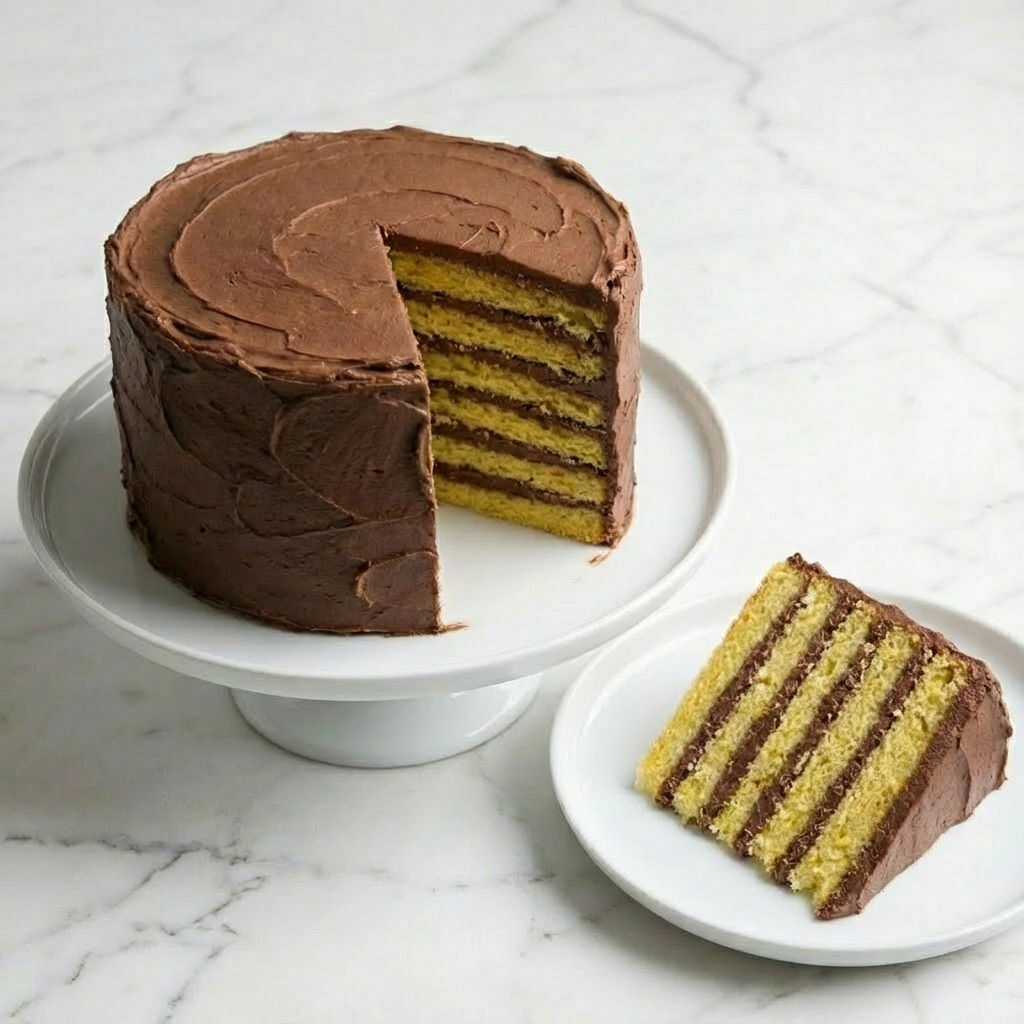
    This is the ultimate baking project for those who love precision and dramatic presentation. A classic 5-Layer Cake isn’t just a dessert—it’s an edible sculpture of alternating, paper-thin yellow cake and decadent chocolate fudge frosting.

    The result is a stunningly tall, visually striking cake with an incredible harmony of textures: tender cake and rich, almost fudgy frosting in every single bite. While it requires patience, the awe-inspiring result is a guaranteed showstopper for any celebration.

    The Art of Thin Layers & A Frosting That Binds

    The magic of this cake lies in its construction. The cake batter is purposefully thin and fluid, designed to spread into exceptionally thin, even layers in the pan. This requires precise baking times (often just 8-10 minutes per layer) to prevent dryness.

    The real star is the cooked chocolate frosting. Unlike a standard buttercream, this frosting begins with a cooked roux-like base of flour and milk, which is then beaten into creamed butter and sugar.

    This method creates a frosting that is exceptionally smooth, stable, and not overly sweet—with a texture that perfectly spreads and sets to hold the delicate cake layers firmly in place without sliding. It’s this frosting that truly defines the classic 5-layer cake.

    Ingredients

    For the Yellow Cake Layers:

    • 2 cups (400g) granulated sugar
    • 1 cup (2 sticks / 226g) unsalted butter, softened
    • 4 large eggs, room temperature
    • 2 teaspoons vanilla extract
    • 3 cups (375g) all-purpose flour, sifted
    • 1 tablespoon baking powder
    • ½ teaspoon salt
    • 1 ¼ cups (300ml) whole milk, room temperature

    For the Cooked Chocolate Frosting:

    • 2 ¼ cups (540ml) whole milk
    • 6 tablespoons (50g) all-purpose flour
    • ½ teaspoon salt
    • 2 ¼ cups (4 ½ sticks / 510g) unsalted butter, softened
    • 2 ¼ cups (450g) granulated sugar
    • 1 ½ cups (135g) unsweetened cocoa powder, sifted
    • 2 teaspoons vanilla extract

    Instructions

    1. Prepare Pans & Oven for Layered Baking: Preheat oven to 350°F (175°C). Trace the outline of an 8-inch round cake pan onto parchment paper five times.

    Cut out the circles and use them to line the bottoms of five separate 8-inch round pans.* Generously grease the pans and parchment. (*If you don’t have 5 pans, bake in batches, reusing 2-3 pans. Let pans cool completely and re-grease/re-line between batches.)

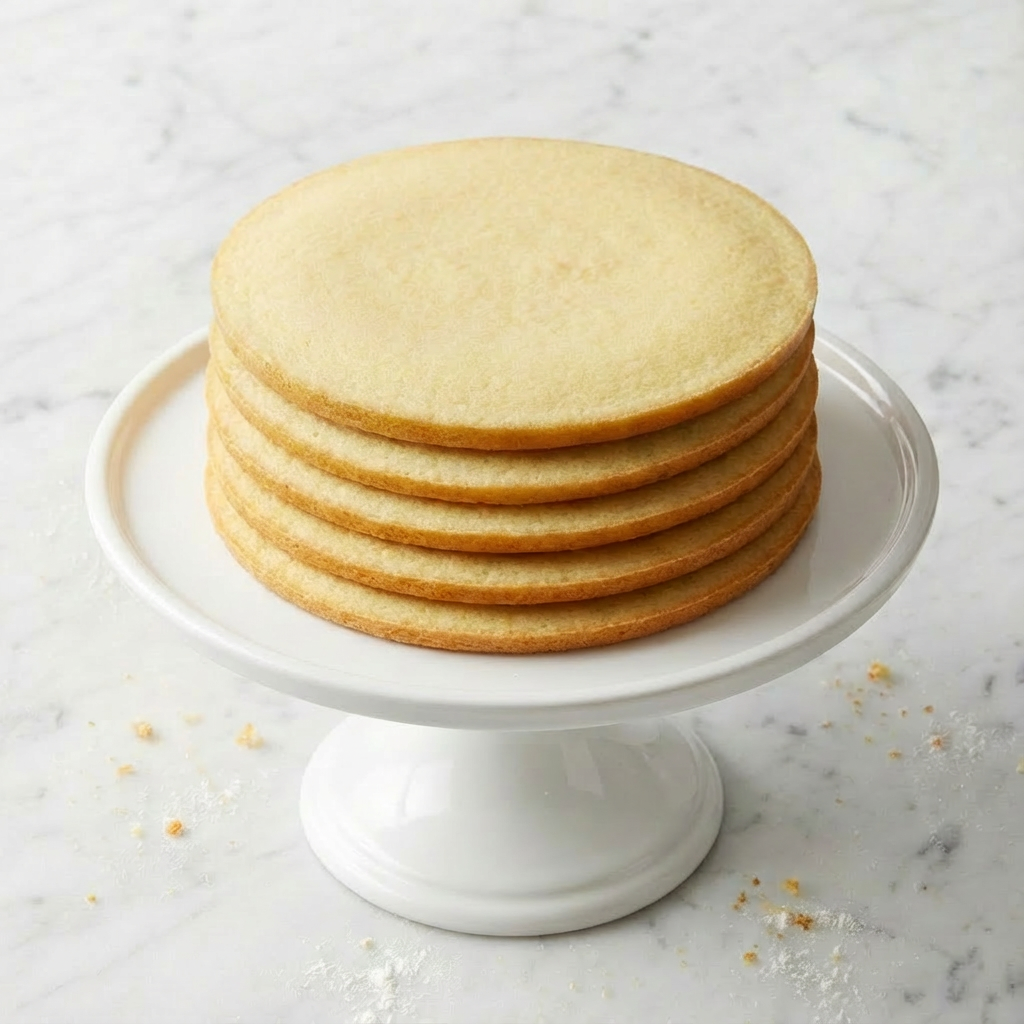
    2. Mix & Bake the Thin Cake Layers: In a large bowl, cream butter and sugar until light and fluffy. Beat in eggs one at a time, then vanilla. In a separate bowl, whisk sifted flour, baking powder, and salt.

    Add dry ingredients to the butter mixture alternately with the milk, beginning and ending with dry, mixing just until combined. The batter will be relatively thin. Divide the batter evenly among the five prepared pans (about ¾ cup batter per pan), spreading it smoothly to the edges.

    Bake for 8-10 minutes per layer, or until the cake springs back when lightly touched and a toothpick comes out clean. Do not overbake. Cool in pans for 5 minutes, then carefully turn out onto wire racks to cool completely. Let layers cool completely before frosting.

    3. Make the Cooked Frosting Base: In a medium saucepan, whisk 2 ¼ cups milk, 6 tbsp flour, and salt until smooth. Cook over medium heat, whisking constantly, until the mixture thickens to a very thick pudding or paste-like consistency, about 5-7 minutes.

    Remove from heat, transfer to a bowl, and press plastic wrap directly on the surface. Cool to room temperature (you can speed this up by placing the bowl in an ice bath).

    4. Finish the Chocolate Frosting: In a very large bowl, beat the softened butter and 2 ¼ cups sugar on high speed for 5-7 minutes, until very pale and fluffy. With the mixer on low, gradually add the sifted cocoa powder and vanilla until combined.

    Now, with the mixer on medium, add the completely cooled milk-flour paste, one large spoonful at a time, beating well after each addition. Once all is added, beat on medium-high for 2-3 minutes until the frosting is perfectly smooth, fluffy, and spreadable.

    5. Assemble the Cake with Precision: Place one cake layer on a cake board or plate. Spread a thin, even layer of frosting (about ⅓ cup) over the cake, going all the way to the edges. Repeat with the remaining layers, carefully aligning them.

    Use the remaining frosting to cover the top and sides of the entire cake smoothly. For the classic look, make decorative swirls on top with an offset spatula.

    6. Chill, Set & Serve: Refrigerate the assembled cake for at least 4 hours, or preferably overnight. This allows the frosting to firm up and the flavors to meld, making slicing much cleaner. Bring to room temperature for 30-60 minutes before serving. Use a long, sharp serrated knife to slice.

    Pro-Tips for a Flawless, Towering Cake

    • Weigh the Batter: For perfectly even layers, weigh the total batter, then divide by 5 to portion it accurately into each pan.
    • Don’t Overmix: Mix the cake batter just until the flour is incorporated to keep the layers tender.
    • Cool Layers Completely: Warm layers will melt the frosting and cause sliding.
    • The Frosting Base Must Be Cool: The milk-flour paste must be at room temperature before adding to the butter mixture, or it will melt the butter and create a runny frosting.
    • Softened Butter is Key: The butter for the frosting must be truly softened to room temperature to cream properly and create a fluffy texture.
    • Chill Before Slicing: This step is non-negotiable for clean, sharp slices that showcase all five distinct layers.

    This Classic 5-Layer Cake is a rewarding baking achievement that promises to be the centerpiece of any celebration.

  • Dark Chocolate Truffles: An Easy, Elegant Homemade Gift

    Dark Chocolate Truffles: An Easy, Elegant Homemade Gift

    Experience the pure, unadulterated pleasure of a perfect chocolate truffle. This classic recipe demystifies gourmet chocolate-making, revealing that the most luxurious truffles begin with just two ingredients: excellent chocolate and heavy cream.

    The process is simple, but the result—a decadent, melt-in-your-mouth ganache center enrobed in your favorite coatings—is nothing short of spectacular. Whether you’re making them for a special occasion, a heartfelt gift, or a personal treat, these truffles deliver professional quality with minimal effort.

    The Simple Science of Ganache & Tempering by Coating

    A truffle is, at its heart, a solidified form of chocolate ganache. Ganache is an emulsion created when hot cream is poured over chopped chocolate. The heat from the cream melts the chocolate, and the fat from the cream blends with the cocoa butter to create a smooth, stable mixture.

    As it cools, the cocoa butter crystals re-solidify, giving the ganache its firm, yet creamy texture. While these truffles don’t require the precise tempering of enrobed chocolates, the rolling and coating process serves a similar purpose.

    The coatings—like cocoa powder, crushed nuts, or even a thin shell of melted chocolate—seal in the ganache, protect it from moisture and fingerprints, and add contrasting flavor and texture that complements the rich interior.

    Ingredients

    For the Basic Ganache:

    • 8 oz (225g) high-quality bittersweet or semisweet chocolate (60-70% cacao), finely chopped
    • ½ cup (120ml) heavy cream
    • Pinch of sea salt (optional but recommended)

    For Coating & Flavoring (Choose One or More):

    • ½ cup (50g) unsweetened cocoa powder, sifted
    • ½ cup (50g) Dutch-process cocoa powder, sifted
    • ½ cup (60g) finely chopped toasted nuts (hazelnuts, almonds, pistachios)
    • ½ cup (40g) unsweetened shredded coconut, toasted
    • 4 oz (115g) melting chocolate or candy coating for dipping
    • Flaky sea salt for sprinkling

    Instructions

    1. Make the Chocolate Ganache: Place the finely chopped chocolate and a pinch of salt in a heatproof bowl. In a small saucepan, heat the heavy cream over medium heat until it just begins to simmer (small bubbles form around the edges).

    Immediately pour the hot cream over the chocolate. Let it sit undisturbed for 3 minutes to allow the chocolate to melt. Then, starting in the center, gently whisk in small circles until the mixture is completely smooth, glossy, and emulsified.

    2. Chill the Ganache Until Firm: Cover the bowl with plastic wrap, pressing it directly onto the surface of the ganache to prevent a skin from forming. Refrigerate until the ganache is very firm and scoopable, at least 2 hours, or overnight.

    3. Portion the Ganache: Using a small cookie scoop, melon baller, or a teaspoon, portion the firm ganache. Roll each portion quickly between your palms to form a rough, uneven ball (this gives them the classic “truffle” look).

    Work quickly as the heat from your hands can melt the ganache. Place the shaped balls on a parchment-lined baking sheet. If the ganache becomes too soft, return the baking sheet to the refrigerator for 15 minutes.

    4. Coat the Truffles: Prepare your chosen coatings in separate shallow bowls. For dry coatings (cocoa, nuts, coconut), roll each ganache ball until fully covered, then return to the parchment sheet.

    For a chocolate shell, use a fork to dip each ball into melted chocolate, tap off the excess, and place on parchment to set. Sprinkle with sea salt or additional toppings before the shell hardens.

    5. Set and Store: Let the coated truffles set completely at room temperature (for chocolate shells) or in the refrigerator (for dry-coated truffles) for at least 30 minutes before serving or packaging.

    6. Serving & Gifting: Store truffles in a single layer in an airtight container in the refrigerator for up to 2 weeks. For gifts, arrange in small paper cups inside a decorative box. Let come to room temperature for 10-15 minutes before serving for the best texture and flavor.

    Pro-Tips for Perfect, Professional-Looking Truffles

    • Chop Chocolate Evenly: Finely and evenly chopped chocolate ensures it melts smoothly and completely with the hot cream. Chocolate chips are not recommended as they contain stabilizers.
    • Don’t Boil the Cream: Heat the cream just until it simmers. Boiling can cause it to separate or scorch.
    • Chill Thoroughly: The ganache must be completely firm and cold to shape cleanly. If it’s too soft, it will stick to your hands and be difficult to roll.
    • Cold Hands, Fast Work: For easier rolling, chill your hands under cold water and dry them thoroughly before shaping. Work in batches, returning the ganache to the fridge as needed.
    • Sift Dry Coatings: Sifting cocoa powder or powdered sugar ensures a smooth, lump-free finish.
    • Experiment with Flavors: Infuse the cream with herbs, spices, or citrus zest before heating, or add a splash of liqueur (like Grand Marnier or bourbon) to the ganache after emulsifying.

    These Dark Chocolate Truffles are a blank canvas for creativity and a guaranteed expression of love and craftsmanship.

  • Chocolate Soufflé: The Ultimate Light & Airy Dessert

    Chocolate Soufflé: The Ultimate Light & Airy Dessert

    The chocolate soufflé represents the pinnacle of baking elegance: a dessert that’s simultaneously rich and ethereal. Far from the intimidating challenge it’s often made out to be, a successful soufflé relies on mastering a few key techniques.

    This recipe breaks it down into simple steps, resulting in a dessert with a dark, intense chocolate flavor, a delicate crust, and that magical, cloud-like interior. Serve it warm with a dusting of sugar or a dollop of crème anglaise for an unforgettable experience.

    The Science of the Rise & Preventing Collapse

    The dramatic rise of a soufflé is powered by one thing: expanding air bubbles in whipped egg whites. As the soufflé bakes, the air trapped in the meringue heats and expands, causing the entire structure to lift.

    The chocolate base (panade) provides flavor and stability; its thickness helps support the air bubbles. Two critical factors prevent collapse: properly whipped whites and thoroughly greased and sugared ramekins. The whites must be whipped to stiff, glossy peaks to provide maximum structure.

    Coating the ramekins with butter and sugar gives the rising batter a rough surface to “climb,” ensuring an even, vertical rise. A final key is baking the soufflés in a water bath, which provides gentle, even heat for a stable ascent.

    Ingredients

    For Preparing the Ramekins:

    • 2 tablespoons unsalted butter, softened
    • ¼ cup (50g) granulated sugar (for coating)

    For the Chocolate Soufflé Base:

    • 4 oz (115g) high-quality bittersweet or semisweet chocolate, finely chopped
    • 2 tablespoons (28g) unsalted butter
    • ¼ cup (60ml) strong brewed coffee or water (hot)
    • 1 teaspoon vanilla extract
    • Pinch of salt
    • 3 large egg yolks, room temperature
    • 1 tablespoon (8g) all-purpose flour or cornstarch (for gluten-free)

    For the Meringue:

    • 5 large egg whites, room temperature
    • ¼ teaspoon cream of tartar
    • ¼ cup (50g) granulated sugar

    For Serving: Confectioners’ sugar, vanilla ice cream, or crème anglaise.

    Instructions

    1. Prepare the Ramekins & Oven: Generously butter the insides of four 6-ounce ramekins. Coat the buttered surfaces evenly with granulated sugar, tapping out any excess. Place the prepared ramekins on a rimmed baking sheet. Position an oven rack in the lower third and preheat oven to 375°F (190°C). Place a shallow pan (like a 9×13) on the oven rack to heat for the water bath.

    2. Make the Chocolate Base (Panade): In a heatproof bowl set over a pan of simmering water (double boiler), melt the chopped chocolate, 2 tablespoons butter, and hot coffee/water together, stirring until smooth.

    Remove from heat and whisk in vanilla and salt. Let cool for 5 minutes, then whisk in the egg yolks one at a time until fully incorporated. Sift the flour or cornstarch over the mixture and whisk until smooth. The base should be thick and glossy.

    3. Whip the Egg Whites to Stiff Peaks: In a perfectly clean, grease-free bowl, combine the egg whites and cream of tartar. Using an electric mixer, beat on medium speed until foamy. Gradually add the ¼ cup sugar while increasing speed to high. Beat until the whites are thick, glossy, and hold very stiff peaks when the beater is lifted.

    4. Fold the Meringue into the Base: Gently stir about one-third of the whipped egg whites into the chocolate base to lighten it. Using a large silicone spatula, carefully fold in the remaining whites in two additions. Fold just until no large white streaks remain, being careful not to deflate the mixture.

    5. Fill, Bake, and Serve Immediately: Divide the batter evenly among the prepared ramekins, smoothing the tops. Run your thumb around the inside rim of each ramekin to create a “moat” (this encourages an even rise). Carefully place the baking sheet with the ramekins onto the preheated shallow pan in the oven.

    Pour hot water into the outer pan until it comes halfway up the sides of the ramekins. Bake for 16-20 minutes, until the soufflés have risen dramatically, the tops are dry and crackly, but the centers still have a slight jiggle.

    6. Serve at Once: Remove from the oven and water bath. Dust immediately with confectioners’ sugar and serve within 2-3 minutes, as they will begin to deflate. Provide spoons and optional accompaniments at the table.

    Pro-Tips for Soufflé Success

    • Room Temperature Eggs are Essential: Cold egg whites won’t whip to their full volume. Separate eggs when cold, then let whites and yolks come to room temperature separately.
    • Grease and Sugar Thoroughly: Don’t skimp on coating the ramekins. This is the “ladder” for your soufflé’s rise.
    • A Clean, Dry Bowl for Whites: Any trace of grease or yolk will inhibit the egg whites from whipping properly.
    • Don’t Over-fold: It’s better to have a few tiny streaks of white than to over-mix and deflate the batter.
    • The “Moat” Technique: Wiping a clean rim helps the soufflé rise straight up rather than curling over.
    • Timing is Everything: Have your guests seated and ready before the soufflés go into the oven. They wait for no one.

    This Chocolate Soufflé is a spectacular dessert that proves elegance can be achieved in your own kitchen.