Author: user

  • Beef and Cheese Quesadilla

    Beef and Cheese Quesadilla

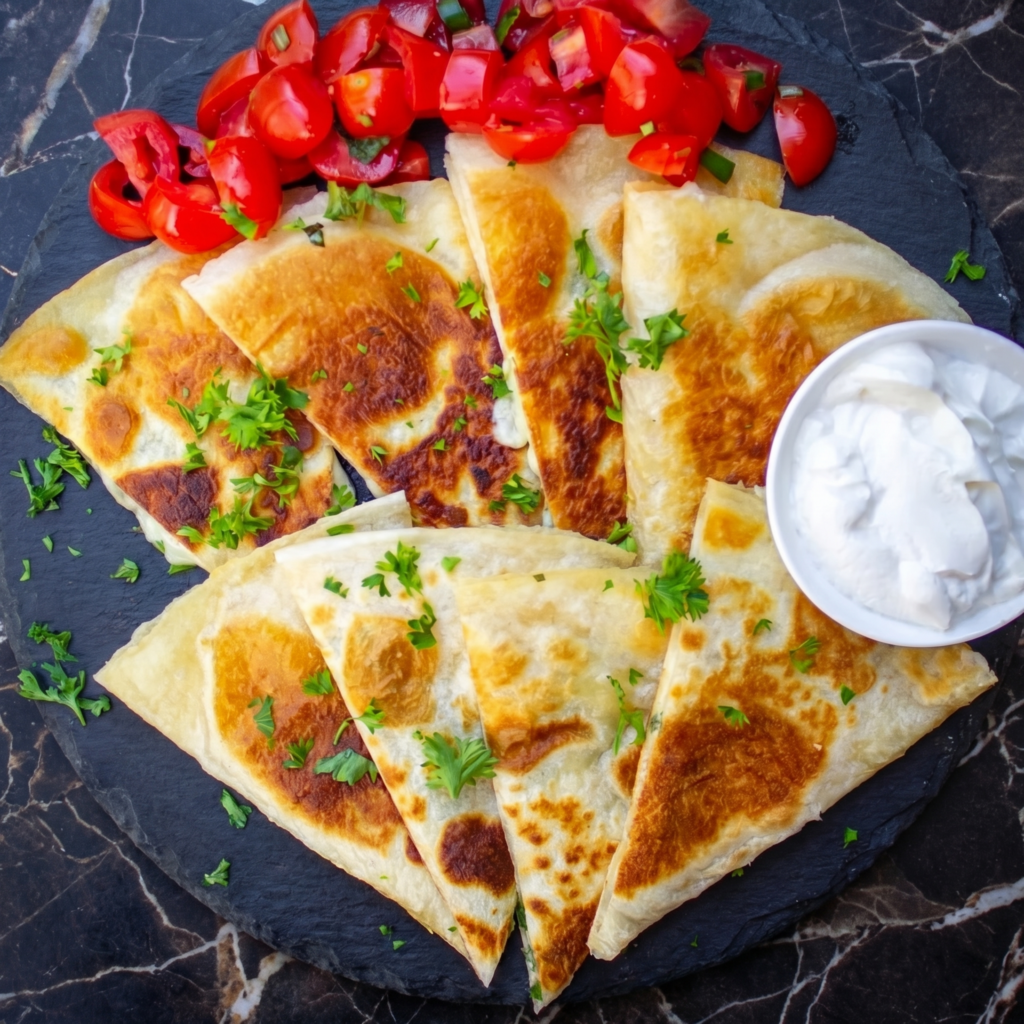
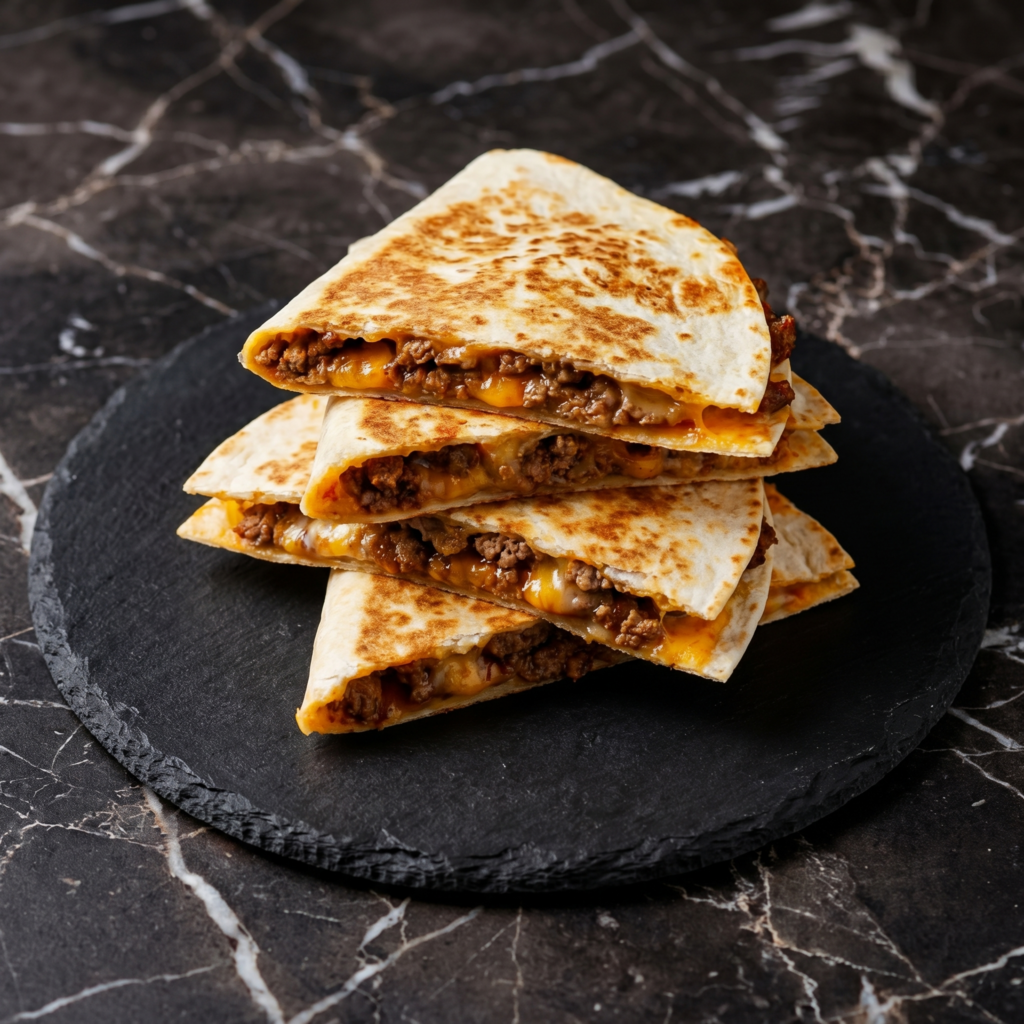
    Beef and Cheese Quesadillas are the ultimate quick comfort food—crispy, golden tortillas filled with seasoned ground beef and melted cheese. Ready in under 20 minutes, they’re perfect for busy weeknights, game day snacking, or a satisfying lunch.

    The beauty of a quesadilla is its simplicity: a few quality ingredients, a hot skillet, and your favorite toppings. Serve them with salsa, sour cream, and guacamole for dipping, and watch them disappear.

    Ingredients

    For the Seasoned Ground Beef:

    • 1 lb (450g) ground beef (80/20)
    • ½ small onion, finely diced
    • 2 cloves garlic, minced
    • 1 tablespoon chili powder
    • 1 teaspoon ground cumin
    • ½ teaspoon smoked paprika
    • ½ teaspoon salt
    • ¼ teaspoon black pepper
    • ¼ cup (60ml) water or beef broth

    For the Quesadillas:

    • 4 large flour tortillas (10-inch)
    • 2 cups (225g) shredded cheese (cheddar, Monterey Jack, or Mexican blend)
    • 2 tablespoons butter or vegetable oil

    For Serving:

    • Salsa
    • Sour cream
    • Guacamole
    • Fresh cilantro, chopped

    Instructions

    1. Cook the Ground Beef: Heat a large skillet over medium-high heat. Add the ground beef and cook, breaking it up, for 5 to 7 minutes until browned. Drain excess fat. Add the onion and cook for 3 minutes.

    Add the garlic and cook for 1 minute. Add the chili powder, cumin, paprika, salt, pepper, and water. Simmer for 2 to 3 minutes until the liquid has evaporated. Remove from heat.

    2. Assemble the Quesadillas: Lay the tortillas flat. Sprinkle cheese over half of each tortilla. Top with the seasoned ground beef and more cheese. Fold the empty half over the filling.

    3. Cook the Quesadillas: Wipe the skillet clean. Heat ½ tablespoon of butter over medium heat. Place one quesadilla in the skillet.

    Cook for 2 to 3 minutes per side until golden brown and crispy, and the cheese is melted. Repeat with remaining quesadillas, adding more butter as needed.

    4. Slice and Serve: Transfer to a cutting board. Let cool for 1 minute, then cut into wedges. Serve with salsa, sour cream, and guacamole.

    This Beef and Cheese Quesadilla is a quick, satisfying meal that’s perfect for any occasion—crispy, cheesy, and delicious.

  • Crispy Pork Belly Tacos

    Crispy Pork Belly Tacos

    These Crispy Pork Belly Tacos are the ultimate fusion of textures and flavors—rich, crispy pork belly paired with tangy pickled onions, fresh cilantro, and a drizzle of crema, all nestled in warm corn tortillas.

    The pork belly is slow-roasted until tender, then crisped up in a hot skillet until the skin is shatteringly crisp and the meat is melt-in-your-mouth tender. Topped with bright, acidic pickled onions and creamy crema, each bite is a perfect balance. Perfect for Taco Tuesday, game day, or any night you want to impress.

    Ingredients

    For the Crispy Pork Belly:

    • 2 lbs (900g) pork belly, skin-on
    • 1 tablespoon salt
    • 1 teaspoon black pepper
    • 1 teaspoon garlic powder
    • 1 teaspoon smoked paprika
    • 1 tablespoon vegetable oil (for crisping)

    For the Pickled Red Onions:

    • 1 red onion, thinly sliced
    • ½ cup (120ml) apple cider vinegar or rice vinegar
    • ½ cup (120ml) water
    • 1 tablespoon sugar
    • 1 teaspoon salt

    For the Tacos:

    • 8 to 12 corn tortillas
    • ½ cup crema or sour cream, thinned with a little milk
    • ½ cup fresh cilantro, chopped
    • 2 limes, cut into wedges
    • Optional: sliced radishes, hot sauce, crumbled cotija cheese

    Instructions

    1. Make the Pickled Red Onions: In a small bowl, combine the vinegar, water, sugar, and salt. Stir until dissolved. Add the sliced red onion and let sit for at least 30 minutes (or refrigerate overnight).

    2. Roast the Pork Belly: Preheat oven to 300°F (150°C). Pat the pork belly dry. Score the skin with a sharp knife. Combine salt, pepper, garlic powder, and paprika. Rub all over the pork. Place on a wire rack over a baking sheet. Roast for 2½ to 3 hours, until tender.

    3. Crisp the Pork Belly: Remove from oven and let cool slightly. Cut into ½-inch cubes. Heat a large skillet over medium-high heat. Add the oil. Add the pork belly cubes and cook for 2 to 3 minutes per side until crispy and golden brown.

    4. Warm the Tortillas: Heat a dry skillet or griddle over medium-high heat. Warm each tortilla for 20 to 30 seconds per side until pliable and lightly charred. Stack and wrap in a kitchen towel to keep warm.

    5. Assemble the Tacos: Place two tortillas on each plate (or use a tortilla holder). Add a generous amount of crispy pork belly. Top with pickled red onions, fresh cilantro, and a drizzle of crema. Squeeze fresh lime juice over each taco.

    6. Serve: Serve immediately with extra lime wedges and hot sauce on the side.

    These Crispy Pork Belly Tacos are a showstopping meal—rich, tangy, fresh, and utterly addictive.

  • Drunken Noodles (Pad Kee Mao)

    Drunken Noodles (Pad Kee Mao)

    Despite its name, Drunken Noodles (Pad Kee Mao) contains no alcohol—the name supposedly comes from the dish’s popularity as a late-night street food for those who had been drinking, or from the “drunken” wok technique that creates its signature smoky flavor.

    Whatever the origin, this Thai noodle dish is a powerhouse of flavor: spicy, savory, and aromatic. Wide rice noodles are stir-fried with protein, fresh vegetables, and Thai basil in a bold sauce made from soy sauce, fish sauce, and plenty of chilies. It’s quick, satisfying, and guaranteed to wake up your taste buds.

    Ingredients

    For the Sauce:

    • 3 tablespoons oyster sauce
    • 2 tablespoons soy sauce
    • 1 tablespoon dark soy sauce (or regular soy sauce)
    • 1 tablespoon fish sauce
    • 2 teaspoons brown sugar
    • 2 tablespoons water

    For the Noodles:

    • 8 oz (225g) wide rice noodles (fresh or dried)
    • 2 tablespoons vegetable oil or peanut oil
    • 2 cloves garlic, minced
    • 2-3 Thai bird’s eye chilies, minced (adjust to heat)
    • ½ lb (225g) chicken breast or thighs, thinly sliced (or shrimp, tofu, or beef)
    • 1 red bell pepper, thinly sliced
    • 1 small onion, thinly sliced
    • 1 cup Thai basil leaves (plus more for garnish)
    • Lime wedges, for serving

    Instructions

    1. Prepare the Noodles: If using dried rice noodles, soak them in warm water for 20 to 30 minutes until pliable but still firm. Drain and set aside. If using fresh noodles, separate them gently.

    2. Make the Sauce: In a small bowl, whisk together the oyster sauce, soy sauce, dark soy sauce, fish sauce, brown sugar, and water. Set aside.

    3. Stir-Fry the Aromatics and Protein: Heat a large wok or skillet over high heat. Add the oil. Add the garlic and chilies, stir-frying for 30 seconds until fragrant. Add the chicken (or your chosen protein) and stir-fry for 3 to 4 minutes until cooked through.

    4. Add Vegetables: Add the bell pepper and onion. Stir-fry for 2 minutes until crisp-tender.

    5. Add Noodles and Sauce: Add the prepared noodles and the sauce. Toss everything together using tongs or two spatulas, stirring continuously for 2 to 3 minutes until the noodles are heated through and evenly coated.

    6. Add Thai Basil: Add the Thai basil leaves and toss for another 30 seconds until wilted.

    7. Serve: Transfer to a serving bowl or platter. Garnish with additional Thai basil leaves and serve immediately with lime wedges.

    These Drunken Noodles are a bold, spicy, aromatic Thai classic that’s quick enough for a weeknight but flavorful enough to impress.

  • Chicken Yakitori (Japanese Grilled Chicken Skewers)

    Chicken Yakitori (Japanese Grilled Chicken Skewers)

    Yakitori is one of Japan’s most beloved street foods—skewers of juicy chicken, grilled over charcoal and glazed with a sweet-savory tare sauce. The word yakitori literally means “grilled bird,” and while you can find everything from chicken skin to liver on a skewer, the classic version features tender chicken thigh and scallions.

    The tare sauce—a reduction of soy sauce, mirin, sake, and sugar—is the soul of yakitori, caramelizing on the grill and creating a glossy, irresistible coating. While traditionally cooked over binchotan charcoal, these skewers work beautifully on a gas grill or even in a cast iron pan. Serve them as an appetizer or main course for a taste of Japanese izakaya at home.

    Ingredients

    For the Tare Sauce:

    • ½ cup (120ml) soy sauce (low sodium recommended)
    • ½ cup (120ml) mirin (sweet Japanese rice wine)
    • ¼ cup (60ml) sake (or dry white wine)
    • ¼ cup (50g) brown sugar
    • 2 cloves garlic, smashed (optional)
    • 1-inch piece ginger, sliced (optional)

    For the Chicken Skewers:

    • 1½ lbs (680g) boneless, skinless chicken thighs
    • 4 scallions (green onions), cut into 1-inch pieces
    • Bamboo skewers (soaked in water for 30 minutes)

    For Garnish:

    • 1 tablespoon sesame seeds
    • 2 green onions, thinly sliced
    • Shichimi togarashi (Japanese seven spice, optional)

    Instructions

    1. Make the Tare Sauce: In a small saucepan, combine the soy sauce, mirin, sake, brown sugar, garlic, and ginger (if using). Bring to a simmer over medium heat, stirring until the sugar dissolves.

    Reduce heat to low and simmer for 10 to 15 minutes until the sauce thickens slightly and becomes glossy. Remove from heat and strain out the garlic and ginger if desired. Set aside half of the sauce for serving and use the other half for basting.

    2. Prepare the Chicken: Cut the chicken thighs into 1-inch pieces. Thread the chicken and scallion pieces onto the soaked bamboo skewers, alternating chicken and scallion. Use about 4 to 5 pieces of chicken per skewer.

    3. Preheat the Grill: Preheat a gas or charcoal grill to medium-high heat (about 375°F to 400°F / 190°C to 200°C). Clean and oil the grates to prevent sticking.

    4. Grill the Skewers: Place the skewers on the grill. Cook for 2 to 3 minutes per side, turning occasionally. During the last few minutes of cooking, brush the skewers with the basting tare sauce, turning and brushing 2 to 3 times to build up a glossy glaze.

    The chicken is done when it reaches an internal temperature of 165°F (74°C) and the sauce is caramelized.

    5. Serve: Transfer the skewers to a serving platter. Drizzle with the reserved tare sauce. Garnish with sesame seeds, sliced green onions, and a sprinkle of shichimi togarashi if desired. Serve immediately.

    This Chicken Yakitori brings the authentic flavors of Japanese street food to your grill—sweet, savory, and utterly addictive.

  • Spaghetti with Meatballs

    Spaghetti with Meatballs

    Is there any meal more comforting than a big bowl of spaghetti with meatballs? Tender, juicy meatballs simmered in a rich, flavorful tomato sauce, served over a bed of perfectly cooked spaghetti—it’s the ultimate Italian-American classic.

    This recipe delivers on all fronts: meatballs that are tender and packed with flavor, a sauce that’s deeply savory and aromatic, and a dish that brings the whole family to the table. The meatballs are baked before simmering in the sauce, which locks in moisture and creates a beautiful crust. Serve it with a sprinkle of Parmesan and fresh basil for a meal that’s pure nostalgia.

    Ingredients

    For the Meatballs:

    • 1 lb (450g) ground beef (80/20)
    • ½ lb (225g) ground pork
    • ½ cup (50g) breadcrumbs (panko or regular)
    • ½ cup (120ml) milk
    • ½ cup (50g) grated Parmesan cheese
    • 2 large eggs, lightly beaten
    • 2 cloves garlic, minced
    • ¼ cup fresh parsley, finely chopped
    • 1 teaspoon salt
    • ½ teaspoon black pepper
    • ½ teaspoon dried oregano
    • ½ teaspoon red pepper flakes (optional)
    • 2 tablespoons olive oil (for baking)

    For the Tomato Sauce:

    • 2 tablespoons olive oil
    • 1 medium onion, finely diced
    • 4 cloves garlic, minced
    • 1 can (28 oz / 800g) crushed tomatoes
    • 1 can (15 oz / 425g) tomato sauce
    • 2 tablespoons tomato paste
    • 1 cup (240ml) beef broth or water
    • 2 teaspoons dried basil
    • 1 teaspoon dried oregano
    • 1 teaspoon sugar (to balance acidity)
    • Salt and black pepper, to taste

    For the Pasta and Serving:

    • 1 lb (450g) spaghetti
    • Grated Parmesan cheese, for serving
    • Fresh basil leaves, for garnish

    Instructions

    1. Make the Panade: In a small bowl, combine the breadcrumbs and milk. Let sit for 5 minutes until the breadcrumbs absorb the liquid and form a paste.

    2. Make the Meatballs: In a large bowl, combine the ground beef, ground pork, Parmesan cheese, eggs, garlic, parsley, salt, pepper, oregano, and red pepper flakes. Add the panade mixture. Mix gently with your hands until just combined—do not overmix, or the meatballs will be tough. Form into 1½-inch meatballs (about 18-20 meatballs).

    3. Bake the Meatballs: Preheat your oven to 400°F (200°C). Place the meatballs on a parchment-lined baking sheet. Drizzle or brush with olive oil. Bake for 15 to 20 minutes, until browned and cooked through.

    4. Make the Tomato Sauce: While the meatballs bake, heat olive oil in a large Dutch oven or pot over medium heat. Add the onion and cook for 5 minutes until softened. Add the garlic and cook for 1 minute until fragrant.

    Add the tomato paste and cook for 2 minutes, stirring, to deepen its flavor. Add the crushed tomatoes, tomato sauce, beef broth, basil, oregano, sugar, salt, and pepper. Bring to a simmer, then reduce heat to low. Simmer for 15 to 20 minutes, stirring occasionally.

    5. Simmer Meatballs in Sauce: Add the baked meatballs to the sauce. Simmer for 15 to 20 minutes, gently stirring occasionally, to allow the meatballs to absorb the sauce flavors.

    6. Cook the Spaghetti: Bring a large pot of salted water to a boil. Cook the spaghetti according to package directions until al dente. Reserve ½ cup of pasta water before draining.

    7. Combine and Serve: Add the drained spaghetti to the sauce and meatballs. Toss to coat, adding a splash of pasta water if needed to loosen the sauce. Serve immediately, garnished with grated Parmesan and fresh basil.

    This Spaghetti with Meatballs is the ultimate comfort food—hearty, satisfying, and guaranteed to bring everyone to the table.

  • Truffle Pasta

    Truffle Pasta

    There are pasta dishes, and then there’s truffle pasta—a dish that feels like pure indulgence. The earthy, aromatic flavor of truffle transforms simple ingredients into something truly extraordinary. This version is creamy, buttery, and impossibly luxurious, yet it comes together in under 20 minutes with just a handful of ingredients.

    The key is using high-quality truffle oil and letting it shine without overpowering the dish. Perfect for date night, anniversaries, or any time you want to treat yourself to something special. Serve it with a glass of white wine and a side salad for a meal that’s sure to impress.

    Ingredients

    For the Truffle Pasta:

    • 8 oz (225g) fettuccine or tagliatelle (or any long pasta)
    • 4 tablespoons (½ stick) unsalted butter
    • 2 cloves garlic, minced
    • 1 cup (240ml) heavy cream
    • 1 cup (100g) freshly grated Parmesan cheese, plus more for serving
    • 1 to 2 teaspoons truffle oil (white or black, adjust to taste)
    • ½ teaspoon salt
    • ¼ teaspoon black pepper
    • 2 tablespoons fresh parsley, chopped

    For Serving:

    • Shaved Parmesan or Pecorino Romano
    • Fresh parsley, chopped
    • Additional truffle oil for drizzling

    Instructions

    1. Cook the Pasta: Bring a large pot of generously salted water to a boil. Add the pasta and cook according to package directions until al dente. Reserve 1 cup of pasta water before draining.

    2. Make the Truffle Cream Sauce: While the pasta cooks, melt the butter in a large skillet over medium heat. Add the minced garlic and cook for 30 to 60 seconds until fragrant—do not let it brown.

    Pour in the heavy cream and bring to a gentle simmer. Reduce heat to low and whisk in the Parmesan cheese until smooth and melted. Season with salt and pepper.

    3. Combine Pasta and Sauce: Add the drained pasta to the skillet with the sauce. Add a splash of reserved pasta water (about ¼ cup) and toss vigorously to coat. The pasta water helps emulsify the sauce, making it silky and cohesive. If the sauce is too thick, add more pasta water a tablespoon at a time.

    4. Add Truffle Oil: Remove the skillet from the heat. Drizzle in the truffle oil and toss to combine. Taste and add more truffle oil if desired—remember, a little goes a long way. Fold in the fresh parsley.

    5. Serve: Transfer to serving plates or a large bowl. Top with shaved Parmesan, additional parsley, and a final drizzle of truffle oil. Serve immediately.

    This Truffle Pasta is an elegant, indulgent dish that’s surprisingly simple to make—perfect for special occasions or whenever you want to treat yourself.

  • Nasi Goreng (Indonesian Fried Rice)

    Nasi Goreng (Indonesian Fried Rice)

    Nasi Goreng is Indonesia’s iconic fried rice—a fragrant, savory, and slightly sweet dish that’s beloved across the archipelago. The name literally means “fried rice,” but this is no ordinary fried rice. It gets its signature flavor from kecap manis (sweet soy sauce), terasi (shrimp paste), and a aromatic paste of garlic, shallots, and chilies.

    Topped with a crispy-edged fried egg and served with fresh cucumber and tomato, it’s a complete meal that’s satisfying, flavorful, and ready in under 20 minutes. Perfect for using up leftover rice, it’s a staple of Indonesian street food and home cooking alike.

    Ingredients

    For the Nasi Goreng:

    • 4 cups cold, day-old jasmine rice
    • 3 tablespoons vegetable oil or peanut oil, divided
    • 2 shallots, roughly chopped
    • 2 cloves garlic
    • 1-2 red chilies (bird’s eye or Thai), seeded (adjust to heat preference)
    • 1 teaspoon terasi (shrimp paste) or 1 tablespoon fish sauce
    • 8 oz (225g) chicken breast or shrimp, cut into small pieces (optional)
    • 3 tablespoons kecap manis (sweet soy sauce)
    • 1 tablespoon soy sauce (regular)
    • 1 teaspoon sugar (optional)
    • ½ teaspoon white pepper
    • 2 green onions, sliced

    For Serving:

    • 2-4 fried eggs (1 per serving)
    • Cucumber slices
    • Tomato wedges
    • Fried shallots (store-bought or homemade)
    • Lime wedges

    Instructions

    1. Prepare the Rice: If using freshly cooked rice, spread it on a baking sheet and refrigerate for at least 30 minutes. Break up any clumps with your fingers before cooking.

    2. Make the Spice Paste: In a mortar and pestle or small food processor, combine the shallots, garlic, and chilies. Pound or blend into a coarse paste. If using terasi, add it to the paste.

    3. Cook the Protein (Optional): Heat a large wok or skillet over medium-high heat. Add 1 tablespoon of oil. Add the chicken or shrimp and cook until browned and cooked through, about 3 to 4 minutes. Remove and set aside.

    4. Stir-Fry the Spice Paste: Add the remaining 2 tablespoons of oil to the wok. Add the spice paste and stir-fry for 1 to 2 minutes until fragrant and the shallots are translucent.

    5. Add the Rice: Add the cold rice to the wok, breaking up any remaining clumps with your spatula. Stir-fry for 2 to 3 minutes until the rice is heated through and evenly coated with the paste.

    6. Season the Rice: Add the kecap manis, soy sauce, sugar (if using), and white pepper. Stir-fry for another 2 minutes until the rice is evenly colored and glossy. If using cooked protein, return it to the wok and toss to combine. Add the green onions and stir-fry for 30 seconds.

    7. Fry the Eggs: While the rice cooks, heat a separate nonstick skillet over medium heat. Fry the eggs sunny-side up until the whites are set and the yolks are runny, about 2 to 3 minutes.

    8. Serve: Divide the nasi goreng among plates. Top each with a fried egg. Garnish with cucumber slices, tomato wedges, fried shallots, and lime wedges. Serve immediately.

    This Nasi Goreng brings the vibrant flavors of Indonesian street food to your kitchen—savory, sweet, and utterly satisfying.

  • Herb Crusted Baked Cod

    Herb Crusted Baked Cod

    Cod is a beautiful, mild white fish that’s perfect for showcasing bright, fresh flavors. This herb crusted baked cod takes it to the next level with a golden, crispy topping made from panko breadcrumbs, fresh herbs, parmesan cheese, and garlic.

    The crust adds a satisfying crunch while keeping the fish perfectly moist and flaky underneath. Ready in under 20 minutes, it’s a healthy, elegant dinner that’s easy enough for weeknights yet impressive enough for guests. Serve it with roasted vegetables, rice, or a fresh salad for a complete meal.

    Ingredients

    For the Herb Crust:

    • ½ cup (50g) panko breadcrumbs
    • ¼ cup (25g) grated Parmesan cheese
    • 2 tablespoons fresh parsley, finely chopped
    • 1 tablespoon fresh chives, finely chopped (or green onions)
    • 1 teaspoon fresh thyme leaves (or ½ tsp dried)
    • 2 cloves garlic, minced
    • 2 tablespoons olive oil or melted butter
    • ¼ teaspoon salt
    • ⅛ teaspoon black pepper

    For the Cod:

    • 4 cod fillets (6 oz each), about 1-inch thick
    • 1 tablespoon olive oil
    • ½ teaspoon salt
    • ¼ teaspoon black pepper
    • ½ teaspoon paprika (optional, for color)

    For Serving:

    • Lemon wedges
    • Fresh parsley, chopped
    • Roasted asparagus, green beans, or broccoli

    Instructions

    1. Preheat and Prepare: Preheat your oven to 400°F (200°C). Line a baking sheet with parchment paper or lightly grease a baking dish.

    2. Make the Herb Crust: In a small bowl, combine the panko breadcrumbs, Parmesan cheese, parsley, chives, thyme, minced garlic, olive oil, salt, and pepper. Mix until the crumbs are evenly coated and the mixture resembles wet sand.

    3. Prepare the Cod: Pat the cod fillets completely dry with paper towels. Place them on the prepared baking sheet. Brush each fillet with olive oil and season with salt, pepper, and paprika (if using).

    4. Add the Crust: Press the herb crust mixture evenly onto the top of each cod fillet, using about 2 to 3 tablespoons per fillet. Gently pat the crust to help it adhere.

    5. Bake: Bake for 12 to 15 minutes, depending on thickness, until the cod is opaque and flakes easily with a fork, and the crust is golden brown and crispy. The internal temperature should reach 145°F (63°C).

    6. Serve: Transfer to serving plates. Garnish with fresh parsley and serve immediately with lemon wedges and roasted vegetables.

    This Herb Crusted Baked Cod is a simple, elegant dish that’s bursting with fresh flavor—perfect for any night of the week.

  • Black Pepper Beef

    Black Pepper Beef

    If you’re a fan of bold, savory flavors, Black Pepper Beef is about to become your new go-to stir-fry. This classic Chinese dish features tender strips of beef, crisp bell peppers, and onions, all coated in a rich, peppery sauce that’s both savory and slightly sweet.

    The star of the show is the generous amount of cracked black pepper, which adds warmth, depth, and a gentle kick without overwhelming heat. Ready in under 30 minutes, it’s faster than takeout and far more delicious. Serve it over steamed rice for a complete meal that’s guaranteed to satisfy.

    Ingredients

    For the Beef Marinade:

    • 1½ lbs (680g) flank steak or sirloin, thinly sliced against the grain
    • 2 tablespoons soy sauce
    • 1 tablespoon Shaoxing wine or dry sherry
    • 1 tablespoon cornstarch
    • 1 teaspoon sesame oil
    • ¼ teaspoon black pepper

    For the Black Pepper Sauce:

    • ¼ cup (60ml) soy sauce (low sodium recommended)
    • 2 tablespoons oyster sauce
    • 1 tablespoon dark soy sauce (or regular soy sauce)
    • 1 tablespoon brown sugar
    • ½ cup (120ml) beef broth or water
    • 1 tablespoon cornstarch

    For the Stir-Fry:

    • 3 tablespoons vegetable oil or peanut oil, divided
    • 2 tablespoons whole black peppercorns, coarsely crushed
    • 2 cloves garlic, minced
    • 1 teaspoon ginger, grated
    • 1 medium onion, sliced into wedges
    • 1 green bell pepper, cut into 1-inch pieces
    • 1 red bell pepper, cut into 1-inch pieces
    • 3 green onions, sliced (white and green parts separated)

    For Garnish:

    • 1 tablespoon toasted sesame seeds
    • Extra cracked black pepper

    For Serving:

    • Steamed jasmine rice

    Instructions

    1. Marinate the Beef: In a medium bowl, combine the sliced beef with soy sauce, Shaoxing wine, cornstarch, sesame oil, and black pepper. Mix well and let marinate for 10 to 15 minutes while you prepare the other ingredients.

    2. Make the Black Pepper Sauce: In a small bowl, whisk together the soy sauce, oyster sauce, dark soy sauce, brown sugar, beef broth, and cornstarch until smooth. Set aside.

    3. Crush the Black Peppercorns: Place the whole black peppercorns in a ziplock bag or between sheets of parchment paper. Crush them with a heavy pan or rolling pin until coarsely ground. Alternatively, use a mortar and pestle or a spice grinder for a few quick pulses.

    4. Stir-Fry the Beef: Heat a large wok or skillet over high heat. Add 2 tablespoons of oil. Add the marinated beef in a single layer. Cook undisturbed for 1 to 2 minutes until browned, then stir-fry for another 1 to 2 minutes until cooked through. Remove and set aside.

    5. Toast the Peppercorns and Aromatics: Add the remaining 1 tablespoon of oil to the wok. Add the crushed black peppercorns and stir-fry for 30 seconds until fragrant. Add the garlic and ginger, stir-frying for another 30 seconds.

    6. Stir-Fry the Vegetables: Add the onion wedges and bell peppers. Stir-fry for 2 to 3 minutes until crisp-tender.

    7. Combine and Sauce: Return the cooked beef to the wok. Give the sauce a final stir and pour it into the wok. Add the white parts of the green onions. Toss everything together and cook for 1 to 2 minutes until the sauce thickens and coats all the ingredients.

    8. Serve: Transfer to a serving bowl. Garnish with sesame seeds, the green parts of the green onions, and an extra sprinkle of cracked black pepper. Serve immediately with steamed jasmine rice.

    This Black Pepper Beef is a bold, flavorful stir-fry that’s guaranteed to beat any takeout—perfect for busy weeknights.

  • Lemon Dill Salmon

    Lemon Dill Salmon

    There are few things as satisfying as a perfectly cooked salmon fillet—flaky, tender, and rich with flavor. This lemon dill salmon takes it to the next level with a bright, herbaceous sauce that’s as simple as it is elegant. The combination of fresh lemon, aromatic dill, and buttery richness complements the natural flavor of the salmon without overwhelming it.

    Ready in under 20 minutes, it’s the perfect dish for busy weeknights when you want something healthy and delicious, yet impressive enough for company. Serve it with roasted vegetables, rice, or a fresh salad for a complete meal.

    Ingredients

    For the Lemon Dill Salmon:

    • 4 salmon fillets (6 oz each), skin-on or skinless
    • 2 tablespoons olive oil or avocado oil
    • 1 teaspoon salt
    • ½ teaspoon black pepper
    • ½ teaspoon garlic powder (optional)

    For the Lemon Dill Butter Sauce:

    • 4 tablespoons (½ stick) unsalted butter
    • 2 cloves garlic, minced
    • 2 tablespoons fresh lemon juice (about ½ lemon)
    • 1 teaspoon lemon zest
    • 2 tablespoons fresh dill, finely chopped (plus extra for garnish)
    • 2 tablespoons fresh parsley, chopped (optional)
    • ¼ teaspoon salt
    • ⅛ teaspoon black pepper

    For Serving:

    • Lemon wedges
    • Fresh dill sprigs
    • Steamed asparagus, green beans, or roasted potatoes

    Instructions

    1. Preheat and Prepare: Preheat your oven to 400°F (200°C). Line a baking sheet with parchment paper or aluminum foil for easy cleanup.

    2. Season the Salmon: Pat the salmon fillets completely dry with paper towels. Place them on the prepared baking sheet. Drizzle with olive oil and rub to coat. Season generously with salt, pepper, and garlic powder (if using).

    3. Bake the Salmon: Bake for 10 to 14 minutes, depending on thickness, until the salmon is opaque and flakes easily with a fork. The internal temperature should reach 125°F to 130°F (52°C to 54°C) for medium. Thicker fillets may require additional time.

    4. Make the Lemon Dill Butter Sauce: While the salmon bakes, melt the butter in a small saucepan over medium-low heat. Add the minced garlic and cook for 30 to 60 seconds until fragrant—do not let it brown. Remove from heat. Stir in the lemon juice, lemon zest, fresh dill, parsley (if using), salt, and pepper.

    5. Serve: Transfer the baked salmon to serving plates or a platter. Spoon the lemon dill butter sauce over each fillet. Garnish with additional fresh dill and lemon wedges. Serve immediately with steamed asparagus or roasted potatoes.

    This Lemon Dill Salmon is a bright, fresh, and elegant dish that’s as easy to make as it is delicious.