Author: user

  • Irresistible Garlic Knots (Soft, Buttery, Garlicky)

    Irresistible Garlic Knots (Soft, Buttery, Garlicky)

    Garlic knots are the unsung heroes of Italian-American cuisine—those soft, pillowy knots of pizza dough, baked until golden, then drenched in a fragrant garlic butter sauce that soaks into every crevice.

    They’re the side dish you fight over at the pizza joint, the appetizer that disappears before the main course arrives, the bread you wish you’d ordered two baskets of.

    Now you can make them at home, and they’re even better: fresh from the oven, loaded with garlic, butter, parsley, and Parmesan, served warm with marinara for dipping. They’re easier than you think, and absolutely irresistible.

    Ingredients

    For the Dough (Makes 12-16 knots):

    • 1 lb (450g) pizza dough (homemade or store-bought), at room temperature
    • All-purpose flour, for dusting

    For the Garlic Butter Sauce:

    • ½ cup (1 stick / 113g) unsalted butter
    • 6-8 cloves garlic, minced (or more to taste)
    • ¼ cup fresh parsley, finely chopped
    • ½ teaspoon salt
    • ¼ teaspoon red pepper flakes (optional, for heat)

    For Topping and Serving:

    • ¼ cup grated Parmesan cheese
    • 2 cups marinara sauce, warmed, for dipping

    Instructions

    1. Prep the Dough: If using refrigerated dough, let it sit at room temperature for about 30 minutes to become pliable and easier to work with.

    2. Divide the Dough: On a lightly floured surface, divide the dough into 12-16 equal pieces (depending on how large you want your knots).

    3. Roll into Ropes: Roll each piece into a thin rope, about 8-10 inches long. Keep the ropes uniform in thickness for even baking.

    4. Tie the Knots: Take each rope and tie it into a loose knot, leaving two ends. Tuck the ends neatly underneath. Place the knots on a parchment-lined baking sheet, spacing them about 2 inches apart.

    5. Second Rise: Cover the knots loosely with plastic wrap or a clean kitchen towel. Let them rise at room temperature for 30-45 minutes, until slightly puffed.

    6. Preheat the Oven: While the knots rise, preheat your oven to 400°F (200°C).

    7. Bake the Knots: Bake for 15-20 minutes, until the knots are golden brown and cooked through. They should sound hollow when tapped on the bottom.

    8. Make the Garlic Butter: While the knots bake, melt the butter in a small saucepan over low heat. Add the minced garlic and cook gently for 1-2 minutes until fragrant but not browned. Remove from heat and stir in the parsley, salt, and red pepper flakes (if using).

    9. Brush with Garlic Butter: As soon as the knots come out of the oven, transfer them to a large bowl. Pour the garlic butter over the hot knots and toss gently to coat every surface. The hot knots will absorb the butter beautifully.

    10. Add Parmesan: Sprinkle the grated Parmesan over the buttered knots and toss again.

    11. Serve: Transfer to a serving platter or board. Serve warm with warm marinara sauce for dipping.

    Pro-Tips for Garlic Knot Perfection

    • Room Temperature Dough: Cold dough is stiff and difficult to roll. Let it warm up for easier handling.
    • Don’t Overthink the Knots: They don’t have to be perfect—rustic is charming. Just tie a loose knot and tuck the ends.
    • Even Thickness: Roll ropes evenly so they bake uniformly. Thick parts might be underdone.
    • Don’t Overcrowd: Leave space between knots on the baking sheet so they brown evenly and don’t stick together.
    • Butter While Hot: The garlic butter must go on hot knots so it soaks in. Work quickly.
    • Fresh Garlic Only: Garlic powder won’t give the same punch. Use fresh garlic for that authentic flavor.
    • Make Ahead: You can prep the knots through step 4 and refrigerate overnight. Let them come to room temperature and rise before baking.
    • Double the Garlic Butter: Trust us—you’ll want extra for dipping.

    These Irresistible Garlic Knots are soft, buttery, garlicky, and absolutely addictive.

  • Classic French Éclairs (Pastry Cream & Chocolate)

    Classic French Éclairs (Pastry Cream & Chocolate)

    Éclairs are the epitome of French patisserie—elegant, refined, and absolutely delicious. A perfect éclair is a study in contrasts: the shell is crisp and hollow, made from pâte à choux that puffs into a light, airy casing. Inside, it’s filled with silky vanilla pastry cream that’s rich but not heavy. And on top, a glossy chocolate glaze adds the finishing touch of sweetness and sophistication.

    Making éclairs at home is a project, but it’s also one of the most rewarding things you’ll ever bake. This step-by-step guide walks you through each component, from the choux pastry to the pastry cream to the glaze. Your kitchen is about to smell like a French patisserie.

    Ingredients

    For the Choux Pastry (makes about 12 éclairs):

    • ½ cup (120ml) water
    • ½ cup (120ml) whole milk
    • ½ cup (1 stick / 113g) unsalted butter, cut into pieces
    • 1 tablespoon granulated sugar
    • ¼ teaspoon salt
    • 1 cup (125g) all-purpose flour
    • 4 large eggs, room temperature

    For the Vanilla Pastry Cream:

    • 2 cups (480ml) whole milk
    • ½ cup (100g) granulated sugar
    • ¼ cup (30g) cornstarch
    • ¼ teaspoon salt
    • 4 large egg yolks
    • 2 tablespoons unsalted butter
    • 2 teaspoons vanilla extract (or 1 vanilla bean, scraped)

    For the Chocolate Glaze:

    • 4 oz (115g) semi-sweet or bittersweet chocolate, finely chopped
    • ½ cup (120ml) heavy cream
    • 1 tablespoon unsalted butter (optional, for shine)

    Instructions

    1. Make the Pastry Cream (Day Before): In a medium saucepan, heat the milk until steaming (do not boil). In a separate bowl, whisk together the sugar, cornstarch, and salt. Whisk in the egg yolks until the mixture is smooth and pale. Gradually whisk the hot milk into the egg mixture (tempering), then return everything to the saucepan.

    Cook over medium heat, whisking constantly, until the mixture thickens and comes to a boil. Boil for 1-2 minutes while whisking vigorously. Remove from heat and whisk in the butter and vanilla until smooth. Pour through a fine-mesh sieve into a bowl, press plastic wrap directly onto the surface, and refrigerate until completely cold, at least 4 hours or overnight.

    2. Make the Choux Pastry: Preheat your oven to 425°F (220°C). Line two baking sheets with parchment paper. In a medium saucepan, combine water, milk, butter, sugar, and salt. Bring to a boil over medium heat.

    Remove from heat, add the flour all at once, and stir vigorously with a wooden spoon until the mixture forms a smooth ball and pulls away from the sides of the pan. Return to low heat and cook for 1-2 minutes, stirring constantly, to dry out the dough. A thin film will form on the bottom of the pan.

    3. Add the Eggs: Transfer the dough to a stand mixer fitted with the paddle attachment. Beat on low speed for 1 minute to release steam. With the mixer running, add the eggs one at a time, beating well after each addition until fully incorporated. The dough should be smooth, glossy, and fall from the paddle in a thick ribbon that holds a V-shape.

    4. Pipe the Éclairs: Transfer the dough to a piping bag fitted with a large plain tip (about ½ inch). Pipe 4-inch long logs onto the prepared baking sheets, leaving about 2 inches between them. Use a wet finger to gently smooth any peaks.

    5. Bake: Bake for 15 minutes at 425°F, then reduce the temperature to 375°F (190°C) and bake for another 15-20 minutes until deep golden brown and crisp. Do not open the oven during baking. Turn off the oven, prop the door open slightly, and let the éclairs cool completely in the oven. This ensures they stay crisp.

    6. Make the Glaze: Place the chopped chocolate in a heatproof bowl. Heat the heavy cream in a small saucepan until just simmering. Pour the hot cream over the chocolate. Let sit for 2 minutes, then whisk gently until smooth and glossy. Stir in the butter if using.

    7. Fill the Éclairs: Fit a piping bag with a small tip. Whisk the chilled pastry cream until smooth. Use a small knife or the tip of the piping bag to poke three small holes in the bottom of each éclair. Pipe the pastry cream into each hole until the éclair feels heavy and full.

    8. Glaze the Éclairs: Dip the top of each filled éclair into the chocolate glaze, allowing excess to drip off. Alternatively, spread the glaze with a small offset spatula. Place on a wire rack to set.

    9. Chill and Serve: Refrigerate the éclairs for at least 30 minutes to set the glaze. Serve chilled or at room temperature. Best eaten the same day.

    Pro-Tips for Éclair Perfection

    • Dry the Dough Properly: Cooking the dough after adding flour removes excess moisture, which helps the éclairs puff and become crisp. Look for a thin film on the bottom of the pan.
    • Eggs at Room Temperature: Cold eggs can shock the dough and make it difficult to incorporate. Let them warm up first.
    • Pipe Evenly: Uniform size ensures even baking. Practice piping straight lines.
    • Don’t Open the Oven: The steam inside creates the puff. Opening the door lets steam escape and can cause collapse.
    • Cool in the Oven: Leaving éclairs in the cooling oven with the door ajar allows them to dry out completely and stay crisp.
    • Fill Just Before Serving: Filled éclairs can soften over time. For best results, fill within a few hours of serving.
    • Glaze Consistency: The glaze should be thick enough to coat but thin enough to drip slightly. Adjust with a little more cream if needed.
    • Make Ahead: Unfilled choux shells can be stored in an airtight container for 2 days or frozen for a month. Crisp in a 350°F oven for 5 minutes before filling.

    These Classic French Éclairs are a labor of love—and absolutely worth every moment.

  • Authentic Canadian Butter Tarts (Maple & Pecan)

    Authentic Canadian Butter Tarts (Maple & Pecan)

    If there’s one dessert that defines Canadian baking, it’s the butter tart. Not too sweet, not too rich, but somehow absolutely perfect—a flaky, buttery pastry shell filled with a glorious mixture of butter, sugar, and eggs that bakes into a semi-solid, slightly runny, caramel-like filling.

    They’re humble and unassuming, but one bite and you’ll understand why Canadians have passionate debates about the proper butter tart: runny or firm? Raisins or no raisins? Pecans or walnuts? Pure maple syrup or brown sugar?

    This recipe honors all traditions while delivering the definitive butter tart experience. Make a batch and discover why this simple tart has inspired devotion for generations.

    Ingredients

    For the Butter Tart Pastry (Makes 12-18 tarts):

    • 2 ½ cups (300g) all-purpose flour
    • 1 teaspoon salt
    • 1 cup (2 sticks / 227g) unsalted butter, ice-cold, cut into small cubes
    • 1 large egg
    • 1 tablespoon white vinegar
    • ¼ cup (60ml) ice water (plus more as needed)

    For the Butter Tart Filling:

    • ½ cup (1 stick / 113g) unsalted butter, melted
    • 1 cup (200g) packed brown sugar (light or dark)
    • ¼ cup (60ml) pure maple syrup (or corn syrup for classic version)
    • 2 large eggs, lightly beaten
    • 1 teaspoon vanilla extract
    • 1 tablespoon white vinegar (yes, again—it balances sweetness)
    • Pinch of salt

    Optional Add-Ins:

    • ½ cup raisins (plumped in hot water and drained)
    • ½ cup chopped pecans or walnuts
    • ½ cup shredded coconut

    Instructions

    1. Make the Pastry: In a large bowl, whisk together the flour and salt. Add the cold butter cubes. Using a pastry blender or your fingertips, cut the butter into the flour until the mixture resembles coarse meal with some pea-sized butter pieces remaining.

    In a small bowl, whisk together the egg, vinegar, and ice water. Drizzle over the flour mixture and toss with a fork until the dough just comes together. Add more ice water 1 teaspoon at a time if needed.

    2. Chill the Dough: Shape the dough into a disk, wrap in plastic wrap, and refrigerate for at least 2 hours, preferably overnight. This relaxes the gluten and keeps the butter cold.

    3. Prep the Raisins (if using): Place raisins in a small bowl, cover with hot water, and let sit for 10-15 minutes to plump. Drain well and pat dry.

    4. Roll and Cut the Pastry: On a lightly floured surface, roll the chilled dough to about ⅛ inch thickness. Using a round cutter (about 4 inches for standard muffin tins), cut out circles. Gather scraps, re-roll, and cut additional circles.

    5. Line the Muffin Tins: Gently press each pastry circle into the cups of a muffin tin (standard 12-cup tin), pleating slightly if needed. The pastry should come all the way to the top edge. Place the lined tin in the refrigerator while you make the filling.

    6. Make the Filling: In a medium bowl, whisk together the melted butter, brown sugar, maple syrup, beaten eggs, vanilla, vinegar, and salt until smooth and well combined. Do not overbeat—you don’t want to incorporate too much air.

    7. Add Optional Ingredients: If using raisins, pecans, or coconut, distribute them evenly among the chilled pastry shells—about 1 teaspoon per tart.

    8. Fill the Tarts: Remove the muffin tin from the fridge. Carefully spoon or pour the filling into each pastry shell, filling about ¾ full. The filling will puff slightly during baking.

    9. Preheat and Bake: Preheat your oven to 450°F (230°C). Place the tarts in the oven and immediately reduce the temperature to 375°F (190°C). Bake for 15-18 minutes, until the pastry is golden and the filling is set around the edges but still slightly jiggly in the center. This jiggle is what gives you that iconic runny center.

    10. Cool Completely: Let the tarts cool in the pan for 10-15 minutes, then carefully remove them to a wire rack to cool completely. The filling will continue to set as it cools.

    11. Serve and Celebrate: Serve at room temperature. These tarts keep well in an airtight container for up to 5 days—if they last that long.

    Pro-Tips for Butter Tart Perfection

    • The Vinegar Secret: Vinegar in both the pastry and the filling is a classic Canadian trick—it tenderizes the pastry and balances the sweetness. Don’t skip it!
    • Keep Everything Cold for Pastry: For the flakiest crust, your butter, water, and even your flour should be cold. Chill the dough thoroughly.
    • Don’t Overwork the Pastry: Overmixing develops gluten and makes tough pastry. Mix just until it comes together.
    • Chill the Lined Tins: A cold pastry shell holds its shape better and bakes up flakier. Pop them in the fridge while you make the filling.
    • Don’t Overfill: The filling will puff and bubble—fill only ¾ full to prevent overflow.
    • The Jiggle Test: For that iconic runny center, pull the tarts when the edges are set but the center still jiggles slightly. Overbaked butter tarts are still delicious but lose their signature runniness.
    • Raisin Debate: Traditionalists are divided on raisins. Offer both versions to please everyone.
    • Maple vs. Corn Syrup: Pure maple syrup adds Canadian authenticity and deeper flavor, but corn syrup gives a more classic clear filling. Both are delicious.

    These Authentic Canadian Butter Tarts are a national treasure—simple, perfect, and absolutely unforgettable.

  • Perfect Pound Cake (The Original Loaf)

    Perfect Pound Cake (The Original Loaf)

    Before layer cakes, before fancy frostings, before anything else—there was Pound Cake. The name tells the story: a pound of butter, a pound of sugar, a pound of eggs, a pound of flour. Four ingredients. Zero fuss. Maximum perfection.

    This is the cake that generations of bakers have turned to when nothing else would do. Dense yet tender, rich yet somehow simple, with a crackly top crust that gives way to a velvety, buttery crumb that melts on your tongue.

    It’s the cake you eat plain because it needs absolutely nothing—though a dollop of whipped cream and fresh berries never hurt anybody. This is baking at its most elemental, its most honest, and its most delicious.

    Ingredients

    For the Cake:

    • 1 lb (4 sticks / 454g) unsalted butter, softened to room temperature
    • 1 lb (about 2 cups / 454g) granulated sugar
    • 1 lb (about 9 large / 454g) eggs, room temperature
    • 1 lb (about 3 ½ cups / 454g) cake flour, sifted
    • 1 teaspoon vanilla extract (optional, but traditionalists allow it)
    • ½ teaspoon salt (omit if using salted butter)

    For Serving (Optional):

    • Powdered sugar for dusting
    • Fresh berries
    • Whipped cream

    Instructions

    1. The Cold Oven Start: Do not preheat your oven yet. Place an oven rack in the lower third position. Prepare a 10-inch tube pan or two 9×5 loaf pans by greasing and flouring them thoroughly, or use baking spray with flour. Set aside.

    2. Cream the Butter and Sugar: In the bowl of a stand mixer fitted with the paddle attachment (or using a hand mixer), beat the softened butter on medium speed for 2–3 minutes until smooth and creamy.

    Gradually add the sugar, about ¼ cup at a time, beating well after each addition. Once all sugar is added, continue beating on medium-high for 5–7 minutes until the mixture is pale, fluffy, and almost doubled in volume. This is the most important step—don’t rush it!

    3. Add the Eggs One at a Time: With the mixer on medium-low, add the eggs one at a time, beating well after each addition (about 30 seconds per egg). Scrape down the sides and bottom of the bowl frequently. The mixture should look smooth, glossy, and emulsified—never curdled. Beat in the vanilla extract if using.

    4. Fold in the Flour: Remove the bowl from the mixer. Sift the flour (and salt, if using) directly over the batter in three additions, gently folding with a large rubber spatula after each addition. Fold just until the flour disappears—overmixing will toughen the cake. The batter will be thick, silky, and beautifully aromatic.

    5. Fill the Pan: Spoon the thick batter into the prepared pan(s) and smooth the top with your spatula. Give the pan a gentle tap on the counter to release any large air bubbles.

    6. Bake in a Cold Oven: Place the pan in the cold oven. Set the oven temperature to 325°F (165°C). Bake for 60–75 minutes for a tube pan (45–55 minutes for loaf pans), until the cake is deep golden brown, the top has a beautiful crack, and a long skewer inserted into the center comes out clean or with a few moist crumbs.

    7. Cool in the Pan: Remove from the oven and place the pan on a wire rack. Let the cake cool in the pan for 15–20 minutes. This allows the structure to set.

    8. Turn Out and Cool Completely: Run a thin knife around the edges and the center tube. Invert the cake onto the wire rack, then flip it right-side up onto another rack. Allow to cool completely before slicing—at least 2 hours. This waiting is essential for the perfect texture.

    9. Serve: Dust with powdered sugar if desired. Slice with a serrated knife using a gentle sawing motion. Serve plain, with fresh berries and whipped cream, or toasted with butter for breakfast the next day (if any lasts that long).

    Pro-Tips for Pound Cake Perfection

    • Weigh Your Ingredients: Pound Cake is historically about weight, not volume. A kitchen scale guarantees the perfect 1:1:1:1 ratio every time. If you must use cups, fluff your flour and spoon it gently—never scoop.
    • Room Temperature Everything: Cold ingredients won’t emulsify properly. Set your butter, eggs, and even your flour out 1–2 hours before starting.
    • Beat It Good and Long: The creaming step isn’t optional—it’s the entire structure of your cake. Set a timer and cream for the full 5–7 minutes. You’re building the foundation.
    • Don’t Open the Oven: Peeking lets out heat and can deflate your cake. Trust the process and wait for the timer.
    • Cool Completely: Pound Cake needs time to set its dense crumb. Slicing warm leads to crumbling and a gummy texture. Patience, baker.

    This Perfect Pound Cake is more than a recipe—it’s a legacy. Four ingredients, one unforgettable cake.

  • Spicy Szechuan Chicken (Numbing, Tingling, Addictive)

    Spicy Szechuan Chicken (Numbing, Tingling, Addictive)

    This isn’t regular spicy. This is Szechuan spicy—numbing, tingling, make-your-lips-dance spicy. Crispy chicken, dried chilies, and those magical peppercorns. One bite and you’re hooked.

    Buckle up. It’s hot in here.

    Ingredients

    Serves 4.

    • 1.5 lbs (675g) chicken thighs, cut into bite-sized pieces
    • 2 tablespoons soy sauce
    • 1 tablespoon Shaoxing wine (or dry sherry)
    • 1 tablespoon cornstarch
    • 3 tablespoons oil
    • 10-15 dried red chilies
    • 1 tablespoon Szechuan peppercorns
    • 4 cloves garlic, minced
    • 1 inch ginger, grated
    • 3 green onions, sliced

    For the Sauce:

    • 3 tablespoons soy sauce
    • 1 tablespoon dark soy sauce
    • 1 tablespoon sugar
    • 1 teaspoon chili oil (optional)

    Step-by-Step Instructions

    Step 1: Marinate Chicken

    1. Toss chicken with soy sauce, wine, and cornstarch. Let sit 10 minutes.

    Step 2: Stir Fry

    1. Heat oil in a wok over high heat. Cook chicken until crispy and golden (5-6 minutes). Remove.

    Step 3: Bloom Spices

    1. Lower heat. Add dried chilies and Szechuan peppercorns. Fry 30 seconds until fragrant.
    2. Add garlic, ginger, and white parts of green onions. Cook 30 seconds.

    Step 4: Combine

    1. Return chicken to wok. Add sauce ingredients. Toss to coat.
    2. Cook 1-2 minutes until sauce thickens.

    Step 5: Serve

    1. Garnish with green onions. Serve with rice and a cold drink (trust me).

    Summary

    Prep Time: 15 minutes | Cook Time: 10 minutes | Total Time: 25 minutes

    Yield: 4 servings

    Difficulty: Medium (watch those chilies—don’t inhale)

    Storage Notes

    How to Store:

    • Fridge: Store up to 3 days. Spice intensifies overnight.
    • Reheat: Hot skillet or microwave.
    • Pro tip: Pick out dried chilies before storing if you’re spice-sensitive.
  • Honey Garlic Wings (Sweet, Sticky, Irresistible)

    Honey Garlic Wings (Sweet, Sticky, Irresistible)

    Meet your new wing obsession. Sweet honey meets savory garlic meets crispy baked chicken. No deep fryer. No mess. Just sticky, glossy, pull-out-the-napkins perfection.

    Double the batch. Trust me.

    Ingredients

    Serves 2-4.

    • 2 lbs (900g) chicken wings
    • 1 tablespoon baking powder (for crispy skin)
    • ½ teaspoon salt

    For the Honey Garlic Sauce:

    • ½ cup honey
    • 4 cloves garlic, minced
    • ¼ cup soy sauce
    • 2 tablespoons butter
    • 1 teaspoon sesame seeds (optional)
    • Green onions for garnish

    Step-by-Step Instructions

    Step 1: Prep & Bake Wings

    1. Preheat oven to 400°F (200°C). Place a wire rack on a baking sheet.
    2. Pat wings dry. Toss with baking powder and salt.
    3. Bake 40-45 minutes until golden and crispy.

    Step 2: Make Honey Garlic Sauce

    1. In a small pan, melt butter. Add garlic and cook 1 minute.
    2. Add honey and soy sauce. Simmer 2-3 minutes until slightly thickened.

    Step 3: Toss & Serve

    1. Toss hot wings in sauce until coated.
    2. Top with sesame seeds and green onions. Serve immediately.

    Summary

    Prep Time: 10 minutes | Cook Time: 45 minutes | Total Time: 55 minutes

    Yield: 2-4 servings

    Difficulty: Easy (baking powder = crispy magic)

    Storage Notes

    How to Store:

    • Fridge: Store up to 4 days.
    • Reheat: Oven at 375°F for 10 minutes or air fryer at 375°F for 5 minutes.
    • Microwave: No. Just no. Soggy wings are sad wings.
  • Chicken Empanadas: Golden Pockets of Latin Comfort

    Chicken Empanadas: Golden Pockets of Latin Comfort

    Empanadas are the ultimate hand pie—a golden, flaky dough wrapped around a savory filling that’s juicy, spiced, and deeply satisfying. This version features shredded chicken simmered with bell peppers, onions, garlic, cumin, paprika, green olives, and a handful of raisins for a touch of sweetness. You can bake them for a lighter crunch or fry them for extra decadence. The dough comes together in minutes, the filling is make-ahead friendly, and the whole family can help assemble. They freeze beautifully, so make a double batch.

    The Science of Flaky Dough & Why the Filling Must Be Dry

    Empanada dough is different from pie dough. It typically includes egg and sometimes vinegar or baking powder, which gives it a slightly more tender, pliable texture that can be folded and crimped without cracking. The fat (butter or shortening) is cut into the flour, creating small pockets of fat that melt during baking, leaving behind layers of flaky, tender dough. Resting the dough allows the gluten to relax, making it easier to roll out without shrinking. The filling must be dry—this is critical. If the filling is too wet, the liquid will soak into the dough during baking or frying, turning the empanadas soggy from the inside out. Cooking down the chicken mixture until most of the liquid evaporates, and letting it cool completely before assembling, prevents this. The egg wash isn’t just for color—it seals the edges and creates a glossy, golden-brown crust.

    Ingredients

    For the Empanada Dough:

    • 3 cups (360g) all-purpose flour
    • ½ teaspoon salt
    • ½ teaspoon baking powder (optional, for tenderness)
    • ½ cup (113g) unsalted butter, cold and cubed (or shortening)
    • 1 large egg
    • ⅓ cup (80 ml) cold water
    • 1 tablespoon white vinegar or apple cider vinegar

    For the Chicken Filling:

    • 2 cups (300g) cooked chicken, shredded (rotisserie chicken works great)
    • 1 tablespoon olive oil
    • 1 small onion, finely chopped
    • 1 bell pepper (red or green), finely chopped
    • 2 cloves garlic, minced
    • 1 teaspoon ground cumin
    • 1 teaspoon smoked paprika
    • ½ teaspoon dried oregano
    • ¼ cup (60 ml) chicken broth
    • ¼ cup (40g) green olives, chopped
    • 2 tablespoons raisins (optional, but traditional)
    • Salt and pepper to taste

    For Assembly & Finishing:

    • 1 large egg (for egg wash)
    • 1 tablespoon water (for egg wash)
    • Sesame seeds or coarse salt for topping (optional)

    For Serving:

    • Chimichurri sauce or salsa verde
    • Lime wedges

    Instructions

    1. Make the Dough: In a food processor, combine the flour, salt, and baking powder. Add the cold cubed butter and pulse until the mixture resembles coarse crumbs (about 10 pulses). In a small bowl, whisk together the egg, cold water, and vinegar. With the food processor running, pour the wet ingredients through the feed tube. Process just until the dough comes together in a ball—do not overmix. Turn the dough out onto a lightly floured surface, form into a disc, wrap in plastic, and refrigerate for at least 30 minutes (or up to 2 days).

    2. Make the Filling: Heat olive oil in a large skillet over medium heat. Add the onion and bell pepper, and cook for 5–6 minutes until softened. Add the garlic, cumin, smoked paprika, and oregano. Cook for 1 minute until fragrant. Add the shredded chicken and chicken broth. Cook for 3–4 minutes, stirring, until the liquid has mostly evaporated. Stir in the chopped olives and raisins. Season with salt and pepper. Remove from heat and let the filling cool completely. (Cold filling is much easier to work with.)

    3. Preheat the Oven: Preheat your oven to 400°F (200°C). Line two baking sheets with parchment paper.

    4. Roll Out the Dough: On a lightly floured surface, roll the dough out to about ⅛-inch (3mm) thickness. Use a 4–5 inch (10–12 cm) round cutter (or a bowl of similar size) to cut out circles. Gather the scraps, re-roll, and cut more circles. You should get about 16–20 circles.

    5. Fill the Empanadas: Place about 1½ tablespoons of cooled filling in the center of each dough circle. Dip your finger in water and moisten the edge of the dough. Fold the dough over the filling to create a half-moon. Press the edges firmly to seal. For a decorative edge, use a fork to crimp the edges, or fold and press the edge with your fingers.

    6. Egg Wash and Top: In a small bowl, whisk together the egg and 1 tablespoon of water. Brush the egg wash over each empanada. Sprinkle with sesame seeds or coarse salt if desired. Cut 2–3 small slits on top of each empanada with a knife to allow steam to escape.

    7. Bake: Arrange the empanadas on the prepared baking sheets, spaced about 1 inch apart. Bake for 20–25 minutes, rotating the pans halfway through, until the empanadas are deep golden-brown and the filling is hot. For frying: heat 2 inches of oil to 350°F (175°C) and fry for 2–3 minutes per side until golden.

    8. Serve: Let the empanadas cool for 5 minutes before serving (the filling is very hot). Serve warm with chimichurri or salsa verde for dipping and lime wedges on the side.

    Pro-Tips for Empanada Excellence

    • Keep the dough cold: Cold butter is the key to flaky layers. If the dough gets warm while you’re working, pop it back in the fridge for 10 minutes.
    • Don’t overwork the dough: Overmixing develops gluten, making the dough tough instead of tender. Mix just until it comes together.
    • Filling must be cool and dry: Warm or wet filling will make the dough soggy and difficult to seal. Cook the filling until most liquid is gone, then refrigerate or cool completely.
    • Don’t overfill: 1½ tablespoons is plenty. Overfilled empanadas burst open during baking.
    • Seal edges tightly: Press firmly, then crimp with a fork. Any gaps will leak filling.
    • Steam vents are essential: Those small slits on top let steam escape—otherwise the empanadas can explode or get soggy inside.
    • Freeze for later: Assemble uncooked empanadas on a parchment-lined baking sheet and freeze until solid, then transfer to a freezer bag. Bake from frozen—add 5–8 minutes to the baking time.
    • Make it spicy: Add ½ teaspoon of cayenne pepper or a chopped jalapeño to the filling.
    • Cheese variation: Add ¼ cup of shredded Monterey Jack or queso fresco to the filling. These empanadas are a project, but a fun one. Get the family involved—everyone can fill and crimp. The messy ones taste just as good.

  • Honey Sriracha Chicken: Sweet Heat, Sticky Wings

    Honey Sriracha Chicken: Sweet Heat, Sticky Wings

    This is the chicken you make when you want something sticky, spicy, sweet, and completely addictive. The honey-sriracha glaze is a perfect balance—the honey brings floral sweetness and that signature sticky gloss, while the sriracha adds heat, garlic, and a tangy vinegar kick. The chicken itself is baked until crispy and caramelized at the edges, then tossed in the glaze just before serving. No deep frying. No complicated techniques. Just a sheet pan, a saucepan, and chicken that will have people licking their fingers.

    The Science of Sticky Glaze & Why Baking Powder Creates Crispy Skin

    The honey-sriracha glaze works because of sugar and acid. Honey is primarily fructose and glucose. When heated, these sugars caramelize, creating deep, complex flavors while the sauce thickens into a sticky syrup. The sriracha provides heat from chili peppers, but also vinegar and garlic, which add tang and savory depth. A touch of soy sauce and rice vinegar balance the sweetness and prevent the glaze from being cloying. The chicken gets its crispy skin from baking powder, not oil. Baking powder is alkaline. When combined with salt and applied to chicken skin, it raises the pH of the skin’s surface, which breaks down proteins and allows them to crisp and brown faster in the oven. It also creates tiny bubbles on the skin’s surface, increasing surface area for maximum crunch. This is the same technique used for oven-fried wings. Baking soda works too but is much stronger—use a quarter of the amount or the chicken will taste metallic.

    Ingredients

    For the Chicken:

    • 2 lbs (900g) chicken wings (drumettes and flats) or boneless skinless thighs
    • 1 tablespoon baking powder (aluminum-free recommended)
    • 1 teaspoon salt
    • ½ teaspoon black pepper
    • ½ teaspoon garlic powder (optional)

    For the Honey Sriracha Glaze:

    • ½ cup (120 ml) honey
    • ¼ cup (60 ml) sriracha sauce
    • 2 tablespoons soy sauce (low sodium recommended)
    • 1 tablespoon rice vinegar (or apple cider vinegar)
    • 2 cloves garlic, minced
    • 1 teaspoon sesame oil
    • 1 tablespoon cornstarch mixed with 2 tablespoons cold water (slurry, optional for thicker glaze)

    For Serving:

    • Sesame seeds, toasted (white or black)
    • Green onions, thinly sliced
    • Ranch or blue cheese dressing (optional, for dipping)
    • Lime wedges (optional)

    Instructions

    1. Preheat the Oven: Preheat your oven to 425°F (220°C). Line a baking sheet with aluminum foil (for easy cleanup) and place a wire rack on top. The wire rack allows air to circulate under the chicken, making it crispy on all sides.

    2. Prep the Chicken: Pat the chicken wings completely dry with paper towels. This is essential—moisture is the enemy of crispy skin. In a large bowl, whisk together the baking powder, salt, black pepper, and garlic powder (if using).

    3. Coat the Chicken: Add the dried chicken wings to the bowl with the baking powder mixture. Toss with your hands until every wing is evenly coated in a thin, dusty layer. The baking powder should be visible as a light white dusting on the skin.

    4. Arrange on the Rack: Place the coated chicken wings on the wire rack in a single layer, skin-side up, with a little space between each wing. Do not overcrowd—if wings are touching, they will steam instead of crisp.

    5. Bake the Chicken: Bake for 40–45 minutes, rotating the pan halfway through, until the chicken is deep golden-brown, crispy, and the skin is crackly. For extra crispy wings, broil for the last 2–3 minutes (watch carefully—they burn fast).

    6. Make the Honey Sriracha Glaze: While the chicken bakes, combine the honey, sriracha, soy sauce, rice vinegar, minced garlic, and sesame oil in a small saucepan. Whisk together. Bring to a simmer over medium heat, stirring occasionally. Cook for 2–3 minutes until the honey is fully incorporated and the mixture is fragrant.

    7. Thicken the Glaze (Optional): If you prefer a thicker, stickier glaze, give the cornstarch slurry a quick stir and pour it into the simmering sauce while whisking constantly. Cook for 30–45 seconds until the sauce thickens. If you prefer a thinner glaze that soaks into the chicken more, skip the cornstarch.

    8. Toss the Chicken in Glaze: Remove the chicken from the oven. Transfer the hot wings to a large bowl. Pour the warm honey sriracha glaze over the chicken. Toss gently with tongs or a spatula until every wing is evenly coated in the glossy, sticky sauce.

    9. Garnish and Serve: Transfer the glazed wings to a serving platter. Sprinkle generously with toasted sesame seeds and sliced green onions. Serve immediately with ranch or blue cheese dressing for dipping (to cool the heat) and lime wedges on the side. Eat with your hands and plenty of napkins.

    Pro-Tips for Honey Sriracha Chicken Greatness

    • Pat the chicken bone-dry: This is the most important step for crispy skin. Use multiple paper towels and really press to absorb all surface moisture.
    • Baking powder, not baking soda: Baking soda is much stronger and will leave a metallic taste. Use aluminum-free baking powder for the best results.
    • Use a wire rack: Baking directly on the sheet pan traps steam underneath the chicken, making the bottom soggy. A wire rack allows air to circulate for 360-degree crispiness.
    • Don’t overcrowd the pan: Wings need space for air to circulate. If your pan is small, bake in two batches.
    • Adjust the heat level: ¼ cup sriracha gives a solid medium-high heat. For mild, use 2 tablespoons sriracha + 2 tablespoons ketchup. For extra spicy, add 1 teaspoon red pepper flakes or a splash of chili oil.
    • Make it a meal: Serve over steamed rice with roasted broccoli or snap peas. The extra glaze soaks into the rice beautifully.
    • Boneless thighs: This recipe works great with boneless, skinless chicken thighs. Cut into bite-sized pieces, coat with baking powder mixture, bake for 20–25 minutes (less time than wings), then toss in glaze.
    • Double the glaze: If you love sauce (like I do), double the glaze ingredients. Keep the cornstarch slurry the same—you can always add more if needed.
    • Leftovers: Reheat in an air fryer or oven (not microwave) to restore crispiness. The glaze will reliquefy and re-stick. These wings are sticky, spicy, sweet, and completely addictive. Make extra—they disappear fast.

  • Gyoza: Crispy, Juicy, Japanese Pan-Fried Dumplings

    Gyoza: Crispy, Juicy, Japanese Pan-Fried Dumplings

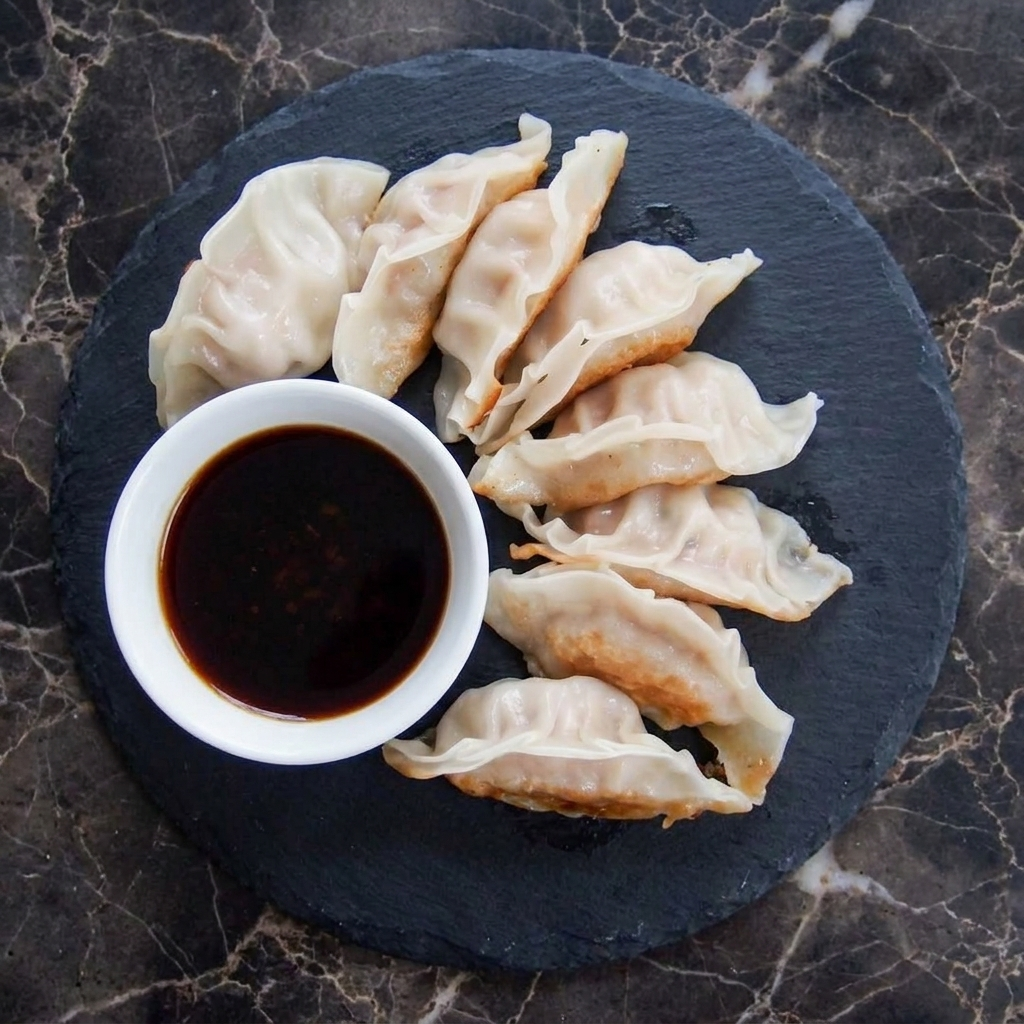
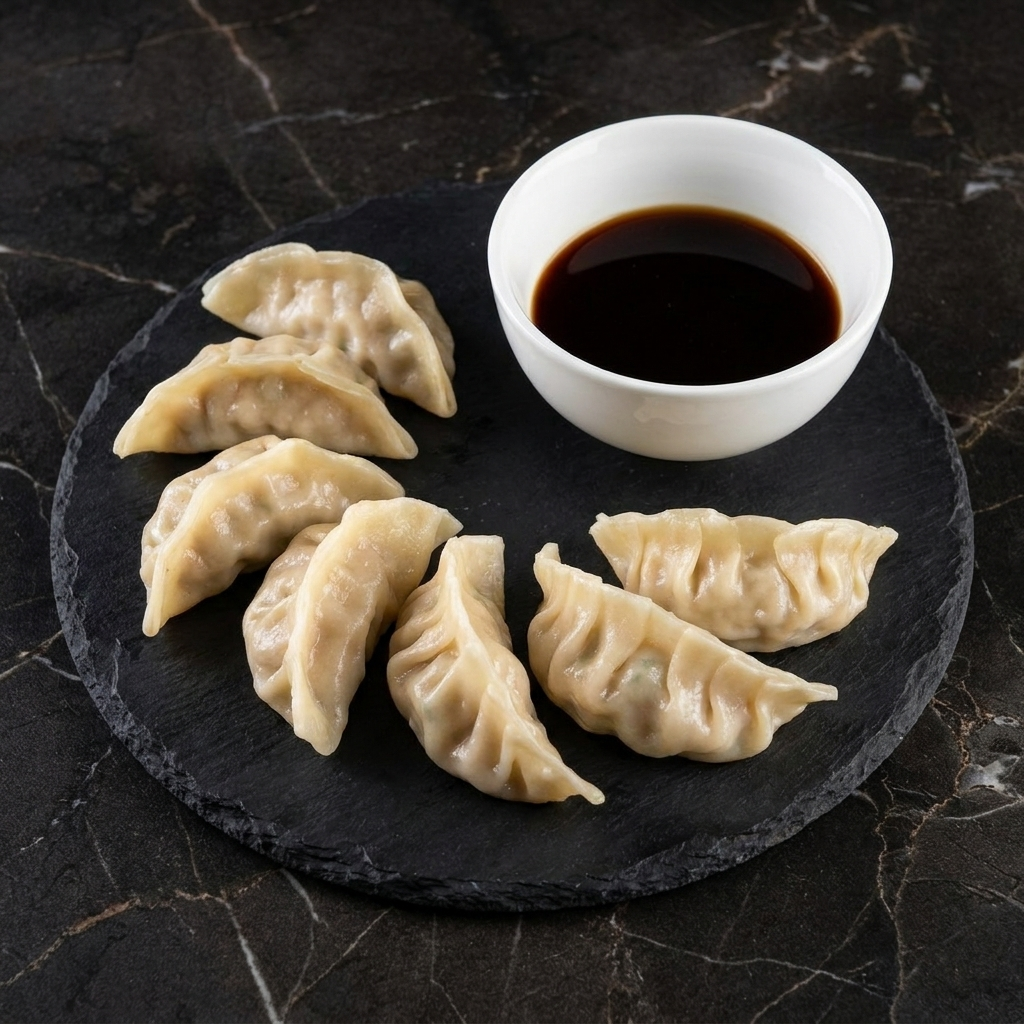
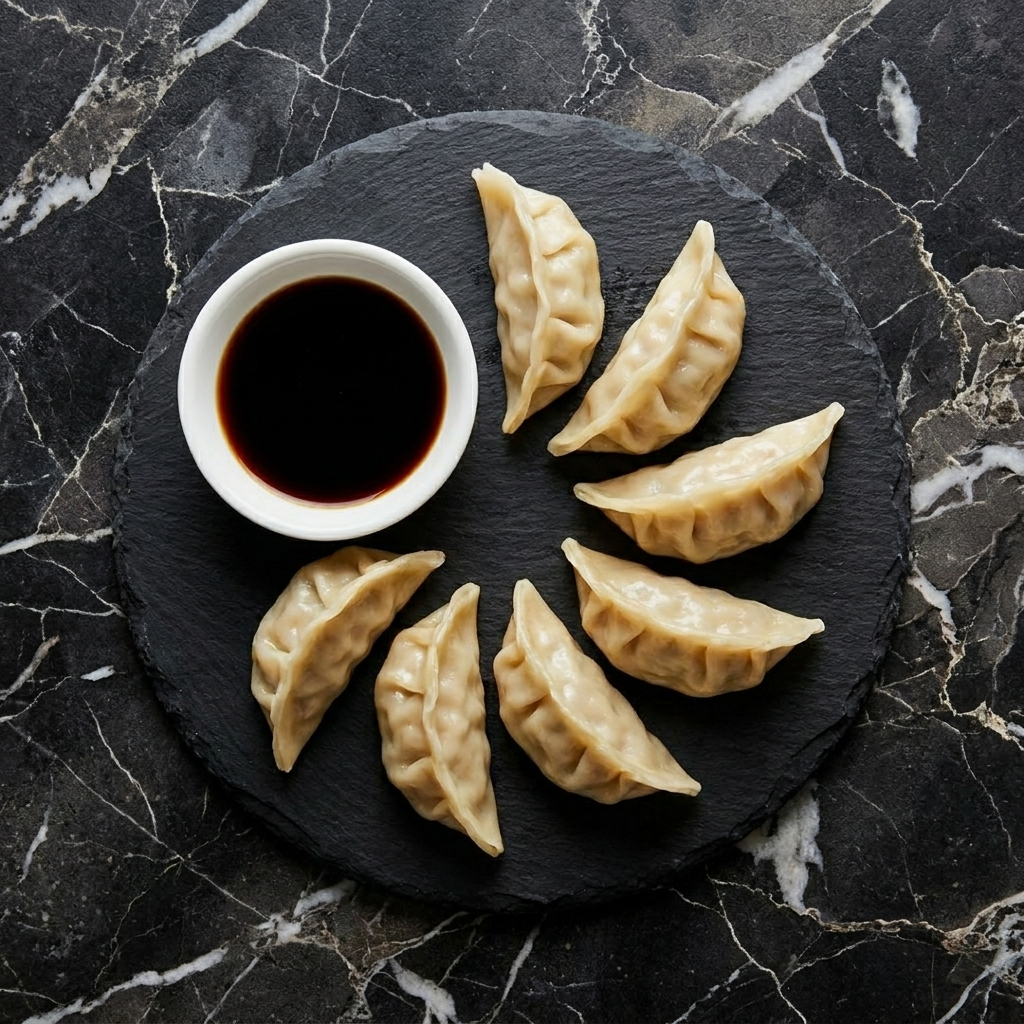
    Gyoza are the perfect food. A thin, chewy wrapper envelops a juicy, savory filling of pork, cabbage, garlic, and ginger. They’re pan-fried to create a golden, crispy lace crust on the bottom while the top stays soft and tender. Steam finishes the cooking, ensuring the filling stays moist. Dip them in a simple sauce of soy sauce, rice vinegar, and chili oil, and you have a dish that’s impossible to stop eating. Yes, folding takes practice. No, they don’t have to be perfect. Make a big batch, freeze half, and thank yourself later.

    The Science of the Crispy Lace Bottom & Why Cabbage Needs Salt

    The signature gyoza crust comes from a starch slurry—a mixture of water, flour, and sometimes potato starch—that’s added to the pan during steaming. As the water evaporates, the starch left behind crisps into a golden, lacy network that fuses the dumplings together. This crust is the best part. The filling’s juiciness depends on cabbage preparation. Raw cabbage contains a lot of water. If added directly to the filling, that water will release during cooking, turning the interior soggy and causing the wrappers to tear. The solution: salt the shredded cabbage, let it sit for 15 minutes, then squeeze out the excess water. This removes moisture while keeping the cabbage’s texture and flavor. The pork fat provides juiciness—don’t use lean ground pork. The fat renders during cooking and bastes the filling from the inside.

    Ingredients

    For the Filling:

    • 1 lb (450g) ground pork (not lean — 80/20 is ideal)
    • 2 cups (150g) green cabbage, finely shredded
    • ½ cup (60g) garlic chives (nira) or green onions, finely chopped
    • 2 cloves garlic, minced
    • 1 tablespoon fresh ginger, grated
    • 2 tablespoons soy sauce
    • 1 tablespoon sake (or dry sherry)
    • 1 tablespoon sesame oil
    • 1 teaspoon salt (for the cabbage)
    • ¼ teaspoon white pepper

    For the Gyoza Wrappers:

    • 1 package (about 40–50) round gyoza wrappers (available frozen or refrigerated)
    • Small bowl of water for sealing

    For Cooking:

    • 2 tablespoons vegetable oil
    • ½ cup (120 ml) water
    • 1 teaspoon flour or potato starch (optional, for extra crispy lace)

    For the Dipping Sauce:

    • ¼ cup (60 ml) soy sauce
    • ¼ cup (60 ml) rice vinegar
    • 1 teaspoon chili oil (rayu) or to taste
    • 1 clove garlic, thinly sliced (optional)

    Instructions

    1. Prep the Cabbage: Finely shred the cabbage. Place it in a bowl, sprinkle with 1 teaspoon of salt, and toss to combine. Let sit for 15 minutes. This draws out excess moisture. After 15 minutes, squeeze handfuls of cabbage over the sink to remove as much liquid as possible. Use your hands—really squeeze. Transfer the squeezed cabbage to a clean bowl.

    2. Make the Filling: To the squeezed cabbage, add the ground pork, chopped garlic chives (or green onions), minced garlic, grated ginger, soy sauce, sake, sesame oil, and white pepper. Mix vigorously with your hands or a spatula until the mixture becomes sticky and slightly paste-like. This kneading step is important—it develops the protein structure that keeps the filling moist and cohesive. The filling should be uniform, with no dry spots.

    3. Set Up Your Folding Station: Lay out a clean, dry surface. Place the gyoza wrappers nearby (cover with a damp cloth to prevent drying). Put the filling in a bowl. Place a small bowl of water for sealing. Have a baking sheet lined with parchment paper ready for finished gyoza.

    4. Fold the Gyoza: Hold a wrapper in your non-dominant hand. Place 1 teaspoon of filling in the center (don’t overfill). Dip your fingertip in water and moisten the outer half of the wrapper’s edge. Fold the wrapper in half over the filling, creating a half-moon. Press the edges together to seal, but leave the top edge open. With your thumbs and index fingers, create 4–6 pleats along one side, pressing each pleat against the flat side to seal. The finished dumpling should stand upright slightly on its flat bottom. Place on the parchment-lined baking sheet, pleat-side up, making sure dumplings don’t touch. Repeat with remaining wrappers.

    5. Make the Dipping Sauce: In a small bowl, combine soy sauce, rice vinegar, chili oil, and sliced garlic (if using). Set aside.

    6. Pan-Fry the Gyoza (First Batch): Heat a large nonstick skillet or cast-iron pan over medium-high heat. Add 1 tablespoon of vegetable oil and swirl to coat. Carefully place gyoza in the pan, flat-bottom side down, in a single layer. Do not crowd—leave a little space between each dumpling. Fry for 2–3 minutes until the bottoms are golden-brown and crispy. Peek underneath to check.

    7. Steam the Gyoza: Once the bottoms are golden, add ¼ cup of water to the pan (and ½ teaspoon flour if you want extra crispy lace). Cover immediately with a lid. Reduce heat to medium-low. Steam for 3–4 minutes until the water has mostly evaporated and the wrappers are translucent and cooked through.

    8. Crisp the Bottoms (Final Step): Remove the lid. Increase heat back to medium-high. Let any remaining water evaporate, then cook for another 30–60 seconds until the bottoms become dark golden-brown and extra crispy. The starch from the flour (if added) will create a lacy, crackling crust.

    9. Serve: Carefully slide a spatula under the gyoza to release them. Invert the pan onto a plate to serve them bottom-side up (showing off the crispy crust) or transfer them directly. Serve immediately with the dipping sauce. Repeat with remaining gyoza or freeze the uncooked ones for later (see pro-tips).

    Pro-Tips for Gyoza Greatness

    • Squeeze the cabbage firmly: This is the most important step for juicy dumplings. Wet cabbage = soggy filling and broken wrappers. Don’t be shy.
    • Knead the filling well: The mixture should feel sticky and almost paste-like. This binds the ingredients together and prevents the filling from crumbling.
    • Don’t overfill the wrappers: 1 teaspoon is plenty. Overfilled dumplings burst during cooking and won’t seal properly.
    • Keep wrappers covered: Gyoza wrappers dry out fast. Cover the stack with a damp paper towel while you work.
    • Pleating takes practice: Your first few gyoza will be ugly. By dumpling #20, you’ll see improvement. By #40, you’ll be a pro. Ugly gyoza still taste amazing.
    • Freeze uncooked gyoza: Place them on a parchment-lined baking sheet (not touching) and freeze until solid, then transfer to a freezer bag. Cook from frozen—add 1–2 minutes to the steam time.
    • Don’t skip the starch slurry for extra crunch: Adding a little flour to the steaming water creates a lacy, crispy “wing” (hane) that connects the dumplings—this is how restaurants do it.
    • Nonstick pan is your friend: Gyoza are sticky. A good nonstick skillet makes release much easier.
    • Leftover gyoza: Reheat in a dry pan over medium heat—never microwave (makes them rubbery). These dumplings are a project, but a fun one. Make them with friends, make a mess, and eat standing over the pan. That’s the gyoza way.

  • Takoyaki: Golden Octopus Balls, Osaka Soul

    Takoyaki: Golden Octopus Balls, Osaka Soul

    Takoyaki (たこ焼き) translates to “octopus fried” — but that doesn’t capture the magic. These golden spheres from Osaka are crispy and brown on the outside, soft and almost molten on the inside, with a tender piece of octopus in the center. They’re cooked in a special cast-iron pan with semi-spherical molds, then turned repeatedly until perfectly round. Topped with sweet-salty takoyaki sauce, creamy Japanese mayonnaise, dancing bonito flakes, and green seaweed powder, they’re pure street food joy. Yes, you need the pan. No, you won’t regret buying it.

    The Science of the Custardy Interior & Why You Need Dashi

    Takoyaki’s unique texture comes from a batter that’s much thinner and wetter than pancake batter. The high liquid content (dashi, eggs, flour) creates steam as it cooks, which puffs up the balls and leaves the inside soft and almost pudding-like. The dashi is non-negotiable — it’s a Japanese stock made from kombu (kelp) and bonito flakes. Dashi provides umami and a subtle oceanic flavor that defines authentic takoyaki. Water or plain broth will not work. The cooking method is a low-and-slow rotation. Unlike pancakes that you flip once, takoyaki requires constant turning over 5–7 minutes. This repeated rotation creates the round shape while the exterior sets into a crisp shell and the interior remains custardy. The octopus is parcooked before adding — raw octopus would release water into the batter and make the inside soggy.

    Ingredients

    For the Batter:

    • 1 cup (120g) all-purpose flour
    • 2 cups (480 ml) dashi (Japanese stock — see note)
    • 2 large eggs
    • 1 teaspoon soy sauce
    • ½ teaspoon salt

    For the Fillings:

    • 4 oz (115g) cooked octopus, cut into ½-inch (1.25 cm) chunks (about 24–30 pieces)
    • ¼ cup (30g) green onions (scallions), finely chopped
    • ¼ cup (30g) pickled red ginger (beni shoga or kizami shoga), finely chopped
    • Vegetable oil for greasing the pan

    For the Toppings:

    • Takoyaki sauce (or okonomiyaki sauce)
    • Japanese mayonnaise (Kewpie brand recommended)
    • Aonori (dried green seaweed flakes)
    • Bonito flakes (katsuobushi)
    • Extra pickled ginger (optional)

    Special Equipment:

    • Takoyaki pan (cast iron or electric, 16–24 molds)
    • Takoyaki turning picks or bamboo skewers

    Instructions

    1. Make the Dashi (if not using instant): If using instant dashi powder, dissolve 1 teaspoon powder in 2 cups hot water. If making from scratch, simmer a 4-inch piece of kombu in 2 cups water (don’t boil), remove kombu, add a handful of bonito flakes, steep for 5 minutes, then strain. Set aside to cool slightly.

    2. Make the Batter: In a large bowl, whisk together the flour, dashi, eggs, soy sauce, and salt until smooth. The batter should be thin and runny—thinner than pancake batter. Let it rest for 15–20 minutes. This allows the flour to hydrate fully and reduces lumps.

    3. Prep the Fillings: Finely chop the green onions and pickled ginger. Cut the cooked octopus into small, bite-sized chunks (about ½ inch). Keep each filling in separate small bowls near the stove.

    4. Heat the Takoyaki Pan: Place the takoyaki pan over medium heat. Generously brush each semi-spherical mold with vegetable oil, including the flat surface between molds. Heat until the oil shimmers—a drop of batter should sizzle immediately.

    5. Fill the Molds: Pour the batter into a measuring cup with a spout for easy pouring. Fill each mold completely to the brim—the batter will overflow slightly. This is correct. Working quickly, drop 1–2 pieces of octopus into each mold, followed by a sprinkle of green onions and pickled ginger.

    6. The First Turn (30–45 seconds): After 30–45 seconds, the bottom of each ball will have set and turned golden-brown. Using a takoyaki pick or bamboo skewer, drag the excess batter from between the molds into each ball, then turn each ball 90 degrees. The uncooked batter will spill out—this becomes the next side. Don’t worry about perfection yet.

    7. Continue Turning (Every 30 seconds): Over the next 5–7 minutes, keep turning each ball every 30–45 seconds. Use two picks for better control. The balls will gradually become round as the batter cooks and sets. Add small drizzles of extra batter into any holes or gaps. The outside should become deep golden-brown and crisp, while the inside stays soft.

    8. Final Crisping: Once the balls are perfectly round and uniformly golden-brown (about 6–8 minutes total), brush a tiny amount of oil over them and let them cook for another 30 seconds to crisp the exterior.

    9. Sauce and Serve: Transfer the takoyaki to a plate. Drizzle generously with takoyaki sauce (dark brown, sweet-savory), then zigzag with Japanese mayonnaise. Sprinkle with aonori (green seaweed powder) and a generous handful of bonito flakes—they will dance and move from the heat. Top with extra pickled ginger if desired. Serve immediately with toothpicks or small forks.

    Pro-Tips for Takoyaki Perfection

    • Dashi is essential: Do not substitute water or chicken broth. Dashi’s umami is what makes takoyaki taste like takoyaki. Instant dashi powder (hondashi) is fine and widely available at Asian grocery stores or online.
    • Cooked octopus only: Buy pre-cooked octopus at Japanese or Korean markets. Boil raw octopus for 20–30 minutes until tender, then cool before cutting.
    • Rest the batter: Those 15–20 minutes allow the gluten to relax and the flour to hydrate, resulting in a softer interior.
    • Don’t be afraid of overflow: Overfilling the molds is correct. The excess batter becomes the material you use to build the round shape during turning.
    • Use two turning picks: One pick is frustrating. Two picks give you control to rotate each ball smoothly.
    • Low and slow heat: Medium heat is ideal. Too high and the outside burns before the inside sets. Too low and the balls become dense and greasy.
    • Kewpie mayonnaise is worth it: Japanese mayonnaise has a different flavor (more egg yolk, MSG, and rice vinegar) that pairs perfectly with takoyaki. American mayo is not the same.
    • Bonito flakes dance: The heat from the takoyaki makes the paper-thin bonito flakes curl and move. This is not a defect—it’s the visual signature of the dish.
    • Leftover batter: Use extra batter to make okonomiyaki or Japanese pancakes. The first few takoyaki will be ugly. By the end of the batch, you’ll be a pro. This is the taste of Osaka festivals, and now it’s your kitchen.