Author: user

  • Roasted Sweet Potato & Kale Salad with Maple Dijon Dressing

    Roasted Sweet Potato & Kale Salad with Maple Dijon Dressing

    Salads in the colder months need to be substantial. They need to be more than just lettuce—they need to be a meal that satisfies, warms from the inside out, and celebrates the robust produce of the season.

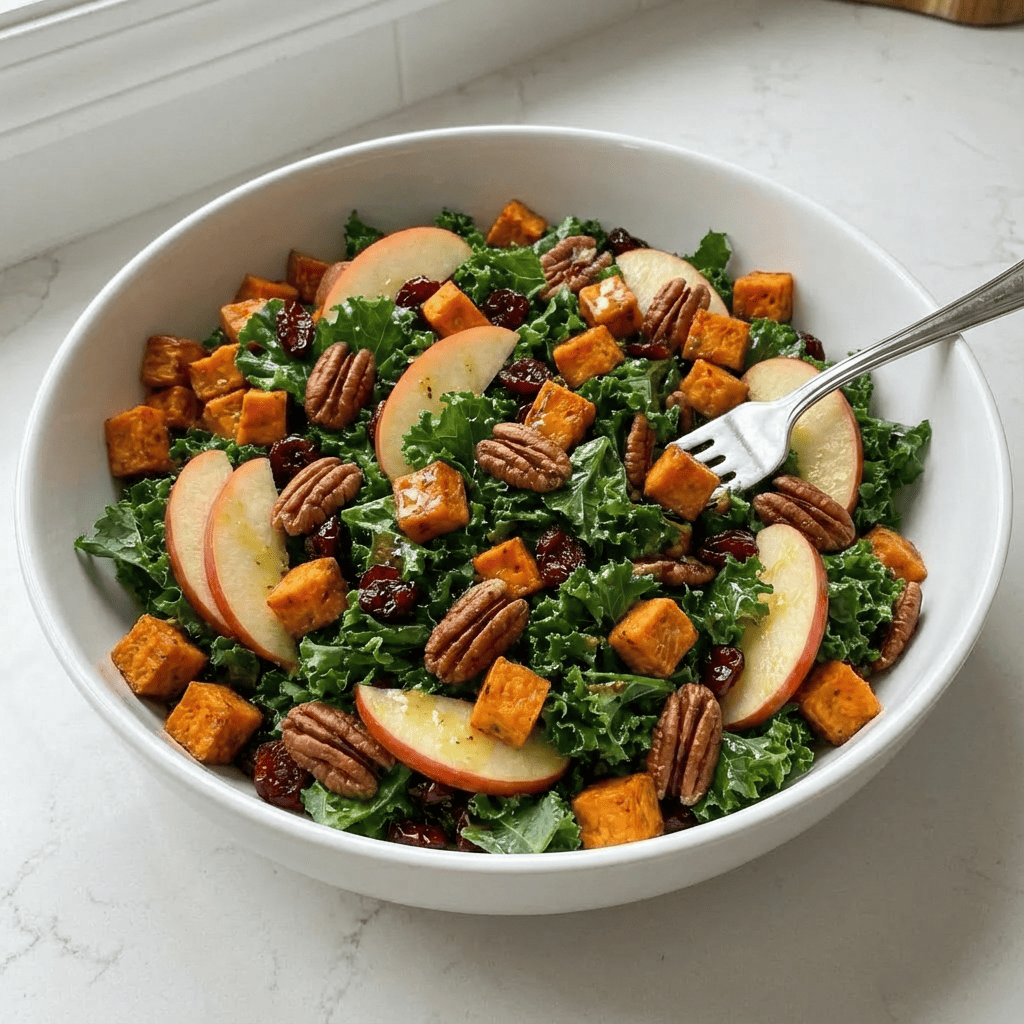
    This Roasted Sweet Potato & Kale Salad is exactly that. It’s a textural and flavorful masterpiece that turns the humble kale salad into a nourishing centerpiece. We start with hearty kale, massaged until tender, then pile it high with caramelized cubes of roasted sweet potato, crisp apple slices for a fresh bite, tart dried cranberries, and buttery toasted pecans for crunch. The crowning glory is a simple, whisk-together maple Dijon dressing that ties every element together with its perfect balance of sweet, tangy, and savory notes.

    This salad is as beautiful as it is delicious, making it ideal for a healthy weeknight dinner, an impressive lunch to pack, or a standout side dish on your holiday table. It’s proof that a salad can be both comforting and incredibly vibrant.

    The Secret to a Truly Enjoyable Kale Salad

    Kale has a reputation for being tough and bitter, but when treated correctly, it becomes the most delicious and sturdy green for a salad. The key is a technique called “massaging.” Rubbing the torn kale leaves with a little oil and salt for just 60-90 seconds breaks down the tough, fibrous cell structure. This process tenderizes the leaves, deepens their color to a beautiful dark green, and mellows any bitter edge, transforming them into a silky, flavorful base that actually welcomes dressing instead of repelling it.

    Pairing this tender kale with warm roasted sweet potatoes is a stroke of genius. The residual heat from the potatoes, when tossed with the kale, slightly wilts it further, creating a wonderful contrast with the cold, crisp apple. This salad also excels because of its make-ahead nature. Unlike delicate greens, massaged kale and roasted vegetables hold up beautifully for days, making this the ultimate meal-prep lunch that only gets better as the flavors marinate.

    Ingredients

    For the Salad:

    • 2 medium sweet potatoes (about 1.5 lbs), peeled and cubed
    • 1 tablespoon olive oil
    • Salt and black pepper
    • 1 large bunch curly or Lacinato kale, stems removed and leaves torn
    • 1 tablespoon olive oil (for massaging)
    • 1 crisp apple (like Honeycrisp or Fuji), thinly sliced
    • 1/2 cup dried cranberries
    • 1/2 cup pecans, toasted and roughly chopped
    • Optional: 1/2 cup crumbled goat cheese or feta

    For the Maple Dijon Dressing:

    • 1/4 cup extra-virgin olive oil
    • 2 tablespoons apple cider vinegar
    • 1 tablespoon pure maple syrup
    • 1 tablespoon Dijon mustard
    • 1 small garlic clove, minced
    • 1/4 teaspoon salt, plus more to taste
    • 1/8 teaspoon black pepper

    Instructions

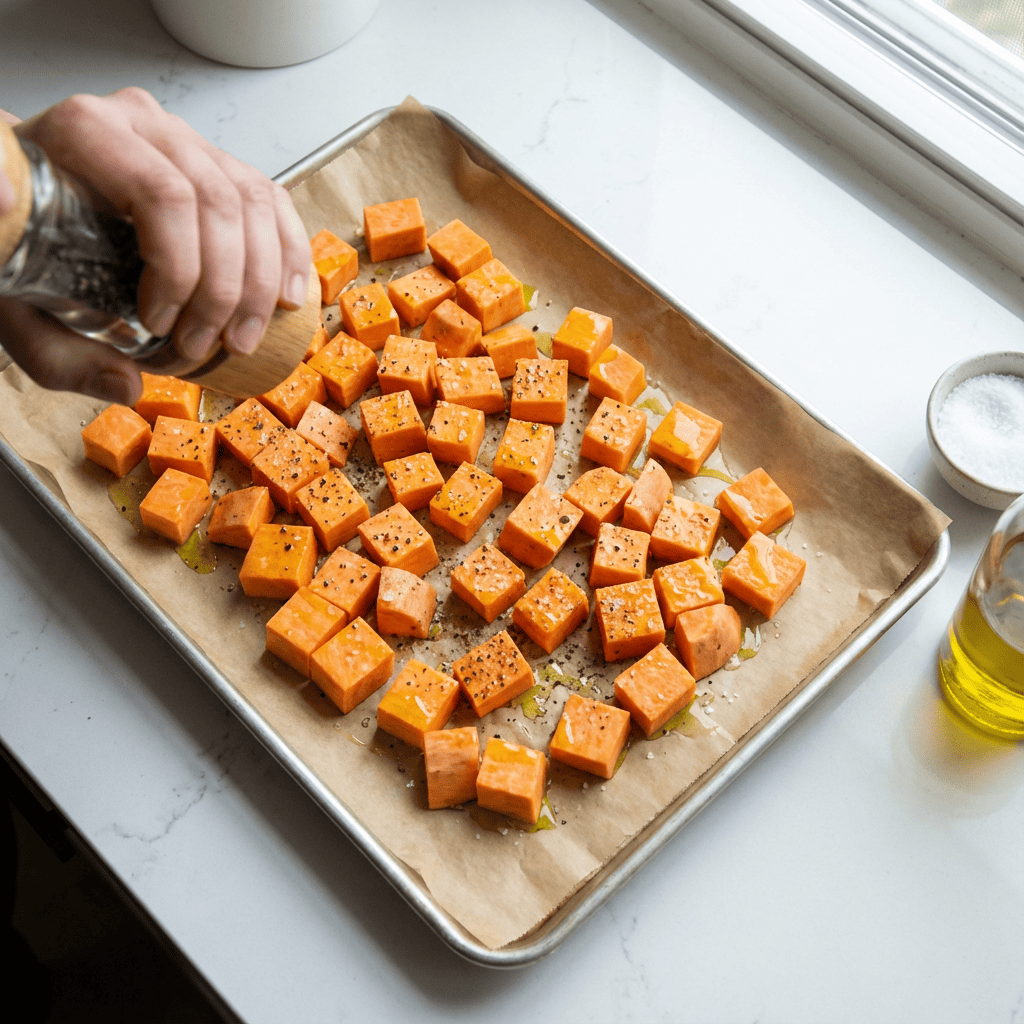
    1. Roast the Sweet Potatoes: Preheat your oven to 400°F (200°C). Toss the cubed sweet potatoes with 1 tablespoon of olive oil, salt, and pepper on a parchment-lined baking sheet. Spread in a single layer. Roast for 25-30 minutes, tossing halfway, until tender and caramelized at the edges. Let cool slightly.
    2. Massage the Kale: While potatoes roast, place the torn kale leaves in a large salad bowl. Drizzle with 1 tablespoon of olive oil and a generous pinch of salt. Using clean hands, scrunch and massage the kale for 60-90 seconds. You’ll feel the leaves soften and darken in color. Set aside.

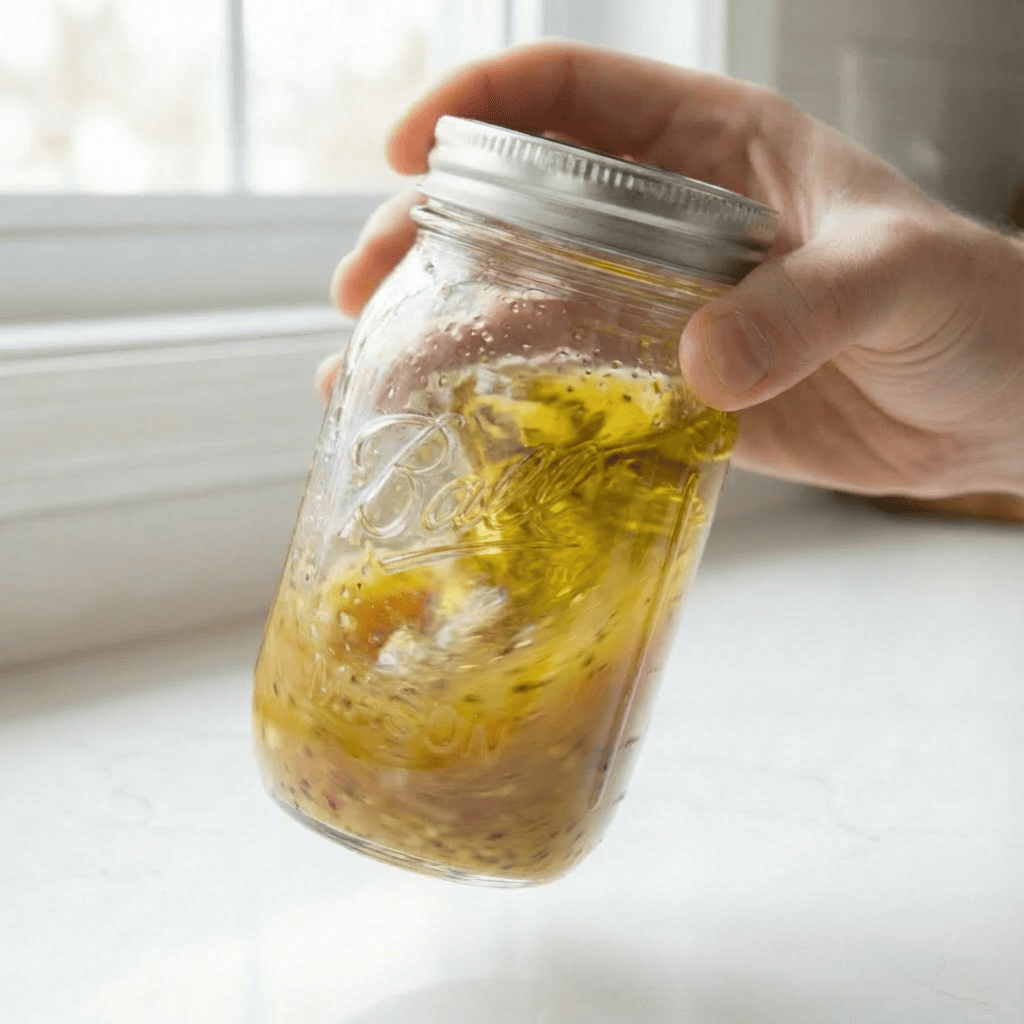
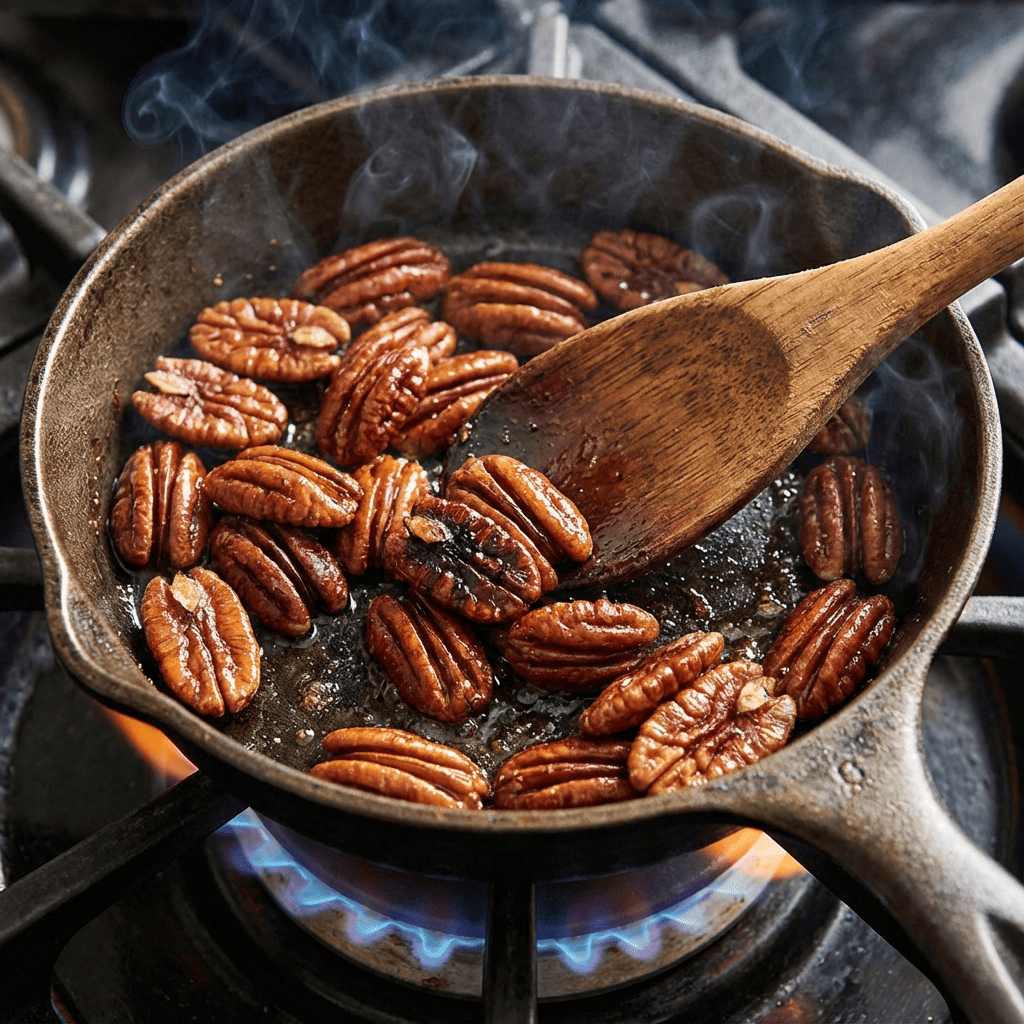
    3. Make the Dressing & Toast Pecans: In a small jar or bowl, combine all dressing ingredients: olive oil, apple cider vinegar, maple syrup, Dijon mustard, minced garlic, salt, and pepper. Shake or whisk vigorously until emulsified. Taste and adjust seasoning. In a small dry skillet over medium heat, toast the pecans for 3-5 minutes, stirring frequently, until fragrant. Chop when cool.
    4. Assemble the Salad: To the bowl of massaged kale, add the warm roasted sweet potatoes, sliced apple, dried cranberries, and most of the toasted pecans. If using, add the crumbled cheese.

    5. Dress and Serve: Pour about 3/4 of the dressing over the salad. Toss thoroughly until everything is evenly coated. Taste and add more dressing if desired. Let the salad sit for 5-10 minutes to allow the kale to absorb the flavors. Top with the remaining pecans and serve.
    Make-Ahead Tips & Customizations

    This salad is a meal-prep dream. Roast the sweet potatoes and store them separately. Wash, dry, and massage the kale, then store it in an airtight container—it will stay perfect for 3 days. Assemble individual portions in jars or containers: dressing on the bottom, then sweet potatoes, then apples/cranberries, with the kale and nuts on top to stay crisp. When ready to eat, just shake it up.

    For a protein boost, add a can of rinsed chickpeas (roast them with the sweet potatoes for extra crunch) or top with grilled chicken or salmon.

    You can swap the pecans for walnuts or pumpkin seeds, and the apple for pear. The massaged kale base won’t wilt, making this salad perfect for potlucks and gatherings where it needs to sit out. This recipe is a versatile blueprint for a healthy, hearty, and deeply satisfying salad that will become a staple in your seasonal rotation.

  • Easy Beef Birria Tacos (Consommé & Quesabirria)

    Easy Beef Birria Tacos (Consommé & Quesabirria)

    The internet-fueled love affair with birria tacos is one of the best things to happen to home cooking in years. This iconic dish from Jalisco, Mexico, is a symphony of deep, complex flavors and irresistible textures. Traditionally, it’s a labor of love involving goat meat and a long list of dried chiles.

    This recipe is a brilliant, accessible adaptation that captures the soul of birria using easy-to-find ingredients and your slow cooker, Instant Pot, or Dutch oven. We’re talking about beef chuck roast, slowly braised until fall-apart tender in a rich, brick-red broth infused with guajillo chiles, warm spices, and a touch of vinegar. That broth, known as consommé, is liquid gold—a dipping sauce that elevates the tacos to an otherworldly experience. And when you fry that meat-filled tortilla in its own fat and melt cheese onto it to make a quesabirria?

    That’s when magic happens. Get ready for a taco night that will blow everyone away.

    The Heart of Birria: The Consommé & The Braise

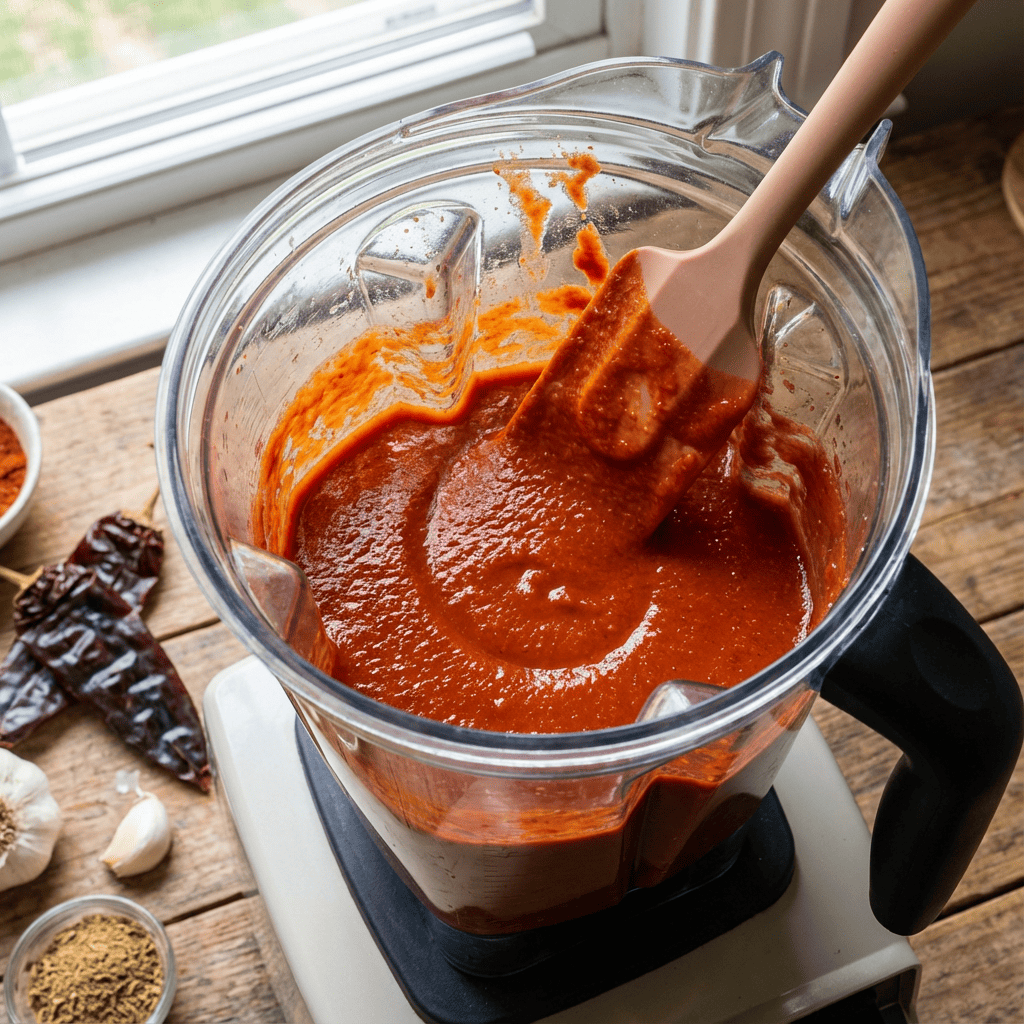
    The transformative power of birria lies in two key elements: the adobo marinade and the braising liquid that becomes the consommé. The adobo is built from rehydrated guajillo chiles (which provide a deep, fruity heat without being fiery), blended with tomatoes, onions, garlic, and warm spices like cumin, oregano, and cloves. This vibrant paste is where the dish gets its signature color and foundational flavor.

    Braising the marinated beef in this mixture, along with broth, allows the tough cut of meat to become incredibly tender while the flavors meld and concentrate. As the meat cooks, the fat renders and rises to the top. This flavorful fat is then used to fry the tortillas, imbuing them with an unbelievable savory depth before they’re filled.

    The remaining broth, strained and skimmed, is your consommé—a rich, sippable, complex dipping sauce that is the perfect companion to the rich, crispy tacos. It’s this beautiful cycle of flavor that makes birria so special.

    Ingredients

    For the Birria Beef & Consommé:

    • 4-5 dried guajillo chiles, stems and seeds removed
    • 1 (14 oz) can diced tomatoes, with juices
    • 1 medium white onion, roughly chopped
    • 6 cloves garlic
    • 2 teaspoons dried oregano (preferably Mexican)
    • 1 teaspoon ground cumin
    • ½ teaspoon ground cinnamon
    • ¼ teaspoon ground cloves
    • 2 bay leaves
    • ¼ cup apple cider vinegar
    • 4 cups beef broth
    • 3-4 pounds beef chuck roast, cut into 3-4 large chunks
    • Salt to taste

    For Assembling the Tacos:

    • Corn tortillas
    • Shredded Oaxaca, Chihuahua, or mozzarella cheese
    • Fresh white onion, finely diced
    • Fresh cilantro, chopped
    • Lime wedges

    Instructions

    Part 1: Make the Birria Beef & Consommé

    1. Toast & Soak Chiles: Heat a dry skillet over medium. Toast the dried guajillo chiles for 30-60 seconds per side until fragrant and slightly pliable. Place in a heatproof bowl and cover with hot water. Soak for 15 minutes to soften.

    2. Make the Adobo Sauce: Drain the chiles. In a blender, combine soaked chiles, diced tomatoes (with juice), chopped onion, garlic, oregano, cumin, cinnamon, cloves, and vinegar. Blend on high until a completely smooth, vibrant red sauce forms.

    3. Marinate & Cook the Beef:
    Slow Cooker: Place beef chunks in the pot. Pour adobo sauce over them, add bay leaves and broth. Cook on LOW for 8 hours or HIGH for 5-6 hours.


    Instant Pot: Use sauté function to brown beef chunks (optional). Add all ingredients. Pressure cook on HIGH for 60 minutes, natural release for 15 minutes.


    Dutch Oven: Brown beef in oil. Add all ingredients, bring to a simmer, cover, and place in a 325°F (160°C) oven for 3-4 hours.

    4. Shred & Strain: The beef should be fork-tender. Remove beef and shred with two forks. Strain the cooking broth into a fat separator or bowl. Let the fat rise to the top. Skim off this flavorful fat (birria fat) and reserve in a small bowl for frying tacos. The remaining clear broth is your consommé; season with salt and keep warm.

    Part 2: Assemble the Quesabirria Tacos

    5. Fry the Tacos: Heat a skillet or griddle over medium heat. Dip a corn tortilla into the reserved birria fat, coating both sides. Place it on the hot skillet. Immediately add a handful of shredded cheese and a portion of shredded beef to one half of the tortilla.

    6. Crisp & Fold: Once the cheese begins to melt and the bottom of the tortilla is golden and crisp (about 1-2 minutes), use a spatula to fold the tortilla in half, creating a taco. Press gently and cook for another 30-60 seconds per side until perfectly crispy and the cheese is fully melted.

    7. Serve Immediately: Serve the hot, crispy quesabirria tacos with a small bowl of warm consommé for dipping. Garnish tacos with diced onion, cilantro, and a squeeze of fresh lime.

    Pro Tips for Birria Bliss

    • Chile Note: Guajillos are mild. For more heat, add 1-2 dried arbol chiles when soaking.
    • Don’t Skip the Fat: The reserved birria fat is essential for flavor and achieving the authentic crispy texture.
    • Make Ahead: The beef and consommé taste even better the next day. Make it a day in advance and reheat gently.
    • Tortilla Tip: Use two corn tortillas per taco for extra sturdiness if desired.
    • Alternative Serve: Serve the shredded beef in bowls as “Birria de Res” with the consommé poured over the top, alongside rice and beans.

    Once you master this process, you’ll have a show-stopping, interactive meal that’s perfect for any gathering.

  • One-Pan Pizza Chicken Bake

    One-Pan Pizza Chicken Bake

    Craving pizza but want something a little lighter, faster, and packed with protein? Enter Pizza Chicken—the genius weeknight dinner that delivers every bit of that crave-worthy pizza flavor without the dough. Imagine juicy, seasoned chicken breasts acting as your personal “pizza crust,” topped with tangy marinara, a blanket of gooey, browned cheese, and all your favorite toppings.

    This one-pan wonder comes together in under 30 minutes and uses simple ingredients you likely already have. It’s the perfect solution for busy nights, a hit with kids and adults alike, and endlessly customizable. Whether you keep it classic with pepperoni or get creative with veggies, this dish proves you don’t need bread to have a pizza party. It’s comfort food that feels indulgent but fits perfectly into a balanced meal.

    Why This Recipe Becomes an Instant Weeknight Favorite

    The magic of this recipe lies in its simplicity and clever layering of flavors. By searing the chicken breasts first, you create a golden-brown crust that locks in juices and adds a ton of savory depth—no bland, baked chicken here. The searing also creates fond (those tasty browned bits) in the pan, which the marinara sauce deglazes, infusing it with even more flavor. Using a high-quality, flavorful marinara is key, as it acts as both a sauce and a steaming liquid to finish cooking the chicken through gently in the oven.

    The cheese selection is crucial: a combination of low-moisture mozzarella for that iconic stretch and Parmesan for a salty, nutty punch. Baking it just until the cheese is molten and spotted with brown ensures the chicken stays tender. It’s a masterclass in efficient cooking, transforming basic chicken into a fun, shareable, and utterly satisfying meal with minimal cleanup.

    Ingredients

    For the Chicken:

    • 4 boneless, skinless chicken breasts (about 1.5-2 lbs)
    • 1 tablespoon Italian seasoning
    • 1 teaspoon garlic powder
    • ½ teaspoon salt
    • ¼ teaspoon black pepper
    • 1 tablespoon olive oil

    For the “Pizza” Toppings:

    • 1 ½ cups marinara sauce
    • 2 cups shredded low-moisture mozzarella cheese
    • ½ cup grated Parmesan cheese
    • ½ cup sliced pepperoni
    • ¼ cup sliced black olives (optional)
    • ¼ cup sliced bell peppers or mushrooms (optional)
    • 2 tablespoons sliced fresh basil or parsley for garnish

    Instructions

    1. Prep Chicken & Oven: Preheat your oven to 400°F (200°C). Pat the chicken breasts completely dry with paper towels. This is essential for a good sear. In a small bowl, mix the Italian seasoning, garlic powder, salt, and pepper. Rub this seasoning mix evenly over both sides of each chicken breast.

    2. Sear the Chicken: Heat the olive oil in a large, oven-safe skillet (like cast iron or stainless steel) over medium-high heat. Once the oil is shimmering, add the chicken breasts. Sear without moving for 4-5 minutes, until a deep golden-brown crust forms. Flip and sear the other side for 3-4 minutes. The chicken will not be fully cooked through.

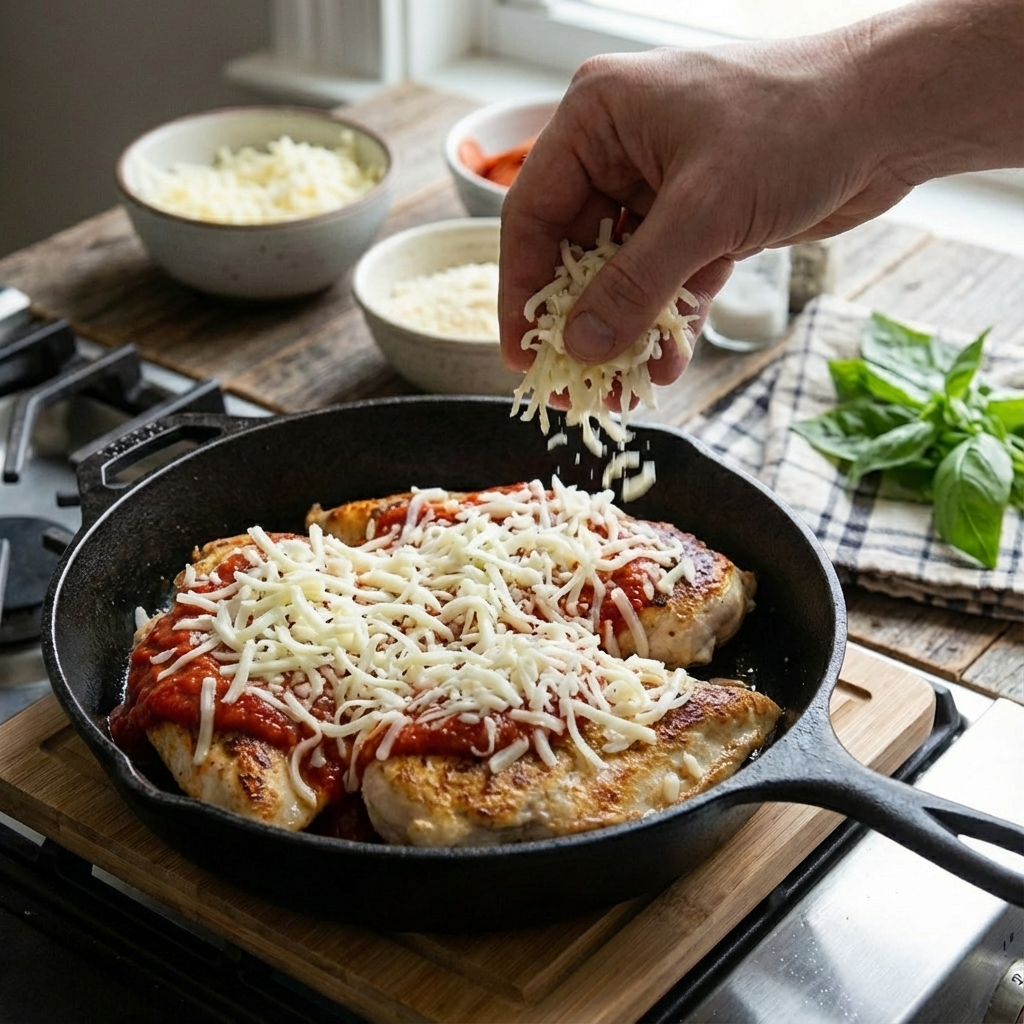
    3. Add Sauce & Toppings: Remove the skillet from heat. Spoon the marinara sauce over each chicken breast, spreading it evenly. Sprinkle the shredded mozzarella and Parmesan cheese over the sauce, covering the chicken completely. Artfully arrange the pepperoni and any other optional toppings (olives, peppers) over the cheese.

    4. Bake: Carefully transfer the skillet to the preheated oven. Bake for 15-18 minutes, or until the chicken is cooked through (reaches 165°F internally) and the cheese is melted, bubbly, and has golden-brown spots.

    5. Garnish & Serve: Remove the skillet from the oven (remember the handle is hot!). Let it rest for 5 minutes. The chicken will continue to cook slightly, and the juices will redistribute. Garnish with fresh basil or parsley. Serve directly from the skillet, with a side salad or roasted vegetables.

    Tips for Perfect Pizza Chicken Every Time

    • Even Cooking: For best results, use chicken breasts of similar size and thickness. If they are very thick, you can pound them to an even ½-inch thickness before seasoning.
    • Pan Choice: An oven-safe skillet is non-negotiable for this one-pan method. Cast iron is ideal for the perfect sear and even baking.
    • Customize Your “Pizza”: This recipe is a blueprint! Make a “Hawaiian” version with ham and pineapple, a “Veggie Lovers” with mushrooms, onions, and bell peppers, or a “Margherita” with fresh mozzarella slices and basil after baking.
    • Keto/Low-Carb: This recipe is naturally low in carbs—just ensure your marinara sauce has no added sugar.
    • Storage: Leftovers keep well in an airtight container in the fridge for 3-4 days. Reheat gently in the oven or microwave.

    This One-Pan Pizza Chicken Bake is more than a recipe; it’s a quick, delicious system for getting a fun, flavorful dinner on the table with a smile.

  • Crispy Bacon-Wrapped Mozzarella Sticks

    Crispy Bacon-Wrapped Mozzarella Sticks

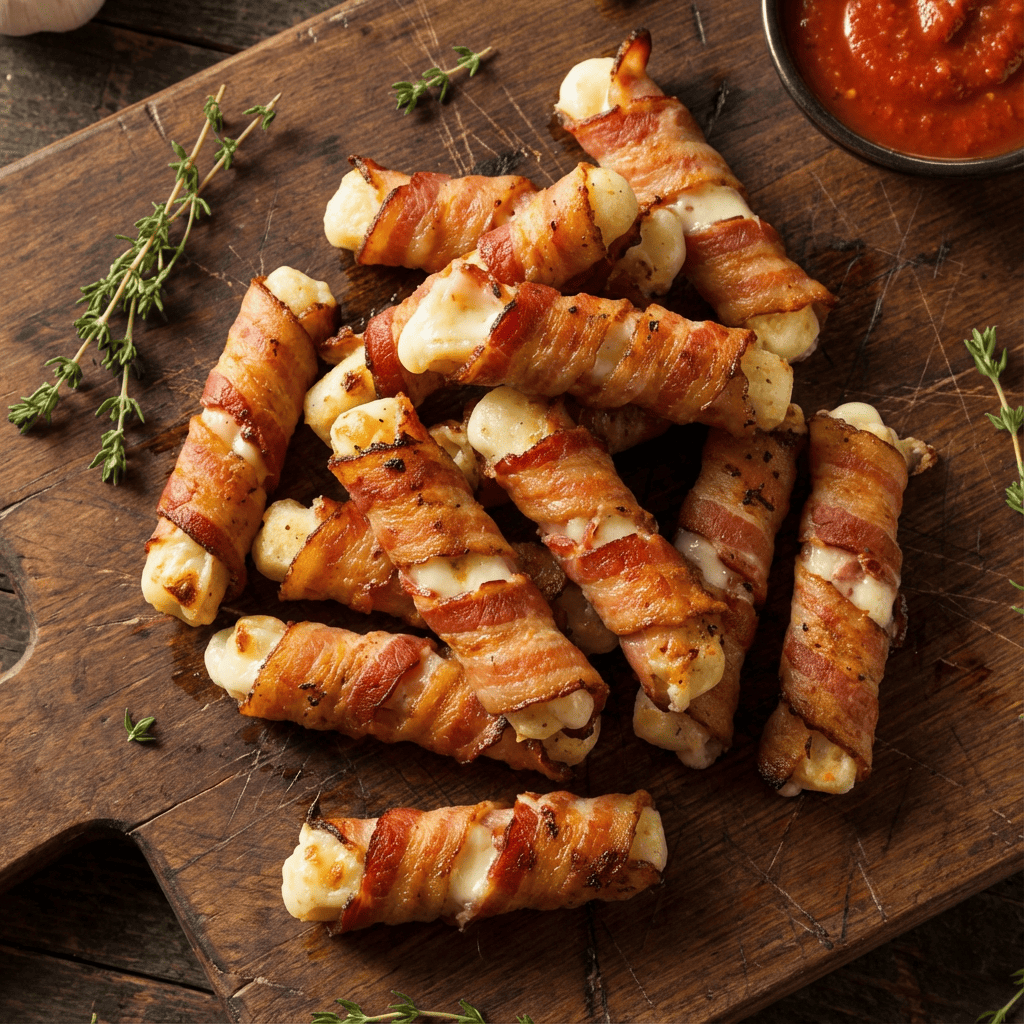
    Let’s be honest: the classic mozzarella stick is a nearly perfect food. Crispy coating, molten cheese center—it’s a formula for success. But what if we could make it even better? What if we could inject it with the smoky, salty, universally adored magic of bacon? That’s exactly what these Bacon-Wrapped Mozzarella Sticks do. They are the ultimate fusion of two iconic appetizers, creating a single, irresistible bite that is greater than the sum of its parts. Imagine a strip of bacon, crisped to perfection, acting as the world’s most flavorful breading for a stick of high-quality mozzarella.

    When baked or air-fried, the bacon renders its fat, basting the cheese from the outside in, resulting in a snack that’s crispy, savory, and delivers that iconic cheese pull with every single bite. These aren’t just an appetizer; they’re a statement piece for your party platter, a guaranteed conversation starter, and quite possibly the best reason to turn on your oven before the big game.

    The Science of the Perfect Cheese Pull & Crispy Bacon

    The challenge of any hot cheese dish is achieving that glorious melt without a total cheese breakout. The secret here is two-fold. First, using low-moisture, block mozzarella (the kind you shred for pizza) is non-negotiable. It has less water than fresh mozzarella, so it melts beautifully and holds its shape longer before becoming a puddle. Second, the bacon itself acts as a protective barrier. As it cooks and tightens around the cheese, it forms a crisp casing that contains the molten interior, giving you precious extra seconds between “perfectly melted” and “cheese explosion.”

    For the crispiest bacon without burning the cheese, a two-step cooking method works wonders: a partial pre-cook of the bacon to render some fat and start the crisping process, followed by a quick, high-heat bake to finish the bacon and melt the cheese. This technique ensures every element—crispy bacon, gooey cheese—is at its absolute best at the same moment.

    Ingredients

    For the Bacon-Wrapped Sticks:

    • 12 sticks low-moisture, part-skim mozzarella string cheese
    • 12 slices thin-cut bacon (not thick-cut)
    • 2 tablespoons brown sugar (optional, for a sweet-savory glaze)
    • 1 teaspoon smoked paprika or black pepper (optional)

    For Serving:

    • 1 cup marinara sauce, warmed
    • Ranch dressing for dipping
    • Chopped fresh parsley for garnish (optional)

    Instructions

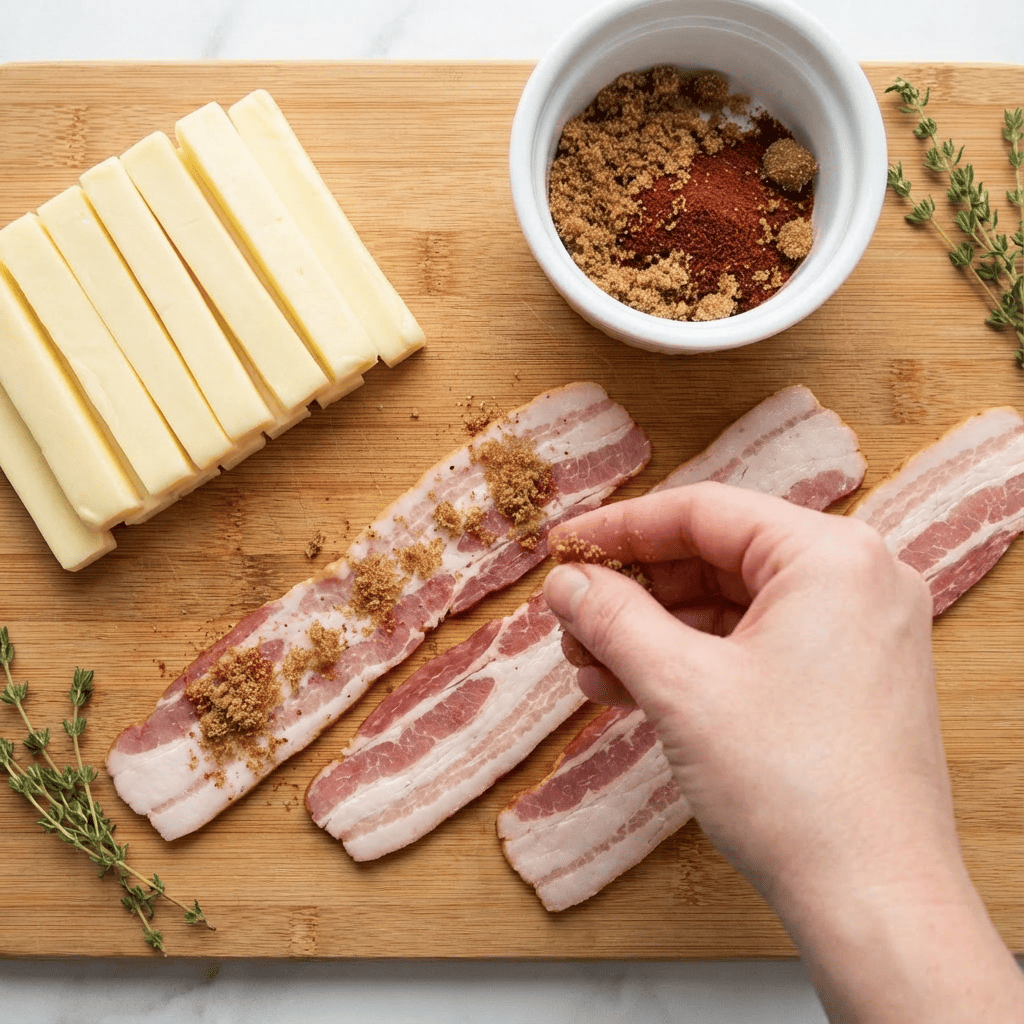
    1. Prep the Cheese & Bacon: Unwrap the mozzarella sticks and pat them completely dry with a paper towel. If using the optional brown sugar and paprika, mix them together in a small bowl. Lay a slice of bacon flat on a cutting board. If desired, lightly sprinkle the bacon with the brown sugar mixture.

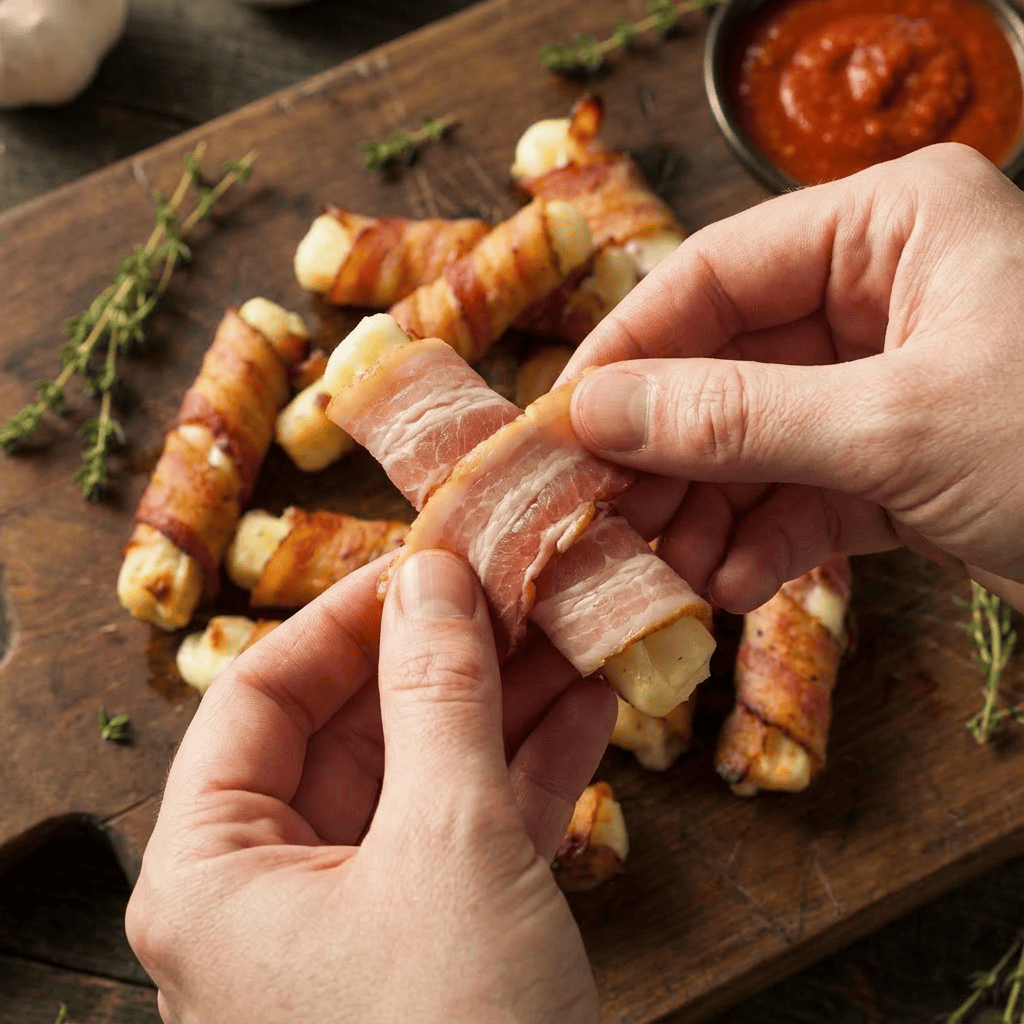
    2. Wrap the Sticks: Place one mozzarella stick at the end of a bacon slice. Roll it up tightly, ensuring the bacon overlaps itself slightly. The entire cheese stick should be covered. If your bacon is very short, you can stretch it slightly as you roll. Place the wrapped stick seam-side down on a plate. Repeat with all cheese sticks and bacon. For best results, place the plate of wrapped sticks in the freezer for 20-30 minutes. This firms up the cheese and bacon, preventing a meltdown during cooking.

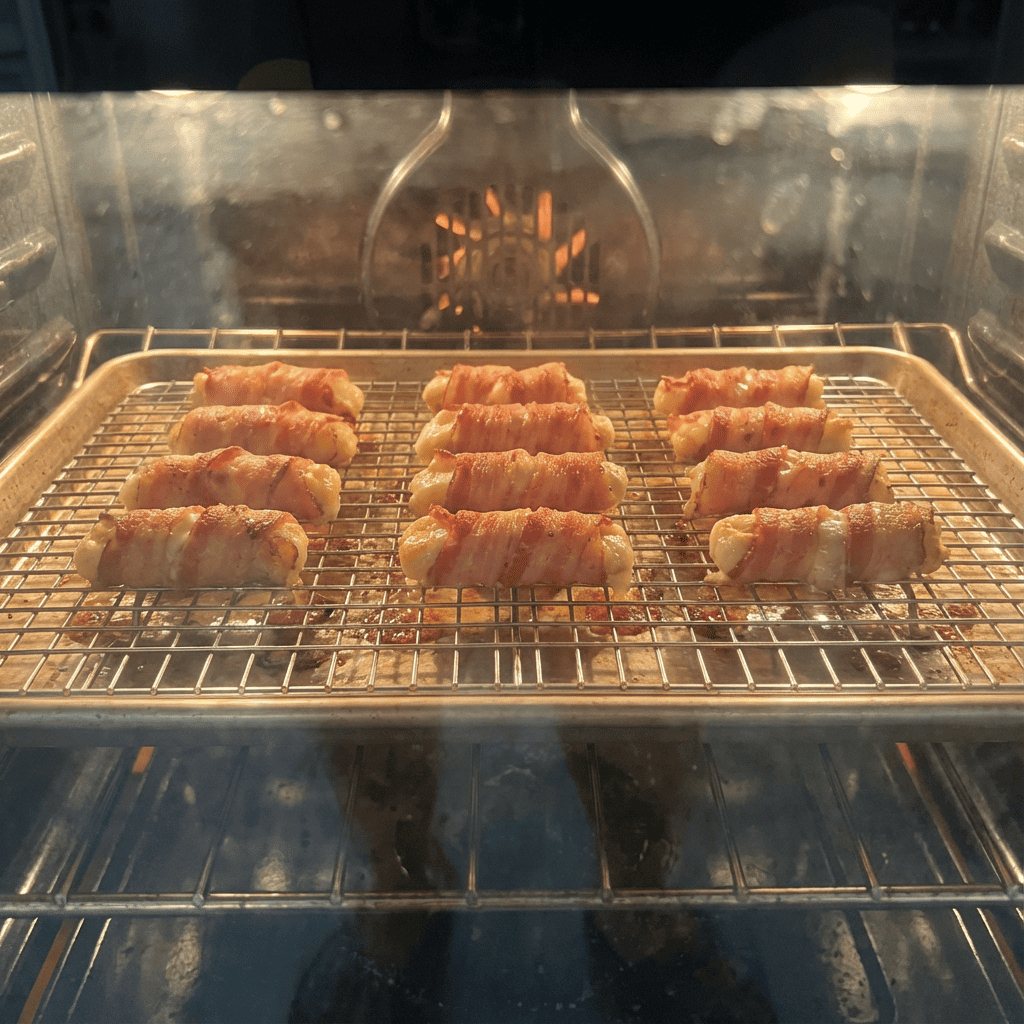
    3. Cook (Oven Method): Preheat your oven to 400°F (200°C). Place a wire rack on top of a rimmed baking sheet (this allows air to circulate for even crisping). Arrange the chilled, bacon-wrapped sticks on the rack, seam-side down, leaving space between them. Bake for 12-16 minutes, turning halfway through, until the bacon is crispy and browned. Watch closely near the end to prevent burning.

    4. Cook (Air Fryer Method): Preheat air fryer to 390°F (200°C). Arrange the chilled sticks in a single layer in the basket, seam-side down. Do not overcrowd; cook in batches if necessary. Air fry for 8-10 minutes, turning halfway, until the bacon is crisp.

    5. Serve Immediately: Carefully transfer the hot bacon-wrapped mozzarella sticks to a serving platter using tongs. They will be very hot inside! Let them cool for exactly 1-2 minutes—this allows the cheese to set slightly for the perfect pull. Garnish with parsley and serve immediately with warm marinara and ranch dressing for dipping.

    Pro-Tips for Appetizer Victory

    Choose your bacon wisely: Thin-cut bacon works best as it crisps up quickly, wrapping the cheese tightly. Thick-cut bacon may not get fully crisp before the cheese overheats.

    The freeze is key: Don’t skip the 20-minute freezer chill. This is your insurance policy against leaky cheese.

    Dipping sauce matters: The cool, creamy tang of ranch dressing is the perfect contrast to the smoky, salty, rich sticks. Marinara is the classic, but don’t overlook other options like sriracha mayo or honey mustard.

    Make-ahead strategy: You can wrap the sticks and freeze them solid on a baking sheet, then transfer to a freezer bag for up to a month. Cook from frozen, adding 2-4 extra minutes to the cooking time. These Bacon-Wrapped Mozzarella Sticks are the ultimate upgrade, turning a simple snack into a legendary party food that will have everyone asking for the recipe.