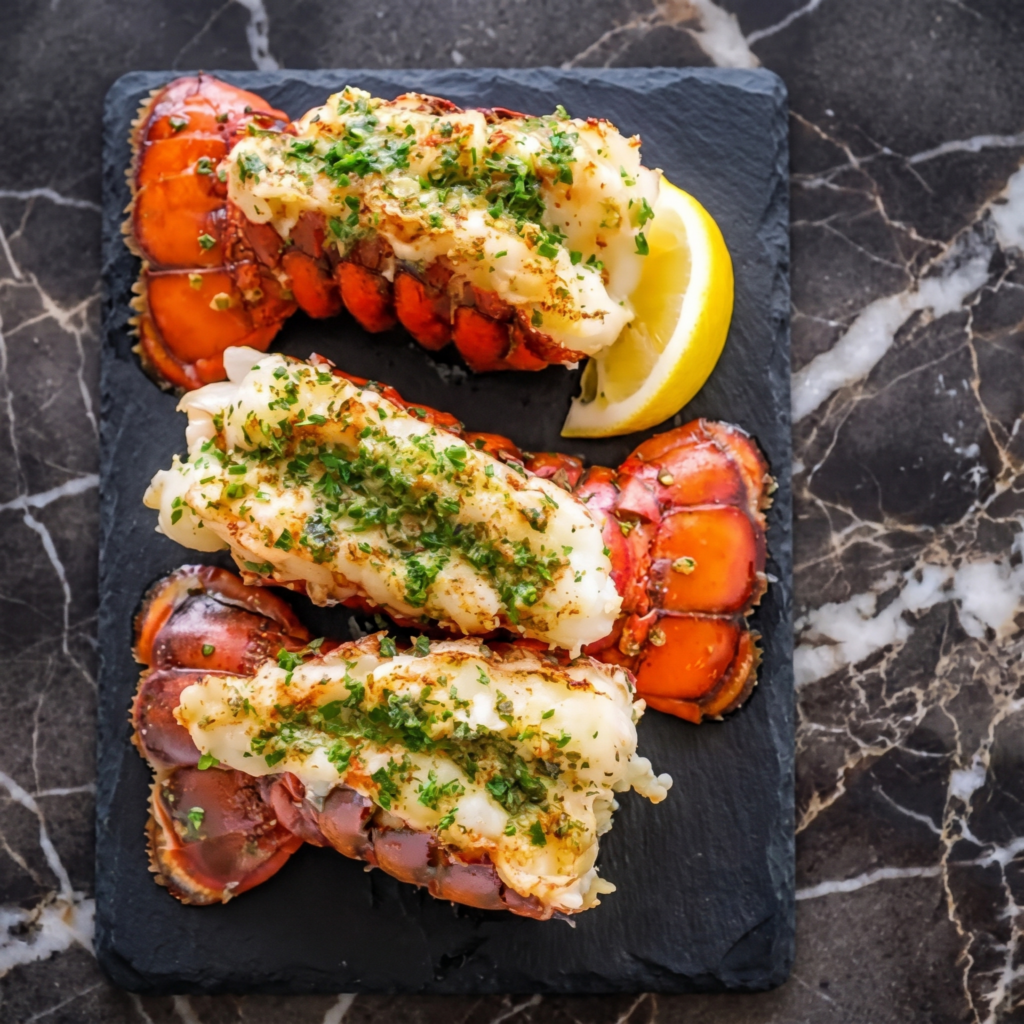
Cut. Loosen. Butter. Broil. 8 minutes. That’s it. Garlic lemon butter takes it over the top. No steakhouse needed. No chef skills required. Just hungry.
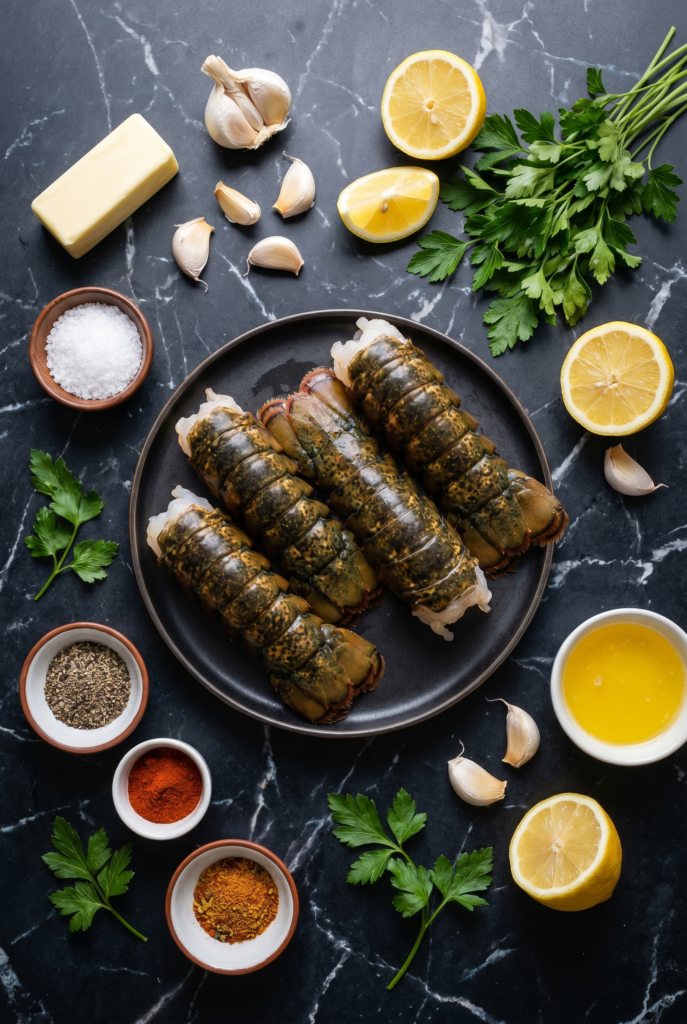
Ingredients
Serves 2.
2 lobster tails (4-5 oz each)
4 tbsp unsalted butter, melted
2 garlic cloves, minced
1 tbsp fresh lemon juice
1 tsp lemon zest (optional)
1 tbsp fresh parsley, chopped
¼ tsp salt
⅛ tsp black pepper
Lemon wedges for serving
Step-by-Step Instructions
Step 1: Preheat and Prep Tails
Preheat broiler to high. Place oven rack 6 inches from heat.
Using kitchen shears, cut down the top center of each lobster shell (stop at the tail fan).
Gently loosen meat from shell, keeping attached at the tail. Lift meat up and rest on top of the shell.
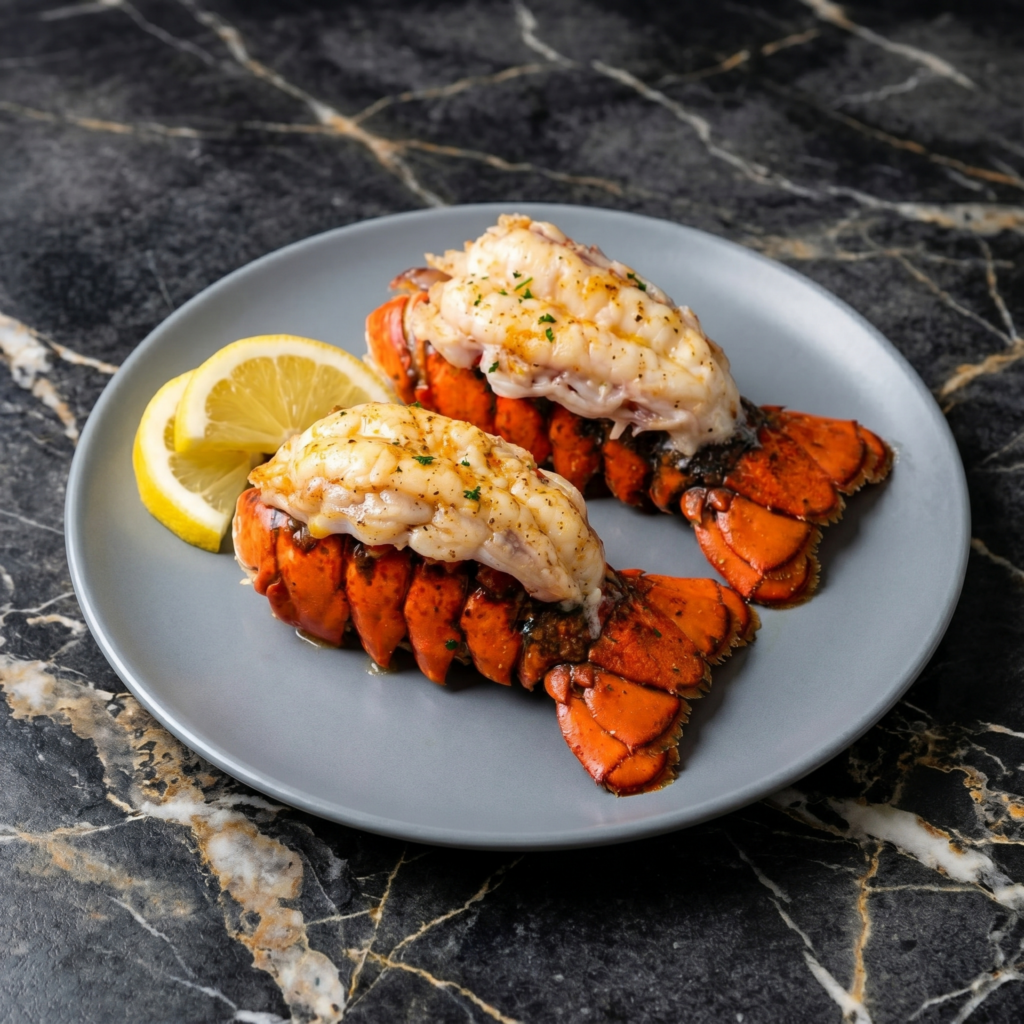
Lobster tail sounds intimidating. It’s not. Cut the shell, loosen the meat, slather with garlic butter, and broil. Fifteen minutes from fridge to plate.
This is your special occasion move. Anniversary, Valentine’s Day, or just Tuesday. You deserve lobster.
Ingredients
Serves 2 (2 lobster tails).
2 lobster tails (4-6 oz each), thawed if frozen
½ cup unsalted butter (1 stick)
4 cloves garlic, minced
1 tablespoon fresh parsley, finely chopped
1 tablespoon lemon juice
½ teaspoon salt
¼ teaspoon black pepper
¼ teaspoon paprika (for color, optional)
Lemon wedges for serving
Step-by-Step Instructions
Step 1: Preheat and Prep
Preheat broiler to high (or oven to 450°F if no broiler).
Position rack in the top third of the oven.
Line a baking sheet with foil.
Step 2: Make the Garlic Butter
In a small saucepan, melt butter over low heat.
Add garlic and cook for 1 minute until fragrant (don’t brown).
Stir in parsley, lemon juice, salt, pepper, and paprika. Remove from heat.
Step 3: Prepare the Lobster Tails
Using kitchen shears, cut down the center of the top shell (the hard side) lengthwise.
Gently pull the shell apart slightly.
Loosen the meat from the shell, keeping it attached at the tail end.
Lift the meat up and rest it on top of the shell (looks like a lobster topper).
Step 4: Butter the Lobster
Place lobster tails on the baking sheet.
Brush the exposed meat generously with garlic butter (reserve some for serving).
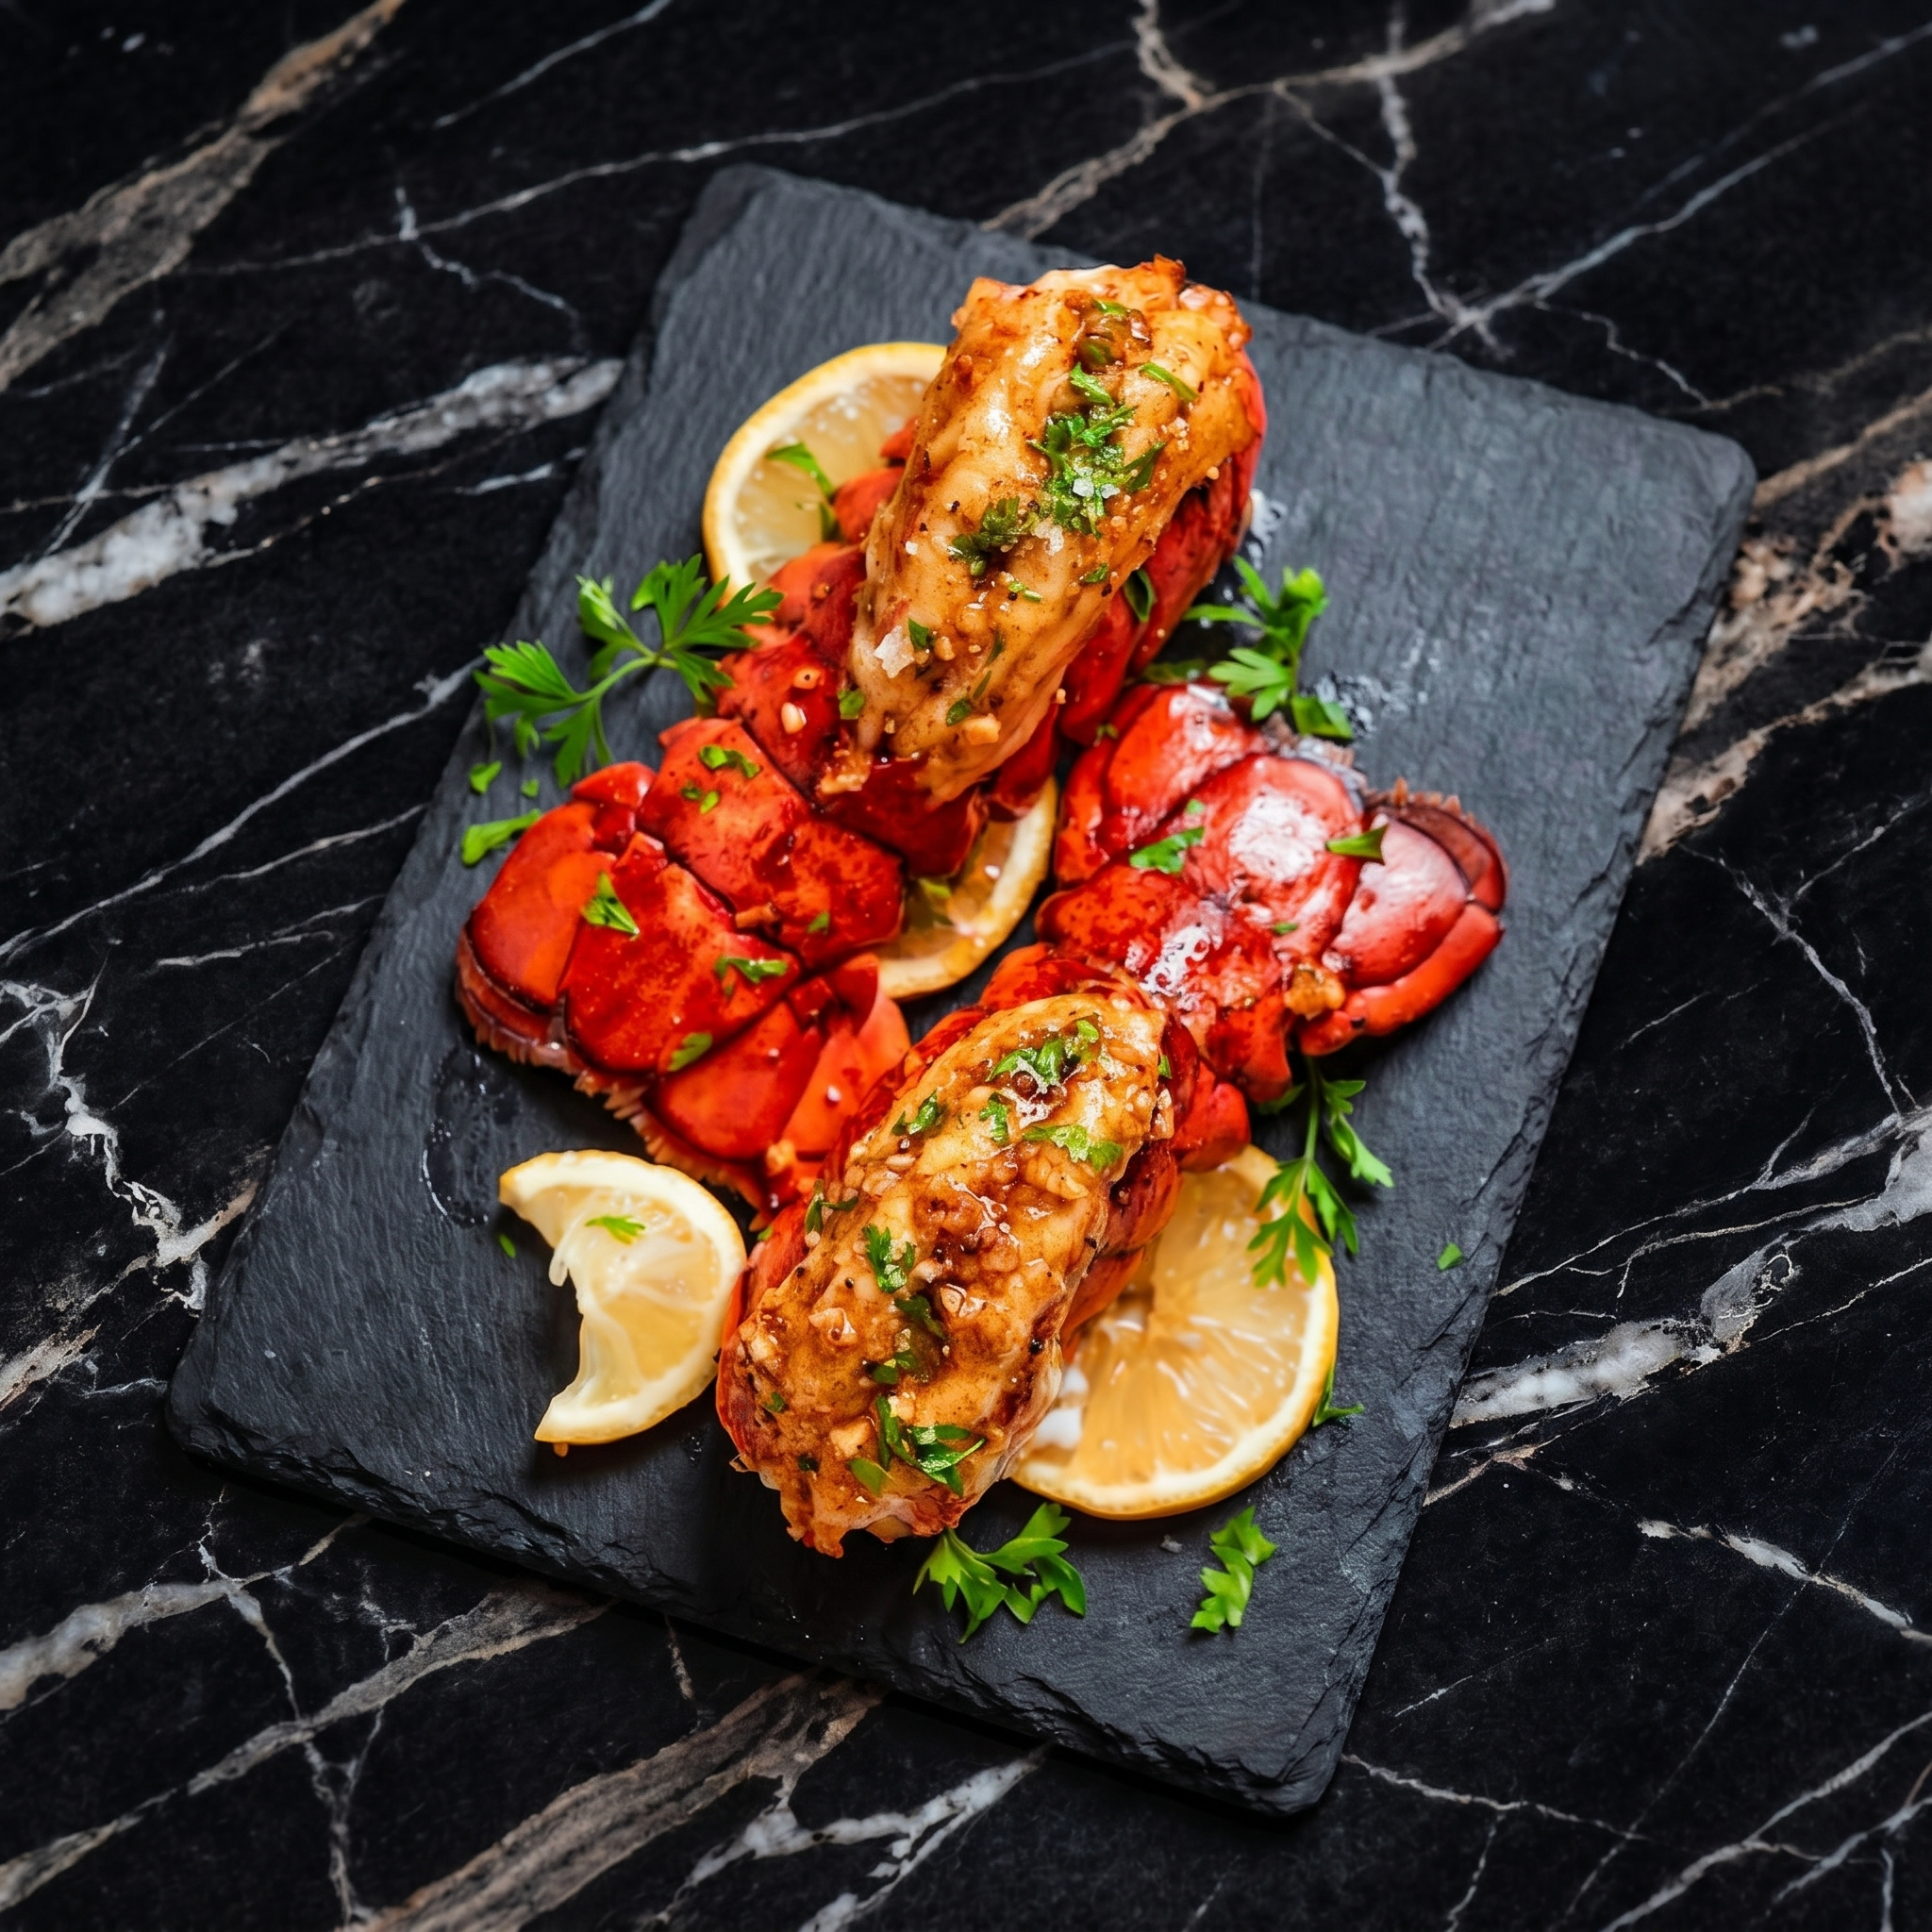
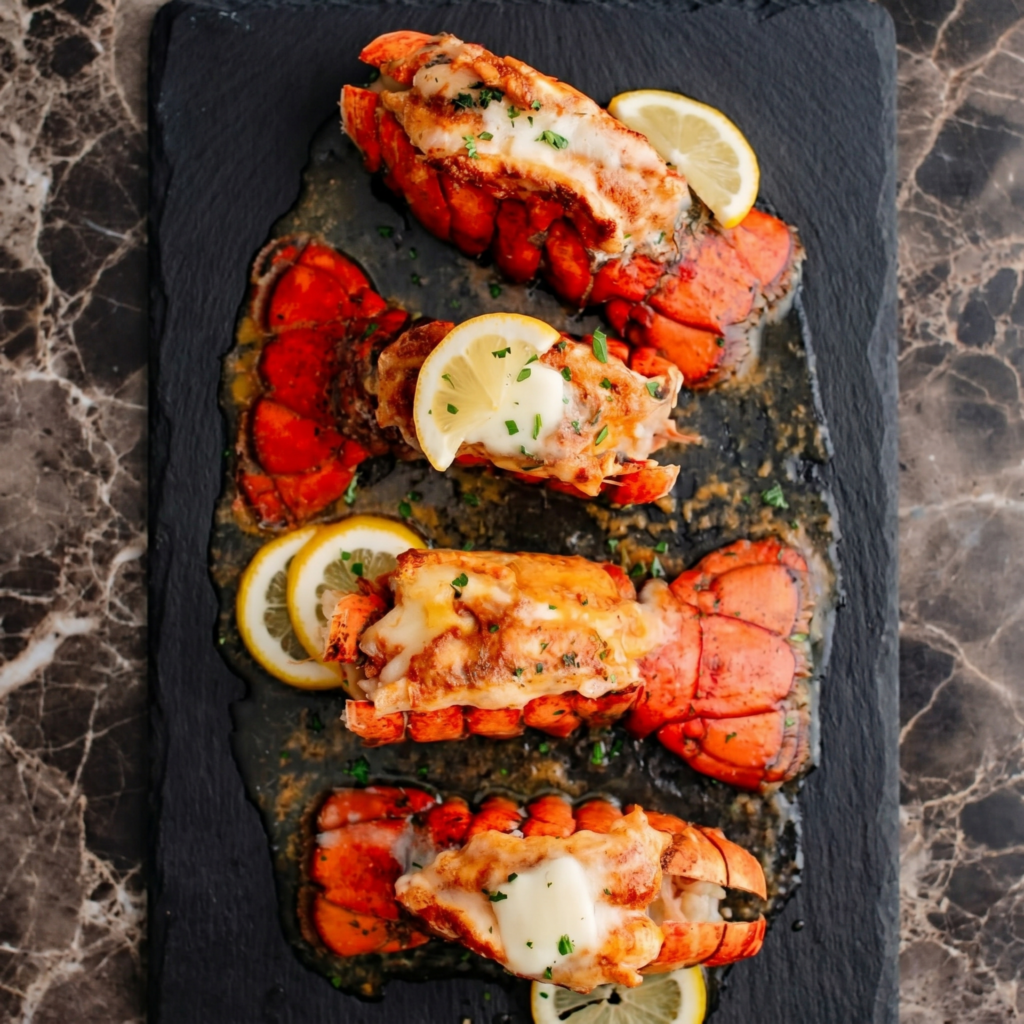
Step 5: Broil the Lobster
Broil for 6-8 minutes until meat is opaque and lightly golden.
Watch closely—broiler moves fast. Lobster is done at 140°F internal temp.
Step 6: Serve Immediately
Remove from oven. Drizzle with reserved garlic butter.
Squeeze fresh lemon over the top. Serve with more melted butter on the side.
Lobster is best fresh. Cooked lobster tails can be refrigerated for up to 2 days. Eat cold (lobster salad) or reheat gently.
Reheating:
Remove meat from shell. Reheat in a skillet with butter over low heat for 2-3 minutes. Microwave in 15-second bursts (risk of rubber).
Buying Lobster Tails:
Frozen tails are fine—most are frozen at sea. Thaw overnight in the fridge. Cold water tails (Australia, Maine) are sweeter than warm water (Caribbean, Brazil).
Pro Tip:
Don’t skip butter basting. Lobster meat is lean and dries out fast. Butter is flavor + insurance.
No Broiler Option:
Bake at 450°F for 12-15 minutes. Brush with butter halfway through.
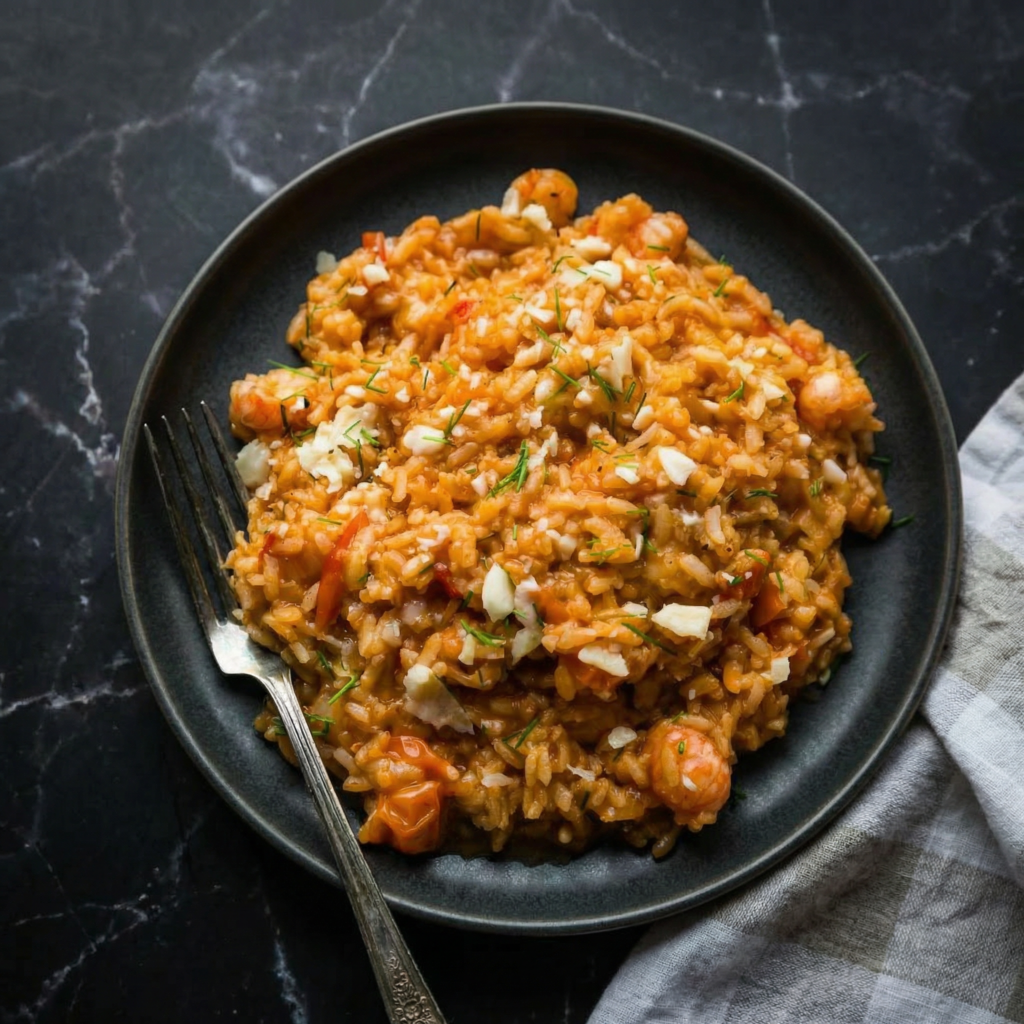
Few dishes scream indulgence quite like Lobster Risotto. Silky, creamy, and infused with the delicate sweetness of lobster, this Italian classic is a showstopper for special dinners, romantic evenings, or celebratory occasions.
While risotto may seem intimidating, it’s more approachable than you think when broken down step by step.
With patience, quality ingredients, and careful attention, you can create a restaurant-worthy lobster risotto that’s both comforting and luxurious.
Let’s dive into the ultimate guide for crafting this indulgent dish.
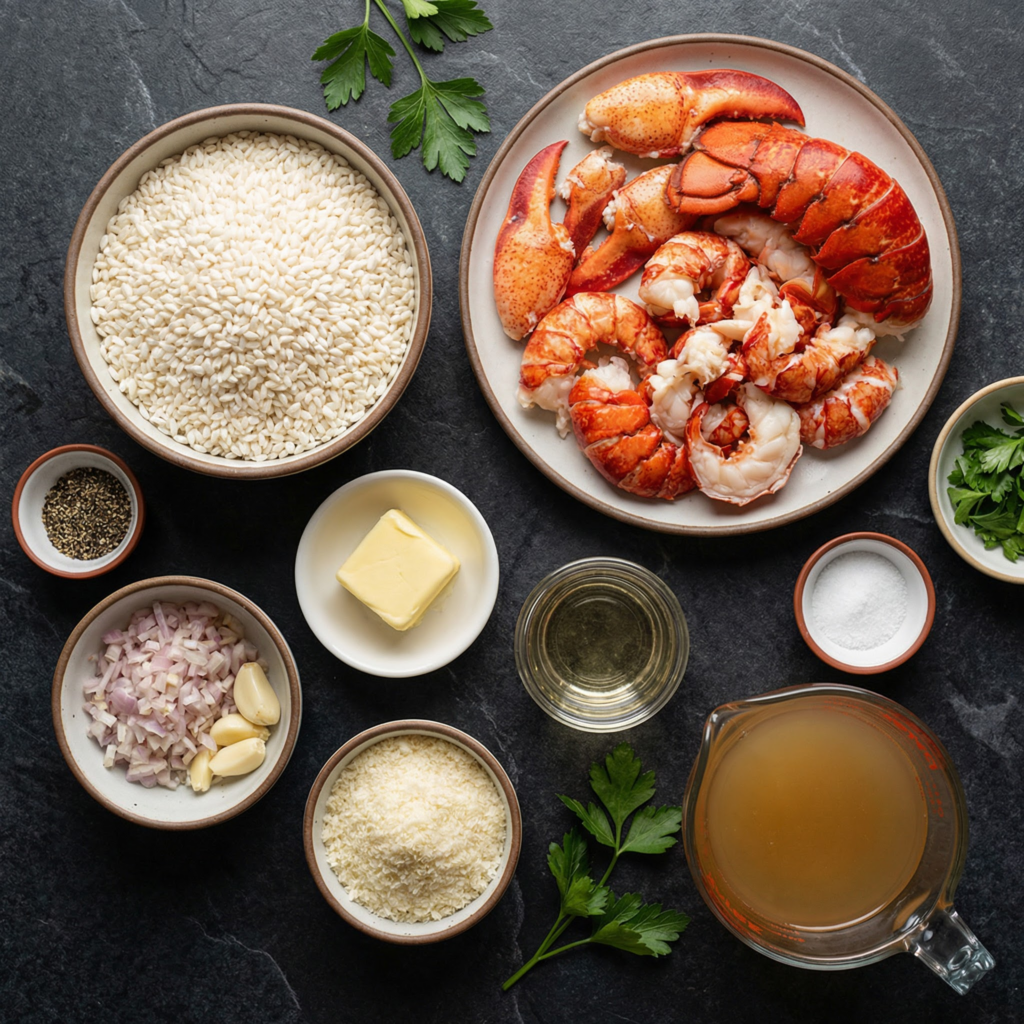
Ingredients
For the lobster:
1–1 ½ pounds lobster tails or whole lobster (cooked and shelled)
2 tablespoons unsalted butter
Salt and pepper, to taste
For the risotto:
1 ½ cups Arborio rice
1 small onion, finely chopped
2 cloves garlic, minced
4 tablespoons unsalted butter
2 tablespoons olive oil
½ cup dry white wine
5–6 cups lobster or seafood stock, kept warm
½ cup freshly grated Parmesan cheese
2 tablespoons heavy cream (optional, for extra creaminess)
Salt and freshly ground black pepper, to taste
Fresh parsley or chives, chopped, for garnish
Step 1: Prepare the Lobster
If using live lobster, cook it in boiling water for 8–10 minutes for tails, or 10–12 minutes for whole lobster. Remove the meat from shells, chop into bite-sized pieces, and set aside.
For pre-cooked lobster, simply chop the meat into chunks and set aside.
In a small skillet over medium heat, melt 2 tablespoons butter and lightly sauté the lobster pieces for 1–2 minutes, seasoning with salt and pepper. This step enhances the lobster’s flavor and prevents it from tasting cold or raw when added to the risotto later.
Step 2: Heat the Stock
Pour lobster or seafood stock into a saucepan and bring to a gentle simmer. Keep it warm over low heat—this ensures the rice cooks evenly without shocking the grains with cold liquid.
Warm stock is a key secret to creamy risotto.
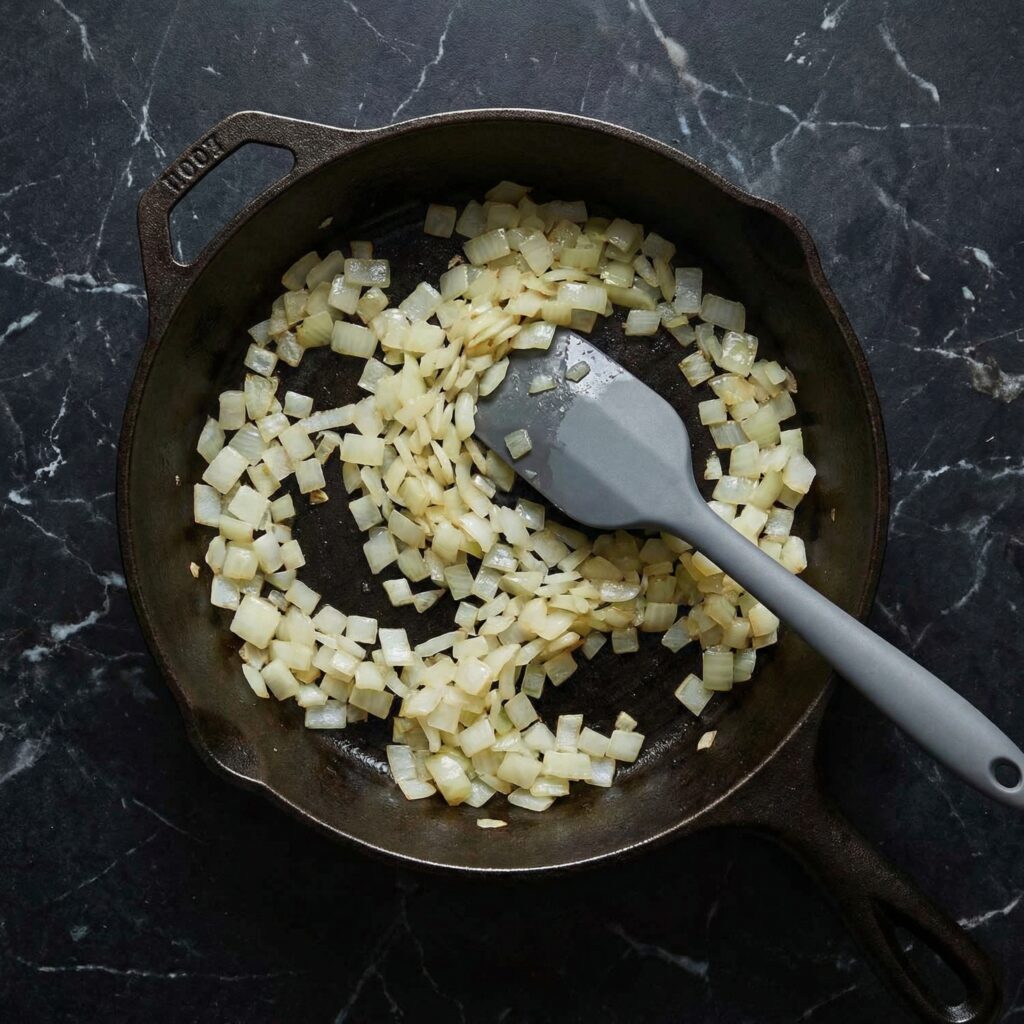
Step 3: Sauté the Aromatics
In a large skillet or wide sauté pan, heat 2 tablespoons butter and 2 tablespoons olive oil over medium heat. Add the finely chopped onion and cook for 3–4 minutes until soft and translucent. Add the minced garlic and cook for an additional 30 seconds, stirring constantly to prevent burning.
This forms a flavorful base for the risotto, ensuring each grain of rice is infused with subtle depth.
Step 4: Toast the Rice
Add the Arborio rice to the pan and stir for 1–2 minutes, allowing the grains to become lightly toasted and coated in butter and oil.
This step enhances the nutty aroma and helps the rice absorb liquid gradually without becoming mushy.
Step 5: Deglaze with Wine
Pour in the dry white wine and stir until the liquid is mostly absorbed.
The wine adds a delicate acidity that balances the richness of the butter and lobster.
Step 6: Gradually Add Stock
Add the warm lobster stock one ladleful at a time, stirring frequently. Wait until most of the liquid is absorbed before adding the next ladle.
Continue this process for about 18–20 minutes. The rice should be tender yet slightly firm to the bite—what Italians call al dente.
Frequent stirring releases the rice’s natural starch, creating that signature creamy texture.
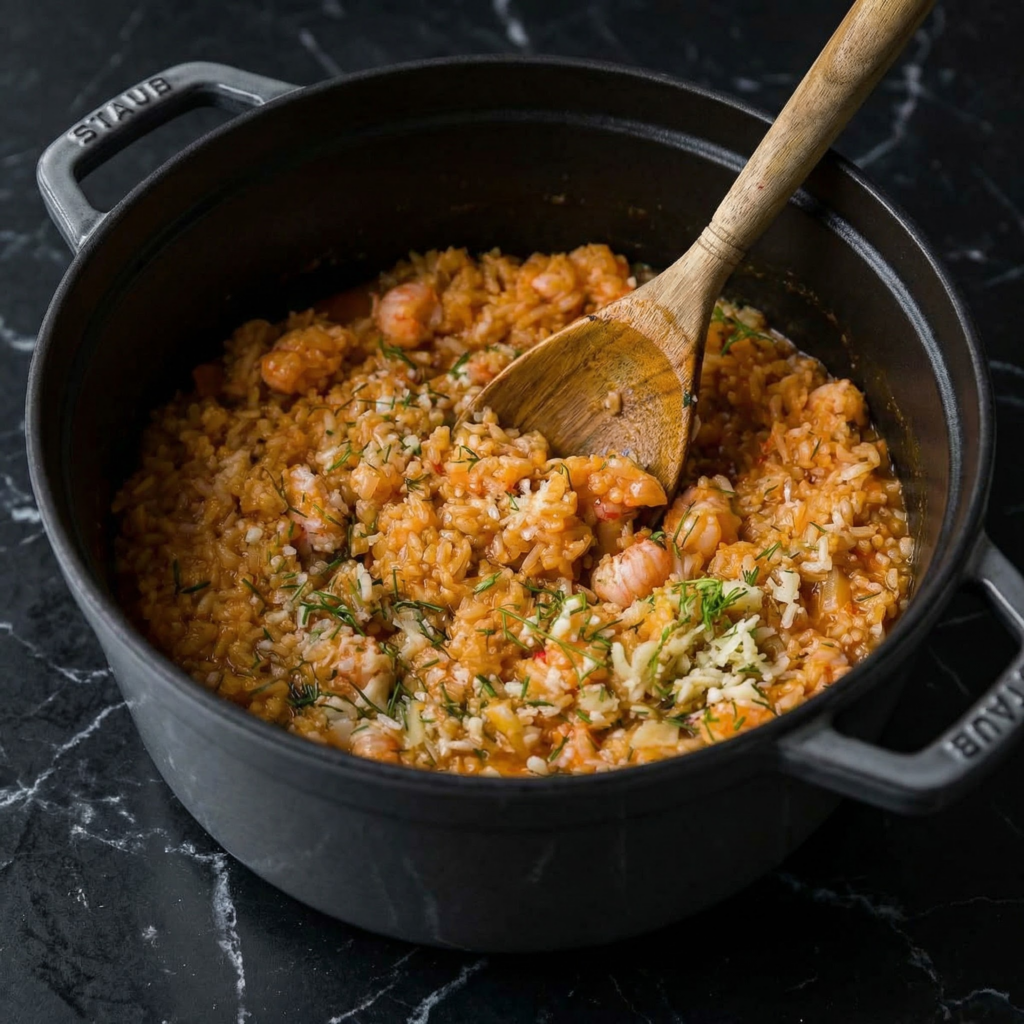
Step 7: Finish the Risotto
Once the rice is cooked, remove the pan from heat. Stir in the sautéed lobster, Parmesan cheese, and heavy cream (if using). Taste and season with salt and freshly ground black pepper.
Gently fold everything together, being careful not to break up the lobster chunks. The risotto should be luscious, creamy, and coat each grain beautifully.
Step 8: Garnish and Serve
Serve the risotto immediately while hot. Sprinkle freshly chopped parsley or chives over the top for color and freshness. For extra decadence, add a small pat of butter or an additional drizzle of cream.
Pair with a crisp white wine like Sauvignon Blanc or Chardonnay for a truly elevated experience.
Pro Tips for Perfect Lobster Risotto
Keep the stock warm: Cold stock can shock the rice and slow cooking.
Stir often: Stirring releases starches, producing a creamy texture without cream.
Timing matters: Cook the lobster separately to prevent overcooking. Add it at the end to keep it tender.
Use quality ingredients: Fresh lobster, good Parmesan, and high-quality Arborio rice make a huge difference.
Consistency check: Risotto should be creamy and slightly loose—not dry or stiff.
Why This Recipe Works
The magic of lobster risotto lies in layering flavors and textures. Toasting the rice adds nuttiness, the gradual absorption of stock ensures creamy consistency, and the final addition of lobster provides sweetness and luxury. Butter, Parmesan, and optional cream enrich the dish without overpowering the delicate seafood flavor.
This balance of creamy, savory, and subtly sweet notes makes lobster risotto a comforting yet refined dish.
Optional Variations
Truffle Twist: Add a drizzle of truffle oil for an earthy, sophisticated flavor.
Vegetable Boost: Fold in peas, asparagus tips, or sautéed mushrooms for color and texture.
Citrus Zest: A touch of lemon zest brightens the richness.
Shellstock Broth: Use lobster shells to make a homemade stock for deeper flavor.
Storage and Leftovers
Risotto is best served fresh, as reheating can change its creamy texture. If you have leftovers, store in an airtight container in the refrigerator for up to 2 days.
Reheat gently over low heat, adding a splash of stock or cream to loosen the consistency.
The Takeaway
Lobster Risotto may seem luxurious, but it’s achievable with patience and attention to technique. By preparing the lobster, toasting the rice, gradually adding stock, and finishing with Parmesan and butter, you create a dish that’s rich, flavorful, and comforting.
This indulgent meal is perfect for special occasions, romantic dinners, or any time you want to treat yourself. Each bite is a perfect balance of creamy, tender, and seafood-forward flavors, proving that homemade elegance is entirely possible—even from your own kitchen.
Once you try this Lobster Risotto, you’ll understand why it’s a classic: simple ingredients transformed through care and technique into a truly unforgettable dish.