Blog

  • Fresh, Bright, and Irresistible: How to Make Classic Tomato Bruschetta

    Fresh, Bright, and Irresistible: How to Make Classic Tomato Bruschetta

    When it comes to simple yet unforgettable appetizers, tomato bruschetta stands out as a timeless favorite.

    This classic Italian dish combines toasted bread with fresh tomatoes, garlic, olive oil, and herbs to create a bite that is both refreshing and deeply flavorful.

    With just a handful of high-quality ingredients, you can prepare an appetizer that feels elegant, rustic, and perfect for almost any occasion.

    Whether you’re hosting a dinner party, preparing a quick snack, or looking for a light summer appetizer, tomato bruschetta delivers bold flavor with minimal effort.

    The secret lies in using ripe tomatoes, good olive oil, and properly toasted bread that provides the perfect crunchy base.

    In this step-by-step guide, you’ll learn how to make authentic tomato bruschetta that tastes like it came straight from an Italian kitchen.


    What Makes Bruschetta Special

    The word bruschetta comes from the Italian word bruscare, which means “to toast” or “to char.”

    Traditionally, bruschetta refers to grilled bread rubbed with garlic and topped with simple ingredients.

    The most popular version features fresh tomatoes, but the beauty of bruschetta is its versatility.

    While toppings can vary, the foundation always remains the same: crisp bread paired with fresh, vibrant ingredients.


    Ingredients

    To make about 8–10 pieces of tomato bruschetta, you will need:

    • 1 baguette or rustic Italian bread
    • 4 ripe Roma or vine tomatoes
    • 2 cloves garlic
    • 3 tablespoons extra virgin olive oil
    • 1 tablespoon balsamic vinegar (optional)
    • ¼ cup fresh basil leaves, chopped
    • Salt to taste
    • Freshly ground black pepper

    Optional additions:

    • Fresh mozzarella
    • Parmesan cheese
    • Red pepper flakes

    Using fresh, high-quality ingredients makes a huge difference in the final flavor of this dish.


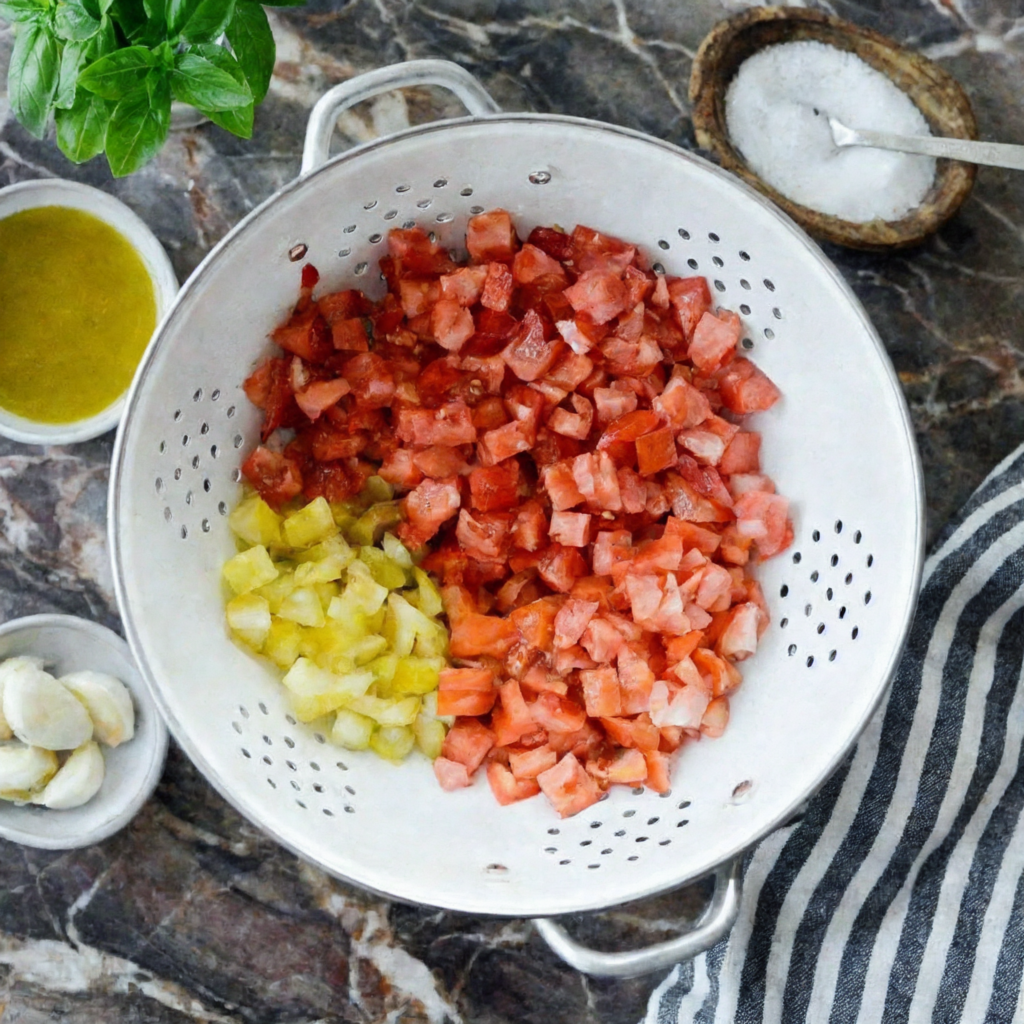
    Step 1: Prepare the Tomatoes

    Start by washing the tomatoes thoroughly.

    Dice them into small cubes, removing excess seeds and juice if necessary.

    Too much liquid can make the bruschetta soggy, so draining the tomatoes slightly helps maintain the perfect texture.

    Place the diced tomatoes into a medium mixing bowl.


    Step 2: Add Flavor to the Tomato Mixture

    Finely mince one clove of garlic and add it to the bowl of tomatoes.

    Next, pour in the olive oil and balsamic vinegar if using. The olive oil adds richness while the vinegar introduces a subtle tang that enhances the tomatoes.

    Add the chopped basil, a pinch of salt, and freshly ground black pepper.

    Gently stir the mixture until everything is well combined.


    Step 3: Let the Mixture Marinate

    Allow the tomato mixture to sit at room temperature for about 10–15 minutes.

    This short resting time lets the flavors blend together beautifully.

    The tomatoes release natural juices that mix with the olive oil and garlic, creating a light and flavorful dressing.


    Step 4: Slice the Bread

    While the tomatoes are marinating, slice the baguette into ½-inch thick pieces.

    Cut the slices at a slight diagonal to create larger surfaces for the toppings.

    Arrange the slices in a single layer on a baking sheet.


    Step 5: Toast the Bread

    Preheat your oven to 375°F (190°C).

    Lightly brush each slice of bread with olive oil. This step helps the bread develop a golden, crisp texture while adding extra flavor.

    Place the baking sheet in the oven and toast the bread for about 8–10 minutes, or until the edges turn golden and crunchy.

    Alternatively, you can toast the bread on a grill or in a skillet for a slightly smoky flavor.


    Step 6: Rub the Bread with Garlic

    Once the bread is toasted, remove it from the oven and let it cool slightly.

    Take the remaining clove of garlic and gently rub it across the warm surface of each slice of bread.

    The heat of the bread releases the garlic’s natural oils, infusing the toast with subtle flavor without overpowering the dish.

    This traditional step is what gives authentic bruschetta its signature aroma.


    Step 7: Assemble the Bruschetta

    Using a spoon, scoop the tomato mixture onto each slice of toasted bread.

    Be generous with the topping, but avoid adding too much liquid from the bowl. You want the bread to stay crisp rather than soggy.

    Spread the tomatoes evenly across the surface of each slice.


    Step 8: Optional Additions

    If you want to elevate your bruschetta even further, consider adding a few optional ingredients.

    Fresh mozzarella cubes can bring creamy richness, while a sprinkle of grated Parmesan adds a salty, savory note.

    For a touch of heat, sprinkle a pinch of red pepper flakes on top.


    Step 9: Final Drizzle

    For extra flavor and presentation, lightly drizzle a little more olive oil over the assembled bruschetta.

    Some people also enjoy adding a small drizzle of balsamic glaze for sweetness and visual contrast.

    This finishing touch enhances both taste and appearance.


    Step 10: Serve Immediately

    Tomato bruschetta is best enjoyed fresh. Serve it immediately after assembling to keep the bread crisp and the topping vibrant.

    Arrange the pieces on a serving platter and garnish with additional basil leaves if desired.

    The combination of crunchy bread, juicy tomatoes, and fragrant herbs makes each bite refreshing and satisfying.


    Tips for Perfect Bruschetta

    Choose ripe tomatoes. Fresh, juicy tomatoes provide the best flavor.

    Use good olive oil. High-quality extra virgin olive oil greatly improves the taste.

    Toast the bread well. Crisp bread prevents sogginess and adds texture.

    Don’t assemble too early. Add the topping just before serving for the best results.


    Serving Ideas

    Tomato bruschetta pairs wonderfully with many dishes. Try serving it with:

    • Pasta dishes
    • Grilled chicken or seafood
    • Antipasto platters
    • Fresh salads

    It also works beautifully as a light appetizer alongside a glass of wine.


    Final Thoughts

    Tomato bruschetta proves that simple ingredients can create extraordinary flavor.

    With ripe tomatoes, fragrant basil, garlic, and perfectly toasted bread, this classic appetizer delivers freshness and elegance in every bite.

    It’s quick to prepare, visually appealing, and incredibly satisfying, making it ideal for everything from casual gatherings to formal dinners.

    Once you master this recipe, you’ll have a go-to appetizer that never fails to impress.

    Serve it fresh, share it with friends and family, and enjoy a taste of rustic Italian cooking right at home.

  • Bold, Tangy, and Comforting: The Ultimate Filipino Chicken Adobo

    Bold, Tangy, and Comforting: The Ultimate Filipino Chicken Adobo

    Few dishes are as iconic and deeply comforting as Chicken Adobo. Known as a national treasure of the Philippines, this savory, tangy, garlicky stew is beloved for its bold flavor and simple preparation.

    Chicken is slowly simmered in soy sauce, vinegar, garlic, bay leaves, and peppercorns until tender and infused with rich, balanced flavor. The result is a glossy, deeply satisfying dish that pairs perfectly with a bowl of steaming white rice.

    What makes chicken adobo special is its beautiful balance—salty, tangy, slightly sweet, and aromatic all at once.

    Even better, it uses pantry staples and requires no complicated techniques.

    Let’s walk through how to make it step by step so you can bring this Filipino classic into your own kitchen.


    Ingredients You’ll Need

    • 2 pounds bone-in, skin-on chicken thighs (or drumsticks)
    • ½ cup soy sauce
    • ½ cup cane vinegar (or white vinegar)
    • 1 cup water
    • 6 cloves garlic, smashed
    • 2–3 bay leaves
    • 1 teaspoon whole black peppercorns
    • 1 tablespoon brown sugar (optional, for slight sweetness)
    • 1 tablespoon cooking oil

    Step 1: Marinate the Chicken

    In a large bowl, combine the chicken pieces with soy sauce and half of the smashed garlic. Toss to coat evenly. Cover and marinate for at least 30 minutes, though 2–4 hours in the refrigerator will deepen the flavor even more.

    Marinating allows the soy sauce to penetrate the meat, creating a flavorful base before cooking even begins.


    Step 2: Brown the Chicken

    Heat cooking oil in a large pot or deep skillet over medium heat. Remove the chicken from the marinade (reserve the marinade for later) and pat the pieces lightly dry.

    Place the chicken skin-side down in the hot pan and sear for about 3–4 minutes per side until lightly browned. This step builds flavor and adds depth to the final dish.

    Once browned, remove excess oil from the pan if necessary.


    Step 3: Build the Sauce

    Return all chicken pieces to the pot. Pour in the reserved marinade along with the remaining garlic, vinegar, water, bay leaves, and peppercorns.

    Important: Do not stir immediately after adding the vinegar. Let the mixture come to a gentle boil first. This helps mellow the sharp acidity of the vinegar.


    Step 4: Simmer Low and Slow

    Once boiling, reduce the heat to low and cover the pot. Let the chicken simmer for 30–40 minutes, turning the pieces occasionally to ensure even cooking.

    The chicken will become tender while absorbing the savory and tangy flavors of the sauce. The liquid will also begin to reduce slightly.


    Step 5: Adjust and Reduce the Sauce

    After simmering, taste the sauce. If you prefer a slightly sweeter balance, stir in a tablespoon of brown sugar.

    Remove the lid and continue simmering uncovered for another 10–15 minutes to reduce and thicken the sauce. The goal is a glossy, rich consistency that coats the chicken beautifully.

    For a slightly caramelized finish, you can allow the sauce to reduce further until it clings tightly to the meat.


    Step 6: Rest Before Serving

    Turn off the heat and allow the chicken to rest in the sauce for about 10 minutes before serving. This resting time helps the flavors deepen even further.

    Chicken adobo is often even better the next day, as the flavors continue to develop overnight.


    Step 7: Serve and Enjoy

    Serve hot over freshly steamed white rice. Spoon extra sauce generously over the top—the sauce is just as important as the chicken itself.

    For garnish, you may add freshly chopped green onions or a sprinkle of cracked black pepper, though traditional adobo is typically served simply.


    Pro Tips for Perfect Chicken Adobo

    • Use bone-in chicken for richer flavor and juicier meat.
    • Do not skip browning—it adds depth and complexity.
    • Avoid stirring the vinegar immediately after adding it to the pot.
    • Simmer gently, not aggressively, to keep the chicken tender.
    • Let it rest for fuller flavor before serving.

    Variations to Try

    Chicken adobo has many regional and family variations. Here are a few:

    • Adobo with Coconut Milk (Adobo sa Gata): Add ½ cup coconut milk for a creamy twist.
    • Spicy Adobo: Include sliced chili peppers for heat.
    • Dry Adobo: Continue reducing the sauce until it thickens and coats the chicken heavily.
    • Pork and Chicken Combo: Combine pork belly and chicken for a richer version.

    Storage and Reheating

    Store leftovers in an airtight container in the refrigerator for up to 4 days. The flavor improves over time, making it perfect for meal prep.

    Reheat gently on the stovetop over low heat, adding a splash of water if the sauce has thickened too much.

    Chicken adobo also freezes well for up to 2 months.


    Why This Recipe Works

    The magic of chicken adobo lies in its balance. Soy sauce provides saltiness and umami.

    Vinegar brings brightness and tang. Garlic and bay leaves add aromatic depth.

    Slow simmering allows the meat to absorb everything fully while becoming tender and juicy.

    It’s a dish built on contrast yet harmonized through simple technique.


    Final Thoughts

    Chicken Adobo is more than just a meal—it’s comfort in a bowl. Its rich, tangy sauce and tender chicken make it endlessly satisfying, whether served for a family dinner or prepared ahead for busy weeknights.

    With minimal ingredients and straightforward steps, you can recreate this Filipino classic at home with confidence. Once you master the balance of soy sauce and vinegar, you’ll find yourself returning to this recipe again and again.

    Serve it over rice, spoon that luscious sauce generously, and enjoy a dish that has stood the test of time for good reason.

  • Sweet, Savory, and Silky: The Ultimate Miso Glazed Salmon You’ll Crave Weekly

    Sweet, Savory, and Silky: The Ultimate Miso Glazed Salmon You’ll Crave Weekly

    If you’re looking for a dish that feels elegant yet comes together effortlessly, Miso Glazed Salmon is the answer.

    This Japanese-inspired favorite balances sweet, salty, and umami flavors in a glossy glaze that caramelizes beautifully in the oven.

    The salmon turns tender and flaky, while the miso glaze forms a slightly sticky, deeply flavorful coating that tastes like it came from a high-end restaurant.

    The best part?

    It takes minimal prep and cooks quickly, making it perfect for both busy weeknights and special dinners.

    Let’s walk through the process step by step so you can achieve perfectly glazed, melt-in-your-mouth salmon every time.


    Ingredients You’ll Need

    • 4 salmon fillets (about 6 oz each), skin-on or skinless
    • 3 tablespoons white miso paste
    • 2 tablespoons mirin
    • 1 tablespoon soy sauce
    • 1 tablespoon honey (or brown sugar)
    • 1 tablespoon rice vinegar
    • 1 teaspoon sesame oil
    • 2 cloves garlic, finely minced
    • 1 teaspoon freshly grated ginger
    • 1 tablespoon olive oil (for the pan)
    • Optional garnish: sliced green onions, sesame seeds, lime wedges

    Step 1: Prepare the Miso Glaze

    In a medium bowl, whisk together the white miso paste, mirin, soy sauce, honey, rice vinegar, sesame oil, minced garlic, and grated ginger. Mix until smooth and fully combined.

    The glaze should be thick but spreadable. If it feels too thick, add a teaspoon of water to loosen it slightly. This mixture is the heart of the dish—it delivers sweet depth, savory umami, and a subtle tang.


    Step 2: Pat the Salmon Dry

    Use paper towels to gently pat the salmon fillets dry. Removing excess moisture helps the glaze adhere better and promotes caramelization.

    If your fillets have skin, check for any stray scales and remove them before cooking.


    Step 3: Marinate Briefly

    Place the salmon in a shallow dish and spoon about half of the glaze over the top. Spread evenly to coat each fillet.

    Let the salmon marinate for 20–30 minutes in the refrigerator. Because miso is salty, avoid marinating much longer than 30 minutes to prevent overpowering flavor.

    Reserve the remaining glaze for brushing during cooking.


    Step 4: Preheat the Oven

    Preheat your oven to 400°F (200°C). Line a baking sheet with parchment paper or lightly oil a baking dish to prevent sticking.

    You can also cook this under the broiler, but baking first ensures even cooking before caramelizing the top.


    Step 5: Bake the Salmon

    Place the marinated salmon fillets on the prepared baking sheet, skin-side down if applicable. Bake for 10–12 minutes, depending on thickness.

    Salmon is done when it flakes easily with a fork and reaches an internal temperature of 125–130°F (52–54°C) for medium. Avoid overcooking, as salmon can dry out quickly.


    Step 6: Broil for Caramelization

    Switch the oven to broil for the final 1–2 minutes. Brush the tops of the salmon with the reserved glaze and broil until the surface becomes bubbly and slightly caramelized.

    Watch closely during this step—the sugars in the glaze can burn quickly. You’re looking for golden edges and a glossy finish.


    Step 7: Rest Before Serving

    Remove the salmon from the oven and let it rest for 3–5 minutes. This allows the juices to redistribute and ensures tender, moist fish.


    Step 8: Garnish and Serve

    Sprinkle sliced green onions and sesame seeds over the salmon for color and texture. Serve with lime wedges for a bright finishing touch.

    Miso glazed salmon pairs beautifully with:

    • Steamed jasmine rice
    • Stir-fried vegetables
    • Sautéed bok choy
    • Cucumber salad
    • Rice noodles

    Pro Tips for Perfect Miso Glazed Salmon

    • Use white miso paste for a milder, slightly sweet flavor.
    • Don’t over-marinate—miso is concentrated and can overpower the fish.
    • Pat the salmon dry to help the glaze stick.
    • Broil carefully for caramelization without burning.
    • Choose center-cut fillets for even thickness and consistent cooking.

    Flavor Variations

    Once you master the base recipe, try these delicious variations:

    • Spicy Miso: Add 1 teaspoon sriracha or chili paste to the glaze.
    • Maple Miso: Swap honey for pure maple syrup for deeper sweetness.
    • Citrus Twist: Add a teaspoon of orange zest to the glaze.
    • Grilled Version: Cook salmon on a grill over medium heat and brush with glaze during the final minutes.

    Storage and Reheating

    Store leftover salmon in an airtight container in the refrigerator for up to 3 days.

    To reheat, warm gently in a 300°F oven for 8–10 minutes. Avoid microwaving at high heat, as it can dry out the fish.

    Cold leftover miso salmon also works wonderfully flaked into salads or rice bowls.


    Why This Recipe Works

    Miso paste delivers deep umami flavor that pairs naturally with rich salmon.

    The sweetness from honey balances the saltiness, while ginger and garlic add aromatic warmth. High heat allows the glaze to caramelize, creating contrast between the crispy exterior and tender interior.

    The simplicity of the ingredients lets the salmon shine while still offering bold, layered flavor.


    Final Thoughts

    Miso Glazed Salmon is proof that impressive meals don’t have to be complicated. With a handful of pantry staples and under 30 minutes of active cooking time, you can create a dish that feels refined, balanced, and deeply satisfying.

    The glossy, caramelized glaze and flaky salmon make every bite memorable. Whether you’re cooking for family, entertaining guests, or simply upgrading your weeknight dinner routine, this recipe delivers consistent, delicious results.

    Once you try it, don’t be surprised if it becomes a weekly favorite. Sweet, savory, tender, and vibrant—this miso glazed salmon checks every box.

  • Viral Dubai Chocolate Brownies (Pistachio Kataifi Crunch!)

    Viral Dubai Chocolate Brownies (Pistachio Kataifi Crunch!)

    If you’ve been anywhere near social media lately, you’ve seen it: the Dubai chocolate bar. That iconic combination of creamy pistachio, crispy kataifi pastry, and rich chocolate has taken the internet by storm, racking up over 127 million views on TikTok . And honestly? The hype is real.

    But here’s the thing—as delicious as the original bar is, I couldn’t help but wonder: what if we gave it a fudgy foundation? Enter these Viral Dubai Chocolate Brownies. We’re starting with an ultra-rich, crackly-top brownie base, layering on that signature pistachio-kataifi filling, and sealing it all with a glossy chocolate topping. The result is a textural masterpiece: fudgy, creamy, crunchy, and silky all in one bite. Trust me, these are worth the buzz.

    Ingredients

    Yields 12-16 brownies (8×8 inch pan).

    For the Fudgy Brownie Base:

    • ½ cup (115g) unsalted butter
    • 4 oz (115g) dark chocolate (70% cocoa), roughly chopped
    • ⅔ cup (65g) Dutch-process cocoa powder
    • 1 teaspoon instant espresso powder (optional, enhances chocolate flavor)
    • 2 large eggs, at room temperature
    • 1 large egg yolk, at room temperature
    • 1 cup (200g) granulated sugar
    • ½ cup (65g) powdered sugar
    • 1½ teaspoons vanilla extract
    • ½ cup (65g) all-purpose flour
    • 1 tablespoon cornstarch
    • ½ teaspoon kosher salt

    For the Pistachio Kataifi Filling:

    • 2 cups (about 150-200g) kataifi pastry (shredded phyllo), chopped into ½-inch pieces
    • 3 tablespoons (45g) unsalted butter
    • ⅔ cup (160g) pistachio cream (sweetened, spreadable kind)
    • 1 tablespoon (15g) tahini
    • Pinch of salt

    For the Chocolate Topping:

    • 1½ cups (260g) semi-sweet chocolate chips or chopped chocolate
    • 2 tablespoons coconut oil
    • Flaky sea salt, for sprinkling
    • Optional: extra pistachio cream for drizzling, crushed pistachios

    Step-by-Step Instructions

    1. Bake the Brownie Base:

    1. Preheat your oven to 325°F (165°C). Line an 8×8 inch metal baking pan with parchment paper, leaving overhang on two sides for easy removal.
    2. In a heatproof bowl over simmering water (double boiler method), melt together the butter and chopped dark chocolate. Stir until smooth. Remove from heat and whisk in the cocoa powder and espresso powder until fully combined. Set aside to cool slightly.
    3. In a large bowl, beat the eggs, egg yolk, granulated sugar, powdered sugar, and vanilla extract with an electric mixer on high speed for 3-5 minutes. The mixture should become thick, pale, and fall in ribbons when the beater is lifted.
    4. With the mixer on low, slowly stream in the warm chocolate mixture and mix until just combined.
    5. Sift the flour, cornstarch, and salt over the batter. Gently fold with a rubber spatula until no streaks of flour remain. Do not overmix.
    6. Pour the batter into the prepared pan and spread evenly. Bake for 20-25 minutes, until a toothpick inserted near the center comes out with a few moist crumbs but not wet batter.
    7. Let the brownies cool completely in the pan on a wire rack. This is crucial—if the brownies are warm, the filling will melt into them.

    2. Make the Pistachio Kataifi Filling:

    1. While the brownies cool, prepare the filling. Chop the kataifi pastry into small pieces (about ½ inch) so it’s easier to mix and eat.
    2. In a large skillet over medium heat, melt the 3 tablespoons of butter. Add the chopped kataifi and toast, stirring constantly, for 8-10 minutes until it turns deep golden brown and smells nutty. Watch carefully—it goes from golden to burnt quickly!
    3. Transfer the toasted kataifi to a medium bowl and let it cool slightly. Add the pistachio cream, tahini, and a pinch of salt. Stir until every strand is coated and the mixture is cohesive and spreadable.

    3. Assemble the Layers:

    1. Once the brownie base is completely cool, spread the pistachio kataifi mixture evenly over the top. Press it down firmly with the back of a spoon or by laying a piece of parchment paper on top and gently pressing with your hand.
    2. In a small heatproof bowl, combine the semi-sweet chocolate chips and coconut oil. Melt gently over simmering water or in the microwave in 20-second bursts, stirring until smooth.
    3. Pour the melted chocolate over the pistachio layer. Tilt the pan or use a spatula to spread it into an even, thin layer.
    4. Sprinkle immediately with flaky sea salt. If desired, drizzle extra pistachio cream over the top and swirl gently with a toothpick for a decorative finish.

    4. Chill and Slice:

    1. Refrigerate the assembled brownies for at least 2 hours, or until the chocolate topping is completely set.
    2. To slice, let the pan sit at room temperature for 10-15 minutes. Use the parchment overhang to lift the whole block onto a cutting board. For clean, Instagram-worthy edges, dip a sharp knife in hot water and wipe it dry between each cut.
    3. Serve slightly chilled or at room temperature. Store leftovers in an airtight container in the refrigerator.

    Summary

    Prep Time: 45 minutes | Bake Time: 25 minutes | Chill Time: 2 hours | Total Time: 3 hours 10 minutes

    Yield: 12-16 brownies

    Difficulty: Intermediate (but so worth it!)

    Storage and Make-Ahead Tips

    How to Store:

    Store Dubai chocolate brownies in an airtight container in the refrigerator for up to one week. The layers actually set better over time, making them even more delicious the next day! For the best texture, let them sit at room temperature for 10-15 minutes before serving.

    Can You Freeze Them?

    Absolutely! These freeze beautifully. Wrap the whole slab or individual slices tightly in plastic wrap, then place in a freezer-safe container. Freeze for up to 3 months. Thaw overnight in the refrigerator.

    Make-Ahead for Parties:

    This is the perfect dessert to make a day ahead. The layers need time to set properly anyway, so prepare them the day before your event and simply slice before serving.

  • No-Knead Peasant Bread (The Easiest Bread You’ll Ever Make)

    No-Knead Peasant Bread (The Easiest Bread You’ll Ever Make)

    There are few things in life as comforting as the smell of freshly baked bread filling your kitchen. For years, I thought making bread from scratch required a mysterious set of skills, a million steps, and a lot of muscle power. Then I discovered no-knead peasant bread, and everything changed.

    This recipe is pure magic. With just 4 simple ingredients and about 5 minutes of active work, you can create a loaf that looks and tastes like it came from a rustic French bakery. The crust is golden and buttery, the inside is soft and airy, and the flavor is pure, honest bread. Whether you’re a complete beginner or a seasoned baker looking for an easy weeknight loaf, this peasant bread will become your new obsession.

    Ingredients

    Makes 1 loaf (bakes in a 1.5 quart oven-safe dish or 9-inch round cake pan).

    For the Bread:

    • 4 cups (500g) all-purpose flour or bread flour
    • 2 teaspoons salt
    • 2 teaspoons granulated sugar (or honey/maple syrup)
    • 2 ¼ teaspoons (one ¼-ounce packet) active dry or instant yeast
    • 2 cups (470ml) warm water (about 105-115°F)

    For Finishing:

    • 1-2 tablespoons melted butter (for brushing the top after baking)
    • Optional: Flaky sea salt, herbs, or garlic powder for topping

    Step-by-Step Instructions

    1. Mix the Dough:

    1. In a large mixing bowl, whisk together the flour, salt, sugar, and yeast until well combined.
    2. Pour in the warm water and stir with a wooden spoon or a rubber spatula until a shaggy, sticky dough forms. There should be no dry patches of flour remaining. The dough will look rough and messy—this is exactly what you want!
    3. Scrape down the sides of the bowl and cover tightly with plastic wrap or a clean kitchen towel.

    2. First Rise (Let Time Do the Work):

    1. Let the dough sit at room temperature for 1.5 to 2 hours. It should double in size and become bubbly and dotted with fermentation bubbles on the surface.
    2. If you’re not ready to bake, you can refrigerate the dough at this point for up to 24 hours. Just punch it down, cover, and pop it in the fridge.

    3. Second Rise in the Pan:

    1. Generously butter a 1.5-quart oven-safe baking dish (like a Pyrex casserole dish) or a 9-inch round cake pan. You can also use a standard loaf pan, but the shape will be different.
    2. Using a spatula or your lightly floured hands, scrape the dough out of the bowl and gently fold it over on itself a few times to deflate it slightly.
    3. Transfer the dough to the prepared pan. It will be very soft and sticky. Don’t worry about shaping it perfectly—just plop it in.
    4. Cover the pan loosely with oiled plastic wrap or a kitchen towel and let it rise for another 30-60 minutes, until the dough has risen noticeably and looks puffy. It should just about reach the top of the pan.

    4. Preheat and Bake:

    1. About 20 minutes before the second rise is complete, preheat your oven to 425°F (220°C). Position a rack in the middle.
    2. If desired, you can brush the top of the dough very gently with a little water or oil and sprinkle with flaky salt, herbs, or everything bagel seasoning.
    3. Bake for 30-35 minutes, until the top is deeply golden brown and the loaf sounds hollow when tapped.
    4. If the top is browning too quickly, tent loosely with foil for the last 10 minutes.

    5. The Butter Bath (Optional but Essential!):

    1. As soon as the bread comes out of the oven, brush the top generously with melted butter. This creates a soft, flavorful crust that’s absolutely irresistible.
    2. Let the bread cool in the pan for 10 minutes, then carefully turn it out onto a wire rack to cool completely. I know it’s tempting, but try to wait at least 30 minutes before slicing so the interior sets properly!

    Baker’s Tips for Perfect Peasant Bread

    • Water Temperature Matters: The water should feel like warm bath water (105-115°F). Too hot will kill the yeast; too cold won’t activate it properly. If you’re using instant yeast, you can use slightly cooler water since it doesn’t need to “bloom.”
    • Don’t Skip the Butter: Brushing the hot loaf with melted butter is the secret to that soft, glossy, flavorful crust. It takes the bread from good to unforgettable.
    • Use a Food Scale for Best Results: Flour can vary wildly in volume depending on how you scoop it. For consistent results, weigh your flour: 500 grams is the sweet spot.
    • The Dough is Supposed to Be Sticky: Don’t be tempted to add more flour! A wet, sticky dough is what creates the open, airy crumb structure. Resist the urge.
    • Oven-Safe Dish: Make sure your baking dish is oven-safe up to 425°F. Glass, ceramic, and stoneware all work beautifully. Metal pans work too but may brown the crust faster.

    Summary

    Prep Time: 10 minutes | Rise Time: 2-2.5 hours | Bake Time: 35 minutes | Total Time: About 3 hours (mostly hands-off)

    Yield: 1 loaf

    Difficulty: Easy (Perfect for Beginners!)

    Storage and Make-Ahead Tips

    How to Store:

    Store peasant bread wrapped tightly in plastic wrap or in an airtight container at room temperature for up to 3 days. The crust will soften slightly, but it’s still delicious.

    Can You Freeze It?

    Absolutely! This bread freezes beautifully. Let the loaf cool completely, then wrap tightly in plastic wrap and place in a freezer bag. Freeze for up to 3 months. Thaw at room temperature and refresh in a 350°F oven for 5-10 minutes to crisp up the crust.

    Make-Ahead Option:

    The dough can be refrigerated after the first rise for up to 24 hours. When you’re ready to bake, simply proceed with the second rise in the pan—it may take a little longer since the dough is cold.

  • Creamy, Comforting, and Bursting with Flavor: Homemade Butter Chicken

    Creamy, Comforting, and Bursting with Flavor: Homemade Butter Chicken

    Few dishes capture the essence of Indian cuisine quite like Butter Chicken. Rich, creamy, and lightly spiced, it’s a crowd-pleaser that transforms simple ingredients into a luxurious meal.

    Perfect over rice, with naan, or even paired with roasted vegetables, Butter Chicken offers a comforting combination of tender chicken, buttery tomato sauce, and aromatic spices. Making it at home is easier than you think, and the flavors are far more vibrant than most store-bought versions.

    This step-by-step guide will help you craft restaurant-quality Butter Chicken from scratch.


    Ingredients

    For the chicken marinade:

    • 1 ½ pounds boneless, skinless chicken thighs or breasts, cut into bite-sized pieces
    • ¾ cup plain yogurt
    • 1 tablespoon lemon juice
    • 2 teaspoons garam masala
    • 1 teaspoon turmeric
    • 1 teaspoon ground cumin
    • 1 teaspoon chili powder or paprika
    • 1 teaspoon salt
    • 2 cloves garlic, minced
    • 1-inch piece of ginger, grated

    For the sauce:

    • 3 tablespoons unsalted butter
    • 1 tablespoon vegetable oil
    • 1 medium onion, finely chopped
    • 3 cloves garlic, minced
    • 1-inch piece ginger, grated
    • 1 ½ teaspoons garam masala
    • 1 teaspoon ground cumin
    • 1 teaspoon ground coriander
    • ½ teaspoon chili powder (adjust to taste)
    • 1 (14-ounce) can crushed tomatoes
    • 1 cup heavy cream or coconut cream
    • Salt to taste
    • Fresh cilantro, chopped, for garnish

    Step 1: Marinate the Chicken

    Combine yogurt, lemon juice, garlic, ginger, garam masala, turmeric, cumin, chili powder, and salt in a bowl.

    Add the chicken pieces and stir until evenly coated. Cover and refrigerate for at least 1 hour, ideally 4–6 hours, or overnight for maximum flavor.

    The yogurt tenderizes the chicken while the spices infuse it with deep flavor, setting the foundation for an irresistible dish.


    Step 2: Cook the Chicken

    Heat a large skillet or sauté pan over medium-high heat. Add 1 tablespoon of butter and 1 tablespoon of oil.

    Remove the chicken from the marinade, letting excess drip off, and sear in batches. Cook for 2–3 minutes per side until lightly golden and just cooked through. The chicken will finish cooking in the sauce, so don’t overcook. Transfer the chicken to a plate and set aside.


    Step 3: Build the Sauce

    In the same pan, add the remaining 2 tablespoons of butter. Sauté the onions over medium heat for 5–6 minutes until softened and slightly caramelized.

    Add garlic and ginger, cooking for 30 seconds until fragrant. Stir in garam masala, cumin, coriander, and chili powder. Toast the spices gently for about 1 minute to release their aroma.


    Step 4: Add the Tomatoes

    Pour in the crushed tomatoes, stirring to combine with the spices. Simmer over low-medium heat for 10–12 minutes until the sauce thickens slightly and deepens in color.

    This step allows the acidity of the tomatoes to mellow and the spices to fully infuse, creating a rich, balanced base.


    Step 5: Incorporate the Cream

    Reduce heat to low and slowly stir in the cream. Mix until fully incorporated, creating a silky, luxurious sauce. Taste and adjust salt and spice as needed.

    Cream balances the heat and acidity, producing the signature smoothness that Butter Chicken is known for.


    Step 6: Return Chicken to the Sauce

    Add the cooked chicken pieces back into the pan. Stir gently to coat with the sauce. Simmer for 5–7 minutes to let the chicken absorb the flavors and ensure it’s heated through.

    For added richness, stir in an extra tablespoon of butter just before serving.


    Step 7: Garnish and Serve

    Sprinkle freshly chopped cilantro over the top and add a drizzle of cream if desired. Serve immediately with basmati rice, naan bread, or steamed vegetables.

    The contrast of the tender chicken and creamy, spiced sauce is simply irresistible.


    Tips for Perfect Butter Chicken

    • Marinate overnight: The longer the chicken marinates, the more tender and flavorful it becomes.
    • Use chicken thighs: Thighs remain juicier than breasts and absorb the sauce beautifully.
    • Balance spices: Adjust chili and garam masala to taste. Start mild and build heat gradually.
    • Cream alternatives: Coconut cream can be used for a dairy-free version while adding subtle sweetness.
    • Avoid overcooking chicken: It will continue cooking in the sauce; overcooked chicken becomes dry.

    Why This Recipe Works

    The magic of Butter Chicken lies in layering flavors: tender, marinated chicken, aromatic spices, a rich tomato base, and cream for silkiness. Each element enhances the others, creating a harmonious balance of heat, sweetness, and umami.

    This technique is also versatile. You can double the sauce for a larger batch, add roasted vegetables, or even make a lighter version using yogurt instead of cream.


    Meal Prep and Storage

    Butter Chicken stores well in the refrigerator for up to 3 days. Allow the sauce and chicken to cool completely before transferring to an airtight container. Reheat gently over medium-low heat, stirring occasionally.

    For freezing, portion into meal-sized containers and store for up to 2 months. Thaw overnight in the refrigerator and reheat carefully to preserve texture and flavor.


    Optional Variations

    • Smoky Butter Chicken: Add 1 teaspoon smoked paprika or finish with a splash of smoked chili oil.
    • Nutty Twist: Stir in 1–2 tablespoons of ground cashews or almond butter to enrich the sauce.
    • Vegetable Butter Chicken: Include cauliflower, bell peppers, or peas for a veggie-packed meal.

    Final Thoughts

    Homemade Butter Chicken proves that complex, restaurant-quality flavors can be achieved in a simple, approachable way. With marinated chicken, rich tomato cream sauce, and aromatic spices, this dish delivers comfort, elegance, and warmth in every bite.

    Perfect for weeknight dinners, special occasions, or cozy weekend meals, it’s destined to become a staple in your culinary repertoire.

    The tender chicken, luscious sauce, and fresh garnish come together to create a meal that’s deeply satisfying and unforgettable—proof that comfort food can also be sophisticated.

  • Stunning, Savory, and Full of Flavor: Layered Ratatouille Made Easy

    Stunning, Savory, and Full of Flavor: Layered Ratatouille Made Easy

    Ratatouille isn’t just a dish—it’s a visual masterpiece.

    The layered version, often called Confit Byaldi, transforms simple vegetables into a colorful, elegant dish where each bite bursts with flavor.

    With zucchini, eggplant, bell peppers, and tomatoes arranged in beautiful overlapping layers and roasted to perfection, this recipe is perfect for dinner parties, special occasions, or even a weeknight treat that feels extra special.

    The good news? Despite its fancy appearance, layered ratatouille is surprisingly approachable. With a little prep, careful layering, and a gentle roast, you’ll have a dish that looks like a work of art and tastes like heaven.


    Ingredients

    For the base sauce:

    • 2 tablespoons olive oil
    • 1 medium onion, finely chopped
    • 2 cloves garlic, minced
    • 1 (14-ounce) can crushed tomatoes
    • 1 teaspoon dried thyme
    • 1 teaspoon dried oregano
    • Salt and freshly ground black pepper, to taste

    For the vegetables:

    • 1 small eggplant, thinly sliced into rounds (¼ inch thick)
    • 1 medium zucchini, thinly sliced
    • 1 yellow squash, thinly sliced
    • 1 red bell pepper, thinly sliced
    • 1 yellow bell pepper, thinly sliced
    • 1 medium tomato, thinly sliced

    For finishing:

    • 2 tablespoons olive oil
    • 1 teaspoon dried herbs (thyme, oregano, or Herbes de Provence)
    • Fresh basil or parsley, chopped, for garnish

    Step 1: Prepare the Base Sauce

    Start by preheating your oven to 375°F (190°C).

    In a medium skillet, heat 2 tablespoons of olive oil over medium heat. Add the chopped onion and sauté for 3–4 minutes until softened. Add minced garlic and cook for an additional 30 seconds until fragrant.

    Pour in the crushed tomatoes, then stir in the dried thyme, oregano, salt, and pepper. Simmer over low heat for 10–12 minutes until the sauce thickens slightly.

    This tomato base provides a savory, flavorful foundation for the vegetables, ensuring that every bite is moist and rich.


    Step 2: Prepare the Vegetables

    Wash all vegetables thoroughly. Slice the eggplant, zucchini, yellow squash, bell peppers, and tomato into thin, uniform rounds or strips. Consistent size is key for even cooking and a visually stunning presentation.

    Tip: If your eggplant is particularly bitter or watery, sprinkle the slices with salt and let them sit for 10 minutes. Pat dry with a paper towel before layering.


    Step 3: Assemble the Base

    Spread the tomato sauce evenly on the bottom of a shallow baking dish or oven-safe skillet. This layer will infuse the vegetables with flavor and prevent them from sticking to the pan.


    Step 4: Layer the Vegetables

    Starting at one side of the dish, arrange the vegetables in an overlapping, alternating pattern: eggplant, zucchini, yellow squash, red bell pepper, yellow bell pepper, and tomato. Repeat until the dish is filled.

    The key is uniform layers and a tight, neat arrangement. This creates the signature spiral or linear pattern seen in classic layered ratatouille.


    Step 5: Season and Oil

    Drizzle 2 tablespoons of olive oil evenly over the arranged vegetables. Sprinkle additional dried herbs, salt, and freshly ground black pepper on top.

    The olive oil not only enhances flavor but also helps the vegetables roast beautifully, developing a caramelized exterior while staying tender inside.


    Step 6: Cover and Bake

    Cover the dish with aluminum foil and bake in the preheated oven for 30 minutes. Covering the dish allows the vegetables to steam slightly and cook evenly without drying out.


    Step 7: Uncover and Roast

    After 30 minutes, remove the foil and continue baking for another 15–20 minutes. The vegetables should be tender, with lightly caramelized edges and a fragrant aroma filling your kitchen.


    Step 8: Garnish and Serve

    Once baked, remove the dish from the oven. Let it rest for a few minutes to allow flavors to settle. Garnish with freshly chopped basil or parsley for color and freshness.

    Layered ratatouille can be served hot as a main dish, alongside grilled proteins, or even as a stunning side dish for a dinner party.


    Pro Tips for Perfect Layered Ratatouille

    • Uniform slices: Thin, even slices ensure that all vegetables cook at the same rate.
    • Don’t overcrowd: Overlapping is beautiful, but too many layers can prevent even cooking.
    • Salt the eggplant: This removes excess moisture and bitterness.
    • Use a shallow baking dish: This ensures even heat distribution and prevents soggy vegetables.
    • Let it rest: Allowing the dish to sit for a few minutes before serving enhances the flavor meld.

    Why This Recipe Works

    Layered ratatouille works because it balances flavor, texture, and visual appeal. The tomato base provides a savory, aromatic foundation. Each vegetable contributes its unique texture and flavor: tender zucchini, sweet bell peppers, and hearty eggplant. Olive oil and herbs tie everything together, creating a cohesive, flavorful dish.

    The baking process allows the natural sweetness of the vegetables to intensify while maintaining structure, resulting in a dish that is both elegant and comforting.


    Variations and Serving Ideas

    • Cheesy twist: Sprinkle grated Parmesan or crumbled feta over the vegetables before baking.
    • Protein boost: Serve alongside grilled chicken, fish, or tofu.
    • Herbal variation: Add rosemary or sage for a different aroma.
    • Roasted garlic: Include whole garlic cloves in the tomato sauce for a deeper flavor profile.
    • Meal prep: Prepare in advance and reheat gently for a weeknight dinner.

    Storage and Reheating

    Layered ratatouille keeps well in the refrigerator for 3–4 days. Store in an airtight container and reheat gently in the oven or on the stovetop. It also freezes beautifully for up to 2 months—simply thaw overnight in the fridge before reheating.


    The Takeaway

    Layered Ratatouille proves that vegetable dishes can be both visually stunning and deeply flavorful. By carefully layering thinly sliced vegetables over a savory tomato base and roasting them to perfection, you create a dish that looks like it belongs on a restaurant menu but is achievable at home.

    Whether for a cozy dinner, a dinner party, or a special occasion, this recipe highlights the natural beauty and flavor of summer vegetables. The combination of tender, caramelized vegetables with fragrant herbs and rich tomato sauce is irresistible, making this layered ratatouille a true showstopper.

    Once you try this recipe, you’ll see why layered ratatouille continues to be a timeless classic: elegant, satisfying, and unforgettable in both flavor and presentation.

  • Decadent, Creamy, and Seafood-Forward: Lobster Risotto You Can Make at Home

    Decadent, Creamy, and Seafood-Forward: Lobster Risotto You Can Make at Home

    Few dishes scream indulgence quite like Lobster Risotto. Silky, creamy, and infused with the delicate sweetness of lobster, this Italian classic is a showstopper for special dinners, romantic evenings, or celebratory occasions.

    While risotto may seem intimidating, it’s more approachable than you think when broken down step by step.

    With patience, quality ingredients, and careful attention, you can create a restaurant-worthy lobster risotto that’s both comforting and luxurious.

    Let’s dive into the ultimate guide for crafting this indulgent dish.


    Ingredients

    For the lobster:

    • 1–1 ½ pounds lobster tails or whole lobster (cooked and shelled)
    • 2 tablespoons unsalted butter
    • Salt and pepper, to taste

    For the risotto:

    • 1 ½ cups Arborio rice
    • 1 small onion, finely chopped
    • 2 cloves garlic, minced
    • 4 tablespoons unsalted butter
    • 2 tablespoons olive oil
    • ½ cup dry white wine
    • 5–6 cups lobster or seafood stock, kept warm
    • ½ cup freshly grated Parmesan cheese
    • 2 tablespoons heavy cream (optional, for extra creaminess)
    • Salt and freshly ground black pepper, to taste
    • Fresh parsley or chives, chopped, for garnish

    Step 1: Prepare the Lobster

    If using live lobster, cook it in boiling water for 8–10 minutes for tails, or 10–12 minutes for whole lobster. Remove the meat from shells, chop into bite-sized pieces, and set aside.

    For pre-cooked lobster, simply chop the meat into chunks and set aside.

    In a small skillet over medium heat, melt 2 tablespoons butter and lightly sauté the lobster pieces for 1–2 minutes, seasoning with salt and pepper. This step enhances the lobster’s flavor and prevents it from tasting cold or raw when added to the risotto later.


    Step 2: Heat the Stock

    Pour lobster or seafood stock into a saucepan and bring to a gentle simmer. Keep it warm over low heat—this ensures the rice cooks evenly without shocking the grains with cold liquid.

    Warm stock is a key secret to creamy risotto.


    Step 3: Sauté the Aromatics

    In a large skillet or wide sauté pan, heat 2 tablespoons butter and 2 tablespoons olive oil over medium heat. Add the finely chopped onion and cook for 3–4 minutes until soft and translucent. Add the minced garlic and cook for an additional 30 seconds, stirring constantly to prevent burning.

    This forms a flavorful base for the risotto, ensuring each grain of rice is infused with subtle depth.


    Step 4: Toast the Rice

    Add the Arborio rice to the pan and stir for 1–2 minutes, allowing the grains to become lightly toasted and coated in butter and oil.

    This step enhances the nutty aroma and helps the rice absorb liquid gradually without becoming mushy.


    Step 5: Deglaze with Wine

    Pour in the dry white wine and stir until the liquid is mostly absorbed.

    The wine adds a delicate acidity that balances the richness of the butter and lobster.


    Step 6: Gradually Add Stock

    Add the warm lobster stock one ladleful at a time, stirring frequently. Wait until most of the liquid is absorbed before adding the next ladle.

    Continue this process for about 18–20 minutes. The rice should be tender yet slightly firm to the bite—what Italians call al dente.

    Frequent stirring releases the rice’s natural starch, creating that signature creamy texture.


    Step 7: Finish the Risotto

    Once the rice is cooked, remove the pan from heat. Stir in the sautéed lobster, Parmesan cheese, and heavy cream (if using). Taste and season with salt and freshly ground black pepper.

    Gently fold everything together, being careful not to break up the lobster chunks. The risotto should be luscious, creamy, and coat each grain beautifully.


    Step 8: Garnish and Serve

    Serve the risotto immediately while hot. Sprinkle freshly chopped parsley or chives over the top for color and freshness. For extra decadence, add a small pat of butter or an additional drizzle of cream.

    Pair with a crisp white wine like Sauvignon Blanc or Chardonnay for a truly elevated experience.


    Pro Tips for Perfect Lobster Risotto

    • Keep the stock warm: Cold stock can shock the rice and slow cooking.
    • Stir often: Stirring releases starches, producing a creamy texture without cream.
    • Timing matters: Cook the lobster separately to prevent overcooking. Add it at the end to keep it tender.
    • Use quality ingredients: Fresh lobster, good Parmesan, and high-quality Arborio rice make a huge difference.
    • Consistency check: Risotto should be creamy and slightly loose—not dry or stiff.

    Why This Recipe Works

    The magic of lobster risotto lies in layering flavors and textures. Toasting the rice adds nuttiness, the gradual absorption of stock ensures creamy consistency, and the final addition of lobster provides sweetness and luxury. Butter, Parmesan, and optional cream enrich the dish without overpowering the delicate seafood flavor.

    This balance of creamy, savory, and subtly sweet notes makes lobster risotto a comforting yet refined dish.


    Optional Variations

    • Truffle Twist: Add a drizzle of truffle oil for an earthy, sophisticated flavor.
    • Vegetable Boost: Fold in peas, asparagus tips, or sautéed mushrooms for color and texture.
    • Citrus Zest: A touch of lemon zest brightens the richness.
    • Shellstock Broth: Use lobster shells to make a homemade stock for deeper flavor.

    Storage and Leftovers

    Risotto is best served fresh, as reheating can change its creamy texture. If you have leftovers, store in an airtight container in the refrigerator for up to 2 days.

    Reheat gently over low heat, adding a splash of stock or cream to loosen the consistency.


    The Takeaway

    Lobster Risotto may seem luxurious, but it’s achievable with patience and attention to technique. By preparing the lobster, toasting the rice, gradually adding stock, and finishing with Parmesan and butter, you create a dish that’s rich, flavorful, and comforting.

    This indulgent meal is perfect for special occasions, romantic dinners, or any time you want to treat yourself. Each bite is a perfect balance of creamy, tender, and seafood-forward flavors, proving that homemade elegance is entirely possible—even from your own kitchen.

    Once you try this Lobster Risotto, you’ll understand why it’s a classic: simple ingredients transformed through care and technique into a truly unforgettable dish.

  • Thick, Buttery & Irresistibly Soft: The Ultimate Chewy Chocolate Chip Bars

    Thick, Buttery & Irresistibly Soft: The Ultimate Chewy Chocolate Chip Bars

    If you love classic chocolate chip cookies but don’t feel like scooping dough and baking in batches, Chewy Chocolate Chip Bars are your new best friend.

    These bars deliver everything you adore about cookies—gooey chocolate, buttery flavor, soft centers, and slightly crisp edges—but in an easy, slice-and-serve form.

    Perfect for parties, potlucks, lunchboxes, or late-night cravings, this recipe comes together quickly and bakes in one pan. Let’s walk step by step through making thick, bakery-style chocolate chip bars with the ultimate chewy texture.


    Why You’ll Love These Chocolate Chip Bars

    • Soft and chewy center
    • Buttery, rich flavor
    • Loaded with chocolate chips
    • Easier than individual cookies
    • Perfect for sharing

    These bars strike the perfect balance between gooey and structured, making them easy to slice while still staying ultra-soft.


    Ingredients You’ll Need

    Wet Ingredients:

    • ¾ cup unsalted butter, melted
    • 1 cup brown sugar (packed)
    • ½ cup granulated sugar
    • 2 large eggs
    • 1 tablespoon vanilla extract

    Dry Ingredients:

    • 2 ¼ cups all-purpose flour
    • 1 teaspoon baking soda
    • ½ teaspoon salt

    Add-Ins:

    • 2 cups semi-sweet chocolate chips
    • ½ cup chocolate chunks (optional for extra gooeyness)

    Step 1: Preheat and Prepare the Pan

    Preheat your oven to 350°F (175°C).

    Line a 9×13-inch baking pan with parchment paper, leaving some overhang for easy removal. Lightly grease the paper to prevent sticking.

    Using parchment ensures clean edges and effortless lifting after baking.


    Step 2: Melt the Butter

    Melt the butter in a microwave-safe bowl or saucepan.

    Allow it to cool slightly before mixing with the sugars. Warm (not hot) butter helps create that chewy texture without scrambling the eggs.

    Melted butter contributes to density and chewiness rather than a cakey texture.


    Step 3: Mix the Sugars

    Add brown sugar and granulated sugar to the melted butter.

    Whisk thoroughly until smooth and glossy.

    Brown sugar is key here—it adds moisture and chewiness thanks to its molasses content.


    Step 4: Add Eggs and Vanilla

    Add the eggs one at a time, whisking well after each addition.

    Stir in vanilla extract.

    The mixture should become thick and slightly lighter in color. Proper mixing at this stage builds structure and ensures even texture.


    Step 5: Combine Dry Ingredients

    In a separate bowl, whisk together:

    • Flour
    • Baking soda
    • Salt

    Whisking ensures the leavening agent distributes evenly throughout the dough.


    Step 6: Combine Wet and Dry

    Gradually fold the dry ingredients into the wet mixture using a spatula.

    Mix just until combined. Avoid overmixing, as that can develop gluten and make the bars tough.

    The dough will be thick and slightly sticky.


    Step 7: Fold in the Chocolate

    Gently fold in chocolate chips and chocolate chunks.

    Reserve a handful of chips to sprinkle on top for a bakery-style finish.

    Even distribution ensures every bite has melty chocolate goodness.


    Step 8: Press into the Pan

    Transfer the dough into the prepared baking pan.

    Use a spatula or lightly greased hands to press the dough evenly into the corners.

    Sprinkle reserved chocolate chips over the top.

    For thicker bars, use a slightly smaller pan and increase baking time slightly.


    Step 9: Bake to Chewy Perfection

    Bake for 22–28 minutes.

    The edges should be golden brown, and the center should look slightly underbaked but set.

    A toothpick inserted in the center should come out with moist crumbs—not raw batter.

    Do not overbake. Slight underbaking is the secret to chewy bars.


    Step 10: Cool Before Slicing

    Allow the bars to cool in the pan for at least 30 minutes.

    For cleaner slices, let them cool completely or chill briefly before cutting.

    Lift out using parchment overhang and transfer to a cutting board.

    Slice into squares or rectangles using a sharp knife.


    Texture and Flavor Highlights

    • Soft, chewy center
    • Buttery, rich base
    • Slightly crisp golden edges
    • Gooey, melted chocolate in every bite
    • Balanced sweetness

    These bars offer cookie flavor with a denser, more satisfying bite.


    Pro Tips for Perfect Chewy Bars

    Use more brown sugar than white. This guarantees chewiness.

    Don’t overbake. The bars continue cooking as they cool.

    Measure flour correctly. Spoon and level—don’t scoop directly from the bag.

    Cool before slicing. Prevents crumbling.

    Use quality chocolate. It makes a noticeable difference.


    Optional Variations

    Sea Salt Finish: Sprinkle flaky sea salt on top before baking.

    Nutty Addition: Add ½ cup chopped walnuts or pecans.

    Peanut Butter Swirl: Drop spoonfuls of peanut butter and swirl before baking.

    Double Chocolate: Replace ¼ cup flour with cocoa powder.

    Caramel Twist: Add caramel bits for gooey pockets of sweetness.


    Storage Instructions

    Store in an airtight container at room temperature for up to 4 days.

    Refrigerate for up to 1 week if preferred.

    Freeze individually wrapped bars for up to 3 months.

    To refresh, microwave for 10–15 seconds for that just-baked warmth.


    Why This Recipe Works

    Chewy Chocolate Chip Bars rely on melted butter and brown sugar to create their soft texture. The ratio of fat to flour keeps them dense and moist, while proper mixing ensures structure without toughness.

    Underbaking slightly locks in moisture, and cooling allows the crumb to set while maintaining chewiness. Using both chocolate chips and chunks creates pockets of melted chocolate throughout.


    Chewy Chocolate Chip Bars are the perfect solution when you want all the comfort of cookies with half the effort. Thick, buttery, and loaded with chocolate, they’re guaranteed to satisfy every sweet craving.

    Once you try these soft and gooey bars, they’ll quickly become a staple in your baking rotation—easy, crowd-pleasing, and absolutely irresistible.

  • Creamy, Smoky, and Irresistible: The Ultimate Spaghetti alla Carbonara Recipe

    Creamy, Smoky, and Irresistible: The Ultimate Spaghetti alla Carbonara Recipe

    Few pasta dishes are as iconic—and as satisfying—as Spaghetti alla Carbonara. This classic Roman recipe combines silky pasta, crispy pancetta or guanciale, and a rich, creamy sauce made from eggs, Parmesan, and Pecorino Romano.

    Despite its indulgent flavor, authentic carbonara contains no cream—the magic comes from the emulsion of eggs and cheese with hot pasta.

    In this step-by-step guide, you’ll learn how to make authentic Spaghetti alla Carbonara that’s silky, flavorful, and perfect every time.


    Why You’ll Love This Recipe

    • Rich, creamy texture without using cream
    • Smoky, savory pancetta or guanciale
    • Quick and simple, ready in under 30 minutes
    • Classic Italian comfort food
    • Perfect for weeknight dinners or a special meal

    Spaghetti alla Carbonara is all about timing, technique, and balancing flavors to achieve that luxurious sauce that clings to every strand of pasta.


    Ingredients You’ll Need

    For the Pasta:

    • 12 ounces spaghetti
    • 2 tablespoons salt (for pasta water)

    For the Sauce:

    • 4 ounces guanciale or pancetta, diced
    • 3 large eggs
    • ½ cup finely grated Pecorino Romano (or ¼ cup Pecorino + ¼ cup Parmesan)
    • Freshly cracked black pepper, generous
    • Salt, to taste (be careful—the cheese is salty)

    Optional Garnish:

    • Extra Pecorino Romano
    • Extra black pepper

    Step 1: Bring Water to a Boil

    Fill a large pot with water and bring to a rolling boil. Add salt generously.

    Salting the water is crucial—it’s the first step in seasoning the pasta itself.


    Step 2: Cook the Spaghetti

    Add the spaghetti and cook according to package instructions until al dente—firm to the bite.

    Reserve about 1 cup of the starchy pasta water before draining. This liquid will help create the silky carbonara sauce.

    Do not rinse the pasta; you want it hot and starchy for emulsifying with the eggs.


    Step 3: Cook the Guanciale or Pancetta

    While the pasta cooks, heat a large skillet over medium heat. Add the diced guanciale or pancetta.

    Cook for 4–6 minutes until golden brown and crispy, stirring occasionally. The rendered fat will become the flavorful base for the sauce.

    Remove from heat once crispy.


    Step 4: Prepare the Egg and Cheese Mixture

    In a medium bowl, whisk together eggs, Pecorino Romano, and a generous amount of freshly cracked black pepper.

    The eggs should be well combined, but don’t worry about the mixture being too thick—it will become creamy when combined with the hot pasta.


    Step 5: Combine Pasta and Guanciale

    Add the drained pasta directly to the skillet with the rendered guanciale and its fat. Toss well to coat each strand with the flavorful fat.

    If the skillet is still very hot, remove it from the heat before adding eggs to prevent scrambling.


    Step 6: Create the Creamy Carbonara Sauce

    Slowly pour the egg and cheese mixture over the hot pasta while tossing quickly.

    Use tongs or a large fork to continuously toss the pasta. The residual heat will cook the eggs gently, forming a silky, creamy sauce that clings to each strand.

    If the sauce seems too thick, add a little reserved pasta water, one tablespoon at a time, until you reach your desired consistency.


    Step 7: Season and Taste

    Taste your carbonara carefully. Add more black pepper as desired. You may not need extra salt because the guanciale and cheese provide plenty of seasoning.


    Step 8: Plate and Garnish

    Serve immediately on warm plates.

    Sprinkle extra Pecorino Romano and a few cracks of black pepper on top for added flavor and presentation.

    Carbonara is best enjoyed fresh and hot—its sauce thickens as it cools.


    Flavor and Texture Highlights

    • Silky, creamy egg-based sauce
    • Crispy, smoky pancetta
    • Rich, nutty Pecorino Romano
    • Al dente pasta for perfect bite
    • Simple but bold flavors

    Every forkful delivers a perfect balance of creamy, salty, and smoky notes.


    Tips for Perfect Spaghetti alla Carbonara

    Use guanciale if possible. It’s more authentic and flavorful than pancetta.

    Don’t add cream. True carbonara relies on eggs and pasta water for creaminess.

    Toss off the heat. Adding eggs over high heat will scramble them.

    Reserve pasta water. It’s essential for achieving a smooth, silky sauce.

    Serve immediately. Carbonara loses its texture as it cools.


    Optional Variations

    • Vegetarian: Substitute mushrooms for guanciale, lightly sautéed in olive oil.
    • Cheese Blend: Mix Parmesan and Pecorino for milder flavor.
    • Spicy: Add red pepper flakes for a subtle kick.
    • Protein Twist: Swap guanciale for crispy pancetta or bacon if unavailable.
    • Extra Creamy: Add a small splash of pasta water to loosen the sauce further.

    Storage and Reheating

    Spaghetti alla Carbonara is best enjoyed immediately.

    If you have leftovers, store in an airtight container in the refrigerator for up to 24 hours.

    Reheat gently over low heat in a skillet with a splash of milk or pasta water to restore creaminess. Avoid microwaving at high heat to prevent scrambling the eggs.


    Why This Recipe Works

    Spaghetti alla Carbonara works because it balances heat, timing, and technique. Crisp guanciale provides texture and flavor while hot pasta creates an emulsification with the egg and cheese mixture.

    The starch from pasta water binds everything together into a creamy, glossy sauce without using cream. Simple ingredients combine to create a complex and satisfying flavor profile, proving that authenticity and restraint can produce a decadent, comforting dish.


    Spaghetti alla Carbonara is more than just a pasta dish—it’s a lesson in flavor, technique, and indulgent simplicity. Silky sauce, smoky meat, and perfectly cooked spaghetti come together to create a classic Roman masterpiece.

    Once you master this recipe, you’ll have an elegant, comforting pasta dish ready anytime you want to impress without stress. Perfect for weeknights, date nights, or a special treat, this carbonara is creamy, comforting, and utterly irresistible.