Blog

  • Baklava (Sticky, Nutty, Honey-Soaked Perfection)

    Baklava (Sticky, Nutty, Honey-Soaked Perfection)

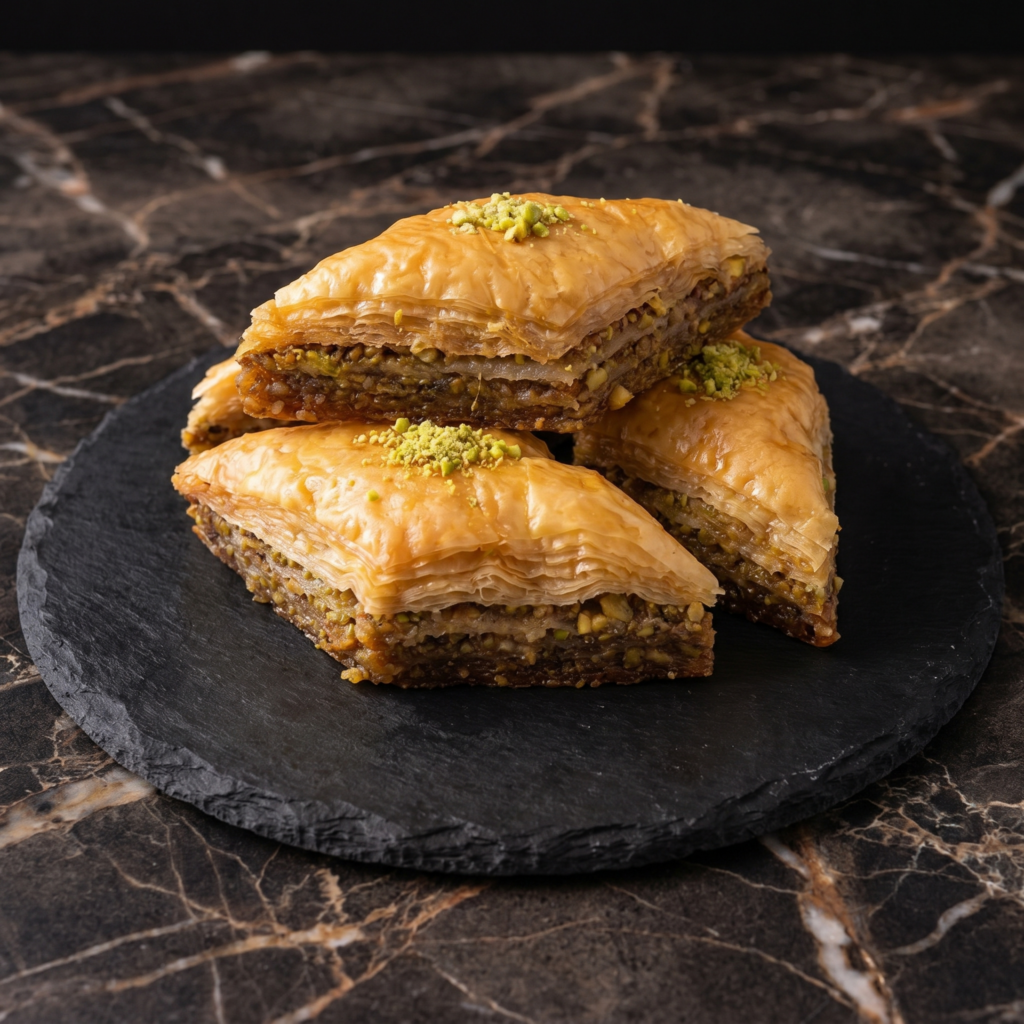
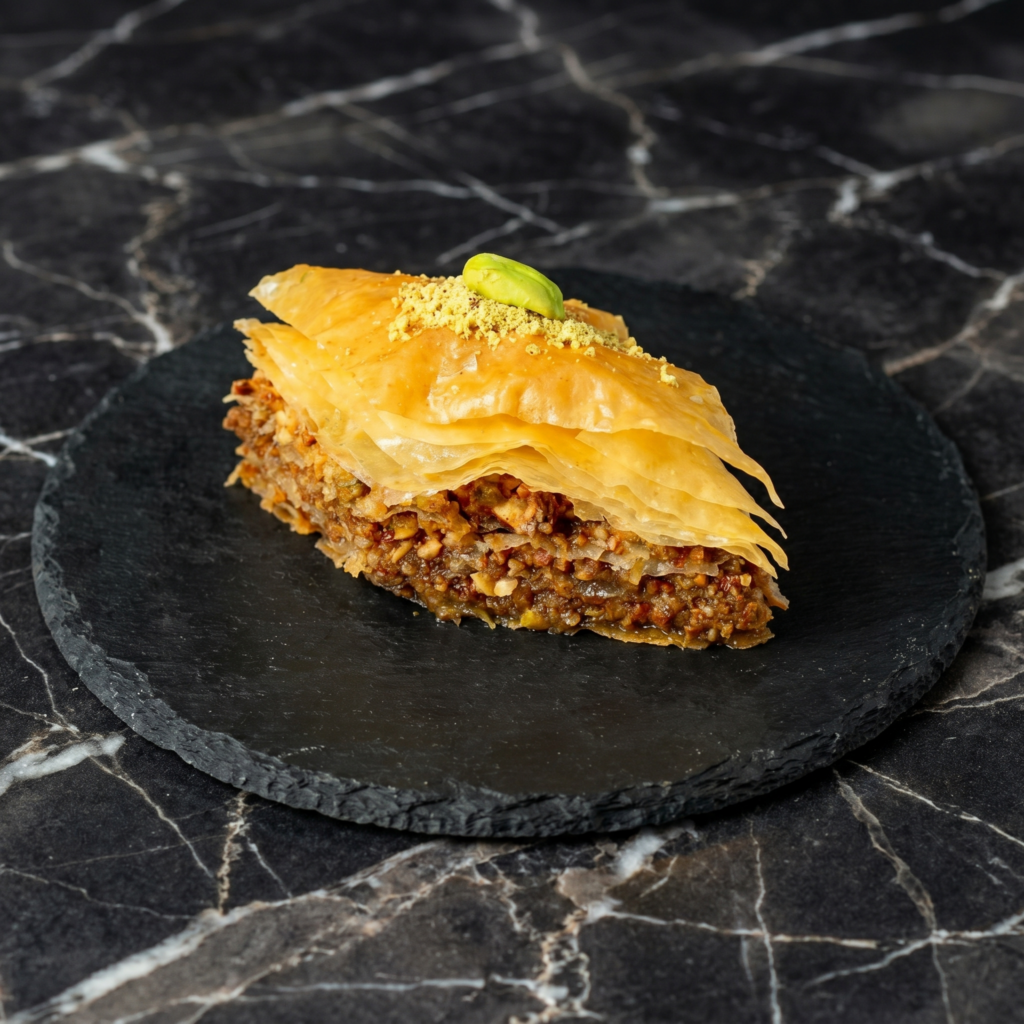
    Baklava is the queen of desserts. Sticky. Nutty. Honey-soaked. Irresistible.

    Layers of paper-thin phyllo brushed with butter. A crunchy walnut or pistachio filling. A sweet honey-lemon syrup that soaks in overnight. It sounds complicated. It’s not. Just go slow with the phyllo.

    Ingredients

    Makes one 9×13 pan (about 30-40 pieces).

    • 1 box (16 oz / 450g) frozen phyllo dough, thawed
    • 1½ cups (340g) unsalted butter, melted
    • 2 cups (240g) walnuts or pistachios, finely chopped
    • ½ cup (100g) sugar
    • 1 teaspoon cinnamon

    For the Honey Syrup:

    • 1 cup (200g) sugar
    • ¾ cup (180ml) water
    • ½ cup (170g) honey
    • 1 tablespoon lemon juice
    • 1 cinnamon stick or ½ teaspoon cinnamon

    Step-by-Step Instructions

    Step 1: Prep

    1. Preheat oven to 325°F (165°C). Grease a 9×13 baking dish.
    2. Mix chopped nuts, ½ cup sugar, and cinnamon in a bowl.
    3. Thaw phyllo according to package. Keep covered with a damp towel (it dries fast).

    Step 2: Layer

    1. Layer 10 sheets of phyllo in the dish, brushing each with melted butter.
    2. Sprinkle a thin layer of nut mixture.
    3. Add 5 more buttered phyllo sheets. More nuts. Repeat until nuts are gone.
    4. Top with 10-15 buttered phyllo sheets. Brush the top with butter.

    Step 3: Cut and Bake

    1. Using a sharp knife, cut diamonds or squares all the way through.
    2. Bake for 45-60 minutes until deep golden brown and crispy.

    Step 4: Make Syrup and Soak

    1. While baklava bakes, simmer sugar, water, honey, lemon juice, and cinnamon for 10 minutes. Cool slightly.
    2. Pour warm syrup over HOT baklava right out of the oven.
    3. Let it soak for 4-6 hours or overnight. Do not skip this step.

    Summary

    Prep Time: 30 minutes | Bake Time: 1 hour | Soak Time: 4-6 hours | Total Time: ~6 hours

    Yield: 30-40 pieces

    Difficulty: Medium (phyllo needs patience)

    Storage Notes

    Counter: Store in an airtight container at room temperature for up to 2 weeks. Yes, weeks. It gets better with time.

    Do not refrigerate — fridge makes it soggy.

    Freezer: Freeze unbaked (cut) baklava for up to 3 months. Bake from frozen, adding 10-15 minutes.

  • Chouquettes (French Pearl Sugar Puffs You’ll Devour)

    Chouquettes (French Pearl Sugar Puffs You’ll Devour)

    Chouquettes are what happens when choux pastry meets pearl sugar. Pure magic.

    These tiny French puffs are light, airy, and topped with crunchy pearl sugar that caramelizes in the oven. No filling. No glaze. Just buttery, eggy perfection. Make a batch. Watch them disappear.

    Ingredients

    Makes 30-40 chouquettes.

    • ½ cup (120ml) water
    • ½ cup (120ml) whole milk
    • ½ cup (115g) unsalted butter, cut into pieces
    • 1 tablespoon sugar
    • ¼ teaspoon salt
    • 1 cup (125g) all-purpose flour
    • 4 large eggs, room temperature
    • ½ cup (75g) pearl sugar (also called nib sugar)
    • 1 egg yolk + 1 tablespoon milk (for egg wash)

    Step-by-Step Instructions

    Step 1: Make the Choux Dough

    1. Preheat oven to 400°F (200°C). Line a baking sheet with parchment.
    2. In a saucepan, heat water, milk, butter, sugar, and salt until boiling and butter melts.
    3. Reduce heat to low. Add flour all at once. Stir vigorously until dough forms a ball and pulls away from the sides (about 2 minutes).
    4. Transfer to a bowl. Cool 5 minutes.
    5. Add eggs one at a time, mixing completely after each. Dough should be smooth and glossy.

    Step 2: Pipe and Top

    1. Transfer dough to a piping bag or zip-top bag with corner snipped.
    2. Pipe small 1-inch mounds onto the baking sheet (about 1 tablespoon each).
    3. Brush with egg wash. Sprinkle generously with pearl sugar.

    Step 3: Bake

    1. Bake for 18-22 minutes until puffed, golden, and crisp.
    2. Do not open the oven for the first 15 minutes.

    Step 4: Devour

    1. Cool slightly on a wire rack. Eat warm. Eat cold. Eat them all.

    Summary

    Prep Time: 15 minutes | Bake Time: 20 minutes | Total Time: 35 minutes

    Yield: 30-40 chouquettes

    Difficulty: Medium (choux patience required)

    Storage Notes

    Counter: Store in an airtight container for 1-2 days. They lose crispness but stay tasty.

    Freezer: Freeze baked chouquettes for up to 2 months. Recrisp in 350°F oven for 5 minutes.

    Pro tip: Warm them briefly in the oven before serving. Almost like fresh-baked.

  • Garlic Bread (The Only Side Dish That Steals the Show)

    Garlic Bread (The Only Side Dish That Steals the Show)

    Garlic bread is not a side dish. It’s the main event.

    Butter. Garlic. Parsley. Toasty bread. That’s it. That’s the recipe. Ten minutes from start to plate. Crispy edges. Soft, buttery center. Pasta is just the excuse.

    Ingredients

    Serves 4.

    • 1 loaf French or Italian bread (about 12 inches)
    • ½ cup (115g) unsalted butter, softened
    • 4 cloves garlic, minced (or 1 tablespoon garlic paste)
    • 2 tablespoons fresh parsley, finely chopped
    • ¼ teaspoon salt
    • Optional: ¼ cup grated Parmesan cheese, pinch of red pepper flakes

    Step-by-Step Instructions

    Step 1: Prep

    1. Preheat oven to 400°F (200°C). Line a baking sheet with parchment.
    2. Slice bread in half horizontally (like a hot dog bun).

    Step 2: Make Garlic Butter

    1. Mix softened butter, minced garlic, parsley, and salt in a small bowl.
    2. Spread generously on both cut sides of the bread.

    Step 3: Bake

    1. Place bread on baking sheet, butter side up.
    2. Bake for 8-10 minutes until edges are golden and crispy.
    3. Optional: Broil for 1 extra minute for extra crunch.

    Step 4: Serve

    1. Slice into pieces. Sprinkle with Parmesan if using. Serve hot. Fight over the crispy ends.

    Summary

    Prep Time: 5 minutes | Cook Time: 10 minutes | Total Time: 15 minutes

    Yield: 4 servings

    Difficulty: Super Easy

    Storage Notes

    Best fresh. But leftovers keep in the fridge for 2 days.

    Reheat: Air fryer at 350°F for 3 minutes or oven at 375°F for 5 minutes. Microwave makes it rubbery—don’t do it.

    Make garlic butter ahead: Keeps in the fridge for 1 week or freezer for 3 months.

  • Paris-Brest (The French Pastry That Looks Impossible)

    Paris-Brest (The French Pastry That Looks Impossible)

    Paris-Brest. Named after a bike race. Shaped like a wheel. Tastes like heaven.

    A giant, puffy choux ring. Filled with silky praline cream. Topped with crunchy almonds. It looks like a French patisserie masterpiece. But it’s just choux pastry, patience, and a little confidence. You’ve got this.

    Ingredients

    Serves 8-10.

    For the Choux Pastry:

    • ½ cup (120ml) water
    • ½ cup (120ml) whole milk
    • ½ cup (115g) unsalted butter
    • 1 tablespoon sugar
    • ¼ teaspoon salt
    • 1 cup (125g) all-purpose flour
    • 4 large eggs
    • ¼ cup (30g) sliced almonds (for topping)

    For the Praline Cream (Crème Mousseline):

    • 2 cups (480ml) whole milk
    • 4 egg yolks
    • ½ cup (100g) sugar
    • ¼ cup (30g) cornstarch
    • 1 teaspoon vanilla
    • ½ cup (115g) unsalted butter, softened
    • ½ cup (75g) praline paste or hazelnut spread

    Step-by-Step Instructions

    Step 1: Make the Choux Ring

    1. Preheat oven to 400°F (200°C). Trace an 8-inch circle on parchment. Flip over.
    2. Make choux: boil water, milk, butter, sugar, salt. Add flour. Stir until dough forms a ball.
    3. Cool 5 minutes. Add eggs one at a time until glossy.
    4. Pipe dough in a ring following the circle. Top with sliced almonds.
    5. Bake 25-30 minutes until puffed and golden. Cool completely.

    Step 2: Make the Praline Cream

    1. Heat milk until simmering. Whisk yolks, sugar, cornstarch.
    2. Temper eggs with hot milk. Return to heat. Whisk until thick.
    3. Remove from heat. Add vanilla. Cool completely.
    4. Beat softened butter and praline paste. Add cooled pastry cream. Whip until fluffy.

    Step 3: Assemble

    1. Slice the choux ring horizontally like a hamburger bun.
    2. Pipe or spoon praline cream onto the bottom half.
    3. Place the top half back on. Dust with powdered sugar.

    Step 4: Serve

    1. Chill for 30 minutes before slicing. Serve cold. Watch jaws drop.

    Summary

    Prep Time: 40 minutes | Bake Time: 30 minutes | Chill Time: 2 hours | Total Time: ~3.5 hours

    Yield: 8-10 servings

    Difficulty: Medium (trust the choux)

    Storage Notes

    Fridge: Store assembled Paris-Brest in the fridge for up to 2 days. The choux softens but stays delicious.

    Freeze (unfilled): Freeze the baked choux ring for up to 2 months. Thaw, recrisp in 350°F oven for 5 minutes, then fill.

    Make ahead: Make the cream and choux separately a day ahead. Assemble the day of.

  • Chicken Katsu: Crispy and Juicy, Japanese Comfort Food

    Chicken Katsu: Crispy and Juicy, Japanese Comfort Food

    Chicken katsu is pure comfort. A tender chicken cutlet, coated in crispy panko breadcrumbs, fried until golden, and served with a sweet-tangy tonkatsu sauce that cuts through the richness. It’s the dish that makes you close your eyes after the first bite—crunch, then juicy, then that sauce.

    This recipe keeps things simple but perfect. Pound the chicken thin. Dredge in flour, egg, and panko. Fry until golden. Serve with shredded cabbage and a mountain of rice. It’s weeknight-friendly, crowd-pleasing, and guaranteed to disappear fast. Katsu night? Best night.

    Ingredients

    Serves 4.

    For the Chicken:

    • 4 boneless, skinless chicken breasts (about 6 oz each)
    • Salt and black pepper, to taste
    • ½ cup all-purpose flour
    • 2 large eggs, beaten
    • 1½ cups panko breadcrumbs
    • Neutral oil, for frying (vegetable, canola, or peanut)

    For the Tonkatsu Sauce:

    • ¼ cup ketchup
    • 2 tbsp Worcestershire sauce
    • 1 tbsp soy sauce
    • 1 tbsp sugar
    • 1 tsp Dijon mustard (optional)

    For Serving:

    • Steamed white rice
    • Shredded cabbage (green or napa)
    • Lemon wedges
    • Japanese mayonnaise (optional)

    Step-by-Step Instructions

    Step 1: Prep the Chicken

    1. Place chicken breasts between two sheets of plastic wrap or parchment paper.
    2. Using a meat mallet or rolling pin, pound to an even ½-inch thickness.
    3. Season both sides with salt and pepper.

    Step 2: Set Up Dredging Station

    1. Place flour in a shallow dish.
    2. Place beaten eggs in a second shallow dish.
    3. Place panko in a third shallow dish.

    Step 3: Bread the Chicken

    1. Dredge each chicken breast in flour, shaking off excess.
    2. Dip into beaten eggs, letting excess drip off.
    3. Coat in panko, pressing firmly to adhere.
    4. Place breaded cutlets on a wire rack and let rest for 10 minutes. This helps the coating set.

    Step 4: Make the Tonkatsu Sauce

    1. In a small bowl, whisk together ketchup, Worcestershire sauce, soy sauce, sugar, and mustard (if using).
    2. Set aside for flavors to meld.

    Step 5: Fry the Chicken

    1. Heat ½ inch of oil in a large skillet over medium-high heat to 350°F (175°C).
    2. Carefully place cutlets in the skillet (work in batches to avoid crowding). Cook for 3-4 minutes per side until golden brown and cooked through.
    3. Transfer to a wire rack to drain. (Paper towels trap steam and soften the crust.)

    Step 6: Serve Katsu-Style

    1. Slice each chicken katsu into 1-inch strips.
    2. Serve over steamed rice with a pile of shredded cabbage alongside.
    3. Drizzle with tonkatsu sauce and Japanese mayonnaise if desired. Add a lemon wedge for squeezing.
    4. Take a bite. Crispy, juicy, saucy perfection. This is katsu.

    Summary

    Prep Time: 15 minutes | Cook Time: 10 minutes | Total Time: 25 minutes

    Yield: 4 servings

    Difficulty: Crispy, easy, satisfying

    Storage Notes

    Leftovers:

    Store in an airtight container in the fridge for up to 3 days. The coating will soften but still tastes great.

    Reheating (Bring Back the Crunch):

    Oven or air fryer (best): 375°F for 5-7 minutes until hot and crispy. Skillet: Reheat in a dry pan over medium heat, flipping once. Microwave: Not recommended—makes it soggy.

    Freezer-Friendly:

    Freeze uncooked, breaded cutlets on a baking sheet, then transfer to a zip-top bag for up to 3 months. Fry from frozen—add 2-3 minutes to cooking time. No need to thaw.

    Make Ahead:

    Bread cutlets up to 4 hours in advance and refrigerate. Fry just before serving for maximum crispiness.

  • Pesto Pasta: Fresh and Vibrant, 15-Minute Perfection

    Pesto Pasta: Fresh and Vibrant, 15-Minute Perfection

    Pesto pasta is the definition of simple perfection. Fresh basil, pine nuts, garlic, Parmesan, and olive oil—whirled together into a vibrant green sauce that turns plain pasta into something extraordinary. It’s bright, it’s nutty, it’s garlicky, and it comes together faster than delivery.

    This recipe uses classic ingredients, but the method is flexible. Use a mortar and pestle for tradition, or a food processor for speed. Toss with any pasta you love, add a handful of cherry tomatoes or grilled chicken if you like, and dinner is done. Fifteen minutes from craving to plate.

    Ingredients

    Serves 4.

    For the Pesto:

    • 2 cups fresh basil leaves (about 2 large bunches), packed
    • ½ cup freshly grated Parmesan cheese
    • ⅓ cup pine nuts (or walnuts, almonds, or pistachios)
    • 2 cloves garlic, peeled
    • ½ cup extra virgin olive oil
    • ½ tsp salt, or to taste
    • ¼ tsp black pepper
    • 1 tbsp fresh lemon juice (optional, prevents browning)

    For the Pasta:

    • 12 oz pasta (spaghetti, linguine, fettuccine, or your favorite)
    • ¼ cup reserved pasta water
    • Extra Parmesan, for serving

    Optional Add-Ins:

    • Cherry tomatoes, halved
    • Grilled chicken or shrimp
    • Burrata or fresh mozzarella
    • Toasted pine nuts, for garnish
    • Red pepper flakes, for heat

    Step-by-Step Instructions

    Step 1: Cook the Pasta

    1. Bring a large pot of salted water to a boil.
    2. Cook pasta according to package directions until al dente.
    3. Reserve ½ cup of pasta water before draining. Drain pasta and set aside.

    Step 2: Make the Pesto

    1. While pasta cooks, combine basil, Parmesan, pine nuts, and garlic in a food processor.
    2. Pulse until roughly chopped.
    3. With the motor running, slowly drizzle in olive oil until smooth.
    4. Add salt, pepper, and lemon juice (if using). Pulse to combine.
    5. Taste and adjust seasoning—more salt, more cheese, or more garlic as desired.

    Step 3: Combine Pasta and Pesto

    1. Return drained pasta to the pot or a large bowl.
    2. Add the pesto and toss to coat. Start with about ⅔ of the pesto and add more to taste.
    3. Add reserved pasta water a little at a time until the sauce is silky and clings to the pasta.

    Step 4: Add Optional Toppings

    1. If using cherry tomatoes, grilled chicken, or other add-ins, fold them in now.
    2. Sprinkle with extra Parmesan and toasted pine nuts.

    Step 5: Serve Immediately

    1. Transfer to bowls or a serving platter.
    2. Garnish with fresh basil leaves and a drizzle of olive oil.
    3. Take a bite. Bright, nutty, garlicky perfection. Simple food at its finest.

    Summary

    Prep Time: 10 minutes | Cook Time: 10 minutes | Total Time: 20 minutes

    Yield: 4 servings

    Difficulty: Fast, fresh, foolproof

    Storage Notes

    Leftovers:

    Store in an airtight container in the fridge for up to 3 days. The color may darken, but the flavor remains delicious.

    Reheating:

    Skillet (best): Reheat gently over medium-low heat with a splash of water or olive oil to loosen the sauce. Microwave: 1-2 minutes at reduced power—add a splash of water before heating.

    Make Ahead (Pesto):

    Pesto can be made up to 1 week in advance and stored in the fridge with a thin layer of olive oil on top to prevent browning. Freeze pesto in ice cube trays for up to 3 months—pop out a cube whenever you need a quick sauce.

  • Filipino Style Spaghetti: Sweet and Savory, Jollibee-Style Magic

    Filipino Style Spaghetti: Sweet and Savory, Jollibee-Style Magic

    Filipino spaghetti is not Italian spaghetti. It’s something else entirely—and that’s exactly what makes it so beloved. Sweet, savory, and unapologetically unique, this dish is the star of every Filipino birthday party, holiday celebration, and Jollibee run.

    It’s spaghetti with ground beef, sliced hot dogs, a sauce sweetened with banana ketchup, and a generous topping of melted cheese.

    If you’ve never had it, prepare to be surprised. If you grew up with it, you’re already craving it. This recipe recreates that iconic Jollibee-style flavor at home—the perfect balance of sweet, savory, and cheesy. Make it for a crowd, because one batch is never enough.

    Ingredients

    Serves 6-8.

    For the Sauce:

    • 1 tbsp vegetable oil
    • 4 cloves garlic, minced
    • 1 onion, finely chopped
    • 1 lb ground beef (80/20)
    • 4-6 hot dogs (Filipino-style or beef franks), sliced diagonally
    • 1 cup banana ketchup (Jufran or UFC brand)
    • 1 cup tomato sauce
    • ¼ cup tomato paste
    • 1 cup beef broth or water
    • 2 tbsp brown sugar (adjust to taste)
    • 1 tbsp soy sauce
    • ½ tsp black pepper
    • 1 red bell pepper, diced (optional)
    • 1 carrot, finely diced (optional, adds natural sweetness)

    For the Pasta and Topping:

    • 1 lb spaghetti or Filipino-style pasta
    • 1 cup shredded cheddar cheese (or Eden cheese if available)
    • ¼ cup grated Parmesan cheese
    • Hot dogs, sliced (extra for garnish)

    For Serving:

    • More shredded cheddar cheese
    • Toasted garlic bits (optional)
    • Chopped fresh parsley or spring onions

    Step-by-Step Instructions

    Step 1: Cook the Pasta

    1. Bring a large pot of salted water to a boil.
    2. Cook spaghetti according to package directions until al dente.
    3. Drain and set aside. Toss with a little oil to prevent sticking if needed.

    Step 2: Sauté Aromatics and Meat

    1. Heat oil in a large pot or Dutch oven over medium-high heat.
    2. Add garlic and onion. Cook until softened, about 2-3 minutes.
    3. Add ground beef. Cook, breaking up with a spoon, until browned and cooked through, about 5-7 minutes.
    4. Add sliced hot dogs and cook for 2 minutes until lightly browned.
    5. Add optional vegetables (bell pepper, carrot) and cook for 2 minutes.

    Step 3: Build the Sauce

    1. Add banana ketchup, tomato sauce, tomato paste, beef broth, brown sugar, soy sauce, and black pepper. Stir to combine.
    2. Bring to a simmer, then reduce heat to low. Cover and cook for 15-20 minutes, stirring occasionally, until sauce thickens and flavors meld.
    3. Taste and adjust sweetness—add more sugar if desired. Filipino spaghetti is traditionally quite sweet.

    Step 4: Combine Pasta and Sauce

    1. Add cooked spaghetti to the sauce. Toss until every strand is coated.
    2. If the sauce is too thick, add a splash of pasta water to loosen.

    Step 5: Cheese Topping

    1. Transfer spaghetti to a serving platter or individual bowls.
    2. Sprinkle generously with shredded cheddar cheese. The cheese should melt slightly from the heat of the pasta.
    3. Add grated Parmesan for extra flavor.

    Step 6: Serve and Enjoy

    1. Garnish with extra sliced hot dogs, toasted garlic bits, or fresh parsley.
    2. Serve hot. Take a bite. Sweet, savory, cheesy—this is the taste of Filipino celebrations.

    Summary

    Prep Time: 15 minutes | Cook Time: 35 minutes | Total Time: 50 minutes

    Yield: 6-8 servings

    Difficulty: Easy, nostalgic, crowd-pleasing

    Storage Notes

    Leftovers:

    Store in an airtight container in the fridge for up to 5 days. The flavors meld beautifully overnight.

    Reheating:

    Skillet (best): Reheat over medium heat with a splash of water or broth to loosen sauce. Microwave: 2-3 minutes, stirring halfway. Add fresh cheese on top after reheating.

    Make Ahead:

    Sauce can be made up to 3 days in advance. Cook pasta fresh when ready to serve, or combine and refrigerate for quick reheating.

    Freezer-Friendly:

    Freeze sauce (without pasta) for up to 3 months. Thaw overnight and cook fresh pasta. Fully assembled spaghetti can also be frozen for up to 2 months.

  • Beef Bulgogi: Sweet and Savory, Korean BBQ at Home

    Beef Bulgogi: Sweet and Savory, Korean BBQ at Home

    Bulgogi is Korea’s gift to the world. Thinly sliced beef marinated in a sweet-savory soy sauce blend with Asian pear, garlic, and sesame, then grilled until caramelized and smoky. It’s sweet. It’s savory. It’s slightly smoky. And it’s the kind of meal that brings everyone to the table.

    The magic is in the marinade. Soy sauce provides saltiness. Sugar and pear add sweetness and tenderize the meat. Garlic, ginger, and sesame build depth. And that quick sear over high heat creates those irresistible caramelized edges. Serve it with rice, lettuce wraps, and kimchi, and you’ve got a Korean BBQ feast at home.

    Ingredients

    Serves 4.

    For the Bulgogi:

    • 1½ lbs beef ribeye or sirloin, thinly sliced (ask your butcher or freeze slightly for easier slicing)
    • ½ Asian pear (or regular pear or apple), grated
    • ¼ cup soy sauce
    • 2 tbsp brown sugar
    • 1 tbsp honey
    • 1 tbsp mirin (or rice wine)
    • 1 tbsp sesame oil
    • 4 cloves garlic, minced
    • 1 tsp ginger, grated
    • ½ tsp black pepper
    • 2 tbsp vegetable oil, for cooking
    • 1 onion, thinly sliced
    • 2 green onions, cut into 2-inch pieces
    • Toasted sesame seeds, for garnish

    For Serving:

    • Steamed white rice
    • Lettuce leaves (red leaf, butter, or romaine)
    • Kimchi
    • Ssamjang (Korean dipping paste)
    • Garlic slices, fresh or pickled
    • Jalapeño or chili slices

    Step-by-Step Instructions

    Step 1: Prep the Beef

    1. Place beef in the freezer for 30-60 minutes until firm but not frozen solid. This makes slicing easier.
    2. Slice beef across the grain into thin strips (about ⅛-inch thick). For ribeye, aim for 2-inch long pieces.

    Step 2: Make the Marinade

    1. In a large bowl, combine grated pear, soy sauce, brown sugar, honey, mirin, sesame oil, garlic, ginger, and black pepper.
    2. Whisk until sugar is dissolved. The marinade should be thick and fragrant.

    Step 3: Marinate the Beef

    1. Add beef to the marinade and toss to coat every piece.
    2. Add sliced onion and green onions. Mix well.
    3. Cover and refrigerate for at least 1 hour (4 hours is better, overnight is ideal).

    Step 4: Cook the Bulgogi

    1. Heat a large skillet or cast-iron pan over high heat until very hot. Add vegetable oil.
    2. Working in batches (don’t crowd the pan), add beef in a single layer. Cook undisturbed for 1-2 minutes until caramelized and slightly charred.
    3. Flip and cook another 1-2 minutes until beef is cooked through and edges are caramelized.
    4. Add any remaining marinade and cook for another minute, letting it thicken and coat the meat.
    5. Transfer to a serving platter and sprinkle with sesame seeds.

    Step 5: Serve Korean BBQ Style

    1. Place bulgogi in the center of the table with bowls of rice, lettuce leaves, kimchi, and ssamjang.
    2. To eat: take a lettuce leaf, add a bit of rice, some bulgogi, a dab of ssamjang, garlic slice, and chili. Wrap and enjoy.
    3. Take a bite. Sweet, savory, smoky. This is Korean BBQ perfection.

    Summary

    Prep Time: 20 minutes + marinating | Cook Time: 10 minutes | Total Time: 1.5 hours (mostly hands-off)

    Yield: 4 servings

    Difficulty: Easy, fast, delicious

    Storage Notes

    Leftovers:

    Store in an airtight container in the fridge for up to 3 days. Bulgogi tastes great cold or reheated.

    Reheating:

    Skillet (best): Reheat over high heat for 1-2 minutes to recaramelize edges. Microwave: 1-2 minutes—will soften but still delicious.

    Make Ahead:

    Marinate beef up to 24 hours in advance. Cook just before serving for best texture.

    Freezer-Friendly:

    Freeze raw, marinated beef in a zip-top bag for up to 3 months. Thaw overnight in the fridge before cooking.

  • Kalua Pork: Slow-Cooked Hawaiian Classic

    Kalua Pork: Slow-Cooked Hawaiian Classic

    Kalua pork is the soul of Hawaiian cuisine. Traditionally, it’s made by roasting a whole pig in an underground oven called an imu—a pit filled with hot rocks and covered with banana leaves, where the pork cooks for hours until it’s fall-apart tender and infused with smoky flavor. It’s the centerpiece of luau feasts, the taste of celebration, the taste of the islands.

    This version brings that magic to your kitchen. A slow cooker or oven, a few simple ingredients, and patience are all you need. The pork is seasoned simply with sea salt and liquid smoke, then cooked low and slow until it shreds with a fork. Serve it with cabbage and rice, pile it on sandwiches, or stuff it into tacos. It’s easy, it’s versatile, and it tastes like Hawaii.

    Ingredients

    Serves 8-10.

    For the Pork:

    • 4-5 lbs pork shoulder (pork butt) or picnic roast
    • 1½ tbsp Hawaiian sea salt or coarse sea salt
    • 2 tbsp liquid smoke (hickory or mesquite)
    • 6-8 cloves garlic, sliced into thin slivers (optional)
    • ½ cup water or chicken broth (for slow cooker)

    For Serving:

    • 1 head green cabbage, thinly sliced
    • Steamed white rice (jasmine or short-grain)
    • Hawaiian sea salt, for finishing
    • Optional: Macaroni salad (classic Hawaiian plate lunch side)

    Optional Serving Ideas:

    • Hawaiian sweet rolls for sliders
    • Corn or flour tortillas for tacos
    • Brioche buns for sandwiches
    • Pineapple salsa or mango salsa

    Step-by-Step Instructions

    Step 1: Prep the Pork

    1. Rinse pork shoulder and pat completely dry with paper towels.
    2. Using a sharp knife, make deep slits all over the pork (about 1 inch deep and 1 inch apart).
    3. If using garlic, insert a sliver of garlic into each slit. This adds subtle flavor throughout the meat.
    4. Rub the pork all over with Hawaiian sea salt, getting it into the slits and crevices.
    5. Drizzle liquid smoke over the pork and rub to coat evenly.

    Step 2: Choose Your Cooking Method

    Slow Cooker Method (Easiest):

    1. Place pork in the slow cooker, fat side up. Add water or broth to the bottom.
    2. Cover and cook on LOW for 10-12 hours or on HIGH for 6-8 hours, until pork is fall-apart tender.
    3. Carefully remove pork from slow cooker. Shred with two forks, discarding any large fat pieces.
    4. Optional: Spread shredded pork on a baking sheet and broil for 3-5 minutes for crispy edges.

    Oven Method (Traditional):

    1. Preheat oven to 300°F (150°C).
    2. Place pork in a roasting pan or Dutch oven, fat side up. Add water to the bottom (about ½ inch deep).
    3. Cover tightly with foil or a lid. Roast for 5-6 hours until pork is fall-apart tender.
    4. Remove from oven, let rest 20 minutes, then shred with two forks.

    Instant Pot Method (Fastest):

    1. Place pork in Instant Pot with water. Cook on HIGH pressure for 90 minutes.
    2. Allow natural release for 15-20 minutes. Remove, shred, and optionally broil for crispy edges.

    Step 3: Prepare the Cabbage (Optional but Traditional)

    1. While pork cooks, thinly slice cabbage.
    2. After shredding pork, toss cabbage with a few tablespoons of the cooking liquid and a pinch of salt.
    3. Cover and cook in the microwave for 3-4 minutes, or sauté in a skillet until wilted but still slightly crunchy.

    Step 4: Serve Island Style

    1. Serve shredded kalua pork over steamed white rice.
    2. Add a pile of wilted cabbage alongside.
    3. Garnish with a sprinkle of Hawaiian sea salt.
    4. For a classic Hawaiian plate lunch, add a scoop of macaroni salad.
    5. Take a bite. Smoky, salty, tender. You’re in Hawaii now.

    Summary

    Prep Time: 10 minutes | Cook Time: 6-12 hours (depending on method) | Total Time: Hands-off perfection

    Yield: 8-10 servings

    Difficulty: Set it and forget it

    Storage Notes

    Leftovers:

    Store in an airtight container in the fridge for up to 5 days. Kalua pork tastes even better the next day as flavors meld.

    Reheating:

    Skillet (best): Reheat with a splash of cooking liquid over medium heat. Microwave: 1-2 minutes, covered to retain moisture. Oven: 350°F for 10-15 minutes covered.

    Freezer-Friendly:

    Kalua pork freezes beautifully! Store shredded pork in zip-top bags or airtight containers for up to 3 months. Thaw overnight in the fridge before reheating.

    Make Ahead:

    This is the ultimate make-ahead meal. Cook a day or two ahead, shred, and refrigerate. The flavors only get better with time.

  • Coxinha (Brazilian Chicken Croquettes)

    Coxinha (Brazilian Chicken Croquettes)

    Coxinha are Brazil’s gift to the snack world. Tear-drop shaped croquettes with a creamy, shredded chicken filling, often wrapped around a nugget of catupiry cheese, then breaded and fried until golden and crisp. They’re the star of every Brazilian party, the snack that disappears first, the thing you crave when you’re homesick for Brazil—even if you’ve never been.

    Making coxinha at home is a labor of love, but it’s deeply satisfying. The dough is a simple, velvety chicken-flavored pastry. The filling is rich and creamy. And that shape? It’s iconic. With a little practice, you’ll be shaping perfect coxinhas that rival any Brazilian bakery. Make a batch for your next gathering and watch them vanish.

    Ingredients

    Makes about 20-24 coxinhas.

    For the Filling:

    • 1 lb boneless, skinless chicken breast (about 2 breasts)
    • 1 onion, quartered
    • 2 cloves garlic, smashed
    • 2 bay leaves
    • Salt, to taste
    • 2 tbsp olive oil
    • ½ onion, finely chopped
    • 2 cloves garlic, minced
    • ½ cup tomato sauce or 2 tbsp tomato paste
    • ¼ cup cream cheese or catupiry cheese (Brazilian creamy cheese)
    • ¼ cup fresh parsley, chopped
    • Salt and black pepper, to taste
    • Optional: 20-24 small cubes of catupiry or mozzarella for stuffing centers

    For the Dough:

    • 2 cups chicken broth (from cooking the chicken)
    • 2 cups all-purpose flour
    • 2 tbsp butter
    • ½ tsp salt

    For the Breading and Frying:

    • 2 large eggs, beaten
    • 2 cups panko breadcrumbs (or regular breadcrumbs)
    • Neutral oil, for frying (vegetable, canola, or peanut)

    For Serving:

    • Lime wedges
    • Hot sauce

    Step-by-Step Instructions

    Step 1: Cook the Chicken

    1. Place chicken breasts in a pot with quartered onion, smashed garlic, bay leaves, and salt. Cover with water.
    2. Bring to a boil, then reduce heat and simmer for 15-20 minutes until chicken is cooked through.
    3. Remove chicken and reserve 2 cups of the broth for the dough. Let chicken cool.

    Step 2: Make the Filling

    1. Shred cooled chicken finely with two forks.
    2. In a skillet, heat olive oil over medium heat. Add chopped onion and cook until softened, about 3 minutes.
    3. Add minced garlic and cook for 30 seconds until fragrant.
    4. Add tomato sauce or paste and cook for 2 minutes.
    5. Add shredded chicken, stir to combine, and cook for 3-4 minutes.
    6. Remove from heat. Stir in cream cheese (or catupiry) and parsley. Season with salt and pepper.
    7. Let filling cool completely. If using cheese centers, cube cheese and set aside.

    Step 3: Make the Dough

    1. In a large saucepan, combine reserved chicken broth, butter, and salt. Bring to a boil.
    2. Add flour all at once and stir vigorously with a wooden spoon. The dough will come together into a ball.
    3. Cook for 2-3 minutes, stirring constantly, until the dough pulls away from the sides of the pan and forms a smooth ball.
    4. Transfer to a bowl and let cool until handleable.

    Step 4: Shape the Coxinhas

    1. Lightly oil your hands to prevent sticking. Take a portion of dough (about 1½ tablespoons) and flatten into a disc.
    2. Place a spoonful of filling in the center. If using cheese centers, place a cheese cube inside the filling.
    3. Carefully wrap the dough around the filling, sealing completely. Shape into a tear-drop (pear shape) with a pointed end.
    4. Place shaped coxinhas on a baking sheet. Repeat with remaining dough and filling.
    5. Refrigerate for 30 minutes to firm up (this helps the breading adhere).

    Step 5: Bread the Coxinhas

    1. Set up a breading station: beaten eggs in one bowl, panko in another.
    2. Dip each coxinha in beaten egg, letting excess drip off.
    3. Roll in panko, pressing gently to adhere. Coat evenly.
    4. Return to baking sheet and refrigerate for another 15-30 minutes (optional but helpful).

    Step 6: Fry the Coxinhas

    1. Pour oil into a heavy-bottomed pot or Dutch oven to a depth of 2-3 inches.
    2. Heat oil to 350°F (175°C). Use a thermometer for accuracy.
    3. Working in batches, carefully lower coxinhas into the hot oil. Don’t crowd the pot.
    4. Fry for 3-4 minutes, turning occasionally, until golden brown and crispy all over.
    5. Remove with a slotted spoon and drain on a wire rack (not paper towels).

    Step 7: Serve Immediately

    1. Arrange coxinhas on a platter. Serve with lime wedges and hot sauce.
    2. Take a bite. Crispy, golden shell. Creamy, savory filling. This is Brazil in a bite.

    Summary

    Prep Time: 45 minutes | Cook Time: 20 minutes | Chill Time: 1 hour | Total Time: 2 hours

    Yield: 20-24 coxinhas

    Difficulty: Labor of love (worth every minute)

    Storage Notes

    Leftovers:

    Store cooked coxinhas in an airtight container in the fridge for up to 3 days. Reheat to restore crispiness.

    Reheating (Bring Back the Crunch):

    Oven or air fryer (best): 375°F for 5-7 minutes until hot and crispy. Microwave: Not recommended—makes them soggy.

    Freezer-Friendly (The Dream):

    Freeze uncooked, breaded coxinhas on a baking sheet until solid, then transfer to a zip-top bag for up to 3 months. Fry from frozen—add 1-2 minutes to cooking time. No need to thaw.

    Make Ahead:

    Filling can be made up to 3 days in advance. Dough can be made a day ahead and refrigerated. Shape and fry just before serving for maximum crispiness.